Description
About This Video
Transcript
Read Full Transcript
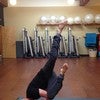
I'm Kathy Murakami and I'm excited to be again here with PyLadies any time to share with you some ideas that I've been using on the Cadillac. So these are crafty creations on the Cadillac. This is a stability sling that is manufactured by balanced body. It comes with double ended clips and we use this in the studio as a great tool to emphasize the breathing work which all of you are familiar with and know that we like our clients as well as ourselves to be very connected to. The way you set this up is you take the long yellow leg springs and attach them to the trapeze and then you take your sling and attach it to the bottom of the trapeze, not on these rings but on the little eyelets.
On the bottom here, and this is my friend Tomo and she's kindly agreed to demonstrate most of today's material. I'm going to ask her to come onto the table and sit and then what she is going to do is dive her hands over the top and I placed this sling around the area. When you're teaching someone breathing this post teary or lateral rib cage area. So the bottom edge of the sling is approximated at the bottom rib I have here before she utilize back. This is a wedge that you can get at a store like bed, bath and beyond.
It's approximately 25 degrees in a height here we'd like to pillow up the client's, especially with a breathing introduction because they will be much more connected to the transverse abdominous via the breath. I have a towel, a hand towel here, ready to go for her for our next exercise. And as Tomo lies back down on the wedge, she is placed so that the lower tip of the scapula are on the edge of the pillow. So I think you can come up just a hair like so. And then the sling is placed right again around the bottom of the rib cage. You can see that the springs are approximately 25 degrees or so.
You do want to have an angle like this. So when we teach someone to breathe, we usually are, have the hands on the back or the clients bent over. And we call for an expansion in the back body. So in theory, if the back body is expanding with the inhalation here, it will press out against the sling. And if that occurs like this, you can see then it draws the coils open slightly or, I mean I'm exaggerating this so that you can see this actually happening. You may or may not see very much movement here, but as long as you feel the body expanding against the slang, that's all that matters is that direct tactile feedback.
So watch carefully. The client can also watch here. We're going to ask Tomo to inhale and widen her back and you'll see there's that slight opening and the exhale they'll close back or they may see the bar slightly move. And so she's breathing in. This is micro movement and exhale. So I'm not quite sure if this shows up on the camera, but I can definitely see the bar moving up and down. Your diaphragm descends plus minus half an inch inside the body.
So it's really very tiny. The challenge. Now what we will ask for is that the inhalation widens her body against the sling and the coils open. I'd like her exhalation to keep the coils open, which means her back must stay wide and she connects to her deep abdominals. So generally I teach the breathing first without the setup here, so not to scare the clients and then we will add this in maybe on the second or the third lesson is you will later be able to use this as a Q inhale as though you're widening the coils. Inhale, feel the sensation of the back opening into the sling and so I feel a lot more abdominal work. Yeah, it's really great. Part two of this is we will add in the abdominal curl with a towel.
So we're going to add call for the hands up here at the towel. It's very important that you grab the towel, not so much at right at the corners, but much closer to the head and really grasp firmly. The elbows are not jumping to the side. They're slightly anterior and pointing on that diagonal line. And then we will inhale widening here.
As she exhales, she will pull the towel, her head is getting a free ride and we ask that the exhalation, keep the coils open and then she can watch again. She widens here. The coils open the exhalation, they wide. So this is emulating the movement of the diaphragm, but not to go back up. And of course you're watching that the pelvis stays neutral, et cetera. And yes, she has the tremor of truth here because we're in California.
All right, this can progress to her letting go. The towel and the arms come forward in your traditional abdominal curl position, prepping her for the a hundred and then she can return back down. And then if you'd like to progress this further, go ahead and breathe in. Exhale and crow forward. The curl forward. Tailbone is heavy. These stay open, we can add in the legs so she stays forward. She can levitate one inhale, exhale the other side.
So I usually take the clip off from the side that's closer to me first than the second side and she can come out of there. Okay. Let's see. Let's do this gracefully. I'm going to give this to you, right? So that was our breathing, sling and breathing sling with the abdominal curl. And now show you a fun little idea I've been playing with for rollback.
I'm anchoring the first rag. My knees are slightly bent here, so I start out in an upright and neutral position. I will exhale and curl forward. Breathing in, widening my back just like Tomo did. So I imagine the coils widening. I will exhale and roll all the way down. Lift in. Hey, I like to suspend actually, and exhale and starting in the pelvis.
Lift and exhale and lift. I like to do three. Exhale. Inhale, roll. Press down lightly. Exhale, curl. Four word, rural up. Breathe in arch back. Exhale. Let that arch come forward and roll back down again. Breathing out.
Be careful with your neck that you don't start too much here. So that's why I start in the pelvis. Suspend and roll through. Roll ahead. Exhale, curl.
Exhale and correct. This time I don't do the arch. I roll up. Breathe in. Exhale, curl forward. Now this time as I arc back, I pull and curl forward. Other side. It's a little bone narrow position.
Widening. Exhale, roll down. One more. Breathing out, diving over, undo lading up right back into it. Breathing in here and forward. So you remember, this is still your warmups so you don't have to go too far right away. Not Too much. Medium drama. Exhale, curl and breathing in. Exhale, curl. Bring the arms around behind.
One. Flex my feet there. Two, three, roll back, arch. One, two, three, finish.
I'll breathe in and levitate the pelvis, diagonal line, knees, reaching over the toes. Exhale, elbows wide and elbows narrow. Reach overhead. Be careful that the shoulder blades don't come off your rack. Take a small breath in here. Inhaling XL, melt the chest, his sternal drop. Breathing out. Use The abdominals without over gripping your rear. Tailbone comes down. Inhale and exhale.
Breathe in. Lift. Exhale wide and narrow. Engage with the inner thighs on the inhalation here. As you exhale, use those inner thighs. See, I'm Kinda tractioning my spine out. As I roll down. Inhale, slide the scapula onto the back and exhale. I'll quickly pop up. Take off the yellow spring.
I now just have a blue spring on my legs. Will be now extended. I'm going to inhale, roll my head forward, exhale, and come up into teaser pivot. Bring my legs here. A scoot. Just a smidge forward. I'll breathe in. Bring the bar down, reach the outside arm up. Exhale, side bed. Inhale, Roll Myself Upright. Exhale.
Take a small diagonal neutral lean here. Take one more. The arm comes up. Exhale side bend carefully. Your ribs aren't popping out. Inhale, bring the body back up right about in this area. Take a small lean back, extend the legs repivot up here. Exhale and roll back. Now take it to the other side. Inhale, exhale, rolling up. Pivot. Scooch forward a little bit. Inhale, exhale, side bend, fanning. Open the side ribs, little diagonal lean. Breathe in. Exhale, side bend.
Inhale, [inaudible] right about in here. Take that little lean back. Pivot in, stretch the legs up. Use that islet as a marker. That's the middle of the table. Exhale. As you roll back, generally your body starts sliding down a little bit into the table. So you may have to reposition yourself a little bit back up. And I'll just do two more. Breathing out, pivot. Inhale, exhale, side bend. Inhale coming up. Exhale, diagonal.
Inhale, exhale, side bend. Inhale coming up, pivot, reach and roll down. And
So reversed abdominals come around sitting. No, no, no. Come around to the front. I'm putting on a blue spring. You can put on a yellow spring as well. It depends on how strong you are. If you use more spring, you have a little more help. If you use less spring, you have a little less help. You want to place yourself about a hand in a half with from this end of the table. Because when you roll back, you want to have your sacrum flat on the table under handed grip fingertips.
So fingertips means this. Last little bit of a joint rather than a full grip of the hand because you're overworking away from the center. And I just would like the fingertips to have a relationship with the underside of the Scapula here. So we'll bring Tomo into upright neutral. This position, you're not pulling on the bar yet. The inhalation lengthens the spine as she exhales.
She will roll her pelvic wheeled. She's lengthening out, she's not pulling on the bar, she's coming back until her, say Crum is on the table. So back a little bit further right there. Breathe in, lengthening from low rib to hip. Exhaling [inaudible]. You notice her elbows are not in gripping or out too wide. All the work is in her center. Great.
Inhale here. Exhale and soften the Chester roll forward all the way to the spring. Retracting once again and curving back. So again, the sensation is not pushing back through the lumbar spine, but a lengthening out little breath. Imaginary coils opening little inhale and coming forward.
[inaudible] switching sides, changing the hand. Start out forward. Exhalation. She will rotate on that diagonal. Look at that view. Inhale here. Exhale, sustain. Keeping the inner thighs engaged.
Another little breath and coming forward. So the bar is just getting a ride here. We're going to show a little variation that you can do. Uh, so we'll start out with the leg suspended. You may have to tip back a little bit. That's okay. She'll breathe in. She's going to curve back, but the bar will come down quite as far, just barely above the knees and she gets that sacrum on the table.
Draws one knee n and she goes for her single leg. Stretch slow. She will breathe in and change. Breathe in and breathe out and breathe out and breathe in and breathe in and breathe out and breathe out and breathe in and breathe in. Beautiful. Breathe out and breathe out. One more breath in. Breathe in and breathe out.
Breathe out both legs here and she'll return all the way up. Up, up. [inaudible] come down. Nice. Oh yes. Lots of shaking. Not Too much shaking. Next, this is, I call it out or push through because the movement is like the forward push through. You do from the inside of the table, but we're loading from the outside so we have yellow spring on, loose spring on and we'll use the box here on the outside for the feet rest on. And I'm going to ask Tomo to sit here.
Be careful when you come in because sometimes you're not paying attention, you don't want to clunk your head. She sits into the table and you can use an optional prop between the legs, but the feet should be slightly separated like so. And then the bar is here. It's almost like it reminds me of being on a ride in an amusement park. The arms. Stay straight here.
So the starting position and the ending position for right now is this. She's in her upright, diagonal sub, not diagonal, upright, neutral here. There she goes. All right, the inhalation, she's growing taller out of her sit bones, the exhalation, the wheels of her eal ears rule forward. The sternum softens. She curls forward till her nose is approximately above her knees. Right about in here. The Bar, you'll feel the bar start to pull you.
So as the bar pools you, you allow it to go up and you will feel this stretch or lengthening sensation through the thoracic spine. You want to allow that to happen so you can see how this is the push through position as though you'd be on the inside of the table. From here, I would like her to inhale and grow longer. On this diagonal line, you can see that bar move a little bit because her spine lengthened, not because the shoulders do this wrong, not because the shoulders scrunched up. So the inhalation again lengthens the spine. She exhales, she's going to curve back, back and stack straight up. Starting position. You're leaning back. Let's stop right there, beautiful, and we'll breathe in and grow tall again. Exhale, roll the head.
Sternum melts, curl, curl, curl. Inhale, coming up and out. Exhale, sustain. What's Nice here is if you feel a particular part of your back that is maybe a little humpy or Hunchy, you can imagine melting that area with your exhalation and drawing it out of the sternum as though it's coming right out of the sternum to the bar. Then she will inhale here, she XL, she'll curl back and this time, that same spot, she will arch back and lean back a little bit. Breathe in lean, that's it, and exhale and come forward to the upright position.
Something like I did on the other side, the arc into the neutral, so we breathe in again. Let's start it up right here. Exhale, melt a forward, curl forward or pulls you. Inhale into that length and position. Exhale, sustain. Stay. Inhale even longer. Opening the armpits. Exhale, curling back. Pelvis rolls back, coming all the way back into extension over my hand. Watch the ribs. Watch your neck, not quite that far.
And then chest can pour word into upright finish rice. I look great. Yeah, thank you. Let's take this down. You can come out of there and we move the box
So I am going to guess that most of you are used to loading it right here. So what we like to do is we actually use it slightly differently. So let's lie all the way down and we will use a towel. If you have pillows in your studio, you can use a pillow, but you will pillow up between the head and the arm. So she is going to lie. You can lie with the arm this way or this way.
It doesn't really matter. It can be like so, but you're lying on a diagonal line from the back corner for the head to the front forward corner for the feet and the hips need to be right in the middle of the table, so go a little more forward. Then the bottom leg will hook underneath the strap of the table so that if you remember, you can also pull the bottom leg up at the same time you're working your top leg. You have your top hand. Here's a kickstand. Make sure everything is first in a really nice aligned position. Then you take the legs spring.
I'm using the purple leg spring on the islet that is closer to the head, so back of the body. I'm going to ask Tomo to bend her knee, going to help her here, put the strap on her foot, extend the leg and reach out, so we're reaching the leg out of the hip, reaching that leg into a distance while the top leg, or sorry, the bottom leg is also pressing up from this position. We're just going to take a small lift up and lower and up and lower. Somewhere between eight and 10 times no higher than about 45 degrees. Inhaling and exhaling monitoring the rest of the body. Inhale, exhale.
So you will feel quite a difference I think when you load and do this, probably very, very familiar exercises. Way
All the while maintaining this length, low rip to hip as well as silver. Remembering the breathing with the coils. So many things to remember. We'll take that into an extension. So from here we'll bend, reach the leg forward, bend the knee again, keep the knee bent, bring the entire leg back here. Stretch the leg back. Isolation.
So here she's only moving the knee wheel. Now she's only moving her hip wheel. Now she's only moving. Her knee wheel is a really tough, oh, only moving the knee wheel. Only moving the hip. Whale, knee doesn't come from, yeah, the foot extend here. So here you would not try to get your leg too far back. Let's just do one more. Bring your knee a little bit down. There you go.
Hip Wheel, knee, knee wheel, hip wheel. I got Ya and me. Okay. Very nice. And your knee up. I can help you take this off and we'll turn her around. So again you can see she's on a diagonal line.
Head to the back, feet to the forward front. Okay, let's put your foot in. Stretch the leg out. Reach out, stretch here. So for the camera I'm going to move to the back side of the table. Your hips need to be a little bit more forward, forward here. Um, so that you can see, but I'm hooking here into the hip bone.
You could do this yourself and press your, your hip bone away so you stay long equidistant on both sides. Be careful about rolling forward and then use that hand as a kickstand again in front. So use this hand as a kickstand here. Pull the shoulder blade down. Great. Bottom leg is pressing up. She's so good. She remembers. It's hard to remember. And you're just moving up and down. 45 degrees.
This is working the outer hip and the inner leg. But of course that entire inner spanks, your inner unit holding the torso and the spine, pelvis, shoulder girdle and alignment. And your head back just a little bit. There you go. Not too high. Breathing out. Beautiful. Nice. One more time.
We will bring the knee forward now. So just the knee forward and pressing back and the knee forward. Be Very aware that your foot does not end up higher than your knee on. This creates a torque in that knee joint, which your knee won't be that happy with going into to our extension. So the knee will rolls back.
The knee wheel rolls forward, the stay at 90 degrees, the hip wheel. And now we isolate the extension views and then me will hit poile. Rolling back Nyquil. Yeah. So she's doing a beautiful job here. Is that sitting on your foot? Okay, the strap. Okay. And and forward stretch. Last one, last one, I promise.
And of course if you're at Holmes Trach and doing this along with us and you want to do extra, you can pause here. You may do all the extra ones you want here. I'm going to come around to other side. [inaudible] alright, we'll let her escape from there. But we're going supine at legs springs and I just want to show you this, cause this is the way I do the supine leg springs. The I let, instead of being in this sagittal plane is in the frontal plane and I like to use this wedge and I use a small sticky mat like so. And we load the springs in the middle.
And this particular Cadillac here isn't used to this. Go ahead and lie down. Uh, and I think somehow these islets are a little bit smaller than mine, but uh, you would load in the middle like this. I have the cross bar just barely below the little hole that's in the frame and the arms are down at the sides. Like so. So instead of hanging on overhead, I think, which is the pretty traditional version, you have no arms to help you. So it's all in your center.
We'll bring the legs down about 45 degrees or so, and we'll just start out with something simple, like the simple walking, breathing in, two, three, four out, two, three, four, and in and out and in and out. And of course if you want more challenge, the bar can go higher. So there's more tension on your springs. Great. A little bit larger scissors now. So we're going to go in, in, out, out, in, in, out, out, in, and out. Out. Inhale. Inhale, exhale, exhale. Inhale.
Inhale, exhale. Exhale. One more. Breathing in and breathing out. We'll stop at 45 degrees and we're going into our bicycle. So the way I like to teach bicycle is that you come in here again, you hold the thigh in this position, you isolate the knee wheel, rolling back, full extension of the leg, and then you will come down. We'll show it with one leg singly again. So you fall to here, keep the knee isolated as you fully extend, and then come down.
So what we're avoiding is something like up and come down to straighten. All right, so we're isolating full knee extension and then only hip extension here. And once we have that, go ahead and do one with the camera leg. Yes, maybe one more. So you have to know where your hamstrings can get to you.
We'll do both legs alternating and this is a nice reach. So there's that moment when both legs are fully extended. So the energy through the leg bones is coming all the way through from the pelvis. So with that breath, you'll feel how you're reaching really beyond your feet. And then of course, as you know, Pilati you have to reverse. So from this position we'll show it slowly up. So that's hip. We'll back knee, we'll forward hip and knee.
We'll together other side up. So again, same thing here. You want to know where you can control this movement because the tendency is to win the bend, the knee bands you collapse in and then kind of shoot the leg out and you're just basically, it looks like you're just kind of slamming your joints around. So it's a much more controlled hamstring movement. Let's do the left leg. When you call this your needle and thread, you put like you're exactly putting your foot through the eye of a needle. Yeah, don't let that fall in. Alright, so let's do this simultaneously up pull like in the both of your legs will be reaching.
There'll be a beautiful moment when both are in the split and you will really feel that back leg working in case you weren't sure where your hamstrings were or do you? Are you sure you're where you know where your hamstrings are? The last one you tuffle. Okay. And let's just finish here. Bring your legs out with some just lie symmetrical like circles, like so, so ending with something symmetrical here,
Stick one foot in. Make sure you flex it, flex it and turn it out a little bit so it's hooked into your fuzzy hang down the other side quickly. You do that so you really give reaching your leg energy through. You. Don't put your feet on this one. She's going to pull herself. This is hip extension to horizontal and then pull herself up three times. One, press down on your fuzzy strongly to use your legs to help you.
Three come down into the stretch and then right away press up and arc. And again, since I'm here I'm going to give her this feeling, that same area you did on that outer push through. Roll the chin to the chest and stretch. Great. And then one more time. Oh wait, come back. Three pull-ups. One more time here. One and two.
There we go. And three great. She'll come down here flexing and then come up all the way. And this time she will point to her feet, bend her knees and Paul in the circle here. Beautiful. And then chin to chest and roll out.
Very nice. Beautiful. So you will be challenged on doing this one. We'll move to, we're going to keep you there. Oh and I'm going to ask Tomo to move that. Uh, actually the cross parking probably stay there and we will put this long springs here on the cross bar and move that cross bar up.
This exercise we're showing here on the table, you can do this standing off of the edge of the table can prefer to stand on the floor and uh, but the bar is a little bit again about the armpit level. All right, let's have you move out. So these are the long yellow legs, springs again. So there's a slight amount of tension here. Feet are separated in parallel. Inhale, grow out of your feet. Exhale, roll that year, wheels forward.
It's like you're doing a roll down or a roll up, standing up, rolling down, standing up to here. Your weight will want to shift back quite a bit. So worked strongly to keep your weight in the middle of the foot. You might have to micro bend your knees. We'll open up to the side on the inhale and press inward just to below the shoulders.
So she's looking all the time through the legs to the Donald's always on staying in the fully flex position. Furry stay here. We'll rotate the hands, come forward in parallel and press back one. So I'm doing this just to remind her about keeping her weight forward. Two and number three and then on a diagonal, v out a little bit, pressing one and two working in the lats and three very nice. Roll yourself up. So you want to keep the hands and roll yourself up, up, up, up, up, up, up.
She's going to step one foot back. Remember the arch and arch back
And Open and three. Well, we're parallel. And one, remember the work, not so much is the pole, but controlling the return. So consider the return your work and then Diagonal v n one and avoid over gripping in your hands too. And [inaudible] three rolling up. Exhaling here. She's got to come up right. Step the other foot back, but reach open and arch back. Pole one. So this feels really nice.
And to create this circle on the back and three, stepping forward and she'll turn to the camera and take a bow. Okay.
Mention
 |
Cathleen Murakami (Teacher) |
 |
Geralyn M |
 |
Sunni A |
 |
Gordon O |
 |
Ileana V |
Comments


 xo
xo


I appreciate YOUR appreciation of the "slower" approach. I've always felt that slower can go veery deep, not that "faster" isn't effective.....speed is something that is added when technique an precision are already there....Thank you

You need to be a subscriber to post a comment.
Please Log In or Create an Account to start your free trial.
