Description
About This Video
Transcript
Read Full Transcript
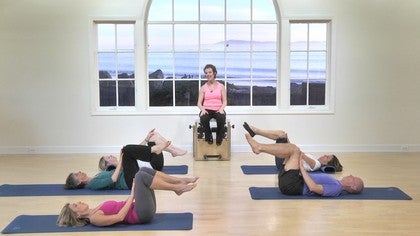
I'm Deborah Cole Way. I'm from Boulder, Colorado, and I'm going to teach just a very relaxing, almost meditative, you might say, you could call it a restorative class, but it's a great body of material that you can use whenever you just feel like you need to relax. Take a few deep breaths. Yes, end of the day, whatever, whatever suits your fancy look, good way to unwind. Good way to find, uh, maybe a deeper relationship to your internal workings. Okay? So everybody just go ahead and lie down. It's up to you whether you have your legs straight out or your knees bent in this beginning part in a little while, you'll definitely want to have your knees bent, but it's really up to you. And if you find, as you lie here, not everybody is really completely comfortable just lying flat on their back, right? So sometimes you might want a pillow under your head if you feel that, just go ahead and get one. If your knees are bent and your hips are tight, sometimes that's not comfortable and you might find that you need a little bit of support for your legs. So you can put your legs over a bolster over a barrel.
You could actually take some kind of a box and put your feet on it. Anything to tip your tip your weight more easily back into your pelvis so that the weight of your legs is not pulling on your lower spine. Okay? So you can close your eyes or you can keep your eyes open. Whatever is better for you. But we're just going to start with what eve gentry called basic relaxation breathing.
There's no particular way to do it. You just breathe and you become conscious literally of the feeling of your breath moving through your body. So inhaling through the nose, up to you, exhaling through the nose or the mouth. The main point is to actually give yourself an opportunity to arrive, to not be doing what you just were doing and to not be worrying about what you're about to do, but just literally be with yourself right here, right now. And does you lie there on the floor, on your mat.
Consider that the floor is actually coming up to hold you. And because there's that support coming up from the ground, it makes it more possible for you to relax into it. So you really don't need to be holding yourself up right now. Breathing in and breathing out. Feel that subtle movement, that subtle energy moving through your body. Even though you might think, oh, I'm not doing anything, but in fact there's a world of movement going on inside your body. Perhaps take, take a short trip through your body, either starting at your feet or starting at your head and acknowledge each part and see if on an exhale you can let go of just a little bit more tension.
You're not necessarily falling asleep. However, you're actually training yourself to be attentive in a relaxed state. Breathing in and breathing out. Noticing all the parts of your body that are actually in contact with the mat and feel how. If you can actually allow the weight of you in gravity to release down than what you're lying on can come back up and meet you and support you. And now continuing with this inhale and exhale.
Go to what you might consider as the deepest, most central channel if you will, in your body and as you breathe in and breathe out, imagine that you're polishing that channel like you'd Polish silver and that your breath moving through that central channel is polishing you and you're getting brighter and Shinier and that that brightness, that shine can radiate out. So as you lie there, your whole body can shine from the inside out and get lighter and brighter. Take a few more breaths, Polish away, any little bits of tarnish, Polish away, any little stickiness, any cobwebs. Just really imagine that you are this clear open through way of light and shyness and then consider again this depth of you think about your spinal cord, so we're getting a little bit more real if you will, that your spinal cord is the very deepest vertical track in your body and that your spinal cord is then continuous with your brainstem and then picture in your mind the brain stem and the brain itself. If you've ever seen a picture in a book, picture that flowering of your brain filling up your skull and allow the frontal lobe to gently roll forward so that might have the effect of you even further relaxing your, your brow further relaxing your forehead, allowing your eye sockets to deepen, allowing some of the tension that we always hold in our eyes to relax away. So again, you're supported on the ground, supported by the ground.
You have this ongoing movement of the natural wave of your breath moving through your body. This shiny, bright central channel that radiates light out and your spinal cord continuous with your brainstem, brainstem, continuous with the rest of your brain, the frontal lobe gently rolling forward, allowing you to sink even more deeply into the weight of the back of your head on the Mat, your jaw line releasing back into your ears, your cheekbones, softening your throat opening. And then imagine that brain as the contents of your skull moist, kind of like a a water balloon maybe, or it big fat jellyfish inside your head and begin very gently to roll your brain sideways inside your skull. Keeping that ongoing shiny polishing breath, inhaling and exhaling. Allow the the weight of your brain to roll your head to the side. Inhaling and exhaling, releasing the weight off to the side. There's no forcing, there's no pushing.
If you notice resistance, stop. Take another breath. Exhale. See if the exhale can release just a little bit of tension and maybe you'll go further. Maybe you won't. When you get as far off to the side as you go, take another breath and release back even further into the support of the mat as you come back to center and go the other way. You can't do it wrong.
The whole idea here is to feel the support. Allow your breath to just keep going. Allow yourself to release into movement, moving the contents of your body as opposed to pushing yourself around from the outside, coming back to the center. Maybe do one more each way. Frontal lobe rolling forward eye sockets, deep and soft cheekbones. Saw jawline line released back into the ears, throat open, shiny, bright light inside you and then come back and hover in the middle and then put the focus.
Now leaving everything still in place that you've already found. Put the focus on the tip of your nose and in your mind's eye you want to project out. You see the tip of your nose out in space as if you had a cone, a cone shape on your face and the open wide part of the cone is close to you and you project in your mind's eye the more narrow tip closed and cone out in space. And put a color there and start to draw circles out in space with the tip of your nose. And as you draw the circles, the only thing that you're trying to do is make the circle perfectly round.
You see the color perhaps you see it deepen and enrich. Every time you make a circle. Maybe if someone's watching you, they don't even see you move. Maybe they do. It doesn't matter. You are picturing it though. And as you make the circles, you keep coming back to releasing the weight, allowing the ground to come up and hold you breathing and polishing your central channel.
Finding that deep internal tracking, releasing the weight into the back of the head. And then if you haven't already reversed the circle, go the other way. If you find a little part of your circle that doesn't want to be round, make it softer, make it smaller.
And once you feel satisfied with your circles in both directions, play with seeing the circle closer to you. The circle of more toward the open end of the cone, larger and closer to you as opposed to smaller and farther away. And feel the difference of when you draw those circles. Keep the steady stream of breath. And if in these circles you have a spot that doesn't want to be round, don't just ignore it.
Perhaps you could trace back and forth. See that color soften.
Farther away they are. The smaller, the closer they are, the bigger.
Breathing in and exhaling. Float the tip of your Chin back down on the breath as close to your chest as close to your throat as possible. However there. Take a breath and exhale. Float the Chin
So you're inhaling in between an exhaling and you time it. So it, it's hard to tell after a while, are you moving to breathe or are you breathing to move? And then come back to the center and focus now on your shoulder blades. And imagine that you could literally slide your shoulder blades inside your skin. Breathe in and on your exhale, slide your shoulder blades up towards your ears just on the exhale.
No forcing, no pushing inside the body. Breathe in and exhale. Slide them back down. Maybe we'll see movement. Maybe we won't breathe in. And exhale, slide him up however there. Inhale and exhale, slide. Just one more like this for you. Then exhaler
And now alternate. Take a breath. And as you inhale your right blade to slide up and your left blade to slide down and let the right shoulder roll your head to the left. Stay there, take a breath. And now exhaling the left shoulder lifts and na sear. Head over to the right. And the right shoulder slides down Henry then and exhaling the right shoulder lip.
It's Kinda like a cue ball, knocks it over, it rolls in, the left shoulder, falls down. And then one more time. Breathe in and exhale the left shoulder up, roll the head to the right, the right shoulder down, and then just come center. And at this point, if your legs are still straight on the floor, go ahead and bend your knees up so that your feet are flat and your knees are bent. How are we going to do a little bit of what I call spinal wave? So we've worked to feel how the breath has a natural way moving through your body. So does the spine.
So tip the tail up and tip the chin up and then tip the chin down and let the tail roll down and then tip the tail up and let the chin tip up and then let the chin float down and let the tail roll down. So go back and forth that way a few times. Tail Up, Chin Up, Chin down, tail down. And again, it'll be different for different people. Some people will feel, you know, like they're really moving their body and some people will just maybe sense this as a subtle shift of weight. It's really like fine motor control or a, you know those magic markers. It's not a big bold magic marker. It's more like a fine tip magic marker. And it's a vertical track through your body. So it's just subtle.
It's inside. You're not pushing anything or placing anything. It's just smooth. Last time, tail up, Chin Up, Chin down, tail down and then come to center and things sideways. Now. So allow your the two bones of your pelvis like headlights to roll to the right, keeping the left shoulder weighted and then come back to the middle and then roll the pelvis to the left, keeping the right shoulder heavy and roll back to the middle.
And then roll the pelvis to the right, keeping the left shoulder heavy and then roll the pelvis to the left, keeping the right shoulder heavy and if it feels possible, allow your head to roll to the heavy shoulders side. So knees, right? Head and shoulder, left knees left, had an shoulder, right? You can start to feel the access of the rotation. Maybe it's a little higher up
Knees one way, head and shoulder the other way. Tail Up, Chin Up. Roll through the center. Opposite side. Tail down. Chin down.
And then they slid down your knee into your hip socket, your hip sockets would be like the sandpit that they slide. And now imagine that I have a little towel underneath your pelvis, a dish towel, not a huge towel. And I'm gonna Roll you by picking up the ends of the towel. And I'm going to roll you three times. And on the third time we'll stay and push off the foot.
So I'll say roll the right roll to the left, roll to the right and push off your left foot and open the hip and then release back down. Beautiful. Roll to the left role to the right. Roll to the left. Push off the right foot. Roll to the right. Roll to the left. Roll to the right. Push off the left foot. Roll to the left role to the right. Roll to the left. Push off the right foot.
Couple more rolled to the right. Roll to the left. Roll to the right. Make sure it's your foot, not your back. And last time, roll to the left role to the right. Roll to the left. Push off the right foot and then come back to the center. Squared off now so that your feet and knees are parallel to each other.
So you still have the same sandpit hips, right, and take a breath, and as you exhale, allow the weight to release down to your sacrum and float your right knee up. Take a breath at the top and exhale. Place that foot back down. We're going to alternate sides. Breathe in, in between. Exhale. Feel the slide from the knees to the center of the knee. Let it fall right back into your hip.
Take a breath and exhale. Place the foot down, however there. Take a breath. Exhale, slide from the knee to the hip. Take a breath and exhale. Put it down. A couple more slide on the exhale. Feel the knee, the center of the knee like a kid sliding right down the slide into your hip and put it down. And one more each way. Take a breath. Exhale, let it fall in. Take a breath. Inhale, place the foot down last time. Take a breath, exhale, let it fall in. Inhale and exhale.
Now we're going to slide the leg. If your feet are sticky without really disturbing yourself, if possible. If you go to slide your right foot on the mat and you feel like it's sort of sticky, then literally move your body towards your feet until your feet can find the floor. So you have um, floor instead of Mat, you could stagger a little bit. Yeah, sorry.
And then as you start to bend the knee and draw the heel back in, keep your sip on chasing your heel even though your foot is coming in and when you get back in and let the kid slide down the slide again and let your fly float back to you. So I'll do that a few times on the same side. We're getting complicated. Now. Slide the foot down the floor. Allow the tip of your right shoulder blade to chase your right sit bone down the backside of you. Allow the right sit bone to chase the heel. And then as you start to bring the leg back, keep the sit bone reaching, chasing the heel, and then release the thigh back into the hip. One more time on this side.
Slide breathing in. Allow the shoulder blade to slide and chase the sit bone on the sit bone to chase the heel and then draw back in and float that thigh up and place the foot to the floor and we'll do the other side. Slide the left leg to straight. Allow the left base tip of your shoulder blade to chase your sit bone. Let your sit bone chase your heel and then draw back in and let the child slide down your knee into your hip socket. And then float the foot to the floor. And again, breathing in. Slide the leg, but the shoulder blade chased the sip on the sit bone, chase the hill.
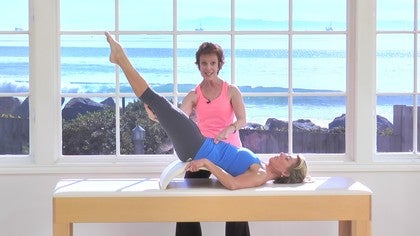
And then as you start to bend the knee, keep the sit bone chasing the heel and float the leg back in. And we'll just do this one more time. Place the foot down. Inhale, feel like a tube of air inside you. Slide release slightly, slide release. And then coming back in and float. Keep the left knee up, float the right leg up and see if you can line your thighs up directly over your hip sockets. If that pulls on your lower back, just lift the shins up higher so the weight of the legs don't hang on you. And then take your palms and cup over the top of your knees.
If you have shorter arms, you might need to bring your legs closer to you. However, a better strategy would be to get something under your head so that your upper body is being lifted to meet the legs as opposed to having to pull your legs towards you. So Wendy, what, um, what Amy's doing is rolling her mat up a little bit so that she has something under her head. So that I don't want you to have to pull your legs towards you beyond 90 degree to the hip. But I do want you to be able to cup your hands on top of your knees. I always think of little Douggie paws, you know, like this. Okay, so your head will beyond that. There you go. Yeah, it's just a proportion issue.
So breathe in and on your exhale, gently press your palm down into your knee at the same rate with which you're going to press your knee up into your hands. So this is probably the most vigorous thing we've done yet. Breathe in. Acts Hailing. Press the fullness of your palm down on the knee at the same time your knee is reaching up into your palm. Two more times. Breathe in acs. Hailing.
Press down on the knee is the knee presses up into the hand. One more time. Inhale. Exhale, press down on the knees. The knee pushes up into the hand, and then take the flat of your palm and slide it to the outside of your knee joint. And then we'll do it here. So breathe in. Exhale, press the flat of your palm into the outside of your leg. Equally pressing the outside of your leg into your hand.
And we'll do that again. Breathe in. Soft, shiny breath. Exhale, press. So you don't have to disturb any of the other wonderful things that have happened just because we're building a stronger foundation in the lower body, right? Breathe in. As you exhale, press the palm into the outer knee joint and the outer knee into the hand. One more. Inhale, so it stays still you. The legs don't come together right. They maintain their hip width and then take the same flat of your hand and place it to the inside of your knees. So we're going to keep our slide right.
We're going to keep our knee lined up with the center of our hip, the center of the knee, and the center to the hip. Breathe in. Exhale, pressing fully, but gently the palms into the inside of the knees. The inside of the knee presses into the palm. Breathe in. Exhaling, keeping the job lines falling back into the ears and the eye sockets heavy in the frontal lobe rolled forward and the brain release. And exhale, press. Send one more. Inhale and exhaling. Press send resistant. And now take the flat of your palm to the front of your thigh so your fingertips will pointing up to the ceiling. Breathing in and exhaling.
Press into the front of your leg as the leg presses back into your hand. Breathe it in and exhaling, gently press meet palm with FYE again. Inhale easy. Now exhale. And then one more time. Breathe in. And exhale. Press now take your hand to the front of your Shin.
So it's okay if your knees get a little closer to you and we're going to take a breath. And if you can't get up easily, I'm going to run around and help you. Okay. And so if you did this on your own, you might have to wear big, heavy shoes. I had to, when I first tried this, had to wear heavy shoes because I couldn't get up. So try not to pull your head forward. Actually allow your brain to stay released back. But take a breath, press the shins forward. Let your head hang back initially backwards for sure.
Lift up and arrive forward with your feet flat on the floor, your knees bent and your head up. Beautiful. Everybody made it. Okay, now stay right there so your knees are bent. Feet are flat. Your hands on yours. [inaudible] and now just tip back til your arms are straight and walk your feet a little closer to you so that your weight is back behind your sit bones. You feel that?
And then float your feet off the floor and see if you can just hover in this position. It's not that easy, right? And then we're going to begin to rock a little bit. So you remember tail up, Chin Up, teeny weeny tail up. Chin Up, Chin down, tail. Now Tail Up, Chin Up, Chin down. It's small. You can think it. Tail Up. Chin up, Chin down. Tail down. Last time. Tail Up, Chin Up. She didn't down. Tail down. Find your balance.
Let your hands go and place your heels on the ground. Flexing your toes up. And as you slide your legs to straight the base tip of your shoulder blade teachers don't like them. The base tip of your shoulder blade slides towards your sit bone and your sit bone slides towards your heels, your legs straight. And that's it. Keep breaching. Don't lie down past your past, your sacred. Okay. And then let your sternum float up.
Come all the way up to sitting, sitting, sitting, sitting. And then just bend your knees, take hold of your shins and start again. So if you want to move over cause you feel like you have room. Okay, so let's try that again. Well if you're going to help, the question is how far back should we go? So we're here and we're going to let go and flex through the feet.
And as you slide you, you maintain that other thought of the base tip of the shoulder blade sliding down and chasing the sit bones. The sit bones chase the heel. So we're not really going to lie down altogether. And then float flo, Flo, Flo, Flo, Flo, Flo, flo, float squeaky shoes. And then come back and you can do the whole thing again. So you'd come to here, we could do it together, right? So you would just tip back. It's a shift of weight. So what I want you to feel to it, it's always like a shift of internal weight as opposed to now I am making a sheep.
So you shift the weight and then just to make it easier on yourself, you bring your feet in a little closer. Okay. And then you pick the feet up and you feel that tail up, Chin Up, Chin down, tail down. And you have to find that wave like action on the breath through your body so you don't throw yourself away. Yeah. And it gets easier over time. It really, really does. But it's so beautiful to open up those tight areas of the body where we don't like to bend. And of course you can feel the implications for [inaudible]. Good last time, come to the middle. Look Ma, no hands.
Flex the ankles and as you slide the legs away, feel the tips of your shoulder blades chasing your sit bones and your sit bones chasing your heels and then float the sternum up on a string.
Mindful Movement: Transitional Moments

Mention
 |
Debora Kolwey (Teacher) |
|
|
Cynthia G |
 |
Jaime Giblin |
 |
Barbara L |
 |
Noelle |
 |
Maggie L |
 |
Jill |
|
|
Mhairi Clare D |
|
|
Helen O |
|
|
Angela H |
 |
Gia Calhoun |
|
|
Amelia S |
 |
Anne P. |
|
|
Anna W |
 |
Katherine D |
|
|
Tania B |
 |
Brian Edwards |
|
|
Francie C |
|
|
Angela |
Comments


PS : the sea out there was so very still when you filmed this, a perfect match to the spirit of the class, congratulations!!

You need to be a subscriber to post a comment.
Please Log In or Create an Account to start your free trial.
