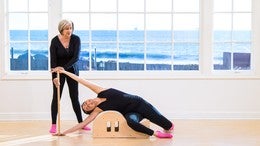
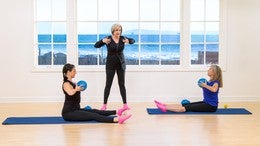
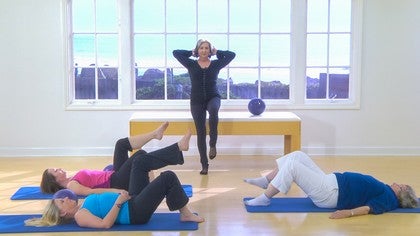
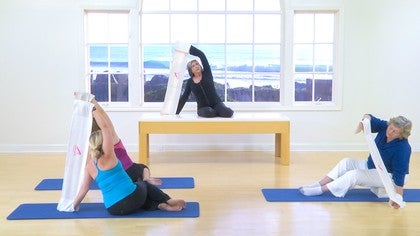
Description
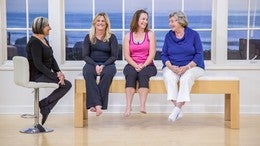
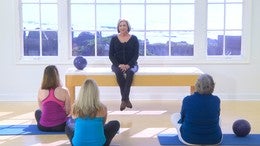
This is the first class in a three-part series on breast cancer recovery. Watch her introduction, where she tells us what to expect from each phase and how her program can produce long-lasting results for recovery. You can also hear the inspiring stories of the women in the class, who have all survived breast cancer in the Breast Cancer Student Panel.
About This Video
Transcript
Read Full Transcript
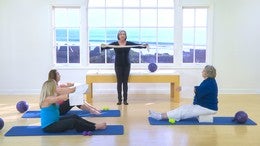
We're going to begin the phase one section of our program. These exercises will concentrate on arm and children mobility as well as breathwork and body alignment. This is important because we really want to have the quality of the movements as the foundation for which we build recovery upon. We're going to begin with breathing, so let's go ahead and just place your hands on your ribs. Take eight inhalation, eh next.
Now our rib cage has the ability to open and close by almost three full inches, so we want to get more movement into both sides. If we're working. Now thinking about the effected side of the body affected side, meaning the side of the body where we've had our surgery, we're going to once again pay attention to the evenness or symmetry of the breath on the inhalation and on the exhalation. Inhale and exhale. What I'd like to see happen here is the first thing we're going to do is we're going to take that breath and we're going to divide it into five equal parts. So I'm going to count one, two, three, four, five. That's your inhale and the same on the exhale, but the point what we want to do here as that number five should be as strong as number one. So in other words, it doesn't go to [inaudible] so that what we want to do is draw the, the air fully into the lungs. Let's go. Yeah, on one, two, three, four, five. Exhale, one nice, two, three, four, five. Inhale, one, two, three. Beautiful. Four, five, and exhale. One, two, three, four, and five.
Now we're going to go just on the effected side and place both hands there. So whatever side you had your surgery on, both hands and everyone is going to be different on that in. Once again, we're going to go in on one, two, three, four, and five. Exhale, one, two, three, four, and five. Inhale, one util three, four, five. Exhale, one, two, three, four, and five. Last time, one, two, three, four, and five. Exhale, one, two, three, four, and five and take a nice, easy breath and relax. Now from there we're going to still go. We'll be working on our effected side. This time, you're going to take the opposite arm and take it around to your back.
And we want to have the breath go from the back all the way around to the front. So let's think about inhale one, two, get moving in the back. Four and five. Exhale, pull it down. Two, three, four, and five. Good work. Inhale, one, two, three, four, five. Exhale. Beautiful. Three, four. We have one more breath here and bring it up. Two, three, four, and five and pull the ribs in and down. Two, three, four, and five. Let's come around. Placed the hands once again on both sides of the ribs. And inhale, one, two, three, four, five. Exhale, one, two, three, four, and five.
Round the body over and relax and roll the spine up too. Sitting where you able to achieve more movement as we progressed with that so that we're getting now to have that, um, inhalation and exhalation really helped the body. The breath is so crucial for all of us, but to really bring the air in to activate even the bottom section of the ribs is just really, really important. Now we're going to do the same exercise, but we're going do it on rotation so it both arms rotate toward the effected side. Just turning the body and now concentrate on holding the unaffected side still as we open in a, in one, two, three, four and five. Beautiful and down two, three, four, and five. Turn the other way, but we're still gonna work on the effected side. Inhale into that side. One, two, three, four, and five. Exhale, one, two, three, four, and five and turn into dissenter. Let's go back to the first side. Inhale, one, two, three, four, and five. Exhale, one, two, three, four, and five. Beautiful. And in the hill, turn to the upper side and inhale, two, three, four, and five. Good. Exhale, two, three, four, and five.
So when we're doing these exercises, we're talking about working kind of asymmetrically, working more on one side than the other. But I always then like to finish with the exercise being symmetrical. So we're going to take the ball and we're going to work both sides of the lungs and just place the ball comfortably. And what we want to do is we're going to take an inhalation and we're going to exhale and round over the ball, lightly rounding and just stretching forward. Okay? Now on the next inhalation, I want you to actively work by pulling the abdominals away from the ball so we're not pushing into the ball on the inhalation.
So we're going to inhale and on the counter four, but we're going to really feel that in the upper back muscles. One, two, three, four, exhale. One, two, three. Relax the arms. Inhale, one, two, three, four. Exhale. One, two, three, four. Inhale, one, two, three, four, and exhale. One, two, three, and four. And now we're going to take the ball and you're gonna put it over the side and you're going to roll it out. As you exhale, take an inhalation and sit up and then exhale and roll the ball out and pull back in. Take it to the opposite side and roll the ball out and come back in. Now do you have one side that road more than the other? Go to this side. What was shorter and is this again, it's your body. Whatever side you need. More stretching.
We're going to take an inhalation. You're going to actually let them roll the ball out. Beautiful. Take it, stay there with the ball. Inhale, exhale and road. Just a little more relaxed into the movement. Stretch just a little bit more and exhale.
And once again, inhale and exhale and stretch out. One more time. Reach away from the body away from and then come back in.
Opposite side. Good. And Roll it back out. Very nice. Come back in. Are there side and roll back out and come back in. Really Nice. Come into the center. Roll the ball and you could well it just down onto your feet. Good and roll it center very nice and comeback length in the spine. Let the spine grow long.
Inhale up. Exhale again. We want to work towards symmetry. Both arms should be even in this position and roll it back and come up. And one more time. Inhale arch. Exhale n roll evenly stretch and we'll back in and come up and sit up. Nice and tall. Very nice. So that completes our breathing. Um, and so now we're going to begin to work on the mat and we're going to work with the mobility of the shoulders. So we're going to have you lie down on the Mat with your knees bent and your feet flat. I'll move the box for you lying down nice and comfortably.
Very nice. Let's now take the arms. You want going to fold them over the chest and I'd like you to place the effected arm on the chest and the other arm over it. From here we lift the shoulders and the shoulders are now going to just come up to the ceiling and then we're going to release the shoulders just onto the mat. Let gravity do the work, opening across the chest. And once again the shoulders. I don't want them to roll forward, but I want you to think about them coming straight to the ceiling.
Beautiful and come down. Let's use the breath again. So we're going to exhale as the shoulders come up and inhale as they come and just to relax them and releasing into a neutral position. One more time and bring the shoulders straight to the ceiling. Up to the ceiling.
Try and work even the on both sides and come back into the center. The affected side only. We're going to just push that shoulder up and center it, release it just to the ceiling on your exhale and release down. Very. And one more time to the ceiling and release. Let's change the position of the arms.
So now we have the effected arm is on top. Both arms, both shoulders come up and now as you come down, press that top arm in pushy, pushing a little bit more, activating the muscles through the shoulder girdle. Exhale on to lift it up, their shoulders, both shoulders and come down. Try and get both shoulders, even the in this movement. One more time on three and press inhalation. On the way down affected shoulder only, uh, up on one down and press into the hand up on two down, pressing to the hand, up on three just to the ceiling, not to the ear and gem. Now we're going to go the opposite way. So from this position, once again, what changed the hand position and we'll press both shoulders into our mat, feel the Scapula, I feel the shoulder blades kind of pressing into the mat as you come down and try once again to get an even feeling all the way through and come back up and for rest down. One more time.
Come back up and press down. Let's change the hand position. Very nice. And once again there she pressing into the mat and releasing with both the shoulders, shoulder blades coming together and releasing. We're exhaling as we do the press and inhaling on the release affected shoulder only press it down on one and release and to and release last time on three. So now what we've done is we were going through our range of motion of our shoulders. So as we are bringing the shoulders up, when we go to the center and then we press and go beyond centered, press down with that position in the center is our neutral shoulder position and it's The p position that we really want to be in, in our standing and walking so that we are not allowing the body to hunch slightly forward. So we want to now think about getting this same shoulder mobility.
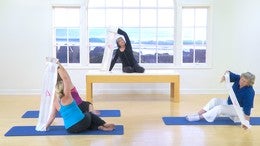
So he goes forward, center and back. But we're going to do it with our arm up. If you were going to work with the effected arm first and if you need to you can support that arm. Um, if you can, other arm just stays down. And here we go. We're going to take an inhale and exhale any lift just straight to the ceiling.
Inhale into center, exhale and press down and release. Inhale, take it high to the ceiling, beautiful and center and take it down one more time. Take it high to the ceiling and center and press to come down both arms up and come all the way up with both arms. And then parece and down. And this is only if you can with both arms and not having that assistance and press to come down. And one more time, take it up and high and press and come down.
Bring the arms down and release. So now we want you to move on and think about working with the pelvic alignment as well. Cause as you know, when he has you have experienced it is the whole body that needs attention through our body awareness and our alignment so that our posture can be improved and our a range of motion as well as our functional daily activities. So what we are going to do is we're going to work with and just the movement through the pelvic alignment. So here what we want to do is just to do a very small curl of the pelvis. So a key equal weight on both feet and from the center position, curl the pelvis upward so that you're really bringing the pubic bone towards the naval. But keep that space nice and long and then come center.
Now go the other opposite way in, tip the hips so that we really are getting that position, the slight lift in the low back and come center. Once again, curl to come up. Very nice and lengthen in the center. Go to that satellite tilt and center. So in that center in Polonius is what we call that our neutral pelvis.
And this is really, really important in good for us so that we know that when we are standing we are not tilting or tucking the pelvis, but we're maintaining a neutral pelvis which is supporting our spines in the movement. So now what we're going to do is we're going to take these small balls and we're going to put it right under the back of your head. So find a really comfortable position and press into the ball so that your nose is still going up to the ceiling. But we're really getting a nice stretch, a little bit of massage through our neck muscles and working through the cervical spine. So we're going to just once again take an inhale on the exhale. Once again, we're just pressing straight down. Don't tilt up or back, but progress the head straight down to activate the muscles in the cervical spine and then release and axial and press down and release and ax Halan press
So we are going to once again curl the pelvis up
What we're going to do is we're going to lift one leg up. Don't lose your ball. Very nice. Bend your knee and have your knee do rectally over your hip. From there, we're going to maintain a stability in the pelvis, but we're going to do a circle with the knee. Circle it across the body first and around and down. Good and across.
Very nice. Now stabilize your head so that the ball is not rolling because if we are rolling and with the unstable realization of the pelvis, we're going also have lack of stabilization through the shoulders. Nice, very good, and go the other way and circle the knee
We're talking about that full stabilization and bring your leg down. Let's work on the other leg. Anchor, leg up, knee bent, and circle around. Keep that nice and stable so that if we're working within the joint for full stabilization, we're going to have better movement in our joints. Reverse the movement. Come around, come around. Hey, just want to do about five each way and bring the leg
So we want to really begin with our full trunk alignment and we also want to begin with the alignment from the, uh, shoulders up into the cervical spine. So let's go ahead and come back up to the seated position for an exercise called the pelvic clock. I'm going to move this for you.
If I roll lightly back, bringing my tailbone down and rounding the back, I'm going to six o'clock and then I'm going to the center of my clock. I'm going to go reach lightly forward to find 12 and center. I'm going to go to three and center and then I'm going to go to nine and center. So do you understand how the clock works? So you're in the center and we're moving forward up to 12 center back to six, center over to three center and over to nine and center.
Now the clock itself, we are going to go up to 12 and begin to circle two, three and two six and to nine and to 12 nice. Let's go the other way. From 12 to nine two, six, three and back. And then go back into your center position. Again, the center position is known as our neutral pelvis and this is the alignment that we really want to, uh, begin to [inaudible] a chain through our pelvic alignment. Now it gets a little tricky. We're going to go from center to 12
Nine and 10 and 11 and 12 so this is that how the clock and we all have places in the clock that we find more difficult to reach than others. And the idea here is once again, we don't want to have any of those positions holding us, Eh, in a way that we are more rigid, but we want to have freedom of movement through the pelvis supporting us for freedom of movement through the upper body as well. Now we're going to just do that one more time going backwards through the clock. So we go from center to 12 to center 11 and 10 and nine
Go all the way around, clockwise, all the way around counter clockwise and then com center. Now we're just going to do, we did shoulders forward and back. Now we're going to do them up and down. So bring the shoulders high to your ears and center. Then pull them down from behind the shoulder blades high to your ears and pull it down and down again. Very nice. Hi to the ears, up and down and down, a little bit more beautiful and uh, and down and down affected shoulder only working at up through the center and down other shoulder is going to be your stabilizer shoulder.
One only affected shoulder working only and that's it. Up, down in, down. One more time. Up, down and down. Both together. Now we'll create that cemetery leading the movement so that we have nice symmetrical work going down the back of the shoulder blades and we come up, down and down and bring the chin to the chest. Now maintain that knee, that centered position for your shoulders and bring the Chin over the affected side and downs with the center. Go Up to the opposite side, maintaining the neutral position through the shoulder girdle. Take it down.
Inhale, let the spine come up nice and long. Press the ball right at the center of the chest in. Squeeze the elbows evenly behind you, behind you. Release and take a nice deep breath. Exhale to come to the front. Inhale and come back up.
Press the ball and and squeeze the elbows evenly behind you. If you can take the ball to the front and go as high as you can with both arms and press it in and release. Press in on the ball, press in on the ball and now use the opposite arm is your stabilizer effected arm in one in two in three come down. Great. Great job. That completes phase one. Thank you.

Breast Cancer Recovery: Early Stage Breast Cancer Recovery

Mention
 |
Kathy Corey (Teacher) |
 |
Kristy M |
|
|
Cigdem A |
 |
Sarah Edwards at Positive Pilates Solihull |
 |
Jennifer S |
|
|
Luna H |
 |
Connie M |
|
|
Lorraine M |
 |
Kristi Cooper |
|
|
Avishag H |
Comments


And unfortunately, I only have one mat and some bands and balls.Hope there are more work out with mat haha. Thank you.


You need to be a subscriber to post a comment.
Please Log In or Create an Account to start your free trial.
