Description
About This Video
Transcript
Read Full Transcript
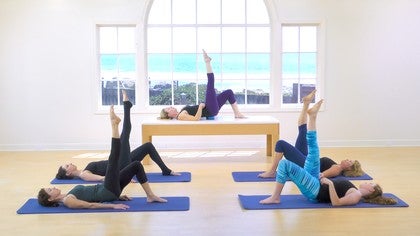
Hi everyone, it's Amy here for a mat class and we are going to really approach this class from a bone safe health standpoint. So if you have lost your processes would be a good class for you. If you ever having a day where you don't feel like bending your spine and rolling, this is a good class for you. So I have four wonderful women here with me and we're all teachers teacher in the making here. Um, we're using weighted balls, you can use hand weights at home. We just happened to be using these today. So we're going to go get started and I want you just to start with your legs apart, feet hip width apart, and just take your weights right by the side of your legs and just lightly press in with the palm of your hands and does let your elbows open out away from you slightly.
And why I want to do this just to give our our back a sense of width, right? Especially at the very low, uh, base of the rib cage and kind of fan the back of your ribs open and your elbows are nice and wide to allow that to happen. So we're going to take three deep breaths here and rather than keep going, rather than thinking of lifting the front of the chest to be tall, I think of lifting the back of your rib cage upward and allowing the front to slide down. Okay. So that we don't lift the front of the ribs and get that tension in the back. We want to have a nice sense of width and carry that with a cross your collar bone. You can actually elongate your arms a little bit. Yeah. Okay.
Let's wake up our appropriate receptors in our feet. So I want you to raise your toes as high as you can, all 10 toes and lower the toes down and raise your toes up and lower your toes. Dionne says, we do these toe raises. Just feel the energy from your feet all the way up your legs into your hip joints, even into your lower back, probably even in your spine. So getting a relationship from the floor or all the way up or body. Well, let's just do two more times guys, and you can just keep pressing those waist right against your legs and lower. And one more time.
Let's lift the toes now with the toes still lifted, bend your knees a little bit just softly. Okay. And then straighten your legs. And as we do these, keep raising those toes, pulling them up, feeling the energy in the ankle and rise. Tracking your knees straight ahead. And this will show up again in a minute when we add some hip hinge thing to it. But right now we're just tracking the knees, just lowering our way to a tiny bit and lifting. And one more time, really awakening the feet. Okay, good.
Now just go ahead and grab the weights and put them right at your shoulders. And let's work some shoulder movement. Let's draw some circles with your elbows. Keep aware of your back and sliding the front of the rib cage down as you try to lift the back of your rib cage up a slight bit and circle the other way. And you can make these circles large or small as you want. Think about this as an opportunity to even start correcting your chest posture, your upper back, your shoulder posture.
If you feel like your head is starting to drift forward, allow it to drift back slightly. Okay, one more time, one big circle and then just hold onto the weights and reach your arms up slightly. Making sure to avoid any shoulder elevation and I want you to just raise one side of your rib cage higher than the other side and then opposite side so it's not so much keep going. It's not so much of a bend sideways at is as it is reaching one side higher than the other side that could promote a bend. But we really want to keep both sides long and just reach and reach. Guide going a little higher and a little higher. Let's do one more.
Each side looks good. You guys lift really a lengthening them big, broad back muscles of our spine and then just lower all the way down. Okay. Now going back to the bending knee. So bend your knees straight ahead and I want you to put the weights right at the top of your leg near your hip joint. And Kane just slightly press in and I want you to bend those knees. But then to hinge your body forward or your torso for and what the ball might be able to represent as our femur head rolling back into the socket.
And as you're hinting down, keep your chest upright. I don't want you to stick your tail back and arch this part of your low back. Keep that broad, remember, okay. And then come out of your hinge for just a second and hinge forward and hinge back. This right up, right. And again, allow those balls to kind of inform where did the femur heads need to go? They need to go back into the sockets and as become upright in stand.
If we could really investigate this, the femur head would slightly roll forward. We can't see that cause we're, we have muscle and skin on us, but as we flex in through the hip joints, the femur head does roll back. So you can apply a little bit of pressure there if you'd like to just add a little bit of pulsing in your legs. Really this is not so much of a knee bend or need bounce, but uh, increasing hip flection, increase hip flection. Good. Start to tap into or think about the abdominals a little bit. Good. Nice.
Manny and, and let's take four more [inaudible] and femurs back. Three and four. Okay. So stay with your knee bend. Bring Your Torso Upright and I'm going to turn sideways for just a second. Guys, take a one more hinge and one foot back. You can choose whichever leg is going to go back. I don't, I don't mind. Pick a leg, step it back onto the ball of your foot. Then bring your body up.
Right. Okay. And I want you to kind of go into these little pulses again and really feel your, the back foot spread the ball of the foot wide. What I want you to do is push off of that foot and just rock onto your front leg. Step back, push off and rock forward. And if you want to, you can stay hinge when you rock forward or you can bring your torso upright. That's fine. Keep going. I want you to just weight shift back and forth.
Yeah. And really push off that foot to come forward three more times then and push back. Rock forward. This little foot push happens a little bit later. So connect into that here and let this one bring you all the way onto both feet. Okay, so I'll turn this way. Then those knees, hip hinge again, step the opposite foot back. Bring Your Torso Upright.
Just start a little bit of pulsing. So concentrate on the back foot. Spread the toes, spread the ball of the foot. Use it. Now here we go. To push yourself onto the front leg
You're not supposed to flex or you just want to challenge yourself today. Just put your knee down, put your hands down. You can let go the balls for a second and just pause on all fours. I'll get up here now and then I want you to walk toward the back side of your mat. The Mat that's close, or the side that's closest to the camera back there. Okay. Just walk yourself over there and then walk back my way.
You're just going to shift. Yup. Just shifting side to side. Now, some of you might be thinking at home, what about my knees? If this doesn't feel good on your knees, you just don't do this part. We're just yet putting a little bit of extra weight into our wrists. Keeping a nice long spine. Now let's come my way. Pause. Turn onto your hip that you see me.
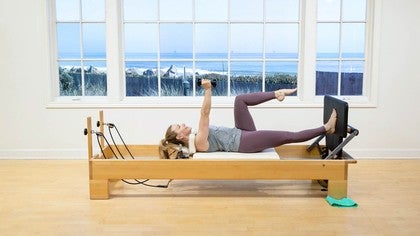
Grab your balls and roll over onto your back and place your hands down on the mat. So you're going to be like there. Why don't we have feet facing each other? Yeah. Okay, so starting with some little bit of Lumbar flection. Okay, so we're not going to do a huge bridge. And once your balls right by your hips, poems on top of the weights, take a breath in through your nose and as you exhale slightly, press your hands on the bowls. Open the collarbone and connect to your lats and your triceps. Inhale, release and exhale. Again.
Press. So the shoulder blades aiming low on the back. Inhale, release. Your arms are not touching the floor. So the upper arm is, yeah, you're good. Nobody's got their upper arms is resting or their elbows. I want those arms nice and straight. Two more times.
Pause, breathe in and exhale as we unroll through the lumbar spine. Come to level. Pelvis is do two more. Exhale.
Okay, so these weights are filled with sand, which provides a little bit of cushion for us. What I want us to think about here is that we don't rest completely on these weights because if we rested, we may go into a little bit of arching of our lumbar and a loss of use of our abs. So I want to keep us working in the abdominals. We are in a pelvic tilt. Okay? Take a nice breath. Now from this position, glide your hips to one side. You can choose which side. So it's going to be that you roll over the top of the ball, slightly come through centers you inhale. This is really hard to see probably from home.
Exhale as you glide to the other side. Inhale Center, keep going. You guys, will I talk about it? So if you feel yourself push down more into one of the balls, that might mean that you're rotating that hip back. Try to lessen that. We really want to just skim the surface evenly and have our weight distributed evenly. Okay, I'm gonna Watch you real quick. What we're really wanting to avoid is hiking the hiphop on this side when we translate our weight just easy side to side. Yeah, so from the aerial view that I have with them, the top of their pelvis is staying even across, they're not gliding and lifting one side. Okay. We don't want to shorten.
We're really working on the lengthening here and evening and Al. So go one more. Each side looks good and usually in doing that we start to feel more of a lateral hips, probably some of the hamstring muscles kicking in. Okay, so from there, find your neutral. Find Your Center Center, not neutral. You're still in pelvic tilt. Take a deep breath and I want you to raise a leg. You can choose and inhale lower down there side as we exhale and inhale lower alternating sides and really feel that same and concentrate on the same fact of keeping even weight on the balls. Four more times guys.
Exhale one side up in Hylo or so we're hinting at those hip joints again, right at the hip. Okay, one more. This leg and lower and last time. Exhale and inhale. Lower. Now go to your first leg again and just bring it through that 90 90 extend your knee, lower that leg until it's the height of the other leg, and bring it right up to 95 times. Inhale, lower it out. Exhale, bring it up, reaching out.
And you're still evenly weighted on the balls. Two more
So you might be as getting a subtle stretch in your hamstrings on this upward lift one more and lift. And then simply bend your knees. Step the foot down. Hopefully you're still the same weight. Now we need to get the balls out of there. So beer really barely lift your hips to take the weights away.
Set your hips down. Level, pelvis anchored rib cage. Raise your arms straight up. Okay, so now with the weight in the hand, I want you to look up to the uh, your hands. And just notice if your risks are inflection or extension or a crooked. Okay? Keep your wrist straight in line with your elbow and your upper arm. You may have to make a soft fist here and let's do some scapula movement.
So reach both arms straight up to the ceilings. You spread your shoulder blades apart and exhale, just drop up. Inhale, stretch and drop. Feel if both are reaching the same height off the mat. We're trying to feel some balance in there.
Two more reach and drop. Last one, reach and drop one at a time. You can just alternate and can go a little faster. And I liked the feel the weight of the scapula really hit the floor and you've got two extra pounds now for the Scapula to meet the ground. Start going faster. So almost like you can't, uh, control the, the movement like little pistons. Okay?
Just kind of waking up some of the upper back area and rest. Alright, choose an arm to reach back overhead. The other arm reaching down by your hip, but neither arm is resting on the floor. So I want you to keep them lifted. Here's an opportunity to keep your back wide and on the mat. Some of us might have that doming ribcage against the sea. If you can avoid that, reach the arms through center and exhale the other side. Just enjoy the added weight and how that can help stretch through the arm change as you exhale. Inhale up
Two trends late down your arm, bone into your shoulder joint and your socket. One more each side. Okay. Down and down. Both arms are going to meet at the ceiling again and this time I want you to bend your elbows out to the floor and just put your, your elbows and upper arms down. Yup. Now if you can rotate from your upper arm and allow your arms to roll back more toward what we, sometimes we'll call the goalpost position like this and just breathe in you guys in and out about three times. You may want to use your eyeballs and looks.
I decided to make sure your wrists are nice and straight. Again. There's a tendency to flex or extend the wrist joint. It's hard in this position. Not too, but trying to have a nice flat wrist. Okay. From this position, lift the arms back up. We're going to go open, close with the arms waits facing each other. Inhale as we open out wide, no arching of the back, and exhale, raise the arms. The shoulders should stay heavy on the floor.
Inhale, allow your chest to get broad. Exhale close. Let's just do it two more times cause the inhale. So if you had a forward head and upper back that somewhat tight, you might want a little pillow underneath your head. Could have said that at the beginning. Ah, from all right. Now put your arms facing your knees again.
Raise a knee into tabletop and then the other knee and a tabletop. And before we get going on with deeper abdominal work, put your hands right by your knees and I want you to extend your arms. It may have to be that you roll your ball up, your knees, push your knees very strongly against those balls as you zip up your abdominals and exhale, it shouldn't be easy. And those abs you really want to turn them on. My back is now flat. I've added a little bit of posterior tilt. Now let's release it. Inhale two more times guys.
Exhale and press the knees into the hands. Broad chest. You know where your shoulder blade should be. Inhale, release. And one more time. Exactly. Exhale. And your feet can be relaxed. You can have a soft point either way, but I just want you to connect into those abdominals. What do you feel? They're hopefully strong, nice and deep work.
Now grab the the weight slightly and I want you to extend your knees if you can get your legs in 90 degrees externally. Rotate your thighs. So your in PyLadies v. Okay, so instead of pumping arms today for the 100 we are going to breathe and want us to open both arms back a little bit toward the ears and lower your legs out slightly on a diagonal, no arching spine. That's an inhale. Exhale. Let's meet at 90 90 everything. Arms on like to 90 degrees in here we open two, three, four, five and close to three, four, five and open four, five and exhale two, three, four, five. Keep going. Two, four, five and exhale. So again, with any of the chest lift or abs series with osteoporosis, we keep our head down, which is actually a little hockey going harder because you don't have the counterweight of your head and your skull up. So these ladies are working really hard to keep those ribs heavy and up.
Reach a little further out in low with your legs. If you can keep stability in your spine and up. I think we're at nine, maybe nine, two, three, four, five and exhale to, and if you're really strong, why not try going all the way down? Oh my God. Maybe not. And all the way up. And then just bend your knees, put one foot down, put your arms down, just wag your tail slightly. Great work. Okay, we're going into seeing some arm circles. Think reformer. Okay. Let's just feels kind of Nice with the hand weights. So knees into tabletop, arms straight up. Call our bonus set.
Let's reach the arms down and not dropping a hole that rotate an open out to your t. Raise those weights up and keep the shoulder blades on the floor and lower rotate. Make it a nice seamless movement. So I like to think about that. I can still see my arms and my peripheral vision even when they're low down there so we don't necessarily have to touch the four completely rotate open and just one more time in this direction. So we're doing five oh round and left other way. Correct your posture with this open up. Exhale close.
Remember the arms have a really connection to the back body, so the muscles from the back and a branch out into the back of the arm. Two more circles. If you repeat this class later, you can add some leg gestures if you want to. We'll keep it simple today and close. Now from here, everybody just put the arms down, put your feet down, extend both legs out. Feel long for a moment. Flex both feet. Let's keep the right heel reaching like that is and raise your left leg up the leg that's up externally rotated slightly. No with leg circles. Today we're going to do single leg circle. Lift your weights up.
Open kind of slightly torted t but not all the way. Hold your core down. Here we go. Cross over. Inhale. Exhale, round lift.
Chest is open spine as long. Here's five and lift. Let's just do a nice easy bend of the knee. Set it down. If you have the endurance, keep your arms out there, lift the other leg up. The foot on the floor is flexed. Top leg slightly turned out. Here we go over exhale, round lift,
Hold it and exhale, fold it in. Other sites, going to reach and hold, hold, hold. Exhale, fold in. Let's do three counts, so hold, hold, hold an n and it's up to you where you take your leg. Some of you are feeling probably warm enough. You can take your leg fairly low. Once again, each side, that's where you have management of stability in your spine. Keep pressing the knee in and into the hand. Hold.
Okay. Arms again out toward a soft t position. I have a little bend in my elbows. Arms come up. Excuse me, legs come up. Turn out slightly. Let's do some scissors. You choose which leg, it's fine. Put one down, lift and pull the other one out.
Let's speed it up. Same direction. Eight, seven, six. It may not feel really organic. That's okay. And three and two and one. And then just everything rest. Okay. Put your feet wide on your mat. Drop your knees over toward, let's say the camera side.
Just hold for a minute. Wherever you want to put your arms right now is fine. Let's take a few deep breaths. So open up this hip joints and you can even let your abdominals kind of puff and stretch. That's fine. And we'll go over to the other. Something about the work with osteoporosis that is fun is, well we need to change dynamic, dynamic rhythm and tempo. So you'll see some of that through this class.
I'm gonna load those bones in many ways. We can go to the first site again and open your arms out to a t. Now with this when you can actually let them rest on the floor if you'd like. And what I want you to concentrate on right now, exactly Hayley, is this foot, the foot that closest to me, can you come up onto the ball of that foot? So you may have to adjust your, your stance a little bit. Okay, so I'm going to bring you back to the warmup when we were doing this little weight shifting bit and I said, we'll see the pushing foot right now.
If you contracted your glutes on this side enough and press this foot into the floor, this glute contraction. Exactly. Lauren will kind of push your hip forward and rotate it and let it go a little bit. But the foot pushing on the floor, that contraction travels all the way up into your glutes and you can release so thin foot glute and move right. Don't let me push you too hard. Again, a couple more. So foot onto ground push and notice how it's rotating, not pelvis more forward. And one more time. Push the foot and press you guys all feel that.
So the connection of the ground into our hips. Again. Now do it so much that we won't hit you with our ball, but that you could toss all the way across the room and you can just put the weights together and come back over just with your tour. So let's do two more. Inhale first exhale, press and toss and inhale as you open. All right, last one. Press the foot into the floor. Toss good stuff and open your torso. And then just easy bring your knees through to my side so you have to do that on the other direction. So as you rotate, yeah, connect to the foot on the ground. The heel is lifted, you're on the ball of the foot, pressed into the ground and contract, you're glued to press the hip or rotate it forward.
And you can kind of do a few of those to rev up for the toss. But again is the more you can track through this backside of your hip, you'll feel that stretch in the front side greatly need those hip flexors opened up. Okay, let's do the ball toss now. So Push, you're going to toss the ball up the window and open. So we're in a little bit of rotation. It's okay for the spine as long as we have decompressed it, which we did at the very beginning of class. Prepared ourself, press and toss. Okay. And then just open your tour so hopefully that feels good.
And then just bring your weights down. Walk your feet, toe, heel, toe, heel. You can bring your knees in, press on your shins, and just slightly transition. Okay. So find yourself over into your tummy. Try to transition where an in a way that you don't round yourself up or even pick up your head like that. So I'm going to just kind of slithered this way and turnover.
Okay. Or, Yup. And maybe we could try to have headspace in. It's always fun to see creativity at work. Okay, so how is, how are we going to start? Like this guy's prone is put your weights right by your shoulders like this on the mat. See if I can get ya. So my elbows are down, my head is lightly touching the floor and the palm is on top of the ball. Okay. And once again, concentrate for just second on the wrist position so that your wrist isn't vent or extend as you've got a really flat wrist and you can even have your hands open. Yeah. So the elbows are down on the floor, our upper arms are nice.
The externally rotated back should be a really nice chest opener. Again, see the theme here to correct our posture. So yeah. Good Michelle. So pressing the elbows down. Let's take a few deep breaths. I'm just checking these guys to make sure they're there and their necks are nice and long. Their shoulder girdles down. Good. Exactly. Beautiful. Okay. Now from that position, take a breath.
I want you to exhale and hover your head ever so slightly off of the Mat. Keep your elbows down, take another exhale, and just hover your hands off your balls and he'll set your hands down and then your head down. Inhale, prepare. Exhale. Head comes up first. Hands off the weights, but your elbows are still down. You're connecting to those external rotators of your shoulders. Wrists are nice and straight.
Lower the hands on the weights and put your head down to more. Exhale, head, and then hands. Inhale hands, and then head. One more round. Inhale. Exhale. Head in. Hands now lightly.
Put your hands back on your weights lightly. You don't really need them there, but they're there. Okay, and your elbows are still down on the mat. Now let's do some neck rotation. Cervical movement. Look my way. Let's look out the window or you probably can't see what I can see. Okay, collarbone wide. It's gorgeous. And daily. Rotate your head. Look down to your chest, open around, look over toward the camera, and then center your neck. Okay, other way. Turn. Inhale. Good, beautiful network and rule the neck look center.
Let's give it a break. Bring your head down. Inhale again. Exhale as you lift your head. So like that. Radiating energy off the crown of your head in your breastbone. Now if you can go higher, but not all the way to Swan, keep working the upper back muscles. Rotating the collarbone back the upper arms back. Okay.
Now I think we're ready to try to reach up into swan, but if you keep lifting your back, you'll get up there. The hands on the balls is going to add a little different energy. I know if this doesn't work, you don't have to do it. Try to keep the wrist flat. Breathe in. And as we come down, can you get the elbows down? Lighten up your hands and bring your chest down two more times.
You may have to move the hands wider. Inhale. Here we go. Exhale out through the head. Take a big inhale as you rise up into swan, zip up those up dominoes. Exhale as we lower down as soon as you can. Light hands. One more time. Let me want you
Lighten up and rest. Okay. And want you to come up as a little transition. You don't need your balls for this, so just bring yourself up, toes, big toes together, knees apart, and just keep your booty back, your hips back. Okay. So again, we're trying to avoid any rounding in the mid spine. And this just feels really nice to feel like you're reaching the back of your pelvis to your heels, your sternum through your hair. Let's take a couple of deep breaths.
And just for a moment, let's just, uh, relax the sternum down to the floor or sag the spine. Nothing wrong with that. Every now and again to just feel that versus more of a supported position. So as we lift our rib cage up away from the floor, our sternum up away from the floor, the back of the neck, gorgeous Lauren is really open and long. The collarbone is wide without forcing it and almost feel for a minute here guys, that you don't really have to push to be in this position that you're almost levitating above the mat. If that makes yes, someone gets that I'm sure. Or magic. Okay, so we don't have to push all the time, but you're somewhat levitating here.
Okay, so now as your toes are tucked, we are going to put more weight into the limbs. Take a breath. As you exhale, you do have to push a little bit. I want you to hover your knees without losing your long spine and inhale, set the knees down and exhale as we hover
We want to surprise our bones. This is just, they know what they're doing now. They've done this several times. Take one hand off and just kind of move around. You can even kind of, you know, whatever. Yeah. Just kind put your body in a new word. Yup. We're loading, definitely doing some spice, site-specific specific load on that risk. And let's come over and breast, other side and hover.
Take with the opposite hand off. I just happened to kind of want to rotate and look around. That's all right. So just loading that wrist. We're going to prep for a, some pushups here in just a second, but okay. And then come on down. Inhale, do to get Nice Mandy and hover and his whole maybe rotate and come back down. One more exhale. However the knees take the opposite hand off and just turn sideways slightly and come all the way down. Okay. Rest your feet. You can come like this if your knees are okay to shake your wrists.
So for pushups, what I want to do is wide pushups. We always, we tend to do the narrow ones, so my maths kind of way see on your knees and put your hands wide, maybe even wider than the mat. Okay. So if you bend your elbows out, can you get your, your nose almost to the mat without arching and dumping your ribs out and then push yourself up to straight. Let's do that five times. Inhale, bend wide chest. Exhale. Inhale Wide Jesse. The hips are going to be a little higher than the back to stabilize your low ribs for Michelle. That's right. That's better. Michelle. Push the ground away. One more.
Good you guys. Okay. Shift down onto your elbows. Still no weights. So now we definitely have our hips sirens that are back on purpose. And then we're going to do some hip extension and leg raises. So how about our right leg? Put your right leg behind, Tuck your toes down. Now this would be another place that you could get kind of sloppy in your shoulder girdle.
So I want you to keep lifting your breastbone up away from the ground. Your hips are square and lift your leg up. I want you to keep your heel flexed, your ankle flex, reach out through your heel and let's just do 10 little easy pulses. Squeeze your glute and two and sternum reaching long. Think a little bit of Swan, Hailey. That's it. And 6 cents, seven and eight and nine and 10 easy. Bring it in other sides. So left leg slides back.
Touch the ball of the foot down. Try to square your hips if you need to. Look, you may ready. Reach out through the heel. Lift your leg. Stomach is working, spine is extended and we lift two and three, four and five and six a little higher. Seven knives you guys, eight and nine and 10 all the way in. Okay. Now I want you to come back up on your hands wide and let step back into a front support long stretch position. Okay? Yeah. So see if you can, we're also habituated to do Polonius pushup like this.
Try to go wide just for variation. Go hands off the mat. Try it. Ready? Yeah, like no, I don't want to do something new. Why aid and push? Oh my gosh. It's a whole different thing. Yeah. Good. More sternum. Haley. Bring your stern into Michelle. Good. Two more times.
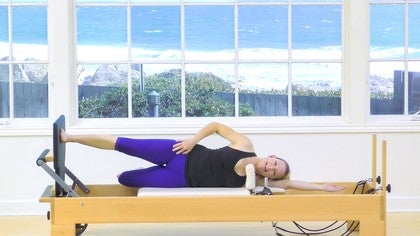
Has the deeper work in the upper bat. Nice. Michelle, this scapula are moving a little bit for me. It's okay. Some might say different. Good Mandy. Okay. Everybody rest. Yeah, so this is again, if we do the same thing over and over, we've heard that recently from other people, but also our bones need to have some surprises. So if we keep repeating the same thing, they can memorize. Oh, that's what that's supposed to do. Need to load them a little different way. Okay, face me. Let's do some side lying. Here's something new probably. So this is not mine. This is, I learned this last year from Irene down at a workshop in Colorado and I really liked this a lot. It's not for everyone, but if you did I do it last week. Maybe not. Come on to your elbow.
Your upper arm is, you're going to be lying right on it. Okay. And then if you can take your fist, top of your hand and push it down onto the mat. Now one of these may be handy for your head and it's actually quite nice because it puts this side of the neck a little more aligned with this side of the neck rather than having your head hanging completely off to the side there. Okay. And this may not work for you if it's not working, just go to the regular position, which is just your folded arm. Okay, so our knees are bent, not quite up to 90 your heels are more in line with your sitting bones behind you. Exactly. And this puts it a pretty nice position for this underneath waistline to already be lifted. Okay, let's clap. Yeah, clam and close.
But I want to say not only work on those hip rotators, push your elbow down your upper arm onto the mat and really push. Again, if your shoulder has some history of injury or something, that's probably wouldn't be the best depending on the condition. Use your discretion. It suddenly got very quiet over here for are we doing guys? It's weird in the three.
I can see all these. Bonnie's just taught right into their, their side body. Use your bottom inner thigh to also help raise your legs up. Bottom inner. Say let's hold here. Top like for five and four and three. Excellent. And two and one and hold.
Now take your top arm up if you can keep your legs up. Great. If they need to lower, that's fine. We're going to move this arm or lowering it down. This really demanding on our sense of balance. And inhale, lift and exhale. Reach your legs out long the head long over the ball. Good Lauren.
And up three more. [inaudible],
Do you bring your, your prompts with you, your cushion for your head? Knees are slightly bent or arm is right underneath. We're pushing that arm onto the floor. Bottom waist is already significantly assisted now with this arm. Okay. No, forget the abdominal. So we're all set up. Here we go. Exhale, open.
I didn't count maybe 10, two, thought about 10 and three. And if this bothers your neck again, just take the ball away or even hover a little more off of the ball. I don't really set things. Even n six
Exhale both legs up and lower. Press that elbow down. Nice. Michelle. So that pressing down actually almost assist. Do you feel that? Can you feel has a little bit of an assist?
A top leg one and two. Keep pushing the arm down and three, remember the arm is part of our back or back has help holding us. So was our abdominal wall. Okay, and down and hold top arm. Inhale. Exhale. Lower it toward the front of the room as low you can without falling in hill for more abdominals. Press back. Spine presses in side waistline's working bottom is hamstrings, hips, the whole body integrated right now.
Long upper spine out the head connection, the add. Nice correction to last one arm is going to go over and stretch yourself long trying to get ankle to ankle, ankle to ankle. That change for all five of us and let's bring everything down and rest. Good, you guys. Okay? Take your cushion away. Roll over onto your back. Give yourself probably just a transitional knee squeeze. Whoops, I lifted my head.
Nice squeeze and you can rock yourself site to side. Okay, now this, how can we do this? This is a new one. We don't need these so I'm going to get them out of the way. Can you come up on your elbow? No, come down on your side. So it's a little leg kick with a fan kick. Okay.
This is something just kind of fun. So legs will be slightly in front of us. I want you to take your top leg up and you'll probably end up rolling off of your mat. I'm just going to tell ya, it's okay. I hope I won't roll off the table. So you're going to come front little kick back, little kick front. Now this, you're going to do a little fin kick, so it's going to come up. You have to roll somewhat like a baby over onto your back.
Go over onto that side and end up sweeping your leg behind. You wished like that. We did it. Now let's start again. So we do front and back and front fan kick all the way around. That top leg will end up sweeping behind again. Good front and back and front and over that leg.
[inaudible] sweeping behind and kick front kick back. Kick front all the way over. We're going to repeat it four more times. Front and back and front. Have some fun, have some fun. It doesn't have to be perfect. We're definitely on a different kind of theme here. It's okay. Woo. Yep. Ready?
We have a fast motion. We have some slow motion. Let's go front and back. It's fine. Front all the way around and it'll be a day behind you. Last one, front and back and front all the way around and up with the leg behind you. Okay. And bring your legs together. Great. Flip over to your stomach's real quick guys.
Let your hands by your chest again. Now I want you to Tuck your toes. Let's push ourselves up to a front support position. I think we're all able to do so. Yep. They're there already and hold and just hold yourself and one long body. This would be where you could push your arms down on the floor slightly and just hold, step the hand farthest away from me toward the other one and turned to face me and just raise out of their arm up. Nothing fancy. Just hold yourself.
It's plenty fancy, but you know what I mean. And then fit the hand down. Let's do the other side. Jesus, crawl over, take the other arm up, rib cages wide, lower back, breathe in and exhale. Put your hand down and how to transition out of that. Just set your knees down. Big Toes together. Again, sit back. So we are going to do a teaser and the teaser I have planned is definitely not the classical to user because we don't want flection.
So turn to face each other. I think that'd be fine. I'll face this way. Hook your hands underneath your knees, feet on the mat to start an open your knees up. So we're in a little external rotation of her thighs and I want everybody to lean back. Now you can balance with your toes on the mat and you with your arms. Pick up your legs a little bit. Okay, so for Haley, tried to get up out of your low back soon. Lightly. I know your favorite thing.
Wait for Cadillac. Flex your feet now. Okay, we're going to do one leg extension. Try not to drop your posture and bring it in other side and extensive use arms connected to our back. Again, their back is doing quite a bit of the work to hold us first leg and in second leg. Okay, let's surprise the tempo. Go a little faster.
Hitchhike your thumb. Now look up to that hand and arch the arm behind the opening up your chest. We're in extension rotation, really healthy. Hold those low abdominals up and then keep the arms circling and bring it behind the leg and other sides of the arm can go forward as it comes up. Make the hitchhiker look up at it.
The other arm is useful to hold ourself in a balance there. Lift up through the chest bone. Open the collarbone, open and around each side. Again breathing. So you're in that hinge back making an arc and continue the arm around. Last one. Yeah.
Oh, I know it's okay. Yeah. Okay, so you guys can face me now. Just put your weights kind of near your chest or your abdominals and face the front of the room. Stay on with your feet about your hip with their slightly wider apart. Okay. A bigger squat. Now I want everybody to sit back and then stand. So when you do these squats you will like you did earlier in class.
That sense of rolling your femurs back. Yup. So you really open your pelvis back. No Tucking in here. Good. And said back so far back, you almost could lift your toes up off of the floor. They are doing it three more and back
We're going to travel with that squad. Okay. You can have your weights. Just stay here, step out and back in same side. We'll do four altogether. So for a sense, even weight on both feet, even weight on both feet, even weight. Now we're going to go that way four times and yes, use the foot, push it off the ground. Stand, squat, hips back. So we're going to alternate eight times that way. That way. Here we go. Side and center side. Good. Yeah. Holding the shoulders steady in low.
Using those arms around onto our back for
You've been seeing this a little bit lately so if your back is nice and flat on the reformer, it might be some skater shift to the other side
If you want to stand on one leg and heel way that happens. Okay. Start moving annual way. You want to move without flection of your spine. Okay. And just see where you take yourself. So we're surprising our bones, we're definitely loading ourselves in a different way.
Yeah. Working our balance. It's been a lot of stuff going on with balance lately. If you've been watching polities anytime and seeing things in the news reports, how important it is, no matter how old or young you are to check into it now find stillness wherever you are. Hold. It's like modern dance and potties class. Okay. And do the other side. You can't see me. We're all smiling right now. Other side guy is mildly gay. The first, the second leg and the old way you get there. Yeah.
And then start moving. Might surprise your own self and if you, if you topple over or kind of stumble a little bit, you know, hopefully you don't dissemble so much. You fall to the ground, you know, we're okay. We're trained to movers here so we know how to fire to test ourselves, I think. But go easy if you're doing this at home for the first time. Something like this. Good. That's great, Hailey. Okay. And then stop. Oh good. Okay. Put your feet together. Drop your weights. Let's do one more centering bit. So how light do you feel now?
We've been holding those hand weights for almost the whole hour in some way, shape, or form. So lift yourself. Let your shoulders even come up a little bit. Feel some lightness. Now allow the shoulders to melt down. Turn and look to the ocean. Well, we have it all around us, but that, that side of the ocean, that window, and then the side, you can't really see it there. Yeah, you guys lower your arms to shoulder height. Rise upon your toes.
Just take it all in guy. Deep breath. Raise the arms up. And as we lower the arms, stay nice and tall. D compressed. You've surprised yourself. You've surprised your bones. And then just rest with your arms all the way down. There we go. Nice job. You guys.
Bone Health: Osteoporosis Safe Workouts
Mention
 |
Amy Havens (Teacher) |
 |
Angela |
 |
Niamh O |
 |
Patti S |
|
|
Cynthia G |
|
|
Laura G |
|
|
Judith L |
|
|
Carole W |
|
|
Claudia C |
|
|
Megan Y |
|
|
Sharon C |
 |
Belloni Samanta |
 |
Lizette Zapata Cadenas |
 |
Louise H |
|
|
Marelle M |
 |
Amy C |
|
|
Marisol V |
|
|
Natalia S |
 |
Marie N |
 |
Connie M |
 |
Deborah P |
|
|
Kathleen S |
|
|
Violet M |
 |
MBrigitta |
Comments


I'm feeling strong, centered and confident in my body again :) YAY!
You need to be a subscriber to post a comment.
Please Log In or Create an Account to start your free trial.
