Description
About This Video
Transcript
Read Full Transcript
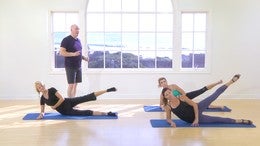
Hi everybody. Shelly power backup please any time and welcome everybody. Thanks for joining. We are going to do a class that's a continuation of some classes that Brent Anderson taught and you might've remembered that he did a class that was hip related and a class that was spine related, looking at how to improve spine mobility, which everybody needs. And it's also really important too, if you ever have an injury, the better your spine moves, the better your life is and the quicker the injury will resolve itself. So we're going to go on with the mat class.
That's going to be a little bit of a continuation for both sets of people. So we're going to look at how it affects the hip joint, how we can make the class a little safer, more comfortable. And then we're also going to see how we can improve and continue to improve spine mobility and during the class. All right, you guys ready? All right, so let's go ahead and lie down on your backs. Really good. Getting down and let the knees bend in. The feet be flat. And again, just, um, if you're observing this class before you take it or if you want to look at the, um, the screen right now is we're going to look at the body position just as we're lying down. So you want to make sure that your head, rib cage and pelvis are touching the mat.
And if any of those things feel like it's a little bit challenging and usually it's the ribs feel challenging. You can put a cushion or a towel behind the head and just see, you want to put that behind your head, Amy, and I'll have you just put the towel behind your head. Yeah, there you go. And it just makes it possible for the rib cage to come down as opposed to making it feel like you have to push it down. Because anytime we use a lot of muscles, it's not, you know, again, it doesn't have this free and, um, encouraging way of doing it. It feels like you're forcing things and that's not a good way to start. So just get something at home if that feels like it's more comfortable to have the head lifted out. We're going to start with some breathing awareness.
So I want you to purposely, and you can have your hands on your body, one on the belly, one on the chest, or you can leave your hands by your side. And I want you to just notice as you're kind of in a resting breath, what moves on you. And we do this a lot as plotty teachers. I, I do this a lot in my classes and I'm sure the students are saying, well, when do we get on with the good stuff? But this is actually really important because we can use breathing and breath to improve our spine mobility. If you think about how the rib cage moves when we breathe, that's a great and really easy way to improve mobility. So just notice if you feel like there's a lot more movement of your chest or a lot more movement of your belly, and that's just the way it is.
It's not right or wrong. And I want you to purposely breathe into the abdominal area. So obviously you're not breathing, you're not breathing into the abdominals. But it's the feeling like the in breath allows for the abdominal area to rise and come back. So it's kind of the feeling of having a, a balloon in your abdomen. Good. That's it. It should be really gentle. It shouldn't be forced.
It should be really gentle. Good. And just again, just notice, is that easy for you to do or is that kind of challenging? Because hopefully as we do the classes, as you do more and more plots, this becomes really easy to control, right? God. And sometimes people, aesthetically they don't want to do this. They don't want to let the abdomen expand. Good. I'm glad you're not afraid to do that and come back in. But it's actually, if we don't force it, it's actually really important. Your organs move better.
There's less stress around the abdominal area. And I always recommend that for my clients who feel like the, um, you know, don't have great, great bathroom habits. So it's like, just breathe more and it'll help your intestines and the abdominal area. Good. Great. So now let's change it and breathe a little bit more into the rib cage so you can do hands to the side of your ribs. If that's not comfortable on your wrist, you can wrap your arms across, put your hands to the sign and see how it is to let the ribs move outward and inward. And you'll notice in the class at Brent taught, he had you doing this lateral motion lying on your side, which was easier because the floor was stopping your ribs from moving on one side and really allowing for expansion. So now I want you to be able to do it without that feeling of having anything help. Right now you're doing it on your own opening and closing the ribs.
Great. Very good. Yes. So much. Not so much. Yeah. So the great question is what, what do we do when the ribs are expanding? Does the abdomen keep expanding also? And you could certainly do that. Um, if you want to get more movement of your ribs, keep the abdominal wall a little bit more quiet or still, but if you want the full chest and belly expansion, that's also good to practice too. That's great. Very good. So now just let it come back to kind of arresting, arresting breath, not set. And I'm going to give you a little quickie kind of strange thing to do, which is to breathe only into one lung. And you might've practiced this before, you might've done this before. If you haven't, it sounds kind of weird and you're not really doing it. So just um, in case somebody goes off and says, you know, Shelly said you could breathe only into one long, you're not, but it's the feeling of it keeping muscles on one side a little more active and allowing for that expansion of the muscles on the other side, a little bit of movement of the ribs so you can pick which side you want to breathe into.
And it sometimes helps if you close your eyes a little bit and start. Imagine all the breath going into one lung and into one side of the rib cage. Imagine all the air going there, direct it there so you're breathing into one side, feeling the ribs, move and expand and back in feeling how quiet the other side can be. Good. And we'll do it one more time and then slowly start to change. So now you're breathing more centered for maybe one or two breaths and then let the breath go into the other side. Inhaling and exhaling.
So again, if this is not so easy for you, roll onto your side, the floor will stop one side from moving and you'll be able to expand in the side that's up toward the ceiling. And that's a good way to practice as if you just can't quite make it happen. Then go back to lying on your back and see if you can get the same feeling without the artificial pressure of the, of the ribs being held with the floor. Now you'll hold it with your own body. Yeah, good. And this is great to do for relaxation, helping yourself sleep if you have trouble falling asleep.
All these breathing exercises are really good for calming the system. Alright, how to go. We are able to both sides equally. [inaudible] first side or second side was easier. First side was easier. Yeah. I always wonder is it because it's the first side or the second side? Sometimes once you practiced it, the second side goes easier or if it's really our, our bodies. All right. Excellent. So let's keep going on and moving and we'll start to, um, talk a little bit about what happens in the end. This is kind of where your question went of what's happening in the abdominal wall. Now when we're actively moving.
So before we had this expansion of the abdominal wall, which is really important, but not particularly when you've got to do something like the a hundred or with your legs extended out, you've got to be able to maintain the shape of your body with the abdominal muscles. They can't just be going all over the place. Um, so I want you to feel what it's like. Put your hands on your abdomen and when you exhale, do a little bit of drawing in. Not a huge amount. Yeah. And just see if you can maintain that tone and breathe into your ribs a little bit. So can you do that movement of the ribs? Not too big. Just a little bit. Think of how you would be if you were moving in class. You wouldn't be taking a giant breath, but you can kind of feel how the abdominal wall stays and the rest of the rib cage can move sideways.
So maybe do a rib breath one time where the ribs move upward away from the Mat. See what that's like. And then the next time that you do the breath, leave back of the ribs on the mat a little bit more when you breathe in. So the expansion is more sideways. Yeah. Good. And so that's a way that you can understand what we talk about when we're talking about core controls. So you guys can let that go for a moment. A core control isn't bearing down and squeezing and activating a lot of muscles.
It's maintaining the shape of the body in a particular way. So in the beginning of class, we're often in what we call a neutral position, had rib cage pelvis, and I'm going to do movements in that position. Sometimes a body's round, sometimes arch can you maintain it with the least amount of effort and the most amount of gains. So that's what we're talking about when we talk about core control. Yeah, okay. It's a little different. That's not, it's not how everybody thinks about it.
So let's go into a little bit of movement at the pelvis and the spine, starting with our pelvic clock, just starting to rock back and forth from the tailbone toward the lower back. And just notice when the lower back comes down, it's the feeling of it lengthening down toward the mat, back and forth with very little muscular effort, the feeling of a wave or a rock going in one way, going the other way and start to notice. And it's great that your head is nodding with it and if you're watching this and just observing is this notice that the head moves in response to the pelvis. And the ribs often move in response to the pelvis as well. So they're three points that are moving, not just the pelvis as you're going back and forth.
And now we're going to start to go from side to side, one side to the other side. We're not going to spend too much time here. You've practiced this already and some of Brent's other classes and some of my other classes back and forth from side to side. And then right away start into your circles around and around and really feel the back of your pelvis on the Mat. If you feel like you're lifting up and doing a bridge, let that go. Feel the weight of your pelvis on the mat as you're going around and around.
And notice is the rest of your body responding to this motion. Go in the other direction, back around the other way. Good. That looks great. So always when you're moving, you want to stay out of pain, but do trust yourself and start to increase the range of motion a little bit as you can. That's great. And then come back to your resting position right in the center. The pelvis is horizontal, more or less going right into bridge. So tilt the pelvis a little bit and begin to roll your spine away from the Mat.
And I want you to have a little bit of pull, like you're trying almost to slide feet towards you and reach your sit bones. Beautiful toward the backs of your knees and then roll back down, widen your shoulder blades apart and let the spine come back down.
It's not going up so much to the ceiling. Start to roll down from here. That's it. That's the right place. Beautiful. And at the top on your next one, you're going to stay up and hold there. Get that little bit of pull, let the ribs come down a tiny bit. That's it. And let's add some rotation here. So this is very similar to what we just did in the pelvic clock, going side to side.
Allow one side of the pelvis to rotate down and the other side to rotate down and see if you can feel that last point of your body that's touching the mat. There's some part that's touching in the next part that's not. See if you can have the feeling of the rotation. Go all the way up to that point where your spine just leaves the mat and then come back to the center and roll down one inch. Ah, and started to rotate one way and rotate the other good.
So we focus on the movement of the pelvis, but there's still movement happening through all the Vertebra, all the way up to that one point that's left on the floor. Good Center. Roll down a little bit and let's do it one more place. That's it. And you'll find, I heard an AH, ugh. Sometimes the good ones sometimes like, Ooh, that doesn't move so much.
If you think we've got 24 total Vertebra, seven are in the neck. So we're not even to the neck or not even to the first few. So if we thought 14 maybe 12 segments, if we could even move half of those, we would have really lovely spine mobility and when that has lost us interest come all the way down. Take a break for a second. Yeah, it's a lot. It's a lot. And it's a good way, again, to tone the legs and the bottom in a way that's useful. Right? We're going to use that feeling. It's not the, the talking feeling. Great.
All right, so go back to you're just bringing awareness to your neutral position. Head, rib cage, pelvis if you want. Yeah. Yeah. And this is a good time. Again, if you feel like it's just tough to get your ribs down, put a little something under your head. A little hand towel is great. It's works really, really well. And let's go into our dead bug or a Femur Arcs, right? So starting to let one leg come up to tabletop and place it back down and just alternate at your own timing.
A lot of times when I'm working with my clients, I love doing, I could do this for an hour and they've done five and they're dying because their hip flexors are so overactive. So have that feeling as you're practicing. So before you lift, and you'll notice if you put, you guys can take a break for a sec. We don't have to do a jillion of these, but if you put your fingers at the front of your hip joint, right, where you'll feel the hip flexors activate a little bit, it's important to get that feeling of rolling back and, and so less work. Let me help you. There you go. That rolling feeling. Yeah, you got to the feeling. You'll notice it the moment that you go, wow, I could do these for ever. That's the right sensation. Exactly. All right, so now let's go back into bridging and put these two together.
Okay. So get your feet set, have a little feel, and you can take the cushion out from behind your head. Roll up into your bridge. Get that same feeling of sending your pelvis toward the backs of your knees, toward the backs of your knees. Like you're gonna pull your feet under you just a little bit. Just a tiny bit. Yeah, left pelvis. Come down. Just a, you got it. That's it.
Now let's do our femur arcs. Here, right are our dead bug left. Letting the leg come up and putting it back down. Good. I'm back up and back down. When you go to the first side, lift the leg, hold it up for a moment. Stay there. Feel that sense of heaviness and then stretch the leg to the ceiling.
Good. Bend it and gracefully place it back down. Change sides. Transfer your weight, and then tabletop. Let the leg extend beautifully. Bend it back in and place it back down. One more of those on each side. Shift the weight lift good.
And in and down. And last side up. You guys are doing a really wonderful job of keeping the pelvis in the starting position and then roll down into your bridge all the way down to the pelvis. Yeah. Good, great. Hang onto that feeling, that sense of being able to stay in that lifted position and move the leg with ease cause that's going to come back when we do leg circles is that's super. All right. Let's get into moving the upper body a little bit. Yeah.
So interlace your hands behind the back of your head. I'm a big fan of interlacing your hands or at least hand on top of hand because this doesn't do anything. Yeah, it's just for decoration. So interlace and and bring your elbows a little bit upward toward the ceiling. Yeah. And just notice, play around with that. Open your arms out. As long as it's comfortable in your shoulders and notice what direction it feels like it's taking you in back toward the floor. Yeah.
And now bringing the elbows up a little bit. Yeah. Now we're kind of going toward chest lift. That's what our goal is. That doesn't mean that you can be lazy and never work to get your elbows out, but if you haven't been doing this very long, you've got to have your elbows up to kind of feed into it and help your body. So take a gentle inhale, not too big, and just start to exhale. Let about half of your air out and then go into your small little curl and then roll back down. Yep. We'll do that one more time. Inhale, first exhale. Let the ribs come down.
Let the air go out for a little while, and then do your curl up. Beautiful. Your head should be resting in your hands. Let go. Place your hands at the sides or the backs of your thighs and now expand your ribs to curl deeper. Yeah, not necessarily higher. Let the arms reach back out. Support the back of your head, and then that first rub that's not touching the mat. Put those ribs down and the next ribs and the next rips, and you're down in hails. Softly.
Exhale for a little while, then go. That's it. Inhale to reach your arms. Exhale to curl deeper. Draw the abdominal wall and just that little tiny bit. So now you can release the hands. Bring them behind your head and roll back down. Good.
Staying up this time. Inhale, start to exhale. Curl up. So the more we leave the back of the ribs down, the more mobility we're getting in the upper part of the rib cage region. Inhale, exhale, curl deeper. Earth. A sense of letting the back of your rib cage expand. Now stay here. Yeah, I like how you're walking your ribs around a little bit.
Everybody walked the ribs around. Helps if you release the skin. Sometimes it helps if you release your t-shirts. It feels like it's pulling you backwards. So now stay there and let your arms reach long. You're going to exhale.
Maintain the shape as you move your arms and then right away bring your arms forward. So your range of motion is based on how far you can move your arms. That's it. We're going to do two more sense. Is there a change in the abdominal wall or not so much? Again, it might change a tiny bit. Last one, but we don't want it to change very much. Cradle the back of head and roll yourself down.
I like to do the assisted role at first so that we really can get the sequencing of the movement. So put your hands behind the back of your thighs and we just worked on getting more mobility through the upper back. So we want to maintain that as we go, right? So now we don't just go, whoop, I'm supposed to roll up. She'll go really fast. We're going to take time moving through the upper ribs before you come up. So here we go. So again, same kind of sequencing. Inhale first, not too big, and then start to exhale. And then toward the end of the exhale, just do a small curl up and pause when your lower ribs just are intact with the mat. So just stay there and send your legs away more. That's it. Good.
Stay there for a second. Really hold on and then roll back down. We'll do that one more time. So let your knees fold in a little bit if that's comfortable for you. If you want to separate your knees, that's also fine. And then start to exhale. Exhale for a little while, let the front of your chest move in, and then send your legs away to just do that small crow on.
Hold on so that when you press your legs away, that helps to roll you up. You start to become the bottom of a rocking chair and roll down. This time we won't stop, but you'll go through that same motion. So inhale softly. Exhale, let the air out and then keep going until your feet come on to the floor. Good, beautiful. Very nice control.
Pull against the back of your knees and inhale as you sit tall and allow your upper back to expand a little bit and then come back to center. Good feet together. Knees open in a diamond shape. So you're going to stay sitting and you can also cross your legs. And this is where really important when you're in your sitting position. If we're thinking about the best position to have the spine in for mobility and for support, this is not it.
This is what we feel like sometimes, like you're struggling to get up. So there's yoga blocks, there's towels. You can sit on anything that you have at home. Because what we want to be able to get into is a position where we're on top of the sip bones so you can sit with your legs in the diamond or legs crossed. See what that's like. And then a couple of you. Yeah, take a block or a towel and just see, are you behind your cell phones or are you, you just advanced the exercise by like four levels you did by sitting up tall and that little block. That's okay though. You can handle it.
You're going to handle it. Yeah. Thought it was going to be easier. I never, I never said that. I just said you're gonna have better spine. Spinal. I meant, yeah, that's it. Good. Right. Pull yourself even more. Now let your ribs go a little forward. That's where we want to be sometimes. And now without changing your pelvis too much. Bring your ribs back. All right, very good.
Take the hand forward and over to the side to go into your mermaid stretch and then change to come back up and go the other way. So I want you to imagine if you were seated right up against the wall and if you're at home practicing this, go sit against the wall and go up and over. Keep changing sides. Can You keep the back of your head, the back of your rib cage in the back of your pelvis, gliding along the wall as you're going back and forth in this movement? Hmm. I'm seeing looks of, hmm, what's happened. Yeah. The head and body want to come forward. But if we, again, if we think about um, the spine and where it has the most mobility, the most options for movement, it's when it's more erect, more vertical, right? Not overstuff but just there. Yeah, that's it. So to your last one, coming back this way and then back up to sitting tall. All right, excellent.
Going into spine twist. Now you can stay in the same sitting position. If you want to change, you can but same, we're going to keep the legs bent and we're going to do hands in on your elbows to start with. Right. And I would like if your risks pretty much your risk, stay in front of your breastbone so we don't get the arms going around to the side. Arms and shoulders come up as you breathe in and then let everything come down as you breathe out and wide. If you hold on a little bit and try to slide your hands apart, your elbows are going to get pulled this way and hopefully your shoulders are going to get pulled the same way. Yeah. Cause the other thing we like to do because it's easy, the body, it's like water goes in. The path of least resistance is here.
So if I just pull my shoulders together, that's not really, that doesn't fix it that much. So I want to go wide. Yeah. So pull open and go. Why you got it? That's it. Now we're going to turn to look out the window at the beautiful day and beautiful, clean, clear sky and come around to the front and turn the other way and keep that gentle feeling of opening wide and back around to the first side. You guys are doing a great job of maintaining the tall sitting posture and to the second side. Um, pause in the center. Now you might have to, we can have arms a little lower.
So are you guys can move so you're not going to hit each other. You want to go back a little bit? So now we're going to start to move and we're gonna use our shoulder blade. Shoulder blade is kind of like a paddle. Yeah, it was. We're pushing through the water. So when you turn, if I'm going to turn to the right, I want to feel like my left shoulder blade is just helping me turn around a little bit to the right. Okay.
And what I want is your hands to stay in your peripheral vision as much as you can. Okay. Here we go. And start to twist this way toward the window and feel like your shoulder blade is helping to push you around. Yeah. And come back to the front and twist the other direction going around. Feel that sense of width. So hold for a moment and check. Can you really see both hands in your peripheral vision without moving your fingers forward? Yeah.
And then come back around even more forward head stay in line with your breastbone. Less, more or less. You can turn it. Yeah. So yeah, it's, it's when we're talking about spine mobility, the question often is, can I move my arms more? Can I move my head more? And yes you can because you want the whole system to have the spiral. But I don't want, I don't want to see is yeah, head turns and nothing else. So you got great neck mobility, right, which you probably already had before.
So turn so you can see your hands and your peripheral vision. Turn your head a little bit but not so
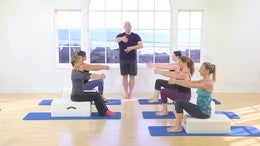
All right, so now you can take your sitting props away. Just put them off to the side and we're going to go into another exercise called the single leg stretch, which is usually done lying down. We're going to do it sitting up. So I would say just turn. So your feet are a little bit out on the slicker floor. So if you're on a sticky mat it won't work so well.
So you want to have your feet on something that can slide. All right, so I'll sit in the middle so we can kind of see. And the idea is to help learn this exercise where there's all these hand placements and all kinds of stuff has to happen. And usually by the time you've learned it, your neck is so tired, you can't even do the exercise right? And you can't remember which hand goes where. It's an hour sitting, it's easier. And then later you can go back to doing it on your back. So you're, let's say the right leg is in, you're going to have your right hand down by kind of the top of your ankle and left hand up to the, and this is a, a pretty standard plot.
These are size and you're going to pull against your leg a little bit not to squeeze it in, right? We want to keep some space around the hip joint, but you want to use your leg to help you go tall right for now. And then change, sly the other direction. Um, pull tall. Yeah. And keep changing back and forth. So normally we do this exercise as in a rounded spine position. We're purposely doing it a little taller right now so we can feel what it's like to use the leg. The leg is going to help us when we lie down and pull. Good. So if again, you have any hip restrictions, you can always do this in a little bit of a turnout and just have one hand.
You don't have to have both hands on. You can turn out that way. And that's another way to change this. Okay. So now keep going, but roll a little bit behind your sit bones and keep going. And I want you to imagine that you're in the beach, but your, your end Miami. So the water is warm and I like the California coast and you're sliding your feet back and forth in the sand and you're gonna create two little troughs in the soon. So it's not just floppy legs. So we have some activity there. Good. Stay in that rounded shape. Uh, one more on each side. Hold the last one.
Can you still have that stretch open of your elbows? Improving the alignment of your upper back. Good. All right, let that go. Turn back to normal and lie back down in your back. And let's go into a little bit of double leg stretch. So we're gonna use the same ideas. And again, double leg stretch. Challenging because I've got two long legs that I've got to deal with out in space.
I've got a center that might be a little tired at this point or not conditioned enough and I've got to take my arms over, has all kinds of stuff going on. So we're going to do it a little easier. We'll easier fashion. So bring your knees in again to tabletop. Take that time to practice. Bringing your legs up. Let's hold, let's try that one more time. So when you pick your legs up again, have that heavy leg feeling.
It doesn't have to be too slow, but always take a moment to give respect to that. Yep. Alright. Hands on top of your knees and press your hands up into your or your knees up into your hands and curl up a little bit. So I get that feeling of the chest lift that we did before. And pressure legs away. Yes. That's [inaudible] hold on. Hold on to them. Yeah, that's your help for right now. Yeah.
So here's the same position that you were just in and single leg stretch. Keep this feeling like it opens here. Yeah, that's it. Good you guys. Now we're going to go into half the a hundred so you're gonna reach your right arm and leg out. Keep holding on with your left side. Good. Exhale deeply. Change sides. Inhale.
And then exhale and go out and hold herself. So stay there, stay there, stay there. Hold yourself with that arm and leg that you've got. Yeah. And experience it. Now. Change. Come in as you inhale, exhale, stretch long. So again, if this is the first time that you've done this, come back in and change to where you've got this long lever stretching out. Now you've got some help and it's a little easier to feel it. Okay, take a break for a second. So again, also important to kind of try things out and experience it. I always say that you can't, if you don't know what it feels like, you know you can't really feel it right? Doesn't make, doesn't make sense in your body. Here's a way of feeling it without a lot of demands.
So this would be a good way to introduce hip mobility back for somebody who's coming back from a hip replacement, especially because at first we were avoiding all the long lever work. So we're past that. Now we can start to do it, but I don't know what it's gonna feel like to stretch my leg out. It might be a little scary so we can practice it and get the feel of it without the demand. It's also really important if somebody has stenosis, tons of people have stenosis where it's really hurts to go into extension at the low back. While this, unfortunately the mistake on this one is stretch your arms and legs out and overhead and the back goes into a giant arch. Pilates hurts me. Bloodies hurts my back. No, no, no, I don't want that. I want to have people have control over the position. Okay, so now you can keep doing that.
Or we can go into arm and leg going apart from one another and see if you can stretch into it in a way that takes it farther than where you've gone before. So same prep, press into your knees, roll up a little bit, walk around, get yourself in the best starting position that you can get in and now just right side again, but the arm is going to go back and the leg is going to go forward. Hold on with the other side. Can you go lower than you normally go? Maybe? Yeah. And then come back in. Re-Establish a better position if you need to. And then go on the other side.
And exhale through that whole movement. Inhale, bring it in. Just one more on each side. Exhale. Imagine what that would be like if you had both arms and legs. Yeah, in hell, bring it in. Exhale, go out. That's it. Beautiful. And then come back in and take a rest. Good. All right. Was that lower than you normally go or about the same? About the same? Yeah, cause you guys are used to doing, used to doing it in its fullest form.
Although I have to say there's a lot of times when I go to classes and people are taught, have been taught to only do their legs to about, you know, 45 degrees. They're like, well why don't you lower your legs anymore? Well because we were told to go to 45 degrees, but again, we stand up so we might as well learn how to do it down to this end of the slow range if it's appropriate. Right. All right, good. So roll on to your sides facing forward and we're going to go into a little bit of sidekick. Now. We just did a tutorial on this about where does your arm go, where does your body go? So you guys are pretty experienced. So I want you to come up onto your forearm and if you're unsure, you can look at the tutorial.
We gave a lot of different options for how to best get into a position that's good for you. So you can, Yup. Long bodies. And I see everybody as lining themselves up with the mat, which is good. Again, what if you could lie against the wall? What if you could imagine that head, rib cage, pelvis, you have to do it where there's a door so your leg can go through the open doorway. Yeah. And then for me, I like the whole body on as long of a line. So your ankles, knees, hips, head, shoulders, everything are in one line. That's the most challenging. Okay. If that's not possible, bend your bottom leg or move your legs forward so that you have a good setup. Put your hand at the front of your shoulder on the bottom. Sign the bottom shoulder on check to feel that it's flush with your body.
Yep. That's it. If you're shy, do what if your shoulder is pushing forward, not safe. So pull it back a little bit. Pull it back so you're right on top of your elbow. Start to hover your top leg up a little bit and then put it back down and you can take your hand down. Now you can have it on the floor to help you with your balance or you can have it somewhere on your body to help you monitor yourself. Yeah, so just start to lift and lower your leg a little bit and notice what happens. That looks great. What happens to your body if you lift your leg, do your ribs collapse down? Does your body start to twist?
Those are all kind of normal things. We're just going to do two more. Keep lifting up from here. [inaudible] yeah, I just changed her whole way of thinking about this. Good. That's it. And pause for a moment. Yeah. Good. Hold there. Stay up there. This is part of an Durrence training now and we think about like how do, how hard is it to stay up on your arm? It's pretty hard. So stay there. So now we're going to start the sidekick.
So the leg is going to lift a little bit and we'll just do a smooth sweep forward and back. So we don't need to do the pulsing necessarily smoothly, front and smoothly back. And just notice what is your tendency. Do you tend to round a little bit and arch a little bit? That's really common. Here's a good place to think about your dead bug that we did earlier with the legs sliding back in the socket. Yeah, sometimes people want to rotate.
That was better. I want to rotate a little bit. Let's do two more. Last one and pause. Good. Let that leg come down. Let the smoke clear from the [inaudible] lateral hip muscles. Now we're going to do some circles. They're going to be small, but I want you to use the feeling of the circle when we go into leg circles.
So we'll, we'll play around with that. See how we go. So let the leg hover. And again it's that rolling ball and socket joints. So if I was able to come and move her leg, how nice would that be? It's really nice. You don't have to do so much. Yeah. So I want that feeling. Go ahead and reverse and go the other way while you're doing your circles. Oh, sorry. I thought you were looking at me. See Ya helps gone.
Let's see. Here we go. I'll stay with her two more. That's what I tell my teachers all the time. Don't just let go. Oh Wow. Good and pause. All right, so did it feel round? Roundish okay, so roll onto your backs. Now this leg is going to be a little tired, but it also was warmed up and part of learning movement is getting the nervous system to get the message right. We've got to have a pattern of movement. So the leg that you just used, bring it into your chest so you know which one it is.
That's the one you just were using. Yeah, Ben, the other knee so that the foot is flat on the floor. Right. Extend the leg up to the ceiling and again, go back to your neutral alignment. Let it go. You've got your foot helping to support and the body helping to support. So just start to take the leg down toward the mat in front of you and back up.
So you were just in this position when you did single leg stretch, right? So again, the body knows this and you've got the support of the other foot. It's not pushing down. Really important to remember. You don't want to push down through this leg. You just want it to be there. Good. Now the next time the leg comes up, open it out to the side a little bit and sweep it around.
That's it. If you have a sense of breathing through the movement, you're going to engage the right muscles, the right amount. Last one and reverse. Let's just do four in the other direction. Roll it open. Roll the leg. Good. Two more.
Last one and pause. Put that foot down. Now what you can do is I'm going to take the ring and just hold that and put your foot in it and you can always hold on with both hands. Sometimes it's just too much on the hamstrings to pull it in and straighten the leg and hold on with both hands. But what you can do if you just hold on with this hand, you can start to learn how to open the leg to the side and pull it back up and it gives a leg a little, like when I was holding your leg, it's not going to fall off like my hands did. You can start to learn what it's like. Learn the feeling of it.
You can also do it with a band. If you tie on a circle in a band and stick it on your foot, you can create some help for your leg without, you know, getting the legs so tired. Yeah. All right, so let's roll onto the other side and then we'll see how we go with that. So come up onto your side, up onto your forearm. Align yourself in a straight a line as you can be successful in, right? If you can't be successful, if your legs moving and your body's all over the place, move your legs forward.
So if set up a place of good support before you start. Yeah. All right. Check your front shoulder, the front of your shoulder, make sure it's pulled in a little bit, and then just start to lift and lower the leg. Now I remember how we were talking about bringing a pelvis forward. Yeah, that's it. You've got it. So if you're aligned with the wall, your bottom won't be behind you. You know your bottle will be in line with your shoulders and your ribs. Good. Keep the leg up and let's go right into the side.
Kick motion going front and going back. So now we've done leg circles a little bit. Can you imagine your legs circle from here?
We're not stopping on this side. Little circles. Get that round feeling in your hip and go the other way. So the movement will be the same. Basically, when you get onto your back, it's just the effects of gravity. You're gonna make it feel awfully different. And then let all that go. Roll onto your back, pick up the leg that you just used. Do you remember which one it is? Ben? The other legs.
So your foot is flat and then just while you're even just with a bent knee up here, just for a second, hang on. Really pushed down into the floor on this side, the side that's just flat. What happens if you really push your foot down into the floor? You start to come up. Yeah, so that's not what we want. I want the pelvis to stay flat, so when you're pressing into the floor, it's only a little bit. Otherwise you'll start going into single leg bridging, which we've already done that. So keep the pelvis down, let the leg lengthen and start just by lowering the leg away and up.
You got it. And it's kind of, you can kind of think of the hip flexors and just do a couple as this thera-band, right? It hooks in here and runs all the way up the front of me. It's got a lengthen every time my leg comes down. So that's a nice image to have as a sense of lengthening through the front. Now from the top position, open down, you have that sense of what would it be like if somebody was holding your leg or there was a band? You guys are doing great. Different on this side. Yeah, allow it to move. This will be your last one
Make it round. Beautiful. Two more. If it gets a little sticky feeling, that's a good time to exhale.
So let's go heads into the center. Roll up and over. All right. Place your hands beside your ribcage with your elbows, poking up to the ceiling. Like you're going to do a pushup, but we're not and we're going to start to lift the head a little bit from the Mat. We're just going to move the upper back a little bit before we go onto our next part. So with your elbows reaching away, you're just going to do the prone press up. You've probably seen on this a bunch of times and I want you to make it feel like keep coming up a little bit. That chest lift that we did
Beautiful. That's it. All right, so coming up really high, you've missed all the mobility options for this upper part of the back.
So we're as close to the floor as we can get. All right. So now from here, all I want you to do without changing your body at all is just lift your head a tiny bit away from your hands
[inaudible] and even subtler. So let this be quiet. Yeah, it's, Yup. Don't even have to not, we can keep looking forward. Right? So this is like an active starting position where you just barely disengaged the head because again, think and take a break for a second, how we were when we were sitting and we were in the kind of the sloppy position sitting thinking about spine mobility. It's the same thing here. If you're going to do a spine mobility exercise and your head is forward, you can't really start very well cause everything's Kinda compressed. Okay? And you stay on funny when you talk. So long body's long hat. That's it. So let's do it again and lift the head just that little tiny bit.
Hold it there and do what you need to do to keep your body in this same position and lift your hands to your head. Oh, now there's a little more demand. Good. Put your hands right back down and then put your head down. Great. Lift the head. It's all easy until we start lifting. Stay there. Do what you need to do to keep your body in place. Lift your hands to your forehead. Excellent. Can You keep that sense of width?
Ah, that's it. And everything back down. Then we're going to go on this time. So they had lifts just a little bit. Lift your hands to your head. Keep the body in the same position. Now bring your hands around and your arms around to a goalpost position and put your hands and arms down on the floor, but leave your body up. Now you're gonna do the next little part of your prone press up, and you're going to start to go into that little arch and your upper back.
Pause there. And when you exhale, I want you to put more of your lower ribs back down onto the mat. So try not to roll down, but see if you can ax hale through the lower ribs and go go down there. Yeah, if you can see the person across from you, you can smile or grimace, whichever you want, and let your body come back down. Turn your head to the side. Hmm, that's a fun one. We're really starting to get into the upper back postural muscles. Yeah.
So let we talk about having good posture. Pow. How do you have good posture? You've got to get these muscles working a little bit so that they have enough endurance that they can hold you upright. Yeah, and if you're in a good alignment, they have to work less and less and less. That's even better. All right, so arms down, head down like your forehead is coming toward the floor. Good. Now bring your head up into that active start position. Only lifted a little bit [inaudible] and that's it.
Even not just a tiny bit, Amy, just a hair up. Yep. There you go. Good. Hold there. And lift your arms up. Keep your elbows lower than your hands. All those low, good. Put your arms down. Lift your arms up. Elbows stay lower than hands. Good. This is like a mini scarecrow. Arms down, arms, elbows. Stay lower than your hands.
Now stay in that body position. Bring your hands around to your rib cage again, the same position we were in a moment ago. The pushup position, hands flat, elbows up and sink your lower ribs and go a little bit more into that position. Keep your lower ribs down and really stretch your breastbone. Breastbone, breastbone, breastbone, and are all down good. Ah, great. Sit back in child's pose for a second. Any questions on that? Is that clear, clear, or murky? Clear.
And then, yeah. And that's important. So when you start your exercises, when you're doing your math class, if you start everything with your forehead down, you're in essence, you're starting your exercises here. All right. And so we need to get back. It's not a problem to have your head there, but you don't want to start a movement there. You want to start a movement where you're better aligned. So that's the reason we're doing that. And it's really tough for people. If you're big busted, if your back is really rounded forward and it's hard to get out of the position, it's tough. It's really tough. So yeah, it's good to work on. All right.
Double leg kick. So stretch back out on your fronts.
That feeling of opening and stretching the leg long right notice, do you feel like the front of your pelvis, so between your hip bones and your pubic bone, do you feel like that's pretty much parallel to the floor? Hopefully it is. It's the same position that we use. Lying face up. Yeah. And it looks great from everybody. If you ever did notice that you really felt like your back was arching down and you weren't able to get out of it, that might be the time to lose a little cushion or a towel rolled up just under the front part of your pelvis toward the top. And that'll help it film. But you guys are doing great. Don't need that. Yeah. Alright, so just the legs.
So we're going to start to bend both knees a little bit. And this is important. What happens? You guys can answer. What happens when you start to bend your legs and you're not really paying attention. Yup. Your Butt hikes up. So we don't want that. Cause again, we're changing the position of the spine and I don't want to change the position of this spine yet. So as you're bending, lengthen your legs really long. Like you could try to stretch your knees to the end of your mat. That looks beautiful.
And then lengthen your legs out a little bit and bend your knees and go long and your thighs. And so I use the quail egg. If you had a little quail egg behind each knee, could you bend around it without squishing? It makes space for it. Go around the knee all the while. Keep the front of your pelvis touching the mat.
That's it with the least amount of effort. All right, so now when we come in, the demand goes up a little bit. So when we add the pulsing, if you can't keep the front of your pelvis in contact with the mat, then don't pulse. Just bend and lengthen. So here we go. We're going to do three pulses with both legs. So coming in, both legs are bent. Oh Yup. One, two, three. Lengthen your legs so much.
They just barely hover off of the floor and in one, two, three, then two, three, two more times. You're doing a great job of maintaining the body position last in two, three and length and good. All right. Ready to be a little more active with it. Here we go. So take your hands around to your lower back. You have a couple of options here. So I want the arm and the shoulder in a position. It's pretty easy not to compress.
So I like to have the hands down more at the pelvis or low back as opposed to having the hands really far up. When the hands are up, the shoulder rolls forward a lot and that's not the greatest position. So put it where you have that ability to lift the front of your shoulder a little bit up. Yeah, that's it. You can keep your hands class when we stretch them out or you can stretch the arms along beside you. More like the dirt. I'll let you decide which one you want to do. So everybody turned their head to the side, either side, doesn't matter.
And here we go. Just the legs in one, two, three. Now lengthen the legs, lengthen your arms and come up into a just an easy crescent shape. Slow motion. Come down a little bit. Yeah, so we're not going really high yet. We're just going long. Turn your head to the other side. We'll do another slow one in one, two, three and stretch and stretch into your own self. Go longer.
That's it. And one, two, three. And lengthen. Exhale here. Inhale. One, two, three. Go through your chest, lift and come up. Good. Last ones in two, three, go through your chest lift before you lift the body. Yeah. And one last time to three and chest lift.
Good. Great. And take a break. And again, go back into child's pose. I really loved how you guys went through that. It wasn't just kick, kick, kick, hoist yourself up. Yeah. So we're using those tools, the movements we've learned from before. All right. Bring yourself right up onto your hands and knees. Align the heels of your hands under your shoulders so it's comfortable. And the knees under the hips. So that's comfortable. Yeah.
And if you're one of those people that gets risked pain or feels like the risks are kind of Saggy, just almost feel like you're gonna make a little cup, like a little suction under the palm of your hand by pressing your fingers down. And we've talked about that. And, um, some of the risks, tutorials of how you can have comfort and build the endurance to be on your hands for long periods of time while people are talking about stuff and not letting you get on with the movement cause they, oh, teachers will do that and we talk about all kinds of stuff. All right, but you should be able to hold it. And that was what, maybe a minute. Yeah, you should be able to hold that for a long period of time, uh, with good amount of support and not feeling like you're working so much. All right, so let's go into that familiar cat and cow, cat and camel round. Our Chin curl has lots of different names I want to bring to your attention. Remembering back to where we moved from so you can start moving, rounding and arching.
And we want when you round more rounding to happen at the lower back and when you arch more arching to happen in your upper back, right? So we all ready can arch our lower backs a lot. So we don't really need to practice that and we've accomplished, we've done that. But we do need to work on rounding it. That's it. And we round really well in our upper back, so we don't need to, I mean I don't need to practice that now. Go out. Yeah, and arch here. Right. Less here and more here.
Then when the curve is consistent, then you can increase the whole curve more. Right. And that's not a problem at all. We just don't want to do it from an imbalanced movement. Right. When you're going into your arch, try this on and see if you can take your lower ribs towards your pelvis as you're going into your arch. It seems counterproductive, but it's actually really helpful because it speaks to what the rib, the motion of the rib is happening when body goes into that arched position. So let's just do one more. When you go into your arch, feel like your lower ribs are moving and expanding down to your pelvis. Yeah, I'm hearing, I'm hearing. Oh yeah. Yeah. That's it. Come back to center.
Find your neutral position. If I lowered the ceiling, what's your pelvis, rib cage and back of your head. Be touching. Yeah. Keep the feeling of opening the hands and almost feel like you're gonna slide your arms apart. That's it. Good. Now, opposite arm and leg lengthening lung. So again, our goal is to not disturb the body positions. So opposite arm and leg. If I had water bottles, I could grab water, water bottles and put them here and put them here. That'd be awfully mean. And then come back in. But you didn't. It's amazing. What? Just a little bit of motivation.
A glass of something really expensive or something you don't want to clean up has on this position. Good. And keep alternating. [inaudible] that's it. Beautiful position and lengthen. Good. Do it again. Stay in the position and let's practice the Z. Sound like a buzz.
So that speaks to the body and you're excelling for a long period of time, but a small amount. So it's not the exhale. It's an exhale that could be,
Same arm and leg without it. Nobody's watching. It's okay. Good. And then do it again and do it again and start the zoo before you move, before you move, before you move. Yeah. Uh, it works. Its magic. Zen. Stretch into yourself. Take your time. Take your time.
Take your time.
You know? And they're like, as fast as possible. There's no possible way you can keep your balance. So take your time, take your time, take your time, take your time. Take your time. Getting into the movement so you don't throw yourself off balance. But we are very goal oriented. I get that. So get there. I did it for half a second. All right, so now let's make it a little more interesting.
We're going to go into the same arm and leg, but we're going to turn into the star, right? So every healthy spine class that I teach at my studio. So people who've had some injuries and you know are doing PyLadies now to come back from it. I always say, now tell people you like your young nieces and you know granddaughters that um, you're doing the star in class and they're going to be so impressed doing the star. All right, so let's do front this arm and leg and we'll turn forward first. So you can do the z or you can just think about it. You can do it internally or you can do it arm and leg reaching out.
And now you're going to start to open up to face forward and feel free to turn your bottom foot a little bit to make a tripod. Turn all the way around. How are you against the wall? Beautiful and gracefully come back in very quietly,
Good smile and come back in jazz hands. Good. One more time. Each way. Here we go. Gracefully. Gracefully. Yeah. Here we go. Imagine that z. So let's do the Z. Do it
Start the z length and long turn your foot so that your foot helps you. Turn your foot. Good up against the wall. Beautiful. And come back in and come back down gracefully. All right, super good. How'd it feel? Look Great. Yeah. All right, so we're going to get ready to finish up and I like to do things in standing at the end of class, but we're going to do a more challenging standing exercise that's not in standing before we get to standing.
So if you can do something more challenging than you can do the regular thing you've got to do all the time. All right, so we're going to go into the leg pull position, which is basically just an upside down plank. So bring your feet to the center.
And what I want you to have a sense of is bringing your pelvis forward in line with your knees and eventually your shoulders. Just that image. So put some weight into your hands, make sure your hands are far enough back that you can get up. One of the common mistakes that I see is people try to get up and their hands are really close to their bottom and they have nowhere to go, right? So take your hands far enough back and turn the hands up. It feels comfortable for your shoulder. Just again, remember you don't want the shoulder plunking forward this way.
So pull it back and in. And as you let your weight go into your hands, have a sense that your pelvis is being lifted.
And sit back down.
Well, Hey, you know, we're always looking for a modification. All right. We can also do it on a box if we need to. Alright, so try it this way first. So we'll do a little contrast, talk a little bit and try to lift your hips up. Kind of horrible. Yeah. Where do you feel it in your neck? Where else? Heavy, heavy feeling. Yeah. So we want light. Okay. So again, pelvis is going to rise from the ashes. Yeah. And lift up a, keep the yes. So go ahead. Keep the breastbone down a tiny bit. Yeah.
So you're just looking forward. That's it. Good. And then come back down. So that's our standing position. What do you think? You want me to grab a box for you? Are you good? Under your elbows and under or under your hands? To be a pyre. We're gonna go to standing so we can, yeah, we'll go.
If we're going to do it a lot more, I would have it. So you'd come up to something like this higher and then lift from here and then there's less stress on the shoulder. Yeah. All right, good. So you ready to stand and do that? So sweep your knees around, come on to your knees and your hands. Turn your toes under and just press your, we're going to stay down. Just press your weight back into your feet in a deep squat.
So rock yourself all the way back. You're onto your feet. That's it. And just feel how the heels can stretch down and just naturally have, if you're trying to improve your spine flection, this round position, sitting like this for a lot of people, it's really helpful. And letting the pelvis and the lower back stretch. So if that feels good for you, you can do that. Okay. So now start to lengthen your legs, keep your hands near the floor and go into your forward stretch.
Go ahead and pause there for a moment. You can have your knees soft if you need. No, that's great. And now we're going to start moving to roll up the pelvis first. So the pelvis is going to start to roll up and over your legs. Feel like you can push the ground away.
And as you're starting to come up, can you get to that point where you feel like your pelvis comes forward to be over your ankles? Yeah, let the shoulders come sideways, not back. So bring them around to the side. Yeah. And now start to move the head round the shoulders, round the ribs. Go as far as you can without moving your pelvis and then go all the way down. Great. Again, start to move from the pelvis to roll up so the pelvis turns backward. And then there's a moment where when you start to come up, your pelvis goes forward a little bit to open up.
Like we practice with all of those movements and pause there for a moment. Stay there. Okay. What did you like about it? Talking about the pelvis. Pelvis moving is crucial. Yeah. Pelvis, pelvis is the handle, right? And Pelvis starts the movement. Yeah. Good. So now keep that feeling of openness. Press the ground away with your feet and press the ceiling up with the top of your head very lightly, very lightly.
So the ground into the ground and into the ceiling, and then allow these ribs to come this way, that go that way. Yeah. And it's gonna feel like you're rounded forward a lot and that's okay. It's part of this whole thing is changing our awareness of how we move in. It definitely feels that way. Great. Everybody. How do you feel? Good. A little bit more mobile. Yeah. Great. Well thank you so much. Thank you.
Please, anytime. And I look forward to the next, to the next class. Thank you.
Mention
 |
Shelly Power (Teacher) |
 |
Suvi-Maria H |
 |
Helen |
 |
ANNE-FRANCE TERNOIS |
|
|
Sharon C |
|
|
Sarah Louise |
 |
Jacqueline D |
|
|
Delys P |
 |
Brenda B |
|
|
Yvonne C |
 |
Denitsa S |
|
|
Or S |
 |
Judit K |
|
|
Alexandra L |
|
|
Elizabeth B |
|
|
Kimberly P |
 |
Francisca A B |
|
|
Lani G |
 |
Anna L |
 |
Beverly L |
Comments


You need to be a subscriber to post a comment.
Please Log In or Create an Account to start your free trial.
