Description
About This Video
Transcript
Read Full Transcript
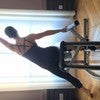
Hello, I didn't know. My name is Kathy Cory and today we are going to be doing a reformer program for general body conditioning. I am joined by Debbie and Wendy today. Thank you for coming who've been doing Polonius for quite some time now and we're going to just do a great reformer workout. So thank you for joining me. Let's begin by having you sit on the reformers, somebody exercises that we will be doing. Our things that I learned in my very, very first lesson, um, which was 36 years ago and I, and some of them are um, newer additions and so we're going to do kind of a combination of things, but it is really a great general workout. You're going to get every part of the body. We're going to use the, the breathwork and of course incorporate all the PyLadies principles into the work as well. We'll begin by having the headdress come up.
I like it. And the, just the lower elevated position rather than the higher one. Good for the neck in that position. And I'm going to give you some extra spring today. So we're going to be working on
And I'd like you to be more on the metatarsal. Very good. And we want to make sure we have a couple of things going on. Number one, make sure you're centered on your carriage, even being off by an inch to one side or the other can throw off the body weight through the shoulders and um, change the position all the way through the pelvis and down into the feet. Um, and the other thing is that we want to make sure that the throat is open so that the neck is nice and long and that we have the hands relaxed onto the carriage. From here.
We're going to inhale as we press out and extend your legs and exhale and come in, work at your own rate of speed. We're gonna do this five times. That's two very nice. And press out on three and n. How's your spring? Fine. And n one more and out and bend and come back.
And now I'm going to take you down to just one red springs.
What was the difference for you?
The next position we're going to go back up and did you like the um, three red or would you want to read in one blue, three red, good for you and you as well. Okay. Three red is a medium to heavy spring. Quite nice for the exercises that we are doing and very appropriate for both of you. And so now what we're going to do is bring the legs into the parallel position and let's go ahead and 10 of these pressing out. Very nice, making sure that the knee stays over the center of the foot and inhale out and use the powerhouse to exhale as you come in.
Reach it out and bring it in. And again, very nice and out. Five more and extend. Relaxing the shoulders, keeping the throat nice and open and make sure you don't have to tip, tip or Tuck the pelvis, but to maintain neutral pelvis as we're pressing out and pressing in and once again. And now on this very last one, what I'd like you to do is to go out and stop with your knees slightly bent. Good. Now from here I want you to straighten your legs. Try not to move the carriage, try not to move the carriage very nice and soften the knees without moving the carriage. And again, are you feeling how this activates the powerhouse?
And it actually then allows us to work into our neutral pelvis and straighten the legs without moving the carers. So are we pulling up on in the inside of the body, working from the interior to more of these soften and lengthen all the way up. Very nice. And once again, bend the knees, soften, soften and length in the body without moving the shoulders. And that looks terrific. And now bend and come all the way in.
So for the next movement and we're going to keep the legs in the parallel position and we're going to extend the legs all the way out and keep your legs nice and straight. Very good. Thank you. Now draw the heels and whirl the heels underneath and then rural all the way up on the count of four and lifting the heels. One, two, three and four down. One, two, three, four. Op, one, two. Now try not to get there until I say four on one. That's it. Two, three and four. Lift up, two, three, four. Roll down, two, three, four. This is really good. And once again, draw in from the abdominals. Don't allow the feet to have to do all the work so that the whole body is really doing that nice lift. Lengthen all the way up, maintaining neutral pelvis and down to three, four and again, breeze, lift, inhale and exhale and inhale. Inhale, exhale and keep the heels underneath. Get a nice long, long stretch. Hold the heels where they are. Soften those knees, bend your knees and begin to come in slowly, slowly, good.
Maintain a heel stretching under and get a good Achilles stretch all the way through and release all the way down. Great. How's that feel? Good. All right. We're going to have you place your feet on the bar and roll up to sitting. So bring your feet down under good and come on up and sit up. Nice and tall. Beautiful. And I'm gonna have you turn around placing your feet on the shoulder rest. So you're going to sit up tall and for this exercise, less spring is the most challenging.
I'm going to take the spring down and I'm going to give you just one red spring for each of you because I think you'll be fine. If you need more help with the exercise, we will add a blue spring to it, but I think it's, it's going to be good where it is. Now we're going to have you hold the straps in your hands and I'd like you to just stretch your hands out and hold the straps more, a little bit more in front of you. Beautiful. Very nice. So that you have that nice long lengthening of the spine and we're sitting up very tall and feet are on that. The shoulder rest. Take an inhalation and as you exhale, begin to curl your spine down, one vertebra at a time.
So you're going to pull, keep your arms straight and rural back and roll and rule back. Roll it. Good. Very, very nice. Now let this spring do the work. Keep your arms straight and roll yourself up and over, up and over. Use your breath. Use Your Bret. Very nice. Keeping the body rounded and then roll up. Just sitting and once again, lengthen upward and now activate from the lowest part of the abdominals.
Roll back, bringing this small of the back down and bringing the waistline onto the carriage. Beautiful. Let the spring do the work. You're resisting it to come up. You look great. How's your spring? You're good with where we are. Fantastic. You look great. Once more we, let's take it, roll it back. Linkedin up and down. The moral one vertebra at a time.
Rolling slowly and easily and using the breath through the movement and roll over. Roll up and sit up nice and tall. Let's add a little bit of a challenge to that because we want to have a nice stabilization through the body and more activation all the way through. Let's place the ball on the shoulder, wrist, and the feet on top of the wall. Now when we're doing the movement, feel how the fact that the feet I have not are not stable changes the challenge and increases the work into the abdominals, Lincoln upward and let's begin. Roll yourself down one vertebra at a time. Very nice. Don't let that ball move.
The more you keep the beautiful that stabilization, do you see how it changes that activation through your core? Very, very nice and rule to come back up easily rolling up and over and two more times. Lengthen it up and make that contraction roll yourself down. Beautiful form the ankles and the knees are lightly held together and the feet are pressing down into the ball, not pushing it away, which means that you have your stabilization coming from your pelvic alignment while you're doing it last time ladies, let's take it down. Rolling down once more easily. Rolling. Can you feel when you begin to push into your feet as opposed to when you're activating from your powerhouse and using the core muscles to work and come up and up and lanes in the spine and sit up nice and tall. Very nice. I'm going to take the ball down and I'm going to have you, uh, if you can extend your legs. Very nice.
And we're going to now hold the straps in the crossed position. So one arm goes over, the one strap goes over the other.
We're going to relax the shoulders down in length in the spine and now as if the arms remain on the same plane, we're going to pull the arms back, not allowing the elbows to drop down or to tip up, but maintaining that alignment and release it to the front and elbows are going to come straight to the back. Elbows, bending, bending, bending. There you go. And straight out. Beautiful. And again, let's exhale and bring those elbows back around and stretch out to the front. Let's do that one more time and elbows come back. Schoolies all the way back and reach it to the front. Now take the arm and just relax that arm down of the bottom strap and we're going to just work with one arm.
Let me know if you need a little less spring for the one arm and fullback. How we doing?
Now change the cross. So we're going to have the other arm relaxed and one arm back. Let's go pull it back on one good work and use your exhale. Pull to very nice no rotation. Maintain that alignment across and don't look like I'm killing you and a little bit of smile would be helpful. And take it back. That's it.
Thank you. And again, one more time. [inaudible] is for the greater enjoyment of life. And now let's go ahead and take both elbows up again. So elbows high, right back on. So that we're in this position. And from here we're just going to take the elbows back, reach them behind and release behind and release behind and release.
Reach and release. Exhale, back. Exhale. Inhale. Exhale. Inhale. Should feel good at that center of the back. Lift that chest just a little bit more back. Nice. Very good. Good activation all the way through the Scapula and release.
Come on four more. And I know you're on a heavy spring. You look great. Keep those elbows lifted and two and the last one and release and round the body all the way over to the front. How are you doing? Are we good? Yeah. Oh yeah. Well we're going to have a lot of fun. So from here we're going to go into our strap work. I'm going to have you release these down.
So if you need to press back to put one on
And then allow the spring too to release you back up. Resisted as it comes up, particularly resisting from the pelvis. So you want to keep your tailbone down, keep your tailbone down, tailbone down, and again, exhale and press down and down and reach. Long to come up. Now. Nothing changes in the tour. So relax the neck and the shoulders and use your breath to be the power of the movement as we stretch it down and then lift and take it back up just to the ceiling. So you are actively consciously stopping the movement, not allowing the reformer to do the work, but letting the reformer help guide the movement as we resist the spring to do the work and come up and hold here. Take an inhale, exhale, and really stretch the tailbone down toward the carriage.
Now from here we're in parallel. I'd like you to just do a rotation so that you would just go a turn out from your hip and back to parallel. Turn out from your hip and back in parallel. Turn out to the legs will come apart or the feet will come apart. Heels will come together.
You get a little bit more rotation from the hip joint and back from the hip joint. Nice. So this is actually lubricating the hips before we go into our leg circles. So we're really wanting to make sure that we get this movement. Now. Let's do the cheer. Now open the legs as wide as you can comfortably.
Circle the legs down, keeping the pelvis aligned and stable. Come together in the parallel position and lift up. Turn out beautiful. Open the legs wide to the side. Circle it down. Close to the parallel position and lift up. Turn out beautiful. Come around, try and keep the tailbone down and come in and lift up.
One more time. Turn it out. Open and squeeze from the inner thighs to bring the legs together. Turn to the parallel position. And now take the legs down. Reverse the circle. Come down and open in the turnout close and come to the parallel position and come down beautiful. And turn it out. Open it and close to parallel. Come down, turn out, open and lifted all the way up last time.
Squeeze out evenly on both legs so there's equal weight and come up and hold. Now go to your diamond or frog physician. The heels are together, their toes are turned out very nice. And we have the feet slightly in the flex position. Once again, keep the length of the tailbone down and extend the legs until they are straight and bend to come back and beautiful and extend the legs length in all the way out and bend to come back in. Very nice and extend the legs, stretch them out nice and long and band. Use your breath and exhale and come back in on the inhalation.
And one more time. Exhale and come back in. All right, let's get fancy here. Come out, extend, lift straight up. Come back down and banded in the frog and for acid back out. Lift into the straight parallel position and Perris from the abdominals to come back down and it can pull it in and 4s at to come out and lift the legs up. Very, very nice and lower to come down.
Relax the shoulders. One more time for it in good work and push it out and lift up. Keeping that tailbone long, keeping the torso long and come back down. Bend into the frog position. Relax for just a moment. Take a nice deep breath. How are we doing? Good. Good. Alright. We're going to do a modified version of the short spine.
So we're going to extend the legs out on the diagonal. We're going to lift the legs up and allow the torso to lift lightly as you come. And we don't want you to lift all the way up and bend the knees, bring the knees over the shoulders, beautiful and roll the spine down. Now you can modify it coming out and let the spring do the work. Let the spring pull you up and overnight if you can go a little higher and bend the knees and roll the spine one vertebra at a time, maintaining the length of the spine and stretch it to go out and let the spring pool you up and over and roll the spine. Beautiful.
And bring the knees over the shoulders and roll the spine down, lengthening out. So you come out one vertebra at a time and get a nice massage on your spine. Let's do the last one up and over. Go up as high as you can this time. Bring the legs to the frog or the diamond over the shoulders.
And now roll the spine down. One verge of red, Italian, lengthening from the throat. Take your time. Take a nice deep breath and relax. From here. Let's take the straps off the and put them on the hands. I'm going to um, leave the spring where it is for the moment and just relaxing to the shoulder girdle, relaxing the neck. Exhale and just press the arms down. Inhale and come back.
Now the legs can be bent with the legs in the parallel position. If that's not comfortable, you may cross the legs and relaxed them over the chest. Otherwise, the position I would like, his knees are bent and held up at a right angle. Beautiful. And again, pull it down. How's your spring? Are you okay? Great. How we doing? Good. Good. Very nice. And exhale down and inhale, back resistant.
Resisted from underneath the arm. Very nice. Exhale and press to come down. Inhale, let it rise up. Resisting all the way through. Exhale and come down. Inhaling comeback.
So we're going to do a very big circle and then let the arms float up and press down and circles so that the arms remain at the same height as the carriage. And then come up and exhale down. Open nice and wide. Circle it around to lift. One more time for arrests. All the way down. Open out, open through this route and lift. Keep using the breath. It's a whole breath open. Now reverse it.
Open out and squeezed down. Squeeze from under the arm and lift the arms to come up open. Open the chest, use your breath. Full breath for each circle. Come down to the sides of the body and open up over the shoulder girdle. And again, open and press lift to come up.
And last time, open it out, circle it down and lift to come up. Now hold the hands where they are, relaxed the feet onto the bar with your heels on the bar. And um, so that the, the lower part of the arches on the bar as well from here.
And again, exhale and curl. Very nice. Make sure you have the resistance on the strap so that we are stable is stabilized through the shoulder girdle and come down and one more time and exhale. Exhale and reached to come up and come down one vertebra at a time and release. Good and relax for just a minute. We are now going to stand up behind the reformer and we're going to take the foot rest down. I'm going to keep you on one red for these movements and we're going to be working one leg at a time.
So if you would like to get on your poll for balance, you can use a poll to help with balance. Great. So we have our polls. Uh, you can use them or not use them. They really do help, uh, for balance because we are going to be on one leg. So they moved and I'd like you to do is to play to find your balance first. Aligning yourself on directly in front of the reformer and place the foot on the end of the carriage with the heel off.
Make sure the foot is quite stable and in the parallel position. And the movement is simply not to change anything in the alignment of the body, but to extend the leg all the way out and Ben to come back in. We then turn to the side with a small turnout on both legs and we're going to open. And this really is wonderful for the hip and the inner thigh. So we're really working all the way over and through and the pole will help you to balance. We'll finish this set of exercises by rounding the body over hip.
Stay over the heels. And Stu stretching just the arms and if you again onto the elbows as well. Okay, let's begin.
And extend leg out. Beautiful. And Ben to come back in. Extend and use the whole foot. Try and keeping your foot into contact with the carriage the entire time and pull back in and extend. Use your breath. Try and keep the foot down and extend. Oh, okay. Well luckily we only have one more and extend and come back in and change legs.
Now try to keep the pole in a vertical position. Very nice and extend the leg beautiful and Ben to come in and try to control the inn as well and bend all the way in and extend. And again, we have less spring on which is making the carriage less stable and I can see you're concentrating Debby and extend and come in and change legs. But this time turned to the side, slight turnout on the legs and lift the leg up and still the bottom of the foot, the heel is off and very nice along the body. Nothing changes. Extended out and bend it in extended long pool from there to come in and exhale, two. Inhale, two more times.
Exhale and inhale. Last one. Exhale. Very nice and come all the way in. Change legs. Find your balance. I will take it. All right. And
Bring the arms up, round the back and straight arms on the carriage from there. Perris out and length in the spine. Straight. Beautiful. Round to come back in. Round in, pool under. So try not to move the hips, just moving the spine steward. There you go. And watch the head.
Keep that neck long and Bandon round the body to come back and, and uh, and beautiful. One more time. And so your hips are stabilized now moving forward, not moving back, using the breath. So we're going to exhale and inhale and again, reach and lengthen. Lengthen, lengthen, very nice. A little bit more, a little more, stretch it and pull to come in. And let's just do one more of these. Reach it out.
Stretch your spine even longer, longer, longer, more articulation. There you go. Or more articulation of the back and van to come in if you want to, you can try this now onto the elbows so it's a little bit more of a deeper stretch round and press out, lengthen the spine, lengthen the spot. Good. And then round it to come under an end. Very nice and stretch it long so there's less movement in this one. Stretch a little longer, a little longer, a little longer on the spine and come back in, not the arms.
Stretch the spine. Use your breath, breathing evenly into the movement and come in. And one last one, stretch it out. Beautiful spinal articulation, which is such an important part of our Polonius work. Come onto straight arms, round the back and roll yourself all the way.
And we, I will keep you on the one red spring and the foot bar is going to be up. Yeah, we're going to lie on the box. So you're going to lie on your stomach, on the box and your hands go onto the bar. This is a modification or a variation of the Swan, which the extension exercises are so, so very important in our [inaudible] work and too much of our work today in society on computers and driving and um, lifting. We all spend a lot of our time in R flection. So these extension exercises are for the body from here.
Keep the elbows nice and wide. Hands lightly churned in and press out
Now lift the upper body and keep the arm straight as you pull in. As you pull in, opening from the chest, opening from the chest and then lower down, bending your arms. So now come here, come beautiful. Then bend the arms and lower down. Press it out as you come in. The arms remain straight through. You're pulling yourself underneath. Very, very nice.
The head remains in line with the spine and down again with the arms bent and Stuart Hatch to go out and length and to come up and pull in and up. Good. Watch the head. It stays in line with the spine. Beautiful and work from the keeping those abdominals. One more time. Push out, push out, push out and come up. Rotate through the shoulder girdle.
Maintain the abdominal activation and come down. Take a breath. Now straighten your arms without moving the carriage. So you're going to lift up from the chest, push out until the body goes down. Beautiful. And then bend your arms to come in straight in the arms and lift, pushing up. Very nice and for arrests out until the arms are long and straight and bend to come back in.
And again for resin to the bar and Linkdin upward and stretch out. Arms are long, arms are straight. And then to come in last time and pull up, up, up, up, up, good and out and bend and come all the way in and relax the upper body. Very nice. And we good. All right, so we're going to now have you come and sit on the opposite end of the box. So you're going to sit up with your feet onto the shoulder rest and I'm going to keep it on one read and we may go down to a blue but we're going to start here.
So we have the hands and they're just going to be in the straps and the elbow. Stay close to the body and we just press as much as we can and pull down and press as much as you can and pull down. Try to get the hands to come closer and over your head so the carriage is going to move. As you do this, that's it. Come by your ears and there you go. And up and come down and come up and come down. Now we're going to go down to one spring to the blue and I'm going to have you sit and face inward, so you're both facing me. Turn to the side, take just the front strap.
Let's turn around and do the other arm. We take the [inaudible] the same thing. So we'll have the strap that is in front of you, so turn around and the heels just go on the edge of the carriage. We sit comfortably. We anchor the opposite shoulder and arm. We lengthen the spine upward and here we go. And actually up and down and exhale up and down.
Exhale, take it long to to go. Press it up. Shoulder stays down. Very nice. Stretch up. And one more time and up. Very, very nice. All right, vox is off.
You're going here, sit up please.
What we are going to do is a variation on the saw from the mat class. So we take the hand and we cross it over the body over the other hand. Good. Now as you stretch your legs out to straighten, this arm goes back behind you and stretch out. Straighten your legs and round and lengthen in the saw position. Now this is not the twist is coming from the torso. Are we good? That's it.
Beautiful. And come to back and together. Bend the knees, good open and it back. Open it out. Beautiful. The head follows the line, relaxing through the shoulder and then turn and come back and again out open. Stretch those legs as much as you possibly can. A little bit more and two more times. Stretching open. Reach it long. Head in line with the spine, looking towards your fingers.
Good and come back in and we have one more to go. Reach out and stretch. Nice and long. Beautiful, beautiful and calm in change sites. As we go out, we look back in behind us and reaching opposition, straightening the legs as much as we possibly can. Getting that twist and we come back in and rotate from under your rib cage and stretch out. Long behind you head stays in line with the spine and come back in.
Beautiful and use the legs out length in all the way through. Breathe with the movement and come back in. Take a full breath for the movement. Inhale as you go out. Exhale and stretch a little bit more. Inhale and exhale to come back in and last one, open stretch, reach around, stretch it long. Use your breath, beautiful rotation from under the rib cage and breathe and come back into center. Very nice. Now that we have some of that rotation, let's work on a little bit more rotation with the Mermaid.
So you're going to sit both of you facing inward and one leg goes against the shoulder rest and the other leg in front of you. Beautiful positions. I have you on one red and one blue. Please let me know if that's a good spring for you. In this position and the first part of the exercise we are going to just do a nice long side stretch so we have the hand on the bar. As you press out, I want you to stretch over and then open and lift to come up, bending in good press and stretch out all the way over. Now here is what the tricky part is. We want to work in opposition, so don't allow the other hip to come up off your back.
Hip stays flat and then open the chest and come back in and up. Good. And press down from the head working opposition as you reach and lengthen and stretch all the way over and come back two more times. And reach and stretch lifting they had follows the line of the movement. Stretch more up, out and back. And one more.
Had a long stretch on the side of the body. Shoulders stay down, bend the elbows and come back in and [inaudible] stretch in, linked in all the way out. Breathe and stretch. You come in, beautiful rotation and the last one rages. Stretch it to come out and Ben to come in. Take the front arm off, place it behind your back, square your shoulders round over again and face the bar. Single arm. Here we go. Out One and in. Beautiful out too and in out on three and come in and come up and change sides. That's a tough one. That is great. You're doing great. But we do have another side. So yeah, same foot position.
Good two more times. Reach linkedin up all the way over and come back. And last one up, stretch, reach, and now row. Take the body and place the hand down and level the shoulders. Pull in on those abs. Press through the back hip and push out on one elbow.
Stay high as you come in and the shoulders reach down toward the floor, out on two and come in head in inline with the spine. Shoulders down and out at extend and use your breath and how an extend shoulder stretch as level as possible and we have one more of these and out. Now take the arm and place it around on the small of the back and turn the body back to face the bar and round yourself over and down and out on one and in one arm is usually stronger than the other. One side is easy and the other side is really difficult. Try and get down just a little bit more.
Good Debbie and out again there it is. The side harder. Yeah, we find that and that's why you're going to do two more for me just because it was that much harder and we're going to make you that much stronger and in
Relax the shoulders. Three breaths here. Inhale and relax into the stretch and take a nice inhale filling up the back and out and relax and one more breath and cut in and bend the knees and round down. Roll down and lie back on to the carriage with the head rest back into the lifted position. But head rest lifted. Number one, not should that. It's not too high.
We'll have the foot on the metatarsal arch and the heels lifted. So you want to be down just a little bit more. There you go. Perfect. And heels up and extend to go out. Now we're going to take one heel down under and we'll press it down eight times. One, two, three, four. Good.
No movement in the hip. Stabilize seven and a and change and other foot one too good. Do not lock the knee. Keep the length of the torso all the way through for a count of Eight. Now come back up, hold, breathe.
And the first leg under for four press one, two, three and change one, two, three and change twos one, two and change one to change one, two, and one. Now singles, roll through the foot with [inaudible]. Make sure you stabilize your hips. Make sure that the shoulders are relaxed, use your breath. We always would finish the uh, our programs with this running in order to get the body aligned and to prepare us for our own work that we would be doing outside of the classroom. And Now Ben to come in and out and in four times straighten one and in straighten two and in straighten three and n Nice alignment and good breath and come in. We're going to be on two reds and out on one
The rhythm of the movement has slowed, moot. The movement down has brought it more into the interior of the body working all the way through the body.
So that all of our movements become Pele's exercises and all of our movements in life become connected, mind, body and spirit, and come all the way in. Take a breath and lift the arms, lower circle and the other way to a nice long [inaudible]
Mention
 |
Kathy Corey (Teacher) |
 |
Candace |
 |
Ana Margarida Cordeiro Ferrao |
 |
Christine T |
|
|
Victoria M |
|
|
Tugce Kazdal |
|
|
Anastasia D |
 |
Stephanie B |
 |
Sandra M |
 |
Stacey S |
|
|
Kay Quenzer |
 |
Saci M |
 |
Cristina P |
 |
Lorraine Chamas |
|
|
Hydie |
|
|
Emilie F |
Comments


You need to be a subscriber to post a comment.
Please Log In or Create an Account to start your free trial.
