Description
About This Video
Transcript
Read Full Transcript
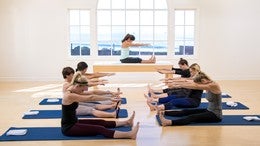
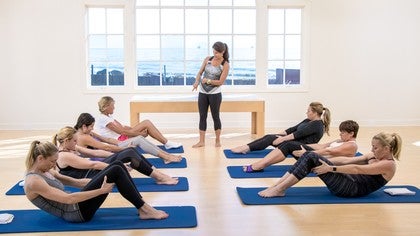
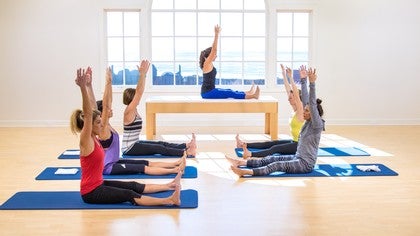
All right. Today we are going to be doing the second class of a beginner mat series that's going to take us from, I have never tried politesse before to an intermediate level and we're going to quickly review some of the things that we went over in the first class. If you haven't done the first class, I strongly recommend you try to do that class and take it as many times as you need to until you feel really proficient in that class and then move to the next one. Just because it's number two doesn't mean as soon as you're done with one you start taking number two and then hopefully you'd go all the way through 10 and then you're ready to take any of our awesome PyLadies classes on plots any time. So for a quick review, we have our Palase box, which are our line straight line from one shoulder to the other shoulder and a straight line from one hip bone to the other hip foam.
And that is a complete box. We're going to stay square throughout our whole workout. Yeah. In initiating every single exercise that we do comes from what we call our powerhouse. And it's a five inch band of muscles around our lower belly and our lower back.
So it's kind of like putting on a weightlifting belt. So you want your lower belly and here. Great. Yeah. Good. Okay. Here is, I want to plot. This is all about that mind and body connection and learning how to move your body, not just from your strong muscle groups that are already strong and you're going to keep working them out. But learning how to have good balance and overall strength, strengthening your entire body.
So you're gonna be using a lot of those smaller muscle groups. So we use a lot of images to send messages to those smaller muscle groups or weaker muscle groups that you might not normally initiate from. So maybe it's your stomach, maybe it's not. But I like to draw a straight line from one hip bone to the other. And that is like a laser beam, like a mission impossible laser beam where an alarm will go off if you cross that line.
So that is one way that I really get my stomach to pull in is I imagine a straight laser alarm, Palladio's alarm, if you will, going across from one hip bone to the other. And there's no little hill between those two hip bones and those that'll become a little more obvious when you're lying down. So right now try to pull that belly in behind that line of your hips from those hip bones. We talked about an image of a barbershop pole so that you got the red and white stripes going out. You can imagine those stripes. So from each hip bone you're going to have red and white swirling stripes all the way down to your ankle.
And so what happens is if you use those muscles correctly, your will naturally turn into a Palati stance. Instead of you just putting your feet there and nothing, there's no engagement. So we would imagine that there's some swirling going on. And so then your feet naturally turn out to a plotty stance, having two to three inches between your toes and the heels are together, hopefully of weight on the ball of every toe. All the big toe, the next toe, all the way to your baby toe weight on the side of your foot and weight on your heels. Great. Okay, so we have our box and our powerhouse pulled in. That's gonna initiate every exercise, right?
Something that you want to understand is pelvis. Where is that going to? What placement is that? Another image is these two hipbones are like headlights on a car and often we get lazy and our tummy doesn't work too much. So those hip bones are pointing towards the floor and your headlights are shining on the floor, not directly forward. So these bones need to be going forward.
Okay. You're our lower backs get tight, so it starts to pull up our tailbone, which automatically makes our stomach to stand and doesn't let it pull in either. So you want to imagine that your spine, instead of finishing at your tail bone, tailbone continues to a tail and it actually has a weight on it so that you lengthen that lower back, stretch it out. And that also allows your lower belly to be able to pull in a little bit more. So a few images while we're just standing here and bringing our mind to our body to start our workout. Okay? Very nice ladies. All right, so now we're going to just lower ourselves down. Sit down any way you can, and you're going to have your head on the pillow behind you. I put out a towel just to help make sure that we're in proper alignment and your knees are going to be back and feet flat. You do know Kay Kim with the sun there? You're sure? All right. Okay.
Let's have our feet about hip width apart. Good. And we're going to start off with shoulder rules. It's kind of awkward to do it here because you don't get to move your shoulders too much, but I really do love the way you can feel the connection of your shoulders being in joint when you're here. So I want you to lift your shoulders as high up to your ears as you can. So you know you look really tense, right?
And now I want you to open your shoulders while they're up there. So they're as low into the mat as you can go. And then I want you to think about your shoulder blades as you slide your shoulders as far from your ears as you can down. And now while they're down, you're going to bring them up to the ceiling, closing the chest, and then continue to more time. So up to your ears, open on the mat, down towards your tailbone. Then close the chest up to your ears. Open those shoulders, bring them down towards your tailbone, and let's reverse it. So they're on the mat. You're gonna go up to your ears, close your chest while you're up here. Come down while they're down, you open.
Bring them up to your ears. Close the chest. One more time. Down, open and up again. You don't get too much movement while you're lying on your back. But here's what I want you to take home from this. Let's lift our shoulders as high up as you can. Good. Obviously tense, neck and shoulders, not very comfortable and all away from our center. Open your shoulders on the mat. Good.
And you might have puffed up your chest or left the upper back off the mat right now. And let's now bring your shoulder blades down towards your tailbone and stay there. So right now your shoulder blades have been recruited to support your spine and be enjoyed with a lot of back muscles. And that's super important. Employees, okay. They want to win your arms work. They want to work one, they're in joint. So you want to have them there. And that's part of the lengthening that we went over, right?
So let's start with our arms, um, and review that lengthening. So you have both shoulders now plugged in, straight across. And let's bring our right arm up to the ceiling. And without that shoulder lifting up off of the mat, try to touch the ceiling, lengthening those upper arm muscles, engaging. All those are muscles. Stretching your arm like Taffy, it's touching.
Touch the ceiling, retreat, reach. Exhale, bring it long down by your side. And I want you to keep this image in your head when we do the hundred and then inhale, bring it back up. Keep length, keep work. Make sure you don't hyper, extend that elbow and last time, exhaling all the way down and leave it there. And let's do the left. You're going to bring the left arm up again. Don't lift the shoulder off. Keep it plugged into your body and lengthen those upper, our muscles.
Reach. Try to touch your fingertips. Try to keep your shoulder down just a little lower. There you go. And now exhale, bring the arm down long by your side, but really lengthen it when you do that and bring the arm back up and then reach it long extending those muscles. We get down by your side, reaching, reaching, reaching. Great. And leave it there. We're going to do the same thing with your legs, right? So we're going to remind you how to hold your legs from your powerhouse.
So right here, um, you know we have four, we do our legs. I'm going to introduce to you that pelvic, uh, stability and placement that I was talking about. So another image I use is kind of like bowl of soup or yeah, let's use a bowl of soup. Imagine that your pelvis is like a bowl of soup and I want you to dump that bowl of soup into your chest. Very, very nice. So your pelvis just tilted. Maybe talk to, there's a lot of things that people say, but I just want you to think about tilting the pelvis towards you.
Your lower back should be super flat on the Mat, right? Everyone's back is flat. It's kind of, that's what I want you to take home from this is that your back is super flat right now. Now I want you to dump that bowl of soup towards your feet, so all your energy is going to go away from your center and you're really going to try to tilt your pelvis as far away from as you can. If it hurts your lower back, only go as far as it feels like a good stretch. Don't take it past that point, but clearly there is a tunnel now underneath your lower back if you've really dumped that bowl of soup, right? If we try to learn how to do pilot days like this, you're only going to hurt your back, so we're not going to learn how to do [inaudible] like this to learn.
I want you to try to draw that line from one hip bone to the other. Pull your belly in, maybe even add using your seat a little bit and tilt your pelvis towards you. Tilting it until your back is totally flat. Now I would love it though, if you're not using your thighs to get your pelvis that way, or pushing your feet into the mat, but rather really using your stomach to get your back nice and anchored playing with those ideas. Feeling good? All right, good. So we're gonna keep our lower back. So when we do, we're going to add three hard exercises today for our series of five.
And when we get tired, you're going to end up wanting to dump that bowl of soup away from you and your stomach is going to give up and your back's going to try to help muscle you through it. And you're going to want to keep this image in your head that you're going to use. Dump the bowl of soup first into your chest. Okay, so we're going to dump that bowl of soup and bring that right knee into your chest and hug it and then straighten it up to the ceiling and put your hands behind your thigh to stretch it. If you're super flexible, go ahead and grab behind your calf, but always avoid the knee. You want your bottom to stay on the mat so no cheeks are off the mat. And now we also talked about those barbershop pull muscles and having that leg turned out in a first class. So from your hip bone, all the way to your ankle, you want the foot a little turned out great. That makes your hipbones now are straight across instead of I'm off.
So go ahead ahead. We rolled in our knee last time just to feel the difference. Go ahead and roll your knee in Vala and that lifts the hip up and we want to roll it out so we feel that our hips are straight across. Great. Now press those strong arms into the mat while your leg up there you go and your bellies in. And I want that the thigh muscles to lengthen. Lengthen. All and try to touch the ceiling with your toes.
Now while your stomach is sinking, sinking, sinking, and we're going to take that long leg and reach it a little bit lower down towards the florid so that the thighs or even just till your thighs or even no lower, good, and you're keeping it in. That bowl soup is dumping it. Yes, thank you. And keep your bowl of soup dumping into your chest as you lower it down a little bit more. See if you can challenge your stomach by keeping that bowl of soup, but that legs reaching, reaching, reaching, and now lowered as low as you can. Keep your stomach anchoring your back and then sweep that leg up to the ceiling. Good from your stomach and reach it down. Let's see that belly. Pull in more as you reached down. Good. Excellent.
And then pull the belly in to bring that leg up because we're not here. Go ahead and hug your knee in to get our quad stronger. That's usually the muscle that's doesn't need too much help. Let's put the right foot down. As you inhale. Exhale, bring in the left by pulling in your belly and dumping that bowl of soup. Excellent. Hugging that knee. Straighten that left leg up.
Both cheeks again are on the mat. You're not pushing with the right leg to get that leg up higher. It's all relaxed. You're just stretching, stretching your hands behind your thigh, good or your calf good. It's turned out right. You should be able to see your inner thigh. Try to have it a little more centered. Pull you together.
Good and roll it in so you feel how that hip hikes and sends your hip alignment off. Roll it out again so that now we're square again. Good. Press your strong arms down on the mat and with both cheeks staying down and your stomach rooting length in the leg to the ceiling. Reach at reach your region. Use those barbershop muscles to help. Lengthen as you go down and the leg is at the same level as the other thigh and you're reaching, reaching, reaching, and then if you can go lower, go for it.
With the belly pulling in more. You really want to be feeling a challenge in your stomach right now. You have to send that message and then lowered as low as you can. Keep feeling like you're controlling your stomach and that bowl soup is dumping and then pull it back up and we'll do it one more time. Keep the foot a little soft, Kim, like relaxed as scoop it in to pull it up. Beautiful.
And hug the knee into your chest. Great. And put the foot back down. Awesome. We also talked about how to properly lift up your head. So if I had, if I tried to lift up my head and I had instead of that tunnel under my lower back, if I had a tunnel under my upper back and I tried to lift my eight to 10 pound head,
So again, your chest bones Naga, stay up here and you're trying to yank up your head. It's like a seesaw. Someone just jumped onto the bar, this side of the seesaw and that goes down as your head and shoulders round up.
We're going to stay down for one more second. Sorry ladies. Inhale into the mat and as you exhale again, try to stay and get really connected. So everything from the bottom of your shoulder blades to your waistband is easily making an imprint onto the mat. Okay. We've talked about using it like a wet slab of cement that we're going to inhale. One more time and this time as you exhale, use your belly to curl up your round up your head and shoulders and neck coming up. Good, good, good. Initiating. Yes. Love it. Yeah. And stay there. Take a breath and
Maybe pull in your belly a little bit more roundup and see if you can
Good, good. Nice. And so take a breath and exhale. Rolling down. Did that hurt your neck or head? Heather? Okay, good. Well if it ever does, because it's your flexibility. We want to come up just a little bit more. But if you're feeling tight where you can't come up anymore, then stay up for as long as you can when, when our heads up, but then lower it down and keep doing the rest of the exercise.
But with your head down. Cause that's what happens to all of us when we're, when we're doing this. So whenever your neck or head gets tired, you just lower. All right, we're going to go ahead and start with the hundred. So we're going to take a breath. Keep your hands actually where they are. Sorry. Take a breath and as you exhale, round on up. Polling in. Good. Good, good.
Now stay there and I want you to reach your arms long by your side. Remember those strong Josef plots. Arms strong and you're gonna draw your belly in to bring in the right knee to your chest. And then your left. You can hug it. Go ahead. I like it. Grabbing your left too. Good. Now get your let knees to a tabletop position. All right, they're good and strong arms and we're going to pump. Inhale, two, three, four, five. Exhale, two, three, four, five in with the air.
Exhale, rounding up a little bit more. Good in with the air and exhaling. Good. Now hug those knees and rest down your neck and head. All right, so pretty good. But we're trying to build on what we did last class.
So I want to remind you guys about that bowl of soup right here because the legs are going to end up going straight and going down quite a bit if you can. You always want to keep working towards your goal, but it's never about where you're going. It's about the journey. So you need to keep working and strengthening. So if you automatically put yourself in where you want to be, but your body isn't working and supporting itself the way it should be, then you're not helping yourself get stronger. Okay? So we're going to keep adding and adding, but I want to make sure that you support your back correctly using your stomach when you do this hundred. Okay, so let's put our feet down on the floor and it started off a different way, but, and we're going to reach our strong arms long, about five inches up from the mat.
And we're going to start with just breath and we're going to pump up and down. Inhale, two, three, four, five and exhale, keeping your head down for now and in with the air. And as you exhale, try to get rid of any tunnels behind your waistband, especially or behind the bottom of your shoulder blades in with the air. Are Your shoulders glued into your body or are they up by your shoulder? Your ears? Yeah, pumping from the upper arm, not just from the elbow. Yeah, that's nicer. Exhaling.
And with the air. Two, three, four, five. And exhaling. Sorry if your breath was a little different. Inhale two, three, four, five. On this exhale, bring your right knee in by dumping your bowl of soup. Keep pumping. So you're dumping your bowl of soup into your chest while you're pumping.
On the next exhale, bring in the left need. Dumping that bowl of soup into your chest so you're really working from your stomach. Big Breath. Two, three, four, five. On the next exhale, round up your head and neck. Looking at your belly. Good. In two, three, four, five. Exhale. There Ya go. Kim came along, girl up a little bit more in with the air. Is your bowl of soup dumping in? Can You keep it and reach the legs towards the ceiling in the barbershop polls? Yes into three four, five. When your neck gets tired, lower it down. Yes. But keep the legs up and working in with the air and exhale, keep working and keep that bowl of soup tilting towards you as you reach those legs lower. How low can you keep? Get them without losing your belly.
Could one more time like this? Big Breath. Two, three, four, five that exhale. Scoop. Yeah, that's nice. Hug your knees into your chest. Good hug. And you're like, I could do this all day. Good, good. So one little thing is sometimes we can pull in our belly or feel like we're tilting our bowl of soup and all kinds of stuff. But when you're ever, your legs go lower in Pele's, especially in the next few exercises. We want to make sure our tummy never looks like a loaf of bread rising in the oven. It has to stay always. Like I took my ice cream scooper and scooped it out.
It always has to stay below that laser beam. So that it's supporting your back and so that it's pulling in your and trimming your waistline. Okay, so we're going to sit up. Voila. Perfect. That knees, feet flat, hands underneath your knees. Good. Maybe bring your feet a little closer to you. Excellent. Good. All right. So when we're saying sitting up, if I went like this, I would be dumping my bowl of soup out. Right now we're going to concentrate on trying to have the hip bones look up to the ceiling. I'm not going to go back with my shoulders.
I'm going to make it happen from this area. So I'm gonna pull back my into my bowl of soup in. Yeah. And my hip bones are going to try to look up at the ceiling. Very nice. Good. Can we get our shoulders still relatively over our hips? So we're trying not to be back here to achieve that. So let's try that again.
We're going to sit up tall and instead of moving our upper body to go back, we're gonna wrap. Pull back and tilt this way. There we go. Good. All right. So I don't know about you, but I'm even thinking remotely about my stomach being on my thighs. Does not bring happy thoughts to me. So I will always think about pulling my stomach as far from my thighs as I can. To start rolling back.
Keep your hands under your knees and try to get your waistband or on the mat. Take a breath and when you come back again, pull your belly as far from your thighs as you can and exhale coming forward. Good. Stay round, round, round again. Take a breath and exhale, pulling your navel in. We talked about it being a big suction cup muscle last time. Get your waistband down, take a breath and exhale.
Pool it in to come forward. Rounding, rounding, rounding. So now when you're here, try not to switch it to here. Okay? Keep it here. All right, we're going to add a few more vertebra, so you're going to very good. So you're gonna roll back your lower back. So we're starting with the tailbone and roll down through the Seagram and the next bone you're tilting your bowl of soup towards you. Try to roll down a few more until you get to the bottom of your shoulder blades. Take a breath and then exhale. Roll the upper part forward. But exhale, come up. [inaudible] pulling in in. Yeah, there you go. Good.
No Lofa breads, right. And again, squeeze your legs together. That helps. And squeeze your bottom and roll back. So tilt that bowl soon. Let me see that extreme tilt. There you go. Yes. So that you roll down one bone at a time. Get into the Bra Bra strap or bottom of your shoulder blades and then come back up. That's really good.
Don't [inaudible] go all the way down to your head though. And then coming back up. Very strong though. Good aunt. It's cause I distracted you ad well. Tilt your pelvis again and roll back. Beautiful Les shoulders.
You want to keep working on stretching your lower back. So tilt that bowl of soup towards you and keep it going. Keep tilting it. Yes. Yes. Make it be your lower vertebra that go down before the middle ones do. Excellent. Good.
Cause your back can use that stretch and then coming up. Leave these here and round the rest up. Fantastic. That's what I'm talking about. Good. All right everyone. Make sure you come back up. [inaudible] good. And we're going to do two more. I want [inaudible] that was taking you almost to the point of, I don't know if I'm going to be able to come up, because when I went down, my legs wanted to come up, or your belly was, your back was trying to work. Then don't go that far.
Only go to where you feel like you can keep control of the exercise. But if you can go further, you can go down to your head this time. So round your back and scoop in and tilt that bowl of soup towards you. Your legs should be pretty light and you're rolling down your lower back, your middle back, your upper back again, only to the point of where you can return and then scoop in. In, in. Yes. Coming forward. And we're gonna do one more this time.
I do want you all to go down to your head, so pull your belly in a way from your thighs. It's behind that Palladio's alarm. It's rolling down your Seagram and tilting that bull soup into your chest, into your chest, roll down all the way to your shoulders, your neck and your head. And you stayed there. But we work always between each exercise engineers just a little bit more. Excellent. Same with you. Collect great. Are ride good.
And we're going to haute tilt that bowl of soup to bring your right knee into your chest. Great engagement camp. Love it. Ha. Good. Straighten that leg up to the ceiling and put your hands behind your thigh. Good. Juliana, you're a hips. A little high. Excellent. Stretching that leg. All right, good. So your hips are straight across right now. And we're going to do leg circles.
We did these last class, but I want to really emphasize that we are working hard. Go ahead and press your arms down by your side to have that barbershop pole image all the way to your ankle. Yeah. And then we're keeping both cheeks down and we're trying to lengthen up to the ceiling. Okay. And when you circle, so you're gonna come up to your nose, cross your body without moving your hips. Hold it right here. Sorry ladies. When you cross hold it, crossover. Did your knee rolling? Did your hip hike.
Make sure your that didn't happen cause cause that's how we kind of thin out and lean out this area that we want to work on. Okay. So as you cross, don't roll in your knee and lift up your hip. Cross with it staying turned out. Go down a little bit towards the floor and then you're going to pull it back up. Hug that knee in for a second. Okay. Go ahead and bend it in for a second and hug it. Good. That makes sense.
That's one of the ways we work on leaning it up. Okay. So we're gonna do five to tempo. Extend that leg up to the ceiling. The your Palladia Xbox stays on the mat. Turning out that leg a little bit and you're gonna use your belly to dump that bowl of soup. And that's what pulls the leg all the way up to your nose. And now we're gonna Cross around, up, cross around, up. Nothing moves too around. Yes.
Last one. Cross surround, reverse down around up. Don't roll in that knee down around, up, and you can go down, around, up, down, around, up to rack, up the bottom of the mat. No pushing with this leg bear. I'd hug it. That hug that needed to your chest. Good. Right foot goes down to bring in the left. You can think of dumping in that bowl of soup, hugging that left.
You got it. Good. Keep both cheeks down on the mat. Left leg goes up to the ceiling, stretch it. Make sure your hips are squared good. And now we're going to make sure we're going to pull it up to our nose and we're going to make sure as we cross it that we don't roll in that knee as we go to that right shoulder. Good. And let's go ahead and go to tempo. We're going to cross around, up, cross around, up.
Good. Don't use this leg. Use your belly. Two more. That's it. Last one. You're doing it. Go the other way down. Cross the road up. Keep your belly anchored. No Salsa in those hips. Go and dance. And tonight one more. Down around, up. Good. Turning out. Hug that knee into your chest.
Very nice. Good. All right. Put that foot down. Good. And so some of you who are just looking so good, um, earlier in the rollback, that eventually will be the roll up. Okay. Where are you rolled back? One the waistband in the middle back and the upper back. And you were able to get your head down on the mat and then come up.
Still coming up with control, right? Sometimes when we lie down though, we end up losing a bit of control. So right now you should still be able to come up using your powerhouse. So inhale into the mat and exhale, draw your belly in and round up your head and neck. Good. And now we'll roll yourself up one bone at a time.
Uh Huh. Come on lady. You've got it. Excellent looking good. All right, now place your hands back under those knees and actually straighten your legs on the map. Her effective are. So we're going to add a transition here that you don't really need right now, but as we become intermediate in our plots, then you're going to need it. So, um, in order to build, we always incorporate our movements in pilates. So when you are gonna transition, this is tense, right? And add a joint, correct? Yeah. And it also does nothing for our triceps, but, and if we drag our bottom on the mat, it does nothing for our dairy either.
So you're going to plant your hands and you're going to keep your shoulders, enjoy it, and you're going to use your stomach, your triceps, and your bottom to lift your bottom forward. Good. Well, ah, you guys all did really well. Now you see how my pelvis is dumping into my chest. Okay? And my weight is on my hands. I want you to do that. Get a little lighter on your feet, maybe walk them a little bit away.
Keep your pelvis like this and slowly get less dependent on your hands. You're not going to change anything in your pelvis, but your right hand is going to go underneath your knee. And then you're going to hold that belly in and nothing's going to change and you get your left hand underneath that knee. I'm still seeing a little bit too much up here. It's dumping that bowl of soup deep, deep, deep. Okay.
So now we're going to be pulling into our stomach so much that we're going to lift, not a the foot like this, but from here we're going to lift up the right leg just a little bit and we're going to put it down. So we're going to now do the left scooping in, do the left good and put it down. So what we're saying is we can use our powerhouse to keep our box square and make all our motion come from our belly. So we're gonna use our belly to keep that bull soup dumped in and it stayed behind that laser beam, is it same behind it and bring up the right leg a little bit hold. And we want to be able to hold it there as we add the left leg and nothing changes. Very dice and put the feet down.
And let's see if it happens when we do the left scooping in your belly and we're going to bring up the left. Good. Your belly can pull in more. Uh Huh. And you're going to bring up the right [inaudible]? Yes. And it's from here. And put down your feet. Watch your shoulders a little bit. They're wanting to go back a little bit. So stay a little more in your upper stomach. Excellent.
And we're going to do it again. We're going to scoop in and add your right little lower for me. Juliana, the right foot. Sorry. There we go. And scooping and add your left. All right, so do you feel how your bowl of soup is dumping? Dumping into your chest? So now we're going to pretend you're going to stay there because you're gaining strength, hopefully sweating a little bit. Something. All right?
So we just got into position and we want to imagine that we're a rocking chair and here's the rocker and you're going to rock back. And when you rock up, your bowl of soup is gonna stay dumped into your chest. It doesn't pop out. So rock back your rocking chair. Woo. Where'd your feet go? [inaudible]. There you go. And scooping. Roll through your lower back first. That's it. You want to really work on this because you don't want to jar your back because your back. All right on here. Yeah. Good. You don't want to dry.
You want to roll through each bone. Not sound like a flat tire. So I hear that a lot that people, yeah, go ahead and rest down your feet because when we get stronger then we end up instead of here we get tighter and then you have to roll like a ball like this. But what happens is is we end up going like that thumping because we forget how to roll through here first. So you want to stay where you are right now where you feel like, okay, if I had a six pack, I'm using my lower set to roll back and my upper to come up, not my upper to go back and my, you know, my lower to go forward, you have to roll back in order. So we're gonna do four more. Really practicing your balance. Okay. Balanced with those feet up a little bit.
Dumped that bowl of soup more, more. Yes. That's where you want your center of gravity. And inhale, roll back and exhale. Roll up and hold. Hey, inhale, roll back and exhale, hold. And so here in how? Three more. Here's where keep going. Here's where when I talked to my first class about we have to roll down one bone at a time and in a straight line.
Here's where our straight line shows up. One more. Inhale, roll back. Upper stomach rolls up, hold up all the soup. Excellent. Rest of your feet down. Did you stay in the center of your mat if not center yourself. All right, so on the roll back that we had done earlier, this is all about rolling back your spine in one line. Maybe you, this is obviously dramatic, but you'll you want to be aware of that. Cause when you roll, all of a sudden you're over on the dominant side.
So that's where you get stronger on that without feeling like you're rocking. So make sure you're centered. And now we're going to do a roll back, but we're going to stop when you hit your bottom of your shoulder blade. So dump the bowl of soup first and roll down. Hands are underneath your knees. Feet are on the mat. Sorry. Feet, stay down. Voila. Valets. Keep your head and shoulders up for me. Thank you.
Stomach is in and use your belly to bring in the right knee. Good. Stretch it in all the way. Good and put it down and then stretch in your left so it's all heads up. So it's all the same stuff, right? Put it down. Good. And bringing in the right. Awesome. From your bull soup and put it down.
I just want you to really feel how it's from yours. Yeah, that's awesome Collette. And put it down. And now if your pillow's not there, go ahead and make sure it is in rest down your head. Cause I have to teach you about proper hand placement here. All right, so we're going to dump that bowl of soup and bring the right knee into your chest. You're going to put your right hand on that ankle. So your right hand is on your right ankle. Yup.
And your left hand is on the knee or right below it. Good. Very good. All right. If you have a bad knee, you always just hold underneath the knee and bring it in as much as you can. But if you have the healthy knee and you want to keep it healthy and you want to keep your hip healthy, then this is how you want to hold onto your leg because our shoulders are straight across, right. And our Pilati Xbox and our hips are straight across. And when we grab and stretch that leg in is your knee. Okay Kim, to stretch it all the way into your chest as close as it. Okay. All right, good. Dumping that bowl soup. Good.
Now Watch this shoulder. It's lifting quite a bit. We want to have it straight across, right. Excellent. So if your arms are equally strong, slide your hand down just a little lower to the ankle. Yes, lift the elbows. Have you ever seen ballerinas have those beautiful arms? They don't let their elbows hang cause that also means hanging back at the arms.
So lift those elbows. Okay. And if you pull with both hands equally, you should be keeping a straight line from your ankle to your knee, to your shoulder. Drop that shoulder and point your fingers that way. Yeah. Excellent. Good. It should be a straight line. Now switch hands. So put your left hand on your ankle and your right hand on your knee. Awesome.
And now if you pull equally, you pull that leg way out of joint. Do you feel that? So yeah, there you go. Exactly. Which for you, Kim would affect your shoulders because you would be pulling in like this every time. But we want to keep them straight. So put your right hand on your ankle and your left hand on your knees. So you thought Palladio's was a lot of mind and body. While this is gonna make you really think now. So, uh, one way to think about it is the arm that's on the outside is gonna go to your ankle and the arm that has to cross over your body is going to go to your knee.
That might not make sense right now, but let's put your right foot down and use your belly to bring in your left knee. And so now it's your right arm that has to cross over. So it's going to go to your knee and your left arms, the outside arm, and it goes to your ankle as you pull in it with those nice high bent elbows. Cause you always want a ballerina arms, right? Always, always. And you're gonna put your foot down and use your stomach to bring in the right knee. And your right hand goes on the ankle. It's your outside hand, the arm that crosses over grabs on that knee, and you're going to put your foot down and you're gonna be in the left and your right hand is going to go to that knee, left hand to that ankle. All right. Now if you have everything super healthy, it might be the last thing you really care to learn.
But otherwise it really protects your hips. It really protects your knee, joint, your shoulders, all of it. If you make sure you use your arms correctly, so on your own now you're gonna put your left foot down and bring your right knee in and see if you can do it and put your right foot down and use your belly to bring in your left knee and see if you can do it. Pretty good. Put your left foot down and bring your right knee. Yeah, I'll keep your dump your bowls who've dumping into your chest and Rye. Round up your head and shoulders. Really stretch that leg into your chest. Remember the thigh and the knee is all supposed to be there. Elbows nice and lifted. Good.
Now let's see that left leg reach a little lower than to the ceiling. You keep it in a little lower to the ceiling. Barbershop pole working down in the middle of your body. Good. Use Your belly to dump that bowl of soup and switch. Yeah, and switched down the middle, right between my hands. Yep.
And switch. You got it. And switch. Dumping that bull suit dumped the bolts. Have to bring your left knee in and down the middle. Dumped the ball soup to bring your right knee in, right the middle and switch and switch. If your neck gets tired. Sorry, you should be bringing it down and switch and last set right and left and hug both knees in and rest down your neck and head. And I'd give extra Brownie points to anyone.
Remembers the name of that exercise besides Juliana to, does anyone remember what that was called? Almost pretty close. Well you weren't here on the first class, but what the name of the ASU said single stretch leg is that we said? Yeah, just out of order. I, I owe both. You Guys Brown is pretty good there. So the double version is next, right? So the double version, you're hands are on your ankles now. Good.
And yeah, but let's put your feet down on the floor for a second. Place your hands one over the other behind your head. Okay. This is one that most people really lose the bowl of soup and I don't want you to do that. So we're going to take a breath into the mat and exhale round up your upper back. So you have bird's eye view of your stomach that's pulling in belied that Palase is alarm. Good.
And now take a breath and dump that bowl of soup as you bring in the right knee. Leave your arms where they are and use your belly to bring in the left. Good. Hit a little and now you're going to perfect. Good. And now keep that bowl soup dumping into your chest as you extend the legs using those barbershop polls and pull in to bring them back into your chest and reach those legs out scooping, scooping, scooping, and pull them in. Don't forget there's a spike behind your shoulders.
Get yourself up and come curl up. Curl up, curl up. Thank you. Stay there now with the upper body and bring it in one more. Those legs go out as your bowl of soup dumps into your chest. Get the legs up higher so that you, that's what I want to see and pull in. Great job. Hug in those ankles.
So as the legs get lower, you're going to be tempted to let go of that ball soup and I want you to keep it pulled into you. Does anyone have any questions on that? Can you feel it? Okay. All right. Good Lens. He can feel it. So hands on your ankles and you can use those hands if you need to. As you take a breath, you're going to exhale and bring your head round it up. So it's off the mat. No, this is just rolling like a ball one day where your head almost is between your knees. So try to get your hands on ankles. Good. All right.
Same thing with the legs, but now your arms go straight up to the ceiling at the same time. So arms straight up, legs out, arms straight up, and pull yourself together. Dumping that bullet soup. Exhale. Inhale, reach from here. Exhale from here. Inhale. Don't lose your bull suit. Exhale. Yeah, don't lose that bull sip as you inhale. Exhale. Pull yourself together. June. More. Inhale, reach. Keep this up. Exhale pool and one more so it stays here and pull in and rest your neck and head. Good job ladies. Rest your feet down.
All right, so eventually we want our legs hovering over the mat for our hundred four so we want to get
See how beautifully straight your legs are. Crawl up a little higher behind your calf. Yeah. Okay. Beautifully straight legs, right? I say that against. Similar to the hands behind your knees. I said earlier. Lower that left leg. Keeping your bowl of soup, keeping your bowl of soup not to the ground, but just shy of it and pull it back up. Dumping your bowl soup.
Switch your hands to the left and dump. Reach that right leg lengthening right. Not using that knee joint and dump that bowl of soup in your chest to pull it up. Grab onto your right. Good. Long left leg going down. Pull it back up from your stomach. Beautiful. Switch to your left. Excellent. Nice. Scoop it in. Don't bend it good. Grab onto your right and bend the knees and rest for a second. Good.
Rest your neck down. All right, so that exercise is called single straight leg. Do you see this exercise? What was it called? Colette single
I don't want it to change to switching to a, I'm back to this one. You see? They both say straight. Okay, so both legs up, crawl behind your right leg. Both legs are straight, lower. The left one is low as you can, and now they're going to switch simultaneously and switch and switch and switch and switch and switch and quicker. And why? Because I don't want your legs to work. That's okay. I want just their light. They're flying. Ooh, that's good. Yes. They fly to New York. This is all your stomach? Yes. Colette. Nice. Last one. And Ben, both knees
It's just flying through the air. All right. Put your feet down on the floor. So that's called single straight leg. Yeah, I rat hand over. Hand behind your head. Good. Now the next two exercises, your hands will stay there even though when you always, when you finish this next exercise, you're going to want to collapse and always take your hands away. Keep them there cause we're ready for the next exercise. Okay. So use your belly to dump your bullets, soup and bring the right knee into your chest.
Keep your hands behind your head and you're going to dump your bowl of soup and bring your left. Good. Relaxing those feet. Good. Take a breath. Exhale round your upper back up like that seesaw that we talked about.
Your legs come forward a little bit towards you and lower the legs as low as you can control it. And the next, they'll pull them towards you and lower your legs as low as you can. Keep that bowl of soup. Amped. Scoop it income up higher. Yeah. Inhale, don't go down though. Stamp.
Very nice. So you're going to want to keep thinking about not having your feet parallel. They're to want to stay turned out. Not by putting your feet there, but working these muscles. Because when you work these muscles then your stomach can work. But if you use your quads then you use your back.
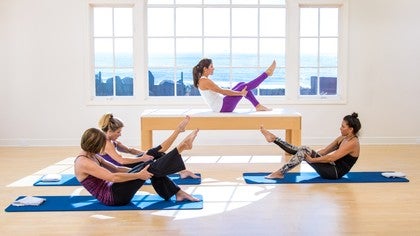
Okay. So if your feet end up being parallel on this one, it's going to be more back and very hard to do. Yeah. Okay. How'd you guys do on that one? Love it. You just love it. Feel it. Feel your stomach getting stronger. Good. So that one's called double straight leg. So we do single leg stretch. I love this common sense stuff.
Double leg stretch, single straight leg, double straight leg. And then Chris Cross. Chris Cross is to help your spine stay really young and flexible so it is a little different than your traditional bicycle. So we're going to put your hands back behind your head and you're dumping that bowl of soup and you're going to curl up your head and shoulders. See if you can get your knees as close to your chest as you can.
Try to keep your right leg right where it is and straighten the left leg, a little shy of the ceiling, a little higher for me. That's it. All the way. Now bringing your right shoulder is close to, I'm sorry, your left shoulders close to your right knee. As you can twist, twist, twist and switched legs. Bringing in the left knee and take your right shoulders high up to that knee as you can. Good and switch. Your left leg is in a barbershop pole and your belly is dumping your bowls, soup, twist and switch and up, up, up, and hug both knees into your chest. How Common? Good. I know, and rest on your feet for a second.
So since we're introducing the crisscross, super important to understand. So this bowl of soup, we want to pull into our, dump it into our chest and we want to support our back and trim our waistline. We don't want to hurt our back. So when we do Chris Cross, sometimes we don't have enough flexibility here so we end up losing our hips. So those end up twisting for us. And in Chris Cross we don't want that. We want this line to stay straight across on the mat. Okay. A goal of crisscross is to be able to make a straight line from your back elbow all the way to your front toe. I can't remember if you can do it, Juliana probably, but let's give it a shot.
So she's going to bring both knees into her chest. Go ahead and lift up. And so it says if I took a pole and put it right down the middle of her body and then she's gonna extend this leg. So here's one point and you're going to pull back your right elbow all the way back. As far as, yeah, that's what I thought. And so she's now a straight line from her back elbow. All the way to that toe. Her hips didn't roll off to do it and go ahead and switch and she stays up in her shoulders as she goes. But now this leg has rolled.
Ha and then there we go. So she had to regain that barbershop pole and hug in that knee. Very nice. Good. So those, it's always important to know what goals you're working towards. So we're not falling off to one side to get higher. Instead you're supporting and working more. So let's do that one more time.
Hands behind your head.
Yeah. Good. And one more time scoop. That bowl is bringing any all the way into your chest because you're dumping that both. Awesome. And Hug both knees in, Huh? Let me squeeze a little more juice out of that exercise. Generally. I like that. Good. Alright, so here's the good and the bad news. The good news is your stomach's going to get stronger and leaner right now cause we're going to do them all to tempo. That's the bad news. Okay, so we're going to do the series of five.
So we're going to start with both knees into your chest and take a breath and then exhale. Use your belly for that seesaw image to round up everyone's rounding up head and shoulders. Your left leg extends like a barbershop. Pull down the middle of your body and left hands on your knee. And here we go. Scoop it in and pull in left and right and left. Each time you dumped the bull soup. Dump your bowl of soup, use your powerhouse, not the quads. Here we go. Three scooping in. If your neck gets tired, you lower it down. One more set and then grab both ankles, double leg stretch. Inhale, reach, and then circle the arms.
Bacteria, ankles. Inhale, stomach stays dumping into the bowl. Soup and exhale. Inhale long and exhale. Keep your legs up higher, Heather and reach and down. Do two more. So if your neck has to go down your arms, your legs have to go higher. Otherwise it'll arch your back and you'll lose that bowl of soup.
So make sure you stay correctly. Good. Rest of your neck and shoulders for just a second. And we're going to go into single, straight leg, double straight leg and Chris Cross both legs go up, round up, crawl behind your right calf or incl. If you can lower the left lengthening out of your stomach and switched, left, right switch and scoop and scoop. You're anchoring your belly, you're dumping that bowl of soup.
It's like a tree trunk getting routed through the Mat. Those barbershop pull muscles or letting your quads relaxed. And that's enough. Both legs up, hands behind your head and lower the legs and inch and pull back towards you and down a little bit. Head and shoulders are up if you can and pull up and down and from your stomach and three and scoop it in. And to remember your barbershop last one.
So legs are a little wider. Then maybe just a little off the mat. Good. And now we get another chance to get better at our rolling. So we're going to have our arms up at shoulder height. Flex your feet if you can, and sit up tall. One bone out in a at a time, stacked on top of each other and start rolling off an imaginary wall with your head and the next bone and the next and try to touch the crown of your head down to the mat.
Yeah. Not your shoulders. Yeah. And down. Good. Good. Good. Down, down, down. And then take a breath if you need to. And then exhale the roll up. Nice and tall. Tall, tall. Nice. Take a breath and exhale down. Rounding one at a time down, trying to touch the crown of your head down to the mat. Nice. Watch your shoulders from lifting up high by your ears and roll back up.
Good. Remember when you rolled down though, keep your head down for a second. Remember when you roll down that you're trying to keep your hipbones right over your sit bones. Take a big breath last time. Exhale down head. Beautiful. Good. Go on down. Keep your stomach scoops and we're going to keep your hipbones right and I'll keep going down though. Reach. Reach to that. So much nicer. And then roll back up. I had to get Brianna too. So we're going to do one more.
You guys can all thank Brianna. All right. Take a big breath and exhale down. Head to your chest. Good. Beautiful initiation. I love it. But now I want you to keep these bones right there. Yeah. An hour talking. Yep. To that laser beam still applies here. Your belly of should never be lying on your thighs. Right? And here we go.
Sitting up tall. Nice job. Relax your arms and go ahead and stand up. Maybe staggering a little bit like you did in the beginning. Good. And you want to see how your posture is now. All right, now that you've worked out your body, get your hipbones are here. Maybe we might pay attention a little bit more now to those barbershop pulls, cause we kind of noticed if we don't, when we're working out, it makes everything a lot harder.
So make sure you've wrapped and you've squeezed and draw that line from one hip bone to the other. Let's add not pressing back with your knees. Sometimes we work so hard, we push pushed back with our knees, so keep them a little soft and your weight should be a little forward. More on the ball of your foot than on your heels. Excellent lays. Great job. Very good. We're all done. Nice job.
The Starter Series: Let's Get Started!
Mention
 |
Monica Wilson (Teacher) |
 |
Julie Lloyd |
 |
Sylvie K |
 |
Sara D |
|
|
Karen E |
|
|
Rosemary F |
|
|
Joanna G |
|
|
Daphna D |
|
|
Ann C |
 |
Monika P |
 |
Gia Calhoun |
 |
Pauline T |
|
|
Hanneké D |
 |
Noelle |
 |
Tamie F |
|
|
Cigdem A |
 |
Chantal C |
 |
Sara A |
|
|
Andrea M |
|
|
Tammy T |
 |
Jorge Sánchez |
|
|
Faten S |
|
|
Marcia E |
 |
Lisa L |
|
|
Niamh O |
|
|
Gemma P |
|
|
Bev V |
 |
Tessa |
 |
Katra K |
 |
Connie M |
Comments


You need to be a subscriber to post a comment.
Please Log In or Create an Account to start your free trial.
