Description
About This Video
Transcript
Read Full Transcript
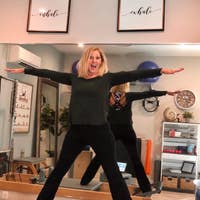
Hello, thanks for coming. I'm Rebecca Rotstein and we're going to be doing a class today that is safe for anybody with osteoporosis and as you may have seen in the other clip that we did where we talked about the protocol for osteoporosis, we're going to be implementing this today and you're going to notice that we're not lifting our head off the ground at all, but we're still getting a good workout. And that's something that is often put into question. So you're going to see that it's possible. So we're going to start off also using the magic circle though throughout the class and you're going to discover some new uses of the magic circle.
So it's good for anybody as well. So the first thing that we're going to do is locate our breastbone, also known as the sternum here. We're going to place the magic circle gently in front of the breast book. And I just want you to bring a little bit of awareness to this point. Now notice what would happen if you collapsed.
Notice what would happen if you arched your back. Now instead I want you to just gently press into the circle, widening through the elbows. Now inhale and exhale. Let's inhale and press gently and exhale, noticing how your ribs start to open to the sides. And exhale, and last time inhale. Exhale. Next we're going to locate our pubic bones. So we're going to press the circle just around the pubic bone.
Men Don't worry, or you're not going to get damaged here. Now I want you to gently pull with your elbows and release. Your elbows are going to reach back and release. And again, and you might notice a little bit of activation here through your core. So that little area between the pubic bone in between the naval pulling in and up, we're also warming up the shoulders a little bit last time. Now the basis of all our movement today, it's going to be from the hips.
So you're going to learn how to do that. Now with the hip hinge, you're going to bend your knees, keeping your back straight and bend forward. So the beauty of this circle here is that the circle is actually touching your thigh bones. If it's not touching your thigh bones, that means you're doing it wrong. So there's upper thighs should be in contact. There you go. And come back up. And again, hip hinge and back up. Last part that I want to bring awareness to after we've done the sternum and now the pubic bone is the head. So we're gonna gently place this ring behind our head.
Placing your hands in the front. Now be very careful everybody, you do not want it behind the neck. So I want it on the hairline, not on the neck. Now you're gently going to press forward into your hands, resisting with the back of your head and release and press and release. A couple more press. Let's exhale here and release. And last time, no, I'm going to have you look to your right ever so slightly and press
So next thing we're going to do is just a little exercise as well as a stretch for the elbows and the tissue around them. So you're going to gently squeeze just a little bit here. As you squeeze, I want you to stay tall and you may feel a stretch around your triceps and release and exhale, squeeze and release last time. Exhale, squeeze and release. One last thing. We're going to do a bow and arrow. So you're going to take your left hand, straighten that elbow out and pull with the right one.
This is called scapular stability. So we're working behind the shoulder blades here to help set the shoulder blades and the other side and pull. Yes, good. Aim for your target.
You're going to stand at the foot of your mat and we're going to take a step forward into a lunge, lowering down our back knee, placing your hands on your front thigh, if that helps. Now you're going to go on to all fours and now we're going to slowly slide down. So we're going to go onto our hip lowing ourselves down, stretching out that arm, and now rolling directly onto your back. You'll notice here that we have small little pillows and these cushions are here specifically to elevate the head. Now watch what happens. Remove the question for a moment.
Notice how it feels like you're having a little bit more trouble breathing. Place that directly under your head again. Now recognize is not underneath the neck. It's underneath the head, and now it's a little bit easier to breathe because we've opened up through that phrenic nerve, which allows the diaphragm to be introverted. And from here we're going to grab our circle. You're gonna place your circle between your ankles and Loring. Your feet down from here, palms are face down, knees are bent. We're going to do a couple of squeezes.
We're going to exhale and squeeze that magic circle one release. Exhale, squeeze to release. Exhale, squeeze. Three release. Exhale, squeeze four, release. Exhale, squeeze five. Now let's take the circle. Place it between the inner thighs and we're just going to do a quick five. We're going to go a little bit faster now we'll squeeze one.
Release two XL, squeeze three to release. Excellent. Now squeeze three. Release. Exhale, squeeze for release last time five. Now let's place the magic circle on the outsides of our knees. We're going to work the AB doctors as well as some of the rotators. We're going to open press and release and press open.
Keep breathing, release, press open, release, press open release. Last time, press open and release. Now remove that head rest for a moment. That little cushion or towel. We're going to do a couple of bridges and you're going to breathe in here. You're going to exhale. Press down into your feet and press your butt up into the air.
You're not going to come too high because I want you to focus on your glutes. Inhale here. Exhale, lower down, so we're going to speed it up. We're going to exhale. Push up one, inhale, lower two. Exhale, push up, lower down. Exhale, push up, lower down. Exhale, push up. Lower down last time and push up and lower down. Remove your circle. Replace the headdress, the pillow underneath your head. Again, remember it's the head and not the neck. We're going to bring in some abdominals. Now.
Take your magic circle and press one end against your thighs. Hold onto the other end here, pushing against it. Now we're going to breathe in. We're going to exhale and we're going to, as you do this, I want you to feel the connection into your core. Inhale, release it. Exhale and push. As you're doing this, feel that sense of almost zipping up from your naval to me, from your pubic bone up toward your navel. Exhale and press
Now place the circle against one leg and push and release and push and release and push and release and push and release. Let's switch legs and switch hands as well. You might find it's interesting which hand you choose. Two to favor and exhale. Push one. Inhale, release. Exhale too. As we're doing this and continue on, I want you to make sure that you're not flattening your back and you're also not arching it and two more points last time. Exhale and push and release. Now at this point, place your magic circle down for a moment.
Hands are directly by your sides. Inhale to prepare. Exhale, we're going to do a little mobilization of the pelvis. We're going to exhale, flattening the back, a little known as opposed to your, your tilt. Inhale, release it, almost arching the back now and exhale flat in the back and inhale, release it. I like to imagine as I'm doing this, that I have a little jellyfish resting on my pubic bone and that Jelly fish slides down toward my navel as I flattened my back and I inhale, release, and last time, exhale and inhale and release. All right. Let's grab her magic circles again. Let's bring one leg up into a tabletop position.
Now in this position here, we're in a neutral position of the spine as well as the pelvis, so in between those two extremes that we just did it in the pelvic tilt. From here, I want you to find that lower belly connection. Bring your hands up toward the ceiling. Inhale here. Now let's exhale and slowly lower one leg, part way down just for some many toe taps, but don't tap all the way down.
Inhale, float that knee back up. Exhale, left. Inhale, float it back up. Very slow, very steady. Exhale, right leg as it floats back up. There's a sense of softness within the thigh socket and left leg. Exhale. Inhale up now from here, lower both feet down.
Lift your arms out of their sockets, pushing the circle up into the air. Now drop it back down and lift it back up and drop it back down and lift it up and last time, drop it back down. Now with that sense of softness in your shoulder sockets, you're going to float your ring, your magic circle overhead behind you. Notice how you didn't have to shrug your shoulders and now returning, bringing the circle back up toward the ceiling. Let's bring in some breath. Let's inhale. Move it behind us.
Exhale, returning forward. Inhale, moving behind us. Exhale, returning forward last time. Inhale behind us. Exhale, returning forward. Let's combine motions now. Bring your legs up into tabletop. Feel that connection into the lower belly, into your core. Now at this point, move the circle behind you like you just did. Inhale without flaring your ribs. Exhale, return. Inhale, circle overhead. Exhale, return. Let's bring in a single leg. Let's lower one leg.
Moving the circle the same time and return. Let's switch legs. Other leg lowers returning. Make sure you're feeling that zipped up connection and return last time. Now continued to hold the circle here. You might start to shake a little bit.
That's okay. You're going to lower your right leg out to the side and bring it back into the center. Bringing a little bit more obliques. Left leg goes out to the side, kind of like a dog at a fire hydrant except upside down and the right leg out to the side and back up to the center, trying to make sure nothing moves in your entire back or so
Activate that hamstring and release it to stretch. Very nice and last time and release it to stretch. Let's switch legs and exhale. So why are we doing this? Part of it is to get that hamstring active as well as to release some of the hip flexor for the next thing we're about to do. And last time, push and release and stretch. All right, place your magic circle by your side. We're going to go into the classic PyLadies hundred.
We're going to do a version of this though with our heads down. So bring one leg at a time now up into tabletop to avoid the strain that sometimes occur at the hip flexors. We've done all this core warm up as well as engaging a little bit through the back of the legs. Now for level one, you can keep your feet here. Level two, you can straighten your legs and lower them down. And we're going to inhale for five counts. Exhale for five counts while we pulse. Inhale two, three, four, five and exhale, two, three, four, five. And inhale, two, three, four, five and exhale and inhale and exhale. And inhale, two, three, four, five and exhale. Two, three, four, five, soft ribs.
And exhale, two, three, four, five. Inhale and exhale, wide collar bones. And exhale, two, three, four, five, two more, two, three, four, five. Exhale through the mouth. Two, three, four, five, last time, two, three, four, five. And exhale, two, three, four, five. And relax. Now stretch both legs out in front of you. Bring your right leg up toward the ceiling.
We're going to do single leg circles. If you'd like and your hamstrings are tight, you're welcome to bend your bottom leg. Inhale, to prepare. We're going to cross over our midline for the circle. Exhale, lower down. Inhale around and up. Exhale, lower down. Inhale around and up. Exhale, lower down.
Inhale around and up. Let's do two more. Exhale and around last time. Exhale and around and let's reverse it. Exhale around. Inhale up wide. Collarbones, soft chest and three more and too, and last time and let's switch legs. Flex both feet for a second and now point them again. Inhale to prepare.
Exhale, cross your midline and over and around and up. Exhale, over and around and up. Exhale over, around and up. Notice what happens through that, Ben, or excuse me, the straight leg that's along the ground. Notice how it's active. It's gently pressing down into the ground and now we're going to reverse it.
And now around and up and down and around and up. Exhale, down and around and up. Two more. Down and up and last time down and around and up. What's the lower the legs for a second? Nope. Let your knees fall away from each other and then returned back together and fall away and returned together and fall away and returned together.
Now we're going to go into the single leg stretch. You're going to bring your legs up to table top again. Now instead of nodding and curling up, what we're going to do is keep our head down. Let's straighten out our right leg in front of us and we're just gonna gently hold on to the left knee. Now we're going to exhale and switch. Excellent switch. Excellent switch.
Excellent switch. Excellent switch and relax. Grab your circle. Now. Place your circle against your left thigh and bring both legs up into tabletop. Okay, now stretch out your right leg and push. Now move the circle to your right leg, straightening out the left leg.
Excellent push. There you go. Switching legs. Exhale, push, exhale, push. Exhale, push. She should feel your abdominals by now. Exhale, push. Exhale, push. Last time. Exhale, push and relax. Let's do double leg stretch. Now with our circle, bringing both legs up into tabletop. Let's straighten her arms behind us and straightened her legs in front of us. So we're not going to move our arms around. We're just going to bend the knees and bring the circle forward. Inhale, lengthen. Exhale, bend. Inhale, lengthen.
Exhale, bend. Makes sure that your back is not arching. You can maintain that neutral spine of a neutral pelvis position, but that does not mean that your ribbon does pop off the ground. And last time, inhale and exhale. Relax your legs down for a moment.
And we're going to bring the legs right back up. We're gonna do a little version of single leg pull. So you're going to straighten both legs up toward the ceiling. Lower your right leg and try and just without your hands are in one like closer to you. Now use the other leg. No this time take your circle, bring it up to the foot.
That's toward the ceiling. Pull, pull, switch. Other leg pole pole switch. Let's do with flexed feet. Po Po switch, po Po switch, pull, pull, switch. You might notice that you get a little more stretched. This way you have a little more support for your back. Last time. Pull, pull. Exhale, pull, pull and relax.
Very nice. Now let's flip over onto our stomachs. We're going to do a little bit of Swan here. You're gonna have your forehead down directly on the ground. Yeah, no towel. Exactly. Now your hands are going to be placed directly next to the chest.
Elbows are hugging the ribs. Pubic Bone, which we located at the very beginning of the class is press down into the mat. Now float your hands off the mat and lower them down. Feeling the nice little squeeze between the shoulder blades and float them off the mat again, making sure that your elbows are pointing toward the ceiling. Yeah. Yes, and lowering down and floating up. Lowering down. Now this time float your hands up and hold them.
You're getting a little middle trap engagement. Now let's flip the head. Continuing to look down, but the head merely floats off the mat. Lower the head, lower the hands, float the hands. Float the head. You might feel again like you're creating a double chin. That's okay. Lower the head. Lower the hands. Float the hands, float the head. Hold it. This is a wonderful, wonderful exercise for posture. Lower the head. Lower the hands.
Last time. Float the hands. Float the head. No. This time press your hands down into the mat to come into a little cobra or swan rising and slowly lowering. And again, let's push up a little bit higher. This time. Elbows remain hugging the ribs, lowering down. And last time, rising up. See if you would come up higher.
Inhale, nice full breath. And exhale slowly lowering down with your elbows, hugging your ribs so that you retain that activation through your triceps. Alright, let's now prop ourselves up on our elbows. Clasp your hands, elbows, or just a little bit wider than your shoulders. And your gaze is going to remain directly in front of your hands.
So we're going to warm up the shoulders first. You're going to sink second to the shoulder blades and now lift up out of them. So it says if the heart drops as you sink and then you rise up, the heart floats up between your shoulder blades. Very nice and sink and arise. And last time. Sink and rise. Now stay in this lifted position as we go into single leg kicks.
You want to retain this activation through your shoulder blades, through the lower belly. And then we're going to bring in movement through the legs. So we're going to kick our right heel, two bar, but twice. Kick kick. Lower it down now left leg kick kick. Lower it down, kick kick. Lower it down, get kick. Lower it down. Alternating sides.
You're going to face away from me here. Now press that pubic bone into the ground. We're going to kick our heels here about twice. Kick kick, lower down. Now without using your arms, you're going to use your upper back to float your head up and turn to the other side. Kick your heels here, but twice. Kick kick, lower down. Float up. And now look to the left again. Kick, kick, lower down. Float up. Look to the right kick, kick, lower down, float up. Look to the left.
Now let's bring our hands behind our backs. So resting on the sacrum. We'll try it here. Kicking the hills to the about twice. Kick lower down. Now stretch your elbows. Look straight in front of you, maybe slightly further down. And now look to the right. Kick your heels to your butt twice. Kick, kick, lower down. Lengthen and rise into extension and look to your left last time.
Kick, kick. Lower down. Find a connection through your cords. You rise to protect your back. And last time looking to the right kick. Kick lower down and rise up and relax. Let's now sit and we're going to go into a version of spine stretch here, placing our circles directly in front of us. Now if you find that you tend to slouch because your hamstrings are tight or your hip flexors are tight, you're welcome to sit up on something taller to reduce that angle at your hip because you want to make sure that you're seated. Very Tall, nice and upright.
We're going to breathe in now for this version of spine stretch. We're going to exhale and just hinge forward at the hips. If you want, your knees can bend a little bit if that helps. Keeping the back straight, very nice and returning back up and exhale, reach in hell and it actually becomes more of a hamstring stretch. As such and returning back up and last time and returning back up, we need to do an interesting version of saw. So one of the things that we know that we want to watch out with with osteoporosis is a curving forward of the spine or the back known as spinal flection. With rotation, what I want to encourage is more extension. So we're going to take our right hand and we're going to inhale and open it as we open our chest so that you come into a slight bit of extension and returning and inhale,
Bring their feet slightly forward at a 30 degree angle. Now you're going to press down through your bottom foot in order for the top heel to rise. Where do I do some of the side leg series or leg kicks here as I should say, and lower down and now up and just see if you could balance right here for a second. Notice what's required. There's a lot of Gluteus medius work here that's happening as well as some core stability and lower down. Now take your circle, place it in front of you, lift that top leg, and we're going to go directly into some front back leg kicks. You're going to exhale forward.
It's much more challenging than it would be without the circle. If it is too challenging, you're welcome to not use the circle and just placed your hand directly in front of you. Inhale to lengthen behind you. Exhale forward kick, kick, inhale to reach behind you. The challenge in this is how not to counter lever. So the circle gives you a lot of information in your body if you're cheating, because if you're cheating, you'll see the circle moving. Keep that circle still and last time forward kick, kick.
Inhale, lengthen back behind you. Now we're going to go up, down leg kicks. You're going to turn out and you're going to point that top leg toward the ceiling as you kick, lift and lower down with the heel. Point the toes up to rise. Lower Down with the heel. Point the toes up to rise. Lower Down with the heel. Let's do two more. Lower Down with the heel and last time and lower down with the heel.
Let's go into some circles. Go back into parallel here. Let's do five circles. Five, four, three, two, one reverse, and five, four, three, two, one. Now let's take the circle. Place it between our ankles. It's a little bit tricky, but now you're going to lower down on your side here. Now we're going to bring in some inner thighs.
Inner thigh work is very important with osteoporosis, as is outer thigh work. So we're going to squeeze one and up and squeeze two and up. Notice every time you squeeze there's a sense of rising of the belly underneath the ribs and four and last time five. Now press down into the hand here, or level two. You're welcome to take your hand up toward the ceiling.
You're going to lift both legs up and lower down and lift both legs up. Now see if you can avoid crunching of the waistline and instead reach out through your legs so it becomes much more supportive on the oblique side that is against the ground than just a crunching of the side that's toward the ceiling and last time up. Now rotate that circle. Keep zipped up and relax. Take the circle, place it in front of you and bring both legs in front of you here. So we bend the knees, I should say we're going to do a couple of clamshells. We're going to lift the top knee up, lower it down and up.
Lower it down. Now be cautious as you lift the knee. That hips should not roll back so you can put your hand on your pelvis. To make sure that there's no rolling going on, and two more and last one. No, straighten that leg out. Turn it in. Now return it back and turning out.
Turn it into straightened slightly behind you. Turn it out to return into the clamshell position. Two more reach out behind you. So we're getting all sorts of different directions of motion through that hip joint, which is really pivotal for our bones and back in and last time out and back in. Now bring that leg forward and straighten it and get a little stretch through the back of the leg as well as through the hip here.
Bend the knee in. Pull it in closer to you and see how you feel the stretch through the whole Piriformis and glute complex here. And we're going to push ourselves up into a moment for teaser. You're going to face me. We're going to hold onto the back of the thighs. Now instead of doing a full teaser, what we're going to do is stretch one leg out.
We're going to make it a balanced right, your size and back in and stretch the other leg out and back in. Feel that connection in the low belly. Don't arch your back too much or else you will strain it. Now let's try both legs. Woo. And in. Don't you feel like a little baby in a carriage? They go, ah, and in last time and now let's gently lower ourselves onto the other side so we have a nice fluid transition, hopefully. All right, so our legs are slightly forward.
30 degree angle just to warm up. Notice what happens when you lift that top leg. Take your hand up into the air again, be aware of the connection pushing down to the ground. That's going to help stabilize your pelvis. That's going to also help you connect into your core and lower it down.
Once again, just lifted up and lower it down. Grab hold your magic circle again. Level one, the option is just to have the hand on the ground. It's more advanced with the circle. Bring your leg up. We're going to go front, back, leg kicks and kick forward twice. Kick, kick point the toes to reach behind you. Exhale, forward kick, kick pointed toes to reach behind you. What you may notice is as you kick forward, you push down on the circle to help you stabilize. As you reach it behind you, you try to avoid pushing on the circle.
If you pull the circle, you will fall. Do two more here and last time. Exhale, forward kick, kick. Point the toes to reach behind you. Lower the leg. We're going to go up, down leg kicks, turning out. Point the toes up. Flex the foot to lower. Point the toes to rise. Flex the foot to lower.
Point the toes to rise. Flex the foot to lower again. Point the toes to rise. Flex the foot to lower. Now let's go into the circles turning in and five small circles. Four, three, two, one and reverse and five, four, three, two, one. And from here we're going to go place our magic circles directly between our ankles.
It's a little tricky to get it in there, but we're going to do a couple of squeezes so we're going to squeeze and release. Squeeze release level too. If you'd like. Bring your hand up to the ceiling and squeeze and release. Last time. Squeeze and release. Left, left. Let's lift both legs and lower and lift both legs. Again, make sure you're not crunching or hiking up through the hip of the side that's facing the ceiling. Lengthen out through both legs and too. And last time, and I'll stay up in the air and let's just move back and forth.
So what's moving? What's not moving? The hips are moving the pelvis, the spine is staying quiet and lower it straight down. Good. Remove your [inaudible]. Cool. And we're just going to do our quick set of clamshells here. You're going to lift the knee and lower and lift, and Lord.
Now make sure that your feet are slightly in front of you. It changed that little subtle change changes totally the angle of the hip and changes the activation of the muscles. So it's amazing what a small change can make. And now we're gonna straighten that top leg out behind us. Turning it in. It's almost as if you're reaching your, the sole of your foot to face the ceiling.
And now we're going to bend it in into a clam shell position. So we're gonna rotate, turning it in to length and behind us. Rotate it out to bend in. Two more. Rotate it in to reach behind us. Rotate it out to bend in. Last time, reach and in.
Now we're going to sit up and we're going to do one quick thing on our stomachs. We're going to place, actually we're not gonna use our circles for this. We're just going to go into a quick exercise of grasshopper. Place your underneath your forehead. Press your pubic bone down into the ground.
Bend your knees and your heels. You can imagine, have on them resting a glass of water or a glass of wine if you prefer. And you're going to press that glass up toward the ceiling while you press your pubic bone down into the ground, squeezing your glutes and lower. Exhale, squeeze. Staying out of your back and lower. Exhale, squeeze. Flex those feet so that yes, so that you rest that glass on them. And two more. Squeeze and lower. Last time, squeeze and lower. And we're going to do swimming here. Bring both arms out in front of you.
Just a quick preparation. Reach out through your right leg. Reach out through your left arm, lower them down. Reach out through your left leg. Reach out through your right arm, lower them down. Float up through your head like we learned earlier. Reach out through your hands which out through your feet so they float up to like you're a marionette doll being pulled in all directions and we're going to go into swimming, flutter, kicking and moving our arms and ten nine, eight, seven, six. Feel the width through your shoulders. Feel the activation through your low belly. Three, two, one and push yourself up onto all fours.
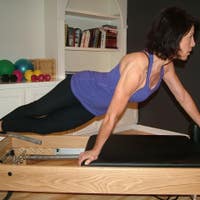
Sit back for a moment and now shift your weight forward and shift back and forward and shift back and forward. Now from here and knees are directly underneath you. Stretch your right leg out behind you. Stretch your left arm straight out in front of you. Careful of the dingling head syndrome.
Good so that you float up through your throat looking downward and other side. Lengthen out through your left leg, out through your right arm. Stay switch sides. Once again, out through your right leg, out through your left arm level to balance on your knee here. Switch sides out through the left leg out through the right arm level to balance on your knee.
Tuck your toes into a plank position for a level one option. You can just simply be on your knees. Level two, you're going to stay here and you're going to stretch your right leg out behind you. You're going to point the toes to push yourself forward. Flex the toes to reach back, point the toes and switch legs left leg out and point the toes to propel you forward. Flex to reach back and point and lower down and bend your knees and we're going to stand up. I'm going to just readjust this for one moment if you'll excuse me.
Notice how your head can float directly over your shoulders, your shoulders directly over your hips, your hips over your knees, and your knees of your ankles. And slowly let your hands drop down. Look to your left. Look to your right. Open your arms and back down.
And thank you very much for coming.
Bone Health: Osteoporosis Safe Workouts


Comments


 Thank you.


Thank you so much Rebekah. I can't wait to do another osteo class hurry back!
You need to be a subscriber to post a comment.
Please Log In or Create an Account to start your free trial.
