Description
About This Video
Transcript
Read Full Transcript
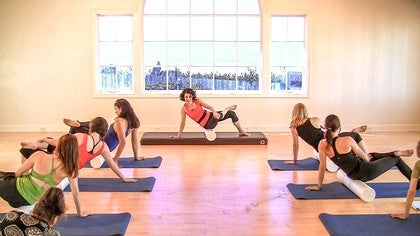
So we are going to begin today with the foam roller class. And the reason that I wanted to do a foam roller class is that people always ask when I give them whether it's in a class or whether I give them as private clients exercises to do. So I thought what a great thing to just have something to send people to instead of saying here's some exercises you can try and do. Um, also because personally this has been this along with the tennis ball have been my best friends for over a decade now. I travel with a roller, a miniature version, but it is such an important part of my life and my body. Um, so what I'm going to be doing with you guys are things that I actually do for my body and things that have made such a huge difference for me. So we're going to begin with rolling out some of the connective tissue and there's different ways that you can go about ordering your foam roller workout. Um, I'm going to show you what I do. So we're going to start with the it bands, remembering that the it band is a band of connective tissue that runs along the side of your legs and it's going from the hip flexor, that TFL muscle as well as from the Gluteus maximus down into the knee.
And if you've had the good fortune of doing a cadaver dissection, you're familiar with how ridiculously thick and adherence this band can be. So it creates support, but it also can create a lot of problems if it adheres to say the quad or if it adheres to the hamstring. Um, and there if you get adhesions, so to speak, so it can wreak havoc on your body as well. But we want to love it and we're going to show it some love now. So we're going to start off. Um, I'll have you guys all facing me and the best way that I have found is to start lower down on your mat. So in other words, farther away from me because then you're going to have a place to move to and you won't have to reposition yourself later. So we're going to start by finding the greater trow canter, which is that big point, that big, uh, projection, not at the very top of the pelvis, but down at the top of the thigh bone.
And then you're going to lower yourself down onto your bottom elbow. And so you're just below that projection. Now take your top foot and place it in front. So that that's going to be your anchor from which to move. Now you're slowly going to roll yourself down so you're rolling down the thigh and then we're going to slow Lee return up.
So I see people do this all the time where they go up and down, they say, I don't feel anything. But if you go very slowly, you allow the changes to happen. There's something called fixit tropey, which is the property have the ability to change from a Gel lake state to a more fluid state. And this is what happens in connective tissue and movement can create that pressure, can create that. So what we're doing is we're literally changing the property of the connective tissue here slowly up and down, and you never want to go onto the knee itself. Okay. So we're just staying on the thigh now. If you want more pressure, lift the top leg up.
So it's not a balance exercise, it's just you're reducing the base here and you're also increasing the weight and the force. And I want you to end where your backup at the hip. So it's almost as if we're also returning the lymph up toward the lymph nodes there. Now you're going to rotate your body a little bit. So now you're on the lateral or the outside part of your quad. Yeah, yeah. And the other thing I want you to do is breathe. And I should also mention, if you find a place that's particularly sensitive, don't force it.
You can either back off or you can pause there and see if you can breathe into it and see if you can release. Because the more you fight it, the more you're just battering up your tissue. But if you can yield to it, then the tissue will also, we'll yield and now we're going to rotate a little bit further so that we're now more on the quad itself. If you're like most people, you're tighter on the outside of the quad than you are on the inside of the quad, and especially women tend to be more dominant on the lateral or the outside quad and weaker on the inside, which is where the VMO is. And now we're going to go onto both sides. So we're offloading a little bit, but you may experience a little bit here. There's just a little gentle lift through the low belly and sometimes people really feel it here. Sometimes they don't feel that much, but you're also getting a little core engagement, which is nice because you're not completely sinking into your belly.
And now we're going to try the other side, so you're welcome to just flip it over onto your other side. I'm going to turn just so that I can keep an eye on everybody and so it makes sure that you start with your roller closer to the base. So farther away from me and we're gonna go just below that point on the top of the Femur, the greater crow trow cancer, lowering yourself down onto your bottom elbow. That's always something that people get confused about. So Yup, you guys look great. I'm just clarifying when people are up here, you're changing the force and you're changing the angle. So if you lower yourself down into the elbow, you'll feel better.
And remembering that that top foot will stay down. That's your anchor. That's what's giving you the direction to move. And then as needed, you can move that bottom elbow. You also have another option of trying to internally or externally rotate at the hip here at the one that's getting rolled out. Cause that might also change a little bit of the force or the angle and the pressure. I have to admit that I do this probably once or twice a day and my body loves it, but it's what keeps me, keeps me sane and keeps my body going.
I think you can. Yup. I think that it's possible to overdo it. Um, I think that, you know, just about once or twice a day is about enough, but I would not recommend that you're doing this continuously over and over again. Um, and you also want to make sure that your body is capable of sustaining it. If you're, if you feel yourself resisting or you feel that the pressure is too much, you might want to use a lighter roller, or you might want to just go into it a little bit more gently. It might not be ready for it yet. And so now when you're ready, you're going to start rotating your body closer down toward the ground so that you're starting to face the ground a little bit. So now you're on the outside or the lateral quadricep. But again, it's so hard to distinguish because this is called myofascial release for a reason, mio meaning muscle fashion meaning that connective tissue, and to really distinguish between the two, whether you're getting the muscle where they're getting the connective tissue, it can be very difficult because remember, this Fascia is running around the muscle. It's running through the muscle, it's embedded, embedded. It's running into the bone, it's running around your organs, it's lining your cavities, it's everywhere. Okay. Now when you're ready, you're gonna get directly on the quad itself.
So you're going to get a little bit more of the center quad. And so if you want, you can go onto both thighs again. And this center quad I have found for my own body has been a real challenge because the center quadricep member, there's four parts of this muscle. The rectus for Morris is the only one of your quads that crosses your hip joint. So it's also a hip flexor.
So it can also be something that can wreak havoc if it's not contracting properly or if it's overly contracting. All right, enough of that. So go up onto your knees for a second and just rock side to side. See if you feel the difference for me. I do. All right, so now we're going to do one that I find people don't do much. And this is the inner thighs. I have come to the realization over the past, I'd say two years that the inner thighs have a very under recognized and under appreciated role in the body again for support.
So there's a huge amount of support for the pelvis that occurs, but also for the problems that they can occur in inhibiting the gliding of the hips and especially the pectineus muscle can be very, very challenging and very problematic in terms of creating problems in terms of um, restricting motion at the hip and then therefore causing some back and knee problems. So I'm going to show you my, my method of rolling it out to everybody. Let's do this. Let's have your heads on the inside of your mat. So your feet will be over there and you're going to place your roller directly in front of you. And I usually like people to place the top of the roller around the shoulder chest area and you're just gonna rest your top thigh over this and it feels kind of good, right? So part of the reason is this is giving a little release to your sacred ILIAC joint. So it's aligning your pelvis and it's aligning your hip.
So notice that your knee is now in line with your hip here. And that's part of the reason this feels so good. So this is almost like a body pillow when people sleep with a body pillow. So you're going to roll forward and roll back. So notice where the motion's coming from.
It's actually coming from your pelvis here. It's coming from your spine as well. So you're mobilizing a little bit through that Essa. You're mobilizing a little bit through the lumbar spine. And on the last one forward you're going to extend your knee. And now rolling back and rolling forward and rolling back and rolling forward and once more rolling back and rolling forward.
Now let's move it up to the very base of the pelvis. Oh my gosh, I feel it already. So this is all the way up where the abductors, these are the adductors, the inner thigh muscles where they come and meet the pelvis. And so see if you feel that little bit of pressure there for myself, this helps quite a bit. So now extend your knee and now internally rotate the hip and externally rotate and internal and external and internal and external. Now prop yourself up on your elbow and then roll forward and back. See if you can feel that pressure. I would say about 90 something percent of the time that I have a client that has something going on with their knee, and I'm not talking, you know, a an ACL tear or a meniscus tear, but something that is, is not diagnosed, but they're having some news comfort or they feel some knee pain as soon as the adductors are released, and especially also the Chrysalis, which is the adductor muscle, that's the only one that crosses the knee joint is released.
It alleviates their pain. So pay attention to the adductors. So you have a couple options here. You could bend your knee in further so that you really increase the angle at your hip joint. Or You could decrease the angle at the hip joint. Again, see what feels best for you, so your knees either closer to your face or it's further away from your face. And now scoot yourself a little bit back so that you're a little bit lower on the thigh here. And we're doing this very slowly not to bore you, but because again, sometimes this fixed a tropey effect.
This change of consistency of the tissue needs time. So to go rushing through it, you often just defeat the purpose. Alright, now one last one just to prove a little points here. Go all the way to the base. I should say the distal end right above the knee of the thigh.
And now put some pressure on that. See how that feels right for anybody who might be watching this class? Unfortunately they can't see the groans and the faces that I can see right now. Okay. Now just to prove the point in case I haven't already stand up for a second, I want you to check the medial glide and your hip now. So you're going to widen your feet here.
We're going to go to the side that we did not do yet. So in other words, you're going to bend toward the side that you just worked. So you're going to feel the tight hip, the hip that wasn't worked. Now let's go to the other side. You're getting the feel of the side that you just released. You're getting what's called a medial glide in your hip joint, so that femur bone every time the other end, so say your foot goes out to the side.
This femur bone has to excursion inward and you have just enabled that excursion to occur. All right, so let's do the other side so that I don't leave you feeling like quasi Modo.
It just changes the positioning. So for this point moment, let's keep our foot on the roller and rolling back
I know, straighten your knee and bend it. And what you may feel is that typical gripping that often happens at the base of the pelvis where the thigh bone just is adhered. It feels like in my body, often to the pelvis where I'm not getting the proper motion and gliding that I'd love to get. And then just do one more and back. Now, one other thing you can do is internally and externally rotate at the hip. So you'll notice that my foot is spinning, but it's not coming from the foot. It's coming from the hip joint where the thighbone comes and meets the pelvis.
Yeah. And again, you also have an option of going a little bit higher with the knee if you'd prefer. And let's roll it away just a little bit. So we're a little more in the middle of the thigh and now I'll let you choose which was your favorite to do. So whether it's the internal or external, whether it's the rolling forward and back, whether it's the bending and straightening of the knee or maybe you want to do a combination of all those. And last one. Alright, returning. Last thing we're going to do here is go all the way at just above the knee and go up onto your elbow and feel some additional pressure there as you go forward and back.
Okay. So let's start getting a little bit with the upper body now. So we're going to start with the upper back. You know, it's, it's in Pele's we talk, um, well depends on on which approach or what type of training or what type of bodies you have or you're working with. But we often are, are talking a lot about stability and stabilizing. And there's also an important mobilizing component because you can't have stability without mobility. You can't have mobility without stability. So for instance, if you don't have enough mobility in your hip joint, you're going to get too much of it up or down the chain. So either something going on in the knee or at the sacred ILIAC joint or the lumbar spine.
So very often people are lacking stability in their lumbar spine and we're talking about all the core control and such. But if you don't release another area that is it causing adherence or adhesions, then you're not going to get the necessary stability. And vice versa. If you only focus on the stability, you're not focusing or you're ignoring the tightness, which may be the root of the problem. So it's a good idea to always pay attention to both. So I want you to come around the back of the bra line or you could think of it as the very bottom of your shoulder blades pleasing your hands behind your head here. Feet are hip distance apart and planted on the ground, you're going to lift your butt and we're gonna roll along the length of the rib cage, not going onto the neck and not going onto the lower back.
So let's just stay at the mid back area and going up and down. And you may feel a little bit of pressure depending on how tight it is in the back. But what we're doing is getting some mobility through those fossette joints especially, and also just through each vertebra, or I should say between each vertebra. I want you to focus on taking a deep breath in. And if you feel a tight area, Xcel, and perhaps you might want to drop your butt there, maybe that's an area that we can help mobilize.
And so the idea is I don't want you to go up and down like this because that's really counterproductive. It's not gonna do much for you. Now at this point here, lower your butt while the roller is at the base of your shoulder blades. Inhale, lean back, widening your shoulders, widening your elbows, and exhale, rise up again. Uh Huh. Now lift your boat once more, rotate toward me so that you're on the side of the shoulder blade. So anybody who has had shoulder problems will find that this might be extra sensitive, but it can also be very, very effective.
So you're getting on the inside of the shoulder blade and you can rotate even a little bit more if it feels particularly helpful. I'll tell whenever I do this, sometimes I get a good mobilization through my back and spine just because of the shoulder blade. So sometimes the connective tissue can be adhering and that can be causing problems through the spine or through the arms. And now let's try the other side. Oh my. So again, right now we're just focusing on the length of the Scapula, the shoulder blade, and we're on what we call the medial border, the border that's closest to the spine.
But if you'd like to rotate a little bit further, going a little closer to that lateral or outside border, you're welcome to do that as well. And let's come back into the center. And now let's stay lifted. Here. We're going to be at the top part of the shoulder blade. I want you to lean back. Inhale and exhale.
Drop your butt and notice how you can teeter totter so that your head rises. So we drop the head while we lift the butt. Inhale and exhale. Drop the butt and the head rises. And once again dropped the head, lift the butt and exhale again. Drop the butt, lift the head.
Let's now push ourselves a little bit further away so that the roller goes a little lower on our shoulder blades. Let's do the same thing here. Drop the head, lift the butt as you inhale this time, exhale, drop the butt and the head rises. So we're not really articulating through our spine. We're moving our trunk and our head is one piece, but we're getting some hip extension here and I'll let you breathe at your own pace. Dropping the butt, lifting the head, and one last time, lifting the butt, dropping the head, and last one, dropping the butt, lifting the head. Now keep the butt down. Inhale, lean back into back extension. Exhale, drop the chin, soften the ribs.
Just to come up to neutral so we're not doing a full chest lift and inhale, leaning back. Exhale, let the dropping of the ribs propel your movement so you drop the Chin as well so that you don't jump the chin forward. And overstrain your FCM, your your big neck muscles here. Inhale, lean back, arching. Exhale, drop the ribs. With that help you and notice how you'll start to feel a little work through the front of the neck here. And this is a different area. This is called the longest, Cole I, these are the deep neck flexors as opposed to these ones on the sides, which would jet your Chin forward last time. Inhale, lean back. Exhale, drop the ribs, drop the chin. Okay, so we just got a little warmth created through our center.
I'm going to show you another one of my favorites. This is for the arms. So one of my favorite stories from cadaver dissections is discovering that I couldn't lift the limb, the arm of one of the bodies, and it couldn't figure out what the restriction was. Obviously there's no muscle tone, there's no nerve impulses telling it to stop moving. And it turns out that it was the Fascia, the connective tissue that was surrounding the Terese major muscle, which works, uh, as a force couple with the lap. So like every time you open a door, that type of movement, and as soon as I snipped it, which I would not recommend you doing your own body, but as soon as I snipped it, all of a sudden there was restored range of motion.
So ever since then, there's a couple of years ago. Ever since then, I'm obsessed with releasing the whole axle area, right? So I'm going to show you my method of doing this. You're going to rest your arm pit on the roller and bend your knees, take your top foot and place it in front of your bottom ankle. You know what if we, well, what do whatever is best for you guys. Yeah, if you guys want to flip around and would probably be a little bit easier.
There you go. Now place your hands behind your head.
You're also coming out towards some of your rotator cuff muscles. So the famous infraspinatus Antares minor muscles are right around here. All right, enough of that. But before we go on, just move your arms. Notice a different side to side. And what is this doing? It's allowing it's urge, restoring the range of motion of your Scapula, your shoulder blades, so that lift one arm up overhead here, and then lift the other mop arm, arm up overhead. Every time you lift your arm up overhead, there has to be an upward rotation or a movement through your Scapula so that movement can be inhibited by this connective tissue. So this is a good way to get your arm up overhead safely and a, we're now going to go into the Tricep, which is my other secret weapon. Uh, you're going to go onto this part right here of your arm and rest of your head on your arm.
So basically your head is rested on your bicep and I like to just bend my knees. There is no real correct position here, but you're just going to go up and down. So we're going to start with your palm facing forward.
Now flip your palm so that it faces the ceiling. We're getting a different head of the tricep. All right. And once again, feel the difference. So this is part of my secret weapon of helping keep my body seen and functionable. So let's try the other side. So we start off resting in the armpit and the top foot, both knees are bent, the top foot is, is in front of the bottom. Ankle. Hands are behind the head and you're going to lift your butts slightly so you're not going all the way.
Oh yeah, don't go too low onto the rib cage. I was going to demo what not to do, but it hurts too much so I won't even, I'll just say it. So again, you're not trying to be on the rib cage, you're just trying to be on the side of the shoulder blade and in that armpit area. And again, sometimes people will feel a little a sweet adjustments that can occur here. Like I just did. I don't know if you could hear it through my mic. Now when you're ready, rotate yourself just a little bit toward the ceiling and go up and down there and you can even go a little bit further if that feels good.
So just see where what your body's asking for. Listen to your body. Don't force anything when maybe it feels better to be slightly forward here. So now we're going to go onto the tricep. So you're going to stretch your arm out, rest your head on your bicep here, and just go up and down first with your palm facing forward. So the motion is actually happening at the hip joint, right?
It's almost as if my knees or my hips start to link the note and then I flex inward. Oh Wow. So this would be from carrying luggage yesterday. I don't know what your excuses. And now as we end it where it's closer in toward the iron pit, let's now have the palm facing the ceiling. Oh Wow.
For any of you folks who might have hypermobility and hypermobile shoulders. This is a really good thing as well because it also releases some of the area that may be adhering and preventing, um, other proper firing. All right, so let's now sit up. How do you feel? Okay, oops, that's my roller rolls away from me. That's the one thing to be careful of. All right, so now we're gonna lie on our rollers lengthwise
Usually your body will tell you because you'll fall off. So it's usually a clear indicator. So I like to take a moment here at the beginning just to let everything settle in because you're on an unstable surface. Pick a deep breath in
Now just try this. Widen your knees like little windshield wipers and exhale, slowly narrow them. Inhale, widen. Exhale, slowly narrow. So thinking of what we were just doing a little while ago, you, Emile, the knees, and rather than just jamming your knees forward to close them, think of your hips widening while your knees narrow and inhale, the knees widen and the hips narrow. Exhale, the knees narrow and the hips widen. So if you can think of it that way, it might change the engagement and the firing of the muscles.
And once more, inhale, knees widen. Exhale, knees narrow. But hips widen. Okay, bring your arms out to the sides. I have a little bit of an advantage being on an elevated surface here, so I'm getting quite an additional stretch. So we're stretching not only the PEC muscles, but the connective tissue that surrounds them and also the connected tissue that then extends out into the arms and down into the fingers.
People with nerve issues can sometimes find release and relief through this, but again, if you have a nerve issue, you don't want to exacerbate or overdo it. So flip your palms down to face the ground. Since that spiraling, that can occur so that there is a natural spiraling through the bones, but there's also a spiraling throughout the connective tissue here. Now imagine you're a marionette doll and being pulled in either direction by your hands. Drop Your Chin to make sure you're not compensating by lifting.
If you lift your chin, you're going to avoid the stretch, so be sure that your chin is slightly dropped. Flip your palms up toward the ceiling and float your hands back up toward the ceiling just like we did a moment ago with the thighs. Your arms are going to open out to the sides. Now as your arms return up toward the ceiling, your shoulders will drop and widen in the sockets, or I should say your arms will drop and widen in the sockets and bring your hands out to the sides. Again. Inhale and exhale, floating the hands up, widening the arms and the sockets, and once more out to the sides and Xcel returning. Now puppet arms. Reach your arms out of their sockets and dropped down and reach up and drop them into the sockets.
Two more. Reach them up. Inhale and exhale, drop. And last time. Inhale, exhale, drop. Now we're going to do flow, what I call Flamenco, wrists, Zur from my days in Spain. You're going to remove your risks around. Now as you do this, I want you to slowly lower your arms out to the sides, keeping the elbow straight. Do you feel that connective tissue, so again, you've got nerves, you've got vessels running throughout this connective tissue and we want to free them up. And let's reverse the direction as we returned back up toward the ceiling. And now stay here for a moment with your, I want you to do a pelvic tilt. Exhale, flatten your back, imprinting your lower back into the roller.
Inhale, release, and exhale. What's lower? Hands down. This time, flattening the back. Inhale, release, and last time. Exhale, flattening the back.
This is going to be where the abductors can now help you. So we already removed the inhibitory portion. Now we're going to find the helpful portion of them so that your feet are planted into the ground. Your thighs are spiraling inward so that your knees shoot straight out directly from you. They don't veer outward from your hips. We're in that neutral position of the pelvis and it's almost a widening of the hips.
Find your connection until your lower abdomen and slowly float one knee up towards the ceiling and exhale, lower that foot back down. Inhale the other knee and foot float up and exhale lowering down and again, and XL floating down and last time up and XL floating down. Now this time, let's start with that first knee again. See if you can remove one or for more challenge. Perhaps even both hands feel the support of your inner thigh. I guarantee you that spiraling inward of your thigh is the key to this along with the entire core control of course, and lowering your hands down and let's try the other foot. Float it up so you're not yanking it.
You're allowing that Femur, the thigh bone to drop in the socket. Feel the planting of your bottom foot. Feel the support of your core. Feel the spiraling inward of your supporting thigh. Breathe and exhale, lowering your hands down. Do you guys feel the difference? The thighs are, the inner thighs are so useful for this. All right, let's sit off a ruler for a moment. Now, the next thing that I want to do is face forward and have your roller by your side here so that you can hold on to the outsides of your roller.
So just roll it back a little bit and roll it forward. Now if this is tight on your hips, you're welcome to either sit on something that's a little bit elevated or you can cross your knees or you can extend your knees a little bit. So you're going to inhale and exhale. So just to clarify, the movement is not happening at the hip joint. The movement is happening in the upper thoracic spine and returning forward and inhale and exhale forward. If you have a lot of range of motion in your shoulders, you're welcome to place your hands on the roller. And if you do that, you'd want to start out on your fingertips so you have a place to go into and inhale an exhale.
Inhale, feel that little lift. So we just did a little bit of a tiny bit of a core warm up so that you have a little sense of control and one last time, inhale and exhale. Now take your roller out to the side here and you can sit cross legged. I want you to place your fingertips here on the roller all the way so that your elbows straight and now rather than a side bend over, I want you to shift your ribs and returning back up. So again, it's not like I'm keeping my lumbar spine still and bending over word or over where I just created a word that I'm bending over that you're going to literally shift your ribs all the way and now you're going to feel a stretch through those obliques here and also through the connective tissue that also goes through. Your Iliac is through your pelvis and back up and once again, so you end up on the wrist.
And once again [inaudible] and again, uh Huh. Exactly. I have a lot of issues in my own body with that attachment. Uh, it's not really an attachment. It's the connective tissue just above the pelvic crest and this is something that gives me so much relief and back up. All right. Another thing that I'd like to do with you is have you sit facing the center again, city. I'm going to sit facing the other direction.
So you're going to sit here on top of your roller. I want you to find your sit bones. So those two boney projections, and if you feel unstable, hold onto the roller here. And Deborah, if you want to turn around, Oh, okay. Sorry I didn't realize your writing. And now I'd like you to move the roller forward so that your sit bones are in front of the roller and now move the roller back and move the roller forward and move the roller back.
This time we're going to move the roller forward by doing a little pelvic tilt. Now notice the pelvic tilt is not occurring above the ribs or from the bottom of the ribs. It's just by the sacred moving. So tucking that tail under, inhale, returning. And as I do that pelvic tilt, my sit bones are now in front of the roller and now I pushed my sit bones back and last time, exhale, inhale back. Now push the sip ons in front of the roller again. Reach your hand that's closest to me behind you. And now we're going to roll out through the glute and the rotators here going up and down. Yeah.
So for people who sit for long periods of time, whether it's at a computer or not, this can be very challenging or I should say this can become a compromised area. It's probably a better way of saying it. Now you have a couple options here. You can stay where you were, you can rotate yourself even a little bit further so that you get a little bit more toward the Gluteus medius and some of the other rotators.
People who have Sciatica can often find a lot of relief through this. I now keep your hands here. Cross the f so the foot, the side of the leg that we were just rolling, take that ankle and cross it over the other thigh and see if that changes anything for you.
So we already did the little pelvic tilt part, so we now want our sit bones slightly in front of our roller place. Your hand that's closest to me now on the ground. And we're going to roll out that butt cheek. So you'll notice that we're just staying on the meaty portion. And you'll also notice that that knee starts to veer out ord, which is fine because the more you veer it outward, the more you're rotating your hip and you're changing the angle and that's perfectly fine.
And you can go higher up if you'd like. But if you go higher up onto your, but just, you may want to lower your elbow down, you can also rotate even a little bit further. So this is different from what we did at the very beginning, because again, beginning we were lower down. We were on the thought, we're not on the thought. We're on the glutes rotators above the hip here, above the hip joint I should say. And now if you'd like, take the foot that is closest toward me and cross the ankle over the opposite thigh.
Okay? All right. So now let's do a little bit with some extension. Before we do this, is everybody on all fours placing your hands here on the roller. So I want you, when you're in an all four position, I want you to be careful of what I call the dangling head syndrome, which is this. So I want you to keep your head in alignment as if you're lifting up through your throat. You're also not exposing the throat, Jutting Your Chin forward. You're looking straight downward. So I want you to sit back, so we're not gonna move the roller now and then you're going to return forward.
So your roller is almost a underneath your shoulders and you're going to sit back, inhale and exhale, return forward. And inhale back. Exhale, return forward. And now this time go a little bit further forward. So you almost come into a hip extension, lifting through the low belly and leaning back again or sitting back and exhale, push. Inhale back. Exhale, push. Inhale, back wide sit bones. Exhale, push. And now sit back and let your head drop and see if you can feel the stretch.
So it's like a child's pose, but your arms or your shoulders, I should say, and are in a greater degree of flection. So if this is too much on your shoulders, you could always put a small pillow of some sort underneath your head so that it reduces that angle at your shoulder joint. Now inhale, come forward again. Exhale, sit back. Now you're going to curve your spine just a little bit, so just tucking the tail. Inhale, so it's not a full cat stretch. Exhale into extension. Inhale and exhale, push forward. Let's reverse that. Let's exhale, push back and inhale into action, attention and exhale, push back and in Helen extension, and now sit back once more.
Lower your head down and pull the roller in toward you. Bending the elbows. Exhale, push the roller away, letting your shoulders slide down your spine. Inhale, bend the roller or bend your elbows, bringing the roller closer in toward you and exhale, push the roller away. Again, it's really important to feel that sliding of your shoulders down your spine. It's the movement that we were talking about before. Once again, roller comes in. Exhale, pushes away.
Last time. You can think of almost a small lift through your throat as well so that you don't shrug the shoulders. Now stay here. Float your head off the mat so that your heart floats up in between your shoulder blades and now look slightly forward. Just a little bit of extension and exhale. Drop your head down and inhale, rise up.
Y collarbones. Exhale, lower down. Inhale, rise up. Exhale, lower down. Last time. Inhale, rise up. Now roll the roller in and exhale. Returning back down. This portion that we're doing right now is a great way for anybody who has stenosis or low lysis, bungalow life thesis. We call them the spawn. These. Anybody who has these issues in their lower back who is told not to do extension, this is a great safe way that they can get extension going through their upper back, but be safe for their lower back. So let's try it again. Inhale, you roll the roller in so that you end up on your fingertips. You exhale, you lower down, so you end up on the heels of the hand, inhale and XL. So those are, those are a little lift through your low as well.
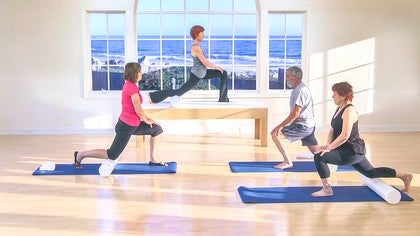
And last time inhale and exhale. So let's try this in a more challenging position. Again, if you have any of those conditions that we were just talking about, you may want to be cautious with this part. Now you're in a straight position from head to toes. We're going to start off here with again the heels of the hand on the roller. We're going to zip up, as I like to say, zipping up.
So lifting through the low belly in and up, pressing the pubic bone down into the mat and your, your hands are going to be just a little bit wider perhaps. Then your shoulders and you're going to eat. Inhale, float up. And you can come up as high as you want, as long as you don't feel any strain in your back. And exhale, lowering down, lengthening through your feet in opposition, away from your head. And Inhale, rise up. And exhale, lower down. Let's do one more coming up a little higher if you'd like, if you feel comfortable. So we're a little swan version here. Inhale and exhale. That felt so good. I want to do it once more and rising back up. Inhale.
So I'm pushing down through my fingers, which is also giving me a little bit of support from my shoulders and lowering back down. There you go. So we've got a little bit of work through the back here as well. Now I'd like to do a little bit of sideline. So you're gonna face me and you're going to rest your top ankle. I'm trying to think of what this appendages, your top ankle is going to rest on the roller. Eliza. Well let's, yeah, let's all have our be facing the same direction here. Okay. So you're going to lower yourself down here and you're going to pull the ruler in, and then you're going to push it away and you're going to roll the roller in and you're going to push it away and roll the roller in and push it away.
Now take that same side arm, that top arm up overhead. Roll the roller away, and I should state that your bottom needs bent. So feel that great. Stretch through your side. And now prop yourself up on your elbow. And I want you to bend the knee so that your knees are stacked and you're going to roll the roller away and bend the knee in and roll the roller away.
Bend the knee in. Roll the roller away. Once more, bend the knee in and roll the roller away. Now we're going to lift up and lower down. Exhale, lift up, lower down, lift up, lower down. So there's that lifted the low belly. Lift up and lower down. Now I want you to swing your thighs around to the other side and place your roller over there.
In and out. Last time in and out. Now we started to rise up and lowered down, rise up. So again, it's the lift through the low belly. It's not a crunch up. It's a lift and lower. Two more lift and lower.
Last time, lift and lower. All right, one other thing that I'd like to do with everybody. Lie On your backs. I'm going to lie the other way so that you can see me a little better, I think.
Look to one side, bring the arm all the way behind you. If you can, growing taller through your spine, and exhale, return it forward. Up and down. Let's switch legs. So you're standing nice and tall on that foot
So our inner ear in our eyes and lower down. Alright, thanks for joining our foam roller class.
Feel the Length: Roll to Release
Mention
 |
Rebekah Rotstein (Teacher) |
|
|
Monica W |
|
|
Pam K |
|
|
Keri |
|
|
Senada B |
 |
Kathrin Ress |
 |
Cindy |
|
|
Katrina B |
|
|
Tova A |
|
|
Natasha J |
|
|
Taina M |
 |
Katia B |
 |
Gia Calhoun |
|
|
Katy Lee |
 |
Pauline E |
|
|
Kathy J R |
 |
Sirena |
 |
Kathy Jo Parsanko |
 |
MKV |
|
|
Louise M |
|
|
Ebeneze V |
 |
Elaine S. |
 |
Karolina M |
 |
Kathleen M |
 |
Trisha Donnelly |
 |
Liz W |
 |
Christine D |
|
|
Esta M |
 |
mbrown |
 |
Marisa J |
 |
Kimberley P |
|
|
Angela N |
 |
Natalie I |
|
|
Anita H |
|
|
PJBuffa |
 |
Elizabeth D |
 |
Arlene S |
 |
Wendy C |
 |
Sue G |
|
|
Ros E |
 |
Gene D |
|
|
Yoly N |
|
|
Colleen F |
|
|
Patricia W |
 |
Betty C |
|
|
Madeline H |
 |
Jamie K |
|
|
Kirsty H |
|
|
CJ |
 |
Elsabe D |
|
|
Mary M |
|
|
Elaine F |
Comments


You need to be a subscriber to post a comment.
Please Log In or Create an Account to start your free trial.
