Description
About This Video
Transcript
Read Full Transcript
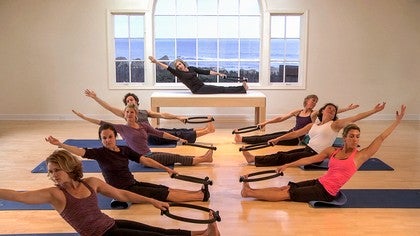
Good afternoon. We're going to begin our magic circle class. Um, before we start, one of the things I'd like to tell you about this course is that the magic circle, um, is one of my favorite pieces of equipment, but a lot of times we just use it by, um, just pressing it in or, or even just pulling it out. So this course as a lot of rotation and a lot of different movements that you probably have not seen or done before. So it's going to be a fun challenge and I hope you enjoy it. We're just going to start with standing and feeding in a comfortable position and then this light turn out on the toes and we'll just do a shoulder warm up. And in order to begin, we want to make sure we have the alignment.
We have a nice neutral pelvis. We have a length in spine. We make sure that the head is sitting directly on top of the spine and as we lift the arms center to the chest and as we rotate them overhead, we make sure that we haven't changed the alignment of the core, particularly our spinal alignment, our ribcage and our shoulders. So we're not allowing any movement to happen through the core alignment. We maintain neutral pelvis, we maintain the ribcage alignment and we rotating through the shoulder girdle so the shoulders not lifting and the rib cage position is not changing. We'll take a full breath and inhale it and exhale to come up and an inhalant axial to come down. Now the only thing we're adding is that as you come up, I want you to really pull out on the circle as you come down, push in on the circle as you go out, pull it out and open through the shoulder girdle and as you come down, push it in. Now let's reverse it.
Lift with pushing in and open it to come down and lift, pushing in and open to come down and lift. Push it in and open to come down. Let's bring our feet together. We're going to lift the circle center and lifted up over the head. Now find your balance and your core roll through the ball of the foot. Lift your leg up and press it over.
Now we're just on the ball of the foot length in the torso and stretch to the side away from your foot center. Exhale over and inhale up. Exhale over. Inhale up. Exhale over. Inhale up now over and pull out on the circle and turn the torso so the sternum goes to the ceiling. Turn it back, stretch more. Lift it, center and lift to stretch. Turn Center. Turn it back, stretch it out to come up.
Are you pulling out on your circles and turn to the ceiling? Turn it back. Push it out one more time and balance and over. Push it out. As you rotate it, reach it, stretch it longer and come back up. Pull out on the circle, lift the leg, find your balance, lower it down and bring the circle center and down right back up overhead. Drop the shoulders down, roll through the ball of the foot, pulling out on the circle. It helps you balance.
Lift the leg high and cross it to come over. Stretch away from the foot. It's oh where to come up. Same side over to lift and over Ab. Nice side stretches over and to hop. Now press it over and come from underneath the ribcage.
Come back to the center. Reach even more pulling out on your circles over and rotate it to the ceiling. Stretching back. Reach over up two more times, lanes in it and breathe with it. And Center. Remember that the circle stays directly over the center of your head. So as we go over now we take the circle with us as we rotate to the ceiling with us as we come back, rigid longer to come up and lift the foot high, hold it up and roll the foot to come down and bring this circle center center and lower to come down. Let's step the feet apart.
We take this circle into the vertical position round over. Now we're going to place a circle first in the center and now press down and up and we're going to keep the arms straight in. The back is nice and round and just press it down. Rounding the back and lifting back up. Press it down, rounding your back and lift it up. Now what I'd like you to do is to lace it at your foot and so it's right in the center of the foot.
Now the other foot we're going to turn out so it is reaching away from us. I'm almost in a parallel position. From there, the arm comes up. We're going to bend this knee, but we're going to press the circle down. As we bend, just bend and straighten and bend and straighten. Bend and straighten and bend and straighten.
Press the circle down and bend and side stretch over, over. Circle the body down. Circle it around. Do I let your circle move and come up? Keep that circle stable as you stretch. Circle it around and open to come up.
Circle it around the circle. Stay stable, round your back, makes sure that you maintain a stability through your core muscles. One more time. Circle, little round, beautiful and open to come up. Very nice places. Circle in the center, Ben both legs to you. Bend down and straighten. Then down and straighten and exhale.
Inhale and exhale and inhale others' side, progressive town. Turn the other foot out. Align the body round the back. Make sure the tailbone is reaching down toward the floor and open the arm to the ceiling and then straighten and then make sure the is going up and down. Per Reza down, the arm is straight, the arm is not moving. Then Now Ben side stretch around the back. Take it down and open to come up and around the back.
Exhale, inhale to come up and around to come down. Circle is stable all the way through and round. Exhale down and inhale and open through the chest. Stretch it long and take the circle in to the center. One more. Set this time, press down on the circle and keep the circle stable.
Then the knees for two straight. Don't change the circle. Bend the knees for two and lengthen the legs without moving this circle in. Inhale, exhale. Inhale. Stabilize that circle one more time.
Inhale and exhale and reach to come up. Let's now begin to roll the spine up one vertebra at a time. Watch the alignment in the feet so we're not rolling in or out. Watching alignment through the pelvis. Stack Vertebra on hopper vertebra and come all the way up into the center.
Bend the knees and bring the legs in. Just like, let's bring our circles up to chess level and we're going to stretch to the side. Keep the hips squared to the front of the room. Keep the shoulders down and the circle is centered so that it stays in the center of the body. You know, turn the body to the side, but not the hips. Now turn the circle so that we are having it in a parallel position. Now we're going to pull it back and push it in like a bow and arrow.
Pull it back and push it in. Relax the shoulders and lengthen the neck and back and across. Pull it back. Push it in, pull it back and in, push back and in. Pull it back, sweep it down to the opposite side and pull it back. Push it in and back. Remember, the hips are square to the front so that we want to make sure that we're getting that nice twist at the waist. Make sure the ribs stay in and the shoulders are down and taking a nice deep breathing with the push and the pull.
One more time and come down and come up. Now this time we're going to turn the hip to face it and we're going to pull the circle out and as you pull a circle out, I want you to push the hip back and just release the circle. Push your hip back so you're getting that stretching the wayside. Push the hip back and push the hip back down and up to the opposite side. Let the hip come with you. Push your hip back and release.
Just just to release the circle and and shoulders are down. Feel the movement across the center of the chest. One more time. Exhale as you press inhale and as you release it, come down in to the center and bring the circle up and bring it high and bring it back over your head. Now we want the circle in the vertical position so that it's not tipping over the top of the head. And we're just going to do squeeze in and pull out, squeeze in. So we're working the circle in both ways.
So we're in and we're pulling it out and in and out. Try not to let it tip this way, cause that means you're releasing the shoulders outward so it goes in and out. Good. Watch the tailbone and the ribs. Pull it in, press it out, pull it in, press it out, pull it in, press it out and pull it in and press it out. Lengthen and bring the circle down in front of you. Now I'd like you to place your arms inside the circle just below the elbows.
I know it feels a little awkward at first, but you're going to have so much fun with these exercises that you're just going to love them. Everybody set? Okay. Okay, we're waiting on you, Christie. From here we're going to press out from the elbows and release. Press out from the elbows and release. Once again, we were chest to chest level and press it out. Really suppress it out. Really suppress it out.
Release and press it out. Release. Bring it down, bring it center, bend the elbows, take it out, bring it down. Bring it center. Then now if your circle is moving, what is the happening? Did you, does that mean that you have more attention on one side than the other? If you actually have no tension, what is happening will be that the circle will fall down, which it might do some time soon, but in any case, if you're feeling that you need more resistance on one side, it most likely you're more dominant. Side is doing more of the work, so really activate evenly on both sides of the body. Alright, come center, come up, come center and down. Did you stabilize your shoulders? Yes you did.
Because if you didn't that circle would be around them right about now and come center and come up. Come Center and down. Come Center and up. Come Center and calm down. Let's bring it down just a little bit. Yes are nice, isn't it? Bring it down.
Josue. Little bits within the middle of the forearm. Closer to your wrist.
Side stretch and lift. Side stretch and left side stretch, twist sides stretch Jeff, two ceiling. Back to center and up. Side stretch. Twist to the ceiling center and app side. Stretch with the twist. Open it and I'll one more time.
Inhale, exhale and inhale and come up. Bring the arms just center. Bend the elbows and extend. Bend and extend. Bend and extend. So the arms stay still and straight up and open. We have to keep resistance on that circle as you'd go.
All the way through the movement and up and out and up. Now around the world. Stand comfortably. Bring a circle down. Bring it up over your head. This is where we have flying circles. Drop the shoulders down. Inhale, stabilize through your shoulder girdle cause you're going to go to the side.
You're going to round the torso as if you're rounding over a giant ball. You're going to come up the opposite side. You're going to reach it long to the side and up to the center. Let's go the other way. Take it up and over. Beautiful. Circle it around as if you're circling over a giant ball.
Reach it out long to the side and come up into the center opposite way. Reach it long, circle it down, reach it out and come up. Last one, take it over and circle and take it around and up and lower and lower it all the way down. You really have to open the shoulders to keep that resistance on the band. Then the next thing is that when we finish, what we want to check now is if one arm moved forward and one arm moved back so that the resistance should remain the same as we're doing the circle. Because once again, when we have that dominant side of the body, that one side that is pushing that arm is most likely going to end up further out as the other one kind of is more pulled back.
So we want to make sure that when we're doing this, number one, we're opening through the [inaudible] shoulder girdle, but number two, we're opening evenly through the shoulder girdle, so let's just place it again evenly on both hands, little resistance and just feel there a little resistance out and little resistance out. Once again, feel the evenness in the muscles in the upper back and the muscles through the arm, in the muscles in the chest. Take it up. If you have one side that needs more resistance, really concentrate on leading with that side, dropping the shoulders down lower and pressing down into the center. One more time. Take it up and inhale high and exhale to come down. Very nice. We didn't lose a circle. I'm very impressed.
I mean the circle is now in the vertical position was we bring our feet hip distance apart and we take it all the way over. We're going to round. Damn. Once again. What I want you to to think about is maintaining the release in through the tailbone of the tailbone, which is down toward the floor. That naval is staying up toward the spine and the shoulders are away from the ear. So in this position we're just going to press it down and lift it up and press down arms stay straight and come up for him.
That nice long line from the tailbone down toward the heels from the center of the hip through the center of the ankles and press it down had remained in line with the spine and exhale on the down. Inhale on the OP X. Y'all come down and inhale and calm up. Now just a little bit of resistance onto your circle and nice long spines in a rounded position and lift the heels up and down. The circle doesn't move. Oh, if the circle is pushing forward, it means you are going forward and back instead of straight up from the core muscles of lifting yourself up and down the heels. Lightly touch the floor, lift it up to come down, lift up and come down. Let's lift the heels up, bend the knees down, press into the circle to come up and lower your heels down and again lifted up and bend toward the floor lane thing.
Keep the circle stable, lower the heels down. One more time. Lift the heels up, bend and stretch all as far as you can, keeping the circle in your alignment length in the legs up and lower your heels down. Let's begin to roll the spine up now. Rolling one vertebra at a time. Shoulders come down and head comes up. Once again, we're going to bring the circle up. We're going to rollover. Place the circle now. Place it on the floor this time.
Lift the heels up and one heel down, one heel up and ro roll through the heels as it running in place. Once again, try not to sway the hips when we're doing this, but to really think about the lengths any of the back of the leg as we come through the movement. Keep breathing, keep the spine rounded and keep the ribs in. Head in line with the spine so we're really rolling foot to foot. Come all the way through the movement. And now both heels up. Sit down on the heels, press in and straighten the legs. Lower the heels, lift the heels up, rule it down. Come back up and lower the heel.
Lift the heels up and begin to come down. Lift back up. Lower the heels this time. Lift the heels, sit down on your heels. Roll all the way down and sit down on the floor. So now you want to sit at the front of your mat. How are we doing? Everybody good. And we're going to place the circle just under the knees and the legs would be in the diamond position.
And we're going to sit up nice and tall. We're going to roll to the side. So I want you to think about rolling to the side and placing your knee directly on the floor. Lifting the arm up. The hip is going to come up. It's called a hip roll. From there, we're going to roll through to the opposite side.
Nice opening and a nice stretch. As I said, the knee goes all the way down to the floor. Take a full breath to go over. The arm is only there for balance to support is coming from the hips. Now to the side. And now just squeeze the top knee down over and lifted up. Squeeze to talk me down, lift up, squeeze it down and squeeze it down and up.
Squeeze it down, up in through to the opposite side. So when we are here, this one foot is flat, the other foot is turned over. So we're squeeze and lift. So this is your stabilizer on your foot and we reach long through the fingertips and reach long through the finger tabs. And now we're going to reach and come over to the opposite side.
So remember when I said this hand is only for balance? That's because we're not using it for support. Now are we? Let's go through no arms and up knee all the way down, rural it through, activate through the whole body, roll it through. The knee, goes all the way down, roll it through and come up. It looks great. Rule it through, lift it up. Roll it through, lift and stay there. Now once again, just lightly down when you're squeezed the circle and we're going to go and through a rotation, through the arm and a rotation high through the ceiling and squeeze the circle, reach and come up, squeeze the circle, reach and stretch and squeeze this circle. Once again, remember we were only having the arm for a little bit of balance.
We are supporting ourselves all the way through the movement to the opposite side and we squeeze, rotate and lift and we squeeze, rotate and lift and squeeze. Open the chest and squeeze and open. The chest. Arm comes up and we'll roll into this center. Rolling like a ball.
There are many ways to do rolling like a ball with the circle, but we are going to do it with the feet on the inside this time.
From there I want you to simply roll back and roll up and roll back and up. Roll back and roll up and roll back. Roll up in. Place your feet lightly down. Now look at where you are on your mat. Hm? Did, oh, I'm in the same place. Really. I am. Uh, what we talked about before, what we failed in the arms. We're feeling that again in our rolling so that if we have that dominant side taking us over and especially with the circle, we have this extra tool here.
So what is making us do is we'll pull to our dominant side and come back up. So what I'd like you to do now is to think about when you are rolling roll a little bit slower, but as you're going back, really concentrate on how you are going back and what muscles, what musculature is helping us to roll back up three more times and round the back and roll it back and come up. Use The circle, push against a circle, push evenly against the circle, use the circle as a tool and roll it back and come up. Is that better? Much better. Again, we're just giving the body the tools it needs in order to make the body work more efficiently, which is what Peloton is all about. Now because we are in control with our circle, we're going to roll back and we have so much control that we will roll back and we'll extend the legs out and we'll roll back up so we will roll back. Head comes down, extend the legs out, bend the legs and roll back up, roll back, extend the legs. Very nice. Legs are parallel to the floor and come back up and roll back. Extend the legs. Try to make it really organic. It looks great.
All right now because we also have the control on the way up, we will roll back, we will roll up and we'll extend the legs to our teasers.
Next roll up and teaser. Now I want it to be organic. That means we don't roll back, extend the legs, roll up, extend the legs. We rule back in to extension and we will up into extension. Make it one movement in complete control, rolling back to extend, rolling up to extend, rolling back to extend and ruling up to x. Stand and bring the legs down. Very nice, very nice. You can do this in your mat class without the circles as well, but the circle really gives you that extra tool, especially when you're extending to really feel the centeredness in the body.
Okay. Stomach massage is next. So we are placing the a circle right on the feet on the circle and the inner side of the circle and we're just going to hold this with one hand. Now instant mic massage. What we want to do is we'll extend out and we'll get that nice roundness into the lower part of the abdomen. We'll flex the feet, point the feet, and then we'll pull the legs back in. We'll extend the legs out. Rounding the back will flex the feet and point the feet and roll to come back.
And just one more of those. Extend your legs out. It's hard on the mat. Yes, and come back in. Now if you'd like, you can slide your legs off of the mat where you can fold your mat back. We're going to do the advanced version, which adds a twist to this movement. So we will take the legs from this position. Well round the back, but as we extend and we're going to stretch the arm up, let's turn the tour. So to the side, let's hinge the body back. Flexing the feet, keep the legs on the floor.
Let's lift the body up, round the body and come. Let's reach to come up. Yes, we're changing sides. Opposite side churned Xi. The side arm is at the ear. Hinge the body back, flexing the feet. Lift the body up, turn to the center and round two come in, lift opposite side and turn. Hinge the body back. Flex your feet, lift the body up. Turn to the center and Ben to come in and again lanes and to come out.
Turn the body in, hinge it to the back lanes in it to come up and turn in to the center. That's make that a little more advanced. Come back. This time we're going to turn the body and we're going to hinge with the feed flex. Now keep your hands turn to the center, turn to the hinge and center. Turn to the side and center. Turn to the side and sent round and come up and up and injured and center.
Staying in that hinge to her and centered and turn it and center and turn and come center and round to come over and lengthen the spine to sit up. Let's place the circle once again, just below the knee. Sit Up nice and tall. We're going to lengthen the spine world down to your mat, one vertebrae at a time. Keep breathing. Nice deep breathing. Little Bit of resistance on the circle.
Now the leg comes up in the diamond position. Head is down, and from this position I want you to just open the feet so they're parallel and then close them again. Open the feet to the parallel position, close them again. This is the same as we were doing with the arms. In that opening and closing. You have to keep resistance on the circle or it will fall to the floor, but it's an open and a close and an open just from the feet. Getting a nice rotation through the hip as well as we're doing that opening and closing. Very nice. Now stay in that diamond position and squeeze the legs together.
Squeeze in and together. Squeeze it in. Really squeeze it in and make sure that you have a nice length and spine on the mat. The throat is open, the shoulders are relaxed. We act as we squeeze in and we inhale as we go out. Now we're going to squeeze and we're going to hold that squeeze. One, two, three and release at out. Squeeze it in. Hold your squeeze. One, two, three. Release it out.
Squeeze it in and all. Hold the squeeze. One, two, three and open and out. Squeeze and hold it. One, two, three and open it out. This time. Squeeze and hold. One, two, three, four, five. Open it out. Squeeze and hole the circles. Now stationary for one, two, three, four, five.
But the breadth we are still breathing and squeeze it in and hold but not the breath. One, two, three, four, five and release. Inhale. Exhale. One, two, three, four, five and release. One more time. Squeeze and hold. One, two, three, four, five and release. But stay in that position. From here. We're going to take the legs down to the side of the body and place the hands behind the head. We're going to exhale and lift the torso up.
Keep squeezing that circle and Ann Hale to come back. Exhale and lift up and inhale to come. Exhale and come up. I bet some of you wish you were on that train right now and exhale to come up. Very nice and inhale to come back net.
We're going to take [inaudible] the body over as well, so we're going to have the circle in between the day. Legs down at the knees, get a little bit of that squeeze. We're going to lift out from under the bottom ridge. I want you to turn and rest onto the side of the body. Now from under that bottom rib, we come back to center, women higher and we lower to come down. We exhale to lift out. We rotate from under the state.
Keep that elbow high off the floor and keep it around and around and around, all the way around to come down and lift it up and circle it around and take it back and take it down last time. Take it up and if they were going to take it around and hold it there on the side, arm down in the front. We're now right on the side of the torso. Shoulders over, shoulder and hip is over hip and from here, take the arm out and lift both legs up and down, up and down. If you need to place the arm down on the floor, on the mat in front of you, go ahead. But otherwise it goes simply up and down and up and down. Now the arm for a little bit of balance and make it up and squeeze. One, two, three. Squeeze both knees together. Five, keep breathing.
Exhale as you squeeze. Press, press, press. Watch the feet and lift higher and come down. Slide that arm out on the floor. Now reach it long. We're going to pull up onto the elbow and side, stretch and come up.
Lift them up and down. Roll around to the opposite side. Drop the legs, only the tour so stays where it is. Lift the torso up and back. Lift the torso up and back. Lift the torso up and back.
Lift the torso up and back. Let's lift the torso and do the chair now. So you're going to turn to the side. Turn it back and down. Lift it up and turn it and turn it back and down. Lift it up and turn from under the rib cage. Reg it all the way around.
Are you finding one side a lot harder than the other? I know I do. Come up, really rotated around. Come back and come down, lift up, enter and holding on to that side. Bring the arm out and both lights come up and down, both legs, up and down. If you need to place the arm down and down and lift and come down. Light support on the hand if you need it. And squeezed to circle. One, two, three, four. Squeeze. Exhale, exhale. Reaching and press it. Press, press, good.
Press and press. Bring your legs down, bring the hand back behind the head. And now let's [inaudible] the arm. Come out onto the floor and reach out. So now we're going to do that nice side stretch. Pull up onto the side of the body. So we're on to the elbow and we're going to get a long stretch.
Oh over now come up onto the arm and reach to the side of the room band and reach it over and come up and stretch it. And Ben Stretch it all the way over and come up and reach over and lift to come up. We come down, arms behind the hand, come from under the rib cage and once again, lift the torso up and down as the torso. Up and down. Lift the torso up. Stretch it down, lifted torso up. Stretch it down. Bring the legs back into the center.
Lift up and lower. Now don't change the pelvis or the spine. Lift the legs up. Reach the legs nice and long. Lift the legs up, reach legs long and lift the legs up. Reach the legs along, lift the legs up, lift the torso up, rural the tailbone back and roll up to your sitting position. Good. You're all still with me. Now we're going to sit up nice and tall and we are going to bring the circle behind the back. From here.
We have a nice long spine and I want this movement to be a hinge movement so that as we're going back, we don't lean back and let the ribs come out. But we slide the circle along the floor. So you want to sit at the very back end of your mat for this.
We pull in to the abdominals and round. Begin to round the back. Flex your feet as you do now from here, think about reaching the torso forward but not collapsing it and the arms are just going to stay where they are and they lift only because the torso rounds forward. From there, let the spine grow to a hinge position and sit up. Slide the circle back on the floor. Very nice contract and round the back. Let the circle lift behind you only because the body's coming forward.
It's not an arm moving. Very nice. Now grow the spine into a long hinge position and sit up nice and tall and again read shit to the back. Round the back. From there as the backgrounds, we take the movement up and down over. Very nice. Now let's go to that hinge position, letting this buying grow long and sit up nice and tall. Once again, stretch with that flex. Rounding the back, round your back over.
Let the arms come up. Pulling out on the circle. As you do, hinge the body, let the spine grow on a long diagonal and sit up nice and tall and release feet. One more time. The region to come back, flex those feet, round the body over. Let the arms float as, as the movement reaches forward, Higgins the body up and sit up. Nice and tall, very nice. Let's place one foot in and the other leg is slightly out to the side, so just about as wide as your mat.
So the open the leg to the side and the other leg comes out. So if you're sitting with both legs straight, your legs will be about a map distance apart. And from here we're going to keep the foot in the center of the magic circle and we take the movement in the thigh, goes to the chest and when we lift the leg up, we bend the leg in and now the arm goes over and set, the leg goes over, we are going to come back in and Andean and stretched it out, pull it in and lifted up. Beautiful. And in and that one more time. We remember we're not collapsing over, but we are maintaining that nice long position from the front of the body to the spine as well. Now take it up and stay up from here.
Changed the hand position so the hand is on the inside of the circle. Do not change the leg position. Reached the opposite arm past your little toe. Bring it up, bring the arm to the ear, rotate the torso around and a way from the foot. Lower it down to the back of the mat, lifted back up. Rotate the torso and reach past your little toe and lift.
Inhale up and twist and exhale and again. Inhale two, exhale. One more time. Reach it up. You look great and turn it around and open it out. Lift and turn and stretch and this is done on it. You can do this in your mat work, but it's also done on the Cadillac and the traditional mat program.
Then we're going to change the hand. We're going to reach past the big toe, so we'll get the rotation to the opposite side of the body. Lift, turn the body, open it out and reach it down. Now think that you're putting something very heavy in that hand in order to get the most out of this nice long stretch and take it down, lift it up and take it out and correct it. I get down, there's one more time. Remember the leg is absolutely stationary at this point. The um, foot is in a very soft flex position. The, uh, the circle is right on the metatarsal and reach and bring the leg in and stretch and get a long stretch over. Bring the legs, the center, then both legs in and lift up to teaser. Bend the legs in and change legs. So now, once again, your legs are an equal distance apart as if they're on both ends of your mat.
We're going to bend that leg and keep the thigh close to the chest. Keep the shoulders down and do a nice extension. Take it out and get a long stretch over. The heel is planted into your mat and come in and up and in and over and come in and stretch it up and come in, stretch over two more times, Ben. Now remember the thigh stays close to the chest and now we'd leg just goes as high as it can with the stabilize hip to thigh position.
One more time. Take it in and up and take it in and get a long stretch over in, up and hold it there. Change the hand position, reach past the little toe, come up armed by the ear, the whole torso twist and we'd go down to the mat. Very nice. Come up and turn it and reach past the little toe and reach and turn it open. Lift and turn and stretch. A little turn, O open and lift. Turn and one more time.
Try not to move the legs so we keep nice stable positions like should not be getting closer to the floor and with each position nor should it be getting higher. It should stay right where it is stabilized out of the hip. Let's change sides. We go past the big toe now and up. Now. Once again, the arm stays by the ear. As we work through the movement, we lift it back up and we turn it and stretch past the big toe. Nice deep breathing as a full breath around and another full breath to come back. Maintain that alignment throughout the core.
Equal weight on both hips and we have just one more time. Take it up, turn it and open it and take it up. Turn and reach. She passed the little [inaudible] in the leg in [inaudible] and stretch to come out. Bring both legs into the center. Now bend the knees, round the back. Find your balance, extend your legs up. Find Your Nice teaser position.
Support yourself nice and long and Ben to come in Ben and come up then and come in and band x. Stand up and band. Are you ready? You didn't think I'd stop there. Did you? Come on up. Take the handoff. Take it by the ear. Turn lower legs down, move.
Remember we just learned how to do that with one leg. Now we're doing it with both. Reach past the opposite toe. Jacobs up open and turn it yellow, Gray. Take it up. Turn and reach past that little tail. One more time. Up in turn. Open it out.
Lift and past the little toe. Hold it in. Take both legs in. Round your back in Halen axial. Let's go back up. We'd have to do the other side. Anchor. Hurry, Chet. Long past the little toe. Take it up, open it and lower the arm. Come up, turn and stretch. Maintain that alignment.
Keep breathing all the way through. Use your breath to help you with the movement. Inhale and exhale. Inhale and exhale. One more time. Reach it around and stretch it and left.
Turn and stretch. Bring the legs in and stretch. Nice and long. All right, now let's have some fun. So you want to be now at the front of your mat or you can pull your mat back a little bit so that you want to have um, basically your bottom red at the end of the Mat. So your circles will be on the floor.
Align the body.
This should not be getting into your low back. Your feet can be slightly apart and relax through the thigh muscles so that we're no not dancing into the low back. As we come up, think about really stretching and lifting from the upper back. Navel is lightly toward the spine and the shoulders are down and take another inhalation at the top of the movement and come down. Now when I said let's lightly press into the circle.
I really mean it because this time you're going to comma and you're going to take the arm up and you're going to look under your arm and you're going to come back to the center and you're going to come lifted up, arm up, look under your arm, come back to the center, reach long to come down and pulling. Lift, turn. Very nice. Turn it back, stay high on the turn back and then yeah, arm comes down, pull it up and open it. Stay long and reach to come down. One more each side, pull it under, lifted up, churn it, turn it back, reach it out and down. Last time come in and up and turn and reach and stretch to calm down. Take a nice deep breath. Bring the legs together.
Pull this circle with you as we sit up and sit down on your heels. Stretch the torso. Yup. If you found like I have on that last exercise where one side comes up and does a lot more rotation, then work first with the side that needs more rotation and you can have an extra breath in there as well so that you get that even rotation. It's probably the same, um, the feeling that you had when we were doing the rolling side to side that maybe one side was a lot easier than the other butterfly is.
Next we're going to kneel with our feet hip distance apart and we're going to really place a circle behind us. You can face me, face each other. Oh, face me. I like seeing your smiling faces. All right, now once again, what we will want you to think about doing when we're pressing the circle down is not pressing it back and not pressing it front, but it goes straight down like that. So we're going to place one hand behind the head. We're going to press down on circle behind you. Now keep the resistance steady on that circle and go to this side and come up.
The circle doesn't move and come up. Go to this side and Karma, go to this side and come up. Go to the side, take the top, elbow and [inaudible] round the back to the elbows, goes to that opposite knee and open it and do the opposite knee. Now the circle's not moving and to the opposite. Knee and open opposite knee and open. Now here we go. Take it down.
Now take the torso around form a circle to the other knee. Climb yourself up the sidewall. Don't let the circle move. Open the chest to the ceiling and center yourself in the middle again. Same side over down. Circle it around along the floor and up the wall.
Open the chest. Hi. One more time. Side stretch to the knee. Down across the floor. Sidewall, sternum to the ceiling and in to the center. Other side. Yeah, yeah. Feels good, doesn't it? Arm behind the head. Circle down and side. Stretch.
Lifted up. Side stretch. Lifted up side stretch and up. Side stretch. Butterfly over. Flap your wing. Round it down. Elbow open and around. Elbow Open.
Wound down and open down. Open side stretch. All right, here we go. Take it down and her well, both knees. Open it up, the sidewall, high to the ceiling in center. Two more times. Take it over and take it around. Circle it down and take it open up and center.
Last one over. Circle it down. Take it across the floor, climate up the wall. Openness, sternum to the ceiling and back into the center. Take it down, bring the circle into the center and lift it up over your head. Round the back and bring the circle down in front of you. Now we're on all fours, shoulder over the wrist, knees and hips in alignment. And we're going to take hysterical and we're going to circle it around underneath. And we're going to really stretch now round the back.
Sit on the heels and reach the arm away from you as far as you can comfortably come back up to sitting other side, round yourself down and stretch it all the way through. Beautiful round and come up to sitting and again re round and back onto all fours. One more time. Reach it around and come back up and hold. Curl the toes under, round, back. Lift the knees happen. Touch them down, knees up, touchdown, knees up, touchdown, knees, up background, and now sit down on your, she knows. Take a nice deep breath. Release to circle and briny arms back behind you.
Relax across the shoulders. Relax the spine. Draw the tailbone down toward the floor. Relax the head. Relax the neck muscles and relax your shoulders. Now slowly begin to roll the spine up to the sitting position. Stack one vertebra on top of the other. Very slowly rolling.
Articulate the spine all the way up and through. Finally stack the head on top of the spine. Inhale, bring the arms high. Let them float open to the size. Inhale, lift the arms high. Let them float down to the side. One more time. Inhale up. Exhale, arms come all the way down. Great job.
Anything Goes: Exploring Spirals
Mention
 |
Kathy Corey (Teacher) |
 |
Gisela G |
 |
Abigail W |
 |
Viola A |
 |
Rajashree Srirangarajan |
 |
Jorge Sánchez |
 |
Leonor F |
|
|
Ruth E |
 |
Julie M |
|
|
Talie L |
 |
CADM |
|
|
Tova A |
 |
Karen M |
|
|
Lani G |
|
|
Debbie M |
 |
Kimberly M |
 |
Tahja |
 |
jas |
 |
Christina Pantazopoulou |
|
|
Verity B |
|
|
Madoka G |
|
|
Yoly N |
 |
Donna S |
|
|
Lourdes V |
 |
Linda T |
|
|
Janis F |
 |
Kate T |
|
|
Kerry |
 |
Hannah M |
|
|
Stephanie S |
|
|
Sherry B |
 |
Elsabe D |
 |
Jackie M |
 |
Jennifer S |
 |
Anne-Marie S |
|
|
Elaine F |
 |
Pele |
|
|
Rachel K |
|
|
Angela M |
|
|
CJ |
 |
Heikki L |
 |
F B |
 |
SMLondon |
Comments


You need to be a subscriber to post a comment.
Please Log In or Create an Account to start your free trial.
