Description
About This Video
Transcript
Read Full Transcript
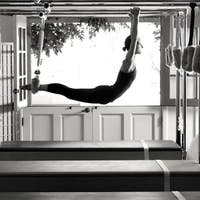
Hi, today we're going to go through just a basic series on the reformer, kind of simple. Um, it's meant to cut a class for all levels, a beginner or low intermediate person as well as someone who perhaps wants to go back and, and revisit the basics, which in my opinion is always a valuable thing to experience. So, um, here we go. I've got my reformer set up with two red springs and a blue, um, or three springs of some description and we'll start with a pelvic curl. But before we do that, just lying on the reformer, setting the arms next to the sides of the body and just feel the bones of the body. Feel the heaviness of the pelvis. Notice as the hip pelvis goes heavy. Does the center of the Rib Cage Arc up?
So can we feel that both areas, the center of the ribs as well as the pelvis are heavy and then feel the arms reaching away from the shoulder blocks. Feel the neck reaching further away from the feet. Then you think you need two and breathe in. As you breathe in, feel the ribs expand to the sides towards the arms, and then exhale. Feel the ribs come close together near the center of the body as we feel that connection into our center body. And inhale this time, Xcel tilt the pelvis, flatten the spine against the reformer.
Do so without any excess leg action. Just feel abdominal work there. And inhale, release the pelvis back and XL. Flatten the spine. Just feel just a nice, easy movement, a gentle rocking of that lower spine. And inhale, release and exhale. This time we flatten the spine first and then we start to lift the spine. So as the pelvis begins to lift off the reformer, that's when we have to start allowing our legs to work a little bit, pressing the hips up nice and high, reaching the harms back into the reformer.
Inhale and exhale. Start from the chest. Feel the bones of the spine reaching down towards the heels. But there's space being created as you place the bones of the spine back into the carriage in healing at the bottom XL first flatten the spine, feel as the spine flattens, the upper arms flatten. Then as the pelvis starts to lift the ribs, drop below the pelvis so that we get that nice long line in our back on our body, really from the knees to the shoulders. Inhale and exhale. The chest drops through the arms, the arms reach forward, the carriage is still lower.
Spine flexes deeply and again, inhale and exhale, flattening the spine. Then lifting it up, picking up one bone at a time. Out of that offset, reformer. And inhale and exhale. We placed the spine back down and do that one more time. So make the most of it. Feel the fee, reach down into the foot bar, but also reach towards the body. And in that way we feel how we can really turn on the hamstrings. Also notice that the knees stay in alignment with one another.
They don't reach out to the sides. And then we roll the spine back down into the reformer. And from here we're just going to reach back and hold onto the shoulder block. Not the shoulder blocks but the handles behind the shoulder blocks where the straps live feed together on the heels. Inhale as the knees are reached towards the left elbow, they just, the defeats, the left foot stays on the show on the, excuse me, foot bar and Xcel to come back. Okay.
So what I was having trouble expressing just now is as you rotate the leg that you're rotating away from Huston, lift up in order to keep the knees aligned, which is important
So we're going to come all the way to the top and we're going to change to one spring. Personally, I like to use a light spring of blue spring, but a full spring would also work out like a red spring. So the blue is a little harder. I'm going to position my body so I've got a little bit of carriage behind me and take a hold of this drafts in my hands just above the buckles where the ropes are from. They're lifting the back to a straight body. Inhaling, exhale. Feel the pelvis reach underneath so we create that long round c shaped spine and then bring that c shape backwards until we feel the lower back. Connect into the carriage in kneeling here, and exhale we curl Becca, creating the c shape with the shoulders above the pelvis and then press lightly down.
Not a lot but a little on the arms as we lift the spine up in here and exhale we are working to keep the knees connected together, the inner thighs working strongly as we then took the spine backwards. Inhale, start, exhaling, feel the work in the abdominals before the spine starts to move forward and then very, very lightly press down on the straps. I'm not pushing down enough to move the reformer. I'm just feeling it a light down. Lord Paul to bring my backup straight and inhale and exhale. We curl the spine now as the lower spine rounds, take care of that to curl the shoulder blades around the front of the body, but instead to keep them held back and stable on the back.
Pausing on the inhale. Exhale to curl forward and inhale to build the spine back to straight. Adding on Xcel, we curl the spine, continue to exhale as you take the spine back into what feels like a chest lift position. Make sure that the pelvis is its best neutral position, but the upper spine is flexed from here. Excellent. As you lift the left leg, lifting from the center of the body and any other place that leg down. Excellent. As we lift the rightly working right from the center. So as the leg lifts, concentrate on working close to the spine, the muscles that are closest to the spine and down and exhale as we pull up. And now I'm alternating legs. One more time to each side.
Xcel as we pull up and down and exhale as we pull up and down. Now in here we're going to do five little mini curls, bending inwards, just challenging the height of the curl and down. Exhale, bending inwards, reaching the rib cage up and over trying to maintain that neutral pelvis. So in my mind, I'm attempting to round the spine more without moving the carriage much. It's kind of hard last too and down and last one and any on the down and exhale, curl the spine at this time. As we straighten the back, we're going to bring the arms wide to the side. Lifting the VAC. It just a moment. They're feeling the back extensors working.
Stretch the arms out. We're going to add those two pieces together. Curling the spine down.
Create challenge in your body. Excellent. As you left, don't just let the legs, don't just pick the leg up, but feel it. Responding to the movement of the spine. Inhale down we go. One more time. Exhale into lift and inhale and exhaling to lift and any hair and we excellent. Curl the spine, finding the shoulders over the hips and in the how.
Bend the elbows y to the side, lifting the back. Feel the back extensors working. Reach the arms forward. Exhale, create a curved spine. Continue to exhale as you round out. Come all the way down to the low position and then rotate your body towards the left, reaching the right arm just over the center. We're just over the right knee and then we just do the five mini curls, just miniature curls and down and deepen to lift. And so we go slow here.
We work with focus with precision
Choose your springs for your footwork. I like to work with three red springs, sometimes three reds in a blue.
We press into the heel and stretch the legs and inhale to come in. So as we're doing that, connecting into the back of the hip, we also want to connect into the waist. I imagine that your center, your spine is velcroed to the reformer and the reformer just moves with that velcroed spinal position as the knees are straightened inc lift up on the knee caps with the quadriceps, so the carriage is always moving backwards and never moving forwards as the knee straight is as you straighten your legs. If you lock your knees, I'll do it once. If and then you can watch the carriage, we'll actually go backwards towards the foot bar. So that's a good way to really to just see if the carriage is always moving away from the foot bar as a leg straighten. You should be in a really good position with your knees. And then we come all the way back in and now move to the toes.
Setting the toes, sit bones distance apart. Press out with the langues, stay there lifting high through the heels there. So feel that there's equal weight throughout the foot and then holding the heels still in that place as we bend the knees in and press out. So the heels are at their highest lift as the legs are straightening or as the legs are straight, but they don't stay locked upwards and move as the carriage moves in and out. And again, feel a sense of heaviness through the upper arm bones, through the rib bones, through the abdominal area.
When you just reach out, warming up the body and pull in and reach out and rate and make sure that we feel the backs of the legs pulling us in. We'll do one more and and stick the feed into a small v-shaped position. Check the knees and it should be lined up with the shoulders wrap from the hips as you stretch out with the legs, and then pull the reformer back to the home position. Reach out, stretch, squeeze and rotate our pull back home. Feel the rotation all the way up into the tops of the hip joints. Feel the heels pressed together to act.
Accentuate the connection through the inner thighs. Feel the arms reaching long arms can actually press back into the reformer slightly and that'll help you activate your upper back.
And we press out and here the feet stay still as though there was a wall in front of them that they could just stand on. And as we pull in and out, we've got an imaginary contraction and inward contraction. It's not an imaginary, just, there was no movement, but feel the legs just magnetically being drawn to one another as they stretch out in, in almost like you're trying to slide them inwards on the bar without actually moving them in space. Exhaling and inhaling back. Last one, coming all the way in. Come onto the toes and he's still in that same wide v position.
Make sure you're not just turning the feet out the feet just under the knees and will you reach out, lining the knees up with the big and center toes. Feel the work not coming from the foot as the leg straighten, but being coming from the pelvis like the pelvis. The activation of the muscles around the pelvis is what pulls the reformer outwards and the feet just, we delay the pressure into the feet for as long as we can.
Last three here and then to reaching out and bend. Last one, reaching out and bend, bringing the feedback to the center of the bar. We press out here. We're going to lower the heels under the bar, pull the heels further than the springs pull you and then rise all the way back up onto the toes and pull the heels under and left. Imagine that someone was holding your feet and they were helping you. Pull your heels down and then create that energy reaching away as though being pulled and left and lift as you lift onto your toes.
Check to see that there's not extra pressure on the insides of the outsides of the foot, but instead that there's weight across both feet equally last time we're gonna stay lifted at the top. Bend the right knee, pull the left heel under the bar, lift to center and switch. We reach up to bend down. We reach up and match the legs and center before the opposite heel drops. The knee that's bending pulls into the center of the body and we feel again that sensation of being connected throughout the whole foot and not just on the inside or the outside. And that's goes for both legs, both the bending knee as well as the leg that's reaching straight under the bar. We'll do that two more times, each side one and switch one lift, then switched to lift, then switch three lifts all the way back up and bend the knees to come in. Taking the heel of the foot on the foot bar. This would be a good time.
If you know that you need to change your spring for single leg to do so, lifting the opposite leg, that leg that's in the air, it's going to stay absolutely still as we connect into that, um, leg on the bar and press out and pull in and feel the evenness in the pelvis. Single leg work is a great way to check in with our alignment and band. We're just gonna do eight like this, reaching out and bent and reaching out. And Ben last to reaching.
Feel the spine and the leg that's pressing work oppositionally to one another. So we're always endeavoring in our bodies to create space, to create energy, to create focus. I going to do three more here on this leg. Here's one.
This piece is just for fun. If it's confusing or flexibility's not there to get the legs straight up, that's okay. You can leave it out. You can modify by taking the leg forward instead of straight. So we just challenging our brain as well as our body.
When rib cage isn't lifting off the mat, it's challenging the stability in the center of the body. Here's the number one, reaching up, bending in, coming all the way into the stopper, turning to the side and helping ourselves up. Adjust the spring so you have either one spring or one red and one blue three. I myself am choosing to use one red and one blue. Oh I didn't check the straps, which is something that I always like to do. They're good. So again we find our way down onto our back and you just start with go move onto a little light arm work and abdominal work as well.
So we're really do the arm supine series here, but I'd like for you to treat it as an abdominal exercise series. So what my idea for you is is as you reach up straight with the arms, feel the shoulder blades broad and heavy, put a little tension on the straps and then imagine that you are going to lift your head up. As you imagine that you feel that every time the head lifts up in the spine goes in that direction, the ribs have to drop. So what we are going to do is lift one leg at a time and press the arms down with the intention of trying to curl the body up. What do I mean by that? Resist from that same place.
What I mean is that when I feel the rib cage is a chest and the ribs drop forward and down and that action just allows the arms to follow through and exhale drying down and in on the abdominals to get the arms moving. The arms are working, they pull from the back of the body. As the front of the body works to stabilize the spine, we'll do three more. That's a great to practice using full breaths as well.
The pelvis inhale as the arms and the ribs spread. Wide. Exhale is the ribs in the arms close inwards towards the center of the body on inhale everything wide and exhale. So as the rims are spreading wide to the side, can we feel that the abdominals are still heavy? That's sometimes one of the more challenging things in my own mind too, to really concentrate on is in healing with the abdominal wall. Pulled downward or relaxed downward for that matter in Helios, we reached Ah, and exhaling as we pull down and we'll do three more.
Keeping the shoulders stable and connected. Inhale as we reach out and exhale as we pull down last time and at the bottom, please rotate the palms to face down. Lift the arms back over the shoulders. Keep the carriage still as the arms stretched to the side and pull in. We inhale to lift the arms. Feel the ribs heavy, open the arms and pulled down. Exhale, rotate to lift opens. Keep the carriage sta.
Exhale, pull down, rotate to the left. Got to keep tension on the upper back or keep that upper body working to keep the carriage stuff. Last too. And last one
As you reach arms above the shoulders, exhale into press down. Inhaling as we reach out, keeping the carrots stills, we bring the arms across and on last time. Now with the arms down at our side, press the upper arms into the body. Bend the elbows, allow the upper arm sustained, hovered off the reformer, but press the backsides of the ribs down and then we just straight in the arms and bend and every time you straighten your arms, I want you to feel that it's connected to your back so the shoulder blades draw down and then your arm straight. Shoulderblades always working from the source of the stabilization and drying the ribs down and in and drying the ribs down and in and last for keep those elbows nice and close to the body. Last three and bent twice more and bent.
Last one, lift the arm straight up and place the feet down. For just a moment you're going to do a couple of more abdominal exercises. I like to scoot myself away from my shoulder box just a little bit. So that's what I've just done. Arms are in the straps. Again with tension on the straps.
One leg at a time lifts for the a hundred prep. We inhale, feel that connection into the ribs first, lift the head up and then follow through with the arms. From there, start allowing the orange to lift. And at the last moment that had comes down with the [inaudible]. So what I mean by what I'm saying is don't just push the arms down to lift the head. We lift the body, we take the body into flection in the arms, respond. By reaching forward, we start lifting the arms and allow the body to respond by going down and lift the body. Reaching forward. Breathe all the out of the body and reaching back two more times. Reaching, feeling that energy.
Take a little time at the top to see if you can go deeper. Go more forward and down. Last time, lifting up and down. Here's a modified coordination. We exhale to lift the body. Inhale, stretch the legs. Exhale, bend the knees, lift the body higher and inhale to come down. Exhale, lift the body. Inhale, take the legs out. Keep the low back flat. Inhale, exhale, bend the knees in and exhale to lift. Inhale, stretch the legs. Reach for the feet with the hands all the time and down. Less to exhaling. We lift.
Stretch the legs out, reaching for the foot bar we bend and a last one. Exhaling to lift. Oops. Keeping the knees sta reaching out, bending and releasing down all the way. Holding the straps in your hands. Press out with your feet. Place one foot in the strap. Put a little tension on that strap to keep the carrot still and then place the other foot into the strap. Start with the legs in a frog position.
This basic hip work series. Double check your neutral pelvic position. Knees are just in line with the shoulders. Tailbone is all the way down. And then we wrap through the outsides of the legs as we press the legs forward and in flexing through the fetus. Uri Cha pressing an imaginary wall away from you. Feel the squeeze of the heels, the inner thighs. Super Strong, very active.
Feel as you press out the ribs, the front of the body is relaxed and dropping down and forward. Arms are always heavy. We'll just do two more. We're reaching out. Feel the rotation of the thigh bone in the hip joint and last one from here we take the legs that tailbone pressing down. We press actively with both legs, evenly separate circle inside of the hip joint to bring the heels together, pelvis down, excelling as we press away and in heels we circled to the top, bringing the heels back together, touch them together before the carriage moves again.
So as the legs are going away from you, can you feel that you're pulling energetically your spine in the opposite direction. That feeling of being velcroed to the carriage works with that idea. Reaching the spine away from the thighs as the thighs reach forward and around Anna and two more. Taking it out at around enough and taking it out
Last one, we'll stay there in a point. The feed and a reach out, opening the legs. Why to the side, flex the feet, drag the legs back together from the center of the body. Connect heels, point the feet, reach the legs out on a straight line. Flex and schoolies the legs back together. Point and open and flex together and point and open. Challenging this stretch. And then again delaying the pool from the feet but feeling the thigh coming together first and we'll do three more reaching. Yeah. Pulling from the center, reaching the spine up out of the legs and two more and all the way back. And last one all the way back together and bend the knees, take one foot out, put it on the foot bar, take the other foot out of the strap, put it on the foot bar and bring your body in.
So with that one, oh, I was using the same springs I was using for my arms, one red and one blue spring, which is a great and significantly challenging place to try a pelvic curl. So let's do that. Now putting the heels of the feet on the bar, I like to start there cause I'm certain that all cram, I'm giving myself Everett every opportunity. And you too, we in here, we keep the carriage still. We lift the pelvis up, feeling those hamstrings working, reaching up in inhale and exhale, healing down, reaching the spine out, working through flection. And then back to neutral. One more time. Like that carriage. So at the stopper, right, we lift the body. Yeah. Feeling as we go and we lifting up into that back extension.
And then we come back down, bending through the spine all the way down until the pelvis connects. So the real challenge for me is to do that on my chart was I did a pretty good job on my heels, but we'll see what happens. Okay, everybody, we feel the inner thighs working. We press down on the bar with the feet, wrapping the toes over the top and keeping the heels low. Exhale as we lift up. Oh yeah, it's a whole different ballgame in here. And exhale, rolling the spine down, keeping the carriage nice and stable. See if you can stay right at the stopper.
Inhale and Exhale, no movement in the carriage as you peel the body, lifting, lifting, lifting and all the way down. And then we're gonna roll to our side again and help ourselves up. Just a few more things to finish. Take the blue spring away, or if you just have one red spring, keep the one red spring. We'll do a stretch. So we'll hold the bar with our hands. Slide the right foot up against the shoulder block or just caught a view of outside. It's awfully pretty tonight. And then we lift the spine through, so now we start to take that leg back, lowering the pelvis down, but endeavoring to the shoulders over the top of the pelvis rather than forward of the pelvis to maximize that hip flexor stretch.
Taking a few breaths in and a few breaths out. Now starting to lift up onto the left. That outside, he'll take the back out long over that front leg as the front leg straightens. So no, we hold the body long. Tilting the tailbone up just slightly Dorsi flexing that front foot. We bend the front knee, arking the back up, reaching back into the shoulder block with that back leg as we pull up on the abdominal from the front and press the bar away from us with our arms and our upper back. And then we reach out, tilting the spine forward slightly the tailbone up slightly as we looking, look, reach out, looking for that nice long line in the body, staying here for a few moments, bending the front knee, lifting all the way in to come, uh, and stepping down. Walking to the other side.
Once the carriage comes all the way into the stopper, we'll just step down. The next exercise we're going to do is the elephant. Um, I'm comfortable on one spring. Um, if you're not, or you're, if you're not, you should maybe add one more spring. So red or red and a blue, a spring or a spring and a half, placing the feet against the shoulder blocks. The heels of the hands are firmly placed on the foot bar. And then we want to take our energy back towards our heels from there, lifting up through the tailbone, but also pressing the front ribs into the back ribs so that we've created this long beautiful line. Nice back lot, lots and lots of back extension work here. And shoulder stabilization work. So as I'm tilting back into my feet, I'm pulling backwards on my shoulders.
And with that we take the heels away, keeping the spine absolutely stable. We lift the toes and bring the carriage back underneath us. And any wheelchair, reach out, concentrate on feeling equal pressure going down into the reformer, underneath your feet.
Draw down the back and just do choom. We're reaching a and coming back in
We're going to take the hands behind the head here, press into the head with the head into the hands with the head and use your thumbs just at the base of your skull to lift up on your head as you draw it down through your shoulders. Feel that there's energy right over the sitting bones and exhale as you rotate to one side, keep the head very still in the hands. Inhale to come center. Exhale. Feel the energy up. Upward energy of the spine as you rotate the opposite way and feel that there's no change in knee alignment and no change in pressure. So oftentimes as we rotate in one direction, the pelvis, the pelvis on the side that we're rotating to will want to come with us.
So what I recommend is just feeling the need that you're rotating to. Just gently reaching forward and center and reaching over and center and reaching over. So be our last one to each sy and across to the other side and back, bringing the arms out to our sides. We're going to reach tilting like we're in the air plane over to one side. As we get there, we put that bottom arm down, but it against the box.
Take the top arm in a reach you the fingertips, but sit heavy in the sip bone. Take that top arm backs with straight up from the shoulder, picked the bottom arm up and lift the spine in. You know as we reach over like an airplane, let the bottom arm come down, reach up, exhale stretching through that side of the waist in. He'll bring the arm back down and exhale lifts the bottom arm and come back up in hill. As we reach over, the bottom arm comes down. We exhale and stretch the pelvis and the top arm away from one another.
I'm just a d d ducting my bottom arm and pushing it into the box and then we reach the arms back out and excelling to left and Nino. As we reach over, the hand comes down. We take it over the top, we reach back out to the side and we left. Hmm. That feels good. Okay. We're going to finish with a little back extension. So what I'd like for us to do is turn around and lie down on the box on our stomach. So I've already set my spring to a light spring.
I'm just going to sit on my box a lot on my box, like to check that I'm even, um, with my chest just at the edge and then sliding the arms up along the frame. Okay. And just lowering the body so it's in a straight line. So the legs are slightly active, not so active that they're lifting off the box, but active enough that they're not going below the box. So they just hover right there on the box and then we'd draw down through the shoulder blades, that shoulder blade areas where the movement of the carriage comes from and we continue to draw down on the shoulders and press in on the upper arms. We lift the chest just slightly forward and then we're reaching back.
So if you just pull with your hands, it's not going to feel like much. So really concentrate on feeling the downward pull of the Scapula, the inward pull of the Scapula, and I'm meaning in on the sides of the body, pressing in like the upper arms are pressing towards one another. And then just guiding yourself up into a position where you feel a real powerful upper back connection and then releasing down, but release with resistance. And again, shoulder blades gliding down the back. The neck gets longer, reaches through the arms. We left. I'm not lifting very high. I'm still very much on my rib cage, very much.
Really working through the upper, back and down and we'll just do that twice more. Inhaling, reaching out on the inhale. Feel the head and the feet stretch away from one another and resist. Exhale, lowering the body back down and inhaling, reaching up and out and exhaling to lower the body down. Allow the legs to just rest for a moment.
Allow the spine to rest for a moment and when you are ready, just step off to the side off to the side and then find yourself a wall. I'm just gonna use the center of this window. Allow the knees to soften. Just feel the alignment of the spine against the wall and breathing in here. My knees are fairly bent there. They're certainly not straightened. My feet are out from the wall approximately six inches or so. Hello, I'm just going to allow my head to drop forward and as I do so I'm concentrating on the con [inaudible] kind of cavity of my abdominal area is I just reach over the top of myself. We're not going to go very low today, just maybe to the top side of the pelvis and lift the head in the your arms hanging in here and draw in on the muscles just above the pubic bone and then continue to lift the spine from the front of the body, feeling the spine align straight against the wall behind you and then flooding the shoulders in the arms. Reach down the head, come up in here one more and exhale the head reaches forward.
The spine curls. We create that sense of scooping that we do when we're in any of our abdominal contractions. Reaching forward, allowing the spine to just relax over the legs for a moment. And in here annex as we stack back, uh, paying attention to the line of the spine, the straightness through the spine, the heaviness of the shoulders in the arms, and the lightness through the top of the spine in the head. Thank you for taking with me.
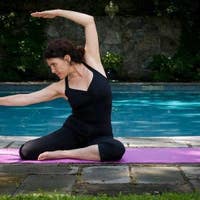
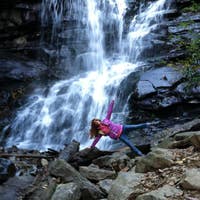
Pilates with Meri Rogers: Reformer Workouts


Comments


You need to be a subscriber to post a comment.
Please Log In or Create an Account to start your free trial.
