Description
About This Video
Transcript
Read Full Transcript
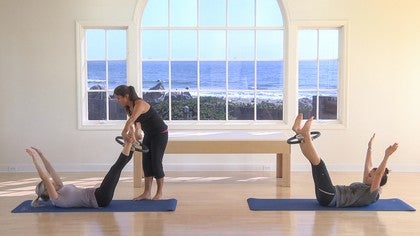
All right, go ahead and lie down. Maybe bring your bottom for it a little. Yep. And just lie on down. Great. And Bend your knees and feet flat. So this is a postpartum class or postnatal class and it's assuming that you're at least six weeks out up until like three years or more, whatever after your kid. But we always need to regroup and pull ourselves together.
So, um, this class is going to take real big baby steps. Most of the work is just going to be on discovering our body and finding out everything and connecting it. So the main thing employees is our box. Our box. So simple is just a straight line from one shoulder to the other, down to a hip, across to another hip and back up. So I'm going to have you take your right hand and point to your right shoulder.
I said that didn't I? Your left shoulder and you're going to cross over. So basically you want to draw straight line, just go in across, because these two shoulders need to be just take one hand and cross it over. Um, you want to make sure that those are one's not higher than the other. That's about as simple as we need. But it's super, super important. Cause when we carry like a heavy purse, we always lift that shoulder up higher. And that changes as the rest of our spine. And when we don't have any stability from having a baby, it's horrendous.
So a straight line from one shoulder to the other shoulder. So put your right hand back on that right shoulder. Yep. And now go down to your, we're gonna Cross it back like you were and then cross it down to your hipbone. So now you want your shoulder directly over this hip. Cause a lot of times when we're carrying older children, we stick out that hip and now that hips no longer in alignment.
And that's a huge thing for moms because that when you stick out the hip, there is no stomach muscles going on or any bottom muscles going on. And those are all the things that we like to have in shape. So hip directly underneath the shoulder and then across, go across to your other hip bone. So again, these two hip bones have to be on the same plane as well. So if you stick out a hip, they're not on the same plane, you usually hike it up. So we need to have them straight across. And then finally completing that box, it goes right up to our shoulder so that hip goes right up to the shoulder to complete that box. Perfect. So you can retrace that if you want, but that is the biggest thing that you want to take home today is that you need to have shoulders straight across there, directly over your hips.
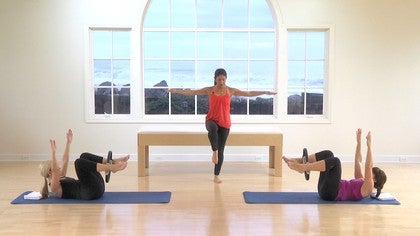
And then the only other thing about that that you can't really experience on the mat is that a lot of people also like to stand wider than their frame. And what happens then is their lower backs gonna pop forward so their hips are actually going to be in front of your shoulders. So that's another way where you're like no need to pull those hips right under our shoulders. And it's always better to stand at least within your frame and applaud his stance, which we'll get to later is even better. So you got your box and in [inaudible] we use our powerhouse.
A lot of people call it your core or your abs or, but we caught a powerhouse. And the powerhouse is if you imagine a weight lifting belt, it's about a five inch band of muscles that goes around your front and your lower back. So I'm going to use a lot of imagery today and one of them's going to be a corset. So you want to really think about pulling all of those muscles in. So we're going to work a lot on on that starting right now. So your navel, your belly button, we actually don't want to go around so much that we end up pushing our stomach out because two things happen. Either develop a six pack on top of your stomach, which is not that attractive that you don't have a six pack, but it's like on top pushing out or you're working so hard that you squeeze out the sides of your stomach and you look like a jelly donut, like going out to the sites. You don't want that either. So almost not working as hard as we think we should sometimes is.
I'm a good way to go. So I want you to imagine a mattress and every now and then there's a button on a mattress and it goes down a little bit. Dips down, that's your belly button. And there's a string that goes from the mattress through the insides, grabs onto the button and pulls it down. So imagine that there's right now a string from your spine going up through your intestines, grabbing onto your belly button and pulling it down. That's about as intense as I want it right now.
I want you to understand that your navel has to pull in. As we get more advanced, it's gonna need to pull in and then fight gravity. We're going to pull it up as well. So we're going to not have so much compression in our lower backs. We're going to pull in and out, but for now we're going to pull the navel in, okay? Like that mattress button. Awesome.
So we've got our box and we've got our powerhouse. Next, I want to focus on your ribs. Okay? So I want you to make two owls and just point your thumbs back. Good. And lay your fingers down on your ribs perfect. And just take a big breath and exhale. Good. So when you take a big breath, they float up to the ceiling and when you exhale, they sink down.
They sink and sink and sink and sink and sink. It's really important and big breath because as moms and exhale, we end up rounding over our kids and we don't know how to open up our shoulders properly. So this is a huge part of how you do that. So big breath and exhale, drop in down those ribs. Good. Now let we know what's happening on the front. While we're doing that, let's think of what's happening on our backs. So take a big breath, they float up and sodas the bottom of your bra.
Strap back, your bra strap. And when you exhale, you kind of press it into the mat. When we do anything with lifting our head up, we're gonna want to really make sure that we do that. Inhale, lifting, letting them float up and that like a little mouse or can crawl onto your back. And now exhale, squeeze away that tunnel. There's no light between your back and that map. Perfect. One more time. Big Breaths. Nice and exhaling. Very, very good. All right, so now I want you to rest your arms down by your side and I want you to keep breathing, but see if you can, when you exhale, not push out your belly.
Sometimes we pull in our ribs, but we push out our lower belly. So take a big breath and as you exhale, see if you can pull the navel in as well. Very nice and big breath. And as you exhale, those ribs sink down and your little mattress button goes down towards your spine. Very, very good. One more time. Big Breath, and exhaling. Great. All right, so now we're going to talk about our pelvis and I want you to put the heel of your hand on these two hip bones right here. So they're right here, one's here and one's here. Good. And you're going to point towards your pubic bone. Good.
And ideally your heel of your hand and the um, fingertips are at the same level. They're parallel to the floor. They're not, the fingertips aren't higher and they're not dipping down cause we're gonna work on that right now. Okay. So I want you to just go ahead and tilt your pelvis like it's a big bowl of soup and tilt it towards your chest so your pelvis is going to go that way. Wonderful. Good. And this is really obvious. Your lower back is snug on the mat and your tailbone is kind of curled up towards you. And we're going to go the other way. We're going to dump our bowl of soup out that way. Good.
And your lower back is now really up off the mat. Good. And now this time we're gonna see if you can pull your navel to your spine while you're dumping your bowls, who've been to your chest. So pull your navel in and as you tilt that's good. So you have a little bit awareness also what's going on in the front, maybe even contracting some stomach muscles there. There you go. And now we're going to go the other way and make sure that you're trying to do more of a arch under your lower back.
Then under your upper back you can do your upper back too. But just make sure that you're feeling it. More of a stretch throughout the lower back than the upper. And pull your navel in and tilt towards you. Fabulous. And now go ahead and go the other way. Dump it out. Good.
Great job. And then we're going to go back to just plain and straight. Good. All right. Now I want you to imagine one of those really difficult little board games where you have to roll a marble and like let it fall into one of those holes. Cause remember those case we have now a marble. Your pelvis is like that board. Then Marvel's gonna go into your, you want it to get it to go into your belly button.
So you're going to tilt your pelvis like a board so that it can fall into your belly button. Perfect. So the marble goes, Ooh. And now I want you to imagine a clock and kind of draw it where there's one o'clock, two o'clock, three o'clock going onto this hip. Four, five, six would be your pubic bone or your Cox, your tailbone, however you want to think. And then seven, eight, and nine your other hip, 10 11, 12 and you can go whichever way you want. You imagine that your clock, I don't know which clockwise it is for you on that side and same here. So we're going to [inaudible] to start with our marble falling into 12 o'clock and then it just, so subtly you have to tilt your pelvis towards so that the marble can fall into one and then into two. And then when you hit three, one hipbone should be up higher than the other, whichever side it is. That's it. But stay at three [inaudible].
You're all rolling. And then four and then five. And when you're at six, it's as if you tipped out that bowl soup again. Good. And seven and eight and nine again, one hip should be higher than the other. And then 10 good, 11 and 12 very nice. I'm gonna make it really complicated. We're gonna go the other way. So back to 12 and then go the opposite direction.
Ten nine, good. A seven. Six is like you're dumping it out. And then five, four, three and then hold it there. Good. So we're holding it at noon. Let's make sure our feet are flat on the Mat. And now we're going to see if we can get a little more range of motion just in here by your knees can move and your legs can move, but the less we move them, the more stretch we'll get in here. So let's go again. Clockwise.
You're going to start at noon and you're going to go 1211 make sure you're not 1211 sorry. One, two and three. Make sure you're not doing too much where it hurts. Keeping it in a comfort zone. Three, four, five and six. Good. And seven, see if you can move your legs even lit a good job. Nine, 10, 11 and 12 it should feel good on your back. And then go the other account or clockwise. 1110, nine, eight, seven, six, five, four, three, two.
And stay center. Great. And now go ahead and relax. So that was really good. How do you guys feel? Good. All right. So now I want you to go ahead and actually turn that's have you face each other and you're going to be on your hands and knees. So you're going to have your hands directly under your shoulders, which is the top of your box. And you're going to have your knees directly into your hips, which is the bottom of your box. So bring the knees in a lot more, Cindy.
They're a little too far back. Good. Great. We're just gonna do old fashioned cutbacks. So go ahead and lift your head and look at each other. Perfect. And Go ahead and let your back hang. And that's right. Good. So this is what we would call an arched back. So, so that we're all on the same terms and we're going to bring your head to your chest and you're gonna round up your back like an angry cat.
Rounding it up. Perfect. Good. So now we're going to break this down. I want you to lift up your head and look at each other again and let your back just hang. So what happens here is cause your spine starts right between your ears. There's a bone and it goes all the way down to your tail months.
So when you lift up your head, it has an effect on what the rest of your back does. So your head's up and your chest Kinda has to automatically open. Good. Now bring your head to your chest and round up like an angry cat. And when you bring your chin to your chest, you can see how you can apply pressure into your hands, into the floor and your chest will pull up into your upper back. And that's really important in a lot of exercises that we do.
That opposition of pulling up your chest and your ribs are really closed, right? You can feel how your ribs like really pulled in. So now go ahead and lift up your head and see what happens when you lift up your head. So the heads up, the chest is open and those ribs are no longer protecting any organs. Like they just let everything hang out, right? They've spread out. So we're gonna do what? Yeah, exactly. Nope, that it Hank and your heads up.
You're just going to let it hang. Perfect. Now we're going to do the opposite against your heads to your chest. Your chest pulls up, your ribs, pull in. And this is the best part about doing cap backs is your naval is pulling really up into your spine and you can feel that you can feel it. Fight gravity and you can feel it.
Put a little bit of a stretch in your low, mid to lower back. Now go the other way where you're going to lift up your head and your chest is going to open. Your ribs are open. And now there's a lot more like space between your belly button and your back cause you're just letting the Hank right and your tailbone is sticking up to the ceiling. Okay, so that's the bottom of your spine. So now let's do the opposite again. So your heads to your chest. We've got heads of chest, we got our chest pulled up, we've got our ribs in, we've got our navel pulling up to our spine.
We feel a little stretch here and now you could probably do even more of that tilt of your pelvis. There you go. And it's as if your spine continued all the way down to a tail and you're like pulling your tail between your legs. That's what you want to think about. And then go ahead and lift up your head and do the absolute reverse. So now your head's up, your chest is open, ribs open again, maybe not to a fault where you're hurting your back. So I don't want to you too far and your stomach's not really engaged and your tailbone is up to the ceiling, right?
One other thing I want you to notice that these two bones, the bottom of your box is like pretty close to your knees. It's going that way. So let's do the opposite and pull these hip bones away from the floor. So head to your chest, rib chest is pulled up, ribs are enabled a spine, and now you're really pulling these bones up also with that belly button as your tailbone points to the ground. Good, very good. So this is what we will call a c curve and a c curve.
We'll have your shoulders at the same level as your hipbones, but the back is extremely rounded in between. Go ahead and stay like that with a nice round back and see how far you can keep your stomach off your thighs as you just sit back and enjoy it. Stretch onto your heels. So you're just going to keep hugging your belly in and just sit back. Good. That's all you have to do. Tough work, Huh? Good. All right, so now we really broke down what a c curve is.
So we're going to go ahead and get back onto our back with your knees bent and feet flat with your feet towards each other. Her perfect. Nice. Those cap backs usually feel pretty good too. Yeah. Good. How it ends, Cindy. Good, good. I'm just gonna bring your feet in a little bit more in. Good. Alright, so now we're gonna add a little bit of, um, we're gonna understand how that works by adding a magic circle. Magic circle is your friend.
It is an iron circle just surrounded by rubber to make it more user friendly. But the good news is is you can squeeze it as little as you want to, but if you really want to pump up your workout, you can squeeze it as much as you wanted to, but it really, it gives you no cheating. So it really makes you work that much harder and for getting back into shape after everything stretching out completely up from having a baby, there's nothing better to help give you stabilization and pull you together. So we're going to put it right between our inner thighs pretty close to our knees. So you're going to put it like right there. Yup. It'll squeeze in there somehow. And some, we have a lot of lymph nodes through here, so if it feels uncomfortable, go ahead and move it whenever you need to. All right. Okay.
And your feet are perfect. Um, do you want to avoid them going too wide? But they look fine right now. All right, so we've done a lot of tilting an until thing and now I'm going to ask you not to tilt at all while we do a little bit of work. Okay? So it's just going to stay as flat and straight as possible. Okay? So that's tilting towards you. So you exactly just want it like that. [inaudible] good.
And so we want to pull everything back together. Everything that's really stretched. So you want to picture your pelvis and there's these two hip bones that kind of formed this bullshit and they come together in the front as a pubic symphysis. But in the back they connect to a triangle bone, which is the bottom of your back called your Seagram. So they push against that triangle bone in the back and in the front they come forward to the pubic synthesis.
So we want to think about those and imagine that our pelvis is actually like an advice and we're going to just imagine that we can pull it, press it together and sometimes we'll squeeze the magic circle with that. But you don't have to, if you don't want to suggest in your pelvis, just parol it together. It's literally trying to send a connection and refiring those nerves and those muscles and after persistence there like on. So you want to think about those and to think about those. Now we're going to add extra muscles. Um, both of you actually need to bring your feet in closer to you a little bit more, I'm sorry, towards your bottoms. Good.
So that it's a little easier on them when we get to the harder part. So repress, we're starting with the pelvis, just trying to press all those bones together. Then we're going to try to squeeze like crazy, just our bottom. Not really tilting again but just trying to, let's add some bottom muscles and they might've already been starting to work cause you're trying so hard to press your pelvis. And then I want you to think about your pelvic floor. And I want you to also pull that up towards you.
So you've got your stable pelvis, you've got your bottom squeezing, and you're trying to like pull your pelvic floor up like an elevator. Good. And now see if you can add outer thighs and inner thighs as you squeeze that circle. Very nice. So we've got a lot of muscles going on now through here, Jen. Just hold it tight. Yep. No, just to where you feel like you're using the correct thing and you're again, not like overworking it cause it's only gonna get harder from here. Okay.
So we're going to hold that and now we're gonna roll that marble into 12 o'clock. So now you're gonna use those muscles to tilt towards your belly button. Tilt that pelvis. And so your tailbones a little bit up off the Mat, right? And we're going to continue lifting that tailbone and you're going to lift up another bone on your back and another bone until your goal is to be a straight line from your knee to your shoulder. Good. And that takes a lot of bottom work. A lot of stretch. You're almost there.
You can probably lift another two inches, but you want to make sure you're not using your lower back to the left. That's easy. You want to use your bottom and just stay there and now try to enjoy melting down one bone at a time. So you're going to make sure that bra strap goes down before your waistband and you're going to do it more significant tilt towards you to really massage your lower back down until you're rolling through your sacrum and you're completely flat with your tailbone. So the down part shouldn't feel like too much work except the fact that your bottom gets heavy and it wants to go down first and you have to hold it up.
How'd that feel? Good. I'm going to have you Brooke, bring your feet in just a little closer. Yeah, especially your right foot there. Good. All right, we're going to do that again, but now we're going to add some pumps once we're up there. When we pumped the circle. We're not going to lift our pelvis up and down, but just hold it stable and the knees. We'll just go in and out. So we're going to start with just our pelvis pulling together, no tilting. Try to keep that Aha. Good job. So just the pelvis, then the bottom. See if you can get your pelvic floor to pull up like an elevator.
Add your outer thigh inner thigh, and now tilt a little bit more before you lift and then it's like your backs. A strand of pearls when we're just lifting up one at a time. Now stay there with your bottom up as high as you can without using your back. And now we're going to press a circle together. 10 Times one, two, keep your bottom up. Three, four, keep it up by six, seven. It's going to lift a little more. Nine, 10 hold it up and tight circle and melt down your bra strap. The chest bone, the sternum is going down until you're all the way down.
Nice job. We're going to get one more time. Press your pelvis together, God and squeeze your bottom. Pelvic floor in and out of the thigh and start coming up. As you get more advanced, you're also going to understand they use these tightening muscles to try to reach your thighs out of your hips towards your knees. This is if your knees are trying to go forward to those toes. And we're going to do 10 more beats. One, two, three, four, five. I like the lines seven, eight, nine, 10 hold it tight. And now keep your bottom up as long as you can enroll down.
Now, most people would have gotten a hamstring cramped by now, or like a Charlie horse or a cast. So that's very normal if you haven't gotten one, that's pretty good. Okay. So that is really good stabilization with the lower, with the lower body. Okay. So as we get more advanced, we're going to not just want to pull the belly in, but pull it in and up. In order to pull it up, you have to blow up away from something. And that is the something.
It's this squeeze that you're going to try to hold tight and you're gonna pull your belly up away from that. Okay. So I'm gonna want you to put your hands behind your head, one over the other good. And I want you to try right here to just as you inhale, feel your lungs on the mat instead of coming up off the mat. So just inhale kind of into the mat and exhale, allow your ribs to go down and breathe even more into the mat. Very nice. Let's do that again.
We're going to inhale and as you exhale, your ribs are going to go down into the mat. Great job. On this next exhale, we'll end up lifting your head. So we're going to inhale and as you exhale, those ribs go down and curl your head up. It's like a seesaw. Your ribs go down, your head goes up. Oh, and now roll down, check it out. You're doing and set up and not in kidding. Inhale, take a big breath. Exhale, pull your ribs in and see if you can also pull the navel end. That's real top. Yes, and roll down. So imagine that core set. We don't want any jelly donuts here, right? So inhale, exhale.
Those ribs go down. The navel goes in and your waist comes in. Beautiful and rolled down. We're going to do that one more time, but we're going to stay up on the next one. Inhale. And as you exhale, those ribs pull in. Your Navel tries to stay in and you stay there. Good. And now lengthen your arms by your side and we're going to pump them. Inhale, two, three, four, five. Now exhale all your air out.
Inhale all your air. Good. Exhale, pulling the navel in. Two more big breath. And exhale. Try to open your collarbones a bit. Good. One more. And exhale, pulling in those ribs and now melt down your head, your neck, and your head and rest. Very, very good. Rest your arms down. That's what the upper body is going to look like in the hundred. It's called the a hundred because we inhale for five counts.
Let me Xcel for five and you do it 10 times to equal a hundred. Good. All right, so how we going to get to the bottom? The full hundred is we're gonna pull our naval in. We're going to squeeze our pelvis together, bottom tight pelvic floor, pulling in and up, inner and outer thighs squeezing. We do not right there. Okay.
And hope we're going to keep our back down and instead we're going to draw our belly button in and up to bring your knees towards these. Your feet are going to float up into like a table top position. So go ahead and yep, exactly. So they're going to be right there. And so with your pelvis you're squeezing that circle tight, good and your bottom. And trying to feel your pelvic floor. Go ahead and place your hands behind your head again and take a big breath.
And as you exhale, the ribs pull in and you're going to float up your head and shoulders. Good. Curling up, curling up. Good. A little bit more up. Don't worry about squeezing the circle and now lengthen your arms by your side and palm. Inhale, two, three, four, five and exhale. And these one a little more like that because you want your head, the weight of your head to imagine that it's right here. Perfect. We're going to do two more big breath and exhale and one more.
And we're just trying to pull everything like a corset. So naval in Wastin and then put your hands under your knees and pull the knees to you as you rest down your neck. [inaudible] so stretching in. Good. And I want you to take the circle and put it to your side. We're going to use it on the next exercise, but I want you to just go ahead and sit up any way you can without having to use it. Great. So where you're going to work up to the a hundred so you did like 40 took a tiny break, you did another 40 so before you know it, you'll be able to do 80 all the way through and then you can do the whole hundred. So Nice.
But you want to make sure you're not trying to get to the end, you're not trying to run before you can walk. You want to make sure you really feel it all and be like, yeah, I got it all in the right places for that amount of time instead of this amount of time and it's all a mess. All right, so let's do, um, the roll back. You're going to have your feet a little bit apart and we're going to put the circle again between your inner thighs. Yep. Good. And so now this is kinda like the cap backs where we had our shoulders in the same plane as our, uh, hips, right? This, but you're gonna really curve your body. So all those things that happened, Nita now happen, happen in a seated position. Good. Exactly.
So we've got our shoulders, but they can just draw it, relax a little bit. Awesome. And they're right over your hip bumps. Okay. And your navel is pulling right into your lower back. Awesome. So we're going to start by that strong pelvis squeezing and the bottom squeezing and your inner and outer thighs squeezing. And we're going to try to pull that pelvic floor up and feet are going to just stay there. Actually. There we go.
And we're going to try to roll down the first vertebra in our back through our lower back here in a rural back. This bone. Exactly. Your hands are going to stay under your knees while you squeeze. Go down, see if you can get your waistband down. That's tough. Hold it there and take a breath and exhale, come forward with your navel in. So you're going to use your belly button to pull in as you exhale and then take a break and relax and sit up. Good. And then I want to see your body morphing. You're going to scoop in your belly, squeeze your pelvis together.
Good. And you're going to pull away from those thighs. Those hipbones are going to pull away from the thighs trying to get your hip lower back on the mat and then take a breath and exhale come forward. So you're trying to come forward using more of your belly than anything else, but your hands are there to help you. And again, and pull it in your belly button. Schoolies your pelvis. That's it. And take a breath and the next hail so the naval can come in as you come forward. Good. Any questions, anything strike you that's difficult to move those muscles and make them do. Exactly.
We're going to do two more, and before you know it, you're going to be rolling all the way down to your head and coming all the way back up. But we want to stop Jess at your waistband and later on you're going to be rolling down to your bra strap. And then you can be rolling all the way down to your head. And we're going to do that again. I want you to press your bottom together, press your hips together, squeeze your seat and pelvic floor, and now you're gonna pull away from that circle. So that's giving you the stabilization.
And then take a breath and exhale, pull in as you come forward. Very, very good. We're gonna do that one more time. Press your hips together, pull your navel away and try to roll down one bone, the next bone. Hold it there as you take a breath and exhale, pulling in as you come home. Really, really good. Go ahead and take a break. What you guys did that was so awesome that is very hard to do is as you guys came back, you pulled your belly button in and rounded your lower back.
Most people are gonna push their pelvis forward as they come back up. So that was really, really good. Alright, so now I want you to um, you can take the circle away and bring your knees together and feet together and squeeze them together as if you did have the magic circle. So sometimes you're going to have to let the crutch go away and still imagine those muscles. Okay? So your hands are under your knees and we're not going to come back up, but I want you to work just as hard even though you're not going to come back up. So I want you round your back and you are going to pull your navel in, squeeze the pelvis together, the bottom, and you're going to pull your pelvic floor with you as you roll down your lower back. So you're going to get down your waistband and then keep going. And then your goal is to just get them all to be in a row.
Straight-Line r is helpful. There you go. And then just rest your head down. So really good cause in employees is we work in between each exercise too so that you're always working. So we have our box and it's very hard to circle our leg without circling our entire box. And that's what we're going to learn right now. So before we do anything, I want you to just, um, I want you to just feel your navel pull into your spine. Good. And we're just going to take a breath and as you exhale, the navel is going to come into your spine.
I want you to bring the right knee into your chest to see if you can use your stomach to help bring the right knee into your chest. And then you're going to put that foot down to the mat and it can be smaller. So we're going to keep our back nice and flat and pulling in her belly and good. Yeah, that's perfect. We're going to put it down. We're going to go onto the left leg now.
So we're going to pull in and we're gonna bring the left leg in and you can use your hands to give it a little hug. [inaudible] so it kind of stretches your hip and maybe your knee, hopefully have healthy knees and hips and you're gonna put your foot down. Good am we're going to bring in the right knee again. So naval in good and bringing it in. Good and down cricket.
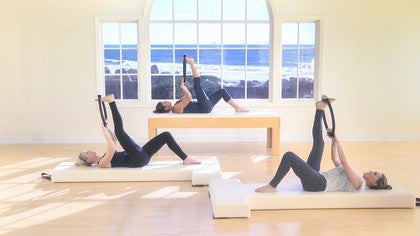
He crack kick and just left them with you and navel in. And we're going to bring in the left knee. Great. We're going to put that down. All right, we're gonna move on and we're going to bring in the right and now we're going to straighten that leg. A the bent knee. There we go. Up to the ceiling. Good.
Put Your hands behind your sigh. Good. Try to avoid the knee and just give it a good stretch. So while you're giving it a good stretch, few things, we want to make the top of our box not come up off the mat. You didn't do that, but you just want to keep it as open. Your collarbones as open and chest open. Good. And see if you can kind of keep your tailbone down too. That would be a good goal to do. It'll add to the stretch.
Finally implies, and this exercise is designed to lean out your thigh. And the way you lean out your thigh is by using the outer thigh and the back of the leg, which will come way down the line. But what you do want to do is slowly rotate the knee and the toes so that they're pointing more towards your shoulder. Exactly. And now that changes the stretch as well as the alignment of your hip bones. Just cause if you roll your knee in, so say it points to the other shoulder, it lifts that hip up. Can you feel how it moved up?
And now turn it out and now it drops that hip down and that's when it's even when it's dropped. Ah Huh. So you want your knee and your toe pointing towards that same shoulder. Could you feel that difference too? Great. So that's your challenge today. Number one. Always. Can I keep my naval to my spine?
But we're going to draw a circle on the ceiling without moving any of our box and then keeping that knee turned out. So we're going to press your arms down by your side. Good. Excellent. And you're gonna draw a circle by bringing it up as high as you can to your nose. You're going to cross your box and you're going to go down a little bit and make sure that needs still turned out. [inaudible] and then pull it right back. Kind of looks more like a d but so you're gonna cross around and then pull it back up. Good.
And relax that foot cause it's going to be just nice and long and loose. And imagine that you have the longest legs in the world and it just touching the ceiling and pulling in and one more. Seeing if you can have good and then stay right there. We're going to reverse it going down. Good job on keeping the turnout around and up. When you go down, allow yourself to stretch that thigh a little more.
That's good and damn. And then see if you can pull the navel in as you come up. Awesome. So down. I didn't do the reverse with you. Sorry. Down Cross and see if you can pull your navel in down the news going to still stay like that and enabling and three and navel. Good. And to pull away from me. Nice.
One more pulling away and now hug that knee in silliest little things. Hips are like circles but they're hard. Yeah, we're going to put that foot right next to your left and we're going to do it again with the left in case I want you to, before you bring it in, you want to make sure you're doing it by pulling your knee. Yeah. So pulling in and then that Neal, come in and hug it with your hands and then straighten your leg up to the ceiling and put your hands behind your thigh. Good and stretch. And then see if you can get both shoulders to open up. Nice. And this is again, we're going to keep the knee pointing towards this shoulder. Not Rolling in because then you feel how much this lifts the hip up as you roll in there. Good. Alright, so now press your arms down by your side. Looks good, Brooke.
And you're gonna Cross your body. Go down and pull it up. Good. Cross around and up. Very nice and cross around em. Pulling it. Nice job. And two [inaudible]. Yeah. One more.
Go in a little bit more. [inaudible] yes. And now we're going to reverse. You're going to go down Cindy, and then cross the body and pull up like a choo. Good down. Really, really get three more and reaching it out. Pulling your belly in. Is that like comes up so that when it rolls in, it's hard to do that. So down last one and now pull your belly in. Awesome. And Bend that knee in.
Good. Hug it in. Good, good, good. All right, put that foot down. Nice. Rest your arms down by your side. Okay. If knees together, feet together. Good. We're going to introduce single leg stretch, which is almost what you've done already. Okay? It's bringing in a knee to your chest, but you want to make sure that your back is super flat. Okay? So for this exercise, and because we're starting off, it's our right to tilt the pelvis towards you. What I want you to make sure is that your back is flat and that you're pulling your navel in to do it.
So I want you to imagine that there's a string connected belly button to your knee. And the deeper this goes, it like pulls the knee right on in with it. So we're gonna pull your belly button in and it's the knees just going to float on in because he did that and we're going to put the foot down and we're going to pull in exactly. Does that make sense? Or you can at least picture that imagery and we're going to pull in fabulous and hug it and then put it down and pulling in beautiful and hug it. Good and rest down and stay there. So while we're doing these at this level, you actually are allowing yourself to not be like in a super advanced class because you want to feel everything.
And what you want to feel is maybe your pelvic floor helping to pull in instead of just being like out to lunch. So you're using your navel to pull in you, cause you could do this by using the quad muscle all day long, but you don't want to do that. You want to use, you want to see dramatic improvement through here. So you want to pull your navel in and you want to even add the pelvic floor as you bring in that right knee. Good. And give it a hug and then put it down. So just adding a little more thought. Good. And then the left. Good. And then down. Nice. Alright, so now we're going to add a little the, I think that's enough. Adding their on on. I was gonna add something else, but we're going to add the upper body component. Okay. So let's put your hands behind your head again. Good.
And just take a breath while you're lying down. And as you exhale CV, your ribs can float down and you can come up with your head as if the weight of your head is in your belly. Beautiful. And roll down your neck and head. Good, good. And now we're going to do that again. We're going to inhale and exhale pulling in those ribs into the mat and your head's going gorgeous. So it's like your belly looks like it's an ice. If I had an ice cream scoop and I just scooped out your whole belly, that's exactly what I want. And Go ahead and lower down. Good. All right, so now these, this exercise and the next one are the first two in a series that we call a series of five and the series of five. The biggest challenge it is basically if I was looking at your box, I wouldn't even know you're doing anything because nothing in this area moves.
The rest is like doing this. It's saying I can do all of these movements is all as choreography while just keeping this super strong and stable. Okay, so you want to make sure that you're not going up and down with your upper body, what you just did, where you exhaled and you curled up. You're going to stay like that. It's not going to go down at all throughout the exercises and k, they're going to try to keep that up. All right? So the lower body is going to be one knee pulling in and then down.
We'll get that. Okay, so we're going to inhale, take a breath, exhale. Let's see what the upper body is doing. We're pulling in. Good. Now take your hands and hug your right knee into your chest. Good, good. And then put it down and pulling in your belly button. Bring in the left and put it down. Nice.
And keep your box totally stable, bringing your right. You can do it navel in Nice and down. And we're just doing one more pulling in. We're going to do the left. Great. Hugging your left. Keep it there and rest down your head. Keep the left there, God. All right. So now I want you to rest your head down and I want you to bring in the right knee, but now you're going to straighten the leg to the ceiling and see if he can slightly turn it out and squeeze your bottom. Great job.
Now we're going to lift back up again, but we're going to take a breath. And as you exhale, you can even use your hands to help pull in your ribs and pull up your head. Great. Good. And now switched legs. Pull your, nope, we're gonna stay up with your head and bought up and you're going to switch left. Hug It in good and right and left. Pull in the Navel and left Nan. Curl up.
If your head goes down too far, it's gonna hurt and right. Just do one more and left. Good. And now hug both knees in and rest your head down. You Go. Yeah. How's your neck doing? It's getting tired. Okay, Russ, everything you get to actually take a break and we're gonna put the circle between our ankles. Not so fun, but super important for beautiful, shapely thighs and bottoms. There we go. So hands. Yep. Between your ankles. Perfect. All right.
And we're going to have your knees just like that. Rest your arms down by your side. Her effective. So what we just did is we bent one knee in at a time, right when we hired one. Now we're just doing both of them. So both knees bend in or both legs straight. And so when you straighten, we're going to get back to those basics and I want you to nothing with the feet.
It's all going to be with your pelvis. So imagine your pelvis is in that Vice. We pull it together, pull your navel in. We pull that pelvic floor, we add the bottom, outer thighs and inner thighs. And you're going to keep your head down for right now. And we're gonna straighten the legs almost to the ceiling, but just a little lower. Good. And then try to pull your belly in as you bring them back in.
Bend your knees back in. That's all it is. So squeezing from your bottom and the pelvis and your navels trying to stay in and then bend your knees back in. Good job. Two more like that. Squeezing it out. Good. And in one more. Let me see that corset. Pull the navel in more. More. That's it. And bending again.
Now put your hands on your ankle. So they're going to come up and just hear good. Rest your head for a second cause I feel bad. All right, so now we will add the head. Okay. So take a big breath though. And exhale. Press your ribs down and come up. And so it's gonna feel like this when you stretch in. Now reach your arms, keep your upper body like that. Arms up to the ceiling. Perfect.
And come back in. Grab your ankles. Three more. Inhale, reach to the ceiling and exhale. Almost two more. No movement here now. Yeah. And exhale. One more. Can You keep your navel in as you go out, keep your navel in. Keep you look at that gorgeous and rest on your head. Lie Down and take a break. Good. I'll take the circles.
She's like gladly. And sit up any way you can. Later on. We'll be doing a sit up as you sit up. But that was great. So you're, you really pulled in as everything else squeeze and it's really great. Last exercise, super important posture. Okay. So we're going to finish with spine stretch forward because as you do that exercise, no matter how advanced you are, later on, you get tired in your back cause it wants to help. And so you're, you're gonna want to stretch it out. So we always do spine stretch forward. You're gonna open your legs about three inches wider than your shoulders.
Some people right off the bat, they're flexible enough to keep their legs straight and sit up tall. And ideally with your feet flex. But if this starts to grab, then go ahead. Just bend your knees a little bit. Okay? But you want good and you want to sit up, not slumping or that you want to think of your spine, one on top of the other. And I want you to put your hands right on your hip bones.
Imagine drawing a line across there and it's like a laser beam that you gotta pull your belly button behind it. See if you can pull your pelvis together. We did that. Squeeze your bottom and pull your belly a little bit up. Good. And now I want you to adjust. Exhale, bringing the crown of your head down to the mat set. Hey, good breath if you need to. And then exhale, looking at your belly button and just crown down. Good. And then roll up through your backs. You're going to lift your middle, lower back, middle and upper. Love it. Good job ladies. Now you, I just wanted you to be aware that when you go down, you don't just lie down your pelvis. So you did a really good job there. Now put your hands one over the other behind your head and push your head into your hands cause you shouldn't be hanging. Okay, you're going to pull your navel in. Big Breath. And now exhale, pull your ribs in as your head comes down and do a stomach crunch.
Really feel your stomach pull in and in and in as you exit. Lex Elix he'll get in the get down and then inhale roll up. And we're going to do that one more time. Big Breath and exhale head to your chest. Ribs are pulling in and you're gonna pull your navel is deep into your spine as you can, and you're going to lift off your seat as much as you can because you're squeezing it as you get down, down, down, and you're going to roll up.
So you're going down because your stomach is completely contracting. But now let's enjoy it. Arm Straight up at shoulder height, big breath, lifting up off your bottom, and then exhale, head to chest and just see if you can reach your arms forward as you reached down. Curve down forward. God good. Yeah, and then roll back up one bone at a time and we're going to do one more big breath and exhale down. And the only thing I want to say here is that on the way up, try your hardest. Start Rolling back up, that once you get your, basically your bra strap down, see if you can really live one bone at a time before you lift your head and go ahead and relax your arms and you are all finished. Fantastic. Nice job.
Mommy and Me: Postnatal Mat Classes
Mention
 |
Monica Wilson (Teacher) |
 |
Sarah S |
|
|
Hannah W |
 |
Noelle |
|
|
Isadora B |
 |
Eva T |
 |
Lauren Ashley |
 |
Anna N |
|
|
Lisa B |
|
|
Claire H |
|
|
sonia lv |
 |
Heidi VDB |
Comments


happy days!


 but loved this class for deliberate beginner pace really getting into my lower powerhouse. i love the magic circle it prevents so much "cheating" i do . thank you monica !

Do you have any good recommendations for literature/resources of post-natal guidelines for Pilates? I enjoy your class a lot and want to expand my knowledge and understanding of the concepts behind pre/post natal movement and safety with Pilates.
You need to be a subscriber to post a comment.
Please Log In or Create an Account to start your free trial.
