Description
The props used are 4 inch balls, Foot Corrector, Toe Corrector, Yoga Block, and Functional Footprints. If you don't have these props, Elizabeth offers suggestions of other objects that can be used in their place.
About This Video
Transcript
Read Full Transcript
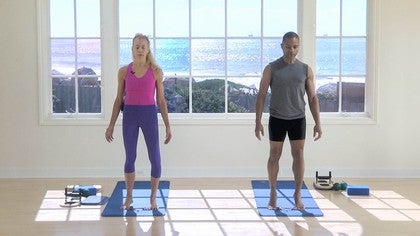
Welcome to any time. I'm Elizabeth Larkam, delighted to be here with you to share some of my favorite material, some of some is from my private collection and others I have learned from my many teachers along the way. I'm here with my colleague Norris Tomlinson. Norris is the owner of [inaudible] in Chicago and Norris and I have collaborated in the Pilati swirled since 1999. We're delighted to be here with you. I'd like to introduce you to the props that you will be using in our foot festival. First we'll take a look at the ball. This ball is a four inch diameter ball. Uh, you can choose any ball, uh, from your collection of that you would be comfortable with. It can be any color, any texture.
We recommend that the four inch diameter would be best for most foot sizes and lengths. Another piece of the apparatus we'll be using a small prop is a yoga block. By all means, you can use a cork yoga block of Foam Yoga Block. Um, this size is just fine and you'll also, uh, do very well with a yoga block that's slightly wider. Another piece of equipment that we'll be using is the, uh, tow corrector.
This is based on the original design of Joseph h [inaudible]. Um, he was a genius in many respects, including, uh, the work that he created for the feet. So now we're happy to have this, um, famous fashion accessory or stocking stuffer that will also do marvels for your toes. If you don't have a toe corrector, no problem. Just get a thick rubber band. It's usually blue from your stock of organic Broccoli and you'll be all set. Now we'll also be making use of the foot corrector, which is another creation of Joseph h [inaudible]. Um, that's been, um, a retooled, uh, manufactured by balanced body. Um, the foot corrector, um, has, can be equipped with a, a very strong spring or a moderate spring. And I requested that we use the moderate spring for today's work.
So just in case you're practicing with the foot corrector, and do you find the work to be very difficult for you? Don't blame yourself. Always blame the environment. That's my philosophy now. Um, with the foot corrector, we'll be making use of, um, some, uh, pads and that will decrease the range of motion with which you start. So if you find that this range of motion from heel to toes is too great a strain on your foot structures, then by all means, you can build up the floor again. Uh, don't blame yourself. Just modify the environment so that you'll be more comfortable.
Finally, we'll be using the functional footprints. The functional footprints are created by Zhang called West and Katy Keller. Jean-Claude West is a kinesiologist who lives in northern California, has a masters in motor learning from Columbia, and he collaborated with Katie Keller, who is the physical therapists for New York City ballet and Julliard. The functional footprints were originally designed to be used by dancers in order to ensure that their external hip rotation had integrity from the hip joint. Now, however, the functional footprints are used by a variety of populations, including those individuals who are interested in improving their mobility of their, um, postier hip capsule, uh, so that are the extensibility of the posterior hip capsule so that they can put off, um, what may be an oncoming hip replacement. Now you're thinking that you signed up for a class as a foot festival, and here I am lecturing you on the history of the props. So it's time to get started. No props this moment.
It's just your hands and your feet. Norris and I will be doing this together. I'll be providing the instruction of course, and some corrections to Norris that you can take into account for yourself. This is part of my private collection. This is material that, uh, given the opportunity, I would prefer to be doing this probably than texting. Um, I know that gives my age away, but here we go. Now, um, Norris, choose the, choose the foot that to your estimation needs the most attention. So whichever, say a fewer to stand in the sand and feel the weight of your feet into the earth. If one foot feels particularly strongly connected to the earth, choose the other one. Okay, I'll do the same.
Here you are seated and crossing your Shin over your thigh. By all means, if you're practicing at home and would feel more comfortable doing this, sitting in a chair, go right ahead. Um, it's just that this set is so gorgeous. We didn't want to mess it up by putting in a chair. All right, so with your Shin crossing over your thigh, use your thumb and first finger and this thumb and first finger are holding onto the little toe with your thumb. And first and first finger on the little toe, you make a uh, emotion as if a spiraling motion. As if to pull a cork gently out of a bottle, you're going to have a spiral motion or rotation that encourages length through the little toe length through the little toe side of your foot and a rotation towards the outer border of your foot. Now you go to the fourth toe, pulling each toe long, making a little space between the joints of the fourth metatarsal and all the bones of your toe. Now the third toe pulls out long spiraling to the outer border of your foot.
Now when it comes to the second toe, pull the second toe long. No spiraling here, not spiraling to the inside nor to the outside because the second toe corresponds with the metatarsal and the bones of your foot that correspond to the arch of your foot, the keystone of the arch. Now hold onto your big toe with all four fingers and a grasp your big toe pull long and then spiral gently towards the big toe side of your foot. So this spiral has a medial aspect to it as opposed to a lateral aspect. More information. When you get to the this on your next foot, now you'll need the thumb and first finger of each hand and the same side hand his foot holds the aspect of the toe that's closest to the metatarsal.
And the um, opposite hand holds the end of the toe. Now your, each hand moves in opposition to the other. It's as if you are unscrewing the lid from the base and the base from the lid of your toe. Now come to the fourth toe. The amount of pressure that you have has the intention change to your third toe. Now has the intention of um, making contact with the bone not to cause bone pain, but to have affirm contact. Come to the second toe.
Now affirm contact. You're going through the skin, through the superficial Fascia, through the periosteum and to the bone. Now to the first toe. The thumb and first finger of each hand are encouraging an oppositional rotation of the distal and prostate proximal aspects of your toes. You're thinking what could be next? Ah, it would be to hold onto the fifth, uh, the last toe, the fifth toe with the same side hand and hold onto the fourth toe with the opposite hand. Now this is toe braiding. Not really because it's only two toes, but you cross each toe over and under its neighbor.
And there's the little rhythmic action here I think, you know, and cross and cross and cross and cross a little toe dance here now across the fourth and the third toe. So you create a rhythm here, uh, six and by now you're wondering, now leave the second toe study. Okay, don't mess with the keystone of the arch. Cross the third toe over the second. Now keep the second toe steady and cross each toe over each other. I was going to make a joke and I forgot I interrupted myself. So sorry. Right now it's time to attend to your metatarsal.
Thus far you've been attending to the, to the toes. Now we're coming to the metatarsal. So let's take a hold of them like so the same side hand holds on all four fingers. The pads of your four fingers. Hold on to the underneath side. That's the plantar surface of your fifth metatarsal and your thumb. Same side thumb is on the top. So you have a grip on your, you have a contact, let's say with your fifth metatarsal like so.
Now on to the fourth metatarsal, the opposite hand comes to the sole of your foot with the pads of your fingers underneath the fourth metatarsal and your thumb on top. So now your hands are going to go ceiling floor, ceiling floor. Here we go. You a jostle your metatarsal is a little bit one up. Other down, one up, one down. [inaudible] oh, I know what I was going to discuss is the amount of repetition for this.
Now change to your fourth and third, the same side pads of your fingers up in the same side. Hand go underneath the fourth metatarsal. And the thumb on top opposite hand, uh, checks the hold of the third. It really depends on how much time you have. You know, when I'm in an airport lounge and the lift hons the flight to Frankfurt is delayed. Believe me, I'm on the floor. That lounge. I tried to find a place where people are not going to really pay too much attention and I take a lot of time to get my feet, uh, mobile anchored, etc. Now, but I still haven't answered your question.
Come to the third metatarsal on the second. [inaudible]. That's it. Norris backup. Just a little bit more to your midfoot. Yes. So move away from your toes, move away from your toes and towards more towards the midfoot. And then up and down here, I'd say between, uh, say eight to 10 repetitions of each of these moves.
And this is when you realize that, um, one has to be genetically, uh, suited or Juliana genetically modified for this particular activity. If you have thin, widely spread toes, it's no problem, no issue to get your fingers between your toes. For others, it's easier to do this in the bathtub with soap or with lotion. All right, now it's not that your hand circles your foot. Go ahead. It's not that your wrist circles your foot, not even your elbow. Circling your foot and ankle way up at your shoulder blade. It's your shoulder blade that's gliding around the curve of your rib wall.
And as the shoulder blade glides around the rib wall, that encourages a mobility of your shoulder joint mobility of your arm through your elbow, through your wrist, and through your fingers. Now lighten up on that white knuckle grip so that you have a through flow of uh, feeling kinesthetic acuity all the way from the thoracic spine through your entire shoulder girdle, through your arm to your hand, and then your foot reverse direction before you get unscrewed here. Reverse direction. That's right. And then your foot and ankle are the passive recipient of this motion from your thoracic spine, through your shoulder girdle and arm. And here you are creating a circuitry, a circuit of your upper extremity, that's your arm and your lower extremity, that shoe leg.
So you have a through connection, sort of like a syrupy wrapping around you, connecting the lower extremity on one side with the upper extremity on the other. Now as fun as that is, there's another variation. Let go. And now reinserts your fingers between your toes such as your thumb is on the inside of your big toe and your fingers wrapped around this way. Now your thumb is between your first and second toes. Resume. Shoulder blade is gliding around. Easy flow there, relaxing your fingers.
So there's a through transmission of force and reversed direction. Appreciating the um, ah, the feeling of perhaps, uh, the stimulation of the area around your shoulder blade. Now let go and with the same side, hand us foot. Pull your toes back. So here you are putting a bit of a a tensioning on the plantar surface of your foot and use the opposite at pads of your fingers to stroke from the toe to the heel along the first, uh, underneath the first metatarsal underneath the second metatarsal underneath the third, underneath the fourth, underneath the fifth.
So here we are providing stimulation to the plantar surface of the foot, go through each and a tarsal gain. And this a line of force is running from the forefoot to the rear foot, the forefoot to the rear foot, the forefoot of the rear foot. You could also run the other way, rear foot to forefoot, rear foot, forefoot, rear foot to four foot. And here's why I suggest those two things. Those of you studying with Thomas Myers will appreciate that the forefoot to rear foot stroke, those of you who are interested in the uh, following the mile, fashional Meridians will appreciate that that particular, uh, line of force will encourage a lengthening of the entire superficial back line. You could read Thomas Meyer's book, Anatomy trains to get to an introduction to that. However, those of you who are studying with them, uh, of the, the work of, of Latimer Iyanda, j a n d a, a, um, the late checklists of Aki and physiotherapists know of his work that the short foot shortening the rear foot towards the forefoot activates the intrinsic muscles of the foot accurately.
So there you have it more for your directed reading. Now where, where we time to ring out the foot. So the same side hand holds onto the forefoot, the opposite hand holds onto the rear foot. Now this is the foot as a twisted plate. You, um, move your hands like so with respect to each other, the forefoot going towards the ceiling, the rear foot, the heel going towards the floor, and then reverse wringing out your foot. I've had the very good fortune of being a student of Eric Franklins, Eric Franklin, the founder of the Franklin method, who has a three year instructor training program in which I have participated. And um, it's from Eric Franklin that I learned the concept of the foot as the twisted plate. This is a, um, a necessary and appropriate action of the foot.
So that when you are walking over unstable surfaces or standing on unstable surfaces in the [inaudible] studio, your foot is well adapted both from mobility and stability. Now come to standing and take a look at your feet. Appreciate the differences in how you feel, who you are standing. Take a look down at your feet. You may notice a difference in color. She said leading the witness.
I know there are always differences between sides and there always will be differences between sides. My hope is that the extra attention that you give to the pressure sensors of the, of your feet and your ankles will help to remind the motor cortex that you indeed do have a foot. And that, um, that uh, increased kinesthetic acuity can inform and improve your balance. The ability to stand on one leg. So there may be a color difference just indicating the change in circulation. Stand on the foot that got the attention and remember this was the side that needed the attention anyway, and then stand on the other side.
And there may be differences between sides and um, maybe not. All right, have a seat again. And let's give the other side of turn in a much more rapid, uh, way so that you can become more familiar with the sequence. And I will interrupt you less frequently. Now Cross your new, uh, foot over. So with the opposite hand to foot, hold on to your distal and if you're at your toe, starting at the base of your toe and pull out, um, creating a spiral motion. Now we'll go to the fourth toe and I'm uh, doing this in rhythm of account to myself, four, five and six and seven and eight.
Now the third toe pulling long, this is when you learn that the flight, which was delayed is coming up soon. So you're going to have to get to that gate fast. Six, seven and eight. Now, no twisting here, no spiraling here. Just pulling Wong, envisioning the spaces, the joint spaces of your, I'm going to keep going here cause I'm going to say something between the joint spaces, between the metatarsal and the toe. Now hold onto the first toe and resume the spiral. Having the idea that you are contacting your bone and in encouraging rotation.
Now, two hands. Ha. Uh, finger and thumb. Hold onto the root of your toe and the distal part of your toe. And it's an oppositional rotation. Change to the fourth toe. I'm thinking to myself, one, two and three and four, five and six and seven and eight. And then I was wanting to keep going cause it feels good.
Nine and 10 and 1920 next one, third one give. And I may be a little moving a little bit too slowly for you. So you'd like to pick up the pace. That's usually the case. I know. Alright now the second toe rotate. Yeah, that's right. And now we go to the first toe encouraging an oppositional rotation here of the distal on the proximal aspect of your toes. Time for toe, braiding, crossing each toe, fifth and fourth over and under its neighbor and the fourth and third over. In other words, neighbor four, five and 6 cents, seven and eight leave the second toe steady and cross the third over and under the second hold the second steady and cross the first over and under its neighbor time to activate the metatarsal. So take a hold with the same side, hand underneath the fifth metatarsal thumb on top, the opposite hand underneath the fourth, and move the fifth and fourth metatarsal ceiling and floor.
Now this is not to be confused with away in towards ceiling and floor. Yeah, and I teach this material frequently to my clients for their home exercise programs. Now we go to the fourth and third or their travel programs and um, I'm just remembering the mistakes that they often make and trying to save you from them. Now hold onto the second metatarsal and move the third up and down with respect to the second. Meanwhile, while this is all going on, not only is your foot appreciating the benefits of this and your motor cortex waking up, um, hold onto the second and move the first metatarsal. Also, you may be noticing that your hands are feeling a different quality of movement, a different feeling in the tissue, different vibration or frequencies in your two feet. Of course, there are always differences between sides. Remember I suggested that you start with the foot that needed the most attention and now we are perhaps working on your more dominant side and you may feel that the tissues perhaps that the tissues on that side are a little more resilient, maybe a little tighter because this is the foot that you choose to stand on.
Again, it's just useful to notice differences because a, that's why we're here now. It's interlacing the fingers between the toes. So spread your toes, interlace your fingers, pleased to meet you and rotating, encouraging mobility of the ankle. Reverse direction. And usually I have to do this a couple of rounds because I have to remind myself that this is not coming from the hand, not from the wrist, not from the elbow, not from the shoulder. Oh no, it's coming. Reverse direction from the shoulder blade.
A reminder glide in your shoulder blade around the curve of the thoracic wall, reverse and that main deed, it could, um, uh, radiate in a good way into a release in the side of your neck, even the side of your jaw. You could pretend you could rule. Okay, now change the interlacing. Now your thumb is on the inside
More information on that rear to four foot and four foot to rear foot connection and flow when we come to stand now, foot as the twisted plate for opposite hand to forefoot and same hand to rear foot.
Now Flex your feet, lie on your back. With your feet flexed, bend your knees just slightly. Make it ground force to press the back of your heels into the ground. And at this time you're fine, Norris, I'm just going to set up a moment. So Norris, you'll stay as you are so that the camera can see the souls of your feet.
And I'm going to change, um, on just a bit of a diagonal. I think that the angle will be fine so that you get two views from the feet up and then the more longitude, the more, um, profile view of me or on that way. Now with your pelvis in a neutral pelvis, neutral spine, a pelvis in a neutral position, press the back of your heels into the ground with just a little bit of a band of your knee, arms by your sides. Now your ankles will go into a slight plantar flection Dorsi flection rocking yourself from your heels into the ground. Now as you do this, the intention is to, uh, imagine your bones and allowing the bones to jostle in response to move or to rock in response to the planter. Endorsee flection. Do this with your feet flexed and then do this activating through your metatarsal [inaudible] pressing the metatarsal and then reach your toes long.
Now leave your left foot where it is and bring your right leg into you and make a rocking motion from heel to the top of your head and then press through your metatarsal. Same idea and then reach through your toes, change to the other side, pressing down with the back of your heel, your knees slightly bent, pressing through your metatarsal with your toe, still the flection and reaching your toes. Long a Nora. Stay as you are. And actually Norris come up and I will come up as well. Roll to your side and go to here. So by now you're thinking, okay, that felt really good on my toes. But what is she doing now? Um, Norris come to lie your back with your feet towards me please. That's right. So just have your head on the blue mat in your feet. Can Be on my mat. Okay. And I'm hoping to clarify now so you understand what I am meaning. So here you are, Norris with your inner knees and inner ankle bones as close together as you can get them.
Now I'm going to use the heels of my hands to press against the, um, fifth grade, the fifth metatarsal of neurosis feet in order to, um, in order to bring the little toe side of the foot correct in order to bring the little toe side of the foot towards the head of the fibula here. Alright, so then now Norris, this, uh, the soles of your feet are um, oriented as if to stand on the, uh, flat roof, the roof of an Eichler, okay. As opposed to an Alpine ski chalet when your little toes are away from you. Okay. So I'm going to press the heel of my hand against the little toe side of your foot. Now Bend your knees slightly, and as you bend your knees, press the back of your heels. The back of your cocaine is down into the ground. Now, um, you will be the passive recipient of, of the pressure from my hands, right?
And as I get a little rhythm going here, you could have the idea that your joints could relax a little bit, including the area around your hip joints and the area around your lumbar spine and the area around your ribs so that your lungs get to take a little bit of a ride and your thoracic wall, and even your head just at the occiput nods a little bit. [inaudible] now press through the balls of your feet towards me. Correct. So now your toes are pulling back. Your ankles are on the way to Plantar flection. And we're going to flex your knees. Bend your knees just a smidge. That's right.
Because a assure weight to stop the flow of motion will be to press your knees into extension and now point your toes towards me. That's right. And we're going to do a similar action here. Bend your knees a little bit. That's right. Nisa bed. That's the hardest one to convey. Now Bend your knees and roll to either side. [inaudible] come up from here.
Okay. So there you have it. Hours of entertainment, how to connect. Um, the, uh, the good feeling from your feet up through your torso. Now, um, you're not surprised that there's another version to this on your front. So come on to your front now and here we are. Um, feet facing the camera. Tuck your toes under into a Dorsey flection.
Place the palms of your hands down on either side of your shoulders. This time have your heels sitting bone with the part and with the souls of your toes tucked under. Hover your um, not your chest bone, but hover your, your face just off the mat and rock and Plantar endorsee flection. Now your knees can be extended. So you make a, a, a force fo r c e conversation between your, the souls of your toes and the heels of your hands. Your toes. Push your hands, push your toes, push your hands, push your toes, push your hand foot. And then it's as if there was a, um, ah, water in a pan and the pan was being moved away and towards the way and towards, or the water in the ocean away in, towards a way in, towards, but faster. Here. Keep the soles of your left toes on the floor.
Lift up your right leg away in tour. So change of the sole of your left toes away and towards. Now both feet on the ground away at toes tucked under. Take your hands off and convey the motion only through your ankles, plantar and Dorsi flection. Take off one foot
I do realize that they are not to everyone's preference. You can see I'm really flat chested. This has a built in Bra? No. Okay. I'm really flat chested so it is no problem for me to be faced down on the mat. Jiggling back and forth, appreciating the emotion of all the different layers of the Fascia of the intercostals and the periosteum around the ribs. And I know this is an acquired taste.
So if you're looking at that and think not for me, don't worry, you can still benefit from plenty of the moves coming home. Okay, now it's time to stand and do some, um, foot strengthening material. Come to stand please. And we'll stand here so you can get closeups as you like. Now it may be useful, um, when you practice this to have a uh, Norris, either a green ball between your ankles or the yoga block between your ankles, um, in order to ensure that, um, you are not falling into pronation nor rolling out into super nation. Um, clearly the, uh, the block will be a more um, firm sort of orthotic, uh, for your, for your feet.
Um, some people prefer to use a ball between the ankles. When you are practicing, um, in the airport lounge or in your studio or your house, um, then use the yoga block because it will, uh, be a more firm surface, more comprehensive surface against which you can press your inner, your inner feet. Now we can certainly make use of this yoga block by using the yoga block to give a floor for your inner thighs. And um, this is particularly beneficial to me since it does not escape you, particularly in this revealing position here. The different shape of my left leg from my right from a, um, a knee injury. I had, uh, tearing all the ligaments, the structures in my knee when I was 15 playing soccer. Um, so you can appreciate that I need to do these move moves every hour, preferably with the block here between the inner have the idea that you're um, uh, inner thighs draw towards each other with just a tad of internal rotation.
So the spiral of this, of the a femurs would be, there would be the force through the femurs would be an abduction and a slight bit of internal rotation. If you were to go into external rotation that would, you would hunker down towards the posterior pelvic tilt. We want you to be high on your hip sockets. Okay. And then the, the ball all dressed up. And where are we going? Hide your toenails and your fingernails
Pick them up and wave. Pick them up and wave. Pick them up. Put down your big toes, all the rest of them. Big Toes, all the other eight big toes, all the other eight big toes. Now keep your big toes and thumbs down and wave the other four. Do your best to keep your tongue in your mouth. Now put down the eight toes and wave the first two.
And as you do that, add to your awareness, uh, to keep your central axis, um, uh, vertical and your central axis in the following alignment. Keep your maneuvering in the center of your chest bone directly above your pubic bone, not leaning back for compression at the Thoracolumbar junction and not tilting forward either standing high on your femur heads. That'd be a quote from Eric Franklin, my way of saying it. Get up on your femur heads. If you had eyes at your hip joints, they would be wide open balancing your pelvis, uh, top your femurs. So this will require a current of your abdominal activation from pubic bone up towards your chest bone. Here we go. Fingers in hand, uh, fingers and feet together, toes under, on the new side, under, under up. And yes, I know that a Dorsey flection tends to make you lean backwards.
Do your best to stand your central access forward. Toe Waves, little to big wave. Pick 'em up and wave. Pick 'em up and wave. Pick 'em up and wave. Pick them up big toe. Oh, the other four big toe. And every time your toes work into Dorsey fluxion, they're your deep abdominals. Put down four and one. Now I can't talk into at the same time. Foreign one
Plant the souls of your toes. Have the idea that your midfoot could lift up without going backwards. Lift and spread your toes. Plan the souls of your toes and midfoot comes up and out. Every time you make a dome of your foot, you draw extra abdominal strength.
Don't lift your heels. Instead, have the idea that you could draw your heels forward, drawing your rear foot towards your forefoot. That will also activate the intrinsic muscles of your feet and it has a stronger effect in connecting the, uh, plantar surface of your foot with your deep abdominals. Maintaining your central access, not only upright, but a little bit forward on the way to up, uh, the doming of four foot two rear foot is what I was, uh, taught in a dance medicine when I worked at St Francis Memorial Hospital as a pilates instructor. It's only more recently in studying the work of Arianda that I learned about the importance of moving the rear foot towards the forefoot in order to, uh, uh, intensify the connection of the plantar surface of the foot to the deep abdominals and hence, um, more functionally integrating the activity of the feet with the core control of the torso. Now having addressed that area of the central axis, you might be feeling that it might be time to remove the constraint of the block. Why not move the block away? Take the ball away and put the block down so that you can stand on it now.
Um, place your foot over the block on top of the blocks so that the toes your toes could wrap around the block. Now at this time and Norris, you're doing of course beautifully and I'm just going to switch a little bit so that I can be seen this way. The soles of your toes are wrapped around the front facing of the block and your heel, the front of your heel will be in contact with the black, with the back of the block. Now, of course it does make a difference how long your feet are and how big the block is, all of that. But that's where I'm, the reason I have such a successful career in this field is that the particular proportions of me fit the props perfectly. So I fit the reformer very well and I realized it's um, you know, different sizes are better for different people, but I'm just doing what I'm genetically suited to do. All right, so wrapping the soles of your toes around the block and the front of your heel over the back of the block, create a perch for yourself and climb aboard the block. Now I know buckle up over there. If you have a cork block, that of course will give you a more firm surface, a foam block, not so much. We're doing our best not to fall over on camera for you.
Now the soles of your toes are wrapped around the front of the block and you have options. You could intend to draw your heels forward to your toes or you could intend to draw your toes back to your heels. Let's just say that learning from Vladimir Yonda, the importance of drawing the rear foot towards the forefoot. Place the pads of your fingers on the your lower abdominal area between pubic bone and naval. As you exhale, draw your rear foot. That's your heel towards your forefoot though.
So your toes and you perhaps will accompany that with a little extra lift of your abdominals current and making a current from pubic bone up underneath your chest bone. Okay, now keeping your fingers here without going backwards. Lift your toes up. The moment you lift your toes up, your eyebrows may lift also, but also your deep abdominals. Now plant the souls of your toes around the block and pull your heel for heels forward to your toes. Inhale to the back of your nostrils. Lift and spread your toes. Exhale, wrap your toes and draw your heel forward to your toes. Twice more. Inhaling, exhaling or wrap around and heel. Inhale to lift.
Exhale to lower. Now, I started teaching this when I was teaching pilates Mat classes in a yoga studio and they didn't have any PyLadies props. I being the queen of props, um, was a little destitute there for awhile until I figured why not use what I was given in the environment, I. E. The Yoga Block. And that's where I came upon the idea of using the yoga block between the inner thighs and the yoga block is a perch to stand on. You can further, um, um, challenge your central axis by inhaling, lift your fingers and lift your toes. And then as you exhale, wrap your toes around the block and bring your arms down and sometimes at the end of the class, uh, good luck Norris. Here we go. Take this all the way into a forward bend. So here you are moving in the direction of a forward bend, looking back towards your abdominals and resting down there and then lengthen from your tailbone out through the top of your head, keeping a firm grip on the block, drawing your heels towards your toes and wrapping around the Yoga Block, etc. So lots of challenge to your bounce, to your proprioception, all grounded in the articulation of your feet.
Now easy on the dismount. Climb off of this. Get rid of the yoga block for the moment. And it is ball time now. So the thighs you can appreciate. I've had many teachers through the years from whom I've learned on some of this, some of the foot material we're doing in today's foot festival. And um, just to recap some of those that I didn't mention, certainly I'm a student of Julio Horvath who's the founder and creator of Gyro Kenisa set up Gyrotonic. So some of the foot material, the hand to foot material. I've certainly learned as Julio student in Gyro Canisius I'm all, I've also done the four year Feldon Christ training and it's the Felton Christ's awareness through movement lessons that have given me some other inspiration of a choreography and material of stimulating the feet with the hands.
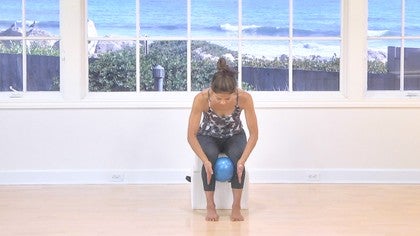
I'm a student also of Eric Franklin and uh, some of this ball material will come from his work as always. Um, I a study, uh, loyalty with my teachers and then incorporate the material best I can with my clients. And we're going to use these balls underneath, underneath the souls of your feet. Prior to that, there's an opportunity to use this ball to Nesa the ball between the sitting bones and the tailbone. Just slightly. So for a moment here to encourage the posterior pelvic floor to um, to have a little bit more elasticity in it. Place your hands on the ground, make sure that the ball is not pressing into your Coxix, but it's in the post to your pelvic floor. Between the sitting bones and in front of your tailbone. You can press your hands into the ground to release the pressure and as is comfortable for you, you can let your sitting bones, um, go over the ball. So the ball is Nessel to the post, to your pelvic floor. Um, the reason for doing this is that a post to your pelvic floor that lacks the opportunity for elasticity will impede the ability, the mobility of the hip joints and the ability of the lumbar spine to keep its curve. And oftentimes, um, the, this will be useful to do if you have a particular, if you've been seated for a long period of time at the desk or you can come off the ball. Now and have a seat and feel how it is to be, um, seated without the ball. There you go.
Now come to stand the material that we do in standing. We'll only need one ball at the moment. North. The material that we do in standing can also be practiced and taught in seated in a seated position. We'll do it standing because we don't have, um, chairs on this set. Now choose the foot which, um, needs the most attention and I will do the same. Now. Um, Nessel the ball underneath your forefoot so that the soles of your toes wrap around the circumference of the ball. Bring your heel a little bit more forward. Norris with respect to the ball. That's right. So the, the ball is encouraging and a doming of your foot as well.
Your heels in contact with the floor and your toes are wrapped around the ball. Now pressing downward, um, onto their forefoot. Roll forward from forefoot to rear foot, spreading your toes and aiming your knee forward over your second toe. Now push off from the souls of your toes and rock back to your heel. Exhale to roll forward. Steering your knee forward over your toes.
Inhale, push off and roll back once more. Gain with your eyes open. Exhaling bringing your pelvis forward. Inhale to push back. Now close your eyes and with your eyes closed without the visual, um, input. Now there's more push off on your toe from your toes. Now there's more attention to the um, the appropriate deceptors and the vestibular system.
There she goes forward and push back. Open your eyes now and Nesa the ball underneath your rear foot if I got that right. Yes. Okay. Now with the ball nestled under your rear foot, press, spread your toes and keeping your left foot steady. Take a step right foot forward, right foot back. I'm just going to back up the moment so I'm still on the Mat, right foot forward, right foot back, right foot forward as if your foot, we're taking a walk now move your pelvis forward and your and your foot will move. So I for saying right and left North, Sarah and I are in different feet.
Your pelvis is forward and your pelvis moves back. Taking a step, putting weight down through your rear foot, over the ball, pause and Nessa the ball underneath your forefoot again. Now the ball is keeping your foot in Dorsey flection. That's right. So that's not only the soles of your toes, it can wrap around the ball, but the front of your metatarsal is as well. Now keeping your toes wrapped around the ball, take a step with your foot forward and back and forward. When you first take this step, your pelvis is um, fairly steady.
Sorry, you're just, you're focusing on your leg moving forward. Now it's your pelvis moves forward and your pelvis moves back. Pal was moving over the ball and back twice more forward and back and forward and back. If all is going reasonably well, Nesa the ball underneath your midfoot, so neither your toes nor your heel are in contact with the floor. Now if you have ankle instability or a tendency towards ankle sprains, similar, just different ways, different language to describe it or have a tendency towards pronation. This is not the move for you because when the ball is underneath your midfoot and neither your forefoot nor your rear foot are touching the ground, there's much more instability. And there the contour, the ball will tend to make your foot, um, um, acclimate like so that is not a preferable if you already have that tendency.
So, um, you have plenty of material. Heavens knows and we'll just go through this quickly. For those of you who are clear of ankle instability at this time, okay, take a step forward and back and forward and back. My propioceptive acuity is not too good on this side, so I'm very conservative. Now your pelvis takes a step.
Elvis walks forward and back. Nice forward and, and forward and back. Pick up the ball for a moment so it will not be an attractive nuisance. And here you are standing on two legs. Appreciating the differences of that.
Put the ball down and Nessel the ball underneath your forefoot. Now with your heel in contact with the ground. As you exhale, roll forward, spreading your toes, inhale to push back. Exhaling your pelvis goes forward and back twice more, five and 6,007 and eight. Keep the ball underneath your forefoot or let's see, but the bone underneath your rear foot, I have to get, stay on the mat and take a step. Foot and leg go forward and back. Two and three and four and your pelvis takes a s a your pelvis takes a walk, so the step is a little bit bigger.
So the pelvis is moving forward and back in space and bringing you along. Now the ball is underneath your forefoot of game. Underneath the heads of your metatarsal is your metatarsal and the souls of your toes wrapped around. So you have a dome of your foot. Your pelvis stays fairly steady, and you take a walk forward and back forward and back and forward. Now you take a larger step.
Pelvis takes a walk more demanding in terms of Dorsey flection five and keep your toes wrapped around the ball. The ball is underneath your midfoot. Neither your toes. No, your heels are touching. Be Conservative. At first one she said taking a two inch step, sorry, four, five and just before leaving the ground. Lots of abdominal action here and then a larger step, maybe three and four, five and six and seven and eight. Bring both balls to the windows and here you are with one ball underneath each foot. Hold onto the windows, have your balls about sitting bone with the part and check to see that you are a neither pronating nor supernate ng, keeping a hold of the windows, appreciating the view of the waves and the sky sitting bones wide and your sitting bones back behind you.
Steer your knees over your second toes coming on down here so it's a ball squat. As you inhale, bring your hip joints forward and up, standing high on your hip joints. Let's see. Exhale sitting bones. Why steering your knees forward over your third toes and inhale to come up. You could also take this inhale to come down, doing your best to balance here.
Neither your forefoot nor your rear foot touching the ground. And then bring your sitting bones forward and up. One more round here, sitting bones wide. Steer your knees wide, over your third toes, broad across your collarbones, and then bring yourself kind of warming up to this forward and up. Easy on the dismount. Now climb off of that.
So lots more where that came from. But that's plenty of these for now. So Norris, now it's a toga is no time. And we'll um, introduce some material with this toe corrector. And uh, pardon me, I use the informal name Toe Gizmo. That would be a toe correcter. Now place the, you can do this seated or standing. Learn it seated.
First we will teach at standing place the, the red bands of the toe, uh, correct her right over the big toenail. So this will be on the distal aspect of your foot and have your feet about shoulder width or maybe pelvis with the part. Now that will encourage your big toes to move with a slight abduction. Now keeping that abduction and your knees forward over your second toes and then straighten both legs.
[inaudible] difficult for me to do and come on down. Now have a seat. Something else that you can do with your toe corrector. In addition to that standing work would be to, um, use it to, um, as a, as a theraband, encouraging to pull your toe wad and then go into planter Dorsi flection. That way you can use it, um, to strengthen plant reflection and keep your toe in line with the appropriate.
A first ray and you can use it too. It was very difficult for me to do. You can use it to strengthen toe abduction, moving your toe towards when moving your toe towards the medial part of your foot. That is for that I require some careful use with hands. So certainly you can do detailed toe work with the um, thera-band. As you might learn from Eric Franklin. You can use the organic, uh, Broccoli rubber band and you can use the toe Gizmo, uh, the toe corrector for uh, to steer each toe in the appropriate range of motion that it desires.
Okay, now onward from this to the foot corrector Norris for this time you'll need your foot corrector and also the two pads here. I'll put mine on this diagonal. Like sewing. You can go straight onto the group there. In my experience, it's preferable to, uh, be sure that your foot is very prepared. Uh, beef for this very quote, warmed up. Your foot has been supported you, um, um, before using the foot corrector. It's important to do the hand to foot work.
Some of the ball work, maybe some of the toe corrector work. Um, because the foot corrector is a very powerful piece of equipment, um, that should be used with great reverence. Now, um, we'll come to stand and put both pads on the, um, both paths on the back of the foot corrector like, so no. You'll place your heel on the pads and your metatarsal heads over the foot corrector. No. With your knee aimed over your second toe, Norris come just a little bit more forward so that the, the [inaudible] not, not only the sole, so the toes, but more than metatarsal heads are on top like that even more forward the metatarsal heads there. And then similar to what we were doing with the, with a ball, um, you're the sole their toes wrapped around the metatarsal heads. One might think that this is somewhat similar to the prehensile grip, the prehensile foot position that you would do on the foot bar now with weight down through your metatarsal. Um, purpose shifts your pelvis forward and the pedal will go down and bring your pelvis back as you exhale, bring your pelvis forward. Inhale to come back. Keep your heel firmly anchored. Exhale forward.
Inhale to come back, exhale forward and in have it come back so rightly so. You're looking at this and saying, what is she thinking? That's not foot strength. That's, that's moving the pelvis, that's transferring the proximal weight of the pelvis over the foot. Yup. Didn't escape me. I'm doing that on purpose so that you'll get the feeling of the proximal area moving forward over the distal and the weight transfer through your foot.
Now we can localize this activity by keeping the activity to focus at the activity in your ankle, foot, and lower leg by keeping your pelvis steady and have the intention of moving your foot towards plantar flection and Dorsey flection, Philando flection and Dorsey flection. At least in my experience. There's a big difference in the range of motion that I can get pressing the against the spring by shifting forward with the whole body proximal approximately versus the distal activation here useful and very important when the effort is greater not to internally rotate, so don't internally rotate and pronate, but stay clear with the integrity of your foot. Now we'll take that similar action with the um, other way. Let's see, you have been activating into Plantar flection. Now we'll activate into Dorsey flection. Place the front of your heel in contact with the top of the metal path, the front of your heel in contact there.
That's not to be confused with the center of your heel or the rear heel. There will be a more, um, accurate transfer of force from your foot into the long bone of your Tibia when the front of your heel is in contact with the foot corrector. Now as you exhale, bring your pelvis forward and that transfer of weight even more, I'd say Norris back, your foot up slightly. There you go right there. Exhale, rocking forward. Inhale to come back. Now a note of caution. Those of you with, um, compromised knee, I should know those of you with compromise knee joint surfaces.
Recognize that this may not be in your best interest because here you are putting direct force through the long bone of the Tibia going right up into the Tibia plateau and the um, the joint of the knee, the intersection of the Tibia Plateau and the condos or the femur. If those surfaces are compromise for you from Contra Malaysia, um, I know that's from the back of the Patella or from arthritis. This is probably not in your best interest. I do this with care and et cetera. So caution there. Now keeping your pelvis steady, moving your, uh, foot into, in the direction of plant reflection.
And there will be, um, less, uh, capability of pushing down so strongly but still beneficial for you to do that. Seven and eight lots more where that came from. Excuse me, lots more where that came from always. But step off the foot, correct her and appreciate the differences here. Each one of these particular moves in our foot festival that, uh, I show you, um, have a different benefits. The benefits layer one on top of the other. So you, if you have all day, what a pleasure to get so well connected from your foot to your pelvis and spine and brain. And if you don't have all day, then of course choose your favorites and the ones that um, best make up your, uh, for your motor control deficits.
Now we'll do the other side very quickly is to go, um, make sure that you're organized. Here you are in Dorsey flection. As you get familiar with this, you could decrease the amount of assist, the amount of assistance that you get from building up the floor. I'll just show that that's possible, Norris as you wish. So we've gone from two pads, uh, to some pads and you can see that now you can stay as you are. That's right that there is a much a steeper angle. Dorsey flection.
Exhale forward. Inhale to come back, exhale forward right away. You can see that when I don't have, when I have not built up the floor, there's the possibility of increased impingement at the anterior aspect of the ankle joint. It's not worth the trouble. Keep the floor built up. Now shifted your weight forward and back. Keep it a more distal action, right? Oh, and I'm certainly appreciating the differences between sides there.
They're always differences between sides seven and eight change now so that the rear foot that would be the anterior aspect of the heel is in contact and now you can see that there's a much greater pitch. Um, of course, if you're going out to the ballet gala or to the opera gal or just stepping out and want to be, want to train for your stilettos, this is the thing to do. Exhale forward. Inhale back. You'll have much better ankle proprioception. You'll be able to walk with more grace and ease no matter how high your heels, six, seven and eight. Now leaving your pelvis steady and focus on the distal aspect, but the pads of your fingers on your sitting bone so that you can feel that the moment you press down with the front of your heel, there is increased action all the way up the chain through the superficial back line where the attachments of the connected tissue and mild fashion Meridians are to your hamstring. Now been there, done that, at least a taste of it.
And coming to the functional footprints cause will be our last hurrah here because the functional footprints, um, often is that phrase in a moment. So Nora's place these so that when you extra, when you externally rotate the footprints, the um, back of the footprints are close together but not quite touching and then make sure they're on the same line as each other. All right. In my opinion, in my experience, the functional footprints are, um, the most sophisticated tool of all of these and um, we'll appreciate that they could have a days, uh, education continuing education workshop associated with them. For right now, we'll give you an introduction. So the functional footprints are associated with our come equipped with axes. So this axis is going to be in front of your outer ankle bone.
How about that? So lift this foot up and press place that axis just in front of your outer ankle bone. Now I'll hold this steady while you move your foot more forward. No, your hole. There we go. That's right. Now your second toe. So here we've got the accesses here. There we go. And the second toe, correct your second toe is in line with this notch. Now the bat, you're fine here.
Now your Achilles tendon is in line with um, the notch at the back. So this is all fine on the first side. Now in order to get to the second side, hold everything and you can hold on to me shoulder head there. I'll hold this steady and climb aboard precisely excellently done. Now your second toe is in line with this notch and your Achilles tendon in line with the back of the notch.
And the side of this access is in front of your Malleolus to the neighborhood of the cuboid navicular area right there. Now when you stand here on these footprints, you will appreciate that the footprints have degrees of freedom such that you can rock forward to your forefoot, to your toes. You don't have to lift your heels, you just rock a little bit, and then you rock back to your heel, to your rear foot. Exactly. Do that a little bit. Now rocking forward and rocking back. It's a slide rock.
Only a few degrees of freedom and we'll just note that you are well prepared to do this because what have we been doing for the last many minutes? But I'm connecting the souls of your feet with your central access through the inner leg, through the pelvic floor and the deep abdominals. Excellent. Now having rock forward and back, your next task is to not rock. Okay, so here you are floating or hovering on the footprints. Neither the front of the footprint nor the back of the footprint is touching the base of the footprint.
And you're well prepared for that having done your work on the front, on the balls with the Franklin material of ball squats, etc. Now next thing to notice is that um, they're, these footprints have an opportunity to rotate. So there is um, keeping this foot steady moving from your right hip joint, externally rotate, correct and then internally rotate. Yes indeed. Just like that external rotation and internal rotation.
Now the next side awaits keeping this steady external rotation and internal rotation and x. That's right. External rotation and internal rotation. Now for everybody. There are always differences between sides and always will be and that we will always have jobs. However, because um, it's always important to improve each side in its own way. Now I mentioned that the functional footprints were designed for dancers to improve the integrity of their external rotation at the hip joint.
It would be preferable to keep the pelvis in a neutral position when you externally rotate both legs. Correct. And when you internally rotate both legs. Now when you do this external rotation and internal rotation, it's likely that you will appreciate that there are differences between sides. Even though I do keep the souls of your toes in contact with the functional footprints. Exactly. So don't put so much weight there that you make the footprint stop on the, on their base. But that's right. Okay.
Now as you do this in external rotation and internal rotation, you would notice that she said climbing a board, her skis for obvious reasons, I do not ski. This is as close as I get to getting on those surfaces. Place your hands at your pelvis. And you will notice that with external rotation comes the tendency towards swaying towards an anterior pelvic tilt and spine extension. With internal rotation, there could come the tendency to drive into a poster, pelvic tilt and spine flection, but the pads of your fingers on your pubic bone and the pads of your fingers at your chest bone.
Now keeping these tube of bones of one on top of the other externally rotate drawing more strongly from pubic bone up underneath your chest bone. Neither rocking forward nor back and internal rotation. The say. Now keep a one foot steady. Keep your left foot steady. And as you inhale externally rotate your right leg. You will note that the whole pelvis tends to follow the right leg.
It would be preferable now to put one hand, uh, in the neighborhood of your external rotators. Remind the external rotators to be active as you externally rotate. One leg, keeping the light from your naval straight ahead. Change hands now. Okay, so the light from your naval stay straight ahead. While the external rotators on one side stay steady.
Now with internal rotation at the hip joint that brings about a, uh, a sitting bones widening, a spreading of the posterior pelvic floor. And then, um, uh, focus on uh, um, elasticity of the postier pal of the posterior hip capsule, extensibility, the posterior hip capsule. When you move into external rotation, that um, encourages the anterior hip capsule to um, more uh, moveable, right? So you can go back and forth between spreading the post here, air the hip capsule and the anterior hip capsule. That's relevant because some people who are anticipating a, um, a hip replacement will have, um, reduced mobility and internal rotation and a tightening of the posterior hip capsule. And this action of coaxing internal rotation encourage as opposed to your hip capsule to have more glide in it to allow internal rotation. Ah, turning everything to the right, have the intention of keeping equal weight on both legs and turning everything to the left. Have the intention of equal weight on both legs.
I'm running into my, uh, that's okay. We're running into things here. So come back to the center, climb off a little bit. And um, we're going to do make two changes at once. Norris spring, the right, um, functional footprint back and a little bit wider. Okay. Now we have a staggered stance having prepared in parallel. Um, so plan your, the axis of the horizontal axis just in front of the lateral ankle bone and the similar one here. Climate boards, your footprints. Now we have a staggered stance. So when you keep the staggered stance, it externally rotate both legs.
There will be more demands on the um, external rotation of the back leg. And then internally rotate. Here you are with your staggered stance. Okay. Now, functional functional footprint. Straight ahead. Turn everything to the right, keeping these footprints straight ahead.
Place the pads of your fingers on the bones at the front of your pelvis and coax the back leg into internal rotation. Keeping the light from your navel straight ahead. Internal rotation, come back to the center and change to the other side. A W you know, we're not gonna go that way. We just have to change the stagger to the stance that I, I, I believe me, it occurred to me and then, then I thought that wouldn't be prudent. What it, all right, last bit of things here to do.
Climate bore to our footprint.
When you just have the idea that you could allow your body to wind or unwind, uh, the way it would like to go, you may discover your own particular blend of spirals coming into play. That can give you more information about how you might, um, organize spontaneously or disorganized spontaneously after spending long hours at the computer sitting. So now eyes open, behave yourself, turn everything to the new side. And now it's the, uh, the back leg, the posts to your hip capsule, cokes, it a little bit internal rotation and internal rotation. Have the intention of keeping equal weight on both feet and do that by bringing the back hip joint forward and up. And that will put weight on your front leg as well. Come back to the center. See now on the dismount.
We'll climb off of this. Again, this functional footprints are exceptionally sophisticated tools developed by Zhang called West and Katie Keller. They're used, um, and with a great deal of precision in clinical settings. And we've intended, I've intended to give you here a, a taste of what's possible so that you can have additional, uh, study as you would like. All right, we've certainly kept you long enough. Thank you so much for your interest. I suggest now that you take a walk and enjoy your new feet. Thank you so much for being with us. Thank you Norris. Looking forward to seeing you next time. Bye now.
Pilates for Dancers: Foot-Focused Classes
Mention
 |
Elizabeth Larkam (Teacher) |
 |
Linda H |
 |
Isabell |
|
|
Cynthia G |
 |
Noelle |
 |
Emily B |
|
|
Chloe C |
|
|
Lori |
 |
Nova C |
|
|
Patricia W |
|
|
Mindi K |
 |
Yeong Cheol C |
Comments


Though I’ve taught some of the similar footworks to my clients, there are still lots of tips and information that I could add on it. It was amazing how the feet and the body responsed to it before and after, especially my gluteal muscles.
Thank you for sharing, beautiful works!! xoxo


You need to be a subscriber to post a comment.
Please Log In or Create an Account to start your free trial.
