Description
Please be advised that before performing ANY exercises with your baby, the baby should be able to hold its own head strong and stable, as well as have the ability to almost sit up on its own.
For additional options to include in your workout or daily routine with your baby, please see Chapter 2 of this class. While Chapter 1 does not require any props, Chapter 2 uses the Magic Circle, a Ladder Barrel, and a Baby Bjorn.
About This Video
Transcript
Read Full Transcript
Chapter 1
Mat Workout
Hi, my name is Daria Pace, and this is Viva Stella Fox. I am, Romana's Pilates instructor trainer, and I am a third generation Pilates baby. And this is Viva Stella. She's the one and only fourth generation Pilates baby. (Daria cheering) And my grandmother was Romana Kryzanowska (baby crying) and my mother is Sari Mejia Santo, who also studied with Joseph and Clara Pilates.
And I'm doing this video today because it was really hard for me, to find the time for myself to start to work out and reconnect my body after my C-section. I'm also a studio owner, as well as helping run Pilates, Romana's Pilates International. So when I'm not working, I wanted to be with her. And so it made it impossible to do any workout. So, I started when she started to hold her head up and after my doctor cleared me and everything.
I started to do a little bit of Pilates with her and then I progressed it into the system, after probably about three months, when she was about three months old is when I started really. You wanna pretty much wait until your baby's head could at least lift up on its own, because it can be dangerous for both you and the baby, if your baby's head isn't lifting on its own yet. So take care of yourself. You only have one body and now it is more important than ever to stay strong and healthy, because now you have a little munchkin to take care of, who's depending on you. So you have to take it slow and easy for her.
Not just for yourself. It's not just about looking skinny. It's about being strong and healthy (baby crying) All right, so let's get started. We're gonna lie down with our baby. And now bring your baby like this.
So her body supported on your legs. Hold her (baby crying) Now my baby hates tummy time and she's a little tired right now. So we're gonna do a little inhale, two, three, four, hold. Exhale, two, three, four, 10 and be careful not to strain your neck forward. I sometimes find myself doing that because I can't stop looking at her.
Exhale, two, three, four, 20. Inhale (Daria breathing in) And exhale, two, three, four, 30. Inhale and exhale, two, three, four, 40. Inhale and exhale, two, three, four, 50. Now another way we can do it as we start to progress and now she starts to sit up more and more on her own, stretch your legs and inhale two, three, four, five, and exhale, two, three, four, five.
Inhale (Dalia breathing in) Exhale, two, three, four, five, inhale, exhale, two, three, four, five. Inhale (Dalia breathing in) exhale, two, three, four, five. Inhale. And exhale, two, three, four, five. Inhale, and exhale, two, three, four, 100.
Whew. Now we're gonna roll up and we're gonna do a little roll back. So turn your baby around. Bring the bottom right down into your powerhouse. Hug your baby and roll back a little bit.
Opening up your lower vertebrates, and pull in and up. And just make it a very small, deep movement. Roll back, reconnecting right back through here and your lower abdominals. And up, lift. And try not to push your neck forward, like I keep finding myself doing.
And now roll back, deepening in hold and now pull back up, and inhale, exhale. And inhale roll back and up and roll back and exhale up. Now we're going to do the leg circles. Again, make sure your baby is right centered on your powerhouse. Bring one leg up, stabilize your hips.
'Cause that's what it's for and make a little circle, one. Make sure that you're not doing a lot of Mambo with your hips because then you're defeating the purpose, so. Two. Now let's try to stretch your other leg out a little bit to challenge yourself three, and four, and five. Other way a round one, a round two and three, four and five.
Let's switch other leg is up. And one. And if you really do this correctly, it's very deep. Four and five. Other way around and one, two, stabilize your hips three from your powerhouse, four and five.
Hold on to your baby and gently roll up. Now we're gonna do the balance, rolling like a ball. which is really deep and really great to open up your lower back and to get into your powerhouse again. So just bring your baby in, hold on to your baby, balance and bring your feet close to you and just find your balance and down. Lift up, holding onto your baby, it's a very deep exercise if you do this correctly.
And up, and your baby will really help you by bringing her bottom on your powerhouse. Inhale back, hold exhale, down. One more, inhale balance. Hold open up your lower back. Get your feet close to your seat and down.
Roll down one vertebrae at a time and rest. Now holding onto your baby, one and one and two and two stretch, try not to push your neck forward. Three, just keep it long and lovely. Three and four. She wants to do it with me.
And four, five and five, six stretching a long deepening six, really coming from the lower back and the powerhouse lower abdominals. Seven, eight and eight and rest your neck down. Stretch it out. Release, take a little break. And then bring both legs into your chest.
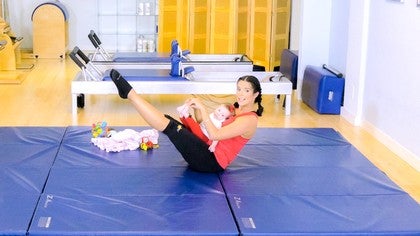
Well, open them around the baby and inhale out, exhale, inhale, exhale, inhale, exhale, inhale, exhale, and exhale and exhale and rest. This is very difficult, even as an in more advanced Pilates practitioner and instructor really getting into it. It's very deep, when you do this correctly with your baby especially. So the next exercise after rolling up, you're going to sit up and lie your baby down. I like to bring the baby's head towards me.
I always have toys around because in case she gets a little distracted, I can make it more fun for her, and so I can continue my workout. So I might do something like this, inhale up and exhale (toy ratting) and up (toy rattling) And inhale, flex your feet, stretch your lower back. Make sure it's opening up and exhale. And roll on up (toy rattling) inhale. Lift, stretch all the way from the nape of your neck through your tailbone.
Lift and lift and lift and lift, and exhale kiss your baby. Kiss your baby. Make yourself as round as you can stretching your vertebraes and up, whew. Inhale lift and exhale, exhale, exhale, exhale, exhale, exhale, exhale (indistinct) and up. She put her finger in my mouth.
All right, next, we're gonna do the Teaser. So bend your knees so that your feet, your knees and your hips are at a 45 degree angle. So rolling back, opening up your lower vertebrae, stretching these your lumbar. You're gonna bring your knees together. One leg comes up (baby crying) (kissing sound) maybe get a toy if you need to.
And then roll back just a little bit it's only targeting your lower vertebraes and up and two more on this side. And up. And one more. And up, now change legs. And roll back just a little bit deepening and up and back and two, and back and three and rest.
Pull her hard and we stretch. And this is a really fun way to really get back into your powerhouse and reconnect to your body. (toy rattling)
Chapter 2
Additional Baby Exercises
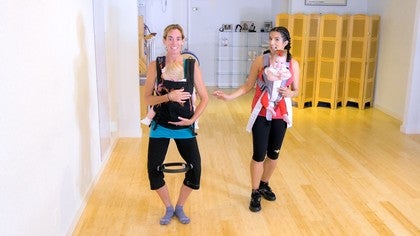
Hi, I'm here with Jennifer Setser who has recently moved to the Dominican Republic with her little baby, Lily who's asleep right now. Jennifer has been teaching in Singapore as well as Bermuda, and now she will soon be teaching in the Dominican Republic. She was my student for a little while, and now she came to visit me for a little bit.
So what I'd like to do, is show you how we can do a little magic circle between the legs, standing with a BabyBjorn. It really helps it help engage the inner thighs and lift in and up. So she's going to place this above her knees. Get into her personal Pilates stance. So feet as close together as you can, toes maybe a little more together for you I think.
Toes a little closer, that's it. Now, making sure that your shoulders are not going behind your hips. They're in perfect alignment with your hips. You're going to lift in and up and squeeze the magic circle. Stand up, lift, lift, lift, lift, lift and rest down, bend your knees (baby cooing) Ain't that fun.
And lift in and up, don't arch your back. Keep your shoulders infront of your hips, stay forward and in an up, Lily's helping you with your powerhouse. Lift and release and in and up and stretch, lift in and up. Don't let your shoulders go behind your hips, lift, lift, lift, squeeze those inner thighs and rest. And one more.
In and up and squeeze. Lift in and up, lift don't fall back. Lift forward and release. And that's really wonderful deep exercise to help you regain your strength and reconnect with your inner and outer thighs. (baby cooing) Okay.
So now we're going to do the magic circle with a chair. So a really good image for this to really understand it, is to get a poll which you probably won't have at home, but I've just wanna make sure you really understand it. And you're stretching your whole vertebraes, making them as long as you can up against the pole. So if you can see, she needs to work a little harder right back here, and then she needs to bring the nape of her neck up. So, remember Pilates is all about lengthening and stretching the spinal column, never compressing.
So, if you look at pictures of Joseph Pilates with his legs up, it's always in this position, his back is nice and flat. So that's what we're going for, to extend those vertebraes, get the blood flow between the vertebraes and get the strength and the stretch in the back. Because after you've had a baby, it's really hard. And then you're holding the baby all day and you have your shoulders behind your hip, and you're standing like this (baby crying) because you're just thinking about the baby and not yourself. And you really got to get that strength and that support.
So really make sure that you're extending your spine, shoulders over your hips not behind, not in front. Lifting deep in and up into your lower back into your powerhouse. Lengthening your neck up. Now I know her, so I'm gonna do this. I wouldn't normally do this.
Pull up, up, up, up, up, up, up. Now she's as lifted as she possibly can be. Now, so we're gonna put this in between our legs, above our knees never touching the knees. Heels are together, toes are apart, don't fall back Jen. Stay where I had you or else I'm gonna have to get the pole out again.
(Daria growling) Okay. Sorry. Lift in and up and forward. That's it, deep from the lower back, squeeze it together from your inner and outer thighs and your lower abdominals and release. Your knees should be slightly below the hips.
The feet should be in alignment with the knee. So it's a 90 degree angle or below. Knee should never be above the hips ever. Lifting in and up and squeeze deepening in, stretching the lower vertebraes right back here, and release. And in and up and squeeze, squeeze.
Pull back in here a little bit more. That's it, and up. I know, just one more I promise and lift in and up right back into here (baby cooing) there and relax. That is a workout if you do it really correctly and you need it. So the Swedish bar or the Ladder Barrel Stretch is a wonderful exercise for our new mom.
We are going to do a little stretch to stretch her lower back as well as her hips and her legs and her quadriceps. So I recommend the BabyBjorn, because that way your baby's totally safe as you're doing this. You could hold your baby technically but I prefer this. So you can find a piece of furniture that is lower than your hips. And it really depends on your flexibility.
For me I'm hypermobile, if you will. So actually the lower the better. For Jen, we're gonna start off here and then we might take her up a notch or down a notch. I'm not quite sure where she's at these days, 'cause she's been in Bermuda. So she's going to bring one leg up, right to here.
Now, keeping the hips in alignment, get that right hip back please, lift in and up. Make sure your shoulders do not go behind your hips. Lift in and up and round forward, stretch holding your baby or you can also have your hands over here for better stability. And now articulate, roll on up, little. Lily's a little bit tired so she's holding her neck because she's starting to fall asleep.
And then she's going to bend her knee forward, keeping that right hip down because it's getting naughty. Lift in and up as you come forward, make sure the shoulders are in front of the hips never behind. Lifting in and up. So she's getting a wonderful stretch through her thigh there and getting a stretch in her hip. Pull back and now come up and now around forward again.
Stretch and come on up, and lift up, stay strong. Just one more, and forward. Don't arch, shoulders in front of your hips. Stay lifting and pull back. Two, one to two is plenty.
Let's do the other leg. Careful with the baby. Again, you can always hold on. Now remember, to get your hip stabilization, you wanna feel if your baby's legs are centered. If one is higher than the other, it's because your hip is up higher than the other.
So keep lifting out of your standing leg and bring the other hip down. So you're saying lifted up and strong here and getting this hip down and stretching your lower back, keeping it stabilized. Which is very difficult especially with the baby. And now lift up out of the standing leg and get that left hip way down. Release it a little bit more.
Lift up and forward. Keep your shoulders in front of your hips. Stretch here, stretch here more. That's it, lift. And now round over, up and over round.
Keep this knee loose and pull back in here. There we go. And now articulate, roll on up deepening in and lift. And now bend forward, get that hip down honey, lift up and forward. Keep it down, don't go off forward too much that you start hiking it up and getting sassy on me.
Now lift up out of that, there we go. And now pull that hip back again. Got a little sassy. And now, and round forward. Jen just moved to the Dominican Republic, plus she has a one-year-old.
So her body is a little more wackadoodle than I'm used to, because having a baby makes it much more difficult. All of a sudden you really have to, your hip stabilization, everything changes. And lift and get that hip back. There, lift and now forward round it. Keep your knee loose.
Do not push into your knee. Whenever you're stretching, you never want to push it into your joints, lengthen your muscles, stretch your muscles. Don't push into your joints. Okay, and that's enough, rest. Lift in and up, tall and beautiful and forward.
That's it and Lily's sleeping beautifully. I just feel it's very important to always finish standing. My grandma always said you need to finish standing, because for the most part you've been lying down and sitting for most of the exercises that you've done so far. So you have to continue that stretch and that strength, while you're standing right. To get that momentum and get the stability (baby shouting) I agree, (baby shouting) it's very important.
Now Lily's bigger than my baby, 'cause she's a year old and she's also very independent right now. So we can't really do quite as much with her at this age. But I'm gonna show you a few things that you can still do when your baby's bigger but also a little bit more mobile. And it's also really good for your body, okay? So Jen's gonna show you the wall.
I have these walls that are kind of a little, these are crazy here. So I have a Plexiglass. So you wanna find a nice wall, smooth because you need to slide up and down a little bit. Jen also has the Pilates socks the sticky socks on. Do not ever do this without sticky socks, you always have to have a mat.
I actually one day did not have my shoes on, and I did not have sticky socks on and I was moving equipment by myself and I gave myself a black eye. So please don't do that. So Jen's going to come with Lily up against this wall. Now she's gonna do what I'd like to say, her personal Pilates stance, 'cause everybody's a little bit different. Heels together toes apart can be the norm, but it's not for everybody.
Some people need to be parallel. Some people need to be a little bit wider, whatever it is. So for Jen, she's gonna do her personal Pilates stance, which is heels together toes just slightly apart. And then she walks out until she feels the nape of her neck. Stretching long up towards the ceiling and her tailbone lengthening down towards the floor, until all of her vertebraes are stretching and expanding up on the wall, without pushing into the wall in any part of her body.
So she's just lengthening and strengthening her entire spinal column by the support of the wall. Her feet are nice and lifted. She's lifting. Think of having energy up through your feet, lifting from your inner and outer thighs lengthening up towards the ceiling, so that you're really expanding and stretching your full body. Stretching it out nice and long.
Now evenly, she's gonna hold her baby with both arms like this, let's do this way first. And we're going to lift Lily up just a little bit by using her powerhouse. So she's gonna use her powerhouse. (baby cooing) Now, so she's stretching her vertebraes, start again. All the way from the nape of her neck, through the tailbone and then, not from the shoulders.
She's going to work from her lower abdominals and lift her baby up just a little bit, small motion. Lifting up just a little bit, not too much. And down from her powerhouse lengthening her power house and down and up. Oh, no, she's like fighting it. She was so good the other day.
(Jen shushing) okay
And up, down. Up, down. Up and down from the powerhouse, Jen. Shoulders down Jen from the powerhouse. Pull your back into the wall and rest.
And that is very hard work if you do it correctly. Don't use your shoulders, don't use your neck. Just work from the powerhouse. She's done for the day I think. All right, now let's do the roll down.
So keep your back up against the wall. If you do it correctly with a little baby like this, it's a lot of work, it really is. So again, lengthening all the way up energy from the feet all the way through your spine, so expanding your spine, stretching your body nice and long. And she's gonna roll down one vertebrae at a time. (cooing noises) stretching all of her little vertebraes, one vertebrae at a time (laughing) And baby helps work the power.
Release the neck shoulders and the shoulders (baby cooing) (kissing sounds) and then roll back up, one vertebrae at a time. And relax. We're gonna do that one again. And bring your head down and slide down one vertebrae at a time. Just to there, and now shoulders down deepening into one vertebrae at a time.
That was better. And articulate down chin to chest one vertebrae at a time. (baby cooing) yay (baby laughing) And roll on up, yay. Now we're gonna try a little skiing. Now, this one has to be smaller than normal when you're holding a baby.
So your feet open out a little bit wider and then bring your heels in alignment with your toes, so you're in parallel. So your feet are right in alignment with your hips. Bring your baby up against you, lengthen your vertebraes and slide down but just a little bit. Your knees should never go past your toes, even a little less. And now pull up and in.
And this is really good for the lower back, the strength in your lower back and your powerhouse. Around two more, small motion deepening in and lift up. Walk your feet out maybe just a little bit more. Say lengthening shoulders down and slide down a little bit. Hold, hold, not too much.
Hold, hold your right knee is coming out. (mumbling) we can parallel. And now pull up. Very nice. Now heels come together.
Walk your feet back. Now, lift in and up. Lengthening all your vertebrae saying strong and tall and long and beautiful. You're gonna walk off with your baby, saying strong, lift up and forward and walk away and have a beautiful day.
Mommy and Me: Mommy and Me
Mention
 |
Daria Pace (Teacher) |
 |
Jessica M |
 |
Lina S |
 |
Elaine C |
|
|
Jean M |
 |
mbrown |
|
|
Jane C |
Comments


You need to be a subscriber to post a comment.
Please Log In or Create an Account to start your free trial.
