
Premium Continuing Education workshop
You can view a 2 minute preview. For details, scroll down below the video.
Description
Objectives
- Learn the definition of structural versus functional scoliosis
- Understand the mechanics of scoliosis and its health risk
- Assess the type of scoliosis
- Use exercises to specifically minimize the curve and to create elongation with a balance of mobility and stability
- Learn a three planar approach to movement choices in programming
- Teach on the Mat, Pilates apparatus using props, and learn specific cues directed toward scoliosis
We want to thank Jean Claude West for the 3D imaging.Once you purchase the workshop, you will have access to the pdf attachment. It will be located underneath the description.
About This Video
Transcript
Read Full Transcript
Chapter 1
Introduction: Convexity and Concavity
Thank you all for coming to this new workshop, working with scoliosis. I've had the honor of the last month to work with Gaby Diskin and Jean-Claude West. And the three of us have collaborated on really exploring in more depth scoliosis and the function of the spine and how it's different with someone with a spiral in their spine versus someone who's spirals, maybe not quite as exaggerated and through the process and hours we put in the research that we did, or I did I should say really, but with their help. I had some new aha moments that happened for me. I've been teaching the scoliosis work for quite some time.
And through this process, I realized there was some real nuggets that I was able to unravel through working with both Gaby and Jean-Claude West. So, it's an... I'm very happy to be able to share this with you so that the information gets out there to you all, to really be thinking maybe some of the things we were doing maybe it's not the best. Not that it's harmful but I just made, so I'm really excited to share that with you. So, in the design of this course, so this is a new course.
Even for myself, so from this day forward, I'll be teaching scoliosis very differently. So, anyway, so as we know scoliosis is an abnormal curvature of the spine. But what is a normal curvature of the spine? That's always kind of the question, right? So, the spine moves in three dimensions, right?
So we have our transverse plane, of course the rotation, right? We have our sagittal plane or flexion extension and our coronal plane, you know, it's our side bending, you know, playing with the spine. So, there's that motion and they're overlap all three planes of motion happen. It's just that what would the scoliosis is that they're going to get stuck a little block in one of the planes a little bit more, and it tends to be the rotational and side bending planes. And it's through the coronal plane and the transverse plane where we can really have a big effect on their spines and give them a sense of how to orientate their spine more towards the midline.
So that's the most important piece. It's not about correcting it. It's not about making their spine, look like my spine. You know, it's, about giving them the ability, to with their motor skills and their perception and their appropriate reception to actually bring their spine towards their midline, so that all the joints are better lined up better for their hips, better for their shoulders and their neck and discomfort. And we can do that through facilitating, through movement, through some hands on, through some propping, we can do to help to actually change the tissue somewhat.
So, we're gonna be working of course, with the soft tissues, the fascia, the muscles, the joints move and through movement though. So is how we're gonna do that. So, a spine that is more in midline, we have the cervical, I'm gonna grab this. (Madeline wheeling the skeleton) Right, so we have... I wanna just do a few terms, for us to be on the same language, right?
So, a concave curve and a convex curve, just to go back to what that is for most people. So if you have a curve, the concave part is the smaller, the more compressed it's like a cave, right? And the convex is the apex on this side of the curve, right? The medical community references the curvature of the spine by the convexity of the spine. So that language wise, so what they say, it's a right thoracic scoliosis.
They're talking about the convex side. I have pictures of, I'll show you. So, but in a spine that is not a scoliotic spine, right? We have a concave on the backside of the spine, the cervical spine, and it's the convexity is in the front, right? The thoracica the reverse, the convexity is in the back, the concavity is more in the front and the lumbar is like the cervical, you understand?
So concave cavity in the back and so on. So those are kind of the curves. Now with those curves scoliosis person, You look at the picture, all right? Structural scoliosis is when the spine is in that position of rotation and side bending. Now, some people have more flexion, they're stuck in flexion, you'll see someone's spine more flexion.
Then there's also the scoliosis type of person who's really stuck in extension. So that plane varies. So you have to look at that in the body to see about that. But generally what you're seeing primarily is the side bending and the rotation. The rotation of the spine, if you think of the spinous process, all right?
It moves towards the concave side. So if you look at the picture, you can see that the turning of the spine goes towards the concave side, right? So, but we referenced the rotation from the front of the spine. Hopefully not confusing you. So the front of the spine is where we reference rotation.
So if the front of the spine is facing, I'm gonna mirror you to the right, right. And it's a right rotation. If the front of the spine is facing left, it's a left rotation. Okay, so that's already a lot of language right there. All right, so, concavity and the convexity, those are the two terms, right.
And we're gonna reference the terminology of the scoliosis name by the convex side, And then the rotation is referenced from the front of the spine, right. So if they say it's a right convexity, they'll say right with a right rotation, right. You have to en visualize that the convexity is on the right. And that rotation is to the right. Does that make sense?
So, as you see it, all right. So here's an example of what I was just saying. So this is a, what would be considered, you know, a balanced spine in terms of its curves of its concavity. So just as I said, the cervical spine, has the concave side here and it's wider at the top, right? They've con backside.
Does that make sense, right? So, thoracic, just like I said here, here's the difference with the curvature of the spine? The difference is that, the cervical concavity is actually compressed down. It's more curved, and the convexity is much wider, you see. And that's true...
(train passing by) That's true through all parts of the spine, all right. If you have any questions, we'll wait till I kind of go through it. So if you have something you should write it down and you know, we'll do that. All right, 'cause I think I'll answer it, you know, as we go. So typically, we're more familiar with the terminology of a C-curve and an S-curve, right?
And so when you visualize C-curve, you think one curve, but it's not actually, it's a C-curve maybe within the thoracic. But the cervical and the lumbar spine do an opposite curve. There's always that compensatory curve. So a C-curve is not necessarily one curve. You can think of it as three curves.
Three curves because we have the cervical, thoracic and the lumbar. All right, so in the sagittal plane here, we're stacked one on top of the other. So this is the regions to look at is the cervical plus T1 and two. So that little block, is cervical T one and two 'cause T one and two, work the neck. So neck motion T1 and two is important for that and arms and shoulders.
So this is one region you can think of it as one region here and then T3 down to T12 would be like the next region. So that's the second block. All right, and your third block is the lumbar and the sacrum, okay and the pelvis. So block one, block two, block three, right? So what happens in the coronal plane is they go off to the side, box goes this way or this way, and this box goes this way, and then this box goes that way, right?
So the cervical and the lumbar spine tend to go in the same direction basically in the three and the four curve or an S-curve, it's a little different I'll show you that. And then you can see the rotational component in the picture of the blocks. Say, so it goes this way, and then they turn, see the orientation of it. So then we get our C-curve. But really the neck has a curvature.
This might be convexity, right? Yes, but the cervical and the lumbar are convexity left. Right, 'cause they're orientating themselves back to the midline, okay. So that's your, you know, if you wanna see typical C-curve, how many, if you notice the C-curve is not actually in the shape of a C, it's rare to have someone literally in a C in the other direction. It's actually a very severe condition because of the heart being in that area.
So if the curve is on that side, it actually is really compressive on the heart. And a lot of times they go into surgery at that point, 'cause it could be life threatening. So you also will be talking about the organs a little bit and seeing what or how the lungs right, or the different compression of the lungs and the breathing is gonna be very important with that. But I'm getting ahead of myself. So I just wanted you to see that with the C-curve, if you notice the weight of the body, because of the convexity right in the thoracic, all the body weight ends up on the right leg on the right side of the body because of the weight of the thoracic going off to the side.
So all the weight is on this side, okay. All right, now, we can think of it as four curves for the S-curve because we need to include a little bit more of like the sacrum in the curve. 'Cause the sacrum does, kind of an oppositional curve as well. So here we have our three boxes as before, but here we've got just an extra curvature in the bottom. So here, it's a right convexity in the thorax and a left convexity in the lumbar and then the pelvis and the sacrum will start to bend back the other way.
So you can actually think of an S-curve as four curves in the spine. Yeah, does that make sense? All right, so, here there's four common types of scoliosis, alright. So one is a right thoracic. Here's your convexity on the right side.
And it tends to be an higher up, but under the scapula up through here. All right, and then of course, the cervical spine is gonna be writing itself and that lumbar spine, like we saw before. So you're having to deal with not only the thoracic curve, but you have to deal with the cervical and with the scoliosis, you're always working within all the curves you have. As soon as you shape one curve, the other two are gonna swap. So you can't just simply do like so and do a twist as a Pilates exercise.
So, you can't just do a twist, because as soon as you start to twist the lumbar spine changes of the next changing, and you're actually creating compression in those other areas. That was the real eyeopening piece about that. So, here is a right thoracolumbar curve. So it's lower down. It's like T, it could be anywhere like T, eight, nine, 10, 11, 12, you know, one, two, you know, it's the thoracolumbar junction.
And this is the spine that we're gonna be working with, with Gaby. She's a right thoracolumbar curve And then there's a left lumbar curve, right. So see how that's the convexity is on the left side. All right, and then there's the right thoracic that your typical S-curve, this is the most common. And you'll notice that now the weight of the body is more on the left leg.
So their body weight tends... They tend to stand more on the left side, on their left leg, through there. Okay, and what you see in the tissue of the body in terms of these curves is, it's not just overdevelopment of muscles. It's a combination of the tissue, but it's the rotation and the bones actually sticking out, if you wanna call it, it's like a bolster look of the back. So this part of the back, would be very prominent through here.
And this side would be like, as if there's no muscle tone at all. And part of it is that the ribs are more prominent on the back side, but also the musculature here has gotten very tight and it's holding here through here. And then this side is forward and these muscles are actually have gotten weak and same in the front. You see from the front, you start to see this rib very prominent here in the front. This is left side, and this side not so prominent here.
So it's a little easier to see in the thoracic and the lumbar spine, what you'll see is more of that prominent musculature, if it's a left convexity on this side. As it, if the bolster is kind of a nice image and in terms of the mass of muscle there, and then this side is also very weak. It's not the (indistinct) isn't there. So, and it's coming from the rotation, but how the complexity of the musculature is working and holding onto the spine, okay. Because I wanna get into doing more movement and looking at the spine moving, I'm not gonna be lecturing on the musculature, and that could go on for hours about all of that.
But I just wanted you to have that visual so that when we start to move, we're gonna be talking about queuing and what we can do. And then as we work, we can be talking about specific tissue in the area and what's going on with that. All right, and we're gonna have to coach for the different curvatures. So even though I were gonna be working with Gaby, so the right thoracolumbar scoliosis will, I'll still address the others to say, okay, now if you are an S-curve, you would actually do it this way. So we'll have that as an example, we just don't have, four, as Krista said, we could have four workshops here for one for each person but we'll address that as we're working, okay.
Chapter 2
Directed Breathing
It might be a little difficult to see, but this is actually Gaby's x-ray of her spine. It's a little light, but I can show it to you later. And this is this, this I'll trace it so you can see, it comes down this way and then here's the curve. So she's starting at seven, eight, nine, 10, 11, 12. Here's L1, two, three now it's back to center four, five.
So with her, this is very interesting because we're gonna work with her, how to like support and prop the spine a little bit as you're exercising, as she's lying down or sitting. But this is interesting because all her body weight is falling over to the right. So it puts a lot of weight on her right hip bone. I just want you to remember that. But there's a compression here.
The lumbar here, her lumbar are very close and she has discomfort in this area, you know. So you, if you wanna call it, it's the quadratus area, but obviously we know there's a lot more in there. That's the lat fascia, thoracolumbar fascia coming in. You've got internal oblique here, you know, and things like that. So, it's that area for her that gives her discomfort because of that compression, okay.
So now, we're gonna talk about directed breathing. Because, the breadth is really where it's at, when it comes to scoliosis, the breathing, and that is because when you're, especially when you're inhaling... When you inhale, especially when you intention it into a certain part of your body, you actually create a spinal movement, a shift in the spine, all right. So to give you a little demo here. So we're gonna pretend this is a diaphragm, even though the diaphragm is obviously not a very symmetrical shape, you know how the dome, it's a very asymmetrical shape.
But, when it's sitting in through here and our ribcage is more balanced, right? It doesn't have a scoliotic curve to it. You know, there's... The diaphragm is pretty much not compressed in certain areas. I mean, we all have postural deviations.
So, even if I have a little side bending and I'm not labeled scoliosis, I still can benefit from the directed breathing, because it can actually take me out of some side bending and compression that I have in my back even though I am not labeled scoliosis, I have a scoliosis. But we all have a scoliosis in some ways. 'Cause we all have a spiral and the spine you know, has its you know compensation. So, I think this works for all populations, but we're gonna be focused specifically on that. So now, if you can imagine, here in this picture, this is an aerial view.
So you're looking down into the cage this way, yes? So, here's the sternum and here's the spinous process. So here with a right thoracic scoliosis, the rib on the back right corner, is deeper back through here, but it's also narrow. Yes, and then the front left corner, so that's what I'm saying is that this is more prominent this way, and this is more prominent back here, right? And then the opposite diagonal, the front right, is more compressed in and the back left is more compressed.
And you see this right through here, is flat compared to that. And then the back here is also flat. So if we take that idea of the ball, all right, and we have the diaphragm here, so now, I have this front corner pressing inward on the diaphragm, you see that? And then I have, I'm I doing that right now? It's the opposite, sorry, the front, this is more prominent.
The front and right corner here, If you see my hand is pushing inward like this, yes? And then, the back right corner is pushing in through that, giving you that shape of the ribcage. So when the person breathes fully, okay, they breathe in fully, the expansion of the breath will go into the bigger area here in the front and here in the back, which actually exaggerates their curve. (Madeline sighs) So no matter how much you're cuing them, if they're just taking a full breath, you're exaggerating this form. So, we're gonna be working with this on the trap table.
So we're gonna try to do with the directed breathing. You can do it visually, give people images, but they need a tactile feel for it. And maybe at first they don't breathe so deep, 'cause you don't want them pushing the air out this way. We need to cue them to breathe into this front corner here, and this back left corner here. So that we're sending the breath.
And that's what these arrows are, right? Sending the breath back into this corner and sending the breath into that front corner. So we're gonna be queuing directed breathing throughout all of the movements that we do, okay. But first we have to teach the person how to do directed breathing. And I always come back to Eve Gentry with her one lung breathing.
Because it's critical for, I mean, for all of us, but also for the scoliosis person. So, I use the one lung breathing a lot in the queuing, especially on the left side. They need the left, so that through there. So, she gifted us with that wisdom. So with the breathing, I just wanna talk a little bit about the musculature because we're all familiar, I'm assuming as Pilates teachers that we're familiar with some of the mechanics of breathing, like what muscles are doing is the diaphragm moving and the expansion of the ribcage.
But, I've come across some scoliosis clients who've come to me who actually are not breathing with their diaphragm. The diaphragm's not moving, Okay, what does that look like? I mean, and what happens is they tend to really contract their abdominal wall really hard to breathe out. So their breath out is (breathing) they have to push with their muscles here to get the air. The diaphragm is not relaxing to let the breath, you know, to recoil and come up into the ribcage to let the breath out.
And then the breathing in of course, goes into these areas and is shallow. So they're muscling their exhales, very exhausting to muscle the exhale, all right. So we have really active local motor muscles that help us breathe, obviously the intercostals, right. We have our obliques that help us breathe, right through that. But then the more local non-local motor muscles, they don't make us move really per se, depending on your opinion on that.
But the diaphragm itself, so when you breathe in, it's to move downward, moves downward and outward, right? So we're familiar with that. But, and then when you exhale, you actually have to relax your abdominal muscles here. You have to relax, let the diaphragm move up and let the intercostals do their job to come in through here, to get the exhale. This is like starting the exhale that way, you know, if you're doing an exercise position, you know, you're doing some kind of movement that requires you to use your abdominals to curl or to side bend like you're doing a movement to contract the abdominals.
That should be the local motor muscles for that movement, but not for the breathing. So it's... I'm finding it's very interesting. I just have a new woman who just came into me and she's really struggling with this 'cause she has a very hard time breathing. And she cannot exhale without literally like having to push really hard in here every time.
So, it's a really big challenge to kind of reeducate her on how to breathe. And it actually means to... She has to let go of her abdominal. She has to relax them to in order to do that. So you have to watch for that with her breathing.
We're gonna... What I'd like to do is introduce, you already been introduced to Gaby, but let's have Gaby come up, and we're gonna take a little, there's an assessment that you can do is very simple it's a standing assessment that you can do it's called the Adams test. And, go ahead and have the weight face sideways, I think, or maybe even back. We're gonna see different views here. But, so from the side, when you look at this side, think of the boxes that I showed you in the other picture, right?
So we have box one, box two box three. Now, Gaby's worked on her body for many years. She's a Pilates teacher in the Bay area. She's been... She's worked with everyone, Who's done except for me, now me, I'm on her list now, but she's worked with all yoga people with, you know, who are experts in scoliosis.
And she's worked with some really amazing people. So, this plum line is really great. Her side plum line is really stacked really nicely. I mean, that's the... This is an example of someone who's actually really done a lot of great work on her body for scoliosis.
Most clients you'll see, will have their boxes, you know, this way, like anybody else, right. You know, different, so you have to look at that from the side, all right. So her side plumb line is fantastic. So from the back, this is where we start to see more of what I was talking about, that bolster effect of the shoulder and the rib through here. And again, she's got the strength she's fit and has strength.
And so she's got tone here. There's not a lot of extra tone here. So this is really her form. Again, another person who is maybe not as conditioned, you'll see more tension in these muscles. Cause they're kind of long and trying to hold on and here they're compressed in through here.
So this is her concavity on this side, right. And the convexity on this side, right. And she's not trying to do her best posture right now, right? Right. (Madeline laughs) Right so you, yeah, but she can show you later, but you can see that her ribcage, now we got the boxes this way, this one's going this way and this one's going this way, right.
So that's a good side view, you know, through that. And then if we had an aerial view we're gonna look at her lying down, so you'll be able to see. You actually see where the head is rotated one direction. The thoracic is rotated in one direction and the pelvis is matching her head in the rotation. So if I were to look down like this, you definitely see thoracic is facing that way.
And her head wants to face that way. We know and her pelvis wants to face that way as well. So her head and pelvis is facing left, right. And her thoracic is facing right. So that's the transverse plane you know, through that, okay.
So now, the Adam's test, you'll see, So to make an assessment is kind of like, oh, this is pretty obvious. I can see that, I don't really need the abscess, but you might have someone with mild scoliosis, all right. So you may say, you know, you might have a little bit, let me see if you have it. So this test is where you have your feet together and your hands together like this. And all you do is you ask the person to like melt like a candle, and they flex down.
It's a very common test. And then just part away down, yeah. Just, you know, alright let your head go. Yeah, so you're melting like a candle. Don't stay up you know, you're not going to the floor.
So now you can really see her curve through here, the convex curve. So if someone is in presenting in this way, but you suspect they might have a slight scoliosis, you can do this test and it will become more evident. Now, functional scoliosis, which is more, most of us have, you know, functional scoliosis is from your job, repetitive movement. You know, think of hairdressers holding hairdryers and always doing this, or maybe they're right handed and always doing this, you know, or your dentist or your hygienists where there, you know, people are doing that or somebody or an athlete always hitting this way, right. So that's, you'll see the curve in their spine.
But then if you ask them to move in a different direction, the curve changes. So I actually have a picture of that. So that's how you can determine. So, the person's erect and they have a convexity on the, that's the left side on that. But actually that's the back, no that's the front left.
So, when they side bend, right, it corrects the curve. Or they're looking at this curve, see the convex right on the lumbar here. So when they bend over, it changes the curve and then a structural one would bend in the curve. The shape stays the same. Do you see what I mean?
So, if here's the shape, I don't (indistinct) The picture is not very good, well I just took off the internet. But if it's like this, you say, and I bend, If I bend to this way, it changes like the curve will change. You'll see a change. Even though I'm static and center, you see it. It will curve this way, but it will also curve that way and come back.
In the scoliosis person, it does this. Does that make sense? So it doesn't change the curve. So that's pretty simple, like that's how you figure out if you're functional or scope, but you could see in here. I mean, some people actually, functionally are pretty tight.
I mean they're really tight, they could be stuck in there. And you'll... What you won't see as the bolster as much. Here or here in the lumbar, if it's there, but you will, they may curve off to the side. You might see them curve that way.
So, but as you look at them and if you have some assessment skills, I didn't wanna do too much assessment. You'll notice that as they're moving, if you just ask them to move like this, it will change. Their spine will change. So one of the things I wanna... As we start to do more movement, I want everyone to really focus on the spine, the whole spine, not just part of it, but we wanna see, we wanna see the spine moving alright.
So that's gonna be really important to our work. Okay, thank you. Thank you. So, where do we start? You know, with someone with scoliosis, right?
So, what you want to do is get educated, work with people, you know, practice on people. And some of the material we're gonna get, I think is this is a first step to it. But really know the person's physical condition. That's the most important thing. If Gaby's your client, she's got she's conditioned.
She's got strength. She's connected to her body. You know, through her mind. If you ask her, you'll see, as she makes an adjustment, she's able to like shift. She's been taught these things and she has worked on it.
When you have a new person, like I just recently had gotten a new person and she doesn't have any of those movement skills. She can't breathe correctly. She's not conditioned at all. She's very weak, you know? So keep that in mind.
You really have to know like the skill level and strength and conditioning of your person. Do an assessment, you know, try identify if you can get an X-ray, it's really great to see. Because you can... If you have to be really good at assessment to really be able to see what kind of curvature, and they might know, or they might be able to tell you, but it'd be nice. Most people, everybody I've had come to the studio always has always walked in with their x-rays.
So, you can ask them, do you have an x-ray? I'd like to see it. So see if you can take a look at it. That would be great. And then, yeah, just understanding if they have postural awareness.
So, this is where with a scoliosis person, you've got to start right away with their awareness, how they're standing. If they're always on that right leg, you have to get them to shift, like we would do with other clients and you have to get them... We're gonna start to teach. Like how do I shift my ribcage, things like that. So they need to have the skills to change their posture and then directed breathing.
You've got to start with that. Okay, so that's first session right away. Even if you have to explain a little bit about the shape of the ribcage and the diaphragm to them, but try to get them to change and direct their breath into the area where they can't breathe, it's alright? And then working with elongation, and we're gonna... That's what we're gonna start with, some directed breathing and getting some elongation out of the spine first.
'Cause there's a lot of that compression there, concavity in the different blocks is really compressed. So giving them a sense of elongation. And when you do elongation, it activates your local muscles, right. You're getting the spinal muscles to engage. So that's very important for them.
So we wanna teach them how to do that and to give them a home program to keep working on it, especially the spinal elongation. I will be doing another class for that. So we'll be able to give you some things for that. And then teaching them the idea of a dynamic translation of the convexity, towards the midline, okay. So get, come back up Gaby.
So what that means is translation. Translation means a movement, kind of a sideward movement. So you're translating back and forth. I want you to face this way. Okay, so as she's relaxed and not in her best posture exaggerate a little bit.
So her ribcage to see it's over here. So what a translation is, is that now when she's... When her ribcage is off to the right side, you can see it increases her concavity, yeah. So if I were to put my hand here and you'll be seeing me doing these cues a lot, I'm gonna put my hand here and say, okay, now just move your ribcage, it's easier if you're sitting down by the way. And press your ribcage over to the left, into my hand.
Do you see how that changes curve? So now her spine moved towards the midline. So her curve now, so this is the vertebrae over here. As she translated her ribcage to left, it moved into the concave space. Did you see what it does as to the spine?
It's opening it up, right? And when she's doing in her mind, and the breathing can help. If she were to breathe into that left side, as she's inhaling and translating. So she inhales into the concavity, translates her ribs over to the left. She's really activating those local spinal muscles that are actually the muscles that need to strengthen in order to hold her in the spine, closer to the midline.
And it's awareness, so if she's tired or have been working all day and she can feel herself, oh, I'm going over here, then she knows that her practices, oh no, I have to bring this over towards the midline, okay. So that's a translation working on that. And we're gonna be using that as our primary cue for most of the exercises. And then give your person tools for everyday living, okay. Thanks. Okay.
And that we're gonna go through that too as well. How should they sit at their desk, right? Not just like, and they don't sit, (indistinct) over but they need to sit in a different way 'cause they're over like this. So we need to figure out, what can we do with their arm, try to fit, you know, and we're gonna do a little clip on that and how to stand. Standing, sitting and lying down.
So, and it's very specific for their structure and how and what position they should be in, okay. So that's really important. So, the sequencing of your session is really understanding, you know, the assessment and the findings and what your direction is gonna be with them. You know, that's really primary. And then your directed breathing, postural alignment so they can reorganize.
So you're dealing with the brain that has to be proprioceptive to saying, oh, I have a new place to be. And so this is my old place. So the brain itself has to make that adjustment to the posture, right? So in strengthening, when the spine is in the best possible position, do not do any strengthening moves. If the spine is not in the best possible position, so you have to get them there, right.
So that is really important. And you wanna try to... You're gonna notice that there's always the question we're gonna target the weaker side. So, not so sometimes we do one side, not the other side. But generally, just an extra set on the weaker side so that you can work both sides, but just do a little bit more for the other side.
And you'll see us doing that as well. And then again, they're daily movement process, some things they need to do on a daily basis, we all should do that on daily basis for just keeping their length and their strength, okay. All right, so now we are going to show some propping in different positions.
Chapter 3
Using Props to Find the Best Position
Okay, so we're gonna use some props to help balance the spine. So as I said, it's best to strengthen when the spine's in its best possible position, all right.
So the best possible position is really one where we're trying to de-rotate the spine, bringing the spine towards the midline, but with comfort. So not to a point where the person's feeling too much pressure, too much, you know, maybe pain. They shouldn't feel any pain, zero pain. Actually, it should feel really good. They should go, oh, feels good.
So we're gonna show lying down. Since in Pilates, we lie down on the reformer, do foot and leg work, you know, anything lying down. We need to prop the spine prone, right sideline and sitting and quadruped, right. Those are all the positions. Okay, so let's just start with the supine position.
So you can have your head there. So props can be a variety of things. Towels, soft, soft is good, nothing hard, soft towels. Now, I'm using washcloth size because maybe they need to wash cloths. A hand towel sometimes gets to be too big and bulky.
Okay, there are wedges on the market. You know, like products that you could probably find, there's some wedges that work well for some people you just have to experiment. I went and bought some beanie babies. I don't know if you remember what those were. My son was young.
He loved the beanie babies. And I got rid of them all of course, a long time ago. And now I'm finding myself buying them again. But I found some bugs there, like spiders and beetles and things that are actually a nice size beanbag. And they're very soft.
And then they're funny 'cause you're like sticking a bug under their back or something and it becomes humorous. It's kind of fun to work with that. So that's a suggestion. Go find some beanie bag or you can make your own little bean bags with soft, there's the smart spine material, that's very nice. You know, these products that are on the market.
So, that's what I suggest that you do. So what we're trying to do with this is to try to bring her spine again back to a more optimal position so that her nervous system can like reorganize and then start to contract the muscles we want her to contract, right. And to let go of the area where she needs to let go. So remember, she's got that prominent right rib. So when she's lying down on the table here, I want you to stretch her legs out for a moment.
'Cause you can see the rotation more clearly when the legs are straight than when they're bent. So her right side, so is that, and you can do this with your own clients. As I put my hands underneath her back. There's a big space on the left side of her back. And her right side is really weighted and heavy down through here.
So instead of supporting the space here, 'cause I would just keep her in that rotation, I'm actually gonna put it on her right side so that her left side will just relax and start to drop towards the floor. So she likes the washcloth. We've already been through this. This kind of just folded in three like this. So I'll let her do it.
So put it under your side there. And she's just not on the spine. She's just putting it on where it's more prominent. Yes, okay. Now straighten your legs out, good.
Now, when you... When this curve, so now the left side of her back is closer to the table here, but what does that done, look at her neck and her shoulders, you see, so box number one, now we see that rotation up, guess what? Also going that way. So it makes these curve more exaggerated. So what we can do, and she also likes to have a towel under her head as well.
'Cause it's a little back, right? And so what we can do with this towel then, and this is where the bug works really great for that. Right, and plus the humeral head when the... When she's got that rotation, So this is posterior and this is going left, then her shoulder kinda off the ribcage, the shoulder joint, there's more ribcage over here. And there's like, no ribcage over here.
So this shoulder joint is not being supported by the ribcage underneath it here. So, trying to bring this rotation of box number one, which is like manubrium, right. And neck to the left, I mean to the right. 'Cause she stuck to the left, right? It's gonna balance out and also help her shoulder to be more set on the ribcage.
So when she starts doing our movement to strengthen right, her shoulder muscles, are actually gonna be engaging better like her lateral serratus and her pack and her deltoid, all of this will be working better. And then in the pelvis, it's the same side as the lumbar here, right. That looks great. So now, her pelvis is more level, right. And you're comfortable, no discomfort, right.
And now this rotation, I think we could maybe do a little bit more like let's do the three here just to give it a little bit more on your scapula. That was that much better. Yeah, good. So we're not going for perfection. We're going to just start to introduce the idea to the body that you can go in this direction.
So we don't wanna do too much. It's not about pushing it. It's not about trying to do it. It's just like, you know what? You can go over here and let it just settle.
So here would be a position for foot and leg work, any kind of you know, leg, arm, anything lying on your back. Okay, so this is what I recommend. Okay, her back now. See, that's the thing about propping. I wanna say it, okay.
Propping is not a permanent thing. And maybe just for a moment, just check it again. So let's say we were doing an exercise here on the mat and then I was gonna go to the reformer, so we would get up and she lies down the reformer. I would check and say, oh, we're not gonna do the props, you're good. You see, so it's not a permanent thing.
So it's a little bit of an art form to really know this positioning, but it's already straightened her arms more except for up here. She seems to be and then maybe it's today. But her neck or something, you know? (student conversing quietly) Yeah, so I see it's... I mean, if I was in session with her right now, this is what I would be addressing with her.
The shoulder girdle sitting on the ribcage. Do you see that? They're supported by sitting on there. When you have a curvature, this is actually, the skeleton is pretty good, right? So when you have this side bending this pole shoulder girdle, is not on anything, nothing's in...
There's no bones here, right? So there's nothing here. So by doing the translation and bringing the ribcage underneath the shoulder, now the shoulder's resting on the shoulder girdle and you get your shoulder girdle muscles actually working. Yes. So that's why even getting that spine under the shoulder will help.
A lot of people with scoliosis have usually one shoulder that's really a problem. Okay, so to support her head, of course, a lot of times we do this, which is great for the exercise and that totally works too. We can see now her rotation. So that would just... All you have to think is same thing as you come in here and go like this, it's like, oh, now it's see, this is posterior.
But the front of her ribs are on the table. And there's no contact with her right front ribs here at all. Pelvis, oh yeah, the right one is way down. There's no, they don't try to change. There's a space here, she's adjusting, okay?
And then same thing with the shoulders. It's like the right breast is really on the table. So, we're gonna do a similar thing where I got my one that she likes three folded in three, right? So you wanna place it under there for me? Are you good?
Good, okay? So now that's allowing the front of this ribcage. Now she's got contact here and there's no overpressure, right. Overpressure is when you're really pushing hard. This is not an overpressure position.
It's just comfortable, okay? So again, this right hip is into the table too much. So we're gonna put a little towel under there to allow that hip to just drop towards here and her shoulder. We may need to do a double. How's that?
Is that comfortable there? Yeah. Perfect, there. Okay, so as you can see, very nice actually, that looks good. So you feel comfortable? Mm.
Great, so, here we are, pulling straps on the reformer leg lifts, right? All the exercises, you know, in this position. It's a great way to do it. And you can move... You mean she could, I don't want her to do it right now, but I mean, you could come up off of it.
Like in the supine you could come up like bridge and come back down. The props don't go anywhere. It's not like they're balls rolling away or anything, okay. So they would still be there so you can move away from it and come back onto it, all right? Very good comments that they are activating proprioceptively now that they haven't have been able to in the past.
As she said, privy to their new proprioception. Yes, and this is changing the nervous system in their position. So, you know, she has to repetition, right, to make it stay. So another question earlier was, does it last? Everyone always asks, whether it lasts, and you know my comment to that usually is, 'cause I even have clients ask that.
My comment to that is what lasts in this world? (group chuckles) Plastic maybe too bad. (group laughing) Plastic, do what I mean like what lasts? Yes please, that's only (indistinct) Yeah, but I mean, so I mean, nothing really lasts. I mean we're different every day.
Every day you wake up, you have a new little twist in your body, a new little something comes your way in your life and you kind of go, whoa. You know, we're always getting off our center. So life is about bringing yourself back to your center every day. So every day we need to practice to come back to center. So I don't think anything lasts.
So that's why Gaby's answer to that question was, well, when I practice every day it stays. But I have to practice every day. So, that's really important. And I think that's important for everybody whether you have scoliosis or not. That you need to have a physical practice every day to keep your body centered, right.
Watch your head's a little trickier. Okay, remember with the S-curve, I didn't... We're doing her curves, but it's the same with... I mean, it's not the same propping. So if we had an S-curve person lying down, you just feel for their most likely they have that right same thoracic, right thoracic.
But the left lumbar, so perhaps their pelvis would be rotated the other way. So you would have to so just feel that's all... Instead of memorizing, like right, left you know, doing the brain thing, just put your hands in here and say, oh look, this is on the table. This is not. It's very simple.
And then put the prop on the part that's on the table, so that we're encouraging the prop to drop towards the table. So it's a simplest way to remember no matter which curve they might have, okay. So now what happens here, you see, now we can see again, that right pelvis is forward. It's down, and this one's back. So her sacrum and her pelvis is facing left.
Yes, and then the shoulder girdle, of course we have, this is more posterior. This is more anterior, right? And her arm, shoulders too. This is more, this is higher, this is lower, right. That up in the neck now, number one neck, so low.
I'm talking about here, not here. This looks higher, it is higher. But we're talking about if I'm thinking T1 and two, I remember it's this part here. This is more posterior. This is dropped right by her neck.
So it's a little harder to see here. All right, 'cause this is so prominent, all right. So we have a couple of choices here to do. All right, one choice could be, now with the rotation there's side bending. And so, for you remember the x-ray with Gaby, her convexity is on the right and her lumbar was a little closer to here.
This compression here, a little side bending. So, you could say she's side bend to left. So if I were to ask her to bring her left knee behind a little bit, right. To bring that concavity that she has a little bit on the left a little more. See, now that levels her pelvis out.
But how does that feel in this little right corner here? Remember I said that was her area of concern. This is more level, but I'm seeing some compression here. But how does that feel Gaby to you? This area here tight or?
Yeah, they are the same. What do you mean the same? She said the same. same tightness. Yeah.
Okay, so come back. Yeah, it didn't change. It changed her pelvis, but I saw, and she has a very a little, I wouldn't say it's unique, but she has a very special curve, you know? It's a little bit... It's not as common I should say.
So this is why, and I'm gonna talk about this in sitting. You have to pay attention to that. So even though I bring her knee back, so do it again. Okay, not too much, that brought this hip forward and this one back. So that, you know, but now I'm looking at her spine.
Remember I said, always feel here on her spine and I didn't see the shift over here. So come back with your leg, right. So she's still over on this side. So now bring your leg back. And if anything, I see a lot more tension in through here.
And I know this is an area where she has discomfort, so that didn't work, okay. But that's a choice. The S-curve that works beautifully, moving the knee back. So all you gotta do, all right. So I might try something like this.
Let me try putting this one under your knee. Okay, now how does, that looks better. Okay, so that helps. And that actually took the tension out of her back. So instead of introducing side bending, so bringing the knee back, introduces side bending in the lumbar spine.
So instead of introducing that, cause I gave her compression, right. I just lifted the hip up de-rotated her. Okay, now that looks good. Now here, what are we going to do about this here? So this is posterior and this is posterior.
So we can do something like move her arm, like her leg. There's another choice. You have to be a little creative with this, right. So let's see if you were to move this arm forward. What would that let's go forward a little bit to open up the concavity here.
Okay, now that kind of doesn't look so great on her neck. So come back all right. So let's try perhaps, oh yes. Much better, yeah. And this actually her spine started...
Now gravity's at work here. Gravity is our friend when it comes to the spine and we start doing some of the spinals on the trap table, we're gonna wanna really surrender to gravity. You have to let go and this completely changed that. So for her, this is sometimes I move the arm and the leg. That's all they have to do the S-curve that works really well.
You don't have to put something under their hands. So now she's in this quarter pep position. She can do you know, knee stretch, quadruped, arm, legs, you know, things like that. I'm saying she has in her X-ray where her lumbar spine is still pretty close to her right side where her discomfort is all right. So even though you think a C-curve, right.
This way, she has like a little tightness and curvature here, the spine is closer to this ilium right. So it creates this kind of high hip look here all right. Actually it, she puts so much... I'll show you sitting you can see it better. We're going to talk about it in sitting so.
But yeah so when I moved her on (indistinct). Okay it already looks better when I move this leg back. Okay, go ahead and move this on forward. The idea is, oh, let's open the concavity, but you see, she went right into her rotation and it didn't end it gave the tension in this little corner. So it didn't really work.
That is a choice, you know, that could work. It was better for her to deal with the rotation. See that was coronal plane, this is rotation. So for some people, the coronal plane adjustments, the best, and some people, the rotational plane is the best in terms of adjusting. Right, she wants to know what's the cause of scoliosis.
Chapter 4
Translating the Ribcage
And they don't really have a definitive, unless you've discovered something that I don't know about, but something I had the stats down at one point, I think it's like 80% of all scoliosis are in girls starts at, you know, in adolescence and it's higher in girls than boys. So Ruth has great. She says that it's also higher in tall girls and intelligent girls. (group murmuring) Okay, according to whom?
Oh Deane, yes, Juhan yeah. So she's talking about a kind of a more energetic form where there's a growth spurt happening vertically through the spine and then the pressure of society coming down on oneself. And I'm one who abides by that. I'll give you a little anecdote about. I had a young woman who's now 28 (Madeline laughing) and she's like successful in New York and everything.
She was 13 and she came, she started getting scoliosis. So they discovered this and her mother, very great mom to support her. So she came in and worked with me. She went to Tom Hendrickson in Berkeley, who does the orthopedic massage kind of chiropractic work that he does Lauren Berry, which is realigning tissue is what he does. And she also saw Ralph Earl her offer and she was doing Pilates.
So it was a lot of intervention right away to young age, long story short, after working with her for a while, she told me that Ralph Earl had told her. that he thought it was a heart issue. They saw, here I am thinking, oh, this, you know, the mother was divorced, you know, when she was young, when she was growing, it was informative time. Maybe her heart, you know, in the scoliosis going around her heart. So I had this whole story kind of about that, you know?
And then I learned something they didn't tell me in her intake form is that when she was born, she had a heart problem and had surgery as a newborn where they had to do something to... So she really had heart problem, not this energetic of like, oh, I have to protect my heart, which does happen. And I believe in people's bodies, but in her case it was like, I mean, the light bulbs went off. It's like, no wonder she had an operation when she was born. So now her body's kind of growing around this scar tissue or, whatever.
So I thought that was really interesting. So organs have a huge impact on the spine in terms of, you know, their health, but also energetic, you know, emotional holdings. So there's all of that that has to be taken into consideration. Oh no, she completely, and when I was working with her, I had completely changed her posture. You know, how she held herself and her strength and she was tall actually tall girl that goes with that percentage.
But yeah, okay, Let's move on. So we were going to do sideline as our next prop, so face that way. So of course we wanna support their heads. So, go ahead (indistinct) this is big enough or do we need another towel? So, okay, alright.
So, she's, we've gonna look at both sides, right? So what is she... She's now lying on her convex side, okay. So go ahead and straighten your legs out. We're gonna pretend we're gonna do like sidekick or something like that, right?
So, now you have to make sure the hips are stacked. This is what I find that a lot of people do, they tend to tuck the other hip back. So, and so we want this stacked across this way and her feet can be a little flex. It doesn't matter so much. Okay, right.
So now, I still think it needs to be a little bit more, good, that's good now. Right now have your arm out like that so she can put your hand on the table yeah good. There we go. So we have the back as wide now. What we can do in just terms of movement in her awareness is to ask her to breathe into this back part and to feel a lift of her rib up off, which is the position you should have her sidekick anyway, right, for everyone.
So can you hold that now? Hold that position very good. Now your S-curve is what's gonna happen is the lumbar on this side, you know, is gonna be, so if she's right, then she would have a left convexity. So you're gonna have to watch that as she lifts this up, that the lumbar spine doesn't increase going that way. Yeah so it may mean that the hip actually has to make sure that that pelvis is up and that it stays up okay.
Because that's going to shift for the S-curve. So again, just looking at the spine. So inhale again and lift the ribs up off the table. Good, a little bit. And now we haven't done the directed breathing yet.
We're gonna do that next after the propping, but I would really like to encourage her not to breathe in the front left corner so much and the right back corner so much. So see if you can, don't breathe so deeply. And that was better. It's a little too deep of a breath, actually ready? So not to breathe too much into this back part.
Try to breathe into your left lung. Expanding very nice. And let's do an experiment a little bit. Can you turn your head to the left a little bit? There, okay.
Now. Wah. Yeah, okay, now with that, can you breathe into your left nostril, into the left lung and translate up off the table breathing in. (Gaby breathing in) Does that help and exhale. (Gaby exhales) Let's do that again.
And breathing in lifting, very. Do you see how the breath is now going into that area? Okay, and relax, okay. Now why did I rotate her head? Well, I did that because I've been playing with the one lung breathing, but I find that when the nostril, the left nostril is right over the lung, there's direct access into that lung.
So as opposed to keeping my nostrils here and just thinking, I'm breathing into my left or even doing this, right. That if you turn your head just a little bit, it can't be much. 'Cause you've gotta to think of your nostril being right in the line. Yeah, and so when you breathe in, yeah, it expands. So, I use that a lot with people and I'm trying to get her to breathe and you can see that really did change her back.
What is one lung breathing? And it was taught to me by Eve Gentry. So that's how I knew of it. And she would cue you to literally... Of course, breath is going into both lungs.
I don't think you actually could physiologically only breathe in one lung, but there are people only have one lung, who are doing just fine out there in the world, right. But if we have two lungs, there's some air going in the other lung. But if you direct your breath, in visualize it into the lung, the left lung will expand more. And in terms of movement, what it's doing is that it actually filling up the space. So if I'm breathing into my left lung, (Madeline breathing in) it expands the ribcage on the left side.
So your intercostals, so in addition to the lung, the musculature is happening is the intercostals are actually expanding on the one side, more than the other side. So it works perfect for scoliosis because the ribs are too close together, approximated here. So if they breathe, it's thinking about the left side, it actually opens up the ribcage here, which then shifts the spine over towards the midline. So she, Ruth was just sharing that with Eve. She used it for a lot of other movements, not just for scoliosis people, but specifically for rotation, yeah.
Okay, because with rotation and we're gonna look at the thoracic translation a little more, rotation is translation. So to rotate your spine translates at the same time. So with that rotation used to see that translation, so that one lung breathing goes with a facilitating, she didn't know the biomechanics like that, but that's exactly what she... But she was looking at the spine and trying to see where that movement should be. And the breath facilitates that translation, okay.
Let's look at the other side, we do have movement. We got a lot of movement to do so, but this is just great. 'Cause once you see this, then we're gonna be using this as a queuing as we're doing the movement, okay. So let's see. Can we have your head at this end now?
'Cause I want them to see your back. So now she's lying on her left side. That's the concave side, right? So what's happening now with her curve is the fact that the convexity and gravity is she's dropping this way. So the weight of the spine is actually working for her.
So we're not really gonna, I don't, you know, sideline propping. I used to prop more like on the other side, which I didn't do because she's able to translate and breathe and hold the position, which is actually a good exercise. But I used to put a little pad under the ribs to support the ribs up in that position to exercise. But, now I've discovered that by doing that, the change that's happening in her pelvis and neck is not supported so much by that just one push of the ribs. So, my new philosophy from this research and last month is not to just push on one part of the curve.
You actually have to deal with the whole spine. So, I didn't show that on the other side because I'm not doing that anymore. So, the idea of putting something under here, to help lift, which is what I used to do when it was on the, when she was lying down on her right side. So she's lying... So she's like this with her convexity.
And when she's lying on that right side, I used to put something under here to help lift up, to align her spine. It made sense to me at the time, but now I realize more about paying attention to also the cervical spine and the lumbar spine. So, I've actually shied away from that and I actually having taught the person to translate and breathe into that left side, totally corrected, no prop needed. So it's, it's best actually. So in sidelining, we really aren't gonna prop.
We want to sleep on the side on the concavity, not the convexity. Really, so that gravity can, you know, person also has to be able to sleep and be comfortable too. I mean, you try to help people with sleep positions and people try it. I just say, you know, after a while you can get used to it. But you know, I have people say, I can only sleep on my stomach, you know.
You know, but people have to sleep. Sleep is more important than rest. So, we don't harp on that too much. Okay, so there's not much to do here with her. Plus again, you think about her conditioning, you know, and her ability to move.
So that's, she's got that going for her. So, sideline it's not that important. So the question is on when she's lying on her left side, would I cue her to translate her ribs like we do. And that's what we're doing. So when we're in side kick position, we're always telling the person to lift their ribs.
You know, they should be a little bit of space there with the hips and that we should be centered in holding that position. She's already centered here. If I ask her, can you translate? can you do it go up that way? You see, yeah, that's taking her into a curve.
Can you see it? So go lift here, lift up. Yeah, okay, and then release yeah. So let's look at the other side, can you turn over one more time? Look at your back.
On this side, she needs to translate on this side, yeah. So you now can see the difference in her curve, you see. So if she were sleeping here in this position, she's really sleeping. So bend your knees like you're sleeping. Do you see, this is really taking her into the curve.
So over the night, this is not the best position. I have recommended to some clients to take a soft towel or something just to put under here to support while they're sleeping. But I have a woman I recently, my new client that I'm just started working with who has the S-curve. And that was not good for her lower back. It was not comfortable.
So then I just told her, well, you need to try to only sleep on your left side and not your right side and don't prop 'cause it wasn't comfortable for her. So, but here for her, the C-curve, so now she does need to breathe into that lung. You can turn your head again like we did, inhale into that lung and translate up, there. And then try not to lift your shoulder with it but here, there you go. So translate, lift up.
And she's having to work here to hold that position. Now, I wouldn't have her do an exercise with her head turned. So that's only for the breathing, just so you know, right. So then her head would go back to being centered. She still would have to breathe and translate her ribs off the mat and then do a kicking leg or leg lifts to the side or whatever we might do.
She's the seeker because you see what happens is, she has that right, this why I said, she's a little unique in her curve. And it's why you seeing that x-ray was really good to see, because normally you would think a C-curve that would be okay, but she gets compressed here. 'Cause she has a little compensatory curve. She almost has a little left lumbar here. You know, not really, but that spine is awfully close to that ilium on that side.
And this is where she gets her discomfort here. So it would not be good to proper that would be very (indistinct) here. That's what I'm looking at. So, I try to keep it to just the breathing through that. Yeah, okay, good.
Let's do sitting and then we'll finish up on the, okay. So sitting, notice where all her weight is, right? So now we've been propping and moving. So she's getting a little more warmed up. So exaggerate a little bit like relax there, you see.
So she's over there, all her weights on this side. So, another aha moment to me, that I had in this research that I'm sharing with you is that when I put my hands under the touch her sit bones, the left one is not weighted at all. I mean, there's hardly any weight on this one and she's got a lot of weight on this, don't adjust. She's got a lot of weight on the right sit bone. So what do you think I wanted to do to proper?
I want to put it under here to level her pelvis out this is too big, but you know, I wanted to put something under here, you know, to level it out, but really the weight on that sit bone. Well, that created the compression here, okay. But I didn't really wanna put a weight under here, because that actually tipped her over more so like (chuckles) she's gonna fall over. So it was kind of like what's a girl to do, about this. So what I discovered was that actually all the wages from her ribcage, if she translates over, and we stretch her a little bit this way, pull her this way, you see without extending.
So that's the only thing here. So if we pull her this way, so go ahead and put your hand behind your head, right. And then just let your shoulder glide be on your ribs. So this is where you can see the ribcage is not under her shoulder blade so well, good and your neck, okay? Mm.
Okay, and then breathe into that backside and now translate you're already there. Okay, and now guess what? Her sit bones are at level. So I wouldn't prop either side of her sit bones because that weighted sit bone was not because of an S-curve, you know, with a lumbar curve. It's because her whole body weights over there.
So, that's what we're gonna be really careful with the propping and sitting. The question was that what would I do to coach her about sitting, then? You know, and the thing is, it's her awareness. It's her awareness of knowing, yes. And she can do something like pull, she's pulling that sideways or, you know, she can pull herself or just be careful.
'Cause she goes anterior here, yeah. So it's hard you don't push too much. That's the other thing, is how much effort, right. That the person has to know that was too much effort. 'Cause she went right into her twist, right.
So, but if she uses the breath and breathe in and translates into my hand over here, there we go. That's the amount of effort. So you have to coach them to what is the right amount of effort. So that's great, and I can really feel her obliques kicking in on this side. Right, so don't do 10 pounds of effort for a five pound movement.
Gee, who said that? (student conversing quietly) Yeah, Joseph Pilates. Yeah, there you go. So how much effort? I quote that all the time to my clients.
So they understand how much effort they need to do for the movement I'm asking them to do. That looks great, good, okay. Some people, the S-curve, a prop under, is a good idea. Again, watch the spine and see what's happening, but that could actually set them up pretty well. And it would be on the side.
That's more weighted. Remember the S-curve has more weight on the left side and standing. So when they sit down, their weight's probably gonna be on 'cause the lumbar's over to left. So their weight's gonna be more on the left and this is gonna be over to the right. So, if I can create a shift in the pelvis, that straighten out the lumbar, then that's a better chance for the thoracic to come over too.
So the S-curve, you could try propping and see what happens with that and pay attention to that, okay. So now we're gonna get to the good step, right?
Chapter 5
Elongating the Spine
So, keep in mind those three areas of the spine, right? That's box one, two and three, the rotation looking at her spine. So we're gonna start with creating elongation with the spine.
So I have a number of exercises or movements to do on the trap table, alright. So, if the hands are able to do this, so it depends on your client, but she can just come up, hold the bars. Now with elongation, we don't want her wanting to rest for a second. 'Cause I just realized what I was gonna say. I didn't want her hands to get tired.
Right? You don't wanna do attraction type thing. That is really aggressive, like hanging from the fluffies upside down. Do you know what I mean that like right off the bat, I mean the, or hanging with your weight, you know, with your legs off, like that. Because the spine is not ready to open up and elongate and it creates kind of a, it's called a, like a recoil of the spine.
So when you do that kind of aggressive hanging and you come out of it, the spine actually gets tighter. So I really recommend that you don't do any kind of aggressive hanging like that. So this is how we're doing it though. She can hang, but be supported on her knees. This is the moon box, small Pilates box called the moon box.
And all you have to do is put in up there. It's back in the same spot. And they're just gonna hang here with her knees supported on here. Now of course, go ahead. So someone's taller you have a smaller platform for them.
If they're shorter, it has to be higher. But basically again, we're looking at that plum line from the side and that her body is really just relaxing. Her weight is on the box and she's getting that elongation. And in this position now, you can cue the directed breathing here. That's what she's doing, why she's here.
So she's going to breathe into it and she could turn her head to the left just a little bit to do the one, one breathing, translating her ribs to the left and exhaling. Just relax and hang don't contract abdominal muscles externally right. Not that they're not yeah. So an inhale, you can see how her spine is getting longer. Very nice breath there right okay.
And relax. Alright, come on up. Now there's a hands on that I like to do in this position that I want to show you on the skeleton all right. So she's that thoracolumbar area here so low. If it's higher, you have to try to hold higher, but down here, so what I'm going to do with my hands is, remember I said that she'll breathe too much into this right posterior side and not enough on this side.
So if I take my hands and put my fingers on the ribs, so I can even do three ribs at the same time with my fingers, right. And then approximate them into the spine, especially on the right side. it's super light, like the weight of a nickel. It's very light. All I'm doing is creating like a closure here.
So I'm not pushing, I'm not squeezing. I'm literally just taking the bones and doing this, putting them together. So it's very light action. I'm gonna draw it into the spine and hold that there. And then she's going to breathe and I'm not going to put as much pressure over here.
I'm gonna allow her to breathe here and keep this rib on the right side from moving too much. It's very simple. Okay, so here, should we move this? So here she is just hanging with her weight on the moon box elongating so now I'm going to go to the apex of her curve and I'm taking the ribs here and I'm gonna draw, especially the right side to see in towards the spine. I'm not really pushing as much on that.
Not pushing, it's a weight of a nickel, take a nickel, put it in your finger like this and see what it feels like. The weight of it. It's that light. But I'm just drawing this ribcage towards the spine. And now I'm gonna hold it here, they're very nice.
And now inhale into that left side and I kind of go over here. Yeah and exhale and I'm not allowing that right side to expand, inhale into that left there yeah, that was really nice. One more time it's really good. Inhale into that side, exhale. Look at that beautiful spine, rest, awesome.
Three, four times to set them up. So she got the elongation, right. I translate it wasn't really pushing on her spine, but I just brought the rib towards the spine to fix it. It's called fixing really, I mean, I call it that, I guess. I don't know who else calls it, but you can fix it so it doesn't actually move, so the area is going to move where you want it to move.
So that's what I was doing and hanging. Another elongation and a little more challenging on the hamstrings cause the person has to be able to bend forward. So remember, keep in mind your condition of your person. Right so it may not be appropriate for everyone. So we're going to come to the end of the table here and where you'll see we've set up some sticky mats on the floor so that she won't slip on the floor, but I'm giving her a little bit of a lift with the pad.
So we have sticky mats on the floor for safety and then one of these pads. And then when I looked at her pelvis, so let's just, well, it's hard for her to hold position. When I looked at her pelvis, she had that right pelvis was lower than the left, just like in quadruped. Right exactly like the quadruped position. So I put the pad under her right foot, just like I put the pad under her right knee.
But it wasn't really enough in standing leg length discrepancy. So I put an extra little pad here, which was just the three bears just right, right. So here we go. So we have that and then we take a roller and you know, there's different softness of rollers, you know, there's different ones, blue, pink, you know, the pink being soft. Sometimes the soft rollers nice.
It presses a little harder. And at my studio, what I do is we have these wedges, they're rubber wedges and you can wedge right here to prevent it from moving, but we don't have any wedges here. So I took a sticky mat, kind of folded a little bit and stuck it in here like that cause when she leans on it, it could roll away. So if you have some wedges, it's actually nice to put that in there. And we have our rollback bar and toss bar needs to be low.
Cause it can't be too much weight. We're gonna suspender her. She's just gonna suspend. (bar whirring) You know I wanted to do a workshop on the original suspension system. Cadillac or suspension training right now is so hot and the Cadillac is all about that right.
Alright. (bar clumping) So here we are roll back bar in a lower position. So she's gonna come forward and she's gonna do a forward bend over the roller. So the roller should be before you go, the roller should be right at the groin. So the idea is the rollers pushing the femurs back like that right.
So and she's lifting her pelvis up and over the roller. So the roller sitting right in here, not in the pelvis, that's really key. So she has to get up and over the roller. So I'll hold it here so she can get up and over it. Great, and she's going to stretch out.
Go ahead. Right. So I'm looking at this levelness here. Can you walk your feet and just a tiny bit more, I'll hold the roll, there we go. Yeah so I want this pressing back as she's lengthening over it very good.
Nice, good. Reach your right sit bone back a little bit. All right so I have to talk a little bit. Are you okay Gaby, if you need to look at the floor. So first of all, you can do a hands on where you can just give her a very, again, the weight of a nickel where I can just lengthen her and she can just...
Now hang your spine hang, let go right, very good. All right so I want her not to be grabbing or holding herself. She needs... And this is actually trying it's actually does suspend you. Okay and then what happens...
Okay you wanna come up? Yeah let's come up for a second. So let me explain a cue, so there's the translation cue . You understand, correct. We've already been talking about the translation of the ribs.
So in the translation, when my ribcage is shifted over to the right, like a right convexity in the thorax, I have the side bending in my spine, going to the left. Yeah so I have the concavity on the left side. So what translation does is as I... As she translates and breathes into that left side, it's actually changing the curve of the spine to straighten up right. Now, the lumbar spine, a little bit different.
So the lumbar spine has this like side bending. So we gonna to use the cue of wagging your tail. Right so you can try that if you can, we want to stand up and just wag your tail. You can do a quadruped it's actually really easy. But if you wag your tail to the right, right.
That the tail is wagging over to the right, the right ilium, the hip is going to come up a little bit right. So your side bending in the lumbar spine. So when you wag your tail to the right there convexity is left. Did you see that? And when you wag your tail to the left, your convexity is right.
So when they're out here suspending you're gonna wanna to fix the pelvis by holding, like I was holding the ribs but hold the Ilium and then ask them to wag their tail to that direction, they need to do. Gaby's got that right side that gets compressed. So I'm going to cue her to wag her tail to the left, to open up that right side and I'm going to hold her ilium. so they're fixed just like I held the rib. So it's creating that forced closure there.
Right so I'm gonna hold it there as then she's gonna under suspension, she's gonna start translating out here. Okay so that's kind of the breakdown of the cueuing. All right, so she's got to get her femurs up against that. Good, very good, great. All right and then she's lengthening now.
She already has that sense of lengthening out and then let your spine hang a little very nice. (student converses slowly) Yeah you can look on this side cause you can actually see her curve. (student converses slowly) Yeah come over here and look, you can move the skeleton even if you want but. Yeah so watch now I'm going to ask her to wag her tail to the left. Okay, now where she does that, that kind of increased her thoracic curve.
Could you see that?
Okay and she's going to breathe into her left lung again and translate the ribs to the left and move the stick to the right and translate. There you go. Yes so there getting that little bit of rotation and the translation and then come back yeah. So come back to relax. Just come up and we'll go into it again so you can see.
So her cueuing has to be wag her tail to left that rights her pelvis. Now I'm holding her Ilium to help her fix it because when she starts to move her thoracic spine, that pelvis and lumbar spine is gonna change. So the hands on actually fixes that so her spine can move. So it is important that you do hold there. All right, but we're gonna try it without me holding her there cause she can...
(student conversing slowly) Yeah. Okay. So you notice what we did was she did two things. So it's the elongation, the translation and a little bit of that rotation. Okay so that's what she was doing.
So she's going to do it with slight wag of her tail tip. That's it, perfect. It was very slight, but now she's fixed. So now I'm holding that so she can hold that herself with her core and elongate translate the ribs to left and rotate the stick a little bit. I'd like to see also that you're actually moving the stick to this way, good.
And come back. Let's do it without the rotation. Lengthen out no rotation, just translate and side bend. Reach the stick out. There you go, reach through this side.
Beautiful let your spine hang, nice. And then come back and again, tail well. So you loses that tail, reach, side bend towards me. Yep keep the tail to there. Keep reaching through that side.
More through this left arm. Yes there reach, breathe in there and breathe inhale. (student inhales) And come back, can you do one more, she's sweating. And again, hold on one second and reach. Go ahead, tail wag? Not yet.
Hold it lengthen and side bend. Reach through that left arm. So she's getting... Look at the stretch of her thoracal lumbar fascia there, the lat. She's getting a good stretch on it and come back and rest, ooh.
Okay. (student conversing quietly) Yeah, are you okay? Yeah. The movement doesn't have to be big, right? 'Cause it's...
When you do a tail wag, you know, depending on the severity of the curve, so if you just have a little curve, if you just intention in your mind that I'm moving my tail to the right, but really not moving so much. You're engaging the local musculature in that area. Like right now I'm doing it and I feel my hip socket, engaged on the right deep in my hip joint. I feel my pelvic floor on the right engaged through here. And my adductor on the right is engaged.
It's holding me there. That's how I'm doing it. So I'm facilitating that training of those local muscles that's gonna hold my pelvis in that position. That's all it is. So it's not a big, it's not like cats, you know, doing this thing.
That's big global muscle cap kind of thing. This is very precise. So it's not gonna appear that she's moving much. Okay. Okay.
Last time. Okay, great. So can you exaggerate so they can see it? Yeah, so that would be it, okay. So that's an exaggeration.
All right, now she's gonna tail wag to the left. See that just a little bit. But see now she's engaged in her hips. All right, and then she's lengthening out, beautiful. So we wanna open up this concavity, right.
So she's gonna translate first, as she inhales into that left side and she's gonna reach longer through her left arm, pushing the stick away, push the stick away. So it's not like she's side bending like big mermaid side. She's actually just pushing, which is creating a little bit of a side bend there, but she's lost the tail wag, there, okay. Yeah, so you have to keep checking now in session, I'm trying to get out of the way so you can see in session, I actually hold the pelvis there, so they don't. And then I just keep cuing her.
Do you notice how I was just keep coaching her keep, because she starts to get fatigued. She's gonna go back to it, okay. But just watch, watch your spine. That's all, I keep watching the spine and you know, so we we're gonna do the same thing, the tail wag. She's gotta set that up and then she's gotta stabilize here, good.
And then she has to translate in lengthen through this side. All right, now, watch what happens to her thoracic spine. If she keeps her pelvis stable and she tries to rotate, and drop that down, can you see what's happening here? Go back here, alright. So reach, I'm gonna hold her here so she doesn't lose her tail wag.
Now translate over here just a little bit. Don't go up, hang more, there. And then reach to this arm lengthen this side. Notice her spine moving towards the center. Can you see that?
Okay, now if she adds the rotation, watch her spine in her concavity. Go ahead, rotate. What's happening? It's getting smaller. So I'm actually not de-rotating her by asking her to bring this forward and come up.
It's a paradox about the rotation. Rotation to the left of her ribcage. Like she was doing actually increases her concavity. Okay, but when we do this one, you'll actually see it. But it was pretty clear though.
You could see whether... So there is literally what it's called a paradoxical rotation. That's what it's called. And this is where in my work in the past and many people do this is I try to get her because you see the ribs posterior, what do you do? I want you to rotate that way.
We all do that. And for some, I'm not saying this is for everyone, but someone who has this paradoxal rotation, you're actually increasing their concavity and creating a not so good curve for them. You're not de-rotating them. It's not helping the scoliosis. So you have to be really careful.
Don't just automatically think, oh, they're rotated this way. I need to rotate them this way. Watch their spine. So the S-curve person who's maybe posterior here would do a rotation that way. And you'll see the spine length, beautiful.
That's an appropriate time. But, we discovered it was a new discovery for both of us, that she had this paradox, it's actually literally was discovered, I think by Dr. Forbes in 1920, paradoxal rotation. So, she's a great example of that. So, anyhow, okay. Any other questions about this little way of elongating the spine and the coaching?
You notice the queuing? The tail wagging, the translation. Where does she need to lengthen? Does she needs to lengthen that concave, pushing to the step? Relax the spine.
The effort, she's gotta let it, so gravity is helping, okay. All right, next one. No, we'll adjust it. Okay, so, what we're gonna start doing now is taking the concepts of what we've been talking about. Aligning the spine towards the midline, right, through the hips, lumbar spine, thoracic and the neck, all in one piece, right.
The translation, the hip glide, the tail wag, whatever we need to line up the spine. Now we need to strengthen, all right. So we're gonna do our strength moves, so we really rely on glutes, are really important to strengthen. Not only the deep gluteal, but the glute max, especially on the one side, you will notice, especially on many people than just people with scoliosis, that there's one glute, that's larger, it's more protruding because of their curvature, right. But if you get the hip glide, get it lined up, then you can strengthen the glute.
So we were working on also creating an elongation for her spine. So even I'm doing glute, I'm not just gonna do her legs and her pelvis and ignore the rest of her spine. So we want... I wanted to keep her elongating. So hence these are the rollback Springs, the light yellow Springs, the short ones.
On the strap, I tried to give her length in this direction. She's also holding the poles to create length. We have the left arm higher than the right arm to open this concavity, to translate the ribs to the left. And then, she's gonna push into the bar, to create the length in her lumbar spine on the right side, okay. So come on back, now as the teacher, of course, I got to keep my hand on the bar, 'cause it's a little precarious with the heel.
But she's talented enough, right. And her strength, now let's bring this in a little bit more 'cause I wanna line up her heel with her sit bone. She's pushing into the bar, very good. And now let this hip come forward a little bit, there. So we're lining up here.
Now her pushing actively into the bar is elongating the lumbar on this side, that little problem area. Now, she's gonna try to keep this length, keep the glute working, bend the knees slightly, just soften the knee. So the knee goes down. She hasn't changed or shortened through here, hopefully. And then push the bar away.
And keep the length here, bending the knee towards the floor, just softening downward towards the floor. And she's pushing the bar away. Get that nice glute work there and repeat 10 times or whatever. But she's working like crazy in her spine. All right, of course, you have to stay here.
This is right. Sticky socks are good so that it doesn't slide off. And we did this, it was new for her. And the next day she said her butt was so sore, but in a good way for her that strength. Excellent, and then rest, good.
Any questions about that? Do we understand the thinking process now? Okay, so let's move on to some more strengthening moves with this idea of always lining her up and cuing her in this way and look at some of our repertory, okay? So we've been talking a lot about the translation
Chapter 6
Strengthening After Elongating
of the ribcage and the breathing. The directed breathing into this side.
And now we introduced in the last exercise the idea of the tail wag, so that we're actually reversing the curve of the side bending of the lumbar spine, yeah. And as the person changes the thoracic spine, they're gonna go into their lumbar spine. So you have to keep going, tail wag, right reach. So, now, the other thing about the tail wag, if you're upright, it's hard. What happens to tail wag, you're actually gliding your hips from side to side.
So the person who's got the ribcage of right thoracic over here, their pelvis is over there, correct? The little boxes, remember the boxes moving side to side? So what this person needs to do is not only translate in the ribcage, but they actually have to glide the hip joint now. So, referencing my hip workshop, the hip glide. So she needs to do more of a medial glide.
She needs to bring the four moral heads like closer together because she's standing in abduction and adduction of one hip, this way. So this is a little exercise. It gives them the feeling for it. So, she's gonna place her right foot in front of her left foot. All right, a little precarious here.
And, what I'm gonna do is give her again a feeling of her pelvis drawing in. So now she's got a squeeze her legs together, like they're one leg. Okay, so that's creating this glide of her hip here on the left, and then, breathing and translating to I'm sorry, pelvis to the right thoracic to left, but she's having to squeeze the legs. There you go. And translate and breathe into this side.
Squeeze your legs. There we go. Do you see how it changes... So hold it there, that's okay. This is an exercise for the person to do, so, you could try it yourself.
You wanna stand up. And so you're squeezing your legs together. And then you're breathing into the side and translating the spine over there. And we got to, this is, it works like crazy to be doing that. There you go.
And see, and it's getting this glute here, working on this side, hold it, do it like three repetitions. So it's a squeeze and then relax. Okay, and do it again. Squeeze your legs together. So you're having to bring this in close together, your thigh bones up higher coming in and translate.
Everyone's gonna be off to probably the right. So translate your ribcage right up over your hips, okay. And then relax and do it again. You had to go to the right actually, you must be an S-curve. We should look at you.
I was watching her shoulders. So as in watching her shoulder, she was translating right, doing what Gaby was doing. But then I started seeing, so let me just show you her. She was translating this way, but this was really dropped. She was really too dropped here.
So, Ruth actually needs to squeeze and translate her ribs that way. Yeah, Ruth, come up here. Just take a look, come here, do you mind? Okay, relax. What I want you to feel they walk around for a second, You'll feel your hips, but yeah.
So watch see the low shoulder here. So put your right foot in front of your left. Okay, and then draw these guys in. So you're really to thigh bones, moving in towards the midline and then translate a little bit over that way into, there you go. Yeah, that's straightening your arm.
Okay, thank you very much So free out. (Madeline laughs) But don't walk around, can you feel that it's amazing how the deep hip muscles are working. So afterwards, as you start to walk, you go, oh my gosh, you talk about a workout for your butt. There you go, see, okay. So that's just a practice.
So now we're putting together the concept of the hip glide, right? Lumbar, a side bending and the translation all together, all these things have to happen together, alright. So we're gonna do a hip on leveling on the wunda chair. So she's gonna come up onto the box. And, so we have the wunda chair.
I have a one red spring here. Don't go yet. It's on the third rung here. The weight can't be too heavy, 'cause it could push the person off balance and it can't be too light. So, I tend to use one heavy spring, but you have to...
if the person's heavier, you know, they're bigger, their leg is heavier. You got to lose a little more weight. If they're much lighter, smaller lighter you know that theory with the teachers here. And this is from balanced body. It's a strap that they have that people use for a lot of different things.
They use it for breathing. They use it for rollback. They use it for, you know, it's just a nice strap. So we're using this strap with an added carabiner and I'm using one light spring. 'Cause it can't be too heavy because it could pull her off balance.
So, we're gonna put the strap around her apex of her thoracic there. Right, okay. And then, she's gonna take her left foot and put it right on the edge of the box. Right foot on here. I'm gonna make sure the feet are leveled.
So your heel has to come back, yeah. Are you okay there? Yep. Okay, and then, we have to keep this up here and she's gonna get elongation from the hanging on the bars up there. Okay, so here's the work.
This is pulling her into her concavity, okay. So, she has to reach down with the right leg to open up this corner of her lower back. And she has to push against resistance of the spring. Now we're strengthening and then release a little bit, right. And she can do it with an inhale.
So inhale, try not to lean on me. Try to do it more through the ribs, there. You see, so I'm monitoring that, that she doesn't move her hip over that way, good. And then release, now, the spring. Yeah, we want the arms to be as leveled as possible, right?
There you go. She was a little out to the side on that arm, which you could use actually, if someone really needs, they could have their arm. You have to play with the position because this arm abducting can help pull the upper. Now, if we're doing upper thoracic, mm? We don't have one here to show you.
But if we had to deal with the upper right thoracic, you can move the hand out more, this way, to get the facilitate this part of the spine. So if she were to translate over here, up here, do you see what I'm saying? So it'd be this part of the spine for your right thoracic. For her we're doing thoraco. So go back to where you were, your hands level.
And now here, she needs to focus through here and reaching down and pressing and release. And again, so what are we getting here? My gosh, we're getting the length of this diagonal, the strengths of this diagonal, including her hip sockets, the adductor and abductor and in the front, it's changing her obliques in the front. So she's working her core in the front, as she's having to stabilize through that position. Is that awesome?
Isn't that great? Nice, so again, if you have somebody who has a good... Poor thing, here we go, release you. (group laughing) That's a lot of... It doesn't look like much, but it is a tremendous amount of work through the spine and the musculature.
So much feed it's all about the motor learning. It's the motor learning. Yeah, it's really stimulating the nervous system for her to shift. Yeah, being passive and being pushed and that doesn't give the brain the learning, like I can be there. I know that, you know, so it's incredible feedback, yeah.
Okay, should we do another one? So there's a simpler version. Let's say you don't have a chair, you know, whatever. So we have another one with just the magic circle and a theraband, yes. So the question is with an S-curve with the two exercises, one would standing, when the right foot's in front and this flips and back, you're getting more glute on this side, right.
And the S-curve is a left convexity in the lumbar and a right convexity in here, right. So that puts them on that left leg. Remember the picture where they stand mostly on the left leg. So it's the same basically, because what this is doing, but bringing your feet together, it's making you do like a double glide basically, you know, but it is allowing for this one to go out a little bit in and this one to go in, which is leveling the pelvis. So I believe that whether you're a right convexity or a left convexity in the lumbar, it works there because it's leveling it out.
(student conversing quietly) And then, your translation is happening, you know, to the left because it's a right convexity. If you're S-curve, is a left convexity, not a right convexity, so it's possible there, you know, I just gave you four common types, but you might have that person come into your studio and you go, oh, you're a left thoracic and a right Lumbar. That's totally possible. You know what I mean? So then you just switch it.
You would stand with your left foot on the chair to lengthen and then put the spring on the other side. But that's could be your job is like identifying where the convexities are, that's why having an X-ray's really nice. It makes it easy for you. There's no guessing. So the question is, what a question is.
Let's say I wasn't thinking correctly and I set it up and it's actually exasperating their curves. It's not doing, not lining them up. You would see that. And then you go, gee, that was good. Let's do the other side now.
(group laughing) We're gonna do a little bit on both sides, but let's do more on the other side now. (group laughing) But you would see that if you want, we could switch this around, but it would take too much time, okay. (student conversing quietly) Yeah, it's, you know, I think you'll see it right away. Like I said, keep looking for that spine to come to the midline. Because even though I'm teaching these skills, you might have the body that comes in that somehow it's not matching up.
Doesn't that happen? I mean, you take a workshop, you get all those great information. You go home, and then you try this thing and you're like, oh, didn't look like that there, but it may not be what you're doing. It may be it's their body. And there's something in it that you're missing.
That you actually have to take what you learned and tweak it a little bit to make it work. But with scoliosis really obvious. Like you set it up and you go, whoa, really see those curves now, that was great. Let's do the other side. (group laughing) Okay, so if we don't have a chair, and a box, I'm just gonna move this out of the way.
We want to see, we're gonna use a magic circle to do the hip glide. And then we're gonna tie the theraband around her ribcage, like the spring. So it's similar, it's not as cool. We don't get the hip drop. What's nice about the wunda chairs you're getting that hip drop.
So, did you tie that area or must I untie it up for you? She wanted to know if she could stand on a moon box, but you know what? It gets a little dangerous. We'll wait to see what we're doing, okay. So, you know, instead of a spring, you can try it with a band, yeah.
Okay, and face the diagonal a little bit, right? So she's gonna push out, so we have tension on the band. So if this band is a very light band, so if you have a heavier band, you could be closer, but she could be away, so you get some pull. Now, we've added this elbow abduction. So her elbow is actually on the bar.
And I'll explain why we're playing with her thoracic up here. And we're gonna put the magic circle here. Okay, so what she's doing now is a number of things. One, she's pressing into the ring creating that glide of the hip, alright. Which is changing her lumbar spine back towards the center, right.
She's pressing into the bar, right, to create actually a translation in the upper thoracic here this way. And then she's pressing into the band and breathing in. So we're doing the same... It's the same motion, right? Good, same, we're fixing this upper part.
So I got all three boxes working here, yeah. The upper box, the middle box and the lower box, yes. It's a nice setup. And she can just repeat, good. And remember local muscles fatigue quickly when they're not strong.
So you don't need to do 50 of these or anything, you know, she's probably on about six right now. So maybe 10, typical Pilates amount, right. So, okay. What she's not doing, okay. What she's not doing, it's now, here, come turn a little more.
So we're away from the pole. Go ahead and push out into my hand, yeah. Don't lean your whole body. Just your shoulder. That's so hard, I'm not pushing you so hard.
Good, so, I'm trying to match like how much I push on her. She's gonna push back. So if I'm pushing on her like this, she's gonna like really push on me. I'm wasn't, but she was pushing harder on me than I was on her. So, that's a cue that I use all the time.
I'm like, just match me. Right, meet my resistance. So if I am, my intention is for her to lightly push into me. I'm gonna lightly touch her. If I want her to push harder, I'm gonna push a little harder on her.
But it's a lot of times the clients don't get that little fine tuning. So I'll just say, meet my resistance. So they match me, okay. So now, go ahead and reach out, like reach out through your elbow. See that's abduction not doing that.
That's not what she is doing against the pole. If I'm the pole, what she's doing is kind of pushing into it. You see, which is contracting through here, her serratus, and you can see her lat is working on this side. Remember, this is the tighter side. This is the longer side.
So this is contracting that, and it's moving this over. Can you see that up there? Different than now, push out, push away, push Z. Then it goes this way or she pushes in. So she's leaning against the pole, which is pushing her that way.
Does that make sense? That's what she's doing with the arm here. And we use that on the reformer too, with the box. You can play with that. So, now from behind now, you can turn this way a little bit.
Now, if you don't have a pole to do this with, okay, you can hold the band for someone, I suppose. I don't know how they would have to play with it, but anyhow, I was trying to think of another way to do it, but go ahead, and so there she goes, she's doing that same idea with the squeezing like that. Translating her ribs that way, good. And then let's try putting your hand behind your head a little bit. Just so the reason is I don't want her contracting in her lat.
So she was doing that just a little bit. I picked up on that. So, as she translate, there you go. That's better. Yeah, even though her arm was down, she was a little bit efforting in her armpit.
And I wanna keep this thoracolumbar that we have already achieved the length. That's the fascia sliding now. She's got the length, it's moving, which is fabulous. Now she needs the strength to hold it, right? So that's the whole point of the elongation.
Get the fascia moving and sliding words stuck, and then add the strength to it with this is great. So she's fixing the shoulder. So it doesn't move by pushing into the bar. So it's creating a force in her shoulder this way, contracting her lat on this side, that's overstretched. And then she's reaching through here to stretch this thoracolumbar fascia through here, translating her spine and gliding her hip.
So the question is, as I'm setting up the three parts here, we had the magic circle, the theraband, and then her arm reaches, right? So, I know from looking at her curve, what the lumbar thoracic... What it needs to do. So I set her up ring band. I already know the arms are here.
It's already a set up. So I've got all three boxes as I'm calling them set up. And then she starts to move. But then I start fine tuning the queuing, like adding the arm here to have her stretch that lat more on that side was critical, though I had her hand here, I didn't cue her to necessarily, she needed to do it more. So even that was here, the position wasn't enough.
She needed to reach more or she needs to translate more. So I don't have you just like, oh, magic circle that works, oh, now band that works, oh, now the arm, it doesn't work that way 'cause you keep changing the curves. So I do put you in the full position, but as I'm watching her move, I'm looking at all those areas. And maybe, the shoulder girdle box is not doing what I wanted to do, or maybe the band part's not doing what I wanted to do and then cue it that way, okay. So we're gonna do swan with the rotation.
Now, this is where we're gonna see her thoracic spine and that concavity change. For increasing the concavity and decreasing the concavity. All right, so this is where that paradoxal rotation comes in play and you'll see it in Gaby's body. Again, not everybody has that. So the whole idea is to watch what the spine is doing.
She's gonna be on her pelvis, on the chair, right, in her lower ribcage kind of off the edge of the chair. It's gotta be comfortable on her ribs. Their ribs are rotated. So there's a little bit, yeah. So come forward more, I think.
Good, all right, good. So, we're ready, so we're gonna put a little bit under here. Just like we did. Good, how's that? Good, you're all right? Yeah.
Okay, so that's all we need is that one because her ribcage is off the chair. Okay, all right, so she still has to do our Pilates queuing of anchoring her legs, right. Getting the femurs weighted into the table. And now she has this little prop here, which of course is making her curve twist a little bit more. All right, so, first come up to a more neutral position.
Not extension, push down a little bit. Yeah, bring your head up a little more. There you go, we want the elongation here. Now, normally we'd say, oh, we need to bring these posterior ribs, anterior go posterior anterior on this side and anterior to posterior on this side, right? So she would know, watch the curve of her spine.
She pushes the right arm down. Right, even if she tries not to use her lack... Go ahead and twist a little more, good. Her spine is moving away from the midline. Her concavity is increasing, and come back.
It's very clear here, okay. Now she's gonna translate. She just did is perfect. And I'm gonna have her actually rotate the other way. Push down this way.
Keep translating, there. You see the concavity lengthening? Oh, wow. I know I could get into the mechanics of it, but I don't want to 'cause it'd be really confusing, but I figured it out. So come on up and rest.
Okay, so, the front of her spine, all right. In simple terms, so she's got this concavity. So what's happening here is that we're translating, opening up that concavity, rotating this way. Which is opening up that concavity. It's that, think of the front.
Okay, but you can see in her spine because when she's like this, she translates over. And when she rotates this way, it actually increases her concavity. So side bending, you know, to the left, there is, you know, there's a type one type two, but there's a whole discussion about those mechanics now. But you know, there is a right rotation or left rotation with that side bending is, so, in her case though, we can truly see that we're opening that concavity of her spine by actually rotating her back. Okay, it's pretty clear, yeah.
Maybe your S-curve person, they do the swan that way, okay. Same parallel legs please. Okay, so here we are, weighted in the pelvis on the chair. And what we're gonna do with the hands on, is that I'm going to do similar to what we did with the breathing when she was hanging, where I'm gonna take the rim, especially on this side and approximate it into the spine this way. So it's fixed.
And then from here, do the movement of the exercise.
Chapter 7
Lateral Tilts
So, more glute strengthening on the reformer sideline legs, but it's nice to have the arc. And so, the arc as it's called from balanced body, fits on the reformer quite well. And what's nice about this for her spine is that when she's on her right side, the arc is actually helping her translate over. And then we're gonna add an arm stretch so that we open up this concavity.
So go ahead and sit down. So she's gonna be up over, and this leg is gonna be on the bar, little turnout position. Is the bar too low? Let me give you a higher bar. Great, don't push out the carriage.
Okay, so we wanna line her up again. So, bring the I'm on a red spring, one red spring. So I want the hips, and what I say is like, I'm taking the wrinkles out. So when I do a hands on with someone, it's just this feeling of kind of a, I don't want the carriers to move. This idea of her taking the wrinkles out of her skin.
This length here, there you go. It just looks a little different than tissue tension. And then is your neck okay now? (indistinct) Yeah, didn't you hold it, yeah. But you were reaching through your arm, yeah.
Okay, let's see about her neck. So, this has to be forward more. Okay, and she's gotta lift now, breathe into the side, reach through here, and we could... You're next, okay, this is where she gets tight. So I'm actually gonna take a small towel, thank you.
And, let's just put one in there. So yeah, there you go. 'Cause I really do wanna her to do this reaching. So again, we're lengthening through this line, but don't go forward here, and feel the... Very nice, there we go, all right.
And then we're gonna keep this stacked and she's gonna have this spiral happening around her leg, and she's just gonna push out. Now we just do our exercise. So it's all in the setup. So she's gonna press out and I'm gonna watch her so that her hip doesn't fall back. Her left hip is the hip that wants to be posterior.
So, rotating outward. So she's got to keep that hip forward. So stay on my hand here. As you go, push out, stay on my hand, keep going, stay on my hand. Keep going, keep pressing.
Don't straighten your leg completely. Pull up your kneecap. Yeah, press here, there. Can you see the glue comes in so that ilium needs to be more forward anterior for the glute to contract. Okay, now she's gonna spiral.
So technically, it really shouldn't move, but she keeps wanting to go back at that hip. So push here, on of my hand. That's it, keep pressing. Keep pressing, good, there. And then come in, so she's gonna repeat now without my hand.
Imagine my hand is there, keep pressing on my hand, keep breathing into that left side. Very nice length on that left side, yeah. So, I'd make her do 10, 15 of these. Okay, let's look at the other side though, in her positioning, all right. So she likes doing the left 'cause she only did the right on the trap table.
So this is good. Excellent, alright. So the other side, we're not gonna turn the carriage on the reformer, but, what's nice about the arc now is it actually is contouring into her curve and they're actually the shape of the curve. Kind of matches her curve. So bring your foot up.
So come forward with them. Just gonna check for the same thing. Now on this side is her concave side. So I definitely wanna take the wrinkles out, right? So all I'm doing is kind of giving her little length in her fascia there.
So that's it. And then now you can hold your head, support your head, right? And this arm can just be here. Yeah, good. Now, we're just gonna watch what this pelvis does now.
Bring this forward just a little bit, good. And then sit down into the wall good. And now we could do, 'cause I can see this from the back, but lengthen through your arm here a little more, pull there and then let (indistinct) that's better. So again, I saw the wrinkles. So her arms like this and there's some wrinkles here, so I'm just having her get rid of the wrinkles.
That's all, to create that's great. Okay, and then the same thing here. She just pushes out, little external rotation here. That's it. And it's a spiral as she bends in her hip, the femur is spiraling around deepening and she should feel it in the posterior part of her hip.
There you go, push it again, keep it in the posterior part of your hip. Nice, and come in, good, okay. So on this side, it's actually, the arc is creating a nice support for her. Nice, and she's still thinking of that side on the arc with the length. Very good, and finish.
Great, good. The other area for strengthening, that's really important is of course the lateral strength. All right, so we're gonna do some lateral tilts. So short box series, you have that lateral tilt thing. We're gonna look at that and on the barrel as well.
Right, so her concavity side, right. The arc is in that shape. But what's nice about this arc, which some people have actually criticized they said it's a long arc, as opposed to some of the other arcs are a shorter arc. So I'm just saying that this actually, there's a benefit to having a long arc. So this long arc is actually giving her the space here for her, to be on it to the side.
Do you wanna... Here, bring it up here. Here. You're just lying out so they can see. So I mean, you could do lateral tilt here right, on the small barrel.
So. (indistinct) You see, and what I was saying about the wrinkles, is that I was just giving her this kind of length to get rid of the wrinkles there. There, just see, there. So that's the position she was in that you couldn't see from the back, that the arc is actually for her curves. Good, yeah.
But the other side, we actually had to create the traction of her fascia, the pulling of that arm to translate her ribs into lengthen through there. So on the one side she was holding like that. Yeah, okay, great. So with that alignment, we can do lateral tilts. Okay, now, what we're gonna be looking for is that alignment of the spine.
I'm not gonna be looking for a concavity side bending, alright. We wanna create elongation strength in a lateral tilt. So we're not gonna be doing this kind of side, bending like this. It is very compressive for the spine. So with the lateral tilt, we're actually looking for the length and then the whole spine, going, or it's a very long curve, she does this beautifully.
So come in and then face the window. Alright. Now, she's gonna be facing this way. And what's great about this is as she goes over into that lateral tilt, she's gonna have to lift and do that translation. It's extremely hard.
But she does it so great. So go ahead and straighten this leg, and well, I'm sorry. Let's anchor that carriage. All right, perfect. Okay, so go ahead and put your right hand down on the shoulder rest.
So I wanna her on her right hip, leg is straight. Now, it is important that the leg be active. So, she's working her glutes again. This is the hip that likes to be back. So I have to keep telling her to stay forward.
It's just, I know that about her body, right? So, and she's got to pull out. So she's working hard here, okay. So now, bring this arm up, reach long. Put your hand behind your head right.
Now translate up and breathe into that lung, okay. You're ready to let go. Hands behind your head. Good, there you go. Now reach long and go down.
Inhale, now inhale as you come up, inhale. Find the translations. Good, keep reaching more through that elbow, the left elbow and down length there and up, good. And down, good. Keep the length, keep reaching through here and lift long, there! And one more and lift up, and rest.
(group clapping) Yeah, I mean she could do more reps, definitely. So let's look at the other side. Keep her turn around and-- I don't know, I'll be... We weren't gonna turn the reformer around. But let's see, so as she goes over though, this side for her, we've got the gravity working this way.
So, all right, you should be able to look from the front of the body. This is a good lesson. Shouldn't always be looking from the back, because you've gotta see what her friend's doing. So her front is gonna be forward on the left and back on the right and the ribcage, right? So, now here's the challenge that concave side is on this side.
So we need to see the length through here. Okay, hand behind your head. Just preparing now, feel the length on this side. There you go. So gravity is letting it fall towards the floor.
Work this leg, flex your foot, hold onto the strap. We'll work your glute here, there. All right, and other arm up. Good, so now reach to this elbow. Get the length here.
Great, now go up with the length on this side, lift this side and keep the length as you go over. Good, that's it. Keep the length on there. Don't go too far. Keep the length through here.
Press out of your elbow, there you go. And down, try to keep the length as you go down. There you go. So she's just reaching through that elbow and up, so much harder. Good, one more, reach.
Yes, can you see that in the front? Yes, and up and rest. Good, (group cheering) Yeah. So lateral tilt on the... You know we have lateral tilt on a small barrel, right?
Large barrel. This one is more challenging than actually the reformer one because in the reformer, you've got the strap that you're pulling up against, you know, and you got the length. I mean, not that it's not hard, but this one being on the barrel, you're perched a little bit over and you got a little more gravity pulling on you and your legs are on the ladder, but not quite in the same way that you actually get to work your hip to help you. So, it is more challenging on the spine all right. So, do you wanna face, which way you wanna do first?
Let's face the window, that's fine, We'll watch your back. Right, top foot here, with classic position. Yeah, this foot here. No. What we were working with her in session was not actually lifting up and down because it was so hard for her to hold her spine in an optimal position.
So what we did was we found the position with her hand here on the barrel, so she's holding on here and then reach the arm behind your head, right. So on this side, right? So she can use her feet into the... She's gonna lengthen out, good all the way through. You gotta make sure that neck is, she's gonna wanna side bend to the right and her neck.
Yeah, so the crown of the head elongation, there you go, look at the muscles. Okay, now I asked her just to let go and hold it. Hold, put your hand back. Relax for a second. Good elongation.
I was doing that through the crown of the head, rib translation towards the floor and let go hold, relax, rest. That's the exercise. So let's see it from the other side. We can look at the front and the back on this one, okay. If you want.
Now this side, of course, she's going into her concavity. So watch the rib in the front here. So now she has to work to really, now she can on here, use this arm to push down into the barrel, to actually get her ribs to translate. So that part's kind of easy, but she's gonna have to let go here. And when she lets go here, her spine is gonna wanna fall.
So this is much harder on the side for her, all right. Are you ready? And inhale into that side and unweighted, hold, perfect. Two, three, four, five, come back, relax. Push your elbow into the barrel, translate.
Open up, reach your elbow just a little bit more. So I get that length through here, right? There you go. Length through this arm, reach to your elbow. All right, there we go.
And let go, two, keep breathing three, yes four, five and relax. All right, so on the queuing, and the body awareness that she had learned about the translation and the hip position. So you see how it builds from what I said from the beginning? Okay, we had a question. That was a great demonstration of strength.
So she says, the question was, what if your client doesn't have that kind of strength? Would you cue them through the musculature in telling them where they should be holding on, right? And my answer would be no. Okay, because it's a felt sense that they have to have in space of where to put their structure. So they're already practicing that through these other exercises that we've done.
Squeezing and translating, feeling that translation. I'm using the same language. So I just transfer that. I don't need to tell them right. To you know, I have to tell him where to breathe, translate the ribs.
If it's a thoracic issue, right. Maybe it's a little tail wag or reach to hold that position and they hold it. So you don't have to tell them, hold your right oblique and your left internal oblique. And you, don't go there. Cause it gets...
It totally disconnects their brain from really feeling the appropriate reception of where they should be in space. Okay, so another little I suggest this now, I actually, if you don't have the strength to do what she just did in the large barrel, we can do this on the reformer, on the elbow. It's a little bit, and then you get a little bit actually a motion through the arm as well. So, I'm gonna do just a red spring and we're gonna take this box and we're gonna put it up here like this. And they have to be careful because the box can actually, if the push arms on here, they can push and it could go boom like that.
So, I put it right on the edge of this and you wanna be really safe. You can just stand right here as the teacher and the box won't move. Generally, I've never had anybody push the box over if I place it right. And if they do push the box over it's because they pushed with their arm instead of stabilizing and moving their trunk. So you move the trunk away from the arm.
That's the movement. You don't push with your arms. So if you push with your arm, the box is gonna fall. All right, so she's gonna kneel. You can face the windows, good.
And her arms gonna be on the box like that. So again, we gotta do the whole lining up again, no not that one, just double kneel for me. Oh, okay, are you ready? Yeah, go ahead, move out some more. I thought you were gonna do the big, big one.
Okay, and we're just getting on the same page here. Okay, so here we are, alright. Now, can you see the shortening here? All right, so try to lift, there you go. Push into your arm right now, but here's the problem.
Your ribs need to translate towards the box. There you go. Now, can you hold on, can you tail wag to the left a little bit for me? There you go. Little tail lag, perfect, hold it.
Push out, and come back. Remember your tail wag a little bit to Lepak, stay forward with your pelvis towards the window. That's it. Push out, good. And in, keep breathing, push out tail wag.
Not too much. One more and reach, excellent. And come back rest. That's a more difficult side, but you see how she learned to do the tail wag, so when she was in that position, she was going into her tightness here, but she was able to lower that just by doing that, to keep that, and then hold that position. And then she was working.
This is really working really serratus in terms of not serratus from the arm, but serratus from the ribcage. So your arm is stable and now you're getting the serratus at this point of the trunk. Not the serratus that's attached up, you know, when you move your arm or your shoulder blade, it's not the shoulder blade apart. It's the ribcage part. That's the part of the serratus, which is really hard to strengthen.
So, I let's see the other side. And that was a more difficult side to be on. And as you're working with a person with scoliosis, on a regular basis, you start to learn like, are you all right? This is the side. So maybe you choose, you know, it depends on the day.
Maybe you choose the more difficult side, do the other side. That's a little easier for them to do. And then you go back to the more difficult side. So you get a little extras sets on the other side, or if they're really tired, sometimes doing the easier side, imprints the body of like, oh, I know how to do this. And then you do the more difficult side and they kind of figures it out.
So there's kind of two approaches as to which side you wanna do first. Okay. Yeah, so, there's no issue here with her translation. She's already got the right hip. It's already a little bit lower.
So, now what we could do is let's have your hand behind your head again, because you do need that. So this is where she tends to collapse. Is it that lat on that side? Go ahead and then reach out, get in. But just so you notice, she is only on the right knee, just for someone is this one's matching, good.
And then in good. Very nice, good. So we're now working actually this oblique sling here that she needs from the right to the left. So this is actually very good for this connection for her through here. Do you feel it more muscular in your core?
It's a (indistinct) so Blake's yeah? Her back, it looks fabulous, 10 more. (group laughing) She sweats bad, okay, great. See, that's the exercise and she's so great holding it. Okay, you can rest.
Super. All right, let's look at pulling straps.
Chapter 8
Pulling Straps
All right, so we're gonna go a light spring. Now, we've added a little bit of the upper tee and cervical rotation for her in the pulling straps. All right, so the pulling straps, we're gonna prop her hip.
She's still gonna go through the extension, but I'm gonna add a little bit again. It's really the upper T's and cervical rotation. Middle's fine. All right, so come on down. It's a light spring blue spring.
Let's see how balanced she is. I'm not just gonna stick this under here, unless I see how she's doing. Tiny (indistinct) but you know what is less than before, so instead of folding it, let's just do that, see if that's gonna make a difference or not. Can you get your weight on your left? There, just not that much.
That was too much. Okay, there, let's fold it. Go and get your way on the left side. Here, feel equal if you can I know, right there. Good, can you feel that?
Okay. let's just the width of your sit bones, all right. So, she's gonna... I'm just gonna have her choke up on the ropes for now, okay. Do you want me to shorten them or that's okay, alright. All right, legs, good, ground your femurs into the box.
Yeah, without tucking, good. All right, so now she's gonna overpower this left side. She's gonna pull more and try you know, side bend on this left side. She's already, so don't pull it yet. Go forward.
Okay, now lower down in your body. All right, so what I wanted to do is look under her left armpit, right? So just looking under it, there we go. And as she pulls the straps up, she's gonna come through center, looking at the floor and then a little extension. We're gonna go into that paradoxal rotation again, looking over her right shoulder, as she's coming up.
Now look over the right shoulder. Keep pulling this right side a little more down, yep. There you go. Can you look up to the right a little more? Let your left shoulder drop a little bit, there.
And then look at the floor, and go down. Do it as a fluid movement and down and under your... So the diagonal is, you're looking here, you're looking at the floor and then you're looking towards the right side. It should be a fluid movement as you're reaching back. Okay, really work that right side.
Okay, come back down. We didn't get the rotation to the right. Okay, so look here. Yeah, all will bring arms (indistinct) all the way so you're completely relaxed, yeah. Completely relaxed, look to the left.
Look under, yeah. You see me? Good, okay. Now, you're gonna start pulling slowly and bring your chest up, now. Look at me over here, over here.
That's it, lift your chest a little bit. Yes, and then go back down, and look at me down here. Yeah, okay. And again, and lengthen. Great, do you see her spine?
It's beautiful. This concavity is moving over towards the mid line. Yeah, see that's making, when she rotates to the right, she's actually having to work this diagonal more. Yeah, do you see that? Okay, the question was that in the past, other teachers here were saying commenting that this side of the body looks like the weaker side, the concavity side looks weaker.
'Cause it doesn't look like it has muscle tone compared to this. This is not muscle tone. So it's kind of a... So, she was saying Gaby was sharing that in some other classes that she's been in, they actually were emphasizing her to pull more with the left arm, thinking it would strengthen this hollow in her back. But actually by poll...
That's her lap, that's tight. So by pulling that it's actually making her go into her concavity more. So that's a kind of an incorrect thinking. So the question back earlier about, would you cue muscle wise? No, because it's not really about that, right?
It is about the lines and watching the spine move and bringing it towards the center. She actually... I was cuing her to pull her right arm more so that it would translate her rib and that's her weak or lat side. So it would translate her ribs to the left and bring her spine to that, okay. So we're gonna do a couple again, the same direction.
We were just doing it in, which is her preferred repetition. This is the diagonal she actually needs to work on. So arms just astray. Good, all right. And, pulling along nice and fluidly and little bit of looking, excellent.
And going down and looking under, good and slowly and smoothly up and down. Don't try to lift higher. Just move into it. Look under. And one more time.
Start your inhalation. So inhale. (Gaby inhales) And then you can exhale at the top and look over your shoulder, easy and come back down. Inhale and exhale. Okay, do you wanna try the other side?
Let's see what your spine does. We won't do too much more. She's getting tired. So arms straight now arms are hanging, right? Yes. You're not too far forward?
You're okay, I think you slid forward. Yeah, alright. That's important. Always adjust, okay, great. And, now let's see what happens with her back because this is gonna be a more challenging diagonal for her because of the curvature, okay.
So here she goes, she's going to lift up. Good, very nice, excellent. No, are you keep going. Are you thinking pull more with your right arm a little bit, Gaby? Or you just moving through?
Is there any thought I just asking you because it looks really nice and even-- Even I was pulling it before. Okay, because she was pulling more before with her right arm. She's kind of just keeping the same feeling and changing the rotation. Good, and lift. Yeah, but you see, this is where her rotation is up here.
Can you see? Yeah, go ahead and keep moving. Remember this is more posterior up here. And more anterior here. This part right here.
So when she goes, go ahead. Good, this is kind of going into her rotation up here. Remember the rotation we were trying to correct. This was, you know, so rest, I wouldn't really do a whole lot there. You're doing more on the other side because the shoulder girdle for her needs to rotate to the right.
Okay, and rest One more. One more she wants to do one more on the side. That's gonna balance her out, excellent. She deserves it, my goodness. Yes, very nice and rest.
And it was another question saying, "now that she's all warmed up and she's been working out hard, would you then follow with her more, elongation that's a little more weighted versus warming up?" And yes, definitely she's gonna wanna do some kind of which we will do. Okay, but let's stick with the reformer and look at the rowing front. Here we go. So I was just looking at her pelvis. I was just taking a look to see about her weight on her sit bones.
And so she does need to translate her ribs to the left just a little bit. So her weights on the weighted on the sit bone. Good, right now, I personally don't like that for your thumbs. It's not very good. So I'm gonna get you some handles.
She had the loop on her thumb like this, and this is really very severe on this very sensitive thumb joint. You don't wanna weight and a strap, pulling on the thumb over and over again. You've got to use your grip. There you go. Take that one.
(Gaby conversing quietly) Yeah, but I want you to hold the whole handle, right? Okay So at first, what I want her to do is find an elongation and I'm gonna watch her pull forward. So get, and see if you can pull forward, now. You're gonna need to translate your ribs still left and lift your chest up and lean into the straps a little bit and go forward from your hips. Good, all right and breathe into this side.
Watch your shoulders, okay. And then come back down. Just let's just move into the arms before we actually do the full. Now, Gaby has good hamstring flexibility 'cause she's able to really move forward through it, okay. So I'm just watching her back, that she's keeping that translation and she has to lengthen more towards with the left arm almost as if the left arm is gonna go higher.
All right, now, we need to find a little manubrium left. The clavicles are gonna float up, but you're leaning forward from your pelvis, yeah. Okay, get your weight on your left sit bone a little. Yes, good. And then come back down.
So what's missing in her arms and the left is actually this clavicle rotation and her manubrium actually lifting up as the arms, start to reach above 90. So, when your arms start to go up like this, rotate the clavicles up, lift the sternum. You can breathe in at that point and see if you can... And just let your back, hang in the back. So, let's see if we can get this moving a little bit.
So again, pull forward and I'll go up and forward. Feel the elongation, feel this lift of your pics here. Good, and translate into the left a little bit there. That's better. Just see how that change the tension in her per trapezius.
When the arms are up overhead, your per trapezius is they are working. They're just hopefully not shortening. And you know, she had nice length and openness here, but it is key at that point hat there's this clavicle rotation that's happening. And that happens because your first and second rib is moving. So that means that's, this is the upper box here.
T1 and two, all right. So, let's try one more, there you go. So she's working her postural awareness. She's working her translation of her ribs, and now she's kind of work that clavicle and lean from the hips, now. The hips, so she's getting hamstring they're much better.
(group applause) Yes, very good, and rest. Okay, and rest, okay. So there was a question about rowing with one arm rowing. And of course, if the person, which would be excellent to do, so if the person can align their spine and then just be pulling with one arm, of course it's more challenging. It would be great.
It's a posture arms exercise is a challenge to the one side to the other right and left side. So the motion, yeah. So we're (indistinct) chest expansion with one arm and a nice arching and lifting of your elbow on the other side. So it's a long box or feeder on the headrest, okay. Now, of course you can do this kneeling, like chest expansion.
It's very challenging, all right. So we have our beautiful arching elbow on the right side and chest expansion pulling back on this side. So we're gonna have this reaching little rotation. We can add little rotation and pulling back, and then the arms are just gonna switch, okay. But the switches you're gonna extend, turn this palm over.
And the other hand is gonna come up. And what we have to watch for is when, especially when this arm, can you reach your elbow more? So we get that translation here and contract this lat more, there. So they give us, this is the side she has to concentrate more on and now switch. And that seems to be okay, in her back.
But it's the opposite side where she's gonna have to really reach and pull down through here to keep that spine in more towards the center. All right, so, and again, like I said, she's feeling your weight on that left sit bone a little bit more. Yes, remember her spine puts more weight on the right side. All right, so here we go. She's gonna lift the right arm up and the left arm back.
Good, and feel the actual elongation and extend and switch the arms. So the motion, let me just... 'Cause you have constant resistance on the strap here. You're gonna extend and your arms pass like this and you pull, right. We haven't done this much.
So she and I together and then this and then pull, right. And let's see what she's doing here. That's it, yes. Di you notice how she's actively translating, there and I'll add a little rotation. So they had a local little to the left with yours.
There you go. And then come back and then switch to the other side. Keep your weight on your lat and rotate to the right a little bit. Now you're going to the right a little bit. So that's a little harder for her.
She starts to get into her concavity there. So it's a challenge. So, (indistinct) same for sitting it's a little there, you're okay? Translate, yes. And, there you go.
Good, and rest, okay. So it's more challenging when you start especially with the thoracic curvature. It's more challenging with the arms so you have to watch and queue and then choose, you know, different varieties of pulling one arm or the other. It's very challenging at that point there, but let's give her a nice lengthening out. What's really interesting to watch is the up stretch.
Okay, an elephant type of loop for her spine. She's got a red and a blue spring on here, heels up and you can see she has very good flexibility in her hamstrings. Now, this is where we're really gonna see her concave side here. And, you see here and then this hip drop here. Yeah, so what if you put your heal, I'm just experimenting out, put your heel down on this side.
Oh no, that's not good. A little bit. A little bit, yeah. It's a little lower, okay, great. So her heel on the shoulder rest is slightly lower than the heel on this shoulder rest.
And that's helping her level this out, okay. Now, what I have to encourage her to do now is to try not only translate, but we need to get more length out of this arm. So come on out for a second. So you're watching me in process. This is always good.
Are you all right? I just wanna... What if you were to hold this side of this bar, this way carefully arrest. Is that creating more length through this side? Yeah. Okay.
I mean-- Yeah, so good. Now clavicles again. Cause I worry about your neck and through here, there you go, so keep that. If you keep that manubrium feeling and the clavicles lifting, there you go. Just let your head hang, it just hangs, like grabbing your head.
Not your whole spine. Just let that go, there. Keep the clavicles lifted though. You can do that without lifting your neck. No don't yeah, very good, all right.
Breathe over here. No, yeah. Exhale for a second. All right, inhale here to this side. Very good, alright.
Now, press out. Reach to this side. Good and coming in. Good, very good reach. Good, keep reaching to this side too.
So again, little tail wag to the left. Good. How's that working with your arm and the risks there. It's okay I just want to adjust-- Okay, keep the length through there and translate there, she go there. It takes three reps.
That's my pancake theory that I've mentioned before, you see, first, you don't let them do it once. Not gonna be good. Second one the brain's kind of figuring out by the third one, it's like bang. It's in and then they can keep repeating. So, don't over-correct on the first one, just a little here, let them do it.
And you'll see about the third one. This is very nice here. Probably feels really good after all that she's been through, okay, and rest. You know, it's a process, you know, working with someone with a challenging spine like that, and it is a process you're gonna try something. It's not gonna work or maybe work great.
You're gonna figure something out and, you know, share it with us. Hopefully when you have some new idea. So we all get to profit from it. Or maybe profit's not the right word, benefit from it. But I mean, what I mean is we all get to profit in terms of helping people, right?
(train passing by) So, I hope that you will take this all in, watch it numerous times, you know, soak it in and keep it simple. I mean, that's what I've tried to do. I've always been an advocate for keeping it simple because it works for the person when it's simple, right? So the important points was the directed breathing. Getting this idea of getting them to feel that translation and the hip glide, thinking of those boxes, I showed you in the PowerPoint, right?
And then the rotation has to be within that segment. It's not this big rotation this way. If it's up high, there are actually the rotation is more. If it's a right thoracic. If it's lower, it's gonna be maybe down here.
If it's lumbar, it's you know, more of a side bending, you know, you have to be very specific to that. And then at the same time, look at their whole spine. Keep looking for it to go to the midline, alright. So even though you've read something in a book and it says, this is supposed to work, and then there you are in real life. And it's like, whoa, that spine is going way off the midline, then something's not right.
And you need to adjust, you know, for the person. So, thank you. Thank you Gaby so much. (group applause)
Continuing Education Credits
If you complete this workshop, you will earn:
3.0 credits from Pilates Association Australia (PAA)
The Pilates Association Australia (PAA) is an independent and not-for-profit organization established by the Pilates industry as a regulatory body for control of quality instruction, member support, and integrity within all legitimate approaches to the Pilates Method.
3.0 credits from National Pilates Certification Program (NPCP)
The National Pilates Certification Program is accredited by the National Commission for Certifying Agencies (NCCA)
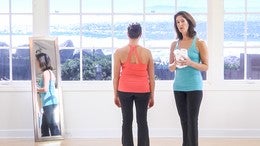
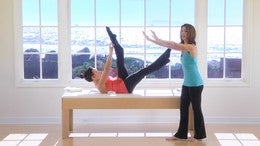
Workshops: Body Pathologies and Conditions

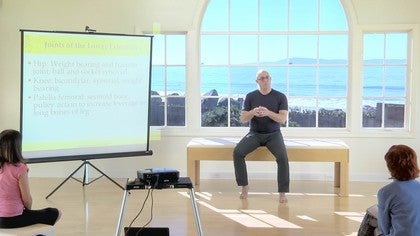
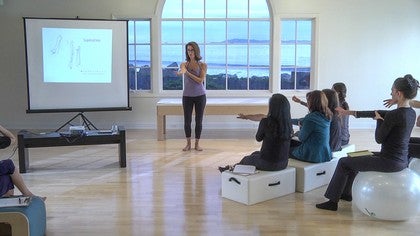
Mention
 |
Madeline Black (Teacher) |
 |
Elizabeth D |
 |
Rachel A |
 |
Emma P |
|
|
Ludovica U |
 |
Elisha G |
 |
Gia Calhoun |
 |
Shelly C |
 |
Maryam |
|
|
Debbie H |
|
|
Mavra R |
|
|
Stephanie H |
|
|
Dayna H |
 |
Heidi G |
 |
Francine H |
 |
Christine B |
 |
Julian G |
|
|
Tova A |
 |
Valya Karcher |
|
|
Taunia M |
 |
Paulinka S |
 |
Heidi VDB |
|
|
Aishling J |
|
|
Tania B |
 |
Letícia Z |
 |
Allie Greene |
|
|
Melanie B |
 |
- |
 |
Kim W |
|
|
Roula K |
 |
Edith G |
|
|
Carole P |
 |
Lynn P |
|
|
Rosie P |
Comments


love your info.
i just wanted to know if you have any more advice for me I am starting to work with a young lady that wears a brace. I have not seem she yet. but i usume that wearing a brace make her quite weak and lack of body awareness. is there other exercise than what i saw in you seminar i should start with
thank
Carole

1. How would I tailor the exercises you show for mat work as I don't have access to a reformer?
2. I live in the UK and would really appreciate some contacts for pilates instructors who specialise in scoliosis?


You need to be a subscriber to post a comment.
Please Log In or Create an Account to start your free trial.
