Description
About This Video
Transcript
Read Full Transcript
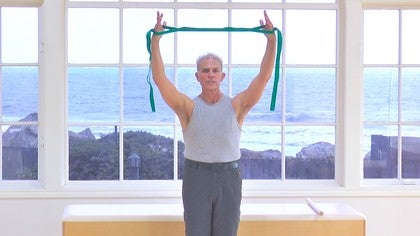
I'm Ken Gilbert and I'm here to share with you a tutorial about the shoulder girl. I have a little story. I've been teaching Palladia since 96 and that's when I met Ron Fletcher and began a journey into creative, expressive it through the body. My wife and I have a theater company and we use the spine as our source of character and how we develop character through long spine, short spine wide, narrow, advanced and retreat, and then all of that articulation of the spine and and what I love to teach, I've created this possibility of more articulation, more intervertebral articulation. Then in January of this last year I fell, I fell knee, shoulder, face, and unfortunately tore to the ligaments in the, in the two tendons in the shoulder and in that and so doing, I had to have some repair done. The repair was done a month later and in that I was told that it would have free range of motion within 12 months. So what I learned before this, about three and a half years ago, I started a journey about range of motion in the shoulder girdle. How that connects to the spine through the shoulder blades.
So it was able to do is heal quickly and efficiently. Range of motion. And so what I'm here to share with you today is about how to open up the shoulder girdle for somebody who is, has issues in the shoulder or somebody who is post Rehab Post. Um, trauma trauma can happen just running into a shoulder, running into a door jam, anything that causes immediate problem with the shoulder getting tight. So what I'd like to share with you today is how I look at the spine first and then how the s I look at the appendages of the arms coming out of the spine. So there's awareness of how the body can move efficiently and with a sense of connection and ease. So I want to start with what I use in, in the alignment of the spine. So I'm sitting in it right now, the pubis to the navel that drops the Calvis. In this case I'm sitting on my sits bones and the end of the table.
Then from the naval to the bottom of the sternum. And then from the bottom of the sternum to the, the chromium or the, the chromium process into the, the top of the sternum here, the the, so what we'll play with is this lifting and resting, lifting and arresting. Then the shoulder blades have the opportunity to create a halo as the shoulder blades reach forward, rather than allowing the shoulder blades to pull back with the Trapezius and the Rhomboid is activated, causing this to happen. The head going forward. What I learned in the process of standing more upright, getting connected with a centered spine, I create a connection called high point or what I call center core. And that allows them to wrap at the trans versus the obliques, the rectus Abdominis, the Serita's.
So the back becomes a place in source of power and the front is an opposition. So in my, in my work of the shoulder, we'll play with this, these oppositional force, oppositional force being widening and lengthening, widening and lengthening opposing to each other. So the front and back are in relationship. So as we play with this, what I want to be aware of is that I want the shoulders to be wide. So I think of the, the MPLS of the shoulder blade being way out here. And since the damage of my shoulder and the atrophy that is occurred, I can feel the bony structure more.
I'm going to be rehabbing that over the next few years and bring it back, the muscle volume of it. So the shoulder feels a little bit more balanced to the healthier one or I should say the one that didn't get hurt. So what I want to play with here is that the shoulder blade goes wide and in widening the shoulder blade, now I take the pressure off the arm, the arm can hang freely. One of my new cues recently is that I want the head to be behind the arms. So as I lift my arms and reach with my shoulder blades, I don't get impinged in the back. I'm using my lats here, I'm using the Trapezius to stabilize the shoulder blade staying wide.
So long muscle allows them to be easy instead of cotton stuck. So I love to demonstrate at this point right now that if I pull my shoulder blades back as people normally fall forward in their chest, so many people will, that I can't lift my arm any higher than this without some sort of discomfort through the healing that I've done since February. I'm allowed to have full range of motion. So I want to address how does that happen? So I have two different tools here. All of us usually have a stick and then I also have the optp strap.
So what I'll play with here is the widening of the shoulder blades. This is a little bit more common for people who are aware of what's going on in their back. This allows them the wrap to come from the back and the move to the front. So from the back to the front, I want to feel that widening. The hebel then naturally come back.
So the maneuver IOM is a mark in relationship to the crown of that head. So pubis, naval chromium process in that chromium process, but the, this, the bottom of the sternum here, the top of the sternum, the maneuver, IOM, actually the clear vicular joint here. And then I have that in relationship to the top of the head. So that allows me then to to turn my head with more ease. It allows me to open my chest and back simultaneously.
There's my opposing force right there to allow the roundness of the humerus to move. So with that playfulness, we can play with ease and connection here to create a range of motion. So by doing this now the healing will happen in any shoulder, whether it's abused in and just ordinary daily life when we're not paying attention or if something does happen to it or we want to heal it. So pay attention to that widening of the epilepsy. This being the very end of the shoulder blade out here. Then the harm of humerus can dangle in front rather than being shoved back here.
So with that awareness we can also play, as you'll see in some of the other sessions that I'm teaching, we can play with the strap to do this kind of stability. So here letting show the blades, actually using the elbows as the cue to widen the back so the elbow is so I can get quite a range of motion out of there cause I'm not allowing this to happen. So I'd want that to be open and available to me opposing from the front. So the back stays wide opposing from the front, so the backstage wide and then opposing from the front. So the back stays wide, there's much more rotator cuff here. And also allowing them the elbows to spin forward allows to be even more to the back across the Trapezius, into the, the uh, the laugh into the terrorist major, minor.
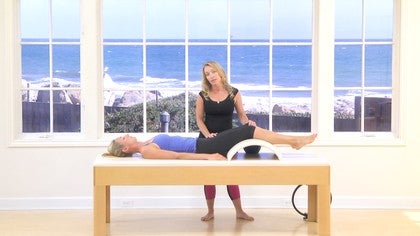
That's where some of the damage was that I had to have repaired. That excites me to be able to have that kind of stability. So we're working from that availability to open and then to play with a patterning of what will help someone understand, not only keeping the shoulder blades wide, also learning how to spend the head of the humerus. A challenge for everybody that I work with. You'll see me in in one of my demonstrations of how I get behind somebody and allow these bones to rotate the head of the humorous and shoulder joint itself.
So here, that's easily accessible. Here's where something has to begin to change so the shoulders don't get engaged. Here's the opposing force from the front. And so the add the breath, it would be okay.
Mindful Movement: Returning from Injury
Mention
 |
Ken Gilbert (Teacher) |
 |
Gary M |
 |
Kokeb M |
|
|
Mayu |
|
|
Rachel Q |
 |
Rahmah M |
|
|
Trisha J |
|
|
Sarah G |
 |
Linda S |
 |
Allison H |
|
|
Connie L |
 |
Lynn P |
Comments


You need to be a subscriber to post a comment.
Please Log In or Create an Account to start your free trial.
