Description
This video is an elaboration on a prior Shoulder Tutorial previously filmed by Sarah, so be sure to watch that video first to get a basis for the concpts that Sarah is exploring in this video.
About This Video
Transcript
Read Full Transcript
Hello everybody. It's Sarah Berta tele here and I'm very excited to be here. Back at [inaudible] anytime. And today I'm going to be teaching a tutorial. Some of you may have seen my shoulder tutorial that I taught last year at some point and the idea of this tutorial is to elaborate a little bit on what we explored during that session. So if you haven't seen it yet, it may be a good idea to check that one out. Um, what I would like to talk today about is first the idea of the outer crust, which is a term that I use a lot. And really all I'm talking about is how to engage the abdominals, hopefully appropriately as a whole, as a core, as a crust.
So anybody who works with me regularly knows what the term crust means. Um, hopefully after this you will to, from there we're going to pay attention a little bit to the legs and we're going to explore the, the combination, if you will, of the ankles to the knees and the hips. And then we're going to apply all of that to some shoulder work as well. So moving on. I Have Katie here to help me with the demonstration. So I'm going to have you go ahead and come around over here, Qaeda and you can stand right like this. This is fine. And what I'd like to do is is show what I mean about um, I'm going to show and then explain and give you an opportunity to feel okay.
So the first important thing when we are trying to find the muscles of the crust, if you will, or the cor accurately or functionally, is to make sure the bones are in the right position. So in a standing position, many of you will find if you bend your knees a little bit, it will be easier to feel that you're equally weighted on your feet. So a little knee bend is good. And when you want to play for a moment with your pelvis position so you can tuck your pelvis, you can arch your back a little bit or go anterior with your pelvis and then settle on what feels like a neutral position for you in that position. I want you to sense that your rib cage is now stacked over your pelvis. Katie, can you take your arms up to like an eye dreamy I dream of Jeannie position and I'm actually gonna lift your shirt up. Is that cool? Yeah, that's that good.
So that we can see actually what's going on here. So a lot of times when we're working on understanding how to use the abdominals, there's a lot of focusing on the front of the body. Yeah, most of our abdominals are on the front of the body, but it's really important that we engage the muscles around the side and to the back ads as well. So assuming the pelvis is in a nice neutral position and I think that's good and the ribs are stacked over the pelvis. For many people it feels a little bit like we have to make a slight fold underneath the ribs and then he long gate out through the crown of the head. So what we've done there is we've deemphasized the arch that sometimes happens right about here.
And then we've found just a little bit of length through the upper back. So now our bones are hopefully in a perfect spot. If I were to ask to to engage her abdominals right now, most likely the majority of the would come to the front. And what I see here is a little bit of a, I'll call it a divot, so there's no muscle right here that's working. So if I were to ask her to engage her transverse abdominous, most people would pull in first, and that's not what I'm looking for.
I'm actually looking for a little bit of a sensation of creating a, a cross or a contraction that actually opens and wraps around the back as opposed to going concave. Okay, that's one thought. Now here, this is representing for me the internal oblique. So Keda, I want you to try to find the muscle that would push my fingers out in a way right here. So you're going to inhale. That was really good into my fingers. Now keep that puff if you will, as you exhale. So she lost it a little bit on that one, but she's going to find it again.
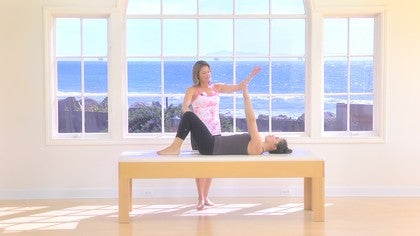
So inhale, it might feel like you have to fold a little bit under your ribs. That was beautiful. Now as you exhale, don't force the air out. Instead, keep the flesh or the muscle almost pushing back on my finger here in hell again. That was really nice. And exhale. Keep the engagement here. So this is your back abs or the completion of your crust. Okay, I'm going to let you take a pause. Many of you after watching that might've felt like, wow, I have no idea what you're talking about. I don't know how to feel that. One way is to put your own hand on your side and actually breathe into your own thumb. Another way is to learn how to use the muscles appropriately, and I'm going to give you an option right now. Would you lie down? So an exercise I use very regularly in my classes, I call the vortex and for me it's a way to functionalize the obe leaks by paying attention, not to the muscles, but the lines that were drawing essentially.
Okay, so assuming that we have a pretty neutral pelvis position, we're going to start here on the back with a softening down of the ribs. I'm not asking for a synching together of the ribs. I'm actually asking for a sensation of opening the ribs slightly and connecting the front ribs to the front of the pelvis. So ribs to hip bones, okay? That can also be achieved with this sensation of elongation of the upper spine. So what I did is I took my hand on the back of Kato's neck here and I gave her this feeling of length.
You can create that on your own body just by sensing someone giving you just a little pullback there. Okay, so we're in a good position. The vortex goes like this. Reach your hands up to this ceiling, and with an exhale, you'll first lift your head and chest. A basic ab curl here we've connected both front ribs to both front hips. Hopefully we've also connected the back rib to the back of the pelvis, which would represent the internal oblique being involved. Okay, now here I'm going to have you lift one up to tabletop. First, bring your hands around the back of the thigh and lift a little higher. Beautiful. So increasing the connection and the contraction here. Gorgeous.
Take your inside hand to the outside. Now your arms represent your obliques. The cross arm helps you define the line from the outer ribs to the hip. The front, the other arm helps you define the connection of that rib, the back of the rib and the front of the ribs to the front of the hip and the back of the hip. So we've got this whole crust wrapping around to the back. Another thing to think about here is almost the heaviness of the lowest rib into the mat. Something to think about.
Now hold this place one hand behind your head. Everything stays utterly still. Place the other hand behind your head and that is beautiful. We breathe. Three breaths is the magical, magical number
If you wanted to lift the head and chest folding under the ribs. Float the other leg now to tabletop. Hook the hands around the back of the thigh and lift just a little more. Feel open through the chest. Feel both ribs connecting to the front, both ribs on the back. Also connecting to the back. Good. Find the twist. So the arm that comes across represents the line of the rib to the hip.
The other arm represents front and back. Ribs to front and back. Hit yes. Place one hand behind your head, holding it utterly. Still. Place the other hand behind your head. And just to add one more thing to think about. The elbows are going to be wide and the head gently presses into the hands.
Gorgeous. Three breaths. One more please, and you may rest. Good. Let's go again. Reach the hands up. Inhale. Go ahead and use an exhale to elongate through your spine. Lifting the chest. Take the other leg to tabletop. Hook the hands around the back of the thigh and just find a little more. Embrace the idea of elongation of your spine. Feel the connection of the dots, the ribs to hips. Bring the hand to the outside. Now we create the vortex.
The rib comes to the hip, front, rib, back rib connects to front and back. Hit finding that whole chain back adds involved. Place one hand behind your head, place the other. Keep the position perfectly still. Gently press your head to your hands. The elbows are wide, but only as wide as your shoulders can handle and rest.
We'll just do one more today. Exhale, lift your head chest folding under the ribs. Float the leg to tabletop. Bring the hands to the thigh and lift a little more. Connect the dots. Feel the ribs to the front hips. Take the hand to the outside and create the vortex. We have the rib coming across to the opposing hip.
We have the front and the back rib cage connecting to the pelvis as well. So we've got the ABS wrapping around to the back of the body and we're so beautifully connected. Put your hands behind your head and hold it. Press your head into your hand. And always a hint of a smile. I knew that I would get that from my lovely model and rest. I Dunno if model is the right word, but I'll say it was a model example of this exercise. Okay, so that's what I'm talking about when I talk about the back ads.
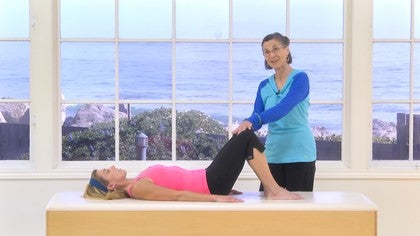
Hopefully you were able to feel something new in your ads if you were really using the appropriate muscles. If you felt it anywhere in your core, it's good. Okay, so it doesn't really matter where you feel it. Just to clarify what I said a moment ago, it's a matter that you feel something muscularly that's new. Interesting. More defined. Okay, so now we're going to talk a little bit about the connection of the legs to the core and well, Katie is here lying down. I just want you to pay attention to the fact that your hip is a separate joy. Your knee is a separate joint and your ankle is a separate joint.
Okay? But they work together as a team, especially when standing. All three have to be involved for one, not always for one to move, but functionally for something to happen, they need to be involved. So go ahead and come up to a standing position. And why don't you face front for me here? Oftentimes when I offer squats or lunges in my math classes, people will say, my knees hurt or my back doesn't feel good or whatnot.
And I find that a lot of times when we're squatting, we're thinking about bending the knees and my friends, you need to pay attention to bending all three joints. I'm on the same, uh, at the same time, somebody who has hip issues may not be bending the knees adequately and or bending the ankles at an adequately. So we just want to make sure that we pay attention to the synergy of the three major joints in the legs. So oftentimes I'll start a class just simply asking people to bend their knees. So bend your knees a little bit and straighten. The rules are that the body is not going to shift forward and back.
Perfect Qaeda. I think it'd be a better view if you turn this way for the people at home. Perfect. So bend your knees to what feels comfortable. Now in this knee bend, notice her body hasn't shifted forward. We have alignment of the, essentially the head, the ribs, and the pelvis are still stacked. The other thing to pay attention to is you don't want to force the knee bend beyond what your ankles can handle. So I want you to sense this ease on the bottom of the foot.
Now straight in your legs and bend again, just small knee bend. Now as she continues to do this movement, I want you to pay attention to bending your ankles. So my friends think of bending your ankles here. You're just going up and down. Each time you press up, feel that you have enough weight in the balls of your feet, some weight in your heels, but 60% of your weight should actually be in the balls of your feet as you straighten, as opposed to shifting back each time. Now as you continue to do this very small knee bend with ease, sense that as you bend your knees and your ankles, you're also bending your hips.
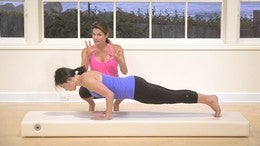
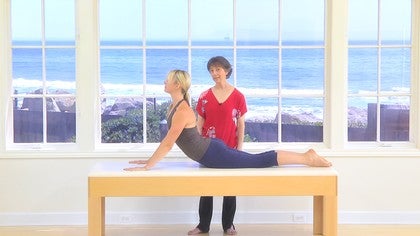
So pay attention to the fold of the thigh as you bend forward. Bend and the extension if you will, as you straighten it, might change the way your legs work when you bend. Okay, now we're going to apply the sensation of bending all three joints with the crust, with some shoulder work. Here we go. Come over to this end here for me and Kate, I'd like you to start with your elbows down on the table. Okay, now this, I did do a shoulder tutorial where we worked a lot on the placement of the bones in the shoulders. So I'm not going to elaborate too much on this, but this is certainly a really, um, more manageable place to achieve perfection of where the bones should be than if you were lying flat. So if you're in a mat and a mat class and you're on your knees or doing a plank, it's much more challenging than being folded like this. Much more challenged, uh, much less challenging on the shoulders, but more challenging on everything else because now we're involved with the core and also a little bit more with the legs. So I'd like you to bend your knees a little bit. Okay.
And I'd like you to stay here. So before we do anything more, we're going to try to find that feeling of the crust. So I want the back abs involved right now. They're not quite as involved as I'd like them to be. Thank you. So what happened there is there's, there's this feeling of a little bit of fold right at this one area. And then we find the engagement of the abdominals.
That wraps all the way around. It's very good. But now I'm a little too rounded here. Okay. I want you to a long, just a little bit through the crown of the head. So we've opened the chest. That was beautiful. So this stays still, but then there is this wonderfully long gay [inaudible] that engages the upper back muscles more. Okay. So we're going to stay here for a little while. Pressing down through both sides of your wrists. Notice naturally the hands might come up, let the fingers rest down.
But notice there's a little bubble underneath the hand. The main focus for me with the arms is that you get the inside of the wrist heavy and weighted. That's gonna wake up your shoulders, specifically your triceps here in a way that is maybe new and exciting and hopefully fun. Okay, so now considering assuming we've got these abdominals still active all the way around to the back, brilliant. We're going to press into the rest and we're going to come forward a little bit. Now Kate has got pretty good ankle flexibility and creativity. Good strength here. So we've got a deep elbow bend. Many of you, you can stop when you feel things crumbling, come back.
So we're starting here with arms, okay? We're shifting forward, weighting the inside of the risks, feeling the openness through the chest. A little bit of a puff in the very upper part of the upper back and go back. And what I mean by that is if your shoulders start crashing together, feeling the sensation of spreading outward of your scapula and your collarbones will help to manage that. We'll do one more here. Forward. Okay, so there's a lot of weight in the upper body here. Now stay press down through the wrist to straighten your arms. What is kind of a pseudo plank position without locking the elbows and then bend your elbows and come back in.
I want to correct something that I've said on the previous tutorial and that is as you straighten the arms, the upper arm is not actually in external rotation, but your external rotators are alive, okay? Bend your elbows, beautiful and Presa. So if you were to do this for a few moments, you'll probably get sore or tired somewhere. Please notice that the hips are bending here and then the arms are moving, that there isn't a shift in the lower leg yet. Okay? Now we're going to change that. Stay here. You're going to shift your weight back to your legs. Bend your knees big for me and keep going as far as your shoulders will allow.
So this is going to be our deep squat for today. Notice we're aiming the tailbone backs. We've got a nice solid position here. Okay, abdominals are still active. We've got the whole crust involved. Now we're going to unweight the arms by straightening the elbows. Beautiful. The arms lead the way they go up by your ears.
The body lifts as much as you can. And then the legs straighten. Beautiful. A little bit of this. So first, bend your knees with ease. Allow the body to shift forward. Continue Bending your knees to the deepest squat you can handle. Put your hands down. Hold for a moment.
Really embraced the idea of the crust of the upper back of this nice little a bend here. If you will, are stretched. Some of you might be getting a little bit of a stretch there in the glutes. Uh, lift arms, lift body. Then legs push up. Good Bend again, foothold and sit deeper. So the, I keep doing this same action. We're going to lift up and press up. I want you to sense that we're working the knees and the ankles and the hips as a team involving the core, involving the upper back, involving the arms a little bit to hopefully create more range of motion and more strength in more ranges of motion in that range of motion.
I should say one more time, please. Beautiful. Press up. Good. And come to a pause. Wonderful. I thank you so much for playing and I hope that you'll explore the possibilities of, you know, just thinking about things a little bit differently and paying attention to where your bones are and connecting the dots.
The Successful Beginner: Movement Breakdowns
Mention
 |
Sarah Bertucelli (Teacher) |
 |
Paula W |
 |
Andrea D |
 |
Gosha McClung |
 |
Dorothy López |
 |
Jitka R |
 |
Jennifer S |
 |
Kristi Cooper |
 |
mbrown |
Comments


You need to be a subscriber to post a comment.
Please Log In or Create an Account to start your free trial.
