Description
About This Video
Transcript
Read Full Transcript
Chapter 1
Exploration of Roll-Down and Thoracic Curl
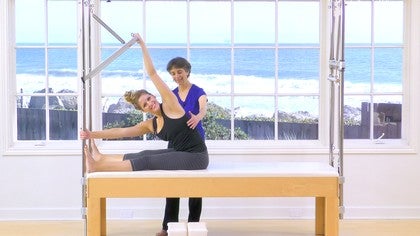
My name is dawn Marie hikes. And today we are here to talk about posture. I, um, love all kinds of things related to [inaudible] and finding ways for people to do polities at home and benefit from different things they're learning in the studio, maybe learning in classes in a way that they can carry over to their daily life. So there was a little joke that started in my practice a few years back that was my patients would say, I would say, you have to do your daily dose. And so then they started saying, oh, well it's not just a daily dose, it's a daily dose of dawn because I would be in their head chirping away at them as they were doing their exercises, telling them what to do. And so then I changed it to say, well, it's not a daily dose of dawn, but it's a daily dose at dawn. Meaning just like brushing your teeth, you get up first thing in the morning and you have your daily dose, you have your standard dose of what you need for your body that you do.
And so with the variety of my different clients, we would set up a basic program. We would do the hundreds, the series of five and a little bit of Swan, um, possibly swan dive at the end of it if they were capable of doing that. And then we'd add a handful of additions to that little structured daily dose that were appropriate for some of their challenges. So what I've done today is take my top six that I seem to be using more and more lately as we've seen kind of a shift in the trend of some of the different postural dysfunctions out there. Um, primarily what we're seeing now, and it's Kinda scary, but kind of true is this shift in the age of people that are suffering from a swayback posture is not just people that are getting older and more fatigued and tired and weak in their glutes, but individuals that are really a lot younger. So I just read a study that was talking about an age, uh, between 12 and 28 is a new emerging group of people that are suffering from swayback postures. And they look at the fact that since the 90s in the early nineties they eliminated lockers in schools.
Kids started having to carry their lockers in their backpacks. So we saw that start to change. And when you have increased weight up here, if you don't have good postural awareness, what happens? You're going to try to stabilize by widening your base and shifting your pelvis forward. So that coupled with video game use, so we also started seeing kids getting hooked on video games. And again this is pre iPhone pre what we're dealing with now, but this is going back into the 90s so they started a little bit more gaming. And then on top of that we also had an increase in technology being introduced in the school setting. Now I'm all for technology in the schools.
I think there's a lot that kids gain from it. But what it is done as it is, it has created a more electronic computer gadget society that we're living in. Kids are not just using computers when they get home to do homework, but they're actually using them in the school setting. And now of course, every child, you know, including many children, much younger than 12 have their own electronic devices and iPhones that they're not using to talk to their friends with, but they're actually using to text. So all of those things in combination have created this new emerging group age, age range group of people with a swayback posture. So I do think that's a piece of where I'm seeing kind of a shift and maybe what I was teaching a lot more of five years ago for a postural corrections. So hopefully some of what we do today will maybe provide some food for thought or some alternatives to teaching some home exercises to your clients that they can do to work on certain postural imbalances.
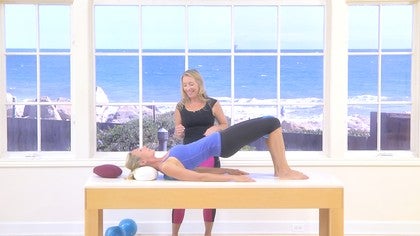
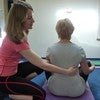
So once you like to lay down right here, so the first exercise we're going to start with is a traditional bridge to a roll down. I'm going to take her through the exercise and then we're going to break it down in pieces with a few different additions and things to look for. This is really good for a multitude of postural issues. It's really great for Lumbopelvic Mobility. It's great for thoracic mobility. It's really good for unloading the posterior structures of the neck, which although you can have a forward head posture and think they're elongated, they're actually shortened.
And it also helps improve body awareness and segmental control. So there's, this is just one of those universal exercises that I find very few people that don't benefit from them. So what I'm going to have you do before we get started, I'm just going to check your alignment. So one of the things that I am a little picky about with, especially as it relates to posture, but just in general with melodies, is, you know, I always want to bias form over force. So I don't want her to be losing her form in order to get through a movement. So what I like to do is make sure that everyone is really comfortable with what it means to be in a neutral starting position and then what it means to come out of those positions, et cetera. So you look very flexible and very warmed up, which is good.
But let's assume she wasn't. So I'd want to check her pelvis and make sure that her ass or anterior superior Iliac spines or what many people call the front of their hip bones. It's actually the front of your pelvis are lined up with the pubic synthesis. So we want it to be parallel to the ground. Okay. And then the second thing I'm going to look at is her rib cage alignment.
So are her ribs flaring in order for her pelvis to get in neutral, which can sometimes happen if someone has a tight thoracic spine or if they um, are just not quite familiar with how to set that up. And she looks really, really good right now. So I don't really need to make any corrections. So once we establish that she is comfortable and aware of the neutral pelvic alignment and then we're looking at what her rib cage alignment is, the next thing we're going to look at is her clavicle position or collarbones. So these parts of your body, and what I like to look at is not symmetry. We're not getting into some crazy postural analysis, but how are her shoulders lying on the table? And even with that subtle reminder, you remind your clients and tell your clients, you know, as you're doing these at home, think about where your shoulder blades are sitting on the back of your rib cage and try to relax the front of the shoulder girdle so that you have that kind of Nice alignment in there.
The reason I emphasize that is primarily because we don't get a lot of cues for proprioception into the shoulder blades. We don't, you know, when you're lying on your back, obviously you're getting input, but if you don't bring your awareness to it, sometimes you're thinking about body awareness and other areas. People don't necessarily think, are my shoulders relaxed? Are they engaged? Do I have a little opening on the front? So I encourage that as well. And then she's got actually great posture. So looking at her cervical position, if she was more of a forward, rounded type of individual or had more of a forward head posture, the cue I might give is just to gently lengthen the back of her neck.
But that's, that's pretty darn good alignment. So I think we're ready to go. Uh, with all of those things in mind, I am going to start her with just 10 small squeezes of this ball to wake up her inner thigh. So go and squeeze 10 times nine, eight and keep going. And what I'm trying to do here is get her body kind of woken up. I want to flip the switch on her lower extremity so that everybody is basically showing up to participate in the exercise. And then she's just going to gently hold this squeeze. It's not a ball popping squeeze. You're going to inhale to prepare here.
You're going to exhale, draw the navel towards the table, tilt the pelvis under and slowly bridge up for a five count four, three, two, one. Good. Inhale at the top, holding there and continue to hold. Exhale. Good. Now what I want her to do, so I actually want her to lift her pelvis about an inch higher. Inhale and then bring the ribs about an inch lower. Do you feel that connection increased in there? And once we do that, I'm then gonna just kind of check her sideline. A client wouldn't be able to obviously do this at home without maybe looking to the side and seeing themselves in a mirror.
But that extra little connection cue really gets that rib cage to pelvic awareness going. So now I'm going to have her inhale here and exhale. She's going to melt down through the middle of the bat. Two, three, four, five, six, because she's very long and she has a long spine and rest for a minute. So now we're going to take this exercise. We're going to progress it a little bit more to emphasize some thoracic mobility by using her shoulders. So now what I'm going to have you do is you're going to inhale to prepare.
You're going to act, help draw that navel in. Tilt the pelvis under length in the back to come up into that bridge. Good. Once you get to the top, check your little reset button. So pelvis is smidge higher and ribs, ah Ha. And then belly and beautiful. Now I want you to inhale both arms overhead as far as you comfortably can.
Exhale, bring them down. Beautiful. Inhale, hold it. That's okay. And then exhale, slowly roll down. Good and breathe. So now with that, I'm already seeing, I don't know if you can see it, but I'm already seeing a nice relaxation in the front of her ribcage, a softening in the front of her sternum and just kind of this open connectedness in her body. So with that particular addition of the arm elevation, you can progress that by doing one arm elevation up and down and then breathing. Then the next repetition you would come up, you would inhale up, exhale down, and then at two you could build that all the way up to five times lifting and lowering, coming all the way through. And the same thing with the basic bridge. I typically recommend just starting out with five cause there are a lot of little fun things you can do to progress these exercises, but you don't really want it to take more than five to 15 minutes in the morning or it's going to be one of those things that sounds good in theory but doesn't really fit into your life. So sometimes people say, well, can I do 10 or can I do 15 it feels really good. By all means. As we go through each of the different things, pick what works for you, but you don't want it to be too much because then it becomes, Ugh, I need 30 minutes to do my daily dose. Or people start trading it out for one, going to class later.
This is really designed to be something that's going to upgrade your class or your private experience with your plotting instructor because it's, it's going to be working on your postural issues or things that you can do at home, which make your experience when you're practicing [inaudible] with an instructor or taking a math class that much better. Okay, so to wrap that up, we would do bridging to a roll down for the intent and purposes of this tutorial. We're not going to go through and have her do all of the repetitions, but you would do five of just the bridge to the roll down and then adding the arms, progressing them up one through five and then coming down through here. Another fun thing to add to this for yourself is just prior to starting any of it. As you're lying in the prep position, just think about where do I feel tension, what's easy, what's hard, what's challenging or not, but take that internal body scan specifically on the posterior side of your body with this exercise because that's what's in contact with the mat or the floor and just bringing your mental awareness for 30 to 45 seconds of what's happening increases your brain's ability to connect to what you're going to ask those structures to do. We're going to take this exercise and change it up a little bit. We're going to add another ball and a few props for her head. This is something that you can try at home. By all means, if you have two separate balls, if you do work with the teacher regularly, this is a great exercise to talk to your [inaudible] instructor about and have them work with your particular restrictions and body changes as you do it as well. That could just give you a little bit more input, having another set of eyes on you while you're doing it.
But I'm going to go ahead and get you set up with um, some pillows and a ball. So we're going to put a ball in the middle of her back and then I'm going to give her some neck support in the beginning, which we may take away depending on what happens when we get you there. Yeah, that's good. And so what I'm gonna explain what we're doing here in that, I'm going to take her through it cause we have not done this yet and it's different for everybody. What we're looking at doing now with the ball on the back, and it's right at the bra line back here, is giving some proprialceptive input for the roll down piece of the bridge. So as you come up a lot, oftentimes people say I rally, I want to connect down there but I can't quite feel it. So what the ball does is it creates a little bit of a mobile surface cause it's got some give so that you actually have something to press into as you're trying to roll down and through and you'll see it as she does it.
The reason I start with the pillows is because I'm talking a lot to explain it. I don't want her holding her neck up there forever, but once you get better at it, you can just put the ball literally behind your back, do your bridge to your roll down and not necessarily have to have that neck support. If somebody has a challenge with holding their neck up or they don't have that strength, then you would certainly want to teach this with the pillows as well. But you'll see why we want to take those away when she gets started. So you're going to inhale to prepare here. You're going to exhale, same sequence, draw the navel in, tilt the pelvis under and slowly bridge up through the ball and now you can see, go ahead and hold that there.
How the force and the weight is transferred into her neck a little bit. Does that, is that uncomfortable at all? It doesn't feel too flexed. Okay, so I'm going to have her inhale here. She's going to exhale and she's going to roll down into the ball coming through the spine and all the way back down in through. So what that creates is a different arc of motion as she's going through that flection phase through the thoracic spine. And it just gives different input to those muscles.
And I find that it's really great for opening the chest wall horizontally as well as elongation vertically. So now I'm going to take this pillow down and just leave this one here. Good. I'm going to do the same thing again. So she's going to inhale to prepare. She's going to exhale, draw the navel until the pelvis under slowly, Regina. Good, nice, gorgeous.
She's gonna Inhale here at the top. She's going to soften her sternum into the ball as she exhales in rolls all the way down and through. Good. How does that feel? Okay. Okay, good. And now what I'm going to do with the last one isn't actually keep your head right there. I'm going to keep her head on the pillow, but I'm going to have her lift and lower the arms for the same progression we did with the first bridging exercise. So this'll be the last one. Inhale to prepare. Exhale, draw the navel in. Tilt the pelvis under, slowly bridging up.
How does your back feel on there now compared to before? Really Open. So good. I'll give you 20 bucks later. That's exactly what I was hoping you'd say. Um, what that really does when you have the ball and you're bridging up, in addition to getting that extension, and you notice when she did it, she wasn't flaring or ribs. So it's not like she was doing this big arc of motion. But what it does is it gives the opportunity to get that thoracic extension with a little bit more opening in the front of the shoulders.
Then you add the arm elevation piece and that helps mobilize the shoulder blades on the shoulder girdle, which is one of the challenges we have with a lot of the more sedentary based postures are the forward head posture is that loss of scapular mobility, which is really not, it's not a linear action. It's not a linear motion. It's really a combination motion that happens in three planes of movement. Um, okay. So how'd that feel? Pretty good. Alright, so the next piece now is taking that exercise and now progressing it to something a little bit different. So we're going to come back to the ball and I'm going to go through this kind of quickly cause we can't pillow pad you up for this one. You're going to come up, we're going to put this behind your mid back. Good. And now you're going to bring your hands behind your head. Elbows nice and wide.
Good. And what I want you to do is inhale, lengthen back for a stretch. As long as that feels good and you can actually breathe there if that doesn't hurt your neck. So unless she's got spinal stenosis in her cervical spine, it is not a bad thing to stretch your neck into extension. Somewhere along the way, we all learn, myself included, and I've been trying to relearn it ever since that for some reason it's bad to let your head hang back or stretch and extension if it's not straining your neck muscles and you're able to do it without pain and you have support. It's not a horrible thing.
How many times do we see people looking up to screw in light bulbs? And if we don't practice this, if we don't work on this range, unless of course we have a diagnosis that prohibits it, then we lose it as we age. So if your clients want to come and let their ribs flare till the cows come home and get a really nice stretch, it's not a really bad thing and you client's at home. If you're in this position and it feels really good, don't assume you shouldn't do a little bit of it. Test it out and see. Okay, so from here, from here, what we're going to do is use this to do a rib cage and Pelvic Association. So we want them to become friends.
We want them to understand how they work together because we use them all day long. They didn't, in and out of a car, sitting at a computer, adjusting ourselves, and then disassociation. How does one move independently of the other? So what I'm going to have her do is she's just going to inhale here. She's going to x help connect the ribs to lift the chest. Good. She's going to inhale, she's going to hold that.
She's going to exhale and she's going to draw her pubic bone towards her heels and create a little bit of a mouse house or an art in her low back. She going to inhale, hold that she's going to ax hail and let the ribs lengthen back. As the chest lifts up, it's going to be a nice stretch and she's going to inhale and relax. Good. So the exhale as you're lengthening up feels very counter intuitive because it's causing you to connect to the abdominal muscles and then you're asking the body to stretch them.
But what it helps reinforce is that idea of having these muscles working and then having them lengthen into a position. And you can play with the breathing to see what works. But this is really designed to give you the association and the disassociation. So now we'll add to this. You're going to inhale here. Sorry. You're going to exhale ribs to lift the chest up. Inhale, hold it. Exhale. Slight anterior tilt. Good.
Inhale, hold it. Exhale. Slight posterior tilt. Inhale, hold it. Exhale, go back into extension. Good. Okay. Alright, so that's with that one. It's just fun. You could do any portion of this. She could inhale, exhale, come on up. She could hold this position and inhale into an anterior tilt.
There you go. That's okay. And then exhale, posterior tilt. We'll do three more. Inhale, anterior tilt just to get some lumbar mobility while the upper body is there. Good. And come back to neutral. She could hold a neutral inhale back and exhale. Chest lift up in hell, back and chest, lift up. And then she could combine both in how back, where is she? Exhales up comes into a postier your tilt, but keep the length at the top of the head. Good.
And then inhale as you go back and go into an anterior tilt and then exhale post here, tilt, Tuck and come together. Good. And inhale length. And how does that feel? Good. And exhale, come all the way up and hold it. And then I'll take the ball away and you can go ahead and lie back down and just breathe. Okay. And again, what I'm seeing here that I really like, this is what I would be doing in a session with a private client. Teaching them how to do these at home is that now she's really got some nice mobility in here. I can already see it in how her chest is lying, how her ribs are sitting. There's a lot less tension. I know you can't see it from there, but there's just a lot less general holding tension in here and it looks very, very nice and relaxed. I really, really like it.
This next exercise is one that we're going to use to open up her hip flexors a
Chapter 2
Exercises for the Pelvis and Spine
little bit, give her some hip flexor mobility, but also work on some lumbopelvic stabilization. One of the pieces to good posture is having good awareness of where your pelvis is in space relative to gravity. When you're sitting, when you're standing, when you're lying on your back and when you're lying on your stomach. So we're gonna start by, I'm gonna have you take the firmer ball and I want you to put that under your sacrum.
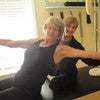
Uh, as you can see, some of them are less blown up, more blown up, different textures. I, uh, for most of my home clients, they have at least two, if not three of these at different, um, air levels so they can work for different exercises. So this one looks good for her. If this were uncomfortable or if it felt like it was too much pressure, having a squishy ball is not going to negate the exercise. It's actually gonna make the stabilization portion a little bit more challenging, but it would make the stretching portion a little bit easier. So we're going to stay with this one for now and what I'm going to have you do is pull your right knee into your chest as a warm up and just hold on to it and then you're going to straighten this leg out. Good.
And get your balance in there. Uh Huh. I can feel that right with the ball in this position. What it allows for is some support of the pelvis while opening the hip flexors. So what, what she can do here before we even get started with the stabilization work is really get a nice stretch on this hip flexor. Oftentimes people have challenges getting on their knees or doing a standing hip flexor stretch because they either lack the balance or it's just not comfortable.
And this is an alternative way to do it quickly while you're also working on some lumbopelvic stabilization and kind of get a nice opening in the front of that hip complex. So now what I'm going to have you do is bring this leg out straight. Ah Ha. This is the fun part. And then bring the other leg back up so you can get a nice even stretch. Feels good, Huh?
It's nice to take a look at if there are differences between the right and the left side, not only in the hip flexor tightness or lack thereof, but also how does my back feel? How does the backside of my body field is one side field different than the other? Not for interpretation, but just for observation. So pay attention to that and then we'll go ahead and bring this leg down and you can now bend both knees. Okay? And we're going to have her here and all she's gonna do, she's going to inhale. She's going to exhale in March, the right leg up to tabletop.
Good. And we'll stay right here. So if this is difficult, it's not horrible. If your leg comes past 90 degrees, it's better if we can keep it at 90 because then these guys are going to work harder to stabilize it. But if this is virtually impossible to start just to get used to the sequencing, you can bring the knee in a little bit more, but you want to make sure that this is really your goal of where you're looking to go. You're going to inhale there again, hold it, exhale, bring it down, and then we'll do it on the opposite side. Inhale and exhale. Float this leg up just to there. Good.
And then inhale and exhale. Now we're going to progress this. But what we've done by doing this exercise with the bullet or Sacrum, instead of having her lay flat on the mat is we've now increased a little bit of the range that she can go through as she's doing it in her lumbo pelvic junction. So as she's bringing the leg down, instead of go ahead and bridge up, we'll show the difference and come on down. If we look at her pelvis here relative to here without the ball and she knee folds up good and down, that's a certain amount of range you get. Go ahead and bring the pelvis back up
Now her foot is going a little bit lower than this point. So that's important for those of you at home because it changes the relationship with how you are able to get dynamic stability of the pelvis and moving the legs. So now we're going to progress this. You're going to inhale, exhale, fold this leg up. Inhale, hold it. Exhale, fold the other leg up. Inhale, hold it, good x, helpful this leg down. Inhale, hold it, and exhale. Fold the other leg down, so progressing on from the single leg lifts to both legs up in both legs. Down. Notice I cued that she exhales on the movement she inhales when she's holding the position and then exhales as she returns the movement. It's a good place to start if you want to change up the breathing.
If you are curious about that, once you have the exercise down in one manner, then play with switching it up, see if it works better for you, but in the beginning it's really, really best practice for something like this to exhale on the movement piece and inhale on the whole because then you're getting the connection through the exhalation. As you're moving the body part. From here, we're going to take it up to the top position and then we're going to create an endurance exercise, so she's going to inhale to prepare. Exhale, lift this leg. Inhale, hold it. Exhale, lift the other leg. Inhale, hold it. Exhale. Remember you like me. Inhale, hold it. And now you're going to start tapping down. Tap one leg down and back up. Good. And the other leg down and back up and [inaudible] in one leg down. And hold this in here. Good. And the other leg down.
Press into the back of your arms a little bit and spread your clavicles. Good and tap. And now let's go a little faster and tap, tap. Breathe in for two and out for two. I'm sorry, two. There you go. You're doing good. You feel it. And in four, two, last one in four, two. And how four two. Good.
Bring one leg down and the other leg down. Inhale to prepare. Exhale, peeling up. I'll take the ball away and exhale slowly. Rolling down. Nice. And again, what I'm seeing in her that is really exciting for me as a teacher is looking at these relative relationships between the pelvis and the thoracic spine and the shoulders really coming together in a more balanced, um, relationship. So it's nice. I like it. Think this next exercise is fine.
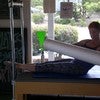
Stretch forward. This is an exercise that I typically will give my clients to do propped up against a wall, which is why we have the pseudo wall. But I've more recently been using, um, additional balls to give more appropriate reception for the exercise. The reason, uh, I am going to emphasize that this particular way of teaching spine stretch forward is for the importance of the thoracic mobility piece. So I find that a lot of times because it's a stretch, people are not always as connected in their bodies, meaning clients, you guys, it's not just a low back stretch, it's not just a hamstring stretch, it's actually an upper thoracic stretch.
And we're working on pelvic stability by setting the specificity of the leg position, the pelvic alignment, the pelvic position, et cetera. And we don't want to be dumping into our back as we stretch forward. So I'm going to show you how to use the balls to give you some feedback so that you can tell whether or not your really getting more of an upper thoracic stretch. We're going to take this one and put it in it. So just scoot your Tush back just a teeny bit. There you go. Good, and then I'm going to have you spread your legs and flex your feet. Good, and if she didn't have great hamstring length, which she does have, actually I lied. I'm going to put this ball behind you. Scooch back a little more. Sorry. There we go. Because these are the same size.
If she didn't have great hamstring length and in this position seated, it was too difficult or you felt like your back was pushing back too much, I could do a handful of things. I could roll up a yoga mat and put it under her sits bones. I could have her pop her knees up if she needed to so that she's right up on her sits bones. The reason that's important as we're looking at these as exercises that are going to help you with your posture every day, if we don't get you up on your sits bones before you start this exercise, we're missing an opportunity to reinforce the importance of being seated on your sitz bones. When you sit in your car, when you're at your computer, at work or when you're in a chair having dinner or any of the other things you might do seated. So it's really not so much about being so picky with hamstring length as much as it's being really picky about how we're starting your pelvis out because each time you repeat something and you go back to that proper alignment, it's reinforcing an unconscious nature in your body to bias towards that when it's challenged. So if she didn't have such great hamstring length, we do that.
But she is very nice and long. We have two balls today. You could also visualize that you have a beach ball in front of you that's a little bit higher so that the shoulders don't drop down quite so much. But for the intent and purposes for what we're doing, this actually works really, really nicely. Okay, so you're going to float your arms up to the top and I want you to take a moment to just draw your shoulder blades is far up towards your ears as you can, like horrible, horrible business. Good. And then draw them down. Good and lengthening. They're at home. It's really good to do what you don't want to be doing so that your body has awareness of what it feels like.
Otherwise you get halfway through the exercise and you realize you're wearing your shoulders as earrings. So just make sure you do a little quick check. The other thing you want to do before you start is reach your fingertips just about two inches away from your body and then burying your shoulder blades back in and settle them in again so that you know the difference between reaching too far forward or up and down. You're going to inhale, grow taller, you're going to ax hell. You're going to Tuck the chin, scoop the belly, support the torso, and slowly start to round forward reaching for those balls. But keeping contact with this backbone. Yes. So did you see the correction she just made? She made that correction here to stay in contact with this ball and we saw the stretch come into her upper thoracic spine. That's exactly what we want it.
Now I'm going to owe you $40. Get another 20 bucks every exercise. So now from here holding here, I want you to anyhow, push the balls away. Good. And then exhale, bring them closer to you through your shoulder blades. First Inhale, hold it. And then exhale, slowly. Roll up one vertebra at a time and float the arms up and then bring them back down to 90 degrees. Good and open. There we go. Beautiful. And bring the hands down to rest.
So we're going to go through that one more time. What you could do is as you lengthen out and come back in, you could lengthen out and come back in twice, then three times, et Cetera, depending on what feels good to you. Or You could just do this spine stretch forward, the alternative as well. So the next phase I'm going to show is actually the opposite breathing. And I want you to try it both ways so you can see which one feels best to you.
Uh, many people do spine stretch forward with varying breathing techniques. And I think it's important to feel the difference because there are benefits in breathing both ways, meaning exhaling as you stretch or inhaling as you stretch. It just has a slightly different emphasis in your body. So now we're going to do it with the opposite breathing. So we will. Good is that chip against? Float your arms up. We'll do the same shoulder check.
So ears and away. Lengthen out, plugging in. Good. And Look at how nice she doesn't even let her ribs flare. I love it. Love it, love it. So now you're going to ax hail to prepare. Good. You're going to inhale as you fold forward, finding those balls and stretching and now exhale as the shoulders reach further away and inhale as they come back in and exhale as they reach further away. And inhale as they come back in. And last one exhale as they reach further away. And then inhale, bring them back in. And now exhale.
So I don't want you to pass out and slowly roll up, Tuck the chin. Good. And then just relax the arms down. Yeah, you can bring them up again or just bring them down. Yeah, it's all good. With this next exercise, we're going to be using the ball to now go into a prone position. We're going to do a swan prep and we're going to use this ball to give you a little bit of feedback into your sternum and also encourage the opening of the chest, scapular mobility, kind of elongation and lifting. And uh, let's go ahead and get started.
So I'm going to have you lie down with this kind of right in the middle of your sternum. So her hands are at the level of her shoulder. If you can see this, I'm actually going to have you bring your arms out just a little bit. The top of her shoulder is, I'm looking down, is lined up with the crease of her wrist. So that's a very good checking point. When you're at home and you're wondering, are my hands supposed to be down here? They supposed to be up here or they out here.
If you just get the top of your wrist, um, generally close to the top of your shoulder. It's a pretty safe bet for some of this starting work. The other thing I want to look at is just making sure that the rest of her body's in good alignment here before we get started. Yep. And um, pelvic position. Before we do anything where she's going to press up in here, I want to make sure that her pelvis is properly positioned on the mat.
So with that, what I'm going to have you do is imprint the front of your pelvis into the table as if the front of your pelvis is a stamp, like a passport stamp, and you gotta stamp that Passport Stamp Down and you want the Asi s or the front of the hips and the pubic bone to be evenly weightbearing as you press in. Okay. Sometimes you're gonna feel more weight, it's easier to get more weight in the pubic bone and I really want to encourage you to try to get it evenly across all three before we get started. Otherwise, as you go to press into the prep, you end up kind of leaving off of that. And we don't want that. Now that you've stamped your passport with your pelvis, I want you to take your abdominals and pull them away from the mat. Nice. And she just got this great activation in her back and that's where I want you to be when you're inhaling and exhaling.
I want you to keep that connection in there cause that's going to keep your back nice and nice and stable. So now from here you're going to inhale and just exhale. Good. Sorry. Now you're going to inhale and press up gently on that ball. Good, nice. And exhale.
I want you to fold down over the ball. I want you to feel the front of the sternum, almost wrapping around that ball. And if you want, I can put a nice little pillow here for your forehead. There you go. Good. And let's inhale and let everything relax.
Exhale. Good. And now inhale again. Impresa lifting the sternum. Good, right through there. Excellent. Exhale, come down, wrapping around the front of that ball. Good. One more time
Hold it there and exhale. Come down. Good. Now I want you to see the difference of what happens in her back. So we're going to switch the breathing around again. You're going to inhale to prepare. You're going to ask hell as you press up lifting the sternum.
And you can see that her range is a little different. You can see different areas of her back getting more range in how come down, good and relaxed.
And now I'm going to place the ball lower down on her sternum and then come down. Good. So if you're at home, obviously you don't have a virtual don Murray to shove the ball down anymore. But what you'll do is just scooch the ball down a little bit and then go through the same sequence. So now we're going to go through the same thing against stamp your passport, pull the navel away. Good. Creating a little bit of activation and length in there. And I want you to inhale and press that good.
And now you can see her arc is a little bit different because we've changed the ball and exhale come down. Does that feel different to in how come up? Good and Tuck the chin length and the top of that good acts. He'll come down and use this to really open these guys up. One more time. Inhale, come up.
Don't hold your breath and don't get too frustrated with trying to sequence it. The whole purpose of this is to really get some nice thoracic extension with support and get feedback on the front of the body where the sternum is, where we're not used to getting a lot appropriate septic feedback. There aren't very many exercises where we get input on the front side of our chest. So we want to do that. And one last position we can do, I'm going to go ahead and have you take the ball down and put it underneath your pelvis. Good. Excellent. We can take it underneath the pelvis. Same rules. Apply stamping the passport. So I want you to stamp the passport.
Just bring your awareness in the front of the belly. Pull the naval away. Yep. Good. And now we're going to inhale and press up as the shoulder blades slide down the back. Good. And now she can go up into almost a full salon and exhale, come down. And as you're exhaling and drawing that naval and think of opening the back. Good. A little wider with the hands. Good. Elbows are fine. Good. Inhale, come up again. Pressing, pressing and shine that sternum forward. Beautiful.
And then again on the exhalation, draw that navel in like crazy to get that low back to open up. Good. And one more time. And then acts, how slowly coming down and rasp. So we're going to add one more variation to this, which is some head turning. She's going to come up, she's going to turn her head to the left, look down through the middle and turn her head to the right and back to center. That's something that as long as you do not have any diagnoses or indications as to not doing too much cervical rotation or cervical selection is a nice addition to this. It's really good to add it as you progress this exercise because cervical rotation is something that we lose as we age and it's really important.
While we're driving, backing up, our car's reaching into our back seat to pick up the apple sauce off the car seat. Everything else. You want to have good cervical rotation in addition to thoracic rotation. So we're going to add that piece. There we go. Shoulders down. Good. So you're going to inhale as you press up again. So exhale to prepare. Sorry. Exhale, connect. Good. Inhale as you press up.
No good. Exhale. Looks. I'm sorry. Exhale. Hold it. There you go. That's better in hell. Look to the left. Exhale. As you look down through the center and inhale at the right. Exhale, look back forward. And now we'll reverse it. Inhale, exhale, look down through the center and he'll hold it there and exhale back. Inhale, one more time, reach long and exhale, draw that naval and tell the length in the back as you come down and rest.
Good. Very nice. Go ahead and press back up into arrest position. Yep. And Bree.
What was your favorite position? This journal when it was hire or when we brought it down a little bit. A little higher, a little higher. So I'm going to have you come to that higher position and we'll go from there. Good. So from here again, she's going to stamp her passport.
She's going to draw her navel in and I'm gonna have her bring her arms out to a tee. Let me give you this little pillow for your forehead. It's a little bit more cozy, right? So she's going to start going and let your arms totally draped down. If you're at home on a mat, your hands are just going to be out to tea on the floor. She's just going to bring her arms up into a t position. Depressed.
Good. From here, she's going to exhale to prepare. She's going to end how? Lift up. Good length in the back of the neck. Exhale, she's going to hold it there, wrapping the front of belly even more. She's going to inhale as she floats her left arm down to her left hip and turns to look over that shoulder. The right arm comes up. Good and exhale. Back to center.
Just gets things open in a place that it's really hard to get open. So let's go ahead and float the arms up again. Good an inhale to prepare. Exhale, come up. Good. Inhale, float the right arm down towards the right hip. I better get out of the way and exhale back to the t and how to the left.
Exhale back to the t in how hold it. Exhale, come down. Good and rest. So you can start this by exhaling up if that helps to get connected or inhaling up the important pieces as you add the side rotation to either the left or the right, you want that to be on an inhalation and then exhaling back to center. Okay, so how you get up into the pre butterfly position, whether you exhale or inhale is really up to you and how your body feels. I would test it both ways and what's going to give you information about which ways better is the exercises we did previously. Okay.
This is a great exercise for improving and increasing thoracic extension with some side bending and cervical rotation. And it's very, very functional. Okay, go ahead and come back into another rest position and then we'll get ready for the next. So that concludes our little tutorial on some exercises to add to your daily dose. We did the bridging with the ball between the knees and at the thoracic spine. Then we went through and we did the um, hip flexor series and hip flexor stretch with the ball at the sacrum.
Then we went through and did the ball at the thoracic spine with some rib cage and Pelvic Association and disassociation spine stretch forward and then the swan series or the swan prep series with the ball of the sternum ending with the butterfly. So if you have any questions, comments, feedback concerns, please feel free to address them in the forum at Palladio's. Anytime I welcome your questions, I'd love to hear your feedback. And, and, or if you try it at home, how it feels, what was different about it, what worked for you. We're always always interested in, always excited to learn more about how we can help you at home. Better enjoy [inaudible] as a part of your daily dose of health and wellness.
Workshops: Free Workshops
Mention
 |
Dawn-Marie Ickes (Teacher) |
 |
Kimberly Chandler |
 |
Marie-Josée |
 |
Vasiliki S |
 |
Katarina S |
|
|
Sherryle D |
 |
Francisca A B |
 |
Theresa F |
 |
Cheryl B |
|
|
Kathy S |
 |
Gosha McClung |
 |
Ginger P |
 |
Christina F |
 |
Lore Miller |
 |
Brenda B |
 |
Eva D |
 |
Lena S |
|
|
Michaela W |
 |
Holly Holland |
Comments


I have a new client and he finds all of this very difficult to comprehend.

Would you mind sharing some of your verbal cues for male clients in the prone position? Many thanks


You need to be a subscriber to post a comment.
Please Log In or Create an Account to start your free trial.
