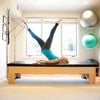
Description
About This Video
Transcript
Read Full Transcript
Hello, this is Aaron and I'm Jonathan and I'm going to take this opportunity to speak about the shoulder girdle today, setting the shoulder girdle in neutral and looking at movements of the shoulder. The shoulder girdle con is comprised of three bones, the scapula or the shoulder blade, the humerus or the arm bone and the collarbone, the clavicle. And I always think that these three bones, when we move our shoulders have to kind of do a little dance together. But before we can start the dance, we have to s find center and find the neutral position. My teacher, Ron, didn't like the term neutral.
He always said that if he put his jeep in neutral, it wouldn't go anywhere. But that, and that's true, but we still need to know where neutral is or center. And it's, it's difficult to find center and [inaudible] teachers. And these in general has a reputation of over contracting the shoulders down. We've heard many times that queue shoulders back and down and that cue is limited because it can be overdone and actually create a rigidity pattern in the shoulder girdle where it impedes movement. And it can actually cause problems in the rotator cuff.
It can cause pinching or impingement. So my aim today is to help you find ways to place the shoulder, stabilize the shoulder, but still allow it to move naturally and the way we want it to move. And now in daily movements. And of course in our [inaudible] practice, the shoulder has a great deal of movement. This specifically the glenohumeral joint, Glen humeral is not some fellow from Ireland, but it's a joint where the ball of the humerus goes into this socket called the glenoid Fossa. And there's so much movement there, which allows us to do many things with our shoulders. However, a lot of times because of all that movement, things are more likely to go awry. And one of my lines is with mobility comes responsibility.
So because we have so much movement in the shoulder, we need to be more responsible of how we move our shoulders to keep things healthy and functional. We know, we know about the movements of the shoulder blade, they shoulderblades can elevate, they can depress, they can retract and they can protract. But the other motion of the shoulder blade is the upward and downward rotation and those are not as intuitive to feel and to and to even understand. So how I think about the shoulder blade and upward and downward rotation is it reminds me of of a teapot and the glenoid faster here. The socket is the spout. So if we have a teapot, when the shoulder blade is in downward rotation, the glenoid Fossa drops down and it's like you're pouring the tea out.
And when we're in a more neutral position, the tee is staying contained in the, in the pot. So what a lot of what happens for a lot of people is they are in their neutral or they're, their default position is with the tea pouring out. And that is where things going go arrive. Because if the tea is pouring out, if the Glenn Foster is, is downwardly rotated, it doesn't allow for as much motion or as much space rather between this, this roof of the scapular, the acromion and the humerus and the, there are ligaments and bursae and uh, there's a bursa and, and of course the rotator cuff tendons live underneath that hood. And if there's not as much space, then things are more likely to get impinged, get pinched.
So that's why it's really important to know where that upward rotation position is. So I'm going to use, uh, errands shoulder here as an example and some just going to ask you to turn around please. And so how do you, how do you recognize if the shoulder is downwardly rotated? Well, there are just basically two landmarks that we want to look at. One is here at, at that acromion, that roof, and the other is this, this corner right here. It's the medial superior corner of the shoulder blade. And what we want to see is that that acromion is higher then the superior medial corner. So with Aaron there, it's, it's higher. But I think, I think it could be even a little little, we could fix it a little bit more or, or, uh, address it a little bit and make it, um, even more functional. And if I look at this one, let's see. Yeah, the, the, the left one has, has uh, has, has a better position.
So what I'm gonna do is I'm just gonna make a suggestion to you, Aaron, and I'll start on this shoulder and we're going to do both and I'm just going to just kind of squeeze and, and lift your t-spot t pot spout up a little bit. And I'm just going to ask you to hold that position with minimal effort and then we'll do the side [inaudible] and hold that position with minimal effort.
Okay. So she said it's lighter feeling not as dropped. I feel like the entire right side of my body is longer and the right side of her body is longer. So those are errands cues. That's how Aaron can feel her shoulder blade position. Everyone has a different way of describing it. So we'll just say later, we'll just use that term. So, so this is that lighter feeling. Okay? Yup. And now go ahead and turn around if you would, Aaron, and just let things relax.
So if I'm not around, Aaron still wants to be able to find her neutral position. So I'm going to give you a little cue to help you find it. So this, go ahead and lift your shoulders all the way up towards your ears. So that's elevation and lower the shoulders down. And then I'm going to ask you to pull your shoulder blades together, squeeze them together. That's retraction. And then lower back down.
Okay. So what I'm going to ask you to do to find that lighter position in your shoulders is that I'm going to ask you to lift your shoulders elevate, but only about 25% of what you have available. And then you're going to pull the shoulder blades together, retract, same thing about 25% and then gently let those shoulders settle down, but don't push them down. Okay. And I'm gonna recheck here and see where things are and I'm going to ask you if you feel like you have that lighter position or that lighter feeling. It's still there. It's still there. Good. So this is just the beginning of finding the position and I like in this kind of work where I give a suggestion of where the shoulder goes and then Aaron finds it on her own. It's kind of like a sculptor. I'm not a sculptor, but I imagine if you're working with clay first you just kind of get a regular basic idea of what the shape is.
And then with time the, the position or the, the, the sculpture will become more spread, more precise. And the sculptor I believe really is the innate wisdom of Aaron's body. So I'm just giving her a suggestion that she can then use to help her find her way. So it, it gets, I'm just helping her find, get started and then through her practice using this cue my is that she can develop more specific, more healthy movement patterns in her shoulder that will serve her for the rest of her life. So once again, let's just go over that, a position that you're going to practice on your own cause I want to give you one more thing. So you're going to lift your shoulder up just a little bit, squeeze together just a little bit, and then lower down. So sometimes I call this floating the boat because what we we where you want to have a sense of, it's not that the shoulder is sinking down, but it's as if it's floating. And then once you've got it floating so it's ready to move whichever direction you want it to move. Uh, then I'm going to ask you to just deliberately breathe and just sense that position.
Then we're going to ask you to do is just reach your arms forward and straight up. Good. And then back to forward and down. So what we want to sense is you get the position of the shoulder, you reach forward to 90 degrees. Basically there's not much motion in the shoulder girdle. So go ahead and reach just to 90 degrees and then as the arms start to reach over head the shoulder blade is to upwardly rotate to make space for the humerus and then reach the arms down and all the way next to your side.
And as she'll, as she practices with perhaps uh, some kind of some kind of reference like using a towel or a circle or the reformer or, or the spring bar that can help her sense more where the shoulder blades are in the back and how the shoulder blades move with the arms. If you want to read more about this Ma, where I got this information was from the work of Shirley Sahrmann and Mark Comerford and they, they have a lot of information about how the shoulders should be placed, specifics in terms of the shoulder. And there's a lot, there's a lot of information out there about this. My, my goal today was just to help you find a way to begin and initiate looking at how you can work with your shoulders, finding center and performing movement different from just shoulders back and down, but something a little bit more, uh, precise, specific, and perhaps sophisticated. Thank you.
Mention
 |
Jonathan Oldham (Teacher) |
 |
Eleanor S |
 |
ANNE-FRANCE TERNOIS |
 |
Olga S |
 |
Katja D |
 |
Jamie H |
 |
KBee |
 |
Penny M |
|
|
Luna Earth |
 |
Judith H |
|
|
Avishag H |
|
|
Femke D |
 |
DJ |
|
|
Julia T |
 |
Jessica |
|
|
Gina |
Comments


You need to be a subscriber to post a comment.
Please Log In or Create an Account to start your free trial.
