Description
Print out the pdf below so you can have these techniques with you wherever you go.
About This Video
Transcript
Read Full Transcript
Chapter 1
Introduction
Hi, I'm Sherry bets and I'm a physical therapist, PMA certified pilates teacher and a geriatric certified specialist. I'm here on behalf of the National Osteoporosis Foundation to present safe Spine Movement for people with osteoporosis to prevent fractures. I'm looking forward to sharing this topic with all of you and I hope you'll enjoy it.
Chapter 2
General Lifting Techniques
We're here to introduce sandy to safe lifting techniques as recommended by the National Osteoporosis Foundation. So this would be for general lifting of anything in your house and how you would do it and keep your spine safe from fracture. So most people, if the, especially if they have legs, weakness will lift something like this, they'll round the back and then lift and you're going to notice that if you're in this position, your ligaments are fully stretched to end range and you really can't use your muscles to control your spine very well.
You get a lot of compression on the front of the spine when that happens. So when you're lifting, if you lift like this, you're really using the ligaments and your discs to give you the stability for the lift and then they get stretched out over time and then you end up with disc bulges or muscle strains or ligament sprains. So ideally what we want is to be able to hinge at the hip joints, set the shoulders on the bat, get the object as close to us as possible, and then lift. So even, um, lifting this way with the hamper instead of using the handles that it has, sometimes it's actually easier than lifting with the, with the handles. Now if something's really heavy, you might want to step one foot back and one foot forward and then come all the way underneath the object and then lift it. But again, someone with low bone density should not be lifting more than about 20 pounds or so. So if the object is a little heavier, if you can do this with good form and alignment, keeping the three bones in contact with that imaginary dowel behind your back, get the object close to you. Set the shoulders down and back and then lift.
So that requires a lot of leg strength to be able to do that. So then putting it back down, stepping down, coming down, and then really requires a lot of hip mobility too. So sometimes people are not able to do those full lifts from the floor because of lack of hip mobility or lack of leg strength. So if you could stand facing me, what we're looking for is that she keeps the head, the mid back and the sacrum in one line as she hinges forward. Otherwise I wouldn't want to allow her to lift anything because that's gonna put, put undue force on the spine.
So hinge forward and as if you're going to pick something up. Okay. And just hinges at the hip joints. Just doing a little little squat, almost like you're going to sit down in a chair. So what we're looking for is that she can keep the three points of contact and then the head and alignment with the body and look down just in front of you there as if you're looking at the object you're going to pick up. Okay. And then coming back up again. Okay. And then what I'm going to do is give you a dowel to be able to put against your back and you can kind of practice that before you start your lifting. Okay?
Okay. All right. Now we'll place the dowel against your back, putting the head, the mid back in the sacrum against the dowel so that that encourages her to Ellyn length on her neck and then hinge forward at your hip joints. You can reach your arms forward and keep the three points of contact. Exactly. So once you can do that with good confidence and control, do it again. One more time. We might have her stand up and sit down a few times, sitting in a chair, standing up and being able to practice that with good alignment of the legs as well as the spine. But this is what's gonna help her protect her spine. Now if you could turn around, we have a hamper here that's full of towels.
That's something that you would be lifting at home on a regular basis. If you could use that same technique and then place the head against the Dell first. Yeah, she tends to want to bring the head forward, which is going to encourage her to round the upper back. So if you could hinge forward and and pick up the hamper, you might have to get a little closer to it, right? And then bring it close to you. So what we recommend is that if you're going to pick something up that's heavy, you want to bring it close to you as possible, that diminishes the load on the spine.
If you hold it really far out in front of you, then that's going to be really challenging for your, your spine, and it's going to increase the compressive load on the vertebral bodies. All right. Bend your knees and hinge at the hips to put the the object down. Notice how she rounded her back with that. So we're going to practice again, lengthening the spine, lengthening the neck. I want you to really keep those three points of contact. I'm going to press the dial against you and then bring a step forward closer to the hamper. I know it's very artificial when it's not in real life, isn't it?
And then hinge forward at your hip joints, bending your knees. Okay. And then you might even want to get even closer to the object before you lift it. So even having it almost against your knees, look down at the object. That's it. Now the three points of contact are here. Now, set your shoulder blades on your back. There you go. If you can think of pulling your shoulder blades back and then lift one much better. That's exactly how we wanted to do it. And then hand to put it down. We don't want to see an increase in the thoracic curve as she lifts something.
So it takes a lot of practice to be able to do these kinds of things. And really using the dowel on your back is helpful. You can either stick it in your shirt at home and you can face me. Yeah, you can stick the Dal inside your shirt or you can use a theraband and tie it to your back to practice at home. Okay, great job. So those were general lifting techniques from National Osteoporosis Foundation for fracture prevention in the spine.
Chapter 3
Picking Up Groceries
Now we'll be looking at lifting techniques for getting groceries out of the trunk. I'd like to, I'd like to demonstrate the incorrect way to do it because the way usually people do it is to stand in front of the trunk.
They round their back in order to get the groceries out of the trunk. And sometimes they even lean against the trunk, which is not a bad thing, but in order to get the leverage to be able to get the bag out of the trunk, they have to round the back and then they're loading an eight to 10 pound weight on their spine directly on the vertebral bodies and then lifting an object. So not a great idea if you have low bone density in our risk for fracture. So what we would certainly prefer is that you hinge at the hips, you set the spine, you lift the object and bring it as close to you as possible. Bracing the knees gently against the trunk, pull the object to you by drawing the shoulder blades down and back and then stand up. That would be a much better way, much safer way to pick up groceries out of the trunk.
Let's have Thandi do the technique, so we're going to use the doll behind the back and if you could again bring your head mid back and sacrum against the dowel and then you can, once you hinge forward, you can look down at the object and you're going to brace your knees against the trunk and then then you're at your hip joints and then reach your hands underneath the bag. Now before you actually pick it up, if you could set your shoulder blades down and back exactly and then stand up. Perfect. And then shoulders down even and you can get a better grip on the bag as you get it close to you and just brace it against your body and then do it again in Djing at the hips, placing it down and back up again. All right, very good. That looks great. Thank you for joining us for lifting techniques, for getting groceries out of the trunk, brought to you by the National Osteoporosis Foundation.
Chapter 4
Lifting Items with Handles
Let's look at some lifting techniques for carrying things that have handles such as luggage or heavy grocery bags.
So one of the things I usually see people do when they live something is I'm going to step in front of you now, is um, they'll use their arm or their shoulder to do it. And if they're trying to put the piece of luggage, say up on the um, the security screening area, they'll pick it up, their wrist will cave in here on the shoulder, we'll lift and then they round their spine in order to get it up there. So there's a lot of things going wrong with this. Um, so what we want to do instead of lifting that way is to again, hinge at the hip joints. Finding the three points of contact here and always making sure the spine is set. But then what is the upper extremity doing? So holding here, setting the shoulder down and back, and then lifting the object. If you can't do it correctly, it's probably too heavy for you.
It'll manage and you could injure your shoulder or a worse injury or spine. So placing the object down by keeping that shoulder down and back and really thinking of using a strong wrist and the elbow to lift the object. So you're mostly using the bicep to do it. Same thing with a grocery bag instead of lifting it like this and then throwing it up on counter is that you set the spine, set the shoulder, lift the object, and then place it down. So let's show sandy how to do that. If you could stand next to the object, we're going to get our trusty little dowel out here and then hinge at the hip joints and bend your knees so you can get down to the object.
So you think of bending your knees in order to get to the object and then set the shoulder down in back. Think of wrist strong and then lift, right? And you don't necessarily have to keep the arm bent to do it. It depends on how heavy the object is. You could let the arm go straight [inaudible] but then you don't want to let the shoulder just hang from the socket. You want to make sure you set the shoulder on the back and carry the object. Yeah, that looks good.
And then hinge at the hips and make sure your head is back a little bit. Good. And then coming back up again. And then let's try the bag is a little bit lower and again, hinge at the hips, sit back and then pick up the object there. And just remember that sometimes when something is heavy, people will hold their palm up like like that. And then let the risk kind of hang back and then that compromises the risks.
So you want to keep the wrist from either thumb up is usually easier or just keep the wrist from if you're going to lift it like that. Okay. Excellent. Alright, thank you very much. Those were general recommendations for lifting things with handles from the National Osteoporosis Foundation.
Chapter 5
Picking Up a Small Child or Pet
Now we'll be looking at recommendations for picking up small children or pets from the National Osteoporosis Foundation. So first, what I usually see when people bend down to pet my little dog is this. So they're rounding their back and they're just kinda hanging out and petting the dog and the dog loves that, but not a great idea if you have low bone density.
So what you'd want to do is either kneel down, which is great for strengthening your legs, hinge at the hip joints to pet the dog. And if you're going to pet the pick the dog up, you want to get down low enough to where you don't have to compromise your spine in order to do it. So you're going to squat down and then, or Neal or lunge and then pick the dog up and get the dog close to you. And then lift. So let's show sandy how to do that. If you could sit, please sit. Sit. Very good. Very good. Okay, Sandy, we're going to take the, the imaginary Dowel, place it behind your back and then step forward with one foot and then hand at the hip joints to pet the dog or to pick the dog up.
Take the dog and bring it close to you first. So I would bring it a little closer to you first. Make sure you've got really good hold on the dog and then cause if the dog tries to jump out then that's going to compromise your body. So now bending down. Excellent. And then let's try again and then be right.
Sit [inaudible] bring the dog close to you first and then pick it up. Exactly. That would be safer. Now we're going to do it one more time and I want you to do it with your shoulders down. Really setting their shoulders on your back. It's a lot to remember when you're trying to handle a child or a dog that's moving around. It's a much more challenging maneuver to be able to pick something up.
It's moving. All right. Be sit down. Sit. Very good. Okay. Yeah. So take the dog, put it close to you. Shoulders down and back and then standing up. That's much better. Those were lifting recommendations for picking up a small child or a pet from the national osteoporosis foundation.
Chapter 6
Safe Spine Position for Washing Face and Brushing Teeth
We will be looking now at how to wash your face and brush your teeth and safe spine position as recommended by the National Osteoporosis Foundation.
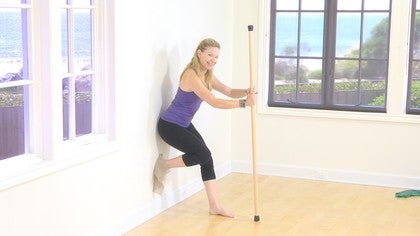
So if we could imagine that you're over a sink and you're washing your face or you're brushing your teeth or maybe putting in your contact lenses and you're bending over like this to get to the sink is a very common strategy that people use. However, that would not be safe for someone with bone loss in the spine. So again, we want to use our dowel to place it behind the back, the head, mid, back, and Sacrum, and then finding out how deeply do we have to actually bend to get our face over the sink. Um, one of the things I always tell people is try not to use too much toothpaste because then you don't have that dripping down your mouth. And that's one thing that's helpful and I'm making sure that you're not rounding your back as your, as your hinges, as you're, as you're leaning over the sink. So let's try it. Uh, so again, putting the dial against the back hinge at the hips, bring your head to the stick. Yeah. So lifting up. But yeah, so that's right. She's still wanting to bring her face down. So lift your hips and draw your, draw your face down. There you go.
So you're bending your knees a little bit and your body's more perpendicular to the floor. And then if you could even lift your face and head a little bit more, I didn't draw the shoulders down. Good right there. And then bring the hands to the face. Exactly. That looks good. Now what's great about this, you can go ahead and stand up, is that when you stand there for a long period of time, then you're actually building strength in your legs and you're building endurance and your back extensors, which is again great for, for prevention of fracture. Um, the other thing is once you start to brush your teeth, if you don't use too much toothpaste and too much water, if you can stand up tall and brush your teeth, you could even stand on one leg and brush your teeth, do a little multitasking. Just don't stab yourself with a toothbrush. Right. And then and then stayed on the other leg. And then again if your balance is very challenged that you wouldn't want to do that while you're brushing your teeth cause you don't want to hurt yourself with your toothbrush.
But those are some things that you can try to incorporate in your life on a regular basis to help prevent falls and help prevent fractures. Those were recommendations for washing your face and brushing your teeth when you have to lean over the sink. From the National Osteoporosis Foundation,
Chapter 7
Making the Bed and Sleep Positioning
we'll be going over some techniques for making the bed and also getting in and out of bed with proper technique to help prevent spine fractures from the national osteoporosis foundation. So most of the time what I see is when people get in and out of bed or when they're coming to my clinic and I'm showing them how to get in and out of bed or get on and off the table, they'll do this, swing the legs up, and then rolled down onto their back. And then when they come up it's like woo, throw in the alarms up and then trying to get up. So what happens with that a lot of times is that people will put an undue amount of force on the spine in order to get up and down.
That puts the spine at risk for fracture. So what I'd like to do is show you a few techniques to be able to protect the spine from fracture, which also is really great for low back pain if you have a low back pain episode for getting in and out of bed and actually making the bed safely. So Shante, please come over and stand in front of the table here and sit down first. And what you want to do is kind of measure the distance as to where your head would go. So you pretty much want to sit in the middle of the bed and then scoot back all the way into the bed before you actually lay down. Then you go onto your elbow, keeping your spine lengthen, swing your feet up, and then lay down. So you go on your side first.
If you try to hurry to get to your back, then that puts you at a compromise position. Then you roll over onto your back and then you can go into your preferred sleeping position and recommended sleeping positions are a little bit different for a lot of people. If you have shoulder pain, you might not be able to sleep on your side. If you have back pain, you may not tolerate sleeping on your back. So what you want to do is find the position that supports you the best. If you want to sleep on your side, you don't want to sleep curled up like a fetal position. Um, what I recommend a lot of times is taking a nice pillow, putting them under the neck, laying onto your side if you want to sleep on your side, and then think of lengthening your spine first before you actually go to sleep. And then you could also put a little pillow under your rib cage right under the rib cage. Uh, putting a small pillow there that actually helps you get off of your shoulder.
So sometimes that allows people to sleep on their side if they have shoulder pain. But again, the main thing is that you get long in the position and you avoid a fetal curled up position when you go to sleep because you certainly don't want to be there for eight hours. That's going to predispose you to forward bending posture. Now when you get up, same thing. You want to roll to your side first to come up, swing the legs off the table first, then push yourself up, staying long in the spine, right? And come up to sitting like that. Okay, Sandy, let's go ahead and come around to the back and we're going to talk about how to make the bed properly. So again, most of the time people will round their back to reach across the bed to to pull the covers up. And what we want to do is have you brace your knees against the bed and then hinge at your hips, getting the dowel and placing it against your back and take the edge of the covers and keep the dowel against the three points of contact. Okay. Now you got to change your spine first you're in a rounded position, so come back up. There you go. Finding those three points of contact, that's it.
And then being able to put weight on this hand instead of just putting your fingers down, go ahead and put significant amount of weight on that hand and you'll have a good support for your back. That's it. And then pull the covers up. Exactly. Keep the chest lifted. That's it. And then coming back up to the vertical position. Excellent. That's great. So those were recommendations for making the bed bed positioning for sleeping. And then getting in and out of bed safely from the National Osteoporosis Foundation.
Chapter 8
Safe Spine Posture for Washing Dishes
We'll now be looking at recommendations from the National Osteoporosis Foundation for being in the kitchen, washing the dishes and protecting your spine from fracture or just managing your back pain if you have any. So the first recommendation I have is to get someone else to do the dishes or if you just have to do the dishes yourself, then these are some of the recommendations I'm going to give you. So one of the things is to imagine that you're standing in front of a counter with the sink here and underneath is a cupboard that usually houses cleaning supplies and your and your dish washing liquid, things like that. So you can open the doors to the cupboard and you can put your foot inside the cupboard and lean against the sink. So instead of leaning over the sink like this and washing the dishes for 30 minutes, and it takes a while to do that, right? So you're, you're in this position for long periods of time.
You're stretching out your spine, you're compressing the vertebrae in the front of the spine and also putting yourself at risk for fracture. So especially with heavy dishes such as a casserole dish, and you're lifting a casserole dish, that's going to put an excessive load on the spine as well. So let's have you come around and you're going to stand over here, which is the simulation for the cupboard. You gonna open the door of the cupboard, put your foot inside the cupboard and just lean against the sink. All right? And then you take your, your plate that you're washing and, and then pick it up and start to wash and go ahead and pick it up and really make sure that you're keeping that chest lifted.
So you're practicing your good posture even as you're washing the dishes. Okay, that looks great. And then putting the dish down, you could change sides. So if you're washing dishes for a long period of time, you could change sides and put your right foot into the and put your left foot down on the floor, if that's helpful. So those are some recommendations from the National Osteoporosis Foundation for washing the dishes. And in a safe spine posture,
Chapter 9
Taking Out Items from Oven or Dishwasher
we'll be looking at some lifting techniques for getting things out of the dishwasher and bending down low to get things out of the oven as well as recommended by the National Osteoporosis Foundation. So what I want to show you first is how people usually do the lifting techniques is to take the spine into a rounded position, grasp the object, especially a hat heavy casserole dish, and then standing up using a curved spine. So that's going to put the spine at risk for fracture. It could put the, the um, soft tissues at risk for muscle strains and also ligament sprains.
So we don't want to put the spine at risk for injury as we're doing our daily activities. So a better way to do it would be to perform that hip hinge action and then place the casserole dish into the dishwasher or taking it out of the dishwasher. And especially a heavy casserole that has a Turkey in it at Thanksgiving or something really heavy is going to be really problematic for people if they have low bone density and maybe weakness in the upper body. So very important to stand either to the side of the oven if you need to get the object closer to you, make sure you put gloves on to protect your hands so that you can grip very easily. If you put little um, hot pads on your hands, those are sometimes too small and you can't get a good grip. So put oven mitts on both hands and then place the object is close to you as you can and then stand up to get the object out.
But you can get a little closer to it if you stand to the side of the oven or to the side of the dishwasher to get things in and out. Now Sandy, if you could stand in front of the imaginary dishwasher there and separate your feet so you don't hurt your knees, you have to make sure you keep your knees wide, especially if it's an oven that's warm. So keep your knees wide as you hinge and then we'll take the dowel and make sure that she's doing it correctly. Bringing the head to the stick first. That's it. And then remember, look down from your spine. So hinge at your hips, sitting back and then see if you can get down to get to the object and then pull it close to you first and then stand up. That was great. Really well done. Bring the head back to the sticks. Sending in your tall posture again, hinges at the hips at way back. Take the object and put it back in that either the oven or the dishwasher.
Excellent. And then back to standing. So those were recommendations for getting things in and out of the oven or in and out of the dishwasher safely from the National Osteoporosis Foundation.
Chapter 10
Safe Gardening
Here are a few tips for gardening safely if you have low back pain or low bone density from the national osteoporosis. So what I usually see is people gardening in my neighborhood bent over like this, pulling weeds and cutting things and trimming and the weed pulling is usually the hardest part, or trimming low hedges or low flowers. And um, what I think is also a big problem for people is when they get down on their hands and knees and they're trying to pull weeds and, and be there for long periods of time, their knees either start to hurt or their feet go to sleep or they have back pain.
So I have a few tips for you that are helpful for reducing low back pain and also reducing compressive forces on the spine as you're doing your gardening. So Sandy, if you could stand in front of me here, a stand where I was and I'm gonna put a pillow in a garbage bag. So I usually go to one of those discount stores and get a thick pillow or to even, it needs to be pretty big and put usually the big black lawn and garbage bags to protect it. And that way you can just use it for gardening. If you have a pillow that you like, then definitely want to protect it with some trash bags. And then you'll need two kneeling pads on either side.
And what you're going to do is come down onto your hands and knees and you're going to kneel. Nope. You're going to straddle the the pad. So you're going to put your knees here and here. [inaudible]. There you go. Keep your spine length and as you do it right so and then sit on the garbage bags. All right, there you go. And so then you can easily get your pelvis lifted. You can be there for a little bit longer.
You could point your toes behind you and just if you had shoes on, it's usually more comfortable, especially in your garden. You want to be wearing shoes, so you want to find a comfortable foot position. So if that's not comfortable to your feet, I'd put another pillow in there for you. You might even need to and get up really high and then put your hands on the ground and then you pull weeds with one hand. So now she's keeping the spine straight as she, as she does her weeding and gardening.
And she can probably be there a little bit longer. When you start to get tired, you need to get up anyway. So you'll have to move all your toys as you go along in the garden. But having the knee pads is helpful so that you don't hurt your knees as you're sitting on on stumps and uneven surfaces or bark. And then having your pelvis lifted is actually really helpful in being able to keep the spine elongated. So, so those are some really great gardening tips from the National Osteoporosis Foundation. I hope you'll find them helpful.
Chapter 11
Sitting Posture
We'll now be talking about sitting posture and the best mechanics for keeping the integrity of your spine as recommended by the National Osteoporosis Foundation.
So usually when people are sitting in chairs, what happens is they slump forward and they kind of rest against the chair back, which ideally the chair back is for. Being able to rest and to relax into a position. However that's going to put the spine at a compromised position for many different tissues of the spine, so such as bone, the ligaments of the spine, the muscles of the spine will tend to get stretched out and then they'll get, you'll get discretion when you sit, you need to have activity in the muscles around the spine that are designed to hold you up all day long in space. These are called type one postural muscle fibers and we want to have them active all day long. So a lot of times what happens is people just don't have the endurance to hold themselves up.
And this is what we work on in our exercise programs is building that postural endurance in all of the activities that they do. So if we could sit all the way back in the chair with the pelvis against the chair back and then length in the spine up and let the spine be supported in an optimal alignment, this is what we want for the best position of the spine that's going to help preserve the integrity of the spine. And all of the tissues around the spine. When you're tired, you need to change positions and sit up, get up, walk around. You shouldn't really be any in any position for more than 20 minutes or so. Um, so just to show some of the problems with the spine in this position is we want those curves of the spine. We want the inward curve in the low back, the outward curve in the mid back, and the inward curve in the neck. This varies with different types of people.
So we may have people that have a little bit more flat spines and we also have people that have a little bit more curve in the spine. When you're in the ideal postural alignment, you have a relaxed low back and that helps you understand when you're in the right position. If you're hinged forward or rounded forward like this, you're going to have work in those back extensors that are really not designed to be working all day long. So keeping the rib cage right above the pelvis helps keep the balance of the discs and all of the joints of the spine so that you don't compromise any of them. This is what the spine would look like with rounding forward. And this presses on the vertebral bodies and, and introduces compression and also compresses the front of the disc. So you don't want to do that because your disc is gonna Migrate Back and then you can have bulging discs in the back.
So keeping that sense of length when you're vertical is really helpful all day long to help preserve the integrity of your spine. So we don't want to be hindering forward to put on our shoes and rounding the back. And then especially not maintaining that position all day long. So let's have sandy come over and what I'd like you to do is sit all the way back in the chair and sit tall. That looks really good. So if I were to put the dowel behind her back, have you come forward a little bit then a scoot forward even more. There we go. And if she weren't supported, that would be the ideal position for her to be in.
You can see that this is a little more challenging for her to get the head back into alignment over the body. So she really has to work through the deep neck flexors and getting a little bit better mobility of that upper thoracic area to help her get there. And in order to get the shoes on, what she would need to do is to do a hip hinge to do it safely. So if you could again, scoot forward just a little bit and then place the dowel against the three points of contact, right and then hinge forward at your hips, keeping the head against the stick for a moment. Hinge all the way forward until you can actually reach your shoes with your fingers. Good. All right. Now keeping the chest lifted. There you go.
You're going to have to hinge even more. So this particular movement requires a lot of hip mobility that sometimes people don't have. So coming back up. That's why we put the shoes on. A little bit of a prop, because in order for her to get all the way to the floor with her hands, if her shoes were on the floor, there's no way that she could get there without compromising the spine. So anytime you're reaching forward to tie your shoes, you'll want to put your shoes up on a stool or a prop. So let's try it again. Hanging forward. Great. There you go.
And then keeping the head against the stick for a moment. Lift the lift from here and then look down. There you go. That's it. So you want to keep this lifted even as you hinge forward. That's gonna help control this upper back. All right, I'll come back up and you can go ahead and try it without the doubt. Put your shoes on. Hinting forward. I know it's very weird at first.
That looks great. All right, so now what happened when she tried to put the shoe on? So let's do the second shoe with the dowel. So let's see if you can do the second shoe. Putting on the second shoe with a dowel without rounding your back. So keep the head against the stick and keep the chest lifted. All right, so there we go.
There's the issue with trying to get shoes on and compromising the spine. This is why sometimes we recommend slip on shoes, but the problem is slip on shoes is they're not as comfortable. So let's try a different technique. Let's have you cross one leg over the other and keep the chest lifted. And again, let's see if we can keep the doll against the back. That's it.
Now take the shoe off and then put the foot down and then put the shoe down. Keep this the three points of contact against the stick there. You got to try it again. Get to the shoe [inaudible], pick it up. Keep the head against the stick and again, hedging forward, keeping the head against the stick. There you go. That's it. And then pick the shoe up again and place the leg over top of the other leg.
Keeping the head against the stick. Bring your chest up. Okay. And let's see if you can reach the shoe with a hip hinge. That's it. And then take the shoe off without losing contact with the stick. There you go. That's better. That's better. Excellent. Alright, thank you. Those were recommendations for sitting in the chairs performing a hip hinge with safe spine mechanics while you're putting shoes on as recommended by the National Osteoporosis Foundation.
Chapter 12
Driving Posture
Well now I'll be talking about driving postures and rotation while you're driving and keeping your spine safe as recommended by the National Osteoporosis Foundation. If your chair, if your, if your posture, your seat is not far enough forward, you'll usually have to pull your pelvis forward to get to the accelerator and the brake. Uh, so what you want to do is make sure that when you adjust your seat in the car, that you are sitting all the way back in the chair and you think of lifting your rib cage up and molding your ribs to the back of the chair. That helps give you some buoyancy in your low back and some length in your low back. You press your shoulder blades into the chair. Then see if you can reach the steering wheel and the brake and the accelerator. If you can't, then you bring the chair forward. If you're too far forward and your knee is way up off of the seat and you're feeling cramped, then obviously you bring the chair back, but sit in the chair properly first before you actually adjust the distance.
For more information about sitting posture, please refer to our other tutorial on sitting posture. So once you get into the position and then you want to look behind you to see what's going on behind you, most of the time what people will do is round and look over the shoulder. It's really easy and very simple to do and the spine is very mobile in that direction, but the problem is that puts the spine at risk for fracture and compresses the vertebral bodies. So we want to keep the sense of length pressing into the seat as we rotate and also to hold onto the steering wheel. And that actually gives you a sense of support as you're turning around.
So use the steering wheel to help you. If you're turning right, then you want to hold onto the steering wheel with your left hand and take your right hand and put it behind the passenger seat. And then rotate and look over your shoulder. Really keeping your chest lifted as you rotate. So let's give that a try. So she's got her steering wheel there, the magic circle steering wheel, but place the pelvis all the way against the back of the chair. And then think of lengthening the spine and placing the shoulders back.
And then your steering wheel is going to be out in front of you and you'll have your arms bent slightly. There you go. So I'm gonna give you some leverage for the steering wheel so that you can turn to the left. So when you rotate, you're gonna keep, think of a breastbone headlight, staying level as you rotate. So that was just neck rotation. But usually that's not enough to see behind you. So if you want to rotate and look all the way, that's it. You're going to take your spine and lengthen it up and you see that her breastbone does not drop as she rotates. So taking that length, think of spiraling up and then rotate to the other side.
Now I'm going to come over here and provide some leverage. Like I'm the passenger seat. Now you're going to pull forward. Yeah, and see how much you can rotate like that. So that gives you a lot of assistance with rotation and you keep that sense of length as you rotate. One of the things is to make sure your shoulder blade is against the chair back. So yeah, that looks great. Really Nice.
So I hope those were helpful. Four tips for driving posture and rotation while you're driving and preserving your integrity of your spine as recommended by the National Osteoporosis Foundation.
Chapter 13
Sitting at a Computer
We'll be looking at some recommendations for sitting at a computer and reading fine prints such as in a dark restaurant when you're trying to read a menu and maybe you forgot your reading glasses. So we're going to look at the way that sandy has to modify her postures in order to see what's on the screen. So you'll notice that this is just a standard height table, standard height chair. And in order for her to read what's on the screen, what do you have to do? Okay, so you see the posture that she's assuming that she has to do in order to read that. And that's just a typical normal postural alignment.
So now if you could hinge forward at your hips in order to read the screen, bring the head against the stick [inaudible] and the tailbone as well. And now hinge forward. Bring your head to the state, make sure you can feel it back there. There you go. Okay. And then hinge forward. So there's no way that she's going to sit in a restaurant or sit at a computer for hours on end to look like that. Right. But that would be the proper postural alignment and you wouldn't want to have her be like that for hours on end.
So what would be better would be to bring a screen up higher. Don't forget your glasses. So bring the screen up a little bit higher so that she's looking straight on at it. And then if the, if the font is really small to have a little light, sometimes they have them on your iPhone or your smart phones that they have little flashlights that you can illuminate the surface that you're looking at if it's a menu or something like that. Or if it's a computer. There's also ways to make your screen size larger. So those are some of the little tips that you can use to help you with modifying your posture, cause you don't realize how your vision affects your postural alignment because you have to bring your head forward closer to the object.
So you want to make sure that the computer's close enough to you and that you can see it. Now the other thing is there's a sharp edge on the Mac that has, you know, that could cut into your hand if you're up here really high like this. So if you put your hands on the keyboard, um, you want to make sure that it's comfortable for your wrist, so you may need a little pad if your laptop is this high in order to tolerate that sharp edge. Um, so anyway, that's uh, some of the things that you can do to modify for the laptop or desktop is a little bit easier sometimes because the keyboard is movable and it has pads on it and things like that that you can use. So those are some recommendations for sitting in proper posture using a computer or reading a menu in a dark restaurant from the National Osteoporosis Foundation.
Chapter 14
Sweeping and Vacuuming Posture
Here are some recommendations for sweeping or vacuuming that can be really helpful for your back and for prevention of fractures. So what we're going to do is I'll, I'll show you first. Um, so this is what usually we do when we're sweeping or vacuuming and if we're vacuuming, it's, it's bending over like this and rounding your back and using really your back to do the work instead of usually your legs.
When they say lift with your legs, this is what we mean. So you're bending down, you're in sort of a semi squat position and you're, you're sweeping like that, right? And you're thinking about generating the energy from your back, not so much from your shoulders, right? So you're, you're shifting your weight and you're gliding side to side. So this makes a wonderful dynamic kind of exercise as you're sweeping or even vacuuming. So here and then I always recommend that people do it on the other side. It's really weird to vacuum with your nondominant side, but, but doing it from the non dominant side as well. So now try it yourself and you're gonna go from the side and then we gotta get the three points of contact here and you're gonna go into a little bit of a squat. Now put put weight on both feet first. That's right.
And do a little squat. It's, it's gonna be strange, hinge forward, and then head against the stick. There you go. And then try to do your sweeping with that posture and then move your hips back and forth. Yeah, so it's good to put on some music and you can do a little dancing with it. It looks like we're dancing here and it makes it a lot more fun to clean to music. So there you go. That looks great. All right, now let's turn that broom into a vacuum. And just think of pressing back and forth and you're going to glide again back and forth. And I love this little hip motion that she has. This is great. And bring your head to the stick as well so you can practice your posture by tying the stick to your back using a theraband or sticking it inside your shirt and try your vacuuming and sweeping and mopping like that.
Now try it with the other hand. That's very odd with the other hand. Now you want to go turn your body to the side this way and put the other foot forward. Yeah, it's odd, isn't it? Yeah. There you go. And then you're going to kind of come across your body like that and do little lunges as you do it. And how is your head against the stick there? Yeah, go much better. That's it. And so you tilt your body forward just a little bit at the hips. And again, [inaudible] bend this hip too. Yeah, there you go. And how you can really get your whole body into it. Great. Looks good.
It looks like doing either yoga or pilates. That's great. All right. Thank you. Those were some tips for sweeping and mopping and vacuuming in a better postural alignment from the National Osteoporosis Foundation.
Bone Health: Standing and Chair Workouts
Mention
 |
Sherri Betz (Teacher) |
 |
Denitta Cherri |
 |
Delia Ford |
 |
Erica T |
|
|
Michelle Stanley-Morgan |
 |
Maggie L |
|
|
Alexandra L |
|
|
Lisa W |
 |
Josephine W |
|
|
Louise J |
|
|
Debbie G |
Comments


.

You need to be a subscriber to post a comment.
Please Log In or Create an Account to start your free trial.
