Description
About This Video
Transcript
Read Full Transcript
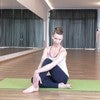
Hi, I'm Tom McCook. I'm here at Pilates Anytime with Sarah and we're gonna do class that has a focus on the thoracic spine and how to develop function and improve your ability to use that area of your body for better posture and just get more out of your movement practice. So we're gonna start with a little bit of an understanding of that part of the spine. So as you know you have seven cervical vertebrae, 12 thoracic, five lumbar, then you're sacrum is more of a fused situation down to your tail. So what influences the movements of your spine is really important to know.
Where movement happens in the spine is in between the disk space so in there, but with a disk and the vertebral bodies meet and the other main place where it happens is in what's called the facet joints, the joints in the back, and what effects them is the orientation. So in your cervical spine, Sarah and I will do this together, the cervical spine, the orientation of your facets are like this, they're like sloping shoulders. So just do that with your hands, okay that's the joints in my cervical spine. And the vertebral bodies are relatively small but the disks are relatively thick and there's no ribs. So you have pretty unrestrained movement in your neck.
What has the most movement is extension. So when you come to your thoracic spine, which is right below the neck, where the ribs begin to the bottom of the ribs, the orientation of the facet joints changes. It goes from your cervical to your thoracic, so they angle down and their movement, what they do really well is rotation, also lateral flexion. What's limited is flexion and extension for good reasons cause right behind your spine there is your heart and your lungs and your ribs tie into here to restrain movement a little bit, and also this point in the back of the spine called the spinous process, the spinous process itself is angled down and it's angled down to restrain movement so you can't extend too far. So we're going to focus on this area, feeling it, and how to use imagery, touch, and then exercise to improve the function which effects posture and how we go through life which is pretty cool.
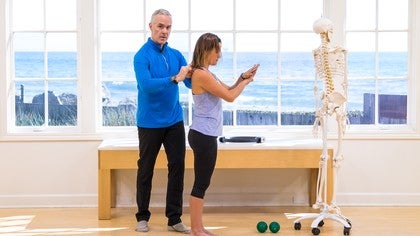
So the first thing we're going to do is we're going to add some awareness to this part of the body. All the years I've been teaching, most unconscious area of the body on 99 percent of the people that I've worked, because it's back there somewhere, it's like out of sight out of mind. So Sarah's going to come to the middle and I'm going to tap. So tapping is a great way for her to understand and feel that part of her body. So I'm just going to tap on her upper back on each side of the spine.
So this is her two minutes of love, it's all good. (laughing) And now what I want her to add to that, is to bend her knees slightly and just add a very slow flexion to the front, should go about half way down, feeling her back muscles lengthen then she's going to come back up. She's going to do that three times. So I'm just giving her body this neural feedback. This touch wakes up this area, this part of the spine.
She's going to roll back up. I'm also tapping around the shoulders to help them release. One more. And I'm also using this as a visual aid to notice what I see. And now from there she's going to slowly with soft knees go into lateral flexion which is to the side, feeling how one side slides together and one side lengthens, and then to the other side.
And we'll do that two more times. You'll have a lot friends if you share this. (laughing) And I'm just going to do one more. Now the last one she's going to do is rotation, so she'll come up after this. Now she'll rotate to whatever side she likes.
One side sliding together more, she's going to feel her lat on one side and the muscles close to the spine, also now her obliques are getting involved. And she'll do that two more times. So what if you just heighten the awareness of this area of the body for somebody and all of the sudden they move better? How would that be? I'm down with that.
And then she'll come back. Now just going to have her sense that for a moment, feel, she might notice that she feels a little more up, her posture might feel a little better. Now, we've created an environment where she's sensing her back, now it's a useful time to give her information about how things are designed so then she can use imagery and simple movement to improve how she moves. So I have Sarah turn around just for a moment so she can see that the facet joints in the upper back are angled like this. So just this a little bit technical but I want you to imagine that that upper bone, we're going to call that the upper facet, actually the, let's see if I can get this correct for you guys, so when you're hands are stacked like this, the one that's on the underside is called the upper facet of the lower vertebrae.
The upper one is the lower facet of the upper vertebrae, so basically when you flex your spine, the lower facet of the upper facet of the lower vertebrae slides up and forward on the one that's below, and I'm going to give her touch feedback and she's going to mirror this with her hands. Now think of the movement, isn't just up and isn't just forward, it's up and forward which means that the joints are like sliding around a curve. It's called curvy linear so your joints are not flat, they're kind of curved, and that's actually a pretty cool movement. So from there I'm just going to stand to the side. Now I'm just going to touch so if you slide your fingers down the back of somebody's neck you'll feel the last big bump that sticks out is C seven.
So you just going to go a little below that and then on each side I'm just putting my fingers. I have one finger, one hand on each side like this where I'm going to spread my fingers as she does the motion. So she goes forward, they slide apart, and then come back up, make it really small, now let the top hand slide forward, that's the lower facet of the upper vertebrae sliding forward, opening the joint, and then it slides back and down and just, your goal is just to feel that, feel how it doesn't require a lot of effort. It just requires putting your mind's eye and your attention into that part of your spine. Let's do that three more times.
That's it, feels kind of good? Yeah, it does. And I think, especially in this particular area of the body in exercise, we tend to use too much force, which creates a lot of neck tension. One more. Now, she's going to go, I'm going to bring my hands a little lower, so she's going to put her tension down a few segments lower.
So she's going to do the same thing. Lower facet slides up and forward, lower facet slides back and down. That's it, and as you're cuing and you're doing this yourself, imagine that the shoulder girdle is laying relaxed and you're getting a fluid motion of the spine. It's an up and forward, a back and down. That's it.
We'll do one more. And then we're going to come a few segments lower. And now again it's up and forward, it's back and down, it's up and forward, it's back and down, two more times, up and forward, back and down, up and forward, back and down. So now we're going to do a very interesting thing. Now she's going to focus on the upper facet of the lower vertebrae sliding back and down as she goes forward so she's going to put her attention on the other side of the joint.
So as she moves, her bottom hand is going to slide back and down, and then it slides back up underneath, so it's the same joint motion, but she's focusing on the other side of the joint. And you might find that you like on any particular day you like one more than the other 'cause you can feel it more. That's it, so it slides back and down, forward and up underneath, integrating. Back and down, forward and up, one more. I'm going to slide a few segments lower.
Slides back and down, forward and up, slides back and down, forward and up, back and down, forward and up. We're going to go a little lower, back and down, forward and up, back and down, forward and up, and one more, back and down, forward and now I want Sarah to let her arms hang and just notice how her upper back feels. She might notice that the head feels a little more up on the spine, a little more relaxed in the neck, and just notice how it feels to move the upper back now. It feels, that when you do you little flexion and extension how that feels in relationship to when we began. What do you notice?
It's lighter, easier. Nice. So she noticed it's lighter and easier which is what we're looking for. Now we're going to finish with adding in lateral flexion, but let me show you the spine one more time for a second. So in the spine you have the four curves.
So whenever you side bend a curve there's another movement that comes with it, so when you side bend in the thoracic spine because the curve is this way a rotation to the same side is accompanied with it. So we're just going to feel that in our bodies, so imagine, so if I am looking at the camera, if I side bend to my right there's also a slight rotation to my right. So Sarah is going to take her hands like this in front of her so when she side bends to the right her left hand is going to go slightly up and forward, her right hands going to come down and slightly back cause that's the action of the spine. And we'll do that same side a few times so it's-- (laughter) That's it, so it's up and forward, back and down, now if you're in question, just imagine doing it one time and the hand that's going down take it forward, take the other one back. So you just switch just to compare do this.
Oh, okay. And you'll notice it feels a little jammed because its not the way our body is designed so as you start to include the design in your movements, your movements get easier, you get more range of motion, and you're activating the design which is pretty cool. So let's take the second side, so as you side bend the lower hand goes slightly down and back, the other one goes up and forward. That's it. And still moving from very close to the middle so the shoulders don't have to work hard.
That's it. Now let's alternate. That's it. There we go. One more.
So if when you side bend there's a rotation, what do you think happens when you rotate? There's also a side bend. (laughs) So now when she rotates to her right, I want her to think there's a slight side bend in the same direction but not even visible, not like you can see it, just think of it as an image. There's a slight screwing down and getting shorter on the side you're turning towards and then come back and then do it to your second side, and it's really, it's not the whole spine, it's just the rib cage, it's just the thoracic spine, and you'll start to maybe feel muscles that you don't feel as often. Yup. And that's kind of cool.
So this is who you get more into all the segments by being more specific on how your spine moves. One more each way and last one. So that's a little lesson just to get set up before we do the exercise, and after would be good just to notice, like have Sarah notice like, how does my spine feel, she might feel more buoyant, a little more easeful in the body and the posture might feel lighter and easier. Yeah. We'll take that.
So now we're going to do a stretch but we're going to do a stretch for the diaphragm, so in relationship to your thoracic spine, your breathing is a big component of that and if we don't breathe well, our thoracic spine is going to be more rigid, our organs don't get the movement they need, and our posture is going to be effected. So the diaphragm is at this level, right at the bottom of the rib cage, and it's three dimensional, it fits in that whole area. It starts at about T five and it's a dome that's up inside the body, so we're going to actually just do a very simple mirroring of that, so Sarah's going to take her hands like this, and imagine like right at the lower portion of the breast bone she's going to have her hands and imagine on the exhale that the dome is domed up. So just take a breath and then exhale fully. Imagine that that dome inside your body is stretching.
As you inhale, see the fibers integrating and pushing down and let your belly move as you breathe in deep. And exhale, let it dome up, and again, it's inhale down. So in the beginning, because we're not used to paying attention to our inner body, you're just going to take it easy and go, can I feel my breath? Can I feel the movement internally? Because of our lifestyle, it's been a little stressful and a lot of doing, we tend to breathe shallow and high, so getting ourselves to breathe lower and deeper is good for every system in your body.
Now we're going to add to that, she's going to put one hand representing the diaphragm, the other hand, so you're going to come this way, exactly. Now the top hand represents the diaphragm, the bottom hand is going to be like this. This represents the movement of the belly. Now your organs have to go down and forward, they can't go back because your spine's there. So when you breathe in think, diaphragm down, belly down and out, then exhale belly in, diaphragm up.
So it's inhale and exhale. Some of you might be thinking well, I don't want my belly to move, yeah you do, you actually do. You don't want to turn your belly back into your ribs, not a good idea, it doesn't move as much as you think, especially if you stand with good posture. Two more. If you're really schlumpy, then your belly moves too much.
(laughs) Now we're going to stretch the diaphragm. So the diaphragm fibers, we just established, contracts on the inhale, so we're going to put our right hand on the left side of the rib cage, and then bed the knees and take the left arm overhead. Imagine your hands are on your obliques, but they're also underneath your rib cage, your diaphragm is right there. So breathe in and feel the movement into your hand. Now on the exhale, image the diaphragm is stretching as you side bend to the right.
See the fibers stretching, now let the inhale, the contraction of the diaphragm and the obliques, bring you back up. And again on the exhale, and notice, you don't have to tense the top of the shoulder, that's too far a way from the movement. Inhale, back up. Knees are bent, the weight's on the top of your legs. Exhale over, the diaphragm stretches, the inhale brings you back up, that's it.
Now you're going to let the fingers stretch, they're mirroring the stretching of your obliques and the diaphragm. That's the inhale, let the, there you go. Now this time inhale over and stay over, go further into the exhale and imagine the muscles are stretching. Now staying over, inhale, and feel the contraction under your hands. On the exhale, let yourself go a little further into the stretch, and again, inhale into your hand, exhale a little further.
One more, inhale, exhale a little further. Now let the inhale, the contraction of the diaphragm, the obliques, bring you up, and then let the arms hang. Now just notice, you might notice that that shoulder feels a little lower, and just notice how it feels to lift that arm in comparison to the side we haven't done yet. So you improved that, that's a big piece, get that diaphragm to move better, the spine moves better, you relieve shoulder and neck tension and you improve your posture. So let's take side two, so we're going to put her hand, her left hand on the ribs, bend the knees a little bit, so the center of gravity drops.
Take the right arm up, now let the weight of the arm just rest on the shoulder girdle. Now breathe into your hand and on the exhale, slowly side bend and see the fibers, spread your fingers, you're seeing the fibers of the oblique and the diaphragm stretching. Let the inhale bring you back up and exhale over. Let the inhale bring you up, that's it. I'm going to come to your back as you do that.
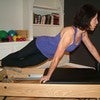
Exhale over, that's it, I'm just cuing her to relax her shoulders even more and she inhales to come up, exhale over, now she's going to stay, she's going to breath into her hand, imagine the contraction of the diaphragm, on the exhale let it stretch a little further, and again inhale, see it contracting, pushing the organs down, exhale it stretches further, and one more, she inhales, exhale a little further. Now a long inhale, let the contraction of the diaphragm and the obliques bring you back up, and then let the arm hang, so just doing that simple integration of the facet joints up top, and a little breathing and work on the diaphragm, now the spine's ready to go into conditioning. Now we're going to move into the sideline position, so Sarah's going to come and lie on her side with her legs bent like she's setting in a chair. I have a couple towels here just to give her head a little bit of support, and with the bottom shoulder, she's going to pull it out from under her a little bit so it's easier to let her head drop towards the towel. So as I mentioned earlier, this is for, we're going to do rotation of her thoracic spine which we have the most range in which allows you to actually extend better.
So working on a rotation is a great way to improve posture and improve shoulder function, all of that happens. So the first thing she's going to do is called telescoping. She's going to take this hand above the other one, about six inches. Now she's going to protract which means to pull the shoulder blade forward. Now she's going to retract, and once she's retract, she's going to bend the elbow.
Now from her thoracic spine, if she lets her head roll, she's going to turn and look towards the reaching arm and I'm going to give her a little stability in the pelvis so it's really in her upper back. She's going to bed at the elbow and come back the way she came and the image for this one, if she wants to think of the facet joints sliding around to her left around the back. So she can let the head go with it and she can feel how her mid back and spine are generating the movement and the shoulder is nicely integrated into her rib cage, and then she'll bend and come back. So think of this as an organization of the head, ribcage, and shoulder girdle, with a focus on the thoracic spine. That's it.
That's right in there. Yeah. There we go, that's it. She's going to do one more. Great exercise that have been sitting all day, just to put this in the program before you do strengthening exercises for their extensors.
It helps to open the pecs, and also stretch your core muscles, and then she's going to come back, now she's going to take that into what's called pinwheel. So for pinwheel she's going to protract a little forward, now as the arm goes up, right when it gets to about her ear level, from the same muscles, from the middle of her back, she's going to turn and take that arm into a big sundial, let her head go with it, and let her eyes follow the arm as it comes all the way down to her side and up and over her hips, so it just continues in one direction. So it goes up, she moves, I'm just cuing her thoracic spine. So again, it's integration of head, ribcage, spine, and shoulder girdle. That's it.
And she's going a good job, well you might find in some people is they arch their ribs, so you want to cue them when they turn that their ribs stay integrated in, and she's doing a good job of that. So now I'm going to have Sarah come onto all fours and this next exercise is called kneeling rotation. It's for the upper 40, upper back. So she's going to take her knees, at least shoulder width apart, maybe slightly wider, and then bring her hips behind her knees so and then with a flat spine so she's more on a diagonal. And then she's going to bring her hands even closer to her knees and she's going to put her left hand on her upper back or the back of her neck, which either one is easier for her to hold, and I want her to visualize a line from her head to her tail and she's going to maintain that.
Now remember the thoracic rotation we talked about with the facet, so we want to consider the turning is coming from the middle of her back. So on the exhale, she's going to turn to her left and then back down, that's it. She's going to feel a lot of work there, and my goal is to help her keep her front ribs in and feel the work is being generated from her obliques and her middle upper back. That's it. Great mobility for the upper back, there's also a strengthening component to this because you're isolating those muscles in the upper back.
She's going to do two more. Shoulder disfunction, improving posture, great exercise for that. One more. Beautiful. Then you would do the next side.
Now she's going to bring her hands down and walk, keeping her hips back, she's going to walk her hands out in front of her like she's doing a kneeling downward dog. That's it, now in this position, I want her ribs to lift, her shoulders to slide down, and the focus is going to be thoracic extension. So remember, think of those facets sliding in. So all she's going to do is a pulse. She's going to pulse her heart down, and then back up, and even a little less force.
That's it. Now she does that, I want the ribs to stay lifted, the mid-back to extend. So there's no shoulder joint stress, you're watching for that. Three more. Two more.
On the next one, do it, and now as you do it let the elbows bend and come to the mat. Let them bend a lot, you can actually let them come towards you, and let them, there you go. Yeah, there you go. So feel like, you're going to keep a little bit of extension like you just felt, keep the ribs lifted, now with your right elbow, she's going to resist it towards your body so she feels the muscles under her arm stabilizing. As she does that, I want her to slide this arm straight and then bring it back, now see if you can slide the arms straight without elevating the shoulder towards the ear.
That's it, just take it even slower. Do three more. Feel like you're reaching out of the middle of your back. That's it, one more, and reach, beautiful. And then rest, and that would be, we'd do the other side also.
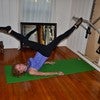
Now from here, she's going to turn right onto her back for supine pelvic rotation. And this is strengthening the middle back and the obliques so in this position her arms will be in like a W and you want the elbows a little below the shoulders and the hands at about eye level so she can open them a little wider if she likes. So if somebody had shoulder discomfort with this they could bring their arms lower, they could even put them down like an A position. That would be fine. Now from there what she's going to do is one leg at a time, she's going to bring her knee up and bring the knee over the belly button.
Then bring up the second side. Now I'm going to come around to the front so I can show you where you would cue somebody. So with her lower legs relaxed let the knees be over the belly button so it's easier to stabilize your back and what I want her to do is through her abdomen, lengthen her lower back a little closer to the mat. Now I'm going to put my hand in between her shoulder blade, her ribcage, and her spine, and I want her to imprint my hand. Now keeping my hand imprinted, she's going to take her knees and her pelvis to the left, only to the degree that she doesn't lose my hand, and then exhale back to the middle.
So it's an inhale, then an exhale. That's a lot of work. It's a lot of work. (laughs) That's it and just three more. So that's a back to front relationship. You don't need to stretch your chest after this it's already getting opened.
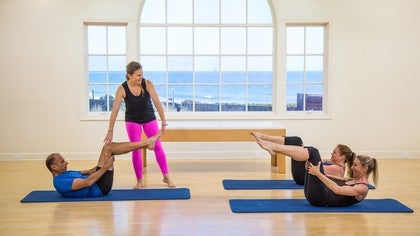
One more and back to center. Beautiful. Now place the feet down and rest for a sec. So we would do side two, from there we're going to grab the ring, so it's nice to do a counter movement after that where she just did all this back work, now she's going to do a little abdominal work to counter and relax the back a little bit. So this is a oblique twist using the ring to press her knee and her elbow into.
So this knee will stay on the ground, this knee will come up, she'll bring her hands behind her head. Now she's going to put her left elbow against the ring and her knee against the ring. Now the contraction is from under the arm to the opposite hip, and on the exhale I want her to press and then hold the press a little longer. Inhale to let it go, do that for three more. Go to the end of the exhale each time.
And again. That's it, two more. One more, nice and smooth. And rest, beautiful. Again, we do both sides.
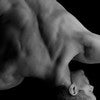
Nice work. (laughs) So now I'm going to have Sarah come forward onto her prone on her belly, we're going to do some extension exercises. We're going to put the ring down and I'm going to go grab the skeleton just to give you a view of something. So if you consider your thoracic spine and how it blends into your neck the junction point is the place where we're going to have a bit of focus right there so think of like, the lower part of your cervical spine. I'll do it myself before I show it on Sarah.
Imagine right there, so the curve is like this, that's the thoracic, and then the neck. So right at that junction point, I want to teach her to draw that back, so when that comes back, the thoracic and the neck extend into each other without bracing the neck or drawing the head back. It's really right at that thoracic outlet. So what I want to have Sarah do is just take her hands a little wider, slide her shoulders down a little bit, a little less, just not pinched, just down, anchor the pelvis, and just lift your head about an inch off the floor. Now right here, that's the junction of where the thoracic and where the neck meet.
So what I'll need to do is draw that into my hand as you feel the heart slide forward. That's it, so that's extending her thoracic into her neck in a nice even way and now lead with the spine back down. So just like we talked about earlier, as she retracts that, the facets are sliding together in the upper back and she's isolating the movement in the right place, and as she goes down, they're slightly opening. And she'll do that three more times, a retraction and a forward through the front of the spine. Beautiful.
So this is really isolating the upper back and putting less stress on the lower back. She'll do two more. As far as posture goes this is what we all need to do more of, just from life, being on our phone, being on the computer, all of that. And down. Now she's going to take it into side bending.
So for side bending she's going to bring her right arm by her side, her left arm overhead. First thing, she's going to set the shoulders low, float the head off the floor, and she's going to image the facets that are going to slide down on the side of the arm that's low, this arm will come off the floor too. And on the exhale, side bend to your left, your right, inhale to the middle. Just do four on that side, this side slides up, this side slides down. This side of the body is contracting, this side is contracting but it's also lengthening close to spine.
Two more. And one more. And then the last one we're going to do is rotation so she's going to come back to center, and now we do the other side obviously. She's going to come down, now take this hand, and put it against your forehead like this. And this arm can be long by your side.
So this time, as she exhales, she's going to extend the same way, but then rotate. This hand will come with you 'cause it's going to be right against your forehead, and she's going to rotate to the right, and then back down, this one's a little bit harder. On the exhale, forward and up, anchor through the legs, now rotate. That's it and just do one more. As you come up and as you rotate, right, think of going a little bit to the right.
There you go. Beautiful. Nice. And rest. And if you want you can give your client a little stretch for the lower back which feels really good after that.
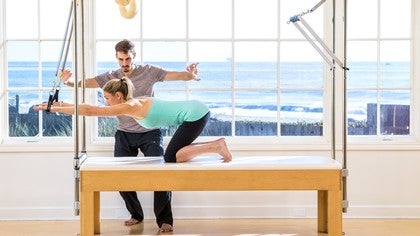
The last movement she's going to do is called an active cat. So she's going to come up on to all fours. This is a nice release after what she did. Hands will be directly under the shoulders. If possible, tuck the toes under, if that's not comfortable for somebody they don't have to tuck their toes under, but if they can it's a stronger position.
So all she's going to do on the exhale is as she rounds her spine let the pelvis come back in space, now as it comes back, keep coming back until you can float your hands off the floor. That's it, now inhale back down and go forward. Now as you open the chest, slide the pelvis over the legs and now resist your hands towards your legs so you start to feel the middle of your back more. And inhale to neutral, exhale curl. Feel the shoulder blades widen and lower and float the hands.
That's it. And inhale down and forward. As you go forward the sit bones widen, the shoulder blades come in a little bit. And again inhale to neutral, exhale curl, feel the obliques, feel the shoulder blades, feel the inner thighs, and float your hands. Beautiful.
One more time. And resist hands and knees towards one another. And last time, we'll flex. Focus on lifting in your lumbar keeping the neck long, beautiful. And float, and down, and rest.
Very nice. There's your lesson on the thoracic spine. I hope you enjoy. Thank you to Sarah, and we hope to see you again soon, thank you.
Back Care: Thoracic Spine Mobility
Mention
 |
Tom McCook (Teacher) |
 |
Anastasiya S |
 |
Veronique A |
|
|
Rachel A |
|
|
Jennifer M |
|
|
Cynthia G |
|
|
Dagmar D |
 |
Zeren Joy |
 |
Maryam |
 |
Gia Calhoun |
|
|
Judy G |
 |
Elizabeth D |
|
|
Declan K |
|
|
Kerstin E |
 |
Ida H |
 |
Debbie A |
|
|
Eric J |
 |
Sarah Edwards at Positive Pilates Solihull |
|
|
Theresa Raess |
 |
Bahara |
 |
Silvia A |
|
|
Monica Bino |
|
|
Carrie B |
 |
Sheila M |
|
|
Megan Q |
 |
Jennifer F |
|
|
Sarah W |
|
|
Tammy T |
 |
Alissa K |
|
|
Rosemary |
 |
Bobbie B |
 |
MKV |
|
|
Or S |
 |
Deborah Wasko |
 |
Ewa |
 |
Andrea D |
Comments


You need to be a subscriber to post a comment.
Please Log In or Create an Account to start your free trial.
