
Premium workshop
You can view a 2 minute preview. For details, scroll down below the video.
Description
About This Video
Transcript
Read Full Transcript
Hi everybody. I'm Jennifer crease and I am delighted to be here. Pilati is anytime with all of you and with Amy havens, who was my lovely model today. And we are going to show you some Cadillac exercises. We're going to do some beginner few intermediate, and the emphasis today is going to be on hands-on technique. So here we go. So Amy, I'm gonna have you face the side and we're gonna hold on to the rolling back bar with fists. Yup.
And I'm going to ask you to pull your some underneath and just round the body forward for me. And let's take a few breaths. So inhaling deeply and exhaling. And sometimes what I like to do is just place my hand on the client's back almost to relax her and prepare her for what we're going to do. And it also helps me to see where she's holding tension in her body. So Amy is very schooled at [inaudible] already, um, and she knows to release her traps.
But what I do as a little technique with my hands, I do a little spread. So I use my thumb and my middle finger and she'll tell you that it feels like a pressure point massage. She's already feeling the guts, right? This really feels relaxing and it also sends a message to the muscles to release. Okay. So from here with arms long, she's going to take a deep breath in and she's going to exhale and roll down bone by bone. And I'm going to have my other hand down here and I'm going to tell her to draw her naval to her spine as she goes. Good. And you can just relax your feet, Amy and relaxed. Your legs got just so I watched the first one and I hold here also as a safety precaution. So take a deep breath in here and then exhale, chin to chest, bone by bone, peeling off the mat.
Good. Nice. So we were both agreeing that we haven't done beginner [inaudible] Cadillac exercises in awhile and it's a nice reminder. Um, and I'm going to go to her quads and just tell her to relax the quads a little bit. So it's a full hand hold that I'm doing and I'm not squeezing. I'm just sort of suggesting that she released them and we're going to pretend we're doing some role playing that Amy is a first time client and when I'm going to have her do is straighten her rest and there's this really nice little handhold that I call the wrist guard cause a lot of people break their wrists when they're using the rolling backbar, especially when you see breathing. So you can see that I'm holding on under her rest and I'm just lengthening the wrist forward a little bit. So she's projecting through her knuckles and it's a really nice way to begin.
Okay. Then for safety issues, I'm going to hold onto the rolling back bar and then one hand here on her low back. So I'm going to cue her to breathe in and then she's going to exhale and roll down bone by bone and just relax your legs Amy and focus more on deepening your abs down into the mat. See if you can squish my fingers into the mat as you go. And then maybe I'll lengthen her head a little bit at the end and I'll still hold on for this one moment. Take a deep breath in, and then exhale, chin to chest and feel like you're moving up bone by bone, keeping the Armstrong and straight. And then maybe I'll let go here and place one hand on her lower abdomen. Okay, good. So we're going to do that again.
You're going to breathe in and then you're going to exhale, roll down bone by bone against soften the legs. And from here, see if you can deepen the abs away from my hand, right? And at the last moment, release your head down. Good. Now something else you'll see is that the shoulders tend to jump up a little bit on rolling back. So this is a really nice hands-on position where I'm basically just using my own body weight to lean in and she really feels that her shoulders are opening. She's smiling cause I think it feels nice. Good. Now from here I add something.
So you're going to take a deep breath in with me and then as you exhale, just stay there and deepen your abs into my fingers. Good. But see if you can maintain the shoulders. Nice. So breathe in here. Exhale. I'm going to watch her on this one. Chin to chest. Keep the arms long and keep projecting through the knuckles. Good. Deepen the ABS even more. Yeah. Nice.
So then it becomes a little bit of work there. So again, breathe in and exhale. Roll down bone by bone. Good. So from here I want even more work in the apps. You feel my fingers under there? Yeah, deepen even more. Good. And you can see me sitting alongside her. This is another nice place to be. So I can press down on her here and I can also sort of Shimmy her a little bit and I can lengthen her head.
So I hold right underneath the ear and I gently pull. Okay. And it really gives someone that sense of lengths that they need. So take a deep breath in here. Exhale, Chin to chest. Good, really nice. Now stop right there. Take another deep breath in and then exhale, hollow out.
Good and round over my hand. Try not to touch my hand as you go over even more, even more, even more. Nice. And relax the shoulders. Good. Let's do one more. So breathe in. Exhale and roll back. Good. And remember to keep the leg soft. Make it all about the center. Relax those shoulders even more. Yeah, that's it. Good. So now I'm going to have my hand here.
This is another great position for the hand to hold the bar. So we're going to hold here. We're going to breathe in, we're going to exhale. Try to find that shoulder position. Good. And deepen your abs at the same time. Better. Then maybe she'll need another reminder. Inhale. One more time. Exhale, hollow out. Good. And one more breath in.
And this time we're going to come up. Beautiful. Keep deepening away even more. Don't touch my hand, but don't let these go and soften your quads. Yeah, a million to think about. Nice. Okay, so we're going to do a little role playing. Can you show what most people do when they first get on? The Cadillac, you ask them to do this. Just give me a creative variation. So take that's a very creative, that was a lot of creativity. Almost too much. Okay.
So you'll see people bending the elbows and doing all sorts of variations with the back, right? And mostly what they do is they go back in one piece. Okay? So that's, that's going down. Now breathe in here, exhale and show what they do to come up. That's another very creative way. And the other way roll all the way back is I want you to bend your elbows because most people don't have the AB strength and keep coming up. Okay? So what do you do with that? Right?
So I wanted to show it done beautifully and then show what most people do. So again, even starting with the wrist helps a lot of people with that projecting through the knuckles, softening down through the head and this hand. And this hand helps a lot because you want them to feel where they are in space. Then the cuing. So inhaling here, exhale, roll down bone by bone. So listen to the language too.
And my hand is here because I want to tell her to pull down into my fingertips. Good. Much better. And then you can't really see this too well, but I'm really lengthening the back of her neck. I'm kind of pulling a little bit. Good. Now keep the Armstrong and straight. See what I just did? I kind of went down the arms. Then I'll come here. Inhale.
And then exhale. As you come up, do not bend your elbows. Keep them strong and straight. And I want you to curl up over my hand. Good. Now go back again. Now what if someone has trouble getting up from here? What if they start to actually straighten the spine? That's what I want you to show. Do that again. I just got excited. Yeah. Okay, so do that. Come up. So from here you say breathe in.
Exhale, deepen away from my hands. Yeah. So you see this beautiful scoop happening right away. So then you can continue. Inhale here. Exhale, peel up the rest of the way. Okay, so it's a simple exercise, but it's not so easy to teach to people who have different variations. And there are no rules. You know, everyone says you have to do every movement down on one breath.
You can stay there and hang with the person long enough to help them feel the apps. Single-Arm so right hand in the middle, hugging the body with the left, round the spine down. Good. So pretend that you still have two hands up here. Inhale with me. Exhale, roll down bone by bone. Good. So what does this exercise great for? Of course, scoliosis or if you have somebody who is doing a specific sport, great to balance the body. So from here you're going to take this hand, you're going to unhook it, you're going to reach behind you to this pole and keep your palm facing out and take a peak at that hand. Good. And I'm going to hold on with her. Breathe in. Exhale, bring the arm back around. I let go, I help her find center.
Inhale here. Exhale, curl up. Bone by bone, keeping the Armstrong and straight. Nice. And the tendency here, what you're going to see, not so much in Amy's very skilled body, is that people will grip their quads. So again, you'll find yourself almost reaching across to say soften the legs. And now we switch hands. So dropping the headway, take a deep breath in. And my hand keeps instinctively traveling up here because people are always hiking their shoulders up. So breathe in. Exhale, roll down bone by bone. Good. And really feel like you're working symmetrically and you're relaxing the shoulder. Good. So with a firm grip, you're going to take that right arm out. Good. Turn the body.
And here I might go in for another cue because I see her arching off the back. So breathing in, exhale, she comes back around the sea arm, she finds center, inhale here, and then exhale, she curls up bone by bone. Keep this arm strong and straight.
So one of the things you're gonna notice that I do is that I layer my queue. So I just want to watch someone move the first time. And then the second time that I go, I see what the body naturally does and then I go in. Okay, so round the spine forward. One more reminder. Inhale, exhale. Roll down bone by bone. And the other fun thing to do is you can come behind somebody and see what the spine is doing. So this is a great vantage point.
So now that I'm really confident that she has a hold, I'm going to tell her to stretch her left arm back here. Take a look. Good. And I'm going to come in and I'm going to say deepen the abs into my hand. Good. And keep facing those fingers. And I want you to reach with energy. Pass the bar. Good. Take a deep breath in. Good. Stay there. Exhale another hands on moment. I come back, I help her find center, take a deep breath in and then exhale, curl up bone by bone. Relax those shoulders, deepen the abs and soften the quads. But flex the feet a little bit.
Nice. Good. And let's switch again. So head down. Do you feel which side feel stronger to you? Your right side. Interesting. So take a deep breath in here. Exhale, roll down. So at first a lot of people aren't that aware to even know which side feels stronger or weaker. But it's a really good thing at this point to kind of cue in and check in with your client. Good. So both shoulders are down.
You're going to take the right arm behind, take a peak. Good. And really, really stretch and see if it can keep the palm out this time. Take a breath in with me and then exhale, really stretch. So I'm kind of tractioning her, I'm reaching across and she's going to come back around. Hug the body. I'm going to sneak in here. Deep breath in and exhale curling up. So if someone were having trouble coming up, I would stop them here.
So can you arch and fake it for me? Like your, yeah. So inhale with me. I'll slide under, exhale round and she'll tell you that's a pretty firm touch that I just gave her. Breathe in. Exhale and coming up the rest of the way. Nice switch for the last time and now we're going to go all the way to the opposite pole. So head down and round. This is a classic position to give someone the feeling of the c curve.
It's really effective. Inhale. And then exhale, roll down. And I'll still do this. I love this little traveling spinal techniques cause I get to feel what's going on in her back and then give her a sense of length in her head and neck. So she sweeps around this time she stops here and then she goes all the way to the opposite pole. But she flexes the opposite foot and deepens here. Take a breath in, exhale and Lainson.
Nice. And then she comes back around, she squares and she finds centers. He takes a deep breath in and then exhale. So now you notice I'm not touching anything because she knows what she's doing. I'm just observing and queuing. Important to do switch hands. And when I started to say is it's important to step away and not touch with every rep only when it's absolutely necessary. So I'll do one more here.
Inhale so you can all see it. Exhale, she rolls down bone by bone. Good. And she's still really thinking about bringing both shoulders down to the mat. And here you can't see this, but I can't. She has this sneaky little thoracic arch happening.
So I want you to take a breath. As you exhale, deepen the ribs down better and get that shoulder down. Yes. So different. And I'll take the arm out to that pole. Now maintain the same me. Don't let this go and take the arm all the way back here. Good. Take a deep breath in with me. I'm going to lower your arms that are right for you. Exhale, I'm going to lean into her and pull and then we're going to come back around. She's going to find center, she's going to take a deep breath in and still press down in that opposite rib side. And then she's going to exhale and curl up.
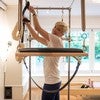
Good. Softening those quads. Excellent. Okay. And we'll let go. So we are here and we are about to show you the breathing. And I have Amy in the trapeze in the strap and she is in a tripod position. Turned out and I'm going to introduce her to the rollback bar, but in a different position. So she's going to hold on with fists.
So in all likelihood for your beginner client, this is the first time that they've been in this set up. So it's really important for you to go over safety features. So she already knows not to release the bar because we went over that for rolling back. But Amy for the same thing, I want you to have really long straight rests and this is another great position for that little risk guard hold that I showed you before for rolling back. And on this one especially, you're going to see that people like to break the risks and I'll have Amy show you once in that. Okay. So what I'd like to do with this is I like to break it down and I like to show the arms first, then the lower body, and then we put the two together. Okay, so you are going to take your arms as close as possible to your hips with straight arms ready, take a breath in and pull down, hold, hold, hold. And then release the Barb.
And you can see I'm helping her on that first one. Do it again. Inhale and pull the bar down. Hold it, hold it and hold it. Good. And I'm just going to let you at home know this, that every single human being on the planet, the first time they do the pull down, they exhale because it's hard. And really this is counter intuitive because what we do is we inhale on exertion for this exercise. So I let her do it wrong twice cause I wanted her to feel the movement. And that's the most important thing in piles. When you're teaching, let someone move, let them relax, let them breathe.
And then you cue the breath and the movement together. Okay, so Amy, this time it's going to feel a little funky, but I'm going to ask you to hold your breath. You're gonna inhale as you pull down and then you actually hold the breath for three camps. Okay? So first breathe for nothing. Inhale, exhale, let it all go. And then inhale, pull down. Good. Hold the breath, hold the breath, hold, exhale and release the arms back with control. Good, much better. And I'm even going to adjust her knuckles a little bit more. Yeah, let's do that again. So inhale, pull the bar down as close to your hips as you can. The shoulders down, hold, hold, hold, exhale and release better. One more time. Inhale, pull that bar down. Hold it, hold it.
Keep reaching for me with those knuckles. And I might tap like this. Exhale. Release. So on a scale from one to 10, how hard is that for you? Yes. So she said it's a seven. And you know, and this is dubbed as a beginner exercise, but I gotta tell you, intermediate advanced folks really benefit from this because they didn't. Yeah. To do it correctly. And also it enhances your lung capacity. That's another really secret benefit.
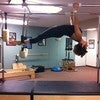
So we're going to now transition to the lower body. So you're going to squeeze your glutes, you're going to breathe in, you're going to exhale, you're going to inhale and lift the hips up. Nice and high. Just left. No roll. So she's going to hold, hold, hold. As she exhales, she's gonna roll down through the spine, bone by Bong. Nice. And again, squeeze the glutes. Lift. Now you're going to hold the breath. Hold the breath hold, and I'm wrapping her quads out. Exhale, she's going to roll down bone by bond. Yeah, beautiful articulation. Now not everyone is that at articulating at first. So I'm going to show you a wonderful hands on that will help people who have issues. So breathe in, lift the hips, squeeze the glutes, squeeze your inner thighs, hold, hold, hold.
Then I come underneath her mid back. Exhale, roll down. And what I'm doing is I'm gently pulling her down and out. And then when she gets to the bottom, I just press gently into the hips. So this is also a really wonderful grounding technique for people because being on the equipment for the first time can be a little unnerving. So a simple cue like this hands-on feels nice. One more time. Inhale, lift the hips, hold it, hold it, hold it, get that outer rotation wrap, and then exhale, roll down bone by bone. So this time I might pull a little bit more unpress. Nice. Okay, so now we're going to add the two together.
As you lift your hips, you pull the bar to your hips, you ready? Inhale. Arms and hips come together. Project forward with those knuckles. Hold it. Hold it. Hold it. Exhale. The bar goes up as you rolled down through the spine. Bone by bone. Yeah, let's do that again. Inhale, lift up.
Try to get it even lower hole. There it is. Hold, hold. And then exhale. Roll down through the spine. Bone by bone. Maybe this time I'll just lengthen through her hips. Yeah. And one last time. Inhale, hips, arms length. Get their shoulders down more. Yeah. And then exhale, roll down.
Really try to go bone by bone. By bone. Yeah, that was great. Good. So you can release this and just rest for a second. So if you notice the last time that we did this, I really just let her move and watch what she was doing with the spine cause she knew what she was doing already and I just gave these subtle cues and that's really what you want to do at the third or fourth rep of something. You really stand back and you watch. Okay, I'm going to hold a trapeze if she takes her feet out. So we have just transitioned from the breathing and we are now going to move onto the leg spring series. So I'm going to help Amy put them on. Let's put this on the right. Good. And I'll let you put that on your left.
Excellent. Okay, so just keep your heels together and for the arm position I'm going to have her have the arms here, right? So about quarter of the way up. And I like this line of the elbow being bent right parallel to the mat and this really helps somebody be completely aligned and engaged in the upper torso. And it also helps to reinforce posture. So from here, since this is a first time client, I'm going to come up on the Cadillac kneeling. It's a position I like and what you're going to do from here is stretch your legs out to me, Amy. Good. So I have full control of her legs. It's a really nice position and it feels good in my body too. So heels together, toes.
And what I like to do to help someone acclimate to the springs is just do a simple up and down movement. Okay? So when you're using these springs, Amy, you want to keep your back completely flushed to the mat and you want your knees not to be locked but slightly soft. So, and you also, one more thing, we want to have the springs intention at all times. So we're going to inhale coming up just to about there. And exhale, take the legs down just to that place where you feel like the back is still flat in the ABS are engaged. Okay. Inhale, lifting up. Exhale, coming down. Nice again. Good. And from here I'm going to let go. I'm going to step off. You're going to be on your own for the next few. Okay.
So then I come to the side. So taking the legs down, deepening through the ABS. Inhale coming up. Exhale, pressing and lengthening out through the toe. So I start to layer my qs now. Good. And then I get to see what's going on in her back also. And she's doing an exceptional job of keeping her upper body engaged as well.
Good. And what I want you to do is lock the knees here for me and show how it's not meant to be done. Yeah. And it doesn't feel good. So do a few more like that with Denise locked and coming up. She's making a face. Do it again. So what do you do if someone's locking the knees at first? Nothing.
You let them do a few reps like that. And then from here you can go behind the knees and just suggest that they soften because they're already busy multitasking and you don't want to overwhelm them. Okay? Then there's another really nice hands-on while she's doing the last few of these is a little grip. And I want you to stop for one second. It's like a claw. Okay.
So what I'm doing is I'm taking my index finger right in between her feet and I'm clamping the heels together and it feels really nice to the client. So let's just do a few more. Then I have my other hand on top and it really creates this feeling of security. And length and they know where they are in space because the springs are really no joke. They're actually a really demanding series. Good. So now that I feel confident that she's really gotten a handle on what this feels like, I'm going to come back up and I'm going to show you another position where I'm going to stand to do an adjustment.
Left good. And again. Now do you feel like you can take the legs a little bit lower? Keeping the ABS engaged in the back flat. So do that. And then right about here, I might give her more of a rhythm. Let's do three more down around together. Good. And try not to let the legs come up past here. Two more. Yeah, one more. And now reverse it down around, up together.
So now your client is starting to get the hang of the Cadillac. You know she's been on here for a few exercises and you can up the ante a little bit. You can start to give her the pace. Good. And she looks beautiful in her core body and not everyone does. So I want you to pause for one moment right here. So what would you do if someone were hyperextending in the ribs? Yeah, so I would have them soften the knees for a moment and I would come in and I would say just release the ribs and feel the back flat. Yeah.
And typically what people do is they actually let the legs go way low with strong straight legs. So keep the legs straight. Yep. Right? So that happens, right? So you want to make sure that the legs only stay here. That's why this grip comes in handy because then you have control and you can go right on. Okay? So if you see them really losing control of the springs, you just say heels together, toes apart, clamp, and then draw the navel to the spine. So do you see this? I have one hand on the feet. One hand here, or one hand here. And it's nice and neat. It's easy. Okay, so now reverse. So now that they're in this rhythm, we've done this, I'm going to say reverse.
Go down, around, up together. Same thing down around and the repetitions for beginner, eight to 10 reps generally speaking. And now I might layer some cues. What I want you to do is reach through the toes and I want you to push through the heel of the hand into those bars and deepen your abs and see if you can relax your shoulders. Good. So I would only throw all of those cues at somebody if I felt like they were really in the groove. All right? And especially for a beginner towards the end of the repetitions, very important to do
And keep reaching out and out. Out. Keep deepening the ABS. Nice reach even longer. So all the way over here. And another nice thing I do is I lift my arm up so they have a target. Good.
Now what I want you to do is deepen the abs and don't let the hips do a little cha-cha. Romana used to love to say, do not do the Cha Cha unless you have an audience or a tango band or a touchup band or a keep reaching unless you're wearing your heels. Okay? Keep deepening your abs and pull your ribs in. [inaudible] now reverse it. Go underneath and out, underneath and out. So when they get to the bicycle, it's even more important to tell them to push into the bars with the hands, deepen the ribs. Good. And instead of actually touching the mat, because you're a beginner, you're still airborne. Yeah, that's right. Good. Keep reaching two more times. Good. And from here, bring the legs up straight and bend the knees into the chest. Okay.
So I just want to make a note to everybody at home so that you know it's not typical that you would stop in between each leg, spring exercise. Because once you get someone going, you really want to keep them going. But for the bare, bare beginner, when they're completely used to this, not used to the springs, when it's brand new, I will allow them to come into this frog position in between. Okay, so that said, stretch out to tension. And this time you're going to have the legs parallel and we're going to do walking. Okay, so with my arms again, you're going to go down, down, down, down, down, down, down, up, up, up, up, up, up, up and down, down, down, down, down, down, down and up, up, up, up, up, up, up to the pace increases all of a sudden and you can see that we're building up to it. And that's what you want to do. Good. Just natural breathing up, up, up, up, up, up, up and down, down, down, down, down, down, down. And at this point in the workout, someone has never done this before.
Has really burning in the backs of the legs. Are you burning? A little, a little bit good. And then coming up again and going down. Come back up, heels together, toes apart, bend the knees into the chest. Good. Take a breath. And what I want you to do is try to keep the fingers around and I'm just going to share another little tidbit with you. So if you noticed Amy's fingers were reaching, which is a really nice way for her to feel the heel of the hand in the bar. But what you like to do in piles, especially on a higher level with teaching, is have someone do what is not easy for them. And when you do that, you actually make them work more efficiently.
It's a great little trick and you can apply it to everything. Okay. So just for the heck of it, I want your fingers tucked in. Take your hands a little higher. Yep. Okay. So from here we're going to do beats. She's going to stretch out attention. She's going to stay there and she's going to beat one, two heels together, five, six, seven, eight, two. We're going to do three sets and three, keeping a nice rhythm and pause.
And now from here you're going to go down to three, four, five, six, seven, eight and up to three. So traveling beats and down, getting a little fancy on the beginner level
Okay. So there are a few different approaches to arms springs. You can really just leave the crossbar where it is without engaging in any additional maintenance and just see where someone right where their strength level is. Do you feel a bit of tension there? Yeah. Okay. So I'm going to make it even a little harder for you and I'm going to have you wiggle this way. Perfect. Okay. So one of the hidden gems of this exercise, one of the hidden aspects of this is that it pulls someone immediately into the rectus Abdominis, into the transverse, into all of the core abdominal muscles. And people don't expect it at first because they think it's just for the arms, but it's not. So you are going to stretch your fingertips long.
Now you are going to stretch your fingers long. You're going to squeeze your knees together. This is another hands on approach that I'm using for the knees, okay? And you're going to make sure your navel is pulling down to the spine. And another moment that I want to show you, I do like to hop up here when I have someone start these because I like to put my hands in on top of their hands, okay?
Because this is actually really involved. So what you're going to do just to start, just like we did for the legs springs, is you're going to pull down. And what's really important is that you keep the fingers in the wrist straight. So can you see what I'm doing with my hands? I'm actually giving her like a physical mirror for her own hands to use.
Okay. Cause I want you to break your wrists for me. So, and now pull down sort of broken rests. Yeah. So did you see that? Yeah. It hurts me to watch actually. So that's what people mostly do. And we do this with long, straight fingers and this just helps someone to feel where they are. And also they can say or look at me and I can say, pull your shoulders down. So inhale with me. Exhale, press down.
Inhale X. Good. You got this. So I'm going to let go Amy. And you're going to keep going and pull down. Good. No one bigger range with the arms. That's it. So you take the arms to the sides, but you pull even bigger than that. Good. Bigger still. There you go. Right. And the danger is that she loses tension in the spring. So don't let that happen. Keep reaching from me. So you see this cue.
This is a winning queue. Try to touch me as you get the shoulders down two more times. So now she's done about 20 no, it should be like eight or 10 now reverse it and she's starting to sweat down around and pull. Good. See if you can get those shoulders down more. Good. Yeah. Nice. Keep reaching for me. And I might grab her fingertips on these last few.
So I'm not pinching, but I'm pulling you. Squeezing those knees together. Are you deepening the ABS? Don't now you are. Yeah. Good. So this is hard work. Three more good. And she's breathing naturally. Last one. Who Baby? Yeah, that was great. Felt that. Yeah. So from here we're going to go to the triceps. So tuck the elbows in, pull the shoulders down and back, deepen the ribs, deepen the abs again.
I'm going to slide in because this one's hard. So inhale, tuck those elbows in more. Exhale, press down, hold and hold and hold. Release the elbows, but keep them squeezing into your body and on the mat. Yeah. So I want you to see this hands on. So I'm pressing down and I'm squeezing her in. Yeah. And then I'm going to sneak in here and guess what I'm going to use again, that same hands on that I did for rolling back. Okay, here we go.
Inhale. On this one I'm just gonna Watch press down. Cause what you want to look for is that the risks are long and straight. Again, press and hold deep and deep and deep and deepen. Inhale here. Exhale, press and squeeze. And maybe I'll come here and squeeze in. Yeah. And then I'll get out just in the nick of time. And again, press squeezed, squeeze, squeeze, press, squeeze, squeeze, squeeze. Even longer. Two more times. Can you get those shoulders down more and deepen the ribs in the ABS? Yeah, it's like a fight of opposites again. Press squeeze.
Yeah. One more time. Press Squeeze and retreat. Reach, reach, reach, release. Yeah. Yeah. So that is quite a workout and you can see that at this stage someone has acclimated sufficiently to the apparatus. You can push her or him a little bit. Now, one thing before we move on, what if they can't get the full palm down on the mat? Will you hurt them? It's kind of a, it's a hairline decision, but this is what I'm going to say to you. Move them back. So can you show what it's like? If you were straining, can you move forward for the triceps? Yeah.
No you weren't. Okay. So in the l here, exhale, press down. Yeah. Not even that way, but most of them now we're really having fun. Too much fun. Yeah. And try to pull down as much as you can. Is that it for you? Yeah. So squeeze your elbows in here and all. I basically, what I want you to do is keep the form of the upper body and then just press down and let me see that you can't get the whole risk down. Go for it. Is that it? Oh Wow. Okay. That's really too far. Move back.
So what I'm trying to show is that little moment where someone can just about get there but not quite. Okay. Inhale here. Exhale and press. So if they're there, that's okay. If they're hovering even higher and breaking the rest, you know that they're too far. Okay. So let's show one nice one. So move back. Inhale here, tucking everything in ribs are closing and now press that I like. And then you can get in there and push and help them. Beautiful.
And now release. So we are moving on after the arms spring series two, one of my favorites, which is the side leg spring series. So Amy is going to come to this side of the Cadillac and what you are going to do is you are going to hold onto this bar and bring your elbow flush with the bar if you can. Yep. And you're gonna lie down on your side and use your elbow has a little cushion. Yup. Now bring your arms in front of you just like the side series on the mat. And you're going to bend this knee in. Good.
And you're going to put your foot through. And I'm going to help to guide her foot. So if you saw I held her knee, which is really important with the leg springs. And immediately what I like to do is set somebody up with their hands. And if you show what I did, I put one hand in front of their lower abs and I have one hand on her back because I want her to feel secure. And I want her to know that she should deepen her abs between these two panes of glass. Okay? And then look what I can do very neatly.
I can check in with her shoulder and make sure that that's in the proper place. And even before we get the springs going, I can see that she's arching her back a little bit. So I'm going to tell you to breathe in and as you exhale, deepen your ribs into my hands. So I went like this. So now I like her set up. Now her legs are here at an angle and what we're gonna do is we're just going to show you the pull down and the side bicycle.
We could really have a party and do pasta and a bunch of other things, but we're just going to show you these few for the hands on purposes. Okay. So you can see that I'm kneeling on the Cadillac and I have one hand on her hip because I want her to make sure that she's not leaning forward or back. And then I'm going to have her lift her other, her foot off of her left foot, two inches. And what you can see that I'm doing is I'm pulling her leg out this way. Okay. So Amy, I want you to slightly externally rotate the leg in the hip socket, feeling the knee cap pointing up to the ceiling and we are going to breathe in and lift the spring up. Exhale, we're going to take the leg down, heel to heel, and again, inhale up, exhale. And then I'm going to switch my grip.
So what I'm doing is I'm kind of threading my fingers through and I'm pulling, I'm kind of bracing on that strap and I am moving with her. Okay. So after she does another two
Good and reach. Now here's another nice hands on. So at this point I might pull with both hands. That feels really nice to the person. Can you show coming out of spring resistance for me? Yeah. So that's another thing that can happen. And how do you as the teacher, stop that on the next one you say just to hear where you still feel the resistance and then pull down. So we're just going to do one more of these.
And from here we're going to go to the side bicycle. So you are going to take the leg front straight, you're going to bend the knee, need two other knee I get out of the way and you're going to straighten that leg back and an arabesque. Good. And see here if you can lower the leg just a little bit and I'm not really going to show the traction yet. We're just gonna lay the foundation heel to heel. Take the leg front, bend the knee, you can see that one foot is under her knee, underneath the knee. And I'm basically placing it in alignment, heel to knee, knee to knee, and then coming back. And then on this one I'm going to hang a little bit.
And this is the a number one SCIATICA exercise, right? For treating SCIATICA. So take the leg forward, bend the knee. So here you want to have the knee. So it's really parallel tracking, taking it back, really making sure that you have a nice handle on the leg and I'm just pulling back and I'm deepening my abs. One more time on your own. Stretching the leg forward. Actually I lied. Can you stay there? So a lot of people also turn in and let the foot cycle.
And what you want to do from here very nicely is help them maintain that external rotation and also get the foot in line. Okay, so bend the knee, I'm letting go knee to knee and then taking it back. Really lengthen and maybe at the end I'll pull back. Okay. Then the legs come home and now we reverse you. Take it back. You bend the knee, knee to knee, knee to elbow, foot to nose. And then take it down again. So for the first few I like to really guide them. Bend the knee for me.
Good stop. Action for one second. So this is a crucial point. People either let their knee dip or the lift up too high, and I like it to be right here and I'm using my body weight against her shin. Now the other thing you can do from here, nice self correction is you can actually guide the leg back a little bit, keeping the knee down and they get this incredible hip flexor stretch right there. Can you take a breath for me? So for the beginner, I won't go into this too much, but if you have someone who's suffering from Sciatica, it's a really great thing to do. So now taking the foot forward, external externally, rotating the leg, and again, take it back. Bend the knee for me. I come in here to protect the knee, pull it through. Good. And I want you to hold right there with your legs straight.
And now this is a really great stretch. I want to show you using your own body as a leveraging tool. So I'm taking my left arm and I'm kind of massaging her it band and I'm placing her hips properly and I'm externally rotating the leg in the hip socket. And all I'm going to do is lean. Take a breath and exhale. Good.
And then I'm going to show you another really funky stretch where she flexes her foot into my abdomen. Okay. It's a big stretch by the way, and I get a great abdominal massage. So I'm going to take my hands on her back. She's going to take a deep breath in and as she exhales I'm going to cue her to flex the foot more. Ooh, feel that ob too much or go breathe in and exhale. Nice. And then guess what other sides.
See how nice and easy that is going to go for the second side of side springs. Amy's going to put her foot through and we are going to bring the heels together and you'll see on this side that I can kneel. This is another really fun approach. One Hand at the back, one hand on the ABS, I can make sure the hips are stacked, the palm is flat and we're going to do the toss up so the leg goes up and then you pull heel to heel lifting up and pulling heel to heel. And I really didn't say this on the other side, but what's nice to do is to have them flex the bottom foot as though they're doing the side series on the mat, lifting up and pulling down. And what I'm doing here is I'm pulling a little bit, it feels really nice and Amy's hip good.
And from here I can say draw the navel to the spine more can start to queue. So it really is the height of multitasking. So I'm letting go. You're on your own. Keep reaching for me, Amy. Inhale up. Exhale, squeeze the inner thighs together. Heel to heel. Good. Keep thinking about length the whole time you're doing this. So not only in the working leg but also here.
And another nice cue keep going is I'll say push me away with your heel. Because when someone's working on that top leg, they tend to forget about the bottom leg and the core as well. Good. Yep. And then of course you can always come around the side and you can use your body to keep them exactly where they need to be. That's one trick. Or you can be in front as I showed you. Okay. So we're just gonna do two more.
Keep deepening the ABS. People will always forget about that. And then on this next transition, yeah, we're going to go into bicycle. So you're going to take the leg forward. I want you to see where my hand goes. Knee comes to the knee. You stay there for one moment. You're going to scoot around and you're going to stretch the leg back.
You okay? You feel like you're slipping a little bit? Good. I need to stop just one more time and I want to take it from the pull-downs into the bicycle. Okay. So from here we're going to go into the bicycle. I'm going to come around and I'm going to teach it from behind. So hand on the hip. You're going to take the leg forward, you're going to bend the knee. I'm tracking that leg for her.
And then I'm going to guide the leg back. Cause again, it's the first time on this side, so I don't even know how this leg is going to react. So heel to heel, we take the leg forward, we bend the knee, there's that little shelf like position. And on this one I'm really gonna Hang. How's that feels? Nice. Good. Take the leg, heel to heel, take it forward, bend the knee. Good. And reach it back. Nice. And I kind of get a stretch to take it front. One more time. Bend the knee. Good. And reach it back.
So this is one of the few Cadillac exercises where you actually do hands on. You can do it almost every time for the beginner. Reverse. Take it back, bend the knee. Good. So hand under the knee, good knee comes to the elbow, foot reaches forward. And let's do that again. Take it back, bend the knee, take a look at this and coming forward. And he comes to the elbow, foot to the nose. And I'm in a really good position here to externally rotate the leg for her with her. And again, take it back, bend the knee. Good. And bringing the leg through. So from here, really stretch that leg and externally rotate it in the hip socket more and pull the ABS in. Take it back, bend the knee.
Good. Pull it all the way through. You stay there. I scoot around, she stretches the leg. And here's this nice little stretch. So I'm taking my thumb inside and I'm almost moving the flesh back and I'm externally rotating the leg in the hip socket. And then I'm leaning in and she's breathing and smiling. Good. And while we're doing that, stretch that bottom leg and flex the foot changes the stretch. Yeah.
Good. So from here, the other one, we flex the foot, so now you can see it from the front. So I'm going to take my hands behind and she's going to take a deep breath in and exhale. I'm going to tell her to press her heel into me and actually feels really good to the teacher too to me. So it's double duty. It's a little intestinal and abdominal massage piles would have liked it. Take a deep breath in and exhale. Good.
And if someone's going, oh wow. Which they shouldn't do. They'll feel the stretch in a big way. You can also ease up a little bit, but usually it feels great. So from here the foot's in a perfect position to remove the strap. So we are now gonna transition from the sidelight springs series. We're going to move on to the mermaid.
So we're going to the entirely opposite end of the Cadillac and what we have added as one red spring to the top. And I am going to get the long box from the reformer, which Amy is going to use for her feet. Okay. So what we need to do first is to see the measurement of where you are. So scoot over to your left and stretch your arm out long. Good. And just have the palm of the hand with the thumb to connect it to the other fingers and your fingers reaching long and take this arm out to the side. Good.
And just have the palm like that. Yeah. And can you just do one for me and press down and see how we do? I feel like a good measurement for you. Okay, good. So what I want to explain to everybody at home is that when I asked her, is that a good measurement for you? If it weren't, can you scoot in a little bit and show people if it weren't and she pushed down, you're very creative misbehavior. Can I say so her shoulder would look very awkward and uncomfortable and would be clearly visual to you sitting behind her. Yeah.
So you want to move over to your left a little bit. [inaudible] and she still has room on the box, so I really don't have to adjust that. Okay, so just to start, you're going to stretch your left arm out to the side. And as the teacher, I already want to go in behind her occiput, her upper back or neck and lift her spine tall. Okay. And this arm, the right arm is reaching in front in her periphery. Okay. So it's not behind her. So from here, squeezing your knees together, you're going to breathe in and as you exhale you're going to press the bar down and lift tall. You're not going to even bend yet. You're going to hold it. Hold it. Hold it. And then you're going to release it up with control. Okay.
And again, press down, squeeze your inner thighs and lift, lift, lift and release. And I have a very light touch on this bar for safety reasons. So she's going to press down as she squeezes the inner thighs and she grows taller. And I might put my hand on her head and say, lift into my hand and release. Now from here the arm comes up to the ear and I'll show you this. Hands on approach. So arm even hiring me if you can, and I'm going to take this hand and I'm going to pull down so that her shoulder feels that cue. So from here you're going to breathe in and as you exhale you're going to side bend over. And my hand is then going to switch to this hip only to there.
And then you're going to inhale, lift the bar back up and really reach through the fingers. Inhale here again. Exhale, press the bar down and then length into the side. Good. And what I'd like you to do, inhale up. Yep. Is increase the stretch this time. So you're going to press down, I'm going to come up and I'm going to lengthen to that hip and I'm pulling her to the side. Inhale coming up. And let's do that again. Inhale here. Exhale the heel of the hand on her hip. Pull those ribs in.
Yeah. So I can cue her from this position too. And then inhaling up, squeeze those knees together. Should we do one more time? Breathe in, exhale and reach. And I'm gonna let her reach and I'm gonna say, pull the ribs into my hand. Keep reaching longer, shoulders down. Nice. And then inhale up really tall. Good. And you can release the bar and let's turn around. So you know, this is a beginner exercise. Um, it's listed as a beginner, but I have always considered this to be pretty demanding. Um, and it's also nice to think about what the uses are for the mermaid. So if someone has scoliosis, if you're working with someone who does a specific sport, tennis, Golf, you really can see which side is stronger and which is weaker. Okay. So this is a different position for the teacher to start.
And I'm just going to scoot this under a little bit. Okay. And let's just measure and see where we are. Yeah, how has that feels? Good. So as soon as I can see where she is, I might have you move in a drop that way. How's that? Yup. Okay. So from here I'm going to come back and we're going to start a new, so you can take a look at her spine and really see where she is.
She's gonna Inhale here as she exhales, she presses the bar down and she lifts up really tall. She inhales up and exhale presses down and lifts and I might take this other hand and really stretch the fingertips for her. Squeeze those knees together. I caught you in the hail lift. Exhale, squeeze in, grow tall. Good. One more time. Breathing in. Exhale, squeeze. And now that I know that she has the bar, I might use both hands to lift her up.
Then this arm comes up to the ear. I grab hold of the Bar, we breathe in together, exhale, and she side bends and I don't let her go too far here. Inhale, she comes back up, exhale, and she reaches. Inhale, lifting up, exhale, going over. So just getting her acclimated and making sure the shoulder is where it needs to be. And then from here we're going to go a little bit deeper. Inhale and exhale. So you can see, I kind of changed my grip a little bit. Inhale up and exhale over. Good. We're going to do one more, Amy, and I'm going to come up here, breathing in and exhale going over. Nice. Inhale up. Actually let's do one more time.
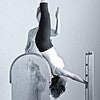
Deep breath in and exhale. So when I'm here, everybody, I'm pushing down into her at her hip and I'm pulling up an out with her wrist, shoulder down, ribs in, breathe in. Nice. I have the bar and you can release it. Beautiful. So one of my favorite hands-on moments is the push through. You're going to have your hands up on the top, have your thumbs around, straighten your arms, flex your feet and lift up nice and tall. So from here she's going to take a deep breath in and as you exhale you're going to round the spine down. Good Navel to spine, see shape and then you're going to push the bar through.
Drop your headway. Nice. Good. And I want to make sure that we talk about the feet on this next rep. So breathe in here. Exhale, roll back, deepening the ABS as you go. Good. And lift the arms up nice and high. So before she goes again, I just want to talk about the feet. When you set someone up in this position, you want to make sure that they understand that as the bar goes through the feet turnout slightly to avoid the bar going through. Okay, that's really, really important. Lifting up tall, long, straight elbows, long rest.
So here's that. Another the wrist guard again that hold that you saw earlier. And I also like to take my hands right underneath the tray where the ear is right underneath that little notch and I left gently take a deep breath in and I spread the shoulders down. Exhale, we pull back into the ABS and then from here I take one arm across and I help to guide her through. Drop your headway. Good. Take a deep breath in here and then exhale, she pulls back, deepening the ABS. And I just want to take this moment to let you see what I'm doing. I'm kind of spreading the traps down and out.
And then I'm going to do this funky little thing with my thumbs and to help to guide her up with her arms. Lift your chin and your chest. Good. So it's here and here she breathes in. And I also say lift up off my fingers. Exhale, roll back. Good. Now here's where I make it a little more challenging. So I'm going to tell you to push that bar through, deepen your abs, push it through. So she'll tell you that it got much harder just now, right? Take a deep breath, then exhale. And we give her a little massage going forward.
So see if you can deepen the abs into my hand a little bit more here. Stay there. Inhale here, exhale, and now roll back. Now fight me. Don't let me pull you. So I'm pulling and she's continuing to press forward. Keep deepening back, keep coming. And there's the same hold with the thumb. She lifts her eyes, Chin and chest.
Good. And one more time. Breathe in. Exhale and pull back. So when it gets really hard, Amy, I want you to soften your legs, deepen your abs more and now push Hala more, more and more and more and more. Yeah. So you see how the push through actually becomes more than just a beginner exercise. Cause Amy is very advanced and accomplished. So on a scale from one to 10 how hard was that? No, she doesn't want to tell you. Take a deep breath in, exhale and roll back. So you're fighting me as I pull you back.
You get that trap spread and then you go underneath and you left. Good. And from here she stays. Do not let me push you. And then a little compression on the arms if Voila. So we are going from the push through into the tower. Yep.
And I'm recruiting Amy's help to get that little safety nylon strap down. And while she's doing that, I'm going to chat with you. So what this little demo was about really was giving you a sampling of mostly beginner with a few intermediate exercises thrown in, um, some hands on techniques, some queuing, but also to show you that even in a body that is as accomplished as Amy, that you can still really get incredible benefits and really feel challenged from the work.
Okay. Tower. So we're going to take one spring from the bottom and Amy is going to carefully get under. So this is for the intermediate exercise where I want to just say, so she knows what she's doing. She got under carefully, she's going to take her hands to the polls on the outside. And this is as we like to say in the good old days of the guillotine set up. Okay. So it's really over the throat and she's going to stretch her arms even straighter. And then what I'm going to do is I'm going to help you lift the bar and your feet are going to come into tripod. So hands here, we're going to push up together and feet come into the center and the hands go back around to the bars. Good. And just release the legs down.
Nice. So from here what we're going to do is she's going to straighten her legs up. She's going to bend the knees into the chest. Good. She's going to breathe in, she's going to bend the knees in. Good. Inhale here. Exhale as you stretch. Good. And let's do one more and stretch. Good.
So now the legs stay straight. The back is flat, just the feet. And I'm using this same clamp so the feet go up. Relevant and flex. She points up and she flexes. Good point again, flex. Good. From here, she's going to point the feet, she's going to use the powerhouse and she's going to roll all the way up to the top. Good.
And my hand is going to come under the small of her back and my hand is here under the bar for safety. So from here you're going to bend the knees to the face. Do not put any weight in my hand. Inhale here. Exhale, push away. One bend and push to bend and push three. Really stretch those legs. Now from here, reaching through the toes.
You're going to roll down bone by bone. So on the first one, I'm just going to watch her. I'm not gonna do anything much. Keep stretching those arms. Keep lengthening your own body down. Good. And then from here she bends the knees. Then we start the whole setup again. Inhale here. Exhale. Just straighten the legs. So I'm breaking it down fully for everybody. Pressing it up, bend the knees in. Exhale, stretch. Let's do one more time. Inhale, bend, exhale, stretch. The legs stay. Now the feet go up.
Point and flex pointing up and flex. And while you're doing that, Amy, squeezing your inner thighs and rotating the legs. Good. From here, breathe in. Exhale, roll all the way up onto the shoulders and go even higher. This time. If you can. That's it. Good. Bend the knees. Inhale here. Exhale. Push the ceiling away. Inhale, bend.
Exhale, pushing up. One more time. Bend the knees, push up, and from here take another deep breath in. And then exhale, start to roll down through the spine. So here comes the yummy hands on. So I do a little bit of rocking to pull her down. And then she bent the knees into the chest and I flipped my rests. And what I'm doing is I'm pulling down and N. Okay, good. And we're going to do one more set to show one more hands on approach.
So pressing up and bending in. Exhale, press, good. Bend the knees, press and stay. Now the feet we point up and we flex and I might come in here because people tend to separate their heels. So it's a nice little reminder. Good, we stay and now you go higher still this time. So all the way up, all the way up, all the way up. Go, go, go, go, go, go, go, go, go. And now bend the knees, breathe in. Yeah. So she's really supporting her head. And her neck with her shoulders, bending in and her next, getting a nice little stretch, safe stretch, bend then and press good. So really lengthened. Oppositionally breathe in. And then exhale, roll down bone by bone. Good.
And I kind of feel where she is. I don't pull too hard. Now I start to pull and then I come up here, she bends her knees, she's excited cause she knows what's coming. So I'm pulling up in my body and I'm basically ironing her hamstrings down and it feels like heaven. She said, and it's fun for the teacher too. Okay, so let's get you out of this safely. So hands up here, you really want to encourage autonomy and your clients, then the bar comes down. Good. We carefully come out chest expansion in all honesty, I meant to do earlier in this Cadillac workout, but I could not close this little episode without showing it because it happens to be one of the most useful exercises that you can do. Um, and this is an exercise that bridges the gap from beginner to intermediate. So all of you at home who are teaching the down stretch and having trouble with it on the reformer. This is my little trick that I want to share with you. Okay.
So Amy's going to come on her knees. She's going to measure one arms length away and she's going to hold onto the bar. Okay. So just like the other exercises that you watched us demonstrate today, I let her really move on the first one or two. So just like breathing, you're going to inhale and pull the bar down to your hips. Let's see, pull down, hold and hold and hold. Exhale and release with control. Good. And again, inhale, pull down and back. Hold, hold, hold and release. Good. So let's take some of the things we've learned in today's session.
So where's that little risk guard hold? It comes in handy in a few different spots, right? So I'd like to see her length and through her wrist a little bit more. I want her to pull her shoulders down and back. And I'm going to ask her to do it wrong this time in the mid section.
So I want you to arch. Okay. So now we've fixed her arms, but now I'm going to make her go wonky and her midsection. So in helpful down. Yeah, that's good. Hold, hold, hold, exhale and reach. So more often than not, that's what we see. So what do you do? Tonna okay, so this hand pulls up, pubic on up. This hand has a downward sweep. Okay. So what you want to do, Amy, is you want to draw the pubic bone up and under as you lengthen through the tail. Okay? And then I might come up here and say, pull the shoulders back as well. Okay. Are we ready? Inhale, pull down. Pull that bar down to the floor. Hold, hold, hold. Better. Exhale and reach those arms up tall.
And I'm still holding her a little bit. Good. Inhale, pull the knuckles down to the mat. Open the chest and shoulders. Hold, hold, hold. Exhale. And reach the bar up. Keep lengthening this up more. Last time. Inhale, pull the bar down, crack a walnut with your wings. Keep pressing down to the mat. Exhale, release. And there you have it. Thank you. Beautiful job. Thank you to Amy and thank you all at home for joining us today.
Mention
 |
Jennifer Kries (Teacher) |
 |
Magdalena O |
 |
Ardy C |
|
|
Carole P |
|
|
Rachelle F |
 |
Janine R |
 |
Silke L |
 |
Tamara G |
 |
Hannah M |
Comments

Unfortunately the video stops at a certain point, - after about 40 minutes, and I can´t get over that! I already have it on medium and it is fully "loaded" till the end. What can I do?
Thank you,
Silke, Bremen, Germany

Silke~ I would recommend restarting your computer and then trying to watch this in Auto-Detect. There you could fast-forward the class to the point where it stopped for you and hopefully then it would play all the way through. Please email support@pilatesanytime.com if you continue to have problems.

Warmest regards to you,
Jennifer :)


You need to be a subscriber to post a comment.
Please Log In or Create an Account to start your free trial.
