Description
About This Video
Transcript
Read Full Transcript
Hi, I'm Shelly Power from Polestar Pilates and very happy to be here at Pilates Anytime talking about how we can modify and really understand stenosis. Stenosis is a spinal pathology that happens as we age, and really stenosis, you can have stenosis anywhere, it's just really a narrowing of some sort of a passageway. And so this happens in the spine, it could happen in the central canal, it could happen as the nerves exit, and that sounds like a lot of sciencey stuff but what it means is it gets uncomfortable to do things like extension, like back bending. And there's a lot of times in a Pilates class where we might go into that type of a position either on purpose because it's part of the movement or what I'm also really interested in is when it happens and that wasn't the intention, so how do we keep ourselves from going into those positions? And you've probably seen people that have stenosis, it happens as we age, it's a normal occurrence, and it's the telltale just a little bit tucking the pelvis under and walking like this.
And so you want to get up tall but what happens is as we age we lose mobility sometimes because we're not practicing and moving enough, and the hips and the spine get in this kind of rounded shape and somebody says oh stand up, you're slouched. And people do that. And the arch, right at the low back, that's where that often occurs. So stenosis occurs quite often at the low back and sometimes at the neck. So we're gonna do a class today, and you may not stick with this class forever.
Do it and see how it feels. It's about exploration but it's also to give you information so you can go and do any class and feel really comfortable about modifying the exercises so they fit really good for your body even if the teacher doesn't say so. So you might even take a very advanced class and know exactly what to do for your body so you can get through and feel great at the end, alright? You guys ready? Okay, so please lie down on your backs.
Just stretch out on your mats for a moment. And as always, we check to see what's the head position. I'm just gonna look and see, everybody looks good here but if you ever feel like your head is kind of falling over backwards, get a towel or a cushion or something to put behind your head. So let's bring the knees into the chest and you're gonna put your hands up on top of your knees and pull your knees in toward you a little bit. And in this position, this is often a rest position, but it's also a really nice way as you pull your knees in to get your lower back to lengthen.
And sometimes in Pilates class we talk about tucking the pelvis under, that's not really useful, it just doesn't set the body up well to move. So if we think about lengthening, that's gonna be a better starting place. So you're gonna use your arms a lot, have one hand on each knee, and just start to do some knee or hip circles. So you're gonna bring your knees in and around, you can let them separate as you go. So you're gonna actually stir them in and around this way.
And so as you're going, it'll feel like you want to do a lot with your legs but use your arms. So make sure your arms are supporting your knees as you're going around. And you can feel how as you pull your knees in closer your back lengthens a little bit more. And if you were to let your knees go away from you more, more and more and more and more, possibly your back might arch. Now for a lot of people that's fine, you can switch and go the other direction now.
But if you have an extension sensitivity you might want to limit that. So you just test and see how far you can go as we're in that position. And so this is a good way to get the spine to lengthen without a lot of force. Alright, as you finish now go ahead and put one foot down at a time. And just notice how your back feels on the mat and this is where again, in a class you might be asked to be in a neutral position.
Right, the word neutral, which has a little bit of an arch at the low back so if you need to, lengthen the back, not tucking but lengthen the back to have a comfortable position. Let's go right into bridging. And bridging, you're gonna start to tilt the pelvis a little bit and roll up. Bridging is a great exercise to work on spine mobility. So start to roll down from the upper shoulder area and all the way down.
And what to be careful for again is making sure that the back doesn't arch too much. So as you start to roll up, leave the back of your ribs down on the mat for a little while, good. And then we're aiming for a long diagonal line all the way out through the body. Beautiful, and then roll back down. Good, what you want to be careful of is lifting the pelvis up a little bit, doing the tilt, and then letting the ribs lift up too much, that would be something where again, you put your lower back in a little bit of an arched position and go long as you come up.
And then take a long exhale as you roll back down, working to improve our mobility. The better the spine moves and the better the hips move, the better our backs feel, that's for everybody. So as you finish up on your last one, come all the way back down to the starting position. You guys are doing a great job. And pause when you get down there.
And let's go right into a little bit of femur arcs or leg arcs, and we're gonna do a little different spin on this. So a lot of times the focus is on lifting the leg up, which you have to do. But we're gonna focus on the lowering part and a different feeling. So let's just start by taking on leg to table top and then putting it down and taking the other leg, that's it. And you can start and stop on the floor, great.
And again, you're paying attention for that moment when your leg lifts that possibly your back might arch a little bit, sometimes that happens, let your back arch so that I can see, yeah. And we want to just keep a lengthened spine as you're going up and down, that's it. And again, this is about building awareness, so you need to notice when does this happen that my back arches a little bit or not? And you guys are doing a wonderful job. So these are great to work on our awareness and prove our alignment.
Now leave one leg up when you lift, leave one leg up, and now let the other leg come up. And here's where we're gonna put in this little different bit of information. So now we're gonna take one leg down toward the floor and back up. Good, and again you're noticing when do I need to stop? So you might not get your foot all the way to the floor and that's okay, or it might take you several repetitions, coming down and back up, great.
Now I want you to just try on a little different idea. Instead of keeping a leg feeling like you're lifting it up, feel like you're pushing it down. So when you go, I'm gonna just give you my hand, push down into my hand a little bit and then back up, right. And if you feel like you're pushing against something either from your foot or you could feel it from the back of your leg, sometimes that helps the body kind of reorganize itself and it makes it easier. You feel a difference?
Yeah, a little bit of resistance, as if there was a stack of pillows or something to push your foot into. Alright, and then let that go and put your feet back down. Beautiful, so now let's combine that with the bridge. We'll just do a couple repetitions. Roll up into your bridge.
Checking again that you're in that long diagonal line, beautiful, let your ribs come down just a tiny bit, that's great. So now let's do our leg arc. So now we are focusing on picking the leg up. But at the other leg, you're pushing down. And just do twice on each side you can alternate or you can do the same side, and just explore that, great.
So you have one leg that's lifting, one leg that's pushing, you got it. When you've done a couple on each side bring both feet down and roll all the way back down to your starting position. Super, alright, let's go right into chest lift. So interlace your hands behind your head, we're gonna change now and roll up from the top of the body. Interlace fully and really let your head rest in your hands, that's important now so that we don't stress the neck.
So keep the head pressing back and as you start to exhale you're just gonna do a small little curl up. Good, and then pause there for a moment. Bring your elbows forward, that's right, great. Reach for the sides or the backs of your thighs. Now, instead of feeling like you're lifting up, curl deeper into the curve, that's right, beautiful.
Hold that position, let your hands come back up, support your head, and roll down slowly. Good, so again we're working into flection or a round position, but as we roll back down we're also undoing that. So start to curl up again, just a small curl. Good, reach to your legs and when you exhale go deeper, not necessarily higher, but deeper. Beautiful, let go with the arms and reach back up to support the head, and roll down slowly.
We're gonna do that one more time, inhaling just a little bit, exhale to curl, inhale to reach for your legs, now use your arms to help you really hold on, great. Let your arms go back up, support the back of the head, and roll yourself down, beautiful. You can also do that up in table top with your legs up, which would just change the challenge just a little bit. So let's go up now into an assisted roll up. So bring your thighs back in toward you like we started in the beginning, but this time you're gonna take your hands behind your thighs.
You got it. So now we're gonna start to use the legs to press into the hands, nod your head so do your same little chest lift and then roll yourself up to sitting. Good, you got it. Great, now leave your feet down for a moment, hold on with your legs and let yourself arch way up here in your upper chest. See if you can do it without arching in your low back.
That's it. And then begin to roll back down, you're gonna leave your feet on the floor. And let your feet kind of drag and you can keep holding onto your legs, your legs will come in with you but they kind of drag in towards you, that's great. So again, exhaling to roll up. Good, and as you sit tall, right, one of the ways you can help to not arch your low back is just to stay behind your sip bones a little bit and then lift your chest just a bit, that's it.
And then begin to roll back again, so keep holding onto your legs. Let your feet stay down, and then they're just gonna drag on the ground until you fold them in. Beautiful, that's it, let's do that one more time. Rolling up. Good, do a little tiny chest lift at the top, super.
And then just sit and rest there for a moment and cross your legs. So I brought in a box, so go ahead and take a seat up on that, and that'll make the hold position a little bit more comfortable. And feel free to do that ever if you feel like you're in a sitting position that just doesn't feel comfortable, sit up on something, even sit in a chair would be fine. So we're gonna do a little bit of mermaid just staying in the sitting position stretching over from side to side, so let's all go this direction first toward the audience, going up and over and take your hand to the back of your head and go into your stretch there. And again, your hand is there so your head can press backward just a little bit, good.
And then change to the other side. Take the arms up and over. Good, and what you want to be aware of here again is your body position. So you wouldn't want to, and you can keep switching from side to side, you wouldn't want to let the ribs move too far forward because that again will have a little bit of arch in your back. So just feel like if you were sitting against the wall, your ribs would be touching the wall as you're changing sides.
And again. And nice to have just a very easy, gentle exhale as you're going into your stretch, and we're really mobilizing the ribs and the spine in the side stretch or mermaid exercise. So when you go over this time, pause. Good, keep pressing the head back into the hands and really hold on there, and then let's rotate forward and around to stretch the spine. And rotate back to face the front and we'll do it one more time.
Rotate forwards, so we're adding a spiral motion. And come back up. Change to the other side. Head presses back into the hands a little bit and then rotate around, so we're mobilizing all of the ribs, face the front, bring your ribs back just a little bit and rotate, beautiful. And come back up, very nice, and then come back all the way to sit, great.
So let's take the box away, you can just set it to the side. Good. And begin to scoot a little bit forward on your mats and we'll roll back down. Good, you can do either your assisted roll down or if you want to do a full roll down with your arms and legs outstretched. You got it.
Great. Alright, so we're gonna go into the book opening, and the book opening is a very nice exercise to get more rotation. So we started to rotate a little bit, now we're gonna keep working on that. So let's all roll forward again, so onto your sides. Yep, just roll onto your side just to face forward, you got it.
Bend your knees and then you have a couple options for your head. Traditionally it's down with the arms outstretched, but sometimes that leaves the head kind of off to the side a little bit. So what you might want to do is put your hand behind your head so your arm can support you. That would be the bottom arm, the bottom arm, yeah, there. Or if you wanted to stack up some cushions or towels you could also put your head on that.
So take your top arm and just reach it a little bit out in front of you. And this is our starting position. So if you need to, you can continue to bring your knees closer to your chest and that again, that motion is going to lengthen your spine a little bit so that's gonna keep your from arching, so you do that as you feel you need to. Reach your top arm up to the ceiling and then pause there. Now we're gonna roll the body backward and then open the chest up and back.
Good, and this is where we really want to feel the sense of opposition stretching. And then come back up, and come back to the starting position. Good, come back up to the ceiling. Now another thing, this isn't a shoulder class but we should probably pay attention to the shoulder. As you open, keep the feeling of the front of your shoulder flush with your arm and your body.
So don't just let your arm go out to the side too much. And then back up, and to the front one more time. And reach back up, and again the importance of this, it doesn't seem like very interesting movement, it feels nice, it's a stretch. But the whole point of this is to improve our mobility in our upper back and all the ribs in the vertebra and then come back up. Very good, roll onto your backs and roll onto the other side.
Let's make sure we're even, I don't want to walk around in a circle. Alright, so support your head as you wish, arm out in front, and again remember, if you don't bend your knees up very far, there is always the chance that your back might arch a little bit, which is fine, it's okay, just remember though to bring your knees up to avoid that. So let's reach the arms up to the ceiling, pause there for a moment, and then feel like you're moving your whole body, like you're gonna stretch your chest up to the ceiling. Good. And then back up, you got it.
It's a spiral motion. We'll do it two more times, going up to the sky and open, and it doesn't matter how far you go, it just matters that you keep the body in this long line. Come back up, and we'll do it one more time. So the goal is definitely not to just get your hand to the floor, we really want to spiral through the body, and open. That's it, that's great, very nice.
And come back, finish on your side, excellent. So now roll on to your backs again and we're gonna go into single leg stretch. So bring your knees, bend your knees in, and take your hands up on top of your knees for a moment, and just hold both knees for the second. Use your knees to help you go into your chest lift again, and then walk your spine around a little bit, it always feel kind of funny, but kind of release the back of your t-shirt or your skin there, that's it. You're gonna hold on with your right hand and right leg, so you're gonna keep them there, yep, yep.
And you can stay rolled up, yeah. And you're gonna just stretch your left arm and leg out, it's like you're doing half the hundred. So we're not doing the single leg stretch proper yet, we're just gonna do a practice of it. You got it, good. And then come back in.
And the reason I do this is because one of the things that happens is when you take your leg down in a class, maybe leg circles or the hundred or any of those things, sometimes your back arches. So when you hold on to your leg and then you reach the other side, remember that feeling of pushing down we did earlier with the femur arcs or the leg arcs. Push your leg down towards the floor as if there was something under it, yeah good. Try that one more time on each side. So again, a little untraditional single leg stretch, but that pressing down gets the body to support itself, beautiful.
And then you don't have that risk of arching your back. So this is a little tip that you can use any time you're doing something with a straight leg lower. Good, alright. Come back in, roll down for a second, I didn't mean to keep you up there quite so long. It is an endurance Pilates is an endurance.
It's an endurance exercise. Alright, so let's really do single leg stretch now with that feeling. So you can take your hands as you start to roll up to your right leg, right hand down by your ankle. So roll on up, alright. Let's get everybody up and then we can start together.
So here we go, switching once and change, good. And change. Now can you still, every time you lower your leg have that feeling of pushing down? Reach, reach, two more sets, that's great, and you can exhale each time you go. Good, and then pull the knees in and roll down.
Very nice. Let's try that on with the hundred. And I say hundred and people usually go oh, the hundred, I was hoping you were gonna forget that one in this class, but this is actually again a really important exercise. The hundred itself is great for people with stenosis unless you don't hold the position right and your back arches. So that's what we're gonna practice because that's really the nitty gritty of it, okay?
So you can place your legs anywhere you want, they could go table top or you could practice the legs straight and lowering. The other thing is, you all have a band by you and you can try this at home if you want, you can try it here if you want or not. If you put the band around your feet, sometimes that helps support the whole body. So if you want to try that, you can. Otherwise, let's go up into our hundred.
So begin your roll up, use your legs to help you kind of wiggle around a little bit, get the arms out, good. So our main goal is to keep the low back touching the mat and here we go. Inhale two, three, four, five, out two, three, four, five. Good. That's great.
Excellent, and now as you're going with this, breathing in and breathing out, if you did notice that your back was arching, just raise your legs a little bit or bend them. Do what you need to do to keep that length and feeling of the back that we had from the whole start of the class. Beautiful, let's just take one more set, how does it feel with the band? It's okay, helping you out a little bit? Alright, and bend your knees in and take a rest.
Beautiful, alright. Roll yourselves up to sitting, and let's go into the spine stretch forward. So again, you might want to grab the box. And again, it's important to just build the spine up so that when you start any of these seated exercises, the saw, the spine twist, the spine stretch, we wouldn't want to start in a slouchy position, because again, that doesn't put the spine in its best alignment. So we want to keep that upright posture, but what you are gonna pay attention to is sitting like this.
Alright, so we don't want to let the back arch, so you may have to position yourselves a little differently to keep that comfortable. So stretch your arms our in front of you. Now we use the wall image before, so if you were sitting up against a wall, could you roll away from it and then roll back toward it? So we're gonna have that feeling. So begin with a little nod of your head, just a tiny one, and then begin to stretch forward and see how far you can go keeping your pelvis vertical.
So can you keep your pelvis kind of in place, not moving? And then you're gonna roll back up and here's where the wall comes in, slow down a little bit. That's okay, and there's the wall, right. So now peel away from the wall, great. So again, we're improving our spine mobility in positions that are really safe and really comfortable.
Roll back up against the wall. Beautiful, one more time. And stretch forward. Good, so it's important to go into the movement, but it's also important how you come out of the movement. So again, that rolling up and stacking up to sit tall, all the way up, great.
And let your arms rest. Swing your legs around to the side, you can again move the box jus toff to the side. Alright, we're gonna come onto our hands and knees in quadruped. Now very common movement here is to go into the cat and horse or cat and cow, it has a lot of different names. But the arching and the rounding of the spine.
So when you go into the round position, this is great, you don't have to modify this at all. So you're gonna round your spine. I do want you to keep the feeling of it being really long, so that's important, we don't want to crunch the spine. And then come back out to what I call, it's like the table, the table position that in between position. Now teachers will often come around and they'll adjust the pelvis so you have the normal curve in your low back and lift your head up a little bit.
Yeah, so you're just looking down, just on the mat in front of you, so tilt your head. Beautiful, that's it. So again, you're gonna have to make a decision as to does this position feel okay or do you want to lengthen the spine just a little bit? So that you're gonna play around with on your own bodies, yeah, that looks great. And some of you may find that you can have that little tiny bit of an arch and it feels fine, and others may not, alright?
So then, if you were gonna arch the upper back, you can try to arch it without moving your lower back. Uh huh, and a little less through the head and let's do more like you're stretching your breast bone. Right, that's it. And then round your whole spine again. Good, and then reach long, and then if you can try to keep the low back in place and just arch in the upper back.
It's not a very big movement, but that's okay, that's what we want, and then let that go. Come back to your center position. So again, your finding your center position that feels comfortable. Now you're gonna stretch one foot back behind you but leave it on the floor, that's it. I don't have glasses, I should have had glasses of water to put right here.
And then bring it back in. And then go on the other side, the challenge really is to stay dry, not spilling the water off to the side, good. One more time on each side. So now instead of working on our spine mobility, we're working on our hip mobility. So this is really important to be able to lengthen the leg or what we call extend the hip and not arch the back, that's it.
Let's do one more on each side. So it doesn't feel like much until your teacher comes around and does place a cup of water on the back of your pelvis and then it's like woo, it has a whole new meaning. Alright, and when you've got both sides you can sit back in child's pose and just let yourself stretch back, got it. Ways to spice up your mat class. Alright, make your way all the way down onto your front, laying face down all the way.
Alright, so you may notice if you have some symptoms of stenosis or you're not happy in extension, that lying down like this is not comfortable, so maybe you even didn't do it yet. And that's okay. What you can do is everybody has a towel, I'll just grab them here 'cause they're kind of at the back. And we're gonna experiment with, I've got yours. We're gonna experiment with using a towel under the pelvis.
And so again, I don't know how much is the right height for you, so you're gonna just experiment with placing the towel, you can fold it longways if it feels like it's too bulky, and just place it kind of at your lower abdomen, top of your pelvis with the intention of again, lengthening the low back just a little bit, okay. So you put that where you feel like it doesn't allow your back to arch. And it's going to feel a little funny, it might feel strange, just keep moving it around and I'll even show you a different modification later if this doesn't feel comfortable at all. Alright, so from here we're gonna do a little bit of prone press up, and it's what we started to do on hands and knees, so you're gonna bend your elbows and put your hands by your rib cage almost like you're gonna do a pushup, you got it. And then really important, before you start the movement is to hover your head off the map, so just lift your head a tiny bit, that's it.
That's right. And now we're just gonna do a tiny movement of the upper back, so you're gonna start looking a little forward on your mat and then come back down. Now you probably can come up really high, but that's not the point of it. The point is to do movement in this upper part of your back without changing the shape of your lower back. So if you notice that, everybody stay in the start position just for a second, notice the whole front of your pelvis on the mat, so if you have your bikini on or your Speedo, we've got both, you want to keep that whole area flat on the mat and the front of your pelvis.
So don't let that change as you do your next repetition, that's it. Beautiful, very nice. One more, and so your movement may not be this big, it may be this big. You just have to start to play around with it and feel comfortable, alright, playing with this movement. Beautiful, alright and take a break from that.
You can either sit back in child's pose or just kind of wiggle around a little bit. Alright, so now come up from there and we're gonna come on to your knees. Crack crack crack. We're all human, we all have the cracking knee. Alright, so you can either kneel on your knees like this or you can go into high kneeling all the way up, it's your choice.
Our goal again is to align the spine, lengthen the spine as you need. But up on top of yourself, so your rib cage is sitting on top of your pelvis and your head is on top of your shoulders and your ribs, that's it. That's great, good. So we're gonna do the dart, but we're gonna do it in kneeling instead. So if you have ever a time where lying down flat is just not comfortable, come up onto your knees.
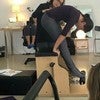
That's another option, okay? So palms are facing back, wide shoulders, and then just feel like your whole body is growing longer in both directions. So push the ground down with your knees, grow tall, and then remember to bring your ribs back, so bring your ribs back into my hand, more more more more more, yep, without leaning on me so that these front guys come down a little bit. There you go, that's right. So now you're gonna slowly, keeping that position, it's like chest expansion, press back and forward, and how far can you press back without, woops, letting your body position change?
So keep the body position as you press back. Good, this is also a really good option if we were to speed it up a little bit it becomes the hundred, and this is another option for doing the hundred if you're not comfortable lying on either side, right? You can go into that movement. Good, so pressing back, and again that sense of length. So what if you could hover?
Can you hover off of your knees? I always offer free class for anybody that can levitate, yeah? That's the feeling. Everybody's going for it, come on, come on. Alright good, and let that go.
Very good. So tuck your toes under and sit back on your feet so you're just gonna be in this kind of low squat position. And we're gonna roll up to standing, so as you feel comfortable you can keep your hands down on the floor, you can also place your hands on the front of your shins and just stand up but stay forward. I'm gonna stand up but you guys stay down, that's it. And if this is ever too much you can always prop your hands either on your thighs or on your shins and hold yourself there in a position that feels comfortable.
So we did the seated spine stretch reaching forward, now we're gonna do it all the way up to standing. We're gonna start at the pelvis. So the pelvis is gonna start to roll around the tops of your thigh bones and you're gonna slowly come up and as you're about half way, so stop for a second. Straighten your legs all the way and push the ground down as you roll up. That's it.
Now can you find that same feeling as if you were standing against the wall with a lengthened spine? Beautiful. And start to nod your head a tiny bit and roll forward. Good, so as you're rolling forward, and keep the legs really straight almost like you're gonna press back against my hand here, press back, that's it. I know it feels funny.
Good, so we're working on spine mobility but also we're working on the mobility coming back up because we want to work on our standing posture. So as you come up, again push down into the ground and just like before, can you levitate when you come up to the top? Could you lift up off of your own feet? Good, great. And again, just for when you're practicing, you can even kind of look in the mirror and see this, when you get all the way to the top, does that happen, which again is gonna be uncomfortable, or can you get all the way up and have the length that you need to feel comfortable in that position?
And so the last thing we're gonna talk about is just standing posture, 'cause I often hear that it's uncomfortable when I go to a cocktail party or I have to stand at the grocery store or wherever you may be that you're having to stand around. That's often one of the signs and symptoms of stenosis is standing because our posture, sometimes we can't get out of that arched position. So you do have some options for that, so again, lengthening the spine is part of it. You can also stand with the feet a little bit wider, so not in your cocktail dress, right? It might look a little funny if you're standing around like this, but the feet a little bit wider, sometimes that's helpful.
And the sense of lifting up through your heart, right, without letting the bottom stick back so keeping the weight forward on your feet, and you could just barely disengage your heels off of the ground, that's a good position to be in. Good, well thank you everybody, I hope this is some helpful information that you can take and use in any class that you go to of how we can make the spine feel comfortable. Just because we have a certain pathology doesn't mean we can't do a Pilates class, we just have to be smart in how we organize our bodies. Thank you very much.
Mention
 |
Shelly Power (Teacher) |
 |
Cigdem A |
 |
Liliana D |
|
|
Melissa G |
 |
Sarah Edwards at Positive Pilates Solihull |
|
|
Suzanne S |
 |
Rena W |
|
|
Jenna W |
 |
Ana D |
 |
Sara A |
 |
Beverly L |
|
|
Nic C |
 |
Jacqueline D |
|
|
Veronica H |
 |
Giglia M |
 |
Lori S |
|
|
Lisa D |
 |
Lizanne B |
 |
Judy S |
Comments


You need to be a subscriber to post a comment.
Please Log In or Create an Account to start your free trial.
