Description
About This Video
Transcript
Read Full Transcript
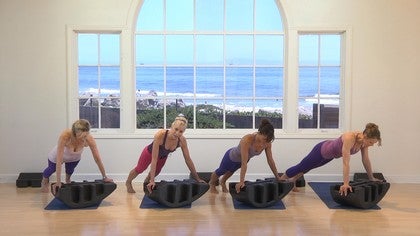
Welcome to Pawleys anytime. I'm Elizabeth Larkin and I'm here with my colleagues, Rhonda Priester, Danielle Holder and Gaye Barns. We are delighted to be with you and particularly pleased to breed the first to bring you the balanced body. Pilati is foam arc in a program that you can practice with us at home anytime. Some of these exercises will be rather restorative and other of these exercises will be very demanding.
Keep up and do it at your own pace comfortably and come back many times. Here you are standing on the step of your arc. One heel will be nestled into the well of the step and the other foot is balanced at the front of the step. You'll be noticing quite the stretch along the back of your straight leg. Place your hands at your hip joints. As you inhale, it's a slight forward bend moving your pelvis over the head of your femurs.
As you exhale, come up to vertical, bringing your hip joints forward and the light from the top of your head goes directly up. Once again. Inhaling, moving your pelvis over the head of your femurs, drawing your abdominals up towards your spine. Exhale to come up to vertical. Now change to the new foot in front. One from the heel is nestled into the back of the step and the other foot is forward. This time we'll exhale going forward. So as you exhale, you can feel all the abdominal layers drawing up to your spine and inhaling, standing high on your central axis, broad across the center of your chest. Exhaling sitting bones go wide behind you. Femurs internally, rotate a little bit.
Inhaling moving your pelvis to the highest point of your femur heads. Now both heels go back into the weld. You might feel a little as if you're standing at the top of whistler mountain about to join the US ski team buck up here, and over time you'll find that you'll be able to stand more comfortably on your central axis. Inhaling, moving your pelvis forward over the head of the femurs sitting bones go wide behind you. Exhaling, bringing your hip joints forward and up, moving your whole spine with your pelvis until you reach your central axis. Exhale to go forward. You think she could make up her mind? Well, both are beneficial when you exhale and come forward, you have more support for your abdominals. And then when you inhale, it's a little bit easier to stand high up on your hip joints. Now the next event is going to focus on your abdominals in a gentle way, so easy on the dismount and puts your step out of the way.
You won't need it for a few moments and this time you'll have your arch with the steep slope towards the corner, the front of your mat, and the gentle slope at the back. Now you're going to be lying on your back on this arch in the following way, steady the arc with your hands and slide your sitting bones until they're almost off the edge of the front of the arch and your tailbone. Your coxix will be off the edge too. So anchor your s, your pelvis at the back of the arch, and then aligning your heels up with your sitting bones. Interlace your fingers making a cradle with your hands so you can support the back of your head and the base of your skull. Now sliding your sitting bones a little further off.
Lie Back until your hands are supported by the arch and your head is nestled, cradled into your hands. Now that I have you here, what's next? Ah, rocking abdominals. Inhale, press with your heels and rock back. Moving your gaze to the ceiling and little bit behind you. Leaving your head supported by your hands. Exhale to rock forward to more of these.
Inhaling keeping your heads supported so your cervical spine is approximately neutral on the way to extension. Drawing your heels towards your sitting bones. Inhale to push back. Opening the front of your hips to the ceiling. Exhale to rock forward. Now as you rock back, lift only your left heel. Keep the sole of your left toes on the floor and then draw your sitting bones towards your heels. Now I asked you rock back, lift your right heel and you can appreciate as you rock that the, uh, your pelvic floor and the organs of your pelvis are pleasantly unweighted.
Think all that time that there you are sitting in the chair in front of the computer and the weight of the world, pressing your organs into your pelvic floor. Not so here. Rock back. Lift your heel and rock forward. Now as you rock back, lift your whole leg up, drawing your thigh towards your torso. Suspend and land in slow motion toe ball heel. As you press back, push the floor away. Bring your thigh to your torso. As you exhale, aim your bent elbows towards the ceiling.
Nod your nose downward. Roll your head, neck and shoulders up as she pushed with the soles of your feet. Send one foot off the ground. Lie Back in spine towards the direction of spine extension. Exhale to rock forward aiming your gaze towards your knees. Two more of these. Plant the sole of your foot. Create a foot, a leg aside to stand on exhaling.
And meanwhile back at the abdominals. Let's talk about them. Draw from pubic bone up underneath your chest phone and slide your chest bone towards your pubic bone. Keep your head neck and eyes up supported by your hands and we're going to gently jump from one foot to the other. Push off land, push off land. This may be easier for your neck when you keep your gaze. Aim towards your hip joints or towards your pubic bone.
Last two coming up and last one. Now push back, lift one leg up and cross zero whole thigh over the other thigh. Roll your head, neck and shoulders up as you rock down as you pushed back. Uncross this leg and place it down. Now you have options. When you rock forward, you can roll your head, neck and shoulders up, or as you like, lift up the other leg. Now you can keep your head down and cross your thigh over, leaving your head supported by your hands on the arch.
You always have options and always lease with us. You should choose the option that's more pleasing, the more comfortable for you. One more each side. Suspending and crossing one thigh over, nodding your nose downward. If you do roll up to see behind the cheekbones of your face, uncross and come down when you rock back, elbows can be wide open.
That facilitates breadth across the front of your chest as she rocked forward, nodding your nose downward, aiming your bent elbows towards the ceiling and towards each other. Now we're going to jump again with a little higher suspension, suspend and land push and land. You have options. You can jump from two feet to two feet or two feet to one foot or one foot to the other. Last two coming up. And last one done with that. As Fun as that is, it's time to move on. Slide off the arc, rescue your mic if it's gone missing.
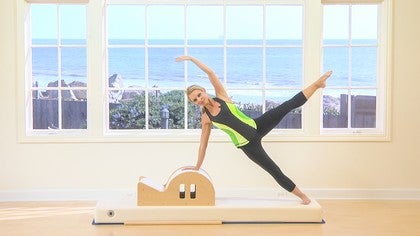
And the next event will be a forearm, uh, rocking with your forearms on the arch. So that's just so my colleagues know where we're going because they don't have to wrangle their Mike. So align your arc so that it's to the corner with the steep slope away from the camera and bring your forearm onto the arc. Now position yourself so the light from your chest bone is directly above the arc. These, this is to take good care of your shoulders because you can see that if your arms are not perpendicular, your upper arms are not perpendicular to the arc. That puts weight through your shoulder in an unstable way and if you're too close to the arc, that encourages too much of your upper shoulder muscles.
Your upper trapezius to work here are in the goldilocks position with your pelvis and spine in neutral. Now we're going to the steep slope. First it's a lateral translation and a rotation just in case anyone wants to call it that. And then a lateral transition translation and rotation. Here you are rocking over the arc, appreciating the weight shift of your entire central axis towards one knee, one form, one elbow, and then towards the other side. Now that will shade the abdominals on this, make them more working more on the side to which you are going, and then put additional abdominal effort on the other side. Now we're going to add a single knee balance, so shift and rock and hover.
V Uphill knee and then make your transition discreetly. Putting the new knee down. Stand on the steep slope side, which we can all appreciate is the more difficult the gentle slope takes you downhill and supports you there. The steep slope that requires more effort on the part of your lateral pelvic stabilizers. Once more each side, just to appreciate the nuances. Exhale to go downhill to the gentle slope and inhaling moving the lobe of your lung over to the side to help you balance there. Onward to the next side.
Spin the arch around and position your upper arms perpendicular to the ground. Give yourself a wide basis support with your knees, greater toe canter with the part we're going to the steep slope first rock and translate to that side. Keeping both knees in contact with the ground. They won't have equal pressure, however, inhaling towards the steep, slow exhaling to the gentle slope. Meanwhile, let's talk about the shoulder girdle broad across the front of your chest. Why between your shoulder blades? This time we'll add the single knee balance. Inhale to shift.
Stay over there, exhale to anchor and hover. Inhale to shift down hill. When you exhale, anchor and hover. This is the pelvis rotating around the head of the Femur so that when you lift one knee, the light from your knee cap shines directly to the ground. Just to be clear, none of us are going to a fire hydrant visit. This is not leg abduction. Been there, done that in the 80s over it.
Shift to the new side, moving your pelvis around the head of the femur asks more of your spine extensors and it's useful for gate just in case you plan to take a walk after this. Now bridging comes next. Spin your arc so that the steep slope is away from camera. That's it, and then come to lie on your back. Now when you lie on your back for bridging, you're going to Nessel your heels right up against the ribs of the arch and the souls of your toes may or may not touch the arc. It's not so important there. What's important is that the front of your heel is nestled right against the rib, the underpinnings of the arch. Now here you are in a neutral pelvis. Neutral spine. You can have your arms, palms down, palms up. Soon we'll have the arms to the ceiling, but that's the next variation. So here you are in neutral.
Inhale to prepare. As you exhale, rock the um, to the steep slope. Keeping your pelvis down. I misled. You must default. And then inhale rock to the new side. So sorry that I misled you. Ah, we're doing our rehearsal for bridging your thing. She said bridging, whereas bridging, well, there's no bridging here. This is supine and we're getting used to the rock of the arc. Here's why. That is when you put weight to the steep slope foot, allow your pelvis to rotate your thighs to tilt and the light from your knee caps shines over to one side on the diagonal.
And then when you go to the gentle slope SAML or story, [inaudible] rock on over to the steep slope, appreciating the intensity of the abdominals. They're subtle but beneficial. Now having rehearsed for bridging, snug your sitting bones towards your heels and on the inhale, lift on up. So the eyes, that's your hip joints are open with respect to the ceiling. Now we're going into the steep slope. First shift to the steep slope, and then shift to the gentle slope. In this case, do allow your pelvis yourself to laterally translate and rotate laterally. Translate and rotate. Now there is another option. Place your palms on your thighs and keeping your thighs fairly steady.
As in don't let your thighs windshield wiper keep your knees the light from your knee caps directly towards a similar area on the ceiling and so your s you're allowing your pelvis and lumbar spine to focus on the rotation. [inaudible]. Now land from neutral. Come on up from here and spin the arc around to the other side. Now the steep slope is underneath the new foot. Surely the new side will be different. We knew that we just have to feel it.
Come to lie on your back. Nestle your heels in a stable fashion against the ribs of the arch. Shins will be approximately parallel to the ceiling. Now we're going into the steep slope. First, stand on the steep slope foot and then rock down. As you inhale, climb up onto the steep slope.
Exhaling down to the gentle slow. Inhale to the steep slope. Exhale to the gentle one this time. Be aware of your knees, taking an arc across the ceiling and then an arc across the ceiling. Now put your palms on your thighs so that you can feel that you edit out that arch.
Inhibit the arc of your knees so you're pressing with your foot. Your pelvis and lumbar spine will rotate a bit, but you keep your femurs directly towards the ceiling. Similar variations in bridging. Drawing your heels towards your sitting bones and vice versa. Inhaling, stand your ground through your feet. It's a neutral bridge. Rock onto the steep slope pressing strongly there.
And inhaling, sorry. Exhale to the gentle slope. Usually inhale, we'll facilitate the lateral translation. Exhale to come back. One more allowing your knees. Oh, sorry. I'm just doing a, you can mere me as you'd like, but this is just dramatic emphasis showing what the femurs are doing. All right, now place your palms on your thighs and inhibit the motion of your thighs doing the windshield wiper. Your pelvis and lumbar spine does the rotation and while you're up, interlace your fingers.
So this would be as you continue your practice with us in the future and are accustomed to this, you can press the heels of your hands, the palms of your hands against each other. When you rock to the gentle slope, press that hand towards a steep slope. When you rocked at the steep slope, press the steep slope side, hand to the gentle slope. Ah, you probably get my drift, but we to say that in more land your pelvis and come on down what I was referring to there. With that, you can use the muscle energy of the heels of your hands pressing against each other to encourage the diagonal activation of the anterior oblique sling system. Just in case you'd like to. Alrighty, now we're going to sideline on the arc. So for that, bring the gentle, the steep slope of the arch towards the wall. He will be preferable to use a wall for this exercise. You don't have to, but if you have one handy, it's better. So you'll be on your, we'll be on our left side and adjusting for your mic box. Come onto your left side. Now you're left greater choke. Canter will be against the gentle slope and slide on down, and here you are right up against the wall.
Now you can feel that if you're against the wall, there's not really much room to stretch towards the wall. So having come as close to the wall as you can back up from the wall now so that you can find just the Goldie locks arrangement just enough away from the wall so that you can stretch length in the top side, the ceiling side of yourself. Now your forehand, your underneath hand holds onto your forearm and you press the palm of your hand into the wall. Both knees start off bent. As you inhale, press your palm into the wall and drive your heel of your foot a long way from the heel of your hand. Roll towards your front now so you have a bit of rotation. As you inhale, roll to your side.
As you exhale, roll in the direction of your back. It will be difficult to press the whole palm of your hand into the wall, but that's the point. To make more space fanning. Open your ribs in the direction of the ceiling. Inhale to come to the center. You can bend both knees as you exhale, press into the wall and roll to your front.
Drawing your lowest front ribs into your spine. Inhale to roll to your back side. As you exhale, press your heel away from you and roll towards your back. Drawing your lowest ribs towards your pelvis. One more of each of these. This time. Inhale to your side. As you exhale, send your heel behind you into hip extension, making more length from the heel of your hand to the heel of your foot.
Connecting your lowest front ribs with your pelvis. A long distance for your lateral line. Inhale to bend to the center. As you exhale, send your heel back again. Roll in the direction of your back. The longest possible distance. Lengthening the lateral line of your mile.
Fashional Meridians easy. Now Undo yourself from that. Using both hands. Push yourself up and spin around to the new side. Here you are on the new side. Granted it will be different, so you may need to adjust your art closer or further from the wall. Slide on to line your new side now and press your ceiling hand into the wall. Your floor hand holds onto your forearm.
Both knees are comfortably been inhale to prepare. As you exhale, press your palm into the wall. Drive your heel away from the palm of your hand, taking the longest distance, fanning open the side of your ribs to the ceiling. Now Roll towards your front, pressing your palm further into the wall. Your lungs could cradle your heart. Inhale to lie on your side, bending your knees a little.
As you exhale, send your heel away from your sitting bone and then roll towards your back so you're rolling in the direction. Rotation with a modicum of spine extension. Inhale to the center. This time we add hip extension. Exhaling driving your heel back. The sole of your foot presses away from the palm of your hand.
Meanwhile, connecting your ribs and your pelvis. Inhale to center. As you exhale, send your heel back behind and roll towards your front. I got confused where I was going there. We'll take one more spine extension, pressing your heel back, roll towards your back. The longest distance. Still connecting your lowest lungs towards your pelvis.
Now come up from here. You can keep the arc approximately where it is and bring, um, actually we'll take this on a diagonal. Our arch will be on the diagonal. So we're going to turn the arc this way. And then you can have your sacrum right up against the arc. Palms, our fingers interlaced and cradle the back of your neck with your hands, with your little fingers side of your hand, underneath the base of your skull.
Aim your bent elbows forward. Nod your nose downward. Bring your gaze towards the cheekbones of your face, towards the sitting bones of your pelvis. As you exhale, roll down your spine, putting the back of your pelvis in contact with the arc. And just when you come to the lower part of your ribs, press up into a bridge. Inhaling all elbows aiming y to the side and the eyes at the front of your hip joints. See the ceiling. Now pour your pelvis away from your ribs.
Lead your sitting bones down to the ground, the back of your spine, the back of your pelvis against the arc. Looked down behind the cheekbones of your face. Nod your nose downward. Roll your head, neck and shoulders up. Bringing the cheekbones of your face towards the sitting bones of your pelvis. Roll back, bringing your sacrum against the arch.
Positioning your feet close enough to your sitting bones so that as you stand into your feet, you can lift your pelvis, supporting your thoracic spine, your head, your neck with the arc, aiming your bent. Elbows wide to the side. Slide your chest bone towards your pubic bone. Lower your sitting bones towards the ground. That would be lumbar extension. And then nod in your notes downward. Move Your Gaze, the movement of Your Eyes for the advanced team for your spine.
Roll-On up from here, bringing the cheekbones of your face towards the sitting bones of your pelvis. This time we'll do this twice more, but without the pelvic lift. Roll down your spine. Open your arms, your elbows wide to the side. Start now. Don't wait to connect to your lowest ribs, to your pelvis. Elbows wide, collarbones wide luxuriating in the supportive thoracic extension to return to flection. Bring your elbows towards the ceiling.
Nod your nose downward and your eyes behind the cheekbones of your face. Keep the support of the arc roll on up. This time we'll come up to vertical purchasing. High on your sitting bones. Adjusting your feet forward as you lie. Elbows wide to the side. As you exhale, nod your nose downward. Bring your bent elbows forward.
Eyes slide along the floor along your toenails, along your knees, along your thighs, and connecting each vertebrae. Each rib into the arc. Keep the lowest front ribs connected to your pelvis. Draw on your lower lobes of your lungs towards your pelvis. Inhaling elbows. Why? As you exhale, broadened between your shoulder blades. Bring your bent elbows to the ceiling, supporting your head. Nod your nose, downward row on up from there.
Now onward to the next event, which will be a rocking arm plank. So here you are with the steep slope uphill from here, away from the camera, and come on to your knees. You'll have the heels of your hands wide apart on the arc. Pardon me? We're just going to relocate this Mike box. Alright, now as before, the light from your chief, from your chest bone is directly above the arc. That's so that you can have the optimal transfer of force from the little finger side of the heel of your hand along the lateral line of the arm, right to the air, the serratus anterior, so your shoulder blades can nessel down your rib wall. All right, already.
What's the move? Okay, so with straight arms rock to the steep slope side, and then exhale rock to the gentle slope side. Inhaling going uphill to the steep slope. You can appreciate that even though, and rock to the gentle slope, even though both knees are in contact with the floor, there's a little bit more weight towards the knee and towards the side of the pelvis to which you are shifting. Now this time we're going to add a single knee balance. Inhale to shift uphill. Exhaling, stand your ground with your hands and hover your knees. Whoa, just off the mat. Now go to the gentle slope side.
Inhaling, exhale, stand your ground, continue this action it as you can appreciate. Takes more force to get to the steep slope side and then finessed your balance there. Then the gentle slope side, it just takes you there and doesn't require as much effort to hone your balance. One more of these each side. Inhaling, shifting your whole central axis and then turning your pelvis around the head of your Femur, inhibiting the fire hydrant visit, and then we're going to the gentle slope side. Meanwhile, back at the shoulder girdle, draw your shoulder blades down your rib wall. Baraud across your collarbones. Surely the new side will be different. Spin around. Let's feel how again, position yourself so the light from your chest phone can shine between the heels of your hands. We're going to the steep slope side first.
Inhale to shift. Keep both knees on the ground for now. Exhale to shift. So when you shift shifted the steep slope side, your entire central axis shifts to that side with a modicum of rotation because of the asymmetry of the arc. One more. When you shift to this side, the TL junction, t 12 and s two they are moving in the same direction at the same time. In addition. Furthermore, while I have you here, in addition, the maneuver BREEAM and the center of the pubic bone are staying lined up with each other as well. Now for the single knee balance, inhale to shift. Stand your ground on your new lateral line. Exhale to lift.
Inhale to shift to rock. Exhaling. Buckle up your lower abdominals. Inhale to shift as you exhale, connecting lowest ribs to pelvis. One more. Inhale to shift and I think I'm shortchanging this side, so we have to do two more. Inhale to shift. Exhaling. Remember to anchor your shoulder girdles prior to lifting one the inhale to shift. Exhaling, anchor and lift.
Now we're going to standing. So for this you will need a wall or a bar or something on which you can place your hands that stable. So we're going to stand now and bring the steep slope of the arc to our left. Now just in case the foot of the of the arc is in the way. Move it away from here because we don't want any impediments to standing.
So sorry, I'm so rude. I'm so focused on the wall, I forgot you. So here you are. Clearing the deck around your arch with the steep slope will be towards your left. Now always for safety reasons. Be sure to stand on the gentle slope first. Here we go. So steady yourself, plant the sole of your big toe on the gentle slope of the arc, and then climb aboard onto the steep slope.
Now at this moment, you must have the souls of your big toes firmly anchored on the arc and your heels anchored as well. So you will collide them up hill to the steep slope, banding your Gentle Slope Knee, and then shift your weight down hill to the gentle slope and the steep slope knee bands. While you're here initially you can keep your hands on the wall just so there are no surprises and you feel steady. As you feel more comfortable, you can hover your hands off the wall. Now while we do this, a few more technical points. Draw your inner thighs towards each other so you activate your ad. Drs.
Also keep your knees steering directly forward over your second toe and maybe even your third toe. One more here. Shifting your weight towards the steep slope, bending the gentle slope, and then shifting to the gentle slope. Now second variation on this side, both knees are extended and this is a very discreet tail wag or pelvic unleveling. So shift your way to stand more on one foot and shift your weight to stand on the other foot. There are a few things that this is not, this is not a booty rotation. [inaudible] edit out the rotation there.
Instead it's as if your your tailbone could aim coxix could aim to one ankle bone and then to the other ankle bone lengthening long on one side of your waist and long on the other side of your waist. Now for the dismount, stand on the gentle slope, steady the arc. Maybe use a hand for that and spin the arc around. Here we are. The new side awaits steady yourself on the wall. Plant the sole of your big toe on the arc, steady the arc as is necessary and climb aboard. So here you are with your inner thighs drawing towards each other towards the mid line. Rock to the gentle. It's a steep slope.
First my mistake and steer your bending knee. That's the uphill knees. Tear that over your second or third toe, and then rock down downhill to the other side as you inhale, climb up high on your femur head. Exhale to go towards the gentle slope. We have two more here. Inhaling, your entire central access translates to stand on one side of the arch and the entire central axis translates one more of those bringing s to t 12 the base of the occiput moving in the same direction at the same time. Time for the discrete tail wags or pelvic on leveling.
Press to the steep slope. First, lengthening the waist of the steep slope side and shortening the gentle slope and vice versa. Now meanwhile, back at the abdominals, there's a strong current drawing, pubic bone up underneath your chest bone behind your xiphoid process. Two more of these. Clarifying a neutral pelvis neutral spine in the sagittal plane, not as fascinating as that is. It's time to move on. Shift to the gentle slope side, easy on the dismount.
Now you'll place your steep slope side to the wall. The steep slope will be near the wall, but not quite touching it because you need enough room to be able to rock the arc. Now it's holding onto the wall. We'll have our left foot forward, which means that the right foot goes onto the gentle slope first and then the left big toe comes forward onto the steep slope side of the arc. Stand your ground here and as you inhale, so take a step forward so to speak. Drawing the front of your hip joints towards the window, towards the wall.
Exhale to rock back. We'll have three more of these. Bringing your sacrum, your hip joints, the spine between your shoulder blades, everything comes forward and comes back keeping your tailbone, your coxix steering straight down towards the arch. One more of these. Inhaling to bring your whole self forward enough, keeping both heels in contact with the arc. Now. Second variation, which is as you rock forward, turn your pelvis towards your front leg, which in our case is the left leg and your right heel comes off.
So your pelvis is turning to face the front foot, the little toe side of the front foot. Exhale to rock back and you'll turn to face the other way. As you inhale, the pelvis starts its rotation turning around the head of the femurs. The back heel comes off as if you could step right through this window and join the beach crew. Turning towards the right, we have two more of these. Inhaling, stand your ground on your new front leg, lifting your heel, turning pelvis, ribs, shoulders, neck, head and arms and turn in the new direction.
One more of these. Inhale to rotate pelvis, ribs, shoulders, neck, head and eyes. There we go. Coming back. Now it's time to climb off, so leave your gentle slope foot there. Take the steep slope foot off, reposition your arch if any, if need be. And the new side, the gentle slopes. Foot goes first, always for safety and climb aboard.
[inaudible] now we have four. Keeping both heels and cord. As you inhale, stand your ground forward, climbing up on your new femur head. Exhale to rock back. You. When you come forward, you could have the idea that the eye at the front of your sacrum wants to see forward and as moving you forward, exhale, seeing with the eyes in the back of your head, maybe the eyes in the back of your spine. So bring your gaze forward to see what's in front of you. And then back up. Backing up to see what's behind.
One more of these anchoring. Both heels firmly zipping from pubic bone up underneath your chest bone. Now we had the rotation turning towards your front leg, which in our cases, the right inhale, the back heel comes up, turning your pelvis, rib, shoulders, and seeing what's over that new shoulder. Exhale to rock back, turning your pelvis in the new direction. Take a step forward as if you could go through the window and take a swim later.
Exhale to rock back. We have two more of these. Turning your pelvis around the head of your femurs, pelvis, ribs, shoulders, neck, head and eyes. And even though we've added the rotation, which complicates matters, you still keep the zip up from pubic bone up underneath your chest phone so that you rotate around your central access. Now, one might think careful on the dismount. Leave your foot on the gentle slope. One might think I'm enough already. How could we possibly come up with more standing maneuvers? Leave it to us.
We have another round for you. This time turned the gentle slope of the arc towards the wall and a reminder that it can be just close enough to the wall so it has there she goes with that mic box so it has room to room to rock. If your arch is too close to the wall, it will run into the wall. However, if it's too far away from the wall, you can't reach the wall. So there you have it. Alrighty, clipping this mic box on. We're going to climb on the gentle slope first with the right foot.
So put the gentle slope right foot on and then you stand on the steep slope with your left foot behind. Making sure that both yields and both big toes have a floor to stand on. Now you're going to climb uphill to the back leg, so press your sitting bone towards your heel and rock to the steep slub side, and then rock to the gentle slope side. Inhale as if you could take a step backwards to see where you've been and where you're going. Inhale to rock back. Exhale to come forward.
Finesse the connection from sitting bone to heal. Each time you bend your knees, steer it forward over your toes. And once again, inhale, filling up y to the lower lobes of the back of your lungs. Exhale to come forward. Now we're not going to do the rotation around here. Instead, climb off and the new side awaits.
So now stetting your arch as need be. You'll climb a board with the a new foot on the gentle slow and the used foot. Just kidding on the backs. Steep slope. All right. Now the whole new side awaits. Feel how this might be different. As you inhale, steer your sitting bone towards your heel and rock to the steep slope.
Exhaling rock to the gentle slow. Inhaling filling up y to the lower lobes of the back of your lungs, bra in between your shoulder blades. When you practice this in terms of your grip, you can be quite systematic about this, which I have not been doing. So how about a self-correction? Initially you would have both hands on the wall and then you take turns feeling how it is to have just one hand on the steady side because everything makes a difference. And then you change to the new side. Everything makes a difference.
It's just a matter of a difference to whom and how much. And then finally, finally, finally with your hands close to the wall, you can finesse and feel just how it is to take your hands off the wall and steady on. You're rocking there now. Easy on the return. Keep the gentle slope foot there. Climb off. And now we're onto plank, rocking and plank with your hands on the arc. So the arc will come to its diagonal position and the steps will go back where they belong. And here you are with the steep slope. My mistake away from camera's steep slope up hill steep slope underneath in our case the left hand.
Now in this progression of the quadrant pad we you'll recall we have had forearms on the arc and then hands on the arch with both knees on the ground and then single knee. Now it's a long plank, so buckle up, Tuck your toes under, have your feet about shoulder width apart and have your arms perpendicular to the ground. Rock to this steep slope. Inhaling here, exhale. It's a lateral translation and a little bit of rotation. Inhibit elbow bending, I. E. Don't bend your elbows, keep your elbows fairly straight and that you can appreciate will require more. Work for the lateral aspect of your thoracic area. More work for the area around your ribs. One more here. Inhale to shift the light from your chest bone goes towards the supporting hand and then in the other direction come down now spin the arc around.
The news side is coming right up next. Here you are taking good care of your wrists, decompressing your risk by having the heels of your hands as wide on the arch as is comfortable for your shoulders. Tuck your toes under. Give yourself a stable base with the souls of your feet and your hands rocking to the steep slope. Inhale to shift X. Hail to rock down. Meanwhile, back at the lower ribs, draw them up so that the TL junction, the area between the thoracic spine and the lumbar spine where those two meet is very well supported.
When you rock towards the gentle slope, there will be extra weight through the soles of your toes there. Then push with those toes to help propel you. You can push with the opposite toes to go to the new side. Push with the opposite toes to go to the new side. [inaudible] come down from this now and spin this around. Now we're going to do this same thing, maybe not as many variations with a single leg lift, so just as you were lifting one knee before, now we're going to shift anchor and lift the other foot.
So buckle up, slide your shoulders down in broad, Tuck your toes under and we're going to the steep slope first and while you're there, lift up the gentle slope foot and bring it down. Go to the gentle slope while you're there. Lift up the steep slope foot. Inhale to shift, buckle up, anchor and lift. Inhale to shift. Make a clear diagonal between the heel of one hand and the standing toes of the opposite foot shift.
Anchor creating the diagonals of stability. I said not as many, but then I got so fascinated with the cues I thought, oh, maybe just one more to clarify the diagonal relationship between other side please between the soles of the feet and the heels of the hands. All right, let's see what other queuing gems we can discover. Tuck up now and here you are. Buckle up the shoulder girdle meaning scapular wide, so rock to the steep slope. Exhale to hover the gentle slope. Inhale to shift, anchor and lift.
Those of you who follow the work of Thomas Myers, author of anatomy, trains and creator of the term the mile fashional Meridians. It's a fashionable field day here, a fashion festival. Here you are anchoring the lateral line with no small amount of work for the front and back functional lines. And I dare say the spiral lines are a bit at work as well. More on that later. Come down from here.
Now it's time to attach the step to the [inaudible]. Finally, we're going to use them all together. So with the step attached to the arc, we'll take this diagonal arrangement so that we'll have, let's have the arch lined up right flush with the corner of the Mat and our feet will be off the mat with that at least to get us all organized. So fabulous. Well, we're all organized, but for something different than I had in mind. Brilliant. Okay, so it's time for, here's why that is sideline or lateral flection is the gateway to spine rotation, which in turn is a gateway to spine extension. So rather than going into spine extension first, instead we'll address the lateral line. So we'll come onto your left side. We'll do this with a lateral inflection and rotation.
Then we'll come to Soupon be right there. Okay, come on to your side. And this time we [inaudible] we won't use the wall. So your lower hand holds onto your upper forearm and press the sole of your foot and your hand away from each other. Fanning open the side of your ribs, the side of your lung. As you exhale, roll towards your front, pulling longer, longer, longer, longer. Bend your knee as you inhale to your side. And as you exhale simultaneously, press your leg away. Pull your arm away and roll to your [inaudible]. Yeah.
Inhale to come to the side. Slacking up a little bit. As you exhale, renew your length and roll towards your front. Your lungs can cradle your heart, taking the longest distance from the little finger side of the hand to the little toe side of the foot. Inhale to your side as you exhale. Roll towards your Ba. Meanwhile, connecting ribs to pelvis, so there's not hyper extension.
Oh No, not that. This next two will drive the heel behind into hip extension. As you exhale, roll towards your front drawing long. So it's side bending rotation, and a little bit of flection. Inhaling here, and as you exhale, side bend a little bit of rotation on the way to extension.
Now using both hands to help push yourself off the [inaudible]. You can come on up for here. Just to note, as we transitioned between sides, it's likely that you would feel more confident, more comfortable if you had your head supported on a towel or a Sapelo between your ear and your arm. So if it feels to you a little vulnerable to have your neck hanging out in space, uh, don't, don't do that. Instead cushion it with the towel. Slide onto your new side. And here you are on your new side with your lower hand, pulling your upper arm along way and she inhale, press the sole of your foot away from the palm of your hand.
As you exhale, roll towards your front. Your lungs spiral around your heart, ringing them out. Inhale to come to your side. As you exhale, press the heel, the sole of your foot away and collecting lowest strips to pelvis. Roll towards your back. Taking the longest arc from the sole of your foot to the palm of your hand.
One more each side. Inhaling vending as you exhale, roll towards your front. So the light from your chest bone goes towards the arc. Inhaling, fanning, open the sides of your ribs as you exhaling, connecting to your deep frontline eye. Lengthening the distance from the front of your, uh, lumbar spine through your inner thigh to the sole of your foot.
Now we'll take the hip back into hip extension. And that means drawing your heel back behind you. Exhale to roll to your front. Inhale to come to yourself. Still taking your heel behind you as you roll to your back.
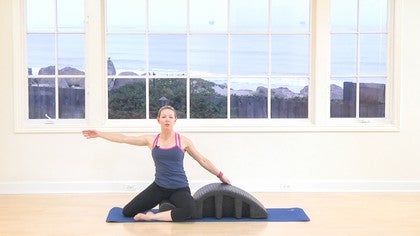
The reason for only in this case, taking your heel behind you is there are different vectors. Uh, do one more each side to the front of the bat. There are different vectors of fashional pole, different vectors of fashional lengthening. When you take your heel, your leg into hip extension specifically, you get a little bit more length along the so as Iliacus and some of the other organ Fascia come onto your side, bend both elbows, using your hands to help push yourself up from here. Now making sure that your arc is well organized here, we'll take the supine work. So now your heels are lined up with your sitting bones, fingers interlaced, and cradle the back of your neck and the base of your skull.
As you inhale, perch up high on your sitting bones, and you may be able to do that much better if you walk your feet forward as you choose there. As you exhale, drawing your heels towards you. Aim your sitting bones towards your heels. Move your gaze along the floor to your knees, to your thighs, and just as your lowest shoulderblades come onto the arch. Push up into a bridge, the front of your pelvis going up to the ceiling, arresting back on the arch with your arms, your hands, your neck, your head. Now leaving your head and neck as they are. Glide your chest bone and ribs towards your pelvis and pour your pelvis into the step of the arch. And then as your sacrum arrives, nod your nose downward.
Roll all the way forward, bringing the cheekbones of your face towards the sitting bones of your pelvis. Inhaling, make your way up to vertical. We'll do one more of these. Exhaling steering your sitting bones towards your heels broad across your chest, bone and collar bones. Just as your shoulder blades arrive, push into the souls of your feet. Lifting your pelvis high, seeing the ceiling above and behind you pouring your pelvis out of your ribs. You're moving into an anterior pelvic tilt in spine extension. Meanwhile, back at the upper abdominals. No shortage of work there. Take the longest possible curve rolling up using your eyes to steer behind the cheekbones of your face towards your sitting bones.
Now this time we'll leave the bridge out. Inhaling to come up. As you exhale, roll back, aiming your sitting bones towards your heels. Keep the back of your ribs, the back of your lungs in contact with the are broad across your armpits, and it would be preferable here to keep your lowest ribs connected to your pelvis, even if the back of your hands don't touch the arch. Another option, roll your head, neck and shoulders up for one more of these [inaudible]. Another option would be to put a cushion or pillow underneath your head. Inhale to come up. And here's why this is exhaling.
Roll down your spine. Oh my gosh. You know, sometimes, excuse me a second. Sometimes depending on which generation of arc you have, sometimes the step separates from the arc bomber, but all you can do is just put it back where it belongs and resume as we go. I'm resuming now.
My colleagues are luxuriating in spine extension and I'll be right there. As you exhale, roll down your spine and you see one size never fits all, huh? So even though the arc is a genius design, still it, if your spine is not so comfortable in thoracic extension, it may be that you won't have your hands on the arch. You might have a pillow supporting your head at this junction. What's most important is that you keep the integrity of the TL junction. Always keep your TL junction integrity with your upper ribs connected to your pelvis. And over time that will change, but not in one hour.
As you exhale, move your eyes to see behind the cheekbones, up your face, and roll your head, neck and shoulders all the way up from here and come up to sitting. Now while we're here, we're going to do some sides sit ups. So, um, turn. So your right side is against the arc and this time having prepared well for the side sit-ups. Uh, this time we're going to reach out with one foot and come all the way up to perch high on both sitting bones gay. Just look in my direction for a moment. There we go.
And this leg will be in a little bit of external rotation and then taking the longest possible arc will come down. Inhaling, your outstretched leg is in, um, internal rotation and as you exhale, reach your heel along the floor, externally rotate your leg and that will help to bring you up to vertical. Inhaling. Take the longest possible arc right down along the lateral line. Now another tip about your outstretched leg.
It can be a little bit forward in hip flection. That can help you even more. As you exhale, reach through your heel externally, rotate your leg and as your heel reaches along the floor, that can help to bring you to vertical. Now take the longest possible arc. Make your way all the way down there. Now we'll take the other side, you share arms to help turn around to the new side. Here you are. We'll leave the arc as it is cause I think the back of you has something to offer. So in addition, we'll take a a new tip here.
So for right now, Gay Rhonda and Danielle, slide your left hand along the arc. So then take your right hand behind your head and using your left hand to help reach your heel away and slide your hand, your left arm along the arc. As you come up to vertical, we'll do another one of these. So you see those of you joining us, you see that you can use your arm along the arc and as that kind of a training wheel, as an assistance to bring you up as your leg reaches into external rotation. This time we'll have both hands behind the head and we'll do three of these.
Inhale to come over. Your legs starts in parallel in a little bit of hip flection. As you exhale, reach your heel away, take your leg into external rotation and that will bring you right on up. And then as you take the longest possible reach along the underneath side of yourself to the arch. Your opposite leg opposing leg will go into internal rotation.
As you inhale, reach your heel, send it into external rotation, pressing the side of your pelvis into the side of the Ar, and then poke your bent elbow beyond the arc. So you take the longest possible curve on the way down. Inhale to prepare with your leg in internal rotation or parallel as UX sail time, the front of your abdominals to the back of your spine, drawing your lower ribs towards your pelvis. As you come right back on up. Now please separate the step from the arc. So climb off here and this time just push the step out of the way.
This time we're going to be on our front with the steep slope of the arc towards the corner. For this, you just cannot have a Mike box on your front. It's time for spine extension and you are so well prepared for spine extension. This is going to be armed jumps are sort of swan dive rocking so you have your hands on the rib of the arch and belly on up to your surfboard here. Ooh, butchering metaphors so that your lowest ribs are slightly forward in contact with are slightly forward of the front edge of the steep slope of the arc. Now position your palms so that as she rock forward, putting weight into the heels of your hands that drives your shoulder blades down your spine towards your pelvis.
If your hands are too far forward, your upper trapezius will work more strongly than the appropriate landing gear of your shoulders. If your hands are too far back, then you should get a nose guard immediately. All right, so your palms are in line just in front of your, just behind your shoulders. Pardon me. So rock forward, do a test run and inhale to push up. Exhale to rock form. As she inhale, the soles of your toes can tuck under. Exhale to rock food. Inhale to rock up. Now it's time to jump, push and suspend and land and suspend and land. If all is going reasonably well, then you can intensify your spine extension by moving your hands and your gaze forward. Inhale, suspend.
Exhale to plummet to earth in slow motion. Twice more,
As before, climb onto your arch. You'll have in our case the left heel into the well and your opposite foot forward. So here you are, um, uh, one foot forward. There we go. Either foot. She likes there. [inaudible] alright, so I would hope that you'll feel some differences, perhaps some more ease in standing on your central axis. Perhaps some more confidence here, some more length along the back line as you exhale, rock forward. Anyway, move your pelvis forward over the head of your femurs sitting bones broad and then as you inhale, come to stand high up on your femur heads. We'll do one more of those just to feel how this might be a bit different from when we started.
Inhale or exhale as you go forward and inhale to come to vertical. Now the new side of weights put the new heel in the well and the other foot forward. Inhaling sitting bones filet or wide behind you femurs internally rotate as you move your pelvis over the head of your femurs and right yourself by moving your femur heads forward and up on the diagonal. Aligning your maneuvering with your pubic bone just in case you needed something else to think about. Exhaling to go forward. The back of your neck is long. Bringing your gaze near your toenails.
Inhale to come up. And now for the finishing event, both heels are into the well, here you go, a forward bend moving your pelvis long over the head of your femurs. And if all is going reasonably well, celebrate the forward bend. You can have your gaze towards your ankles, towards your knees, towards your thighs, and then make your way up long through the back of your neck. So the light from the top of your head comes all the way up to vertical. Thank you so much for joining us.
We really look forward to being with you the next time on Pele's anytime. Thank you. Bye now.
Pilates at Home: Spine Corrector Classes
Mention
 |
Elizabeth Larkam (Teacher) |
 |
Maureen M |
 |
Sigal R |
|
|
Giuseppe S |
 |
Federica I/ Federica Iommetti |
 |
Kristi Cooper |
 |
Jocelyn N |
 |
Robin A |
|
|
Sherry B |
 |
Hannah M |
|
|
Jelena P |
 |
Andy R |
 |
Karen A |
|
|
Marie-Josée Packwood |
 |
Susan P |
 |
Amy Havens |
 |
Z A |
 |
Anne-Marie S |
|
|
Cali Teter |
|
|
Ileana V |
 |
Cathy M |
 |
Brian R |
Comments


Thank you Elizabeth!


Kristy, can Elizabeth teach a foot corrector class?
Thanks!


You need to be a subscriber to post a comment.
Please Log In or Create an Account to start your free trial.
