Description
There are a few exercises that are only done on one side so that you can get the benefit of the exercise on the side it is needed without compressing the opposite side. If you have the strength to do the exercises on both side without compromising your alignment, you can do the other side.
About This Video
Transcript
Read Full Transcript
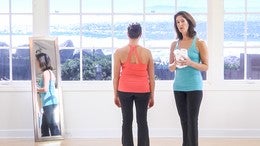
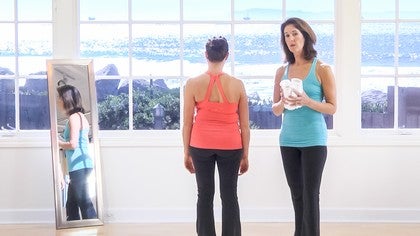
This is a mat class for people with scoliosis. And we're going to start with elongation and move into more strengthening moves. So this is Gabby, she's my student for the class. And I hope that you watch the assessment part prior to this class so that you understand your specific cues for your curvature. Gabby's curvatures are right through Raco Lumbar, uh, curvature.
So I will be queuing her and then giving you extra cues to say if you will have the opposite curve or an s curve. I'll tell you how to change the exercises to better meet the alignment of your spine. Okay, so we're just going to start standing on two feet. When we take an inhalation. If you have a right thoracic, you're gonna Inhale, lift up the our left arm up. We're going to try to open that side of the spine reaching long. And if you're a c curve, you're going to bend the left knee and just dropped.
So we're just trying to open that side of your spine, make sure you don't sit in your hip and exhale and bring the arm down. So Gabby's going to repeat that. So inhale, lifting up and dropping the hips of what you want to feel as the hip is dropping down, away from the ribs and come down. So she's going to keep moving. And I'm going to do the s curve, so it's the same arm lifting up, but I'm going to drop my right hip down. So this is where I'm going to open the lumbar spine and come down. And if you have a lumbar scoliosis that's convexity left, then you want to drop that right hip down to open up that right side.
Good. We'll do one more and stay and up. And now you can grab your hand and drop that knee and the long gate up towards the ceiling and open up the rib cage on that left side. Hold it there. Take a breath in, span that ribcage, and exhale coming down. Very good. So we're going to do directed breathing. So you come sit on the edge of your chair, so your sit bones are on the edge of the chair and really plant your feet and then take a theraband. You could use a towel, but a therabands nice for the stretch and you tie it so that you can wrap the theraband around the rib cage, preferably at the apex of your curvature.
So it's on the ribs. And then you're going to place the band on your right elbow. Now this is for people who have the bolster effect on the right side of their rib cage. If you are one of the few who have it on your left, you would do it on the other arm. So what she's doing with the band now is she's directing her breath into that left corner resisting the band. So she's pulling the band this way with her arm and then pressing her ribs into the band and then breathing into that and then relax.
So you pull the band this way, which will shift your rib cage into your curve, but you're using your muscles in the breath to move your rib cage against the resistance to the left and a few more times. So create the resistance. She's breathing into that left side, shifting the ribs opening up. That can con cavity of her left side. We can do it a couple more times. This is opening up that part of the rib cage that's compressed. And when we do the breathing and all the exercises, we're going to want to do this directed breathing and rest. Excellent.
You can practice that many times during the day. That would be great. Can we do another elongation? So you're going to stand up and take your chair and hold the back of your chair and just step back. And you can do like a tabletop position and you want to try to Elongate so that you're reaching this way and sending your thigh bones back behind you. Now this is a good stretch for your hamstrings as well.
So if it's tight for you, go ahead and bend the knees, Bend your knees so that your back is not being pulled too much from your hamstrings or if you have good hamstring length, go ahead and keep your leg straight. So now what I'd like you to do is try that directed breathing. So she's going to inhale and translate like the theraband trying to push a rib cage over to this side and breathing in. And exhaling. Then do a couple more lengths. Nice long next year, looking at the floor, reaching the crown of the head to the chair, reaching the tailbone away. Two more breaths.
Now breathing into that side and you're letting gravity just rest your spine. One more time. Inhale, exhale. And now bend your knees. Roll up through your spine. Just nice and easily. Walk forward a little. Bend your knees and come up out of at Nice and easy. Okay. Now we're going to go onto the mat and you're going to need a few towels.
And you're gonna need a pole or a dowel. You can use a broomstick, uh, and a mat. Okay. So you need a stick about this size. A dowel. You could get one at a hardware store, uh, and you're gonna need a few towels for the propping. So just have that handy nearby. And here's your chair. So you're going to come onto your knees and you're going to actually hold the legs of the chair. Now be careful if your chair is very light, you're going to be pushing and pulling on the chair a little bit. So I don't want it falling and hitting your head or anything.
So maybe you want to put something weighted on here. But if you have the right amount of effort, the chairs should be pretty stable. So as you can see, what she's doing is another elongation as we did standing, but she's reaching back. Now, here's what we're going to do with the arms, with the right foot of convexity here on your spine. If that's the shape of your spine, you're going to want your left hand higher than your right hand on the chair. And she's going to kind of reach back through her hips to create traction in length. And then what she's going to do is you push with your left hand, you push the chair away, and you pull gently with your right arm.
You're not bending the elbows, but you're just pulling in. You're trying to link them good. And then that creates that rib translation and she's going to inhale and exhale. So she's directing her breath once again into that side. Now you have to be careful of your pelvis. So the think about your tail, what direction is your tail pointing into? So for Gabby here, I want her to reach her tail to the left a little bit. There we go.
To open up this lower part. So you might want to play with a little bit of wagging your tail to see which direction there. That's a nice stretch that you can feel from this diagonal up to this diagonal. A few more breasts. So you're just holding that position. Good. And relax. Great.
Now she's going to come onto quadro pad position. So that's with your hands there. Good. All right, so we have a nice shoulders, hands under the shoulders, knees here. Now depending on your curvature, you might notice that uh, your pelvis may not be level. If I took the stick and went across this way, there might be a tilting happening of the pelvis. So you may want to move one knee behind you. So let's try moving the right knee behind you. There we go. So that dropped her hip a little too low. So we're going to bring it back in.
Now let's try your left knee back a little bit. Just a tiny bit that's better now. Leveled her out a little bit. All right. And then arm wise, we want to see that your shoulders are more level and that looks pretty good. Actually you can go a little forward with the left hand. Good. So we're opening up this left side so she has her left hand a little forward and the left knee behind her, which is opening up that concavity.
If you're an s curve person, you're gonna want to bring your right knee behind you, not the left knee, and probably still your left arm forward. So here we're gonna start with just a tail wagging. It's a very small movement, moving your lumbar spine. Very nice. So you can move your tail towards the right. And then towards the left, see how small the movement is. Just a little cause we want to keep it in the pelvis and towards the left. Now feel it as you're moving. What side feels tighter to you?
What side feels like it's opening up your spine. And for Gabby here I can see she gets more tension when she wags her tail to the right as opposed to to ragging her tail to the left. So we'll do a few extras to the left, just the left and center, just the left and center. Great and left and center. That's opening that right side of her lumbar spine. So if you have a left lumbar curve, this is a nice way of opening that concavity on the right side of your back.
Very good. All right. And then we're going to take a little bit of curling here. So she's gonna just curl the pelvis. Now it's just the pelvis curling. So the tails dropping and lifting just the pelvis. Now I don't want to see the rib cage moving and rock it back and again. So it's just a feeling of the tail dropping down and the front of the pelvis lifting up. It's a very small movement. It's happening in your hip joints, so you feel your hip joints opening here in the front and your hip joints folding in the front. And one more time. Lift the pelvis up.
See how there's very little movement in the rib cage. Good. All right. And now we're gonna do a little hip gliding. So you're just actually going to lean to one side and then you're going to lean to the other side. And what you're trying to feel, what Gabby is doing very well is she's moving in the legs, the hip join, there's no tail wagging here. Good. So she goes to the side, she's staying level. And so I decided to, you should feel this in your hip sockets in the legs here. Very good. And if this feels comfortable to you, you can actually take this in a circle, but you may want to just keep doing this motion. But let's go forward now and to the side.
So we're getting a little diagonal back, diagonal, and center. Let's go the other side. So sideways, forward, diagonal, right diagonal, right diagonal, backwards and centers go two more times side. Forward, forward, diagonal, back, diagonal center. Now to the left, forward, diagonal, right, diagonal, back, diagonal and center. In any point, if your arms get tired, you can sit down and rest. So let's just sit for a second. She's comfortable sitting on her knees. You can just come out of the position. It's kind of a lot to be on your hands for that long. Okay, so let's go back and now we're going to do is with a little thoracic extension. So what I want you to think about is a very small movement, but think of your breastbone sternum and have the sternum is as if there is a light beam on your sternum and you're going to shine the light forward.
So you're going to look up a little bit and move the sternum forward. Very good. And then come back and look straight at the floor. So your neck is long. She stabilizing her pelvis. So go ahead, stern and move forward. Do you see how the back is extending? It's a very small movement, it feels like, and come back and look at the floor, but we're creating contraction of these spinal muscles deep in the spine to strengthen them here and then come back. And we usually do about five repetitions. So again, extending beautiful and come back.
Now it's nice to combine the tilt with the extension. So pelvic tilt as we did before, come to neutral and sternum reach and neutral coming back and pelvic curl. Very good and neutral and sternum reach. Beautiful and center. And then we're going to finish with a tiger stretch is what I call tiger.
So slide your hands forward. If you're tying in the shoulders, you can bend the elbows, but go ahead and cross your thumbs this way. So it create a little opening, a rec external rotation of the shoulder. So you're wrapping your arms around and then you just reach forward. You can walk your fingertips forward, right? And this rest your back. Good. And keep breathing and exhaling. Remember, inhale into that directed side and exhale. Let your sternum drop. Good.
And then bend the elbows down and rest. Very good. Come on up. So now we're gonna turn in, lie on your back, and this is where you're going to use some towels and some props. Okay. And we have the stick ready. So you want to be able to grab the stick and it's time. So feel your back on the floor, feel what part of your spine has more contact with the mat.
And as we said in the assessment, most likely it's going to be that right side where you have the bolster effect here. So I'm going to hand the towel to Gabby. She likes it, fold it in threes. This, there's just the right amount of uh, thickness for her. So she's going to put it under that right side, not on the spine, but just where the bolster is. And then, uh, we're going to use her pelvis because that's tipping her in that direction. So we want now the opposite side, so we're going to place that under her left hip and then we, her shoulders now has more contact here than this side. So usually the same side, lower back. Um, padding is the same as the shoulder. It's very common.
So you would do one side here and the same side for the shoulder and the in the pelvis. And then she also likes to have a pan under her head to support the head. Very nice. Very good. Okay, so we are now going to do a little bit of pelvic movement and then start working on our core a little bit more. So first one I want you to do is make sure that your feet are far, far enough back so that you really feel your feet on the floor. So you're gonna start with your right knee.
And what I want you to do is just think about reaching it. So just like someone's pulling it, just like I'm doing very small movement and come back down and then reach this knee. Someone's pulling your knee and come back down and she's going to do it again. Reaching. And what the reaching does is opens up between the pelvis and the ribs and come back and you're getting a little rotation.
Also little small movement in the pelvis and the lumbar. He can see the obliques start. You start to feel that working there and reach and we can do it with the inhale. So inhale and reach. Exhale, good. Inhale and reach.
Feels very nice on the back and inhale and you're going to do it one more time and inhale and reach. Good. Now she's going to come up in a very low bridge. So you use your feet and lift your pelvis up, but rest your spine come up a little bit higher. Good. So you want your body weight still on your thorax, right on your, on your shoulder blades, not a very high bridge. And you're letting your spine just relax.
But you're working your legs like crazy to support that. And we could do the reaches here. So she's gonna reach that leg again and come back and reach right. So now she's getting this Oberly care and come back and read. So we're getting this overly Cline here.
Those are the most important lines for you to strengthen into elongates who are doing both with this motion. We're both getting the elongation and the activation of the muscles. Very good. And we're gonna do a couple more and reach very nice and reach. Good. Now I'm going to shoot both. Nice reach. Inhale here, exhale and coming all the way down to neutral. Which means your tail just comes and sits down on the mat. Okay?
So now you're going to take your stick and you're going to put it across your pelvis here, and it's going to be your leveler, right? So feel the hip bone. So if your padding is correct on your hip, then they should, the stick should feel even right on the top of your hip bonds. Very good. And what we're going to do with the stick is we're just going to do some knee folds and knee folds means that your leg is going to be very relaxed and you're gonna feel the top of your femur dropped down into the socket and you're not gonna move the pelvis. The leg is very heavy and you're just folding, feeling this drop right with the levelness of your pelvis. Just keep repeating as I'm talking. So inhale, exhale. Drop the femur down into the socket first and your knee just floats up.
Good with the [inaudible]. What I was saying about your pelvis is that sometimes the hip sockets not really sitting in the socket as best as it can. Good. And one more time. And it's, this looks very simple, but it's hard to not let that stick move from right to left, especially when you put the leg down. All right, let's try the left side. So four times on each side. And exhale, drop the femur into the socket. Keep the leg very heavy. We don't want the Shin Up, we don't want to contract the whole leg.
We're working in the hip joint and we're working on the deep core muscles, specifically. One very famous muscle called the [inaudible]. All right, and we're doing four. Very good. All right, one more great and rest. Now you can take your stick and just put it next to you. That's enough. Yeah, very good. And we're going to activate the, so as a little bit more, and it's actually more than just the, so as I just use that word, cause many people have heard that name of that muscle, which is why I said it was famous. But when you really activate the femur in the socket, you're gonna feel very deep core activation. It's also internal oblique working your pelvic floors working. It's more than just the so as, but let's go ahead and do a knee fold again with the leg really relaxed, good and stay there and you're going to take the opposite hand and place it on your knee with a straight arm. Elbow is straight. And take your other hand, the right hand, and just put it on the soft tissue, right, right here.
Just I want you to feel that you can feel that contracting. So this arm is straight and what you're going to do is push your knee into your hand and resist with your hand. Good. And don't move anything. It's an isometric contraction and breathe out. Good. Now take a breath and relax for a second. Relax and do it again. Press your knee into your hand.
Can you feel the tone happening deep in the core here and relax. It's very low in the bowl of the pelvis near where the femur sits in the socket. Excellent. One more time. And with that feeling we're gonna. Yeah. Oh, that's really good. With that feeling. We want to feel that every time we're moving our legs, when we start doing more advanced exercises. Good. And let's switch signs. So again, do a nice knee fold. Don't tip your pelvis.
Excellent field a femur sitting in the socket. Reach across and what the arms straight cause I places your leg right where I want it aligned. The hip. And then she's going to press the knees slightly. So the need, just so you know, just keep doing the exercise is going a little towards you, but a little bit on the angle. It's not a real big sideways push. It's more towards your chest and a little bit towards your shoulder. She's going to do it two more times.
Really making sure you're feeling that it's really great. You feel a tone happening here. Yes. One more time and good. All right. And now we're going to work on alternating. So take your stick again and put it across your pelvis again is a leveler.
And now what we're going to do is an alternating leg and every time you're exhaling gonna feel that activation that you just did. So ready? Take a breath into start. Exhale, drop the Femur in socket. Good. And now we're going to switch legs. So inhale, exhale en switch legs and you can just touch the mat and switch legs and switch. Keep working that deep core. Keep finding where you felt that. So as working legs are very heavy. Good.
So you just barely put the weight of your foot down and then it comes right back up. Keeping that work deep. Keep the stick nice and level. Excellent. Gabby, we're going to go two more right and then left. Good. And then put your right foot down and left foot down and rest. Excellent. If that feels too much and you can't control the stick, you can simply do alternating by just doing right, like put it down. Then lift the left leg as opposed to kind of a marching action. So just make it a little bit simpler. Very good. All right, so now we're going to take, you need another towel and we're going to use the stick to help support our heads. So the stick is hard.
So it's nice to have a little bit of padding on the stick. All right. Now if you feel your head here, the back of your head, if there's a point in your head where the skull bone drops in like that, and there's a, there's a little notch. All right? It's called the Indian actually. And it's this little notch on your skull before you hit your neck. So on this bone, I want you to take the stick and kind of get it underneath that little notch.
I think that's why it was designed there. No, I don't know. Okay, so you can see she's holding. What you're going to do is the stick is actually going to pull up on that notch, which creates an elongation in the back of your neck and allows your head to just kind of roll forward a little bit. So this is aligning the neck so that when we curl our head up, or when you curl up your head, you're going to be engaging in the deep front neck muscles here and not overworking the muscles that kind of make your neck feel really tired. So then I want you to keep the weight of your head there. All right? So we're just gonna practice curling up with the stick.
So I also want you to think about your sternum. So two things are going to happen. You're going to lengthen with the stick as you inhale. Okay, lengthen. Exhale, drop your sternum down. Let your head just rest on the stick. Very good. You notice how she has a nice amount of space between the Chin and throat. So just hold that position, take a breath in and exhale in deep and just breathe out. Good.
And two more times. Exhale deep and the abdominal Muslim and just let your abdominals go down toward your spine. We're going to do two more exhale and really feel that sternum dropping. Good. And one more. Exhale. Good. And then lower down base of your neck first and then the stick. Very nice.
Now if that is too many repetitions, do two breaths and practice. And the more you can get the length with the stick of your neck and use your core to hold your head up, that lessens any tension you might have in your neck. So we're going to do it one more time so you can practice. So you're going to inhale to lengthen. So you pull the stick this way, so you feel your chin drop just a little bit. Exhale, drop your sternum down. The sternum pulls down. Good. And then just hold that position. Inhale, guess where you're inhaling. Exhale.
You should be inhaling into that concavity cavity side. You direct the breath into the left side. More exhale. Very nice. Two more times. Exhale. Notice how her abdominal wall is dropping down towards the spine. And one more time. Exhale.
And then lower the base of your neck and then your head. Excellent. Very good. Okay, so we're gonna do, um, frog legs here. So we're gonna, um, let's keep the stick there. So we're gonna bring both legs up. Now in this position, I want you to imagine that you have a piece of Velcro from your big toe to your heel here on both sides. And we're going to stick the velcro together. So big toe heals really glued together and the legs are just relaxed down, whatever's comfortable for your knees. Now the knees are gonna slightly open.
So what you're gonna feel is a squeeze of your feet in that activates a inner thigh, but way up high by your pubic bone. And you're going to be pressing your knees a little bit out at the same time. So you're getting a coke contraction of the deep muscles in your buttocks here on the side and you're getting a contraction up high of your abductors near your pubic bone. All right. And what we're going to try to do now, you could keep your head down here and just do the leg part, but I'd like to try to do the whole exercise together. So what the legs will do is as you exhale, the legs are going to reach out to an angle if you can do it with the legs parallel squeezing together. And if this is too much, you can always stop at the point of bending your knees and then you come back to the position where your knees are opening, but you're squeezing your feet together. We should really feel your hip sockets. All right, but we're going to add the curl. So here we go.
I'm going to inhale and lengthen the neck. Wait, lengthen first, don't lift. So let's start again. So inhale, lengthen. The next. You're just pulling the stick. You're not lifting off the mat at all. All right, one more time. Lengthen. Inhale. You're just pulling the stick to feel the length. Good. Now exhale is when you come up and drop the sternum down and the legs go out.
Squeeze your legs together. Hold the body up there and bring the legs in. Inhale, exhale, and go up. Velcro feet. Squeeze the legs and in Exhale, keep dropping through here. Breathe out. Good. Rest your head on the step. Good. And dropped the sternum. Exhale, use the legs. I'm going to make her work here and I'm going to do two more. And XL. Use the legs. Good. Last one.
Exhale. Good. And then bend the knees, lower the head down and rest your head if that is too many reps for your neck. Okay? You can always do one or two and rest and then repeat until you can strengthen too. You can do three in a row and then do four in a row and then do five in a row and working way up to 10 I wouldn't do more than 10 okay, so now we're going to do the same idea, but we're going to do what's called single leg stretch and Pilati. So we're going to start with the legs up again.
So she comes up to the frog position. Very nice. And a single leg stretches. The right knee is going to, the right leg is going to stretch out and the left knee is going to stay here. And then we switched. I think many people are familiar with that exercise, but of course we're going to do it with the head up. Okay? So inhale here. Exhale, curl up, right leg. It's going to straighten out and get a nice pulling of the knee in and the leg reaching. Good. And switch your legs. Breathing out. Good and breathing.
I'll try to rest your head on the Dowel, but keep working your sternum. Good reach, good reach. Good. Keep breathing out. I'm going to two more. Good, good. And bring both knees in and lower your head down and rest. Okay. So I want to do a more advanced version of that same exercise.
So you can do it again with the dowel or we take the stick away. Hmm. This is kind of fun. So now we're going to start using the stick with our arms. Okay. So we're going to do, uh, the scissors, so you can still do the same idea of the stick behind your head. Butt, scissors are straight legs that reach in this direction. And then they change. And what we're gonna do is you're going to roll the, stick up your leg, and you're going to curl up and reach towards your foot. So you push up with the stick and then you switch and roll the stick down a little and exhale and reaching up. Nice.
And now watch your stick as you're going up because with your curvature, your sticks going to tilt a little bit. So really reach through that side and keep that stick level. Good. Then you know your back is reaching a little bit more level. Good. Rolling it down. Good reach. Now we can go a little bit faster if you'd like. If you have it down and reach and reach and reach.
Good. Bring the leg to the stick and the stick to the leg. Good. Two more. Good. And then the knees and Laurier head. Oh, rest for a second. Excellent. Okay, so we have scissors now to do on a diagonal. So it's the same motion. But what we're gonna do is roll the stick up the opposite leg. Okay, so you're ready, Gabby. Here we go. And take a breath in. Exhale. So this is a good starting position here. See how our elbows are bent? Stick is against here. Now she's going to curl up and reach up. Good.
And then reach good. Um, and come back and roll. Yes. Good. And Roll. Excellent. So you notice how she's going on the diagonal? Reaching good and roll good. And we don't want side bending, but we want reaching to the leg. Yay. And reaching through both sides of your waist. Good. So it's a very small to us.
Very small. Reach to the right arm towards the left leg, left arm towards the right leg and reach. Good. Couple more. Reach one more. After this he'll be even, and rest could job and rest there. Good. Alright. We'll put the stick down and you'd probably, if you had something on your head it'd be nice to put it back. All right. And we're going to do a little version of corkscrew with piles we call a corkscrew, but it's more about your hip joints. So let's bring the right knee up and the left knee up to rest. Okay.
Check your body that your centered. And if you can, I'm going to straighten the legs up. And again, if you don't have the flexibility for the please bend your knees slightly. It will still work. All right, but you have to squeeze your legs together to do this motion, but straighten the legs and I want you to watch your feet. So I want your feet to sway to the right and you're going to notice that your left foot is going to slide down towards your ankle a little bit and then switch. So you're making one leg shorter than the other, just a little bit and come back. So you're keeping your pelvis on the mat. Good. And slide the foot. So this is hip joint movement here and you're controlling that you don't twist in your spine.
So you're stabilizing in the spine and we're working the inner thigh and the outer thigh of both legs as you go from side to side. Very nice. So you shorten one side, lengthening through the other and it's almost like a little windshield wiper. Yeah. So slide your feet, feel your feet sliding along one another. Now if this feels good to you, keep going. We're going to go around in a circle. So she's going to go down. Make both feet level, shorten the left one, come up, shorten the, yeah, go the opposite side. Shorten the right one, come to level, shorten the left and come up and right short level, left short, come up side.
Good down, good and rest. Ooh. So it's very important that you feel that the legs right are doing the shortening action here so that you go over, you're shortening one side, and then as you circle, there's a moment where you're reaching really hard to the leg to level the legs and then they shortened again and come up. Can we do that one more time to really emphasize that? It's always going to do a second set. So see if you can really show us the levelness. So she goes to the side, this is the short leg.
Now she has to circle that and reach with that left leg to make it level and then shorten the right and then reach to the right to make it level. One more time. Shorten the right reach through the right to make it level, shorten the left reach and come center. Okay, very good. And rest. Good. So now we're going to do some sideline work. So we're gonna roll up the towel so we can support our head and we're going to lie on her side of sideline with your curvature is a little tricky. So you might want to play with your props a little bit.
So here she is going to lie on her side. Now I will make a suggestion for those of you who don't feel that secure about placing anything under their spine to help support them. I want you to go against the wall. So if I were the wall, so come to the edge of the table, Gabby. So let's pretend this is the wall. So this is the wall. You've got your head against the wall, the shoulders against the wall, the hip's against the wall and the heels right against the wall. Okay? So this is your alignment here.
So having a wall gives you a contact surface to feel all right. And you want to make sure that the shoulder is not shrugged and compressing, right? So we need to have a little higher towel for you here on your head. Yeah. Okay, so the neck is not right. If you have a small bolster, it works very well. And this is great. One pelvis bone stacked on top of the other and legs reaching.
Now here's the tricky part. She's lying right now where her, her curve is actually increasing. So there needs to be a little bit of a lift. Happy. Now she could do it muscularly that's ideal because then you're working that translation. But if that's really difficult for you, you could take a small towel and put it underneath that rib cage, right to help bring the spine back into better alignment. So that's one choice for you there. If you feel comfortable. Now with your curvature of the lower spine, you want to make sure let's flex the feet that both legs and feet are at the same angle. So she needs to reach that, right?
Cause that's her tighter side in the lower spot. Yes. So you want to feel that both feet are really level and then you can support yourself with your hand here. So we got good alignment is the most important thing before you start doing your exercises. So we're going to stay in parallel and you're going to slide your heel up the wall, slide up the wall, keeping this hip away from your ribs and down. Now if you feel good, bounced, kiss, keep moving, lifting up, you can take this hand and put it on your pelvis. Can you do that?
And push your pelvis away from your ribs there so you don't let that hip hike up towards your rib cage and lift. Good and down and lift up. Really feel the joint moving here and down. Don't let the hips move at all and up. Good and down. Two more times. We're going to do about 10 here.
So you wanna do 10 repetitions. Very good. And lift and down. Now we're going to turn out, so you want to make a little v there. Good. And we do the same thing again. I want you to focus mostly on the back of your hip socket here. So again, we don't want the hip to move the pelvis that is up here near the ribs and we want to see that you're working through here. So our range of motion, if we're really true to our hip joint, is really not very high, right? So we want to keep that work happening right in that hip socket. And you're going to find that one side is going to be more difficult for you to feel than the other because of your asymmetry in your pelvis. But if you have that wall, it's a great place to make sure that your alignment is there. Feeling the wall.
Very good. She's going to do two more times and winning up. Good. And last one. Excellent. And rest good. Let's do the other side. All right, so, so again, if you're lean lying against the wall, you want to have contact with your heels, the back of your hips, your shoulders, right, and the CR in the back of your head. Now on this side, she's actually lying on the side of her concavity. So gravity is actually opening up her curve. So we don't need to have any prop under there is actually a really good position for her to be in for her spine. So here we go.
Parallel slide up the wall and lift. Now this is this, keep moving. This is the hip that is high on her a little bit and she tends to tense on that right side. So put your hand here. Push your hip away so that it don't let it move up towards your ribs here. So keep reaching good one as long as you can. Good reaching out. Very nice. She's isolating her hip very well here and good.
It's also, you can think of the length of your inner thigh. She's lengthening through here as we're working in the hip rotators here and the gluteals here. Good. And she's breathing beautifully. If you can hear the breath. So you want to keep your breath with every repetition. Remember the directed breathing's. Very important. You're going to do two more, right? So we're working out for about 10 good.
And come down and then we're going to turn out. So same thing and keep moving up. Good. Now if the wall is here, you're going to be sliding up the wall. There we go. If your foot gets too far forward off the wall like this way in, okay, you're going to start contracting this area of your hip here, which gets very tight on many people and this is her more difficult hips, so she's got to keep it back here. There you go. So I'm going to be her wall. So stay with me here and work. They feel the difference, Gabby? Yes. So you're not working the front of your hip right here, but you're keeping it to the back of your hip.
There is what we would call the posterior part of your hip. Very good. So it's a little more difficult for her on this side. All right? So she's going to keep working that. So if you keep your foot against the wall, you'll be good to go. So I highly recommend that you lie against the wall, right? She's got two more to go. Lifting good and lift. Excellent. And rest. Okay, so now she's going to lie on her stomach. Hmm. So you're going to have to back up. So, uh, I wanted to be able to stretch your arms out here. Very good. All right, so we're gonna work on some, what I call the swan or the Sphinx.
And I want you to take two washcloths for your hands. Hmm. So you can just fold them in here, right? Let's see. Right. I want the washcloths to slide. Okay. Now here in this position, I'd like your heels in line with your sit bones here. Right? So the heels are actually facing the ceiling. Very good. So they're not facing inward and they're not facing outward.
They're actually straight up to the ceiling. And then you want to check's feel your pelvis again. So here's another position where you want to check what hipbone do. I feel more solid on the mat than the other one. And in her case it's the right one that's usually down.
But she's looking pretty good here because we've been working for a whole day. So if you feel that you have more contact with your right hip bone than your left, then you're going to want to put a pan under there. Or if you feel more on your left than your
So this is gonna write her pelvis so that there's better contact here with the mat and then she's going to be moving in the upper back. So I think that's going to be fine. So what we're gonna do now is you're going to start with your eyes and you're going to look up with your eyes just a little bit, just a little look, and you're going to slide those towels towards you as you bend your elbows and widen your chest and rest on your elbows for a moment so it's not very high. Keep your pelvis into the mat. Very good. And then start with your breastbone. Remember the light beam on your breastbone. Just slide it forward.
Straighten your arms, got slide, slide forward and lower down. Excellent. So again, inhaling into that directed breath. As you look up and sliding in, breathing out to rest on the elbows. Good. You don't have to come too far in. I want you to keep the shoulders nice and why? Think of the light beam.
Reach it forward and slide forward. Very good. She's going to do another one at that range. And again, looking up, sliding in, resting your elbows on the mat for a moment. Now press down a little with your elbows into the mat so you can really lift that sternum and then go forward with the light being very nice. You know, Gabby has the strength or to do a little bit bigger swan. So I'm going to ask her to do that, but you can continue doing the one you were just doing. So again, look up.
She's going to drag that in. She's going to rest on her elbows. Feeling the hip into the mat. Now she's going to lift up a little bit and let her elbows come off the mat a little bit and slide forward. Beautiful. And looking at the floor, we can do one more like that and looking up, sliding in. Good rest on the elbows from what you can even push down a little to lift the chest. Very nice and slide and good.
And now she's gonna stay in this position. Bend the elbows in, place your forehead on your hands. You can get rid of the towels. Exactly. And all we're going to do is work the leg. So I want you to feel the front of your hip bones. And the front of your thighs really pressing into the mat. And you can do this one leg at a time or both legs at a time. All right, but I'm going to ask her to do both legs at a time. So let's lift both thigh, just your thigh bones off the mat. The knees are going to be nice and long, so you see it's hardly lifted at all and back down. Good. And inhale again.
Try to feel the length through the whole crown of your head. Press the front of your thigh, bones into the mat, keeping the legs long. Excellent. And come back. So again, we're isolating the postier hip here and lift. Yes. And we're getting the work into the back with it as well. Good. And again, and lift. If this is too much work, too much effort in your lower back, then you could do one leg at a time.
All right, so we're going to keep going. She's going to lift. Excellent. Noticed she stabilizing her pelvis really well. Good. Then do two more times and coming up. Good. And last one. Okay. We're going to stay on our stomach. I know this is a lot on your stomach, but we're going to work in those extensors.
So I don't want you to change your position there. We got one more on our stomach to do and we can do swimming, but we're going to use the washcloths again. So we're going to stretch out with the washcloths. And what you're gonna do is you're gonna do one bending of the elbow like this, thinks the right arm as you lift and I'll come back down. Okay. We're going to be lifting the left hand up and the right leg up. Okay.
So lift up that, that's the action. Okay. But what she's going to do is do the sternum lift and start sliding the right hand in and pushing the left leg down. So slide in a little bit. Yeah. Good. Lift your chest. Good. So the elbow bending is just very slight. Yeah, very good. It's just enough to slide in. Good. Push down on the towel, slide it in as you lift your chest. Good. And let your head go down each time. So your neck is long. Ready and slide in and lift right on. Left leg. Oops, let's start again.
[inaudible] that's okay. Let's start again. So get good length. Reach out to start and reach through your legs. All right, so we're going to lift the right arm and the left leg and slide the left washcloth in, pushing the right leg down. Does that make sense? We're doing a diagonal. And again, so we're activating this diagonal of your back and in the front, the front diagonal at the same time. Excellent. And left. Now we got it good down. So there's a little bit of sliding pressure down with the hand.
Press down with the leg. Excellent. So we're contracting the front and the back at the same time. Very good. All right. Couple more. Nice, Gabby. Good. And last one, a right and rest. Now it's time to get off your stomach so it comes. Sit back. All right, good.
And just sit for a second. Don't overstretch. Reflects your back. Alright. Come around and just sit. All right. And I'm going to get the chair. I want you to sit. We're gonna do a little spine stretch with a chair. So your legs are going to be on the sides of the chair. So he likes this way up there. Good. And come a little forward. Yeah. Right. Can you stay on the little mat there? Yep. Straight legs and parallel if he can.
Good. And then rest your elbows on the chair. Good and rest. So this is a way to rest your spine. After doing that extension, I think it's best for your musculature and for your joints of your spine. Not to go into a deep contraction inflection to do a counterparts here in this position, you're actually letting the musculature rest and the spine rest. So I call this spine stretch on the chair. So she's just going to take a little second to rest and rest the back.
Very nice. And you can breathe into that left side here. Good. One more breath. So you can take about five breasts until you feel that you've released the tension of the hard work you just did. Okay. And rest. All right. Want to go back to our quadrupedal position and we're going to work our hips a little bit more. Okay. So this is a progression of those move forward so that you have somewhere to go with your leg. So now you want to find your optimal length of your spine.
So the crown or the head in line too, from the reaching out through the crown and reaching to the tail. So the back as long as possible, not too flexed, not too curved, right? So she's going to hold that position. Can you bring your hips back so they're over your knees a little more? Do you notice that? So I want your knees right under the hips.
So bring your hands back to the right under the shoulders. Now after all the work we just did, her back is pretty level here, so I'm not going to ask her to bring the knee back cause that's where we're going to be sliding. So she's going to take an inhale and to that concavity and exhale, maintain that as she slides the right leg back and the left hand forward. But keep it on the mat so the toe is on the mat and your fingertips are on the mat. Right? And just hold that position. And see if you can keep your pelvis in that position. Good.
And then just slide your knee towards the floor and back in and your hand under. Let's do the other side again. Try Not to do a tail wag. Try to hold that position. Slide the right hand forward as the left foot goes back. But don't lift, just hold the position. Inhale into your concavity. Try to open up that space in there.
Good and exhale and come back in so you can repeat that if that was hard for you. So again, breathe out or you can hold the position and then inhale and lift your foot and your hand and exhale, coming down and bending the knee in. Make sure your hips stay right over your knees. And again, other side going out. Very nice, very good, nice. And it doesn't have to be a high leg at all. I've had to prefer that it's not and come back down because I want you to work the gluteal area and again go out good without extending in your lower back.
If you lift your leg too high, it is natural for the back to curve. So we want to keep this as a flat back as possible and come back and we've got one more to do. Then we're going to add a little bit of um, hip abduction on the next set. So this is the end of the first set and coming up beautiful and coming back down. All right, let's go to the other side and reaching out. All right, so now lift up. Now you're simply going to bring your left hand to the diagonal away from you and your right foot away from you on the dial without changing anything in your spine. And then bring it back to the midline and come back in. That's the hard part. And again, straight out from your midline and out to the side and back to the midline and come back down. So she's doing the same side.
We're just going to repeat that two more times. Out side center and come down one more out. Hold your stability there. Excellent. And she's got that nice breath going into that concavity good other side, four times on the other side and out side in and down. Good. We've got to keep that pelvis facing the table and again out.
Go ahead and keep that pelvis here. Just your leg is moving. Good. Yes, and down. That was two and out. Do you notice how she keeps adjusting her spine back into alignment? When she comes back to the mid line, it's very important. She readjusts and gets herself aligned and then repeats the last repetition out center and down. All right, now we're going to add a little more advanced circles with this, so we go out, out to the side and what we're going to do is drop down and come into the midline and lift up. So you go out to the side, you dropped down and into the midline and up and the arm is doing the same thing out down and bringing the arm up. It's like a port abroad and down and lifting up. Let's do one more out, down and lifting up and then last one up and then bring the leg in.
That was the last one. She loves that woman. She could do it forever. All right, let's do the other side. You could build up to about 10 repetitions and lift up. Now we'd go out, down, up. Good out. Don't touch the mat though. And lift up. Good and out. Remember, it's not very high because you want to keep your spine in that great alignment that you've worked so hard to, to achieve prior to this exercise. And watch that left side, Gabby. Just keep breathing into that ribcage. Yas. It's very hard when you bring your leg out to the side, not to go into your account cavity on that side. So you have to keep working in.
All right. Do you feel like you've done as many good and rest? Okay. Excellent. Good. All right, so we're going to do a seated reverse one. So sit down with your legs straight now and they're going to be in a little bit of a v position with the feet flexed. All right, so open, good feet flexed. Good. Alright, and reaching the arms up this way. Did I say Swan? I meant okay. Sorry. Seated reversed. Saw, sorry. All right.
And what that means is typically in Palladia, so the rotation goes to the left and you're going to be reaching towards your left foot, right hand, your left foot. But we're gonna do a reverse action. So she's gonna find the crown of her head up towards the ceiling. She's going to breathe into that left side. She's going to XL, she's going to rotate, looking back to the right, keeping the length, and then reach that left arm, which is opening the left side of her concavity towards the foot, not going down to touch the foot, but you see the length that she's achieving through that reach. Good. And then bring it back to center and again through the crown of the head, lift up and rotate to the right. Good. And reach long above your foot.
Because we're trying to keep that side of the body open as she's reaching and come back and again and lift up. And this is a case where in her curvature being that c curve that we're only gonna do this side and come up and lift. Good and reach and lengthen. So you notice where really lengthening long forward and come back. And we're going to do one more and lift. Excellent reach.
Beautiful Gabby. Excellent and release. All right, so we can do some arm strength, a little more core with some bridging. So side bridges, there's two ways to do a side bridge. You can do it on your elbow. So let's show that one. Okay, the Gabby's advanced. So I'm actually gonna make her do the more advanced one. But let me show you how you can do this. Once your knees are bent, heels in line with your sit bones here. All right.
And you're on your elbow with the neck nice and long. And you can have your hand here to help you at first. Or you can have your hand on your side of your body. Good. And what you're going to do is just, you press down with your elbow and you lift your hips up, but try to create a nice straight line from the crown of your head through the tail. Beautiful. And you can hold and breathe. Breathe into that left side. Very good. And gravity's your friend here.
It's actually helping her open up that curve and come back down. That action of the arm and the gravity is actually putting her spine in optimal position and again, and push up. Excellent. Good. And come back down. Now you can repeat that like three or four more times. But we're also going to do with straight legs now and up on the hand. Yeah.
Did we do the plank? Now she's going to come up with a side plank. The right to top foot's going to be bent on the floor here. Bend down. We'll do that one. [inaudible] excellent. So now this is challenging the arm a little bit more. She's got to watch the neck and lengthen through the top of the head. Very good.
And she's going to hold that position. You can look over your hip and bring your arm up and reach and hold. Keep breathing. Very good. Keep opening. Look at that. Nice openness here. That's working her curve there. Good. And then come down. You want to try with both legs straight. So that's, here's option number three, the most advanced one, the side bridge and straight legs.
And in Polonius we do an exercise called twist, but I just wanted to hold the plank. So she's working that rib cage, the muscles through here to keep the open and breathing. Just breathing into it and come back down. I like to take about three to five breasts, but about three breasts and holding the position. Let's do the other side. Okay, so let's do two of the needs spent. So we'll make her even. All right. Now this side's going to be a little more difficult. She's going to have to really translate and lift the left side of her ribs up as she does this. Your, your feet are a little too bent. Okay, here we go.
And she's going to push into the mat, lift the rib cage up. Good. And inhaling into this side. Very good. And exhale. Good. And again, inhaling, good. And XL c and this is where you can see, see if we can bring this a little bit more, right. Breathe into that side. Very good. And come down great.
Like straight one leg bent in the front. So you doing this class, you should choose which bridge or maybe you'd like to do all three. So come up. It's easier to come up on two or, okay, good. Alright, good. Great. Now what's your working here is not only the arm balance here, but you're working into your breath here and you're working this spiral of your spine. Very Gun. Just keep working and breathing into the back part so that this rib kind of moves back here.
And this part of your ribs gonna move forward through the breath. So we want the breath here and here. Good. And come back down. And then the full position. Good. And breathing and good. Yes. Good. Keep breathing into that side. Very good.
And holding backless good. So this is good for strengthening and also working the tone of your arms. One more breath. I'm going to make sure she's even okay. And rest. Okay. So now we're going to bring the chair back and we're going to do a position, a sidekick position. So, but really I just want you to do is hold the position.
So she's going to put her elbow on here. On the chair. Is that okay or is it too hard for your arm? Okay, let's see here. A little towel. There you go. So if you have an upholstery chair, it's perfect. Okay, so sidekick is kneeling right with the leg out to the side for this flexed. Good. And then this hand can be behind your head. Hmm. Very good. Yes.
Good. So long net care. So the sidekick, if you had your hand on the mat, would be a little too compressive for her left side. So by using the chair, you can actually lift yourself up off of here to open up that side and then lift the leg up without hiking in the hip. That's very important. If you're short on that side and just hold the position and breathe into that side and breathing in. Good, good. And exhale. Keep working that hip. So we're really working through the hip here. Okay. And place the foot down. Okay. Now if you feel secure and comfortable there and we can add a little movement of the leg forward and back. But the pelvis not changing. So here we go.
We're going to lift up. She's going to exhale forward with the leg just a little bit. Good and back. Posts your hip. Good and forward. Excellent and back. Nice and forward. Nice. Gabby and back. Good. Keep reaching that right top of your hip, away from your ribs.
Keep going and forward and reach back and forward and reach back and bend the knee and come down and rest. Excellent. Let's do the other side. Okay, we'll get to see your back this time. That would be nice. Okay. All right. So get your elbow onto the edge of the chair. You're going to line up your spine. Straight line. This leg is parallel, so you're going to feel the big toe edge in your heel on the mat here. So we're working in this hip here. So again, you want to keep this hip bone away from the ribs here and you're going to breathe in. So now you can use this arm to lift up off of your hips to open up your concavity if it's on the left for you. All right, so just lift the leg first and hold.
You're gonna notice it's much harder and come back. Because this curve wants to shorten and contract. So we might do is just lift a little bit and hold it up. See if you can just unweight the foot and down. See if you can unweight the foot without lifting the hip. Very nice and down.
You can see the side is much harder and try not to lift the hip and unweight the foot and down. Good. And for some of you it might be just holding the position of breathing and down. Okay. So keep breathing into that. Keep reaching through this arm. Elbow. Good. Keep that hip forward and lift. Nice. Okay. You do want to do the kick or is this good? It's probably good on this side.
Yeah. Okay. And rest. Yeah, so we're going to knock to do the kick on this eye. It's a lot of work for her and that hip. Yeah. All right, and rest. So let's stretch now with the hip flexor stretch. So we're going to finish with a series of three stretches actually in the first one's going to be a hip flexor stretch. So we're going to kneel on a mat. You're going to use the chair for balance.
You bring your right foot forward and take your left hand and make a soft fist and place the back of your hand in your knuckles. The soft on the sacrum. So the fingertips are facing down for a soft fist. So you're gonna be using yeah, exactly. So you're gonna be using your knuckles on that. And what I want you to do is you're going to with your hand pulled downward towards the floor.
You're pulling your sacred just a little bit downward as you lean forward into the hip and then come back. So there's a little pressure towards the floor as you lean forward. Good and come back and just keep doing that. And as you're doing that, you want to feel, especially on the left side, go ahead and lean forward that you're lifting that rib cage up and off of your hips. Nice. There you go. And come back. So it's hard on the side that you have that con cavity. So as you're stretching forward, you want to lift that rib cage up.
Good. And come back. Let's do a couple more here. Cause this is the side she can really use the opening here. Reach through here and come back and let's add a left arm rising up. So bringing an arm up. Good. And as you lean forward, reach higher and Simon a little bit to the right. Just a little bit going up. There you go.
So you feel that ribcage opening up here and come back and let's do one more like that. And that sacrum is still reaching towards the floor. It'd be nice if he had two hands and stretch and open this side of the body. Very nice and rest. Let's do the other side. So turn. Yeah, very good. So left leg is forward, right hand is on the sacred, nice, soft fist. And you just lean forward and you're pulling the tail down towards the floor as you lean forward and come back. Very good. And again, inhale, good and come back. Good and reaching.
And you can lift the sternum up and get a nice reach through there. Good. And we're going to do two more. No, we don't need to reach on this side because her convexity is on the right side, so I don't want to be opening the side that's already very open there. All right, one more reach. Good and rest. Okay, so now we're going to sit on our chair and we're going to do a side stretch on the chair. Actually we have to sit sideways on the chair.
Now here's a little problem with chairs in general. Chairs have a slope to them so you could sit on the corner of the chair. So hold on. No like this that, hold on. I'm going move it into a diagonal. And so you can sit on the dye on the here, hold on, I'll show you. So you can sit more. Kind of like that. So you're on the diag.
The chair is on the diagonal. That's one choice because the chair slopes and if that's your hip that you have that curvature on, it's going to make your curve more exaggerated. So a lot of times sitting on chairs, even though it may be funny if you're at somebody's house sitting on chair on a corner, that's ideal for your sit bones cause they're more level chairs have the slope down towards the back. So you could do that. Or You could prop the one side, but let's try it this way. Let's see if you can sit on the corner so you feel that your sit bones are more level and then we're going to go into a side stretch. Okay. See if that works for you. Yeah, very good. That's more level.
All right, so we're going to reach up to the side and then reach over. Can you take your right hand onto the chair or is that too far behind you? On the top here? Yeah, I know we're experimenting with the new chair position. Okay. Just keep your arm down. Good. And then reach up. Now translate your ribs over to the side. Inhale. Let your head just go.
But you're thinking long lift and then come back again and again. Lifting up. Reach that rib over to the left as you go up at that said. Very nice. So that's an important cue that you reached the rib to the left as you go over.
Very nice and come back and last one and reach. Nice Gabby and relax. All right, let's try the other side. Now it's going to be different on this side. We have to move the chair. We get our little diagonal corner to sit on. Now on this side, we don't want so much side bend and we don't want to go into the curve. So we're going to reach up with this arm and we're just going to think straight up really good.
And translating the ribs to the left. Good. Let's put the other hand behind your head. All right, so we're gonna reach this elbow away from you this way. There you go. So this action and then she can reach up this way. So ribs shift to the left by pulling this arm up and stretching this arm long and then bring that down. Good. So two things. Reach that elbow length and through that left side and reach up feels really good and release and we'll do one more and reach to that side, the left side of the body as the same time you're reaching up, thinking about doing side bending but not really good and relax. Okay, and now we're going to sit on the chair on the edge of the chair again to finish up with a little bit of a stretch.
Sit on the edge of the chair with your sip ons. Reach your hands behind you on the chair and let your shoulders just drop and then just lean forward and just get a nice stretch through the shoulders. Very nice and just hang there. Good. You don't round. We're trying to open through here. Very nice. Good. And just breathing into the left side and relaxed.
Very good work. Thank you. Throughout the class, I was queuing where the alignment should be. And so many times if you really feel that that Ilium, the top of your hip bone is reaching away from your rib and stabilizing the levelness, whether you're a c or an s curve, the alignment is correct. But to be more specific for the s curve, usually what happens with an s curve is a similar translation of the rib cage to the right. It's as if your ribs are falling off your pelvis this way. But the difference is is that your pelvis is more in the center, not on the left side because of a counter curve of the lumbar spine. So this apex is right, and then the lumbar spine would be like this.
So your right hip is high this way. So if that makes sense. So your rib cage goes to the right and you stand mostly on the left so that this hip is up. So some of the cuing that I gave Gabby, which was to drop her left hip more, that was the part she needed to work on for her. For you, it would be dropping that right hip more. So always feel the space between the bottom of your ribs and the top of your pelvis that you feel that side is elongating and not a shortening and tightening through there. That's the best way to know whether or not and use your sensibility of how it feels to you. It should actually feel very good. Should never feel any contraction or tension in the spine.
In one particular area. There's going to be a spot like for Gabby, she has a little lower right side near her rib here, which is right where her spine is transitioning back towards the center. That always is kind of talking to her. So if you feel an area like that, you try to open it up. But the most important thing for you is to do that rib translation and breathing and then feeling the hips moving away from the ribs. Yeah. In this sequencing of the mat work, uh, there were a couple of times where Gabby only did one side and that is because if we had done the other side, her concavity would have increased more. So we weren't getting a benefit at all.
We weren't getting an opening of the tissue and we weren't getting the opposite strengthening of the tissue. We were just creating her pattern in a more exaggerated emphasized way. So I think there was only one or two where I did not have her do the other side because of the curve. So you need to have a feeling of like, this is feeling good. It is stretching and lengthening and not making me feel compressed. Um, and on the, the Legwork, if you noticed on the, especially the kneeling sidekick, she could not lift her. She got the leg up off the mat, but in order to move her leg, she started to go into her curvature.
So I don't allow the movement to happen until you have the strength to hold that position and move your leg to the side. So once you have that strength like she had on the other side to get that strength to do that, then you, then you'd be ready to move the leg. But I felt plus she was tired. I felt that it wasn't in her best interest to start moving the leg just to do the movement. She needed to keep the spine in that alignment. So you'll have to really track that for yourself.
Either have a mirror in front of you or best is feel your body. Yeah. So in the sidekick, if you are able to lift your leg and it is, you know, you are able to lift and do the other side, go ahead and pause the video and go ahead and do the exercise and repeat the repetitions. And when you've done that side, you can put it back on play and continue.
Back Care: Pilates for Scoliosis

Mention
 |
Madeline Black (Teacher) |
 |
Kimberley K |
 |
LInAnne |
|
|
Melanie P |
 |
Paulinka S |
 |
Olga R |
 |
Elizabeth D |
 |
Heidi VDB |
 |
Stanislava I |
 |
Laura Hausler |
|
|
Thodoris P |
|
|
Sarah B |
 |
Vanisha T |
 |
Britt-Angela W |
 |
Anita L |
 |
Valya Karcher |
 |
Glynis R |
|
|
Stamatia K |
|
|
Yumi H |
|
|
Katherine A |
|
|
Julie K |
 |
Maria Wheeler |
 |
Tahmour B |
 |
Connie M |
 |
Petros K |
|
|
Vivi J |
|
|
Maria C Rubio |
|
|
Sigal R |
|
|
Janine S |
|
|
Jennifer T |
|
|
Jennifer S |
|
|
Mindi K |
|
|
Oryan W |
Comments


You need to be a subscriber to post a comment.
Please Log In or Create an Account to start your free trial.
