Description
About This Video
Transcript
Read Full Transcript
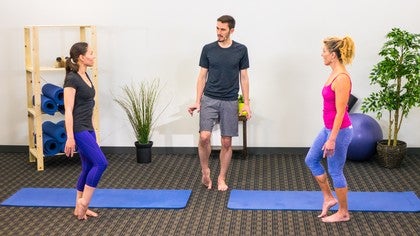
Hi there. My name is Juan Nieto. I'm from Spain. I'm here to do a mat class for runners, especially for the runners who want to warm up or want to start running. And I'm here with very good company.
And I hope you enjoy your class. So guys, the first thing we're gonna do is to work on the feet. So feet are really important for running and basically for our whole life. So we're gonna start to wake them up a tiny bit. So what I want you to do is just to take the right foot a little bit behind the left foot, just a tiny bit, like half foot.
And I want you to feel that you can, that you can drag the big toe and the ball of the big toe close together to the heel. On both feet? On this one, first. Okay? There you go.
And there you go. So what I want you to notice is that very gentle, in a very gentle way, you feel like the arches are going higher, okay? So just to have an example, I show you in this. I want you to feel something like this, very gentle. So I want you to find or to feel any wrinkle in the toes, the toe has to be extended, all right?
And one of the things of having the foot behind is like I don't want you to feel these tendons in the front of the ankle to pop out. So that's the tricky part. So if they don't pop out and we can see the lifting of the arch, it means that the intrinsic muscles are working. So first we need to play a little bit with the intrinsic. Sometimes it takes a little bit more time to be able to press with the ball of the big toe and lift the arches without overusing the other muscles.
All right? It is working? (laughs) Yes. I know, I know, little by little. It takes time, probably more than one class to practice this.
But it's something very easy that you can do whenever you wanna do it. All right, cool. That's it. So one of the ideas that, let's do the other side. So one of the ideas that you wanna get when you do this exercise is to feel that the big toe is getting close together to the heel.
And it's also very important not to feel this rotation in the ankle. So it has to be just the foot, okay? With a little elevation would be more than enough, more than enough. It's just this tiny activity here, all right? Can you feel that?
Okay, said that, once we have this feeling of, to make an analogy of what we do in Pilates, sometimes with the core, this is like preparing the core of the foot. And actually it is. So we are taking the deep muscle stabilizers to engage a tiny bit, because sometimes they get weak and we need to re-communicate again with them. So now I want you to lift all the toes. There you go.
And now you will feel that the tendons are popping out. That's normal, because these muscles are mobilizers. So now very gentle, let's go to lower the toes. And let's do it again. So it's very important that you keep the weight on the tiny ball and the big ball and the center of the heel, right?
And try to spread the toes out. All right? So again, we don't wanna feel or we don't wanna have the movement into the ankle joint, into the heel. All right? Just toes, awesome.
Perfect, you got this? Okay, now we're gonna do just with point. And very slowly go down. Okay, so when we point our feet, it's important that it's the big toe, the one that is on the ground. Sometimes what happens is that we go to this part of the foot, because the foot is kind of weak.
So I want you to focus especially in the first, in the big toe and the second. And now take the hips a little bit forward, just a tiny bit. And then up. There you go. And now very gentle, just slightly touch the mat with the heel, slightly.
So you really rest some weight, but very slightly. Almost nothing, okay? So let's do it again. Keep the big ball, probably the second, hips forward. There you go, sometimes it gets long.
Very gentle, like just slightly touching with the heel. Okay, one more time. Big toe. Lengthen the hips in front. And very gentle, we go down.
There you go. It's not that easy as it looks sometimes, right? Okay, perfect. Now we're gonna roll with the foot. So we start with the right one.
So put it a little bit behind, just a tiny bit. And I want you to flex the metatarsal phalangeal joint. Make sure that the heel is over the big toe. It's important to understand this roll. So let's go into do this just for a few seconds.
Feeling that you are driving the movement to the metatarsal phalangeal joint. When you're there, what I want you to do is to press with the big toe and the second toe, you know that you point completely the foot, and then very slowly are going to roll over the dorsal part of the foot, sorry. So now, press with the toes again, view the toes. And now put the ball on the ground again, and very slowly come back. Okay, let's do it again.
So roll over the big toe. The heel is just above the big toe. Press with the two toes, and then roll over, feel that kind of stretching, right? It's nice, it's nice. And now press.
And heel back, perfect. Let's do the other one. (woman talking quietly) Usually we work with the one behind. Okay? So roll, feel what the heel wants to do.
So try to keep the heel over the big toe. And now press with the two toes, and then roll slowly. Feel that kind of stretching. A foot can be worse than the other one, or better. And now press back again.
Take the metatarsal phalangeal joint against the ground again, and slowly move down. So you see very easily that one foot is quite dumb, and the other one is much better. (laughs) But we all have a dumb foot. Okay, so let's do the first part again. I want you to focus on this again. Two, three times is gonna make it easier.
And now once we're here, we press with the two toes. Then we roll, awesome. Feel the stretching. Now lift your chest, good posture. I know, I know.
Now press back. Point the foot completely. Metatarsal phalangeal joint. Okay, last time, one, and press, that's two, cool, three, roll, four, back. Five, and six.
Okay, perfect. A little bit more difficult? Let's do it. Sometimes, sometimes. Okay, so now what I want you to do is to take the big toe behind and the other four forward.
If you've never done this, that I think is the case, good luck. (laughs) Okay, if you cannot do it, you just come here and take it with your hands. And I just want you to have that experience. Sometimes you cannot do it at the first time. Can you point the foot? Okay, that's okay.
Perfect, that's enough, just to get into the position, just to work with the toes. It's more than enough at the beginning. Okay, for the most advanced people, if they want to bounce a tiny bit on that connective tissue, it's interesting. We are warming up the fascia between the toes. And that's interesting.
All right? Cool, so rest. I'm sure you wanna rest. (laughs) Okay, now we can do the opposite. So I mean four fingers behind, and the toes, sorry, and the big toe forward. If you can point the feet, perfect.
If not, as much as you can. So little by little. If you wanna bounce here, maybe it's too much. Sometimes we can do it on the mat if the floor is very hard. So you decide.
It's kind of painful, I wouldn't say painful painful, but it's a discomfort. So that's all. But one of the things that you can do now is just compare one foot with the other. It's completely different. All this information it gets really creates all this space into the foot.
Let's go to the other one. So big toe back. You wanna take it, take it there. Okay. I know, I know.
Just playing with the toes is more than enough. I know, it's what it is. (laughs) It happened to also at the beginning, it happens to also. But that's what really is telling us is that our foot has way more ability than we thought. If you wanna bounce, maybe it's not the case, but you could bounce tiny bit. After a few seconds, it's more than enough.
And now we can do the four toes back and the big toe forward. That's easiest, this here. And if you want to bounce as well, you can do it. So we really need to prepare the toes, because now we are gonna challenge our balance and our connection with the ground. And it has to be a very, everything has to be awake.
Okay? So let's try again to do as before, to do the point and down. Look how easy it feels now, after this exercise. All the information that you have exchanged with your toes, now we can use it for function, okay? So now we're gonna do a full squat, okay?
But the full squat has to be with the spine completely upright and vertical so we can lift the heels. So we can lift the heels from the ground. So it will look something like, you can take your arms forward if you need. If not, just skip it. But I want you to feel is kind of sensation of taking the big ball on the ground, extend the thoracic spine, and up.
Okay, you got this? Yeah, let's do a couple. One. And up. And I want you to feel that you really control these.
So believe it. So down. Yeah, so now think about the pelvis. And the pelvis is going up. That's it.
And then the legs respond. The legs will help you. Do it again. Okay, and up. That's good.
Let's make it a little bit wider. Now we're going to play between full squat with the whole foot on the ground and full squat on the balls, all right? So first, as we just did. So just go down. And now try to keep your balance.
And roll into the full squat position, I know, can do it? Okay, let's, no. (laughs) Let's do it again. So I want you to go from this position to this position, okay? And you can feel that the feet are working here. So forward.
Try to lift your chest. And slowly down, perfect. Try to feel more comfortable possible there. I know sometimes it's difficult. And now forward.
So chest up. And let's stand up. Cool, shake your legs a little. Okay, little by little. All right, so next step is trying to kneel from this position.
So it's going to be very similar of what we do, but we are breaking it in tiny parts and making some breaks to make it bearable (laughs) because sometimes it's too much. (laughs) Okay, so first is the full squat, heels up. Here. And now, instead of going back, we're going forward. So try to keep the shoulders in the same position, and slowly lower your knees.
You probably feel that the foot is working, everything has to work here. Now, try to think now in your hip joint, and I want you to find a movement, there you go, where you plug in the hips into the socket. And then we go to the full squat. I know. I know, awesome.
Okay, so back again. And now keep the shoulders in the same position, and slowly lower your knees, perfect. If you can do it at the same time, much better, instead of one and other. But it's a process, it's a process. So it doesn't make sense to force you to have something that you don't really feel it.
So I'm very interested in this position of cluck. There you go. And down. Awesome. And up with the hips.
And let's go up. All right, shake it. (laughs) Okay, more? Yeah. Okay, cool. So this is all connected to the same sequence, all right?
So we know this, one, and now slowly, keep the shoulders, two, and now we go to a high kneeling position. So here, I want you to feel like the bridging, like the exercise of the bridging. So really lengthen the front of the hips. Feel the big toe pressing the ground. And the glutes are helping you to extend the hip forward.
Okay? So if you extend too much, you lose control with your toes. But if you keep with wedging your toes, you cannot go farther. So it really protects your lumbar spine. So now here, I want you to lean forward, like a thigh stretch position.
So try to imagine the same line between the head and the knee. And lay back. Are you breathing, guys? Yeah? Okay, now what I want you to feel is that you are creating tension here, and you are using that tension to bounce back.
Perfect, awesome. There you go. So you go back, back, back, back, and release. That's it. It has a certain rhythm.
And release. And do it again, release. Last time. And release. Now, let the toes down.
And let's sit, if you can. Okay. You're okay here? Let's try to take the knees together, and same as the foot, as the feet, sorry. All right.
So now, take your arms back. And now let's try to, again, to open the front of the hips. It's like a posterior tilt, but we cannot get a lot of posterior tilt in this position, because there's a lot of tension in the front of the hip. Just a tiny bit, little by little, okay? And rest.
So I don't want you to see, I don't want to see a lot of movement up. It's more like a posterior tilt. And you feel the tension in that tissue again. Right? And do it again.
There you go. It's very important to really lengthen the front of the hip for runners, because they usually run in a flexed hip position. So it's important to have this information into their system. Okay. So you got this?
So we're trying to get all this together in the same sequence, okay? And we can do it. So feel the hips and the glutes, and the contact of the foot and the ground, and up. Perfect. Are you using this?
Yeah? So if I go here, that's it. Good warning. (laughs) Perfect, okay. So I want you to feel this support here.
Okay? I wanna see a couple of, a couple more times. So very upright, you sit, feel the contact with the foot. Hips forward, duck. And rest.
Flex. Awesome. One more time. Are you working here? It sounds good?
It sounds good, perfect. (laughs) Okay, so toes down. You sit. We roll. Here. Down.
There you go. That's it, and now up. Okay, so let's do the full sequence. The full sequence is going to start with the feet flat on the ground. So this is one.
And now forward, two. Keep the shoulders, three. Four. Thigh stretch, five. Now toes down.
And now thigh stretch here. There you go. Toes up again. And now you sit. And now plug in your hips again, cluck, heels down, and up.
So one of the things about this is not that you do it. It's that you feel comfortable doing it. So you really need to own the exercise, to really lower your center of gravity and make it high again with control, with enough control. So let's do it again. So one.
Two. Let's make a pose. Three. Four. Five.
Oops, you're right. (laughs) Toes down, six. Toes up. Six, and now plug in the hips, cluck. And now heels down. And up.
Let's do it again. Breathe, easy, one movement. Okay? So one, two, three, four, five, toes down, tuck, yes, that's it, that's it, and up. Perfect, gorgeous.
Was much, much better than at the beginning. So we're going to connect this exercise with a very well-known exercise of Pilates that is the mermaid. And we're gonna create a little modification to work more on the hips, all right? So we're gonna use the same idea to get into the ground. So we do our full squat.
And now we control with our hips. There you go, you don't need your hands anymore. And now here and here. So now what I want you to do, and it's more difficult than it looks at the beginning, is to sit to one side of your legs. There you go.
Well done. And now, not with the shoulders, but with the hips, so we go up again. It takes time at the beginning. And one side, again, is more challenging than the other one. So I want you to control this.
And now up. All right, perfect. And now control it. Try to be the more upright you can be. That's it.
And now it's the other hips. There you go. (laughs) And back. It's good to go out of your comfort zone, because sometimes you don't really know how to do these kind of exercises. Do it again. And up.
And the other one. Okay, so now take the leg back, and the other one forward, like a mermaid. (woman talking quietly) Absolutely, absolutely, yeah. Don't worry. So now I want you to roll on your hips.
This is a very nice way to rotate the hip in a kind of passive way, because it is your torso driving this rotation. And again, it's your torso creating this rotation in the hips, all right? So all the movement you don't have in the hips, you need to compensate with the spine. The spine is perfect to do that, because it has a lot of mobility there. So try not to compensate as much as you can.
So I don't mind if the sit bone is not touching the ground. That's perfectly okay. All right. And now I want you to encourage the rotation also in the torso. So we rotate the hips.
And now we rotate the torso. And you can use your hands if you like to rotate even more. And now let's come back. There you go. So we rotate the hips, the torso, use the hands.
And feel all this lengthening, all this opening through the front of the hip, all right? And sit. Just one more time. Rotate. Feel it like just one movement.
And back. Okay, so no hands. And we change to the other position. Okay, so now we are in the other mermaid. So because we play with this, I recommend you to really take the sole of the foot closer to your butt, because sometimes if we do this, it's like a stop.
So you can't really get the pelvis down, because you have your foot stopping you. So it's, yeah, it's in this position. Like this, and you try to, here you can sit. But if you are like this, it's way more difficult. All right?
So now from the hip, we rotate, trying to keep the lumbar as more stable as it can. It doesn't mean that you need to hold anything. You're breathing, you are laughing, you are happy. Just to try to get the movement into the hip instead of taking it to the lumbar. Now, we add the rotation of the torso.
You can use your hands. And you can rotate even more if you like. Feel the lengthening in the front of the hip, probably the quads are kind of stretching a little bit. Okay, so hip, torso, use your hands, open the front of the hip. Perfect.
Let's sit. And remember to keep this as much stable as you can. Try to find the groin, the movement there into the groin. And now rotate. Lift the chest.
Shoulders back. Rotate, and back. Okay? So you got it? Now we're gonna play with this motion again, a couple of times.
I want you to feel that you can control your body with the hips, perfect. There you go. And find some sort of organic movement here. Perfect, cool. All right, so now what I want you to do is I want you to face each other.
And we're gonna use the same position to go into quadruped. Okay, so we don't really need to change it more. So let's go to quadruped. All right, so first I want you to feel that the toes are on the ground. So really feel the flexion in the metatarsal phalangeal joints, okay?
So one of the things that I want you to notice is first, the spine should be as neutral as possible. Understanding neutral as light lordosis in the cervicals and the lumbars, and the light and long kyphosis in the thoracic spine. Said that, I want you to feel that your support is coming from here. Look, I barely need the arms. So I want you to find this feeling of taking the weight, sometimes it takes a little bit more time than we thought.
But the idea is that you don't rely on your arms. Your arms are, that's it. So from there, little by little, you will get more control. So it's very important to work with the extensors of the lumbar spine, because they also, they give us support. If we are flexed, it's very difficult to keep it.
So I don't really need that, there's no hands. But I want the hands to be very easy, very gentle, okay? So lengthen the top of the head. Lengthen the sacrum. We are in a six-point quadruped.
So hands, knees, and toes. And I want you to keep that position when you flex your spine. Perfect, and you go forward just a tiny bit. So flex the hips, keeping the spine as much neutral as you can. Control the hips, the ribs, sorry.
And forward. There you go, and now back. And now forward. And now back. And now forward.
Okay, so this is easy, right? Okay, now what I want you to do is to take the left knee forward just a tiny bit, and the right knee backwards. Again, check your lumbar spine, check your thoracic spine, check your shoulder blades, and now go back. And the movement is completely different, right? It gets some sort of diagonal.
So I want you to feel that diagonal, and I want you to take the weight right into the hips. Okay? So again, this is going to prepare the hip for that three-dimensional motion that we need to do when we walk, when we run, et cetera. Okay, let's change to the other side. Check your spine, lumbar spine, the shoulder blades, lengthen the neck, lengthen the head.
The sacrum and the head are very, very separated. And now you go forward and out and backwards and out. Here you probably feel, again, some sort of difference between one hip and the other one, right? Just a tiny bit. And allow that three-dimensional motion to happen.
So let the body go where it wants to go. There you go, just a tiny bit more. Okay, now you got it. Perfect, so let's go back to the parallel position again, like more symmetric position. Here.
And because we don't really have much weight here, it should be very easy to do this, right? Now you feel that the support is coming from here, basically is coming from here. So this is easy. So once you have one arm forward, try to keep the same position in the spine, lengthen the other one. All right?
And now we're gonna change. So first the arm, feel the connection in the hip. It's very important to feel in the hip. And now extend the other one. And from there, you lengthen.
So let's do this a couple of times. Arm, feeling the hip, the connection into the groin, and now lift the leg. Perfect. One more time. Arm, feel the hip, and okay.
So what happens now if what we do is to start with the legs? It changed completely the way we do the exercise. So I want you to feel, now let's take the feet down. Perfect. So leg, and then you notice that some sort of shifting happens here.
That's okay. The easiest way now is to have this hand free. So you feel very easily that this hand is free. So I want you to put the weight on that hand, because what I want you to take the other hand out. Okay, and now come back.
That's it. Now, legs, you feel that this is the free hand, so let's put the weight on the hand. Feel the connection into the hips. And very slowly, take that hand out. Okay, and come back.
Sometimes this gets very difficult. Some sort of tricky, so this is a little trick that we can do that will help. So right leg, and I want you to rotate, and I want you to press with the left hand into the ground. And then we go to a kneeling style. And this looks more spectacular and difficult, but actually I think is easiest.
So now lengthen the arm forward. And rotate your torso, your complete torso, over the hips. Try to lengthen the head, the arm, the foot, and now rotate again. Press the ground. Use the knee and the hand to press the ground and rotate and smile.
And then lengthen. And now you control the rotation, and you are in the position. Cool, well done, girls. You need to rest? No.
Okay, so let's do the other one. Okay? So now I think you got it. So let's repeat it again. The weight is here.
I don't have a lot of support here. So left leg, and now rotate, rotate the pelvis. When you feel that you have rotated enough, press with the hand, rotate the shoulders, keep rotating the hips into a more vertical position. Lengthen the arm over your head, and rotate the whole torso, trying to be as much as parallel as you can on the ground. And rotate again.
Press the ground with the knee and the arm, of course, the hand. And lengthen again, forward. And try to (laughs) find the wrist on the plane, and then rest. Cool. Okay, let's rest here, tiny bit.
If you want, you can stand the arms behind or forward. Do whatever you need to do to feel more comfortable. All right. Cool, so we are building our body into the plank position that is a bit more challenging. But we're gonna start with prone positions, okay?
So now what we're going to do is a couple of exercise into the prone position. One of the things that happens in running is that we need to stabilize, and we need to train our body to be able to support 180 perturbations per minute, that is every step we do when we run. So our motor control has to be very reactive and has to be very fast. We cannot think about it. We cannot prepare it.
So we're gonna use that kind of input into the Pilates exercise. So we're going to make it faster, all right? So let's go into the prone position. We're gonna do the swimming exercise, all right? So what I'd like you to do is take your arms over your head.
And please feel the hip, the front of the hip, and remember that the hip is kind of deep and lower than we usually think. So it's at the same height of the symphysis of the pubis. So try to feel the hips really connected into the ground. It's like where we do the bridging exercise. I want you to have some sort of connection here.
Okay, the hip is going to be the fixed point. So now I want you to feel that the right foot is lifting and reaching the wall behind you. So you feel that the leg is kind of levitating. And now let's do the other leg, as well. So you're not lifting the leg.
You're lengthening and raising the wall behind. And it levitates. And now we're gonna do the same with the left arm forward. Try to reach the wall, not with the shoulder blade. Not lifting the elbow into the ear.
But lifting the whole body. And now with the right arm. So be sure that you're keeping your connection into the hip joint, not the lumbars. Okay, and rest. So it was okay?
Any discomfort in the spine? Okay, if there's anybody who has a hip, lumbar pathology like spondylosis or a stenosis, this exercise is not recommended, because it is an extension. So nothing here? So we can do it, all right? So again, hips forward, lengthen right foot, raise the wall.
Now keep the focus on the hip, lengthen the other. Now reach with the right arm or the left arm. And now with the other one. And I want you to start swimming. Make it quick, quick, quick, quick, quick, quick, as fast as you can.
The focus is in keeping the hip really connected into the ground. So lift the sternum. Try to feel the thoracic spine, not the neck. And try to be fast, fast, fast, fast, fast, fast, fast. A lot of tension into the legs.
Okay, and rest. Perfect. Hands beside of your torso. And now rest here. Try to breathe into the spine.
Try to breathe into the sides. All right. Cool. So now let's we're gonna do something a bit different, all right? So take this position into the elbows.
So the elbows is kind of under the shoulder. All right, so you're making like a triangle with your hands and your forearms. And again, I want you to feel the connection into the glutes and the hips, okay? So again, the hips are the fixed point. Not the lumbars, but the hips, okay?
So you're really connected here. All right? So one of the things that I want you to do is to check if we are able to bend the knee without losing that fixed point. So we're gonna make it slowly. So if we go here, try to feel if you can keep the same contact point with the pelvis into the ground.
And now lift. And now the other one. So the focus is not on the knee. The knee is what we're using to challenge our pelvic stability, our lumbar stability. All right.
So when you have the experience of what happens in the lumbar spine and the pelvis, try to make it way faster. So tuck, tuck, and don't let the pelvis move now. So prepare yourself. And if you can increase the rhythm would be nice. Okay, so rest.
Hands to the sides, and now rest. All right. Breathe a couple of times there. It is normal to feel that the lumbar spine is working. It doesn't mean that it's damaging you or making you something bad.
But it's normal, because those muscles also need to work. Multifidus and erector spinae has to work in this exercise. All right. Okay, so let's go to the plank position. That's gonna be the more challenging position now, into this class.
So let's focus on what we've learned. We've been talking about the hip extension. And we need to use the hip extension in order to create the stability into the lumbars. So what I want you to feel is not like that we are holding here, but also I don't wanna see people losing their lordosis. When we lose our lordosis, we just rely on the abdominals.
But the thing is that our system is built to work in the front, in the sides, in the back, so the neutral position here is where we take advantage of the whole system, instead of just the other muscles. All right? So the second thing I really want you to focus is in extending the knees. If you extend the knees, you communicate with your glutes through the iliotibial tracts. And it creates a lot of stability.
And the third things are the toes. This position that we've been working for the whole class, we're gonna use it. So now, this is how we set up the plank. Again, remember this. We don't need this.
We are using the legs. And now take the arms, the hands forward, okay? So from there, I want you to press the mat forward with the hands, and backwards with the toes. And lift into the plank position. Lengthen the neck.
Organize your shoulder blades. Keep your lordosis. Extend your knees. I really want you to focus on the knees. And now come back.
And now try to take the chest in between the arms. Keep the pelvis up. Cool. So quadruped. Hands forward, toes backwards, that separation is helping you to find this.
All right? And now back. And extend the thoracic spine. Perfect, beautiful. You feel the thoracic spine here, right?
Okay, so what happens when we run? We run at 180 steps per minute. So I want you to be stable, not in a static position, but 180 rhythm. So once we're here, I want you to be very quickly creating tiny steps. Keep your lordosis.
Knees upright, straight, sorry. Lengthen the chest, lengthen the shoulder blades, breathe, smile, be pretty for the camera. And rest. Different, right? It's a bit different.
Okay, so this tiny trick is one of the tricks that we use to challenge the system to be ready to do that kind of perturbation that happens when we run. Another way we can do it is with the arms. Okay, so let's go to the plank position again. The hands are going farther away from the head. Press forward with the hands, press forward with the toes.
Lengthen the spine. And now, separate your feet. And I want you to do, tuck, shoulder touch. Try not to rotate the spine. 180.
Perfect. All right, I know. (laughs) Rest in that position, all right? Breathe. Let your heart to recover, all right?
So the closer we take the feet together, the more challenging it is to control the rotation. It's okay we feel some sort of shifting. That's okay. But I don't like that much that we rotate when we do this, okay? We can do this as a game.
And it's a very fun game. So you're gonna play each other. So we're gonna do, (laughs) we're gonna do the plank in this position here. And I want you to be closer together. Okay, so once we are into the plank position, we're gonna play to take the hand of the partner.
That's so mean. (laughs) I know. Okay, so let's go to the plank. And now, come on. That's it, that's it.
That's it. Can we move our arms? Yeah, you can, you can move. Okay. You can move.
That's it. That's it. (laughs) Perfect, perfect. Okay, you can be as mean as you wanna be. Okay, so this creates some sort of funny thing to do. It's not a good idea to have a lot of people taking it.
But in couples, it works very, very well. Okay? Now we're gonna do another plank exercise. And we're gonna create lateral movement with the arms. Okay, so let's come back to the plank.
I think you're very happy with this position. You understand it very good now. So feel the toes, controlling from the hips. The hands are farther away. And now extend your knees, keep your lordosis.
And I want you to go one side, one side, that's it. That's it. And back. So try to rotate your body as little as you can. And come back to the center.
All right. So these little changes that you did to adjust is what is telling you it's preparing your body to stabilize it. As much as you can, you go straight. So let's do it again. Let's do it again. (laughs) Okay, so I don't want you to see this kind of motion.
Even though you'll see something, it's okay. But you're not turning. Yeah, no, you're here, here. Here, here. Here, here, okay?
So let's do it. (woman talking quietly) (laughs) It's different to understand it, that you live it. There you go, well done. All right, okay. And the last thing we can do is if we can play with partners, with couples, during the class, or the teacher can do it, we can create external perturbations into the system of a person.
So can you demonstrate a plank again for me? So- You gonna knock me over? (laughs) (laughs) No, it's not gonna be very mean. Okay, so this is a static plank. But it happens a lot, if I start pulsating 180 times per second, so try not to move. Try not to move, try not to move.
Try not to move, don't let me move. That's it. Now you're engaging your glutes. Can you feel it? Awesome, try not to move.
Try not to move, rest. You see the difference? It's completely different from the static point of view, where you don't really need to react to anything. But if you create a little perturbation, your system needs to adjust all the time. And suddenly the level of energy that you're spending on the learning that you're having is completely different, okay?
(woman talking quietly) Now with you. Another thing that we can do, so let's go for the plank. All right, so lengthen there. So you can create lateral perturbation. Not to move, not to move, not to move, don't move, don't move, don't move, don't move, don't move, don't move.
You can create rotations. Don't move, don't move, don't move. Okay, perfect. Or you can surprise them. That's it, perfect.
That's it. Good. Okay, try to be stable, perfect. Okay, and if you really want, you can do a more challenging trick here. Well done, Gia.
Perfect. Okay, so how are you feeling? Great. So let's finish in a squat. Let's see if our squats improved.
Okay. And one of the goals to run is that you are able, make it wider, Christy, make it wider. Yeah. So really rest here. And bounce.
Bounce, bounce, bounce, bounce, bounce, bounce. Much more easy, much easier for you. Now you're really deep into your hip, you're forward, okay? So if you can't do this by your own, you can get closer together, and use the arms of the partner, all right? Perfect.
So you are supporting Christy, and Christy's supporting Gia with that distension in your arms, okay? So one of the good things about this, now, is that you can get into more extended position. There you go, with this support. So try to feel this, like you are taking the elbows back. There you go.
Can you feel the thoracic spine? It's a very nice way of feeling the thoracic spine. Okay? If you are holding your partner, so you keep that arm, and now raise the other one to the, and rotate, okay? If you are doing it by yourself, you get into the shoulder, into the knee with your shoulder, and then you go up and rotate and breathe and extend.
Okay, and now, hold, and now rotate. Lift the chest, lengthen. Help each other. There has to be some sort of tensegrity there. Okay, good.
And now let's bounce again, 180. Tack, tack, tack, tack, tack, tack, tack, it's not the muscles, it's that you bounce on the connective tissue. All right, so now lengthen your spine, and up. All right, so thank you very much. Great.
I hope you enjoyed the class. You feel the energy. Probably now you feel the support on your feet, the easiness in the legs. Even though we've been working so hard into the hip joint, now the feeling of opening and space is unbelievable. I hope the thoracic spine feels lifted, as well.
Feels fantastic. You look lifted. So thank you very much, thank you very much for watching.
Running with Pilates: Runity

Mention
 |
Juan Nieto (Teacher) |
 |
Michele M |
 |
Beverly L |
 |
Ana Margarida Cordeiro Ferrao |
 |
Grah |
 |
Martha "Mars" Hart |
 |
Mariia H |
 |
Christian Thurstone |
 |
Linda R |
 |
Margherita M |
 |
Alicia C |
 |
Dantras Albane |
 |
Jeanne R |
 |
Nic C |
|
|
Kate C |
|
|
Lisa W |
|
|
wf |
 |
Anke M |
|
|
Debbie K |
 |
Karyn S |
 |
Aline V |
 |
Fiona |
 |
Antonio G |
 |
Laurie C |
|
|
Laurie K |
|
|
Ash |
|
|
Carolina D |
|
|
Aline B |
 |
Pamela T |
 |
Sara P |
|
|
Natalia P |
 |
KIKE MARIN |
|
|
Esta M |
 |
Dorit T |
 |
MKV |
 |
Inma F |
 |
Leonor F |
 |
Alison Lloyd |
 |
Judy P |
 |
Rafael H |
 |
Filippo F |
 |
Hwanii K |
|
|
Geri J |
|
|
Yos W |
Comments


You need to be a subscriber to post a comment.
Please Log In or Create an Account to start your free trial.
