Description
About This Video
Transcript
Read Full Transcript
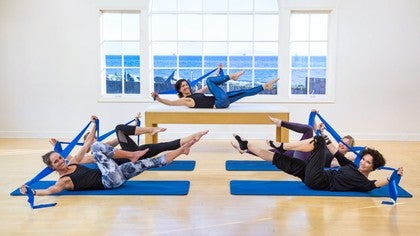
Hi everybody. We are here today to do a little bit of a work with the theraband. So the theraband is one of my favorite pieces of apparatus or prop because it's so accessible. You can experiment with different tensions and different supports and it's fun. So we've set the band up on the center of the Mat long ways and we're actually going to sit on one end of it so that there's a little bit left at the top for you to be able to hold onto.
Abdominal Curl
So we might just go ahead and have a lie down and just make sure that the band is right in the center of your body. And before we get started, just do a little quick test and make sure that you're happy with the amounts that you have to work with over your head. Um, I just got to find our connection down to the ground, so feel the way your feet are settled into the mat and noticed that we're already creating a bit of a loop with our body. So we have our trunk feeding up into our arms and then continuing into the band and creates this beautiful loop of energy. We're going to breathe into the back of the body. And then as you exhale, just create a little gentle pool, but leave your body on the floor and just feel that work into the upper arms feeding into the band. Just lightly. One more time. Inhaling here, and as we exhale, we're gonna peel our body up off the ground using the band as a guide. And then we'll stay here for breath in pulling the band a little and then see if you can let your head and upper body rest into the band a little bit more so that you can actually go in a little deeper. And then as you lay your body down, really have an awareness of the way the band is laying down onto the ground.So that's going to sort of give you some inspiration of how we want our spine to move. And we'll continue in our own time for about six breeding in at the top, finding the support of the arms, giving the neck permission to release a little if it was overworking, deepening and rolling down. And just allowing this first exercise to have a bit of an exploratory feel about it in hailing. Imagine that as you inhale the band widens two and then rolling down. And I think one more might do it breeding out as we call forward breeding into the back, finding that openness, feel the support for your head as well on the band and then roll it down.
And so we'll allow the band to rest on the mat. Interlace your hands, place them behind the head and we'll go for some regular chest lifting here. So just breathing out as you curl forward, but we'll arc the arms through and hold onto the backs of the thighs and then just go a little into that chest lift and arch the arms back behind the head. Imagine that the band is still there and we'll roll out spine, back down onto the floor, inhaling at the bottom so that we can exhale. And curl forward and as the arms arch to hold onto the thighs and then go back to that awareness of the loop that we'd created when we did have the band there and see if you can conjure up this image of connection from the back of the body all the way around and then feel the way the front of the body unfurls just as the band did. And we'll just do one more here. Breathing out as we curl forward, looping the hands forward onto the thighs. Curling a little further holding here and just taking the legs up and let's see if we can find a sitting position from here. So pushing the legs forward, rolling like a wheel and finding our seated position. Great.
Roll Down - Partial
So this is where we get to move the band. So just taking it out from underneath your bottom and we're going to loop the band across the shins and then we'll make a little cross. So you're actually holding onto the opposite end and great. And you want a little to work with here, so not too close. So you'll notice that as you pull the band out to the side, it's gonna make your knees want to drop in.So you're going to work against that. Okay. So we'll roll down just for a little partial roll down. So once you feel the back of your pelvis or your sacred rest down, we'll hold and then we're going to pull the band, work against it with your hips and roll back up again. And the range that you move here is completely up to you. Make it comfortable. We're still warming up.
So finding that work and feeling the way the band deepens this work rather than just makes it harder. It's there to support and to draw your attention to how your body works. Inhale through the nose into the back of your body and then exhale, rolling back. You and the band working together as a team. Inhaling into the back of the body and into the armpits as well. And then rolling through and the neck. This one will be our last one.
Breathing in through the nose, growing tall. Exhale rolling down, and then allow the legs to float up. And let's just take hold of the band, place your feet back down onto the ground and find a tension with the band that feels comfortable for you. You don't want to feel like you're working really hard, you just want to feed into the shoulder muscles so that we can to arch the arms overhead and still feel that you have an energy into your body. Your ribs aren't floating up.
Bridge w/Overhead Arm Extension
So we'll roll the pelvis up into the bridge and as you go higher with your hips, your arms come down over the thighs and press down quite firmly towards the floor. So you're working into the band, your pelvis or thighs, and then rolling back down and taking the arms overhead and just maintaining a consistent pressure into the band with your hands. And we'll do five more like this. So rolling on up, pressing down with the feet and pressing down with the arms while your pelvis and legs are pressing up to meet the band and then rolling back through. And you could almost imagine that you're still working against the band initially as you're rolling down. So we've got our next four here. So happy for you to move in your own pace and just notice the way you naturally want to organize your shoulders as you're finding that work into the legs. And then see if you can find a better way that allows more openness through the chest and more activation into the backs of the shoulders to see, give you that support roll and on down.And we're going to do two more here. Breathing out, rolling up, pressing through the legs, pressing through the arms, melting down, down, down into the mat, arms arking through. And one more time up we go. Feeling that sun shining on your chest, breathing in and rolling back down onto the ground. Now we're going to see if we can still find that hamstring work when our legs are in the air. So to give us a little bit of help, we'll put the band over the shins. We don't need too much tension here with the band. So make it work for you. You want to have your hands pretty close to the floor and we're just going to actually press the knees all the way together as well.
Side to Side
So if we allow our shins to fall a little, as you gently press your shins back up into the mat, you just want to feel a little bit of work through the backs of the thighs and where the leg connects into the hip and then allow your legs just to drift back down again. If you want a little bit more attention, go for it. And then again, just pressing up and you can feel that work. Connect you deeper into your lower abdominals two and then back one more time. If you press too far, you'll actually feel that the work will start to come into your quads. So we don't quite want to get there. Now maintaining this connection into the band, let's do a little side to side.So we're going to roll onto our left hip, pressing the right shin up into the band a little bit more than we might normally coming back through center. And then going over to the right or onto our right hip. Pressing the left Shin into the band will continue for three more to each side and feel the way the upper body and the legs work together to create this rotation. Inhaling onto the right hip. Exhaling. Feel yourself settle back. Inhaling onto the left hip, right shin pressing up and then settling back more to each side. He going over onto the right and back.
Notice the challenge to the shoulders on either side. We've got quite a long band here too, so we can really play with how much we're working into the tension right now. Coming back into the center, we're going to take the hands just up. Come up into a little chest lift. Keep those legs active as though the band is still there.
Single Leg Stretch
Draw the left knee in as the right leg reaches away, away, away, and let's switch and we're going to do six to eight each side. So only four to each side left here. And as you're switching with your legs, really finding that imaginary connection between the band and the shins. Last one to each side now, and we're going back to that feeling of the legs against the shins. Both knees together, band on the thighs.Find a tension that works for you as the hands come to the floor and deep in your legs in further and further for the double leg stretch. So the arms go overhead and then everything comes back to center. Inhale, shoot it out and then exhale. Draw it in. Breathing out. Feel the way the band helps you. Curl it a little deeper and drawer it in.
Double Leg Stretch
Last two and in. You're doing beautifully. Last one, and in from here, let's lay down. Take a moment as we curl back up again, we're going to have the hands, the band, sorry, behind the head, reaching out into it. Feel the way you can Nestle your head into the band as you rotate towards your left knee, and then switch it up and switch it up. Good. Feel the way the arms and the band work together to help move the whole upper body in a beautiful sort of loop or ring last one to each side here and center.
Criss Cross
Lay it down. We're going to stretch the left leg long and hook the band under the right foot and we'll cross the band so that we've got lots of support. Allow your elbows just to rest on the mat and let's just point and flex a little just to get some movement through the ankle. Reach the bottom leg nice and long. Have a connection to the ground with that leg. And this is our last one. We'll do three leg circles.
Single Leg Circles
Let's make it five leg circles to each direction. We'll go across the body first down out to the side and back up again. And as we do these circles, actively steer your leg with your hands. Feel the way you can create that support and give really to the hip through the support of that band holding here at the top. Let's go the other way. Reaching out.Notice how one side of the band stretches and it's kind of in symmetry with the part of the leg, that stretching as well. So inner thigh and outer thigh. Final one here and give you a leg. One more stretch before we change sides. Changing the leg so that the left leg is being supported by the band.
It is worthwhile taking the time to stretch the band out all the way because then it's less likely to flick on you so it does go into point and flex the ankle. Just getting a little bit of blood flow here, really thinking about the ankle itself rather than just the toes. Two more. This also gives you time to adjust your band as necessary and let's go across the body. Notice how I'm creating that pool with one arm and with the other and it's actually giving access to this beautiful smooth movement through the hip. Two more circles in this direction around last one around and hold and we'll go the other way out to the side, across and up.
The someone like me who gets quite tight through my hips, I find this to be a real relief one more and holding at the top, giving your leg a little bit more of a stretch here, bending both knees so that you can come up into your chest lift. This time we're going to take the arms in line with the head straightening both legs ready for the scissors. So switch and switch. And if you actually pull on the bench just enough, it's gonna feed into your shoulders and actually support your curl. So it's still going to really work the curl.
Scissors
We don't want the arms so far over here that it gets in our way. Last one to each leg and in bring the knees in, take the hands onto the shins and let's roll all the way up so we can place the band under both legs and stretch the legs out. So the roll up, often a challenging exercise in a math class. We've got the band here, we're going to play with some variations with the band, but if the variation without the band on the legs doesn't work for you, you can skip that and just use this one instead. So we're going to keep the arms straight as we roll down.
Roll Up Variation
Now as you do your bicep curls, hopefully you can feel some access into your deep belly. Of course you can still bend the knees as necessary through the roller when we hit the top rolling up. Now if it's available to you, we're going to take the band off the legs here. If not, you can keep the band where it is. Create that tension out into the band and roll down. So this allows us to take our arms overhead, which feels really good. Breathing in, exhale, curling forward because our arms are where they are.
We can hook the band around our legs, sit tall, bending the knees as necessary for our three bicep kilz swoops, not a row. The bicep curl, three arms are straight and we'll roll it down.
Take the hands or the band around the legs sitting tall. We'll do our biceps. One more time. One and two and three and rolling down. Very nice. Good. Taking that breath in. As we curl up, feel the shortening of the band.
Saw
Are we going to unhook that band? Separate the legs a little, and this is where you might want to roll up a mat or bend the knees. We're going into the soar. We're gonna rotate towards our left leg and as we reach out pinky finger to our pinky toe. Let's really stretch that bend out and notice the stretch in the back of the body. Breathing in, bring it back. Rotate to the right leg and stretch.Use the stretch of the band to inspire the stretch in your body. Growing tall and rotate and sitting tall and rotate and sitting toe. Very nice. Let's go for two to each side. This is where I like to really start to think about my legs, so it's very easy to be distracted just by the upper part of the body. But how can I use the reach of my legs to create that rebound effect back into my lower abdominals coming through the center. Bring the legs close and let's roll down.
Take the band just to one hand for a moment as we fold our legs up to tables, hop, hold onto the bandwidth. Each side just with the band under the legs and we'll try the rollover. So it's a small connection into the band here to remind our shoulders that they're here to help straightening the legs and rolling up and over into our roll over position. Let's separate the legs, flex the feet and roll it down using the arms and feeling the stretch in the band coinciding with the stretch and our abs. Circling our legs, legs together and up and over we go again. Separating the legs, flexing the feet and rolling on down, reaching through the legs, finding that circle. You guys are going to continue for two more so I can have a look at how beautifully you're doing. Great. Finding that openness.
Rollover
Feel the opposition as you roll down. Keep the work in the arms. Feel that lovely scoop and this is your last time up and over. Rule it through. Great job. Taking it down, finding that circle. Very nice. Take the band, hook it onto your feet. Find a Pele's V.I would recommend crossing the straps here, but then let the legs belong on the floor. Perfect. We want the band to be not too, too strong because we are going to be using the arms in this. So adjust. We're going to curl up and as you scoop your legs up, we're actually gonna pull the band out to the sides and up towards our Ese. If you can straighten your arms, that actually helps us even more. And then as you roll down, allow the arms to drift down. Well done. That looked fantastic.
Teaser Variation
So we're going to do six because I know a lot of people put, they couldn't do this. So let's roll it up. Push out with the legs, push out with the arms, resist the temptation to bend your elbows. Find that lift, and then as you roll down, reach your feet into the band. So good. Inhale through the nose. Exhale, curl it up. Pool out and up with those arms. It's like magic. Inhale. Exhale, rolling down. Finding that rate. Nice job. Three left, curled up.
And now if we can the crescendo rolling up.
Prone Spine Extension
We're going to flip over onto our stomach. So your head in the center of the room would be perfect. Alright, so let's find some oppositions where all of that selection we just did. I going to take the band and just have it in our hands, one in each one engine, each hand, but over our back. Perfect. So sort of in the small of your back is fine or even with the arms long is fine too.So we'll take a breath in and as you exhale just dropping your body further and further and further into the mat because we don't really spend much time finding neutral in a prone position. Now that way ready? We're just going to start to peel out upper body only up and it's just a small amount of pool with the band with arms straight, not very much finding that lift. And then as we exhale coming on down. Good. I'm going to watch a couple of these funds, taking a breath in and then as you exhale, peel and just finding the way the band helps us identify that connection in our shoulders to support the openness through our chest. And then we'll roll it back through. Good.
And when you come down to the bottom, don't be afraid to allow the shoulders to release a little and again, roll it up. We're still um, prioritizing the upper back, but we're just feeling the way we can make this a whole body movement with the shoulders connected and then roll it down. And how about we just do the one more and roll it up. Beautiful. Allow the legs to be nice and heavy and let's just create a little pool with the band a touch more. And we're going to pump the arms up and down for 10, nine, eight, seven, six, five, four, three, two, one and rolling down. So from, he will bend the knees, let the feet come up, see if you can hook the band to the Shin or to the ankles around. If you've got short arms, it can be tricky. I've got long arms, so this stuff comes fairly easy to me across the band and that's going to make the likelihood of the band slipping much less. Great.
Prone Shoulder Press w/ Extension
So from here, we're not going to mess with choreography anymore. We're just going to go ahead and bend the knees, pulling the heels to the bottom for three, three, two, one. Kicking the legs out behind you, coming into your double leg kick position and you'll find really pushing into the band, but also pulling it out with your arms will actually lift your legs a little higher than you might think you can. Take them. Turn your right cheek onto the mat as you come down. Bend the knees for three. One, two, three. Extend the legs, extend and reach with the arms. Low neck. Yeah, and then come on down, left cheek onto the mat and one, two, three extending out. Beautiful.
Double Leg Kick
One, two, three. And really working the arms. Take them out away from your body more than we might normally hear. Yes. Two more. One, two, three. Kind of wish I was doing this with them. One more time. One, two, three. Hold it out there. We're going to go for some heel baits here. Breathing in. Two, three, four, five, six, seven. Out, two, three, four, five, six, seven, eight.
Prone Heel Beats
I know two, three, four, five, six, seven, eight. Last one. And up to three, four, five, six, seven, eight n rest. I would bend the knees so that the band can come away nice and easy. Let go with one hand, it doesn't matter which, and then you might be able to just move the band out of your way. That got some wrong bands to work with here.
Swan
I'm just pop the band besides you so that it's, I'm not in your way, but imagine that the band is laying long on your mat like it was at the beginning of the session when we did the chest lift. So as they come up into the swan, now we're just going to find that sense of stretch throughout upper body from our pubic bone all the way through the navel, through the sternum, up into the chin, through the roof of the mouth and the crown of the head. And then let's bend the elbows and layer body back down onto that imaginary band. But reading in through the nose and exhaling as we roll up, finding the stretch that naturally occurs through the front of our body. See if you can push down a little bit more.Almost like you're working into the yeah, and then bend the elbows to come on through. Nice job. Let's do two more here and rolling up. Finding that stretch. We always think about strength in this, which is important, but sometimes you have to let those abdominals lengthen. Ah, Nice. Bend knee elbows, roll it down. That was beautiful. And we do one more. Inhale, roll it up.
Lengthen the abdominals so they're still on there like a drum skin. I send tight and we're gonna rolling. Roll it down. Looking forward for as long as you can. Great job. Go ahead and find a little child's pose. And now if we did have a band to stretch, it would be the back of our body.
Child's Pose Stretch
So feeling the way your bottom nestles into your feet, the way your head nestles into the mat and all the space in between. Just as a gentle stretch, just like the band we've been working with, and finding that sense of ease and openness through the back of our body. All right, so let's find a seated position. Now this can be a little bit tricky because obviously hamstrings can be tight, but we can still do this with a bent leg if we need to. So we're gonna take the band and wrap it under the soles of the feet again and can make, take the time to make sure it's nice and open.
Rows
Crossing the band usually gives it a better tension for me. Let's create a little bit of energy out with our feet. It doesn't have to be a big push, but just an awareness. And we're going to start with a little rose. So just pulling back and lengthen. And for me, what I like to think about is, yeah, I'm getting a bit of work through the backs of my arms, but how does this support the position of my lower spine, which finds it tricky to be upright. If I needed to bend my knees, you can see it doesn't change.The exercise very much just allows me a little bit more range and comfort really. And one more time bending in and lengthen. So now that we've found that support, we'll see if we can keep it without the band behind the legs so that when we are here, we can still have that lift. Now if we needed to bend the knees, we can do that too. So let's stretch the band a little. So we're finding those external rotators of the shoulders, but then reach out on a diagonal. Keep the external rotation, bring the elbows in, and then allow it to back off. So as we rotate our ribs aren't gonna fling forward or it's going to work the back of the shoulder, stretch it through. That's where I like to find my lift in my waist, Ben.
Arms Reaching Forward
And then release. Good for more. Stretch it out and reach it forward. And then drop it in and release and rotation. Energy out. Bring it in and in last time, take it out and lengthen. That looks great.Bring it in. Good. So keeping that energy through the backs of the shoulders, we're going to flip our hands, palms down and see how we go lifting up. Now this is the tricky bit. So can we take the arms behind us? The great thing about the band is you can slide your hands along the length of it without anybody even noticing. We're going to lift back up again until you find the position that works best for you. So we'll do another three lifted up that we're not just holding a bit of plastic here.
Arms Reaching Forward and Behind
We really trying to find the way we can work and create support with our for our body. So as we go up, when we get into the tough bit, if we actually pull out into it a little, sometimes you can get those deep stabilizers to give us a hand up and over. Then I added an extra one. So from here we'll go up and over and we're just going to rest our hands onto the floor. It's good if you can hold the mat but the band, but you don't have to work it too hard. See if you can use your imagination here again, so that as you press up, we're going to work with the shoulders nice and deep. As we reach our toes to the floor and our bottom comes down.
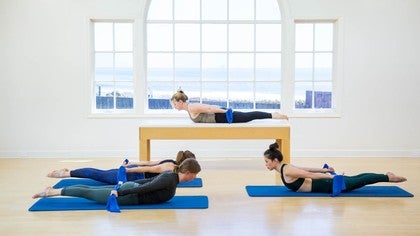
Leg Pull Back
And again, spear the toes down, open through the chest by working to support that deep in the shoulders. And then bring it down. No leg kicks today. Just the plank part two more. He lift and find that reach. Bring it down. Find the lift here. One more time, press it up. Beautiful job. And then bring it down.Excellent. Cool. So let's spin around so that you're facing me. We're gonna do a mermaid in a zed sit position. Let's have your Shin to this side of the room and then the band is going to be in front. But before we do that, let's take the hands. You might not be quite as bendy through your hands as me, but it's kind of weird. But, um, let's just give the hands a little bit of stretch and move and we'll reach out in a way and really opening up that palm side. I wanna just do one more. I'm going a little bit more holding of the band coming up one more time.
Mermaid Variation
Okay. Now hips, hopefully we can be pretty even on the mat if that's tricky for you. You might just find a little bit of a up and down is enough, but if that's not quite right, feel free to cross your leg in front or stretch it out to the side. So let's get started. Take the band out in front. Not Too much tension. It's going to come up overhead as well. Okay, let's side bend for as long as you can without changing the band. Then stretch it out into the side bend.Allow that bottom elbow to bend a little bit and we're going to bend and straighten two and up three and up. Now peeling your hand up off the mat. Come to upright side bending this way. Let your hand eventually come down. So we creating tension. Bend and straighten. This one feels really good on my ribs.
That opens everything up. And last one. Now use the tension in the band to help create the lift. We'll do one more, so over without dropping that bottom hand and then actively draw it down. Bend and straighten. Good. Find that long line from the crown of the head all the way through to the hips lifting up and one more time going over. Let that hand come down.
Bend and stretch two and last one, calming on up. Take the band behind you. Bring the legs around. I like to put the band so it's under my shoulder blade so it's not too far up here onto the top of the shoulders and the neck. Straight in the top arm as well. All right, let's see if we can push out into a side plank now. So taking it on up and when we do our twist, we're just going to reach straight back so it's not to the feet, just reaching back, rotating the upper body and then bringing it back through.
Side Arm Support w/Rotation
Noticing the way the band stretches the back of our body and then as we come to face more front, we feel that openness through the front. One more crossing around, stretching the back of the body, bringing it up, bending the knees, taking the band around, and we'll get to the other side. Excellent. Gives you some support, right? And that's what, that's what a tier four. So I adjust your hip position so that it's right for you. Take the band in front, start to feel if that bands the right tension.
Mermaid Variation
Take the arms up and let's start side bend and then take the arm overhead. Let's bend and straighten just three of these and up and then peel the hand going up and over, bending the elbow as you straight and think of when you do the breaststroke and that straight arm kind of propels you through the water to here. It almost makes you lengthen more as you straighten your arm. You bring yourself up again. Going over, we band and our ribs open up, we straightened and we lengthen and two and three peel a hand off. Last time, going over, stretch and straighten.And I like to feel how when the band lengthens, I can get more lift through my undecided waist. And then keeping that, find that lift. Take the band behind you, adjust your hand position. I just you a leg position. Let's say you can take your top foot in front and we're going to sweep ourselves up and over into that twist band behind. That's it. And then we're going to feed it through. We're not reaching for the feet, just going straight back and then up and again to more rotation. I've lost my hair tie and up. Last one, stretch at three and burring it up. Hold. Try this. Put your hand down, pivot your feet.
Side Arm Support w/Rotation
Good. Work up into the band. Can we do it? And let's lift our right leg and lower it down and our left leg could, we'll do another two to each side. Lift and lower work into the band. Let it inspire that space between your shoulder blades. Very nice work. Last one. Great job. And then rest.
Leg Pull Front
Kneeling Leg Lift and Lower
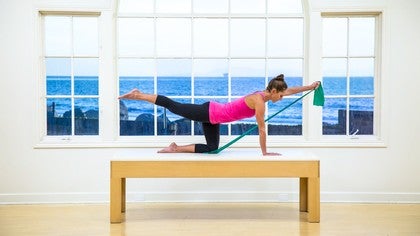
Press the knees all the way together. And I feel that if you tie a bow, it's easier to undo later. Let's see if my theory is right, then we'll find a position on all fours.So here we are in our little quad repair. We going to find that length through our body and reach the leg that's um, furthest away from me. Out to the side. Yep, exactly. And back in. Now as we do this movement, we want to move from the hip rather than from the foot. So feeling as though the whole leg sweeps out. Excellent. And then back in. So the Shin and the knee are actually aligned with one another. Good.
We have three more like this. Press it out and in and see if you can on these last two, think about how that supporting leg is also having to work great. And now circles for six around you. Choose your direction. But thinking about that supporting leg, three good and four. Nice.
Kneeling Leg Circles
Five and six of course we go the other way. Six, five, four, three, two. Last one. Take the leg straight back. Yeah. And then back in [inaudible] and to stretch it up, three, four, five and six. Place the leg back. Give your wrists a little stretch if you need to.
Kneeling Single Leg Press
And we're going to do the other side. So supporting leg is what we want to give a little more attention to. Taking the leg out and in that moving leg is going to get all the work that it needs. Three four. Find that length through the spine. Five and six.
Kneeling Leg Lift and Lower
Ready for circles. Now can I move with a theraband around my legs? Could really working from the top of the thigh. You have it. That's it. Good. And reverse six nice.
Kneeling Leg Circles
Five going back is better. Yeah, that's it. Three, two and one. And then the last bit just reaching straight out Annie too. Find that link through the body. Be inspired by the reach back with the legs. And last one. Nice job.
Kneeling Single Leg Press
Find that plank position just for a moment because we're going to bend the elbows if we can and lower ourselves down. That worked quite well for a change for me. I can to try this one too. Or this one three. Now this one too is where we can return to our hands back on the floor. Let's try a couple of those.
Swan Dive
So we're going to come on up into our swan and this is the rocking swan. So as we rock out, I want you to feel that your legs are pushing out into the band, so you're going to bend the elbows real fast and press ourselves back up again to more like thisLet's bring ourselves up. Keep the band around the legs, make sure you've got some room behind you holding onto your ankles. Okay, let's see if we can extend the leg furthest away from me. So I've got some support into the band. Good. And in now with this version of the open leg Brocker we can still do it with bent knees as we need to up and in.
Open Leg Rocker Prep
But you might find that that push out into the band can help relieve some of the stress on the hamstring to lengthen all by itself. It gets some support here. Last one of this single leg prep. Let's see if we can do the double now. So reaching out into the band as we lengthen it looks pretty good. Yeah. And then Ben, Nice. One more. Stretch it out and in.
Now the challenge is can we do the open leg rocker without holding onto the legs? So taking it out, reaching the arms parallel. You don't have to do this version, but let's give it a go rocket
Open Leg Rocker
A little. Impress out.
Jackknife
Roll it.How much lift can you get? Reached down through the arms folding at the hips. Roll it back down. Lower the legs to 45 one more fold. Role lift magic. There was a band between your hands.
Could you pull that apart as well as using the band around your legs? Fold. Roll it down. Lay the buddy back through. Bend the knees and sit herself up. We're so close to the end. Let's come up to standing.
Standing Lateral Hip Press
Find a position where you're happy facing me. I think with the amount of distance between your legs so that the band can support you. Okay, so from here we're going to shift our weight over to this side of the room so our toes can still be touching the floor and we want to find that elongation out on that diagonal. And then see if you can lift that foot up off the ground that the band will be there to support you. Tap your leg down and back up again to tap and lift. You can use your arms in connection or you can just keep them still.
Now this time, touch the toes down. Send your body weight into that foot nice and even, and then transfer your weight over so that your foot peels off just before it lifts. Elongate. Find the lift and tap to tap three touch. Lay The foot down other side over. Find that connection into the band instead of the connection to the floor
Take the foot down. Last one over. Find the long line. Lift that leg,
Roll Down
Just like our back side of our body is relenting allowing this movement to occur. Breathing in at the bottom and then exhale. Find the reach down through the feet. Let your imaginary band like a, let your fingers twinkle. Take a breath in. One more time.
He can think about whatever you want this time. Link down, enjoying this gift of movement that we have breathing in and as we roll up.
Thanks guys.
Pilates at Home: Theraband Mat Classes
Mention
 |
Joanne Bezzina (Teacher) |
 |
Mary Briggs McCabe |
 |
Daniela H |
 |
Jocelyn N |
 |
Maryam |
 |
Kathleen Fitzgerald Henry |
 |
Katarina S |
 |
Susie B |
 |
Ivan Z |
|
|
Roberta M |
|
|
CG H |
 |
Gary M |
|
|
Julie B |
 |
Aileen C |
 |
Rachel |
|
|
Jacquie S |
|
|
Kiri F |
|
|
Michele F |
 |
Dawnna Wayburne |
|
|
Pamela S |
 |
Sarah K. Artha Negara |
 |
Cynthia E |
|
|
Nadine L |
|
|
Catherine G |
 |
Sara B |
 |
Patti S |
|
|
Michael Mary S |
 |
Lynn Wise |
 |
Jodie |
 |
Kandie A |
 |
Katia B |
 |
Jo D |
 |
Melissa W |
 |
Limber Pilates |
 |
Nancy C |
|
|
Colleen Tomlinson |
|
|
Malgosia M |
|
|
Trudi L |
|
|
Anne H |
 |
Sarah Edwards at Positive Pilates Solihull |
|
|
EVI K |
 |
Lisa NYC |
|
|
Elissa F |
 |
Cindy K |
 |
Margie N |
|
|
Annie B |
 |
Tammy W |
 |
Olga S |
 |
Diana M |
 |
Rosa Reeve |
 |
Len P |
|
|
Victoria B |
|
|
Roula K |
 |
Liliana D |
|
|
Peggy |
 |
Grace Hurry |
 |
Lina S |
|
|
Denee D |
 |
Danita R |
 |
Laurie C |
 |
Filippo F |
|
|
Annie Petcharat S |
|
|
Belinda B |
|
|
Babette V |
 |
Jorge Sánchez |
 |
Marna P |
Comments


You need to be a subscriber to post a comment.
Please Log In or Create an Account to start your free trial.
