Description
About This Video
Transcript
Read Full Transcript
Good morning, I'm Delia Buckmaster live from Whitefish, Montana here at my studio. Today's the second week of the eight part series called "Level Up". And this week will be a little bit more challenging than the last but you didn't necessarily have to do the last class to be able to do this one. So, today we're gonna get started on all four. So if you can find your quadruped position on your mat, placing your hands underneath your shoulders and then your knees underneath your hips.
So in this position is really important because if you do not have your hands underneath your shoulders then you are not the most supported at your shoulder girdle. So from here, take a deep inhale breath. Let's just do a simple cat-cow by flexing the spine, looking down towards your thighs and then finding your flat back and extending your spine. And do a few of these without my cue. Just to make it feel good to you this morning or afternoon or wherever you're following me from.
And then as you move along with your cat-cow I want you to start to focus on the lower abdominals for the flexion and the upper back and chest for the extension. Finding an exhale as you shorten the front of your body and then an inhale as you shorten on the back of your body. Let's try that one more time, exhale breath and then inhale breath. Continue with your cat stretch here with your knees supported on the mat. I'm gonna take this up a notch.
So, curl those toes under, from here, lift the knees up to a hover. And when you lift the knees up to a hover make sure that those shoulders don't shift forward and put all that weight onto your wrist and then gently place the knees back to the mat. Inhale as you lift the knees up. And it should feel as though you're being lifted to the ceiling or the sky with your tailbone. Twice more as you inhale breath, lift, exhale breath to lower the knees back down.
And then one more time as you inhale to lift the knees off the mat and then exhale to lower. We're gonna combine those last two exercises. So, this time as you lift the knees up to hover over the mat, you'll then flex your spine maintaining that same distance off your mat with your knees, straightening out your back to find your flat back and then lower the knees down. We'll eventually find that extension. So knees lift, inhale breath, exhale breath as you scoop the abdominals in, look towards your thighs, lengthen tailbone to head and maybe find a slight extension there and as you lower the knees you'll find that neutral.
Try that again. If this is too much of a load for your wrist you can go ahead and continue on with just the cat stretches with your knees supported on the mat. This is a really great way to warm you up real quick. Let's do that one more time. Inhale to lift the knees, exhale as you flex around the spine, loading the front of your body.
Extend the spine, find that slight extension and then lower the knees and rest. From there we'll have a seat onto the mat and we're gonna lower down for some supine ups so just on your back. And we'll have three variations here. First, we'll start off with the knees at tabletop so make sure that you are supported at your lower back onto the mat. If this is hard for you, you can keep your feet on the mat but let's squeeze the knees together, knees in line with your hips, ankles in line with your knees.
Arms up towards the ceiling to find your hundred prop. You're gonna lift your head and shoulders up, stretching your back as you reach your hands towards your feet and then lower yourself right back down. And again, with just one breath pattern exhale, inhale to lower. Again, as a repeat feet be on the map for this which is how we had it last week and this would be your next level with your feet in an open kinetic chain which makes it a little bit harder to support that lower back So, if you are a struggling just a little bit here make sure to press your lower back gently into the mat and then really find that upper middle back flexion and continue as you exhale, and then inhale to lower. We are gonna do the a hundred today.
Let's do one more prep, exhale, inhale to lower. On the next one find your hand of choice. Either knees bent, legs extended and start to pump your arms. Inhale two, three, four, five, exhale, two, three, four five. Inhale two, three, four five, exhale, two, three four 20.
Lower those legs as you feel comfortable. Exhale, two, three four 30, inhale. Exhale, two, three, four, 40. Inhale, two, three, four, five. Exhale, two, three, four, 50.
Inhale, two, three, four, five. Exhale, two, three, four, 60. We're almost there. Exhale, two, three, four 70, inhale. Challenge yourself.
Exhale, two, three, four 80, inhale. Squeeze those inner thighs together for support. One more and go ahead with control, which is really hard, drop those knees into the chest, hands to the shins, rest your head and your shoulders down. I'm gonna give you one more variation here on your back. So we're gonna go into what we call backstroke.
So taking your hands into a triangle position. So four finger to four finger, thumb to thumb, making a little triangle. And let's bring the hand towards the forehead. Legs are still at that tabletop position. Nod the chin to find that upper back flexion.
Extend your arms and legs towards the ceiling, bring your arms out towards the side. Open up your legs about shoulder width and then find your hundred position. Arms to the hips, legs squeezed together, bend your knees, hands towards the forehead and you can rest your head between each repetition. So, head and shoulders up on your flexion. Reach the arms and legs up.
Open the legs, open the arms, circle everything around hands towards the hips, bend your knees and do it again. Inhale, arms and legs, reach, exhale. Knees, bend, elbows bend. And again, inhale, reach. Legs, arms open.
Squeeze those inner thighs together. Hands back to the forehead. Three more times, inhale. Exhale, bend. Two more, reach, maintain that flexion the whole time.
Again, you can rest your head and shoulders if you need to between each one. Last one and you exhale. Find the top of that hundred position, pause. Knees come in, head and shoulder rest. Ah, place the feet down and then arms down by your side.
We're gonna do a bridge variation here to open up the front of the body. So, with your legs about fist distance apart which is about the width of your sitz bones, you're gonna place your hands on the mat and lift up to your bridge. I always like to just lift up to my first bridge, find that great position. If it doesn't feel comfortable, I'm not in concrete. I could start over.
So arms are along by your side, maintain as much neutral as you can with your pelvis as you lower your bottom towards the mat and then lift your bottom back up. So instead of your hip rolls, instead of that spinal articulation, what I like to do is to wake up your glutes. And your glutes are best woken up when we can stabilize the lumbar spine to activate the glute max. And pay attention to what your legs are doing here as you lift and lower. If you don't feel any activation in most inner thighs what might be happening is the knees might be collapsing to the side, which is completely normal if you have tight hip flexors but the goal here is to be able to stretch the front of the body so that we can work the glutes.
Otherwise we'll end up in trying to squeeze the glutes too much. And that's not gonna fire that glute max. Continue here, lifting and lowering. There shouldn't be any pressure into your lower back. You're nice and wide with the shoulders, pressing the head up against the mat.
One more time and then lower the hips back down. I have no idea how many repetitions we did but it doesn't matter. So we're gonna lift the hips back up and find your bridge. Let's try this unilateral. If this doesn't work for you, go back to that first exercise, both feet on the mat.
I'm gonna take my right leg to a tabletop position and if my left leg wasn't right, I'm gonna drop my bottom down and start over and move it a little closer. From here, drop just the single bottom down and up. And when you do that, that left glute's gonna fire but what this also is gonna do is, if you have either a weak glute or a very tight hip flexor, you're gonna start to lean into one side of your body putting pressure onto your shoulders. Try as much as you can to maintain the same height with your hips the whole time. Yeah, we'll do a couple more here.
Your glutes should really be firing. One more time. Let's pause at the top. Before you drop your bottom down can you draw your left knee in about a quarter inch or centimeter? You'll feel that inner thigh fire.
Lower your hips to the mat and then release that foot down. If you're feeling anything in your lower back please shorten your range of motion or don't do as many repetitions. We're gonna go to the other side. Let's lift the hips back up and take that left leg up to that tabletop position and we'll do the same thing on this side, lower and lift one. And you'll notice that one side is going to be a little bit easier than the other which is completely normal.
So you'll notice if you do sports that you favor sides. For example, I'll give you skiing. If you favor in some dangerous conditions keep turning to one side, that's usually your stronger glute giving you that balance so you feel confident that you're not gonna fall and it'll apply to different sports, of course. Let's do just two more. And on the last one, you're gonna hold it up at the top and then draw that right knee in just a teeny bit.
You really feel that inner thigh working and that glute firing even more and then roll yourself down and then lower that foot down. So you'll see how synonymous the inner thighs are with the glutes for hip strength. We're going to add onto this one. So this will be your third. Go ahead and lift the hips back up to bridge and then we're gonna focus on the glute meat this time.
So let's lift the right leg back to tabletop, from here, take that right leg, lean it slightly to the right not so far that you now have your head and shoulders trying to keep your bottom up. So be real careful, let's do that again. Just lean it slightly to the side, make sure you're not just moving from your foot. You're opening from your hip. And as you lean that leg you'll really feel that glute meat fire, make sure to keep that inner thigh connection on that left leg.
And again, you're not trying to hit the floor with your leg, you're just trying to fire the right muscle. Let's go two more and one more. And then you'll place that foot down and then lower the hips back down. We'll try the other side. Lift the bottom up, opposite leg comes up.
You pause, you take that leg that's up to the side and back. Again, pay attention to your lower back, how much pressure you're putting on that shoulder that has the leg in the air. And as I tell my clients, and I'll tell you again I might've said it last week but your head and shoulders are not responsible for your rear end. So please make sure to keep everything comfortable at the top. Just twice more.
Last one, lower your foot down, roll your spine down and then just extend your legs nice and long and your arms overhead. And just give yourself a nice big stretch. Wiggle your toes, wiggle your fingers. And we're gonna go into three exercises out of the ab series. Take your knees, tuck them both into your chest and give yourself a nice big hug.
We're gonna go onto your single leg stretch. As you lift your head and shoulders up, place your hands on your shins and then use a resistance of your legs and hands to pull you up a little higher and almost act as though they're your hip flexor so it supports you here just a bit. Extend your left leg out and make sure that your toes are lined up. Take your left hand to the inside of your right knee and your outside hand to the outside of your ankle from here you'll just switch. So this is the hand positioning but I prefer the for the single leg stretch and what the hands are doing, they're simply a guide for you to keep your legs straight.
So if you put that resistance against your leg with each hand, you'll see it lines up your leg and it changed the exercise for me once I learned that and I think it was Benjamin Degenhardt. He had a workshop on "Pilates Anytime". And I think this was an aha moment for me when he explained that. So continue to move with the legs. Yes, one more on each side and then bring those knees in, head and shoulders come back down.
And now the double leg stretch. I might add a little bonus here with the double leg stretch. So head shoulders come up and you flex, again, hands onto the shins, scoop those abdominals in. We're gonna start by extending your legs but just bring your arms down to the a hundred position when you extend your legs and then bend your knees and pull it in. With each repetition, bring those arms higher and higher.
So maintain the same height with your legs but with every repetition, take those arms a little bit higher until you find a position that your double leg stretch feels the most comfortable. Arms are always in your peripheral vision. You're going to reach the arms away from you form that V, circle the arms around, tuck those knees in, inhale, exhale. Twice more. On the next one, I'm gonna have you hold the legs out and bring your arms to your hips and a little pulse here with the upper body is a bonus for eight, seven, six, ribs to hips four, three, two and one.
Knees in, head and shoulders down. And we're gonna go into your obliques or crisscross. Let's interlace those fingers, place them behind your head before you lift her head and shoulders up, pull your elbows into your peripheral vision. So that'll set you up for success when you come to that flection. So now nod your chin, working the front of your neck muscles and lift your upper body up and pause.
We're gonna start with the knees bent as you rotate from side to side, your goal is to bring the elbow towards the mat not the elbow to the knee. The elbow to the knee gives you false hope that you are actually making that rotation happen. So now as you get a little bit more comfortable, extend the gesture leg out and turn towards your bent knee and switch to the other side. Again, you can stay on that bent knee variation but once you find that full crisscross, make sure to really reach that leg away from you like you're trying to poke a hole in the wall across the room and your breath can be whatever works for you. Inhale, inhale, exhale, exhale or inhale, exhale on the exchange.
You decide what works best for you. Let's do two more sets. Last set and then go ahead and lower the knees. Rest the feet, extend the legs. Give me a nice little stretch again.
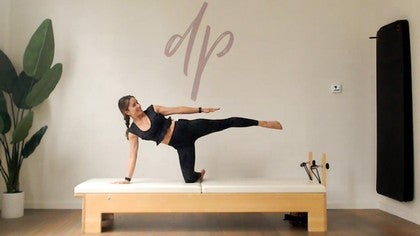
And I'm going to turn to my right side to face the camera and fold my bottom arm under for a side line series. So finding the side body next. So when I go to fold my arm under, I'm just gonna keep my head slightly lifted. You can rest because I have a mic across my face here, so I don't wanna press the mic into my cheek. So I'm gonna extend my legs nice and long, hold it here and then I'm going to go ahead and take my legs up to a little hover.
When I take my legs up to a hover, I'm gonna recognize whether or not I have some pressure onto the lower back. And if I do, then I'm gonna bring my legs slightly forward and then rest them back down. So from here, let's curl the bottom toe under sort of forms a little anchor and then take that leg up about the height of your hip and we're gonna kick that leg forward. So flex your ankle, take the leg as far forward as you can bring it before it takes your torso out of position and then point the toe and bring that leg back towards extension. And I make an adjustment with my bottom foot.
So I'm gonna go ahead and take that leg forward and then take that leg back. What you wanna focus on here as you do your kick is your abdominals pulling that leg forward. And then as you bring the leg back, it's your glute. And then next week, if you join me next week, I'm gonna show you how we can take this one up. Another level, exhale as the leg comes forward, feel the abs working.
Inhale, you take your leg back. Feel the glute working. When your sidelined it's hard to find that neutral position so make sure that lumbopelvic spine is nice and stable, reach it forward and then bring it back. We're gonna do that one more time, take it forward and then back. And then this time we're gonna focus on the glute minimus which we haven't hit yet.
Take that left foot and this let it hang as though it's broken off the ankle they're just hanging out. We're gonna bring your legs forward and then from here, you're gonna lower that foot. I happen to be on a high table so I can go pretty low here. Then you're gonna lift that leg up and then bring it back and you'll do it again. Take it forward, lower the foot, lift the foot and then bring it back.
The medial rotation needs to come from the hip. So it's just your ankle forced down, it's not gonna work. So it's almost as though you're taking saran wrap from the back of your leg around the outside of your leg and then tucking it into your inner thigh. And that's the feeling that you should have. Let's give you a little bonus, bring that leg forward, hold it there and then just touch, lift, touch, lift, touch, lift.
If you're having any issues with supporting your back you can always take the bottom knee, the supporting leg and bend it but you should really feel these. And this is normally where I lose track of counting, four, three, two and one. And then you bring that leg back and line it up with your legs. So now both legs need to be forward of the hips for the next one. And I'm actually gonna extend my arm out that was supporting my head towards the front corner of my mat and then rest my head down.
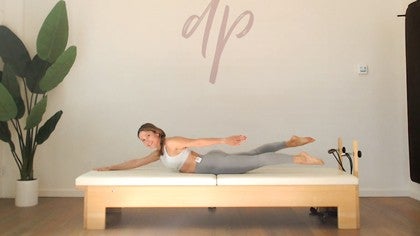
Again, I'm kind of at a hover here a little bit. So my left hand is my supporting hand and I'm gonna keep it on the mat and I'm gonna lift my legs up as a team. So they're gonna come up as a team and I'm gonna lower it back down and I'll do it again, lift it up, lower down. Now I'm gonna add my upper body to form a little bit of a banana shape and then lower back down. That top leg is dead weight for the bottom leg.
So let it just hang out. And as you lift up with the legs see if that bottom lake can reach further past the top leg to maintain that leg that length on the underside of your body lift and lower. This should not feel like pressure at the lower back. If it does, then I need you to focus on taking that oblique and putting it in your pocket with your mind obviously, we're gonna do that one more time, lift it up and see if you can pause there. Maybe reaching that gesture arm out as a bonus for eight, seven, six, four, three, two and one and then lying down.
Just as a quick transition, let's lift up and do a little mermaid stretch for the underside of your body. Keeping that arm long, that is a big cue. When the arm bends, then it doesn't stretch as much. So you really wanna reach with that opposition arm. I'm gonna swing my legs to the other side and we're gonna do it again.
This time I can rest this head a little bit easier. So folding my arm under legs are long, taking my leg slightly forward and lifting them making sure that they feel comfortable there. And I'm gonna go ahead and hook that bottom foot as my little kickstand and then I've got my hand in front. We'll go right into your kicks, flex your right ankle and then bring that leg as far forward as you can, feel that first one, really feel the abs working and then bring that leg back. I like to really feel the first repetition to make sure I'm in good position.
Exhale as that leg comes forward, inhale as it comes back, exhale, feel the hamstring stretch and then feel that hip flexor stretch. So don't always think of your body one dimensional. If you're always focused on say, if you're focused on the back half of this, you're focused on maybe just the stretch of the hamstring, think about how much the abs are working and vice versa. So you become more 3D or 4D, exhale, forward. Inhale and back, let's do two more exhale and inhale, one more exhale and inhale.
Now that foot just hangs, remember just hangs off the bone and the whole leg turns medial. Bring that leg forward, touch, lift, bring it back. So unless you walk pigeon toe this is normally a more challenging position of the hip but it's good to train, especially if you're somebody who walks a little bit more duck footed or if you are an instructor joining us today and you have clients that like to point their toes out, it's nice to work them in that opposition. And then eventually maybe they'll find that parallel position to be a little bit more comfortable. So forward, touch and then lift.
But let's just leave it out there and do the touch lift. So just touch, touch. Yes, now this side is a little bit harder for me for eight, seven, six, five, four, three, two, one and then line those legs up and then lower them to the mat. I'm gonna extend my long supporting arm out to the front corner and then my hand is still there as my kickstand. I'm gonna test my legs and just lift it up and make sure that I feel comfortable here and then lower down, ready?
So legs lift upper body lifts, forming that little bit of a banana shape of the body and then lower. So you could choose, you could choose to just maybe do the upper body or the lower body depending. And don't get frustrated if you can't get up there. Most of the time, this is not about abdominal strength it's about the opposite side flexibility. So if you've got a tight hip here on the bottom it's hard to get those legs up.
Make sure that your top leg becomes just dead weight for the bottom leg. Otherwise you're overworking, especially the ankle joint. People start to point the toes towards each other. On the next one you're just going to hold it up, just hold and maybe take that hand if you feel safe, just to reach it out for eight, seven, six, five, four, three, two and one and then pull the knees in, push yourself up, find your counter stretch, remember that long arm. Ah and let's go onto our belly for some prone exercises.
We're gonna tackle three exercises here depending on how I feel you might get a bonus, who knows? So lie on your belly. Couple of cues here. And this was am aha moment for me in a balanced body master instructor course is the pubic bone pressing down. So legs ideally at parallel for this extension work.
If you can't keep them add up together in parallel, obviously open up your legs were all built very differently but think about pushing that pubic bone down into the mat and what that forms is a little bit of a flat surface here at your lumbar spine and it elevates the knees a little bit so that you can really press the tops of your feet down. This is important, now we'll continue, okay? So hands are by your side to form a W, we're gonna go into your breast stroke. You're gonna lift your upper body up squeezing your shoulder blades together in that W. You'll dive the arms forward, allowing your shoulders to rise for a stretch.
Turn your palms out bringing your hands long towards your hips, lifting to that extension while continuing to anchor your feet getting your W. Inhale, dive or exhale, excuse me, inhale, extend. I mean, you could actually switch your breath as long as you're not in the water obviously. You don't wanna inhale as you dive in. Exhale, inhale to open.
This should feel fairly smooth. And if you're having a difficult time with this exercise then just practice floating that upper body off of the mat with those W arms or practice one of the arm positions and hold that arm position and upper body position, dive forward, navel to the spine. Again, continue to anchor your feet. Find that extension by retracting those shoulder blades together since it is synonymous with your extension. One more time and then rest and relax everything in between.
So fix your leg if you need to, fix your arms I'm going to re anchor my hips pubic bone down this time I'm gonna flip my legs up in parallel. Make sure those legs stay straight and you feel that activation at your glute. Then I'm gonna float my arms up and just test this for a moment. See if I'm in good position with my arms, my legs and then I'm going to rest. We are gonna go right into your swimming.
So your Pilates mat swim exercise. Let's float everything up, lift your right arm and left leg a little higher and then switch it to left arm, right leg. And I want you to take this slow, really slow, like your stealth, inhale two, three, four, five, exhale. Making sure that you feel the length from opposite arm to leg as though you have two flex bands tied to your fingertips and to your toes. And every time you lift, you're just stretching that flex band across the front of your body.
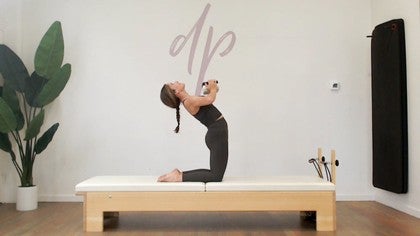
Body stays quiet, now to rock your surf board, your paddleboard, whatever you think you were balancing on and then rest everything back down. If you feel any lower back pressure here go right into your child's pose before you continue, otherwise, we're gonna go into a swan prep. Let's bring the arms back to that W position. This time your feet are anchored but your hands and arms are going to stay down. Push into the palm of the hand, lift your eyes and send the crown of your head to the ceiling and then slowly lower yourself back down.
I will give you a bonus here in a moment. Eyes lift, crown of the head to the ceiling, keep those eyes peered forward to maintain as much extension as possible before you lower the chin. Inhale up, exhale down. Don't forget you are anchored and please avoid squeezing your glutes because if you squeeze your glutes it will hinder that extension. So be careful.
But if you do have to open up your legs and turn them out, just try not to over squeeze. Here's your bonus. I'm gonna have you float those arms off. Inhale as you lift, as you come down, float the arms off and allow your toes to naturally float off the mat, press down, lift up. As you release the hands, the toes will slightly float up.
So you don't have to do a continuous movement like the regular swan dive, just a great way to teach your upper body to maintain that rocking position. And then press. I really love this one. Two more, a lot of control here, a lot of triceps, one more. And then as a little treat, we all go into a child's pose.
So go ahead and take the bottom back, forehead to the mat and feel free to even bring your arms behind you so that your shoulders round forward and then when my forehead presses into the mat it releases a little bit of tension at my back and my neck. All right, we're gonna tackle some plank. Plank is not everyone's favorite. So most people know what a plank is and most people know how to do some variations and modifications to planks. So feel free to do that but I'm gonna have you just try and hold a regular plank and this is how we're gonna get into it.
So hands are underneath your shoulders, knees are underneath your hips, okay? This is a great place to adjust your plank versus adjusting it from plank. Take one leg back, hook the foot, got it? And then lift the other, hook the foot and that should you in a really good plank position. Let's take those knees down and try it again.
You could try opposite leg if you want. So I'm gonna anchor my left foot now, pop my right one up and then here's my plank. And then I'm gonna take that same leg I started with and I'm gonna alternate, right leg lift, left leg lift, right leg down, left leg down, left leg up, right leg up, left leg down and continue finding a breath that's gonna liberate that movement of the lower body and also easily stabilize the upper body. Most people can hold plank even with a shoulder injury because when your arms are under your hips or excuse me, not under your hips, under your shoulders you're the strongest in the shoulder girdle. So this is something really nice to do to try to continue to strengthen the shoulder and find a really good plank.
Okay, so continuing on with this theme a bit, I'm gonna have you just take your right leg back and hook it. From here we're going to lift and lower that left knee off the mat. So lift, pause, lower and again, lift, pause, lower. So there are several exercises in Pilates that require plank with one leg off the mat, which I'm gonna show you guys in a second, which would be your leg pull, leg pull front, knees up. There's also an exercise called front support that looks very similar to mountain climber but with control, let's do that one more time.
Inhale and then exhale. Let's just switch. I've gotta slop down on that one. That was hard. All right, so extend that left leg out anchor the foot, shoulders wide please, point those elbows backwards and give me a nice shoulder girdle head in line with your spine.
Let's lift again, lift, lower. So now this side is easier for me. Inhale, exhale. Yes, your left quad is working but what's nice about this too is that most people don't understand that the quad is a huge part of their plank. You wanna find that extension of the knee with a patella lifting with a quad muscle.
Many years in the gym people have been taught to soften the knees, soften the knees and a lot of clients that come in here that were gym rats have a really weak insertion of the quad muscle at the knee. And so we work a lot on that with our footwork on the reformer. So make sure that you're working those quads one more time and then lower the legs down and then the knees down. If you need a quick little stretch of the shoulder feel free, shoulders wide, look side to side. Now we're gonna go into the leg pull.
So please do the last two if this one is too hard for you. I'm gonna find my perfect plank, right foot hooks, left foot hooks and I'm gonna take my right toe pointed, I'm gonna lift it twice. I'm gonna go up, up and I'm gonna flex and pull that foot down. Other one up, up and pull. Inhale, inhale, exhale.
That is where the leg pull front word or its description comes in or the name of the exercise and pull, two more sets. Leg pulls down. One more set because I am fatiguing, last one and then down and rest. If your can sit on your heels, great, if not, just have a seat. Take your hands behind you, interlace those fingers and let's just open up the shoulders.
And again, you're looking side to side because that neck tension might've developed there as you started to fatigue. All right, we are gonna continue to use the arms but just one at a time this time. So we're gonna come to kneeling and I'm gonna face you, a nice thing about a high mat is my feet can kind of rest off the back, which is really nice. So if you have a high mat and you've got somebody with tight ankles it's kind of nice to be able to have that option or if you yourself have tight ankles. Let's take your arms out to airplane wings.
The arms need to be in your peripheral. If your arms are not in your peripheral then you've taken your shoulder blades out of neutral. So make sure they're not back in here or up in here. Okay, all right. Just a little airplane here for a moment finding that lateral movement.
So as you're leaning, try not to shift your hips too much but just create more of just some lateral movement in the spine. You know, you've been in a really good Pilates class if you've taken your body in all planes of motion. And a lot of times you don't even know why it felt so good but a lot of times that's why. So we're gonna do one more and I'm gonna go over to my right and I'm gonna place my hand down and I'm gonna take my left leg up. So I'm reaching that left leg, don't be too concerned with that supporting leg unless it's really, really uncomfortable.
You don't have to have it perfectly lined up and I'm gonna take that leg down and I'm gonna come to airplane then I'm gonna do the other side. I'm going to reach, extend that leg and then I'm gonna come back down. Now, the work comes in in supporting in the waist. So as I'm doing this exercise, I am working the obliques so that I don't collapse. So I really feel my abs lifting me back up to that position.
Inhale reach, exhale to float up and again, inhale reach and then up. We're gonna do one more and then I'm gonna add on for you. So reach it out and then back and the other and then out and then back, to add a little coordination, I'm gonna add some pulses. So just to wake up that neurological system a little bit let's take those arms to airplane wings. I'm gonna go to the right, I'm gonna pause my arm to like three times, one, two, three, pull up, other side, one, two, three, pull up.
Takes a little bit of control to maintain that line, two, three. So it's like you're between two panes of glass. And again, one, two, three and up, one more, one, two, three, up whoop, almost lost it on that one. Last one and it's one, two, three. Here's your bonus if you want it, taking your right hand down like you're about to go into those pulses but instead you find a side plank and then just pause on that side plank for four count, four, three, two, one knee down, knee down other side for that bonus, take it to the side, side plank, squeeze those inner thighs together, one, two, three, four, take it down and then rest, nice job.
All right, we're gonna go into some seated exercises next. So I'm gonna have you on your seat facing any direction you'd like as long as you can see me and then extend the legs out. So just as a reminder, for those of you that are not understanding of your anatomy, the hamstrings attached to your sitz bones. So if your hamstrings are super tight then it's gonna pull that pelvis posterior and then you're gonna end up with that lower back strain. So try with your legs straight, legs are going to be about the width of your hips apart.
Try legs long and when you bend them, if you sit up a little bit taller then that's your position. So you remember that. I'm gonna extend my legs and force myself into this position today. And then I'm gonna take my arms and cross them on my chest. So I'll turn towards you, just don't choke yourself out here, it's just your hands across chest.
Take the upper body from the ribs up and rotate to the right. Move your upper body only, not your lower body and come back to center. And then over to the other side and then back to the center. What I tell people is don't drive a stick shift. So as you rotate your upper body don't push one foot down while you bring the other one with you.
It's not that that's a bad thing but with your hips coming with you, we're not actually focusing on mobility and rotation of the upper part of your back and that's what this is about. So maybe inhale as you rotate, that'll give you a little bit more rotation, inhale as you rotate. We're eliminating the pulses today by the way, you can add them at home if you'd like and then over to the other side and then back to the middle. Now I'm gonna have you open the legs about the width of your mat. Same rules apply.
Straighten your legs, if that doesn't work, bend them a little bit. Now I'm going to have you take them arms across your chest again. We're gonna modify the saw. So rotate your upper body to the right and then address your knee, like hello, knee, look at that knee and then sit up tall and then go over to the other side and address the other knee. And what you're trying to find is that stability in the lower part of your body and then the understanding of your head in space.
So you wanna make sure that your neck is moving synonymously with the upper part of your back in the rotation and the shoulder blades they all go together and then over to the other side and then we're gonna change this. So take it to the right and as you bow and address your knee just reach your left pinky finger to your right pinky toe and then come back up and exchange to the other side. And then back, sometimes adding too much coordination with a saw in the arms takes you out of position. So if you really understand the torso movement so everything is about the torso. So as an instructor, I'll tell people I really don't care what your arms and legs are doing if your torso isn't cooperating.
So don't worry about all the gesture and jazz hands and all of that. So just continue to move with the upper part of your body. Reach, one more and back. Now legs together as your bonus and we're gonna do a little neck pull prep. So now legs come a little bit closer so they could be depending on how you feel.
Hip distance shoulder width, same thing, flexed ankles. Take your hands, interlace them behind your head. Your elbows are again gonna be in your peripheral vision. So tall through your spine. The neck pull, the name of the exercise comes from pulling the head up against your hands.
So that's gonna give you that stretch. We're only gonna do the top part. So flex over your legs as though your knees are the edge of a building pressing your lower back behind you as your chest not your neck comes closer to your thighs and then pull the head up against the hands. That's it, that's what we're working on. Flex forward, inhale, lengthen.
It's like your hands are your little therapist. So you're flexing forward. Get your thighs close and then come up you can add little pauses at the bottom but make sure you're not pulling your neck down. So you're flexing and then you're taking your chest three counts down, one, chest, a little closer, two, chest a little closer, three, neck pull up and again, take a forward two more sets. One, two, three, neck pull up.
Last one, I actually really love that feeling. And once I understood what that neck pull really was, two, three, this became again one of my favorite exercises and then release. Nice work you guys. So from here, since we're on our seat we're gonna do a little reverse planking series. So we'll start with the knees bent which is where I always like to start a class because even if they're strong, maybe they went on a run the day before and then their knees just aren't working in the same.
So I like to give people options so they could stay in with the class. So let's reach the arms up. The arms need to be in your peripheral. So make sure they're not way back and you haven't chicken necked and then take your hands back and place them on the mat leaning slightly back of your sitz bones and then lift your butt up and you might have to adjust your knees and then find that extended hip here, shoulders wide, arms are long. And I love this too because it stretches my bicep and if you pay attention to your body all day your elbows are bent all day long, so it's a nice stretch.
All right, I'm going to drop my bottom down and then lift my bottom up, drop it down, lift it up. And this is also could be a nice variation of the shoulder bridge as well, taking it to the next level. I'm very much a layering person. I favored algebra growing up out of all of the maths modalities. So Pilates works for me because I can layer.
So if I remember pre-algebra I can move on algebra one and if I could do algebra one, I can certainly move on to algebra two. So let's layer the next one here. As you lift, sorry, I have sweaty hands today. All right, a you lift your bottom up take your right leg up and as you lower your bottom, drop it down. So all the rules still apply.
Maintain the integrity of your long arms, the position of your neck. Make sure you're still coming into a hip hinge, so the glutes fire. Make sure those inner thighs are connected not to each other but just in space so you feel that strong base for your hips. One more and then drop your bottom down. We're gonna do a full leg pull back.
All right, so we're gonna extend the legs. I'll give you a little bonus on this too. Leg position can be either parallel and abducted or turned out. But again, the turnout comes from here not just from your knees or you'll wreck yourself. Hands come up for star position, hands come back.
Bottom comes up. Now there's a temptation to drop the neck way back but be careful because your shoulders are still slightly rounded forward which means your neck needs to be too. So drop your bottom, lift your bottom, drop your bottom, lift your bottom. All right, here's your bonus. Drop your bottom, lift your right leg up, drop your bottom, lift your left leg up.
One more on each side and then everything lowers to the mat and then you go ahead and stretch forward. Now there's several ways we're going to transition to standing. You could either bring your bottom to your heels or your heels to your bottom and then lift yourself up or you gonna stay on like a normal person. And then I'm gonna place my hands here on the mat and then fold over. So once I've gotten to fold over position, I'm gonna walk myself to the back of the mat.
And then what I'm gonna do from here is I'm gonna walk out to a plank. So walk your hands out to plank and then wrists are underneath the shoulders and remember your plank and then lift up to your pike. And I'm gonna drop my heels down. And to this down dog, I actually love to call this upside down teaser because if you're here, I like to feel my abs working as though I have my legs floating in the air and seen on my bottom. So if I flipped over, I could hold this position.
So I'm just gonna go plank to pike a few times, plank to pike, getting that extra stretch in your heels and if you actually do not like this position, you don't like down dog or upside down pike or pike or upside down teaser, most of the time, it's because you don't have that flexibility at your ankle. So then what it does is it loads your shoulders which is a pain. So be careful here and try not to readjust the position to stretch your heels. When you code a plank you should be able to fly and plank, okay? Not adjust every single time.
All right, one more time and then I'm gonna pause here and depending on you, you're gonna walk your hands to your feet or your feet to your hands and then you're gonna roll up. And I do have a tendency to end with lunges and squats. So that's what we're gonna do today. So I'm gonna have you actually transition. Arms are going to go up, arms are gonna come down and you're gonna go ahead and roll yourself out to your plank and then lift your right leg up so that you can find an arabesque but once you find your arabesque, take your right foot forward and you can just go right to your lunge, I'm giving you a fancy way to get in there.
So knee over the center of your foot and then open up the front of your body. One of the great things about a lunge too is not just the stretch but also the balance. There's a lot of balance required here. Pause, you could even drop that back heel up and down a few times and that'll really stretch that hip flexor and then bring those hands back and then you're going to step back into your plank and then lift your left foot up into your arabesque and then shift that foot forward and then come up and again, find your balance. Open up the front of your hip maybe take that heel down a few times, make sure that left knee is lined up with the second and third toe.
Those two toes are the most stable at your foot. Make sure you're not in that lower back too much. And then from here, just take your hands down and either step your foot, your back foot forward or your front foot back, and then you're gonna roll yourself up. And then just as a little energy here, we're gonna end with a few squats and a stretch. So find the center of your mat, face me and then find your squats, shoulders back.
And this will get the blood flowing back to your feet, to your hands, all over, just moving it all around. And the squat is a really great place to see if everything is now in alignment, your feet, your knees, your ankles, your hips. If you understand that standing neutral just two more and then hold it here and let's just take one arm up to the ceiling and then hold it with the opposite hand and just pull that wrist and then stretch to the opposite side of the wrist that's being pulled and then take it to the other. Hold that stretch and we did do quite a bit with the upper body. So I'm gonna hook one arm in the front and stretch my shoulder blade and then I'm gonna hook the other and stretch it out and then take one big interlace of the fingers and open up the chest.
And I like to move my neck around. I don't know if you can hear a crunching in the mic but it's crunchy. Now reach those arms up to the ceiling. Take a deep inhale breath, open up the front of the body, hands to prayer, hands to heart, center. And thank you guys so much for joining me for class two of "Level Up".
Level Up: On the Mat
Mention
 |
Delia (Teacher) |
 |
Jess H |
 |
Norita |
|
|
Acheson H |
|
|
Catherine R |
 |
Clare P |
|
|
Lyn G |
 |
Gemma P |
|
|
Lavina M |
 |
Carina H |
 |
Marissa |
 |
Susannah R |
|
|
Marie-Laure M |
 |
Jill C |
|
|
Carla |
|
|
Cigdem A |
|
|
Natalie K |
 |
Ingrid J |
|
|
Sharon C |
 |
Adrian D |
 |
Maryam |
 |
Andrea L |
|
|
Tova A |
 |
Conce P |
|
|
Fiona O |
 |
Federica A |
 |
Lina S |
 |
Gary M |
Comments


You need to be a subscriber to post a comment.
Please Log In or Create an Account to start your free trial.
