Description
You can watch Madeline's Pilates for Scoliosis Workshop to get more information on scoliosis and how you can help improve alignment with Pilates.
About This Video
Transcript
Read Full Transcript
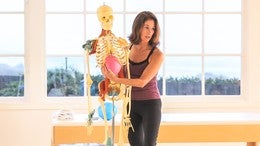
Performing the Scoliosis Assessment on Yourself
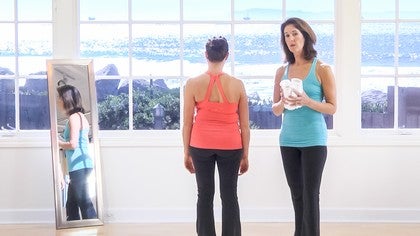
Welcome to Pilates Anytime. We're going to do a little assessment work here, prior to taking the scoliosis mat class. It's very important that you understand the curvature of your own spine. Because the cueing and the directions of the mat work we will be doing will be determined specifically for your curves. What I'd like you to do is to stand in front of a mirror. Have a second mirror behind you, so you can actually see your back. You're going to be assessing yourself to see what your curves are for your spine. So come on over here.
The Four Common Curves of Scoliosis
There are four common curves of scoliosis. One is called a right, it's on your right side. It's up high here, in the higher part of the ribcage. And normally what you would see is you would see a more prominent part of the back here, versus a flatter, more hollow part of the back on this side. So it's a pretty high curve up here. That's called the right thoracic. Lower down, the second common curve is a right thoracal lumbar, which basically is the same as the right thorax one up here, except for it's lower. It's located in the lower part. This is the kind of curve we see here that Gabby has. So you can see where there's more prominent tissue here on this side and a hollowing, flattening, of the back on this side.
And then there's a left, which she doesn't have. But it would be on the left side, the left lumbar area. So this idea of seeing a bolster type shape here-- you would see actually on the lower left side of your back is more prominent. And the right side of the lower back is a little bit more hollow. So you may see that in your back. And of course there's the double curve, the S curve, which would be a combination of this upper right side being prominent and this lower lift side prominent. We're going to be doing a class-- I'm going to be directing it towards the right thoracal lumbar curve, because Gabby is going to be the model doing the mat class. But I will cue the other curve, so that you can adjust your own curve to the movement that we're doing.
Directed Breathing
And the second thing you need to understand and try to feel is what's called directed breathing. So in the breathing, your own breathing, you want to try not to breathe deeply into the areas that are very prominent, light breathing. Can you do that for us, Gabby? Can you breathe and really exaggerate your inhale on this side. Yes, can you see how it exaggerates this bolster? Now what she's going to do is take her intention and actually breathe into the left lung on this side. And it actually kind of helps sometimes to turn the head a little bit. So as she breathes in, you'll see that there's some rib movement on the left side, and her right side isn't exaggerating in her curve. And if anything, when she directs her breath into the concavity part of her spine, it actually elongates and moves her spine towards the midline. That's what you want to feel.
From the front of the body, you'll see the opposite, where if you have a right side in the back that's prominent, the left front of your ribcage is going to be more prominent. So again, when you're breathing in, you want to try to breathe into the right front part. So we have this diagonal here. So face sideways, this way. We want you to breathe into this left back and right front, so we're breathing into this direction, not exaggerating the already exaggerated direction. So take your time to figure out your curves, and then you can start with the mat class.
Using Small Towels as Props for the Mat Class
During the mat class, we are going to be using small washrag size towels to do a little bit of propping for your spine. So again, we have to determine which curvature you have of the four. But I suggest that you get three or four towels. And you're going to fold them in thirds. If you're lying on your back, you will see that we will take the padding, and we're going to put the padding on the prominent side of your back. Not in the hollow part of your back, but on the prominent side of your back. So you want to put it on the ribcage and not on the spine. So you're just going to put it right at this point of the back. And then the pelvis is going to be the opposite side in Gabby's case, where we're going to put a towel on this side and then an opposite on the shoulder on this side.
And the idea is to take your curvature and to encourage your body to right itself towards the floor. So you have better contact with the floor. If you can imagine if you're lying on your back on the floor, this part of your back will be touching the mat and this would be off the mat. So the padding here is actually going to move the ribcage a little bit that way, allowing this part of your back to actually rest on the floor. And lying on the stomach, we'll be propping also the rib in the front. So if the prominent rib is on this side, we're going to be putting the pad on the prominent part of this side of her back. And then in the pelvis it's going to be on the opposite side of her pelvis. And you'll see us do that in the mat class.

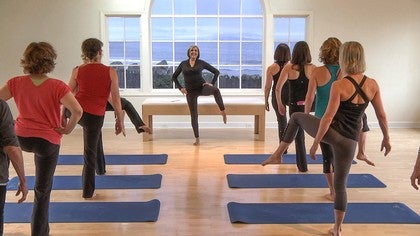
Back Care: Pilates for Scoliosis

Mention
 |
Madeline Black (Teacher) |
 |
Malene S |
 |
Heather Shaw/Heather Shaw |
 |
Copycat |
 |
Bev G |
 |
Beverly L |
 |
Marta H |
 |
Lisa Marie Glodowski |
 |
Inna G |
|
|
Shila L |
|
|
Avishag H |
|
|
Carole P |
|
|
Leidiana O |
 |
Nicholas P |
|
|
Janie J |
 |
Angela W |
Comments


I love your explanation and technique for scoliosis , I have a client with a right thoracic curve, and a vary little letf lumbar curve, I been working with her 3 time now in alignement of her spine while doing her pilates exercise. she has the shoulder really winging out and want to try to decrease the wiging so she can have a nice back in her wedding in the summer, this is the first time i am working with a shoulder that wing that must do you have any advice for me?
thank Carole


You need to be a subscriber to post a comment.
Please Log In or Create an Account to start your free trial.
