Description
Read about Meredith Rogers' experience as Benjamin's student in her blog Moving With An Open Mind.
About This Video
Transcript
Read Full Transcript
Introduction
Hi everyone. My name is Benjamin Degenhart and I'm here at is anytime to share a workshop on the original 34 mat exercises. For most of us, the mat work is our gateway into the pullouts work and the first thing that we learned yet I believe it's also the hardest thing to truly master. Throughout the workshop, I want to break down every single exercise from the original sequence as outlined in the book return to life through control, edgy by Joseph Paul, Audis. No matter what kind of math class you take, whether here plot is anytime or at a studio, you will find that variations of these exercises are tod and as much as I believe that you should follow the instructions of the teacher, I wanna use this workshop to also give you an opportunity to deeper understand the work in your own body and to know how to make adjustments for yourself. Another thing I want to share in this workshop is the interconnectedness between the different exercises and how I view the mat work as not 34 different exercises, but indeed one exercise with 34 different movements built in.There are no absolutes in Audis and I believe that there is no right or wrong variation of an exercise in your own practice. You will probably encounter many different variations and probably wonder which one is right for you. Throughout the workshop, I want to offer you placeholders for exercises that are currently not available to you physically as well as make you understand how the exercise is build onto one another so that you can be more successful in your practice and truly own it. I am joined by my friend Mary Rogers, who's helping me bringing this workshop to life who will also ask questions as they come up throughout the work. We will finish it up by sharing a complete flow of the 34 exercises with you as well as a download of the things that we discovered throughout the workshop. If you are an avid practitioner of the map work, I truly hope that you will enjoy this workshop. It was made for you.
Chapter 1
Exercises 1-5
Hi everybody. I'm Benjamin Degenhart and today we're going back to basics.
This is a workshop on the original map work and we're going through the entire sequence today. All 34 exercises as they are described in Joseph plot his book, return to life through controller [inaudible]. My goal for this workshop is to collectively workshop every single exercise but showcase the interconnectedness between the exercises as well as getting really clear on their purpose and how they all fit together so that you understand that the math work is not really 34 different exercises but instead one exercise with 34 movements in them that are all connected with one another so that each exercise prepares you for the next and continues where the previous one has left you off. With that, you might find that if you take classes on PyLadies anytime or elsewhere that you might encounter movements that are not available to your body at this point. So another goal for this workshop is to show you some place supplements that you can pepper into your class, into your practice to replace the exercise that is currently not available to you and then hopefully find success in those down the road because it's a journey.
And of course we begin right with the a hundred. You can see that she's miked up as well. So we will dialogue on these exercises as well if any questions come up for her body as to how to adjust them, um, as well as how to find more success in the exercise. So we'll begin with the hundred, which is our quintessential warm up exercise. Mary, go ahead and lie down on your back.
And the way I look at the hundred as our gateway into the plot is practice. For many of us, it's the first exercise we'll ever learn and it's the hardest one to master. Um, the goal for me really is to learn how to unweight pretty much half of our body weight off the mat against gravity from central body control, which is a tall order right at the beginning of class, right at the beginning of the practice to set us up for a really strong movement experience. Cause what happens here in the a hundred really continues to thread through the rest of the sequence. So go ahead and extend your legs out long and low, we'll go um, just on the mat and just rest them long. Exactly. Feeling completely supported by the math. The original idea of the math work behind the math work was to teach the body in a way that is close to the way that we learn movement the first time around where we're completely supported by gravity as babies and toddlers and have to really earn our way up to later on sitting, kneeling, standing, and then running away from our parents.
So we'll learn the exact same sequence here by starting from being completely supported by gravity and the ground to lifting ourselves up and away from that support and seeing if we can hold ourselves together, find postural control and not lose our breath. All right, so our first order of business is to extend the legs and activate the lakes out of the hips, stretch them across the room until we start to find that our central body begins to activate and engage. The idea is to ultimately lift the legs up and as per the original instructions, they only lift about a couple of inches away from the ground. So start with that. Start to notice how the center of your body begins to engage and probably is not a very pleasant sensation because you have to work quite hard to just get that done. Release the legs back down. Now this works even at a visualization level.
For those of you that feel like this is not in the cards for my body today, so even if Mary now just went ahead and imagine lifting about say half a pound of weight out of her heels, she will probably find the same sensation happening through the midsection of her body without the thread of the legs lifting up and loading her back in perhaps unfavorable ways, but if you can lift your legs up, we'll go ahead and do that again. You can now choose your working level. If this low two inch height is not appropriate for you, you feel like your back is starting to cringe. You just find the level at which the vector of your legs really threads nicely into your back where your ribs can be supported against the ground. She's shaking a little bit here. That means it's working slowly. Lower the legs back down from here.
We'll take our time with this exercise just a little bit longer because again, it sets us up for everything that's to come our next step because the weight of the lifting legs goes all the way up through the rest of the body as well. We're actually currently the spine against that to better prepare the body. So next time she lifted the legs up to her working level, she also bends her head towards the legs, bending her spine evenly from ears to hip. So go head, especially the legs out of your body. Pick yourself up into position that is sustainable to you, which means you're free to breathe. You take a deep breath in, you'll take a deep breath out, taking any tension out of neck and upper back where it's not needed, putting it instead and where it is needed right through the center and the opposition of the ribs deepening against the legs, stretching out. Take one more breath.
That way we know it's sustainable and it's under your control. Then slowly release back down and relax completely right? Your breath is always the best way to monitor whether your body is in controlled and in a place that it can sustain. When the body feels threatened, it shuts of the breath right away. So if you find yourself doing exercise and holding your breath the entire time, it's probably your body's best option and it might be a good consideration to start thinking about the exercise differently and finding a place where you can actually breathe and control your breath. All right, we're now going to add the pumps to get our body warmed up, to get our circulation going. Stretch the legs out of your body, find your working level. Bend your spine evenly and begin to pump the arms up and down.
Breathing in four, five breathing out for five. The idea is that the arms move rapidly while the breath is actually fairly slow. It feels sustained. It fields deep. Breathing in, completely emptying out. Nice. We'll just do a couple of more here. Obviously we are going all the way up to 101 thing I always like to introduce to my students here is that you're not stuck in this position as you hold it for a hundred pumps. Maybe at some point you need to readjust.
Maybe your legs have to come up a little bit high or maybe you need to rest them down. Perhaps you need to even take a break and join back in, so always feel free to do that when you feel like you're losing the alignment. One more breath out and then relax completely. My favorite instruction from the original book, relax completely at the end of your hundred right? It is a nice thing to do. Now options other than leaving your legs on the ground, leaving your head on the ground. The more obvious modifications is also to work with one leg at a time, right?
Or to even just find your starting position and work from there and working on your breath. The arm movement at that moment becomes quite optional. I would say if the rest of the body is not yet in a sustainable position. All right. How did that feel in your body? Did you get yourself warmed up nicely? You there? All right, so this opposition that we found of the legs reaching out against the ribs deepening down so that the body can unweight itself threads over into our next exercise. The roll up right? She's going to flex her feet for this one just to have a nice end point through the heels. She brings her arms over her head, so that same full body control we just found in the a hundred continues here we introduce articulation of the spine.
The reason this exercise is so difficult for so many is because our spine isn't necessarily built to articulate evenly all throughout because we have natural curves that contradict one another and that's the sticky point for most people where the thoracic curve of the spine, that middle back curve translates into the lower back. There's a conflict there, and at that point where the curves translate, we often get stuck. We often find the feet flying off the mat. It feels impossible to do so. We're just curling up to that spot right now to highlight that in one marriage and lift her arms up and her head, neck and shoulders up and forward and get to that place where she feels like now the effort changes in her body, right? We have this idea while you stay there to accomplish this exercise from our abdominals alone, but this is really where the power of the legs, that reaching out through the heels becomes relevant. Again, just like in the hundred, go ahead and release back down because our abdominals can only pull us up so much until we need to work out of the hips to carry that shape up and forward. So just have one more time.
Our first goal is to bend the spine as deeply as possible to maximize the curl of your spine before then reaching through the legs and tilting this whole shape up and forward over the legs without hinge at the hips. So we create this nice even bend from head to tail. That energy through the leg stays relevant as she comes back down, pushing the heels right across the room as she articulates back down to then fully release the spine into what feels neutral to her to reach the arms overhead, right? So that is the original roll level. Do one more like that flowing right through it. The arms lift up with an inhale. She rolls up and forward Xcels the air to create a nice deep bend and an emptying of the lungs.
She rolls herself back down and she reaches the arms up and back over your head. Now if you have the luxury of a traditional math with a strap at the end, it's not achieved to actually use it. I will become a strap for her. At this point, I'm not holding you feed down, but I want you to actually pull your feet into my hands actively and really make sure you do that. Start to finish. Lift your arms back up, lift your head, neck and shoulders. Roll yourself all the way up and over the legs. Deepening your ribs back against your legs and arms reaching forward with control. She comes back down, she's responsible to pull herself into my hand, like she would use the strap and then the arms go overhead and then release for a second. Does that make physical sense how the hundred really prepares us for this at that sticky spot? Right?
So the moment you find that you get stuck in the way of coming up, right? Think about just staying in that moment, firing up the legs in opposition to your reach of the arms and the bend of your spine. Stay with that until one day you develop the mechanics that you will need to come all the way up and over. There might be all kinds of reasons why that is difficult. Spinal tightness, hamstring tightness, Justin, overly active hip flexor region, which then leads us to a good place holder, which is obviously I'll have rolled back. So if the roller is absolutely not in the cards for you, this is always a good one to throw in. Instead come up to a seated position, bend your knees, feed a flat for this one.
You can hold on behind your thighs or have your arms extended out in front of you, but we'll start right here. You just set yourself a nice and tar lifting through the crown of the head and we start to roll yourself back. Now this is a good place to talk about this idea of rolling bone by bone. Let's go to where your arms are straight. Stay there for a second and then lift yourself all the way back up.
We always employ this image that our spine can actually articulate like a slinky, but I want you to start thinking a little bit about the spine actually moving as a whole at all times so that the second she begins to roll herself back, she really articulates from ears to hips. The spine bends on both ends as she rolls herself back until she's distanced enough from her legs to still hold on with straight arms, deepening the curve in the lower back and then lifting herself all the way back up. Never with the thread of really slouching into position because of the arms. Hold her in place. Do One more with the arm stretched out in front of you. Finding that sticky spot from the top. Roll yourself back one more time. Both ends of the spy moved simultaneously. That was gorgeous.
Hold where it gets tough. At this point you could explore extending the legs out along the Mat who really fired that opposition again and then see if you can come up from here with straight legs so we can play around with taking your half roll back into the idea of a full roll up. Go ahead and take a stretch. You deserve it after all that nice slow work and then lift yourself all the way back up. So you can probably tell by seeing the connection between hundred and roller. If your hundred doesn't feel so easy on any given day, both legs lifting up is not in the cards for you, it's probably an indication that you will get stuck in your roll up as well, which just means you may have to adjust your practice for the day and start to make better decisions for your own body. The next one, another tall order in the sequence and it's only exercise number three.
We're going into a rollover that was Joe's a plot. He's his third one, which continues the idea of our position in the body. It continues the idea of spinal articulation and it adds inversion version into the mix. It's the roll up turned upside now. All right, go ahead and lay down on your back. That's outlined the original exercise first before I throw in some placeholders for you here on a traditional mat, you've probably seen those. There's wooden handles that the body can hold on to to better activate the back. If you are on a mat that is slightly elevated like this one or even just a high mat, you can replace that by taking your arms over your head.
Go ahead and do that and hooking your hands around the corners of the map. Right? You can even go wider here. Yeah, exactly right there. The idea is that you pull with your hands to activate the muscles of your back, which actually helps you not slouch into the position we are about to go into. Right? You feel how that gets your body ready for action, right? It gives you a nice sense of traction.
It usually also keeps your neck out of trouble cause the last thing we want to do is end up here. All right. First Order of business for the roller is again to lift your legs up just like we did in the hundreds. So thing of stretching the legs across the body to pick them up to 90 degrees and pause right there, right? Once you know you're clear, you can get your legs to a 90 degree angle. You might want to try the next step, but first bring the legs back down. Do that one more time. Actually thinking of pulling the corners of the mat, stretching the legs across, lifting them up to 90 and then from here we'll do a little pre lift. See if you can lift your heads up just a tiny bit without tilting the legs towards you. Maintaining the angle at the hip.
Nice control against the pull of your arms, lower back down against the pull of your arms, lower the legs back down. And this in and of itself is a great exercise, right? Without going all the way, especially if that is not available to you or if it's not appropriate for your body. We'll do one more this time. We'll go all the way. Stretch the legs out to lift them up, Paul, with the arms to lift yourself up and over. Don't be afraid to use your arms. It is a full body experience. The legs open at this point. Once we go overhead, the legs reach across overhead. As body comes down, the arms are still pulling against the mat.
Bring the legs down, circle back together, flow through two more like that. Up and over. Open the legs. Pull with the arms as you roll yourself down to slow down the descend. Your goal is to sit down a little bit farther on the Mat and where you came from. One more time. Up and over. Often we like to flex the feet as we come down, but that as an optional piece of choreography that you can leave out as well.
Think of opposition through the legs. Bring the legs together and then rest for just a moment. We'll do the other direction. Of course we'll do it a little faster and we'll do it with the arms down by our sides as not all of us have the option to hold onto something, especially for on a rolled out mat on the floor. Right? So we'll take the second direction with the arms down by the sides.
Extend your legs on the Mat. But because that was really helpful, right? For the exercise, do you have any advice around like if you only do have a rollout, Matt asking how can you recreate that sensation cause it was quite helpful and it found what's helpful about it. What made that helpful is the fact that you're actually engaging the muscles of your back in that moment. So that doesn't just become a good luck exercise, right? It's throw your legs overhead and see if you can catch yourself there. But you have the power of your back fully engaged, which helps you slow down and control the descent as well as the app. Now, if you don't have that available for you, you can use your arms by your side and we actively press your arms into the Mat, right? Again, this idea that we're working from the center, the powerhouse, the core alone is maybe not as relevant. If we talk about an advanced skill like this one, right?
So really allow your arms to stretch away from your head. Press them into the mat and see if that gives you the same sense of activation your back. It'll feel different, but it'll give you something, right? It's chest expansion, it's pulling straps, it's all of those things. Stretch the legs out of your body, lift them up. Let's start with the legs open on this one.
So he opened the Lex roll up and over. Bring the legs together. Push your arms into the mat as you roll yourself down and see if you can get that same sense of activation. It's a little more difficult down around and up. Two more times as the legs or legs come together and the spine rolls down. Also think of your head pressing into the mat to again, get the backline of your body engaged. Take one more down, around and up. Bring the legs together, press your arms into the mat, your head into the mat.
Become longer as you roll yourself down. So beautiful. Lower the legs all the way down and again to go rest. All right. Again, you still might think, well, that still doesn't work for me because my hips just don't want to come overhead, right? And that is true. Again, if we don't have the right mobility and then there's no reasoning with that, there's no way to modify this to get your legs up and over your head in a way that is safe or even appropriate or productive for your body. So instead, I always recommend, maybe it's better to just get used at this point in class to get your hips lifted in the air in a more supportive fashion. So we'll just do a little precursor to our shoulder bridge, which is an exercise we'll do much later in the sequence. But we'll leave the kicks out. So you bend your knees, you place your feet flat down, and then we just go ahead and articulate the pelvis up towards the ceiling, right? If in the original sequence, it was important, at this point we get the hips lifted to reverse your blood flow to increase your use, to stimulate your circulation in a different way.
Then we can get that accomplished by just coming into this position. Once we're up there for you to build the strength for the ultimate rollover. Later on in your practice, you can start playing with the idea of taking weight out of your feet and getting the hips up higher without just using your legs. And you might start to find that you set off a whole different effort through your center, your powerhouse, your core, whatever it is you call it. You Roll yourself down with the idea of sitting down on your heels becoming really long as you approach the ground. We'll do that one more time.
Lifting up, right? So at this point you have a lot of weight in your feet, your hamstrings work, if CAEP works back works. But as you shift weight out of your feet, maybe towards the back of the body, does that change your effort at all in the body? Do you feel how this area starts to engage a little bit deeper and how that threads into what later becomes a rollover? Slowly roll yourself all the way down, become really nice and long.
We'll get back into the shoulder bridge action much later in the sequence for now. Just go ahead and bend your knees into your chest. So this is one place holder you can use if you are taking a class where a rollover is being practiced and you feel like it's not in it for you that day. Another place holder is the circling action of the legs, right? So if you are clear to lift your legs to a 90 degree angle, which and that's fine for your body, you can practice the action, the centrifugal action of the legs circling in both directions, especially because our next exercise is the single leg circle. Go ahead and extend your legs out straight on the mat.
I call these double leg circles, but they're not an official exercise. They're just a breakdown of the rollover. So go ahead and lift the legs up to a 90 degree angle. Lower them back down, halfway. Open them, circle them back up, close them together, repeat that one more time and then go the other way. This is another way to stay in sync with the class you're taking. If the rollover is not there for you that day, lower the legs all the way down and we'll let that one go, right?
So that should give you some options to play with your rollover because we'll come back quite a bit throughout the sequence. We'll build on these ideas as well to start introducing rotation when it comes to the corkscrew and all of the other variations that we have on a rollover. But hopefully you have something to play with if you can't yet do it. Next one. Oh yeah, yeah, please, please. So I can lift my legs and that's fine and it feels great, but I can't quite keep them straight. Then we you just allow them to just be a little then and still do their thing.
Circling action. Absolutely. So what makes the difficult to keep a slight bend in the knee is that usually what happens as we start circling, we then straighten and then we bend and the movement becomes so much more about the legs and you put so much more effort into the musculature of your leg. But if you can commit to keeping an angle at the leg and drawing the movement out of your hips, right, then I think you get the purpose of the exercise accomplished because what happens in the actual roll over later is that the circling of the legs gives you a certain sense of momentum into the actual movement and into the inversion. So if you can properly do this with the knee slightly bend or even fully bend and doing the circles here, I think you've got a lot of productive work done. I'm not sure this prepares you for the rollover as much, but it's still a valid placeholder at that moment. That's a great question.
Yeah, because hamstring tightness is a real struggle for a lot of us, especially because we haven't fully warmed up yet. Right? If we stayed true to the traditional order, um, we're just in the third exercise, the body might not be fully prepared just yet, but chances are if you get your 100 right, your body will be warm at this point in class. Um, so next step is our single leg circle or one leg circle. And I think this is an exercise that's worth taking a closer look at as well because often we think of it as a circular motion at the hip as opposed to a spinal rotation. And I often say this in my classes that this is a one legged corkscrew, right? The idea of bringing the leg to 90 degrees and circling it around there is not really as functional as the idea of navigating that movement from the hips, from the spine and basically building up what later becomes our saw, our corkscrew, our hip twist and all those fun little rotation exercises.
So I'm going to set it up quite slowly with her one leg lifts up to the ceiling of this point. We know it doesn't just lift, it stretches out of the body to lift up the same question that Mary had earlier about, can the knee be bend here? Absolutely. If it must. I'm more concerned that the thigh is at a 90 degree angle than that. You have your foot right above the hip, but if you can, you must. We take the leg up here, I'm just going to give you some relief. You can give the leg to me.
So when I was married to find now is instead of dropping the leg across the body is to find that same sense of activation to her arms first of all so that her shoulders are wide and engaged against the mat. You could hold onto your mat again overhead if that is available to you and that was helpful to you. What initiates this movement? Is the hip lifting up so the left hip lift up and goes across how far while as far as she can keep her left shoulder down. So we have a corkscrew or tick like action happening here. It's that hip coming down that brings the leg right back up.
So we'll just go across one now. Let's do that one more time. Left shoulder stays down, leg goes across. Now at the same time, the opposite leg rotates inwards against that and all of a sudden we're talking about a whole different effort through the center of the body. Hip comes down, leg lifts of, let's show that on the second side first, just to set the stage for the original one leg circle, right leg lifts. Both arms press down, the hip lifts up. It's like our favorite figure four stretch in a lot of ways they are exactly less stretch, more work. We're not selling this really well, Mary. I think take it up and across, but it's valid with everything we're about to do, right? Our first rotation shouldn't really be a corkscrew. It starts here.
Lower this leg down. Chicken loose for a second, cause this might get into your legs a little bit, right? Remember that in as we sequence this altogether, it should happen fairly fast, right? We're just breaking it down, which makes it a little bit harder for the beautiful body that I have here. Now let's go to the first side. Again, we're going to take this into a full circle so the hip lifts up both arms. Press down, the lake, swings down, around it, up. You find your center, you go again, hip goes up, leg goes across. Circle down, around and up. One more time. This way we activate your arms and back into the mat.
Reverse the circles. Open down, across and lift. As the leg goes across, we go again into the rotation. Pull the hip down to come back through center. One more time. Take it down around him, up, lower the leg all the way down, and we'll go to the second side. Now very often we're told in this exercise, keep your hips steady, right? So I get a lot of questions around why I teach it this way. Well, one reason is that's just how it was. Second is I think it's really valid again, to prepare us for all the rotation exercises that are to come and it puts the effort a little bit more into our center rather than just the leg down around it up. One more time, across, down, around and up. Reverse, open down across and lift and two down across and lift.
Final one. Pushing your head back into the mat is well lengthen the leg away from you, bring it all the way down and let that one go. So it's quite different, right from the way we're often taught as exercise, but does that make physical sense? [inaudible] tell her this and that. Then I do to try to help map out. They're still just didn't like physically. It feels nicer to me and I hope you feel the same way. Now it might look or even feel a little sloppier than what we're used to [inaudible] but I think the effort that it requires for us to actually control the lift of the hip and rein it back in is really at the heart of what this work is about. And again, it'll prepare as nicely for what's to come.
I think it really illustrates like the relationship between moving the leg from the center of the body rather than just moving the leg. Exactly. It's not a limb driven modality, right? We're always trying to work from the spine. So thanks for saying it that way. Last one in what Jo's apply use described as the first five exercises that cluster of five exercises that he proudly promoted note one man in the United Nations could do, right? And that's why there's no word peace, crazy man. Um, but these first five exercises meant something to him and I think they also conclude our first chapter in the math work, the first circuit, if you will. Right? We've prepared the body in a very sagittal, which means forward and back kind of way. We've been connecting a hundred, the lift of our legs against the bend of our spine into an articulation of the spine up and forward into the rollover, which takes the body into inversion into the rotation that we found in the single leg circle. But there's a connection between all of these exercises and now we swapped.
Now we roll. Now we treat our body to a nice little massage of the back. All right. Um, again, if a rollover is not in your practice, you probably already can tell that this will be a difficult exercise to do. It probably is not going to feel great if you can articulate smoothly, feels like you're rocking like a box instead of rolling like a ball. Right? So one of the things that I think is a great place holder, and we'll start with that, is just getting into the exercise properly, which is to start from your back exactly where you just left off. So your arms are down by your side. You still have that sense of activation.
And from here you just pull yourself up into your start position with no adjustments. You curl your head, neck and shoulders up. You lift your legs up, you bend your knees, you grab a hold of your shins in that seated position, boom. And you're there. Now, any muscular effort that you're looking for in this exercise had to be present for you to do this. So in a way the exercise is accomplished at this point, whether you can roll back or not. Let's reverse out of this first. So you come back to laying on your back, stretching the legs forward, arms forward, rolling the spine back down against that. And remember, this may not be as bone by bone as you would like depending on how your spine is constituted, how you feel on any given day. But this action is really just representative of lifting or body weight up against gravity. Taking the a hundred to the next level, you'll see stomach massage in here. There's a mini little teaser built into this as well, right? All of those things come together into that squad like action. So do that again.
Pick yourself up, bend your knees up and into your chest. Grab a hold of your shins could be down by the ankles. If you want to take it really far, you can cross the hands of the opposite ankle, but we'll stay right here. There is an oppositional force of the arms pulling the shins in while the shins are pushing out into the hands so that she can really puff her back out against that and find that even bend again from her ears down to her hips. Now, once the effort is there, the goal is to just breathe in joy and roll back and forth like you're actually having fun. Roll yourself to your soldiers and lift yourself back up. I don't see how you can not have fun doing this.
Once you're in the proper position, the idea is that you really massage the mat with your back so it can massage you back. Lift yourself up, do a couple more. Rolling back. Of course, we try to keep the heels close to the seed throughout the entire range. We try to make sure that the head doesn't drop into the mat, that there's a sense of length coming through the crown of the head, but don't be afraid of roll yourself all the way onto your shoulders. That's take one more just for fun. Rolling back early lifting upholded. Therefore a second and just for fun. Let's reverse back onto laying on your back, your arms and legs, stretching forward as your spine rolls down and then let that one go.
So that is the first five exercise in the sequence. Was that fun or that fun? So fun.
Chapter 2
Exercises 6-11
Our next cluster of exercises actually continues the idea of a squad that we just found in rolling back or rolling like cabal as it's more commonly known into the one leg stretch than the double x stretch. So I want you to think of them as squats a one legged squad, double legged squad, continuing that same action rather than thinking of them as abdominal exercises. Yeah, we're working on mcdonalds with pretty much everything we do on here, but really think of these as full-bodied events as well rather than just isolating effort into one part of the body in return for life.
There were only those two. Um, there were the other three exercises added that made the ab five. Um, but we'll just keep it to basics today and just look at the single and double expiration, how they thread into the work. Go ahead and pull your right knee into your chest and give us that nice little squeeze in a hug and you can leave your head down for now. Um, I want you to start religious owning in on the purpose of this, which is to create better hip mobility and to use the strength of your arms to get the knee nice and close to your chest all while already finding opposition through the left leg so you don't even have to lift it up to start setting that up. It's the idea of creating distance between your knee and the opposite foot. Really stretching them apart. All right, go ahead and go to the other side as well. Bring your left knee in and to really own up to how difficult this could be. Write a good test here. Something that I'd like to do for people to really feel the amount of hip work that is part of this exercise is to try and keep the knee exactly where it ends up.
But see if you can let go of it for a second without the knee falling away from you and all of a sudden you see, oh, there's really build strength through the middle of your body. Go ahead and grab back on, right? You use your arms as your hip flexors in this exercise, right? So the strength of your arms as we do holds the leg there because you just fell how heavy it is or how hard it is to keep the leg there. Go ahead and extend both legs out.
So translating the idea behind this exercise into going really into that deep compression becomes almost like what Joe's applied is called the stomach massage and massage of the internal organs by drawing one knee at a time in and getting that deep massage at the hip fold. All right, we're going to add to that the idea of the a hundred again, because we've been programming for this exercise all along, right? So you curl yourself up, you pick up both legs like you are going into your hundred, but you transition to pulling one knee into your chest, pulling it in deeply, stretching your legs in opposition from one another while deepening the back down. And the spine again moves from ears to hips evenly. Go ahead and switch to the other side. Really fold the leg in as closely as you can, as closely as it's comfortable for you and switch and switch and switch. So it's a fairly simple exercise.
But for today and for the exploration of the origins of this exercise, really draw the knee in so deeply. It might just feel like your tailbone is beginning to lift off a little bit and be okay with that. As long as it's the idea of lengthening out your lower back deeper and getting a deeper fold at the hip at the knee and add the shoulders pulling in three and a two. Do One more set each side before resting back down when bend both knees into your chest. Leave your head down for just a second, right? So it's not necessarily that we take the attention away from using our center as much as making it more about the body organically moving in and out of those squat positions, right? And that takes us right into our double x stretch, which again, yes, you will work your abdominals quite deeply.
But I want you to think of this again as a squat position we've been in before. It's the a hundred position and coming back in this time, both legs move at the same time. Originally the arms didn't even go overhead, right? So instead I want you to think that your legs are like a magic circle. So once your legs extend out, I want you to press your palms into the sides of your thighs for today. Okay? Curly head, neck and shoulders up. Let your legs escape your arm. Send them out long and low.
Find that level again that you found in your 100 press your palms into your thighs, deepen your back into the mat. As you exhale, pull the knees up in and give them a squeeze in a hug deeper into your chest. You're near rolling like a bar position. Go again, stretch the legs out long and low. Exhale, come all the way back in. So especially if you find that taking your arms back and overhead really brings you into trouble with your neck and your head placement. This is the original variation. Let's do a couple more stretching out, which of course doesn't mean that taking your arms overhead is not a great idea. If you're ready for it, take one more like that. Exhale, come back in.
Let's to go and take the arms overhead. If you do that, make sure that your rib connection against the mat works also against the opposition of your arm, so go out, arms back, beautiful work extra. Come all the way back in so that your head stays in one position sustained so that your breath, the passageway of your breath is nice and free. Let's do a couple of more here. Inhale, reach, exhale, come Megan. Finding that opposites oppositional. Stretch in two directions, out through the legs, out through their arms in through the center. Come all the way back in and slowly release your head down.
Opposition is such a hard word, even though I use it so much. How are you feeling? Great. Good. So you can really keep it to the basics with just these two exercises to get just about enough massage into your hips and into that squad action to give the leg some rest because we just work them in straight positions throughout. The first chapter of this, we're next up going into a spine stretch right away. Come on up to a seated position.
Open your legs as wide as the mat and place your hands in between your legs on the Mat. All right, we're going to keep this one fairly basic and original as well. Um, we're probably going to be talking about hamstring tightness as well, but because our hamstrings are not tight, we'll just show the original version of this exercise where your legs are fully energized and activated, right? She's flexing her feet, she's pressing her fingertips slightly down to really lift her spine up. And if you look at original pictures of this exercise, you might actually find that the body starts not completely vertical, but slightly behind the sitz bone. So I want you to push your fingers into the mat and already begin to curl a little bit under. All right. It feels like the horseback. Take a deep breath in from here and as you exhale, just let your arm slide forward. Keep that shape and what that little initiation does, it avoids you, hinges into your hip folds, but really building a spine spreadsheet, which is the name of the exercise restack your spine. As you inhale, use your fingers wisely against the ground. You find that initiation again, press your heels out of your body, ribs, go back.
The rest of the body slides forward and again, the body moves from both ends of the spine at the same time. Ears, two hips, rebuilt your spine. Come all the way back up. Let's do one more like that. Up and over you go. Ribs deepened back, so think you're stretching back as much as forward. The original aim was just spine stretch, not spine. Stretch forward. Maybe think of going back here as well. Roll yourself all the way back up. You see how we're visiting the shape that we'll need for rocker with open legs or open leg rocker, which is our next exercise release for a second.
Let's talk about the elephant in the room, which is tight hips and hamstrings, tight backs, and this not feeling anywhere near as pleasant as I'm sure it just fell for you because it looked wonderful. So very often we then hear, well, if your legs are not able to straighten out, go ahead and soften your knees, right? That is of course a very easy way to find your way out of any distress that you might find in your hips and legs. What you might miss in the exercise, however, is the idea of opposition out through the heel that helps you find that opposition back through the ribs, right? So a much better variation for this would be to find an elevation for the hips. If you're at home on a rollout mat, that could mean you take the back of your mat and you roll it up to sit a little bit higher than the ground or the good old telephone book. Somebody still has those in the original studio. We have telephone.
They do. Does anyone ever look at them? I don't know. I live in New York. We don't have space for um, in the studio you can probably find something else to sit on like a moon box along box. It's always, I think the better option to elevate your hips. Still keep the legs fired up rather than bending the knees in this exercise. But again, that is a valid option here as well and a great place holder because at the end of the day, the spine stretch is just a warmup for what's next, which is our rocker with open legs. Are you ready for that? Let's see. Let's see. We've been here before, right? We've done our Rola, we've done our rollover, we've done rolling back and those things combined make the rocket with open legs paired with a spine stretch that we just came from, just like rolling like a ball.
I find that the transition into the exercise sets off the right effort so that even if you don't successfully roll back and forth, you get the purpose of the exercise accomplished. So we'll take the transition as its own exercise today. All right, so for this one, you can just point your feet away from you, stretch your arms out in front of you and find half of a roll back here. So you curl your hips under the spine, Benz evenly, ears to hips, and you roll yourself back towards the Mat to the place where you feel like your torso and your legs weigh about the same so that maybe you can even hover your legs about an inch off the mat, holding yourself there with a nice round spine. Beautiful. She's in a spine stretch. And then just lift yourself back up. Let the legs drop and set yourself back up tall. That is a lot of work, right?
It's like an open legged hundred almost coming out of a rollback, but it is the first step of the open lake rocker. So just find that again. Now even if you can do the Open Lake Rock, I'm pretty sure you can try this even if the legs don't come up again, this idea of just unweighting the legs a little bit, sets off the right effort. You might have to come down much farther than Mary does right now in order to get that sense of control over your legs. Lift yourself all the way back up from there. It's stunning. Little lift yourself up to the top.
Now the next step is of course we get your legs up in the air from here, so we're all yourself. Back to that place where you can control the weight of your legs. Now you have two options. We'll do the easier one first where your legs start to unweight off the ground. Keep your spine where it is, but bend your knees in so you can grab a hold of them by the ankle and then unfold the legs from there. Bend your knees back in.
Stretch your legs down long and low and lift yourself all the way back up. I want to do that one more time. This time we try to arrive in our open leg rocker position, which means you have to go a little less far back in order to capture the position. So roll yourself back a little less than you did before. Keep the height of your chest as you bring the knees in towards you. Here's a rolling like a bar position.
Grab a hold of your ankles outside the legs. Unfold the legs from there. She's now in a lifted spine stretch position. Bend your knees back in spine stays and she's breathing the entire time. My hope. And then you shoot your legs out. Just lift yourself back up. Good. So that is one way to get into this as this is the exact transition you will find in return to life as well. It's an excellent exercise in enough itself.
If rolling back and forth is not in the cards for you, just do this. It's good enough. Now you can take this up a notch too by keeping your legs straight and picking them straight up in front of you. So let's try that next. Arms up and forward. Roll yourself back and find that place where your torso and your legs weigh about the same. And then see if you can lift your straight legs out of your hips, up into your hands. Holding the position here.
Now think of actively pushing both feet into your hands so that you're back and relax in the opposite direction. Lower both legs back down, letting them go and then set yourself back up. Let's do that one more time. And that all even happens before we even go into the actual fun of the exercise. But again, it might not be available to you. So this is really great work that gets you there. Pick the legs up by stretching them out of your body like we've been doing since the hundred exercise. Number one, breathe, lower the legs down again and lift yourself all the way back up.
And let's take a short breather. In fact, you can relax your arms down in your legs cause this is also a good moment to talk about the fact that I don't really address the breath all that much. Often we think, oh yeah, absolutely straddle away. Um, we often think that breath and movement have to be completely choreographed with one another. And yes, that's often a good way to go at it. But especially now that we're workshopping these, I want you to liberate your breath and rather than thinking, inhale here, exhale there, start to make up your own mind as to what makes sense for your body. Then liberate your breath. Yeah. I think what we're trying to teach the body here is to not ever hold the breath, to not ever threaten the body by shutting down our respiratory system, but actually marry movement and breath together so that they can coexist.
Because breath is just another expression of movement. Even if it's not visually moving us from a to B, it's moving our organs around. It's actually helping us supply oxygen to the rest of the body as well. Right? So especially as you're exploring exercise that are difficult for you, don't get too caught up in breathing patterns. Let them unfold in your own body until you're ready to maybe change them up more consciously. But more often than not, it's confusing.
And especially when it comes to finding our own flow and really owning our practice, I think liberating. That is a really good way to go. So instead of telling you when to breathe, I'll just remind you to breathe today. All right? Yeah, so we haven't done our open leg rocker yet, so let's get right back into it. After this lovely little break, you set yourself up nice and tall. Now you choose which way you get into your position. Come forward just a little bit on the mass so we don't have to worry about you falling off. Stretch your arms forward and away from you.
Roll yourself back either bending the knees or straight legs up. You find your transition into your position fee. Push into hands, hands pull on legs. Now we roll like a ball again with straight legs. You Roll yourself back, you push the legs forward, you'll lift yourself back up. Your gaze is a powerful tool to find the momentum to come back up. So rather than looking down, look out and go again. Rolling back, lifting up. Find your spine, stretch opposition in here for better success as do one more rolling back.
Massage the mass with massage as you lift up. Transition out the way you came in so you can bend your knees, stretch your legs out on the mat and just come all the way back up to your start position. And that is your open leg rocker. All right? Now again, tight hamstrings. What am I going to do with my legs, right? It's called the open leg rocker, not the straight leg rocker. So again, if in your transition, if we can do just one more time. All right? If you go ahead and roll yourself back, you bend your knees in the way you did and then on the way of unfolding, you find that your legs get stuck, right? And your only option to straighten them out is to slide the hands down on the leg. I'd much rather have you stay right here, right?
And maintain that position. Find the opposition of your ribs and then roll in that position back. Push the legs forward, lift the gaze, come up. Do that one more time just for good measure, rolling back, lifting up, and then finding your way back out so that your body can express itself in the way that it gets. The benefit of this movement in relationship to everything we've been doing so far. Yup. Yeah. Next up, our corkscrew, we already done it, right?
We'd done our one leg circle as a one legged corkscrew. Now becomes a two legged corkscrew. It's the actual corks. We'd go ahead and lay down on your back. We'll start with a baby corkscrew. At this point you can start to make decisions, right?
If your rollover didn't go so well, you probably don't want to do an overhead corkscrew. Right? If managing the rotation of the spine didn't go so well, maybe you keep your range of motion fairly small. At this point you've already checked in and self evaluated how your body is going and moving. Right so we can make some decisions as to which version of the corkscrew is more appropriate for us. On a given day. We'll start with a baby corkscrew, which is to fire the legs up out of the body, pick them up. We already are masters at this. By this point, the legs pressing into one another, the arms pushing into the mat, or again, if you have the option, you go over head, the hip, the left hip lifts to take both legs to the right. The legs swing around, following through with that angle, and you come all the way back through center to reverse directions.
The hip lifting that takes the legs across. Opposite shoulder always stays down. You come back through center. We'll do one more each way over to the right. Circle it down, around and back up. And one more time. Take it to the left, circle it down around and back up. Hug your knees into your chest for a moment of rest, right? So that is the more approachable, accessible way of doing this. Again, if your knees cannot fully straighten, no problem whatsoever.
As long as you navigate that movement from your back rotating. Yeah, please. I haven't heard you yet. Mentioned politely, Stan. Oh, like do I need to be in turnout? Do I need to be in parallel? Is that important to you? So, yeah, that is a whole can of warm bed. No, it's a, it's a great question. The reason I haven't mentioned it yet is similar to the breath. I don't think that there is one way to look at, right?
I think that there's a really good way to make sense of Palati stands, which is a made up term, right? But if you just bring your arms down by your sides for a second and just go ahead and get your legs up to the ceiling and then hold them here for a second. The way I want you to think of your plotty stands is not so much of rotating externally through the legs, but rather find what feels like a more neutral rotation in the hips because our legs aren't perfectly parallel anatomically speaking, right? So we're neither externally rotating. Neither are we forcing parallel, but more often the nod, I want you, you and you to find what fields the most supported in your hips. And more often than not, that is a slight turnout, which is why I think we see that position so much in the original work, but there's really no specificity unless you start going into corrective work and you start to understand from my body I need to really go into more external rotation or keep things more parallel. Right? But generally speaking, what makes or breaks the exercise is really much more about am I breathing?
Am I getting the purpose of this particular movement throughout my body rather than on my legs in the right rotation? Those are, that is a detail that of course comes with its own sense of importance for some, but more often than not, I want you to worry about that a little less and really start to think about what makes sense for my body. That's actually really helpful. I to to actively externally rotate. For me it was hard to actively stay parallel is hard, but just to get, just allow my hips to just be, we made it like less, less, um, effort, less efforting. Well, what I think happens, right? If you're go ahead and extend your legs up one more time. And if you think of that almost invisible external rotation more as a way of pressing your heels into one another rather than pulling your toes apart, you probably feel a sense of engagement that actually helps you have your legs hold each other in place rather than it just being a stance. Right.
Which is why I don't like the term because squatty stance shouldn't be a stance. It should be a movement in and of itself where you spiral the legs into one another to get a sense of uplift. Right? But again, for for this exploration, we might not be too detailed with what it needs to be because there's never just one way of doing things right. First, find what feels natural in your body and then we will always fine tune it from there. Okay. Thank you. But thank you for asking that. We still have to do our corkscrew, right? Styling work. Well, no such luck. I did remember we'll go into a full corkscrew from here. So after you've done your baby corkscrew, you know you've done your roll over, it felt great. It's in your practice.
You've done your one leg circle with the hip lifting off. We're now ready to add this in because it's those two exercises. Bake together and add one's us up for what our next exercise, which is the soft, but I'm jumping ahead. Go ahead and lift the legs up and overhead. Let's find your Jack Knife first. So you rollover, you take your legs up, toes above eyes, but make sure mostly that you have space in the front of your throat, your arms up, activating against the mat or against the corners of the map. And then from here, roll down on the right side of your spine, tilting your legs over to the right as well.
Get yourself really long like coming out of a rollover. Follow through with the angle lifting up on the left, finding a little bit of uplift through the legs at the end to unload the spine. Someone and we'll come down on the opposite side. So we alternate our lead sides, which with each repetition down around it, up on the right key, pressing your arms into the mat. And again, if your legs go ride, that means your left shoulder probably wants to come off the mat and let it happen. Take it up and over. So that determines how big your circle will be. How much can you keep your arms activated? Let's do one more on the left, down, around it, up, and then thing at somebody pushing down into your feet as you roll yourself down.
And you have to lift up into that person's hands to find opposition on the way down while activating your own arms against the mat. And then you lower your legs and you're done with the corkscrew. All right, so again, many different ways to approach it. This is the full expression of the exercise and it warms as for what is a much more intense, isolated twist of the spine, which is the saw. So go ahead and bend your knees into your chest, rock yourself up to seated, take your spine, stretch, start position again, and bring your arms out to the side. Good. So I talked this pre, talked about this previously in a tutorial that I did on the song here, which is that in the original instructions, the shoulder blades were hugging together while maintaining maximum with through the arms. And that is a way to keep your chest nice and open in this exercise.
It's not the way to walk through life, it's just for this particular exercise to make sure that your arms don't steal the twists in your spine. Once we started going into rotation, so with the same sense of activation through your legs that we had in our spine, stretch with your shoulder blades hugging together while maintaining your maximum wingspan. Go ahead and twist towards the right and you'll see the body doesn't go all that far right, but she has to really work for that, a little bit of rotation and instead of it going really far, it happens in more places in her spine because we want just a little bit of movement in a lot of places. Come back to center and take it up and over to the left. Lift up and out of the waist. Take it over to the left side. We'll again just warming up for this. Come back through center.
If your arms out to the side gets heavy, you can take the hands behind your head as well. We're taking it a step farther now twist to the right again and now round over your legs. So you see her chest is right over the leg. She now takes a spine stretch forward over the right leg while pulling the arms away from one another. Slowly come back through center and find that same action on the left side. So you rotate you around over the leg, stretching one on four with the other arm back for now.
Let your hedges express itself the way it feels organic to you and then come back through center. Let's add some speed to this. Twist to the right Etcera, roll it down, lift yourself back up, center to the left, twist and round down. Fill out the stretch from your right shoulder all the way down into your left hip. Come back to center, arms outside, relax for a second. All right, so same rules apply. Soften your knees if that's the only option you have. If you can elevate your hips and you want to keep yourself out of trouble and with tight hamstrings, hips or back, you can do that as well. What's really important in this exercise, I think is to make sure that we're not slouching or hindering into this position, right?
That we teach our body that we have a sense of lift as we rotate there. We're not just twisting in one place a lot, but again, just a little bit, but in a lot of places along every single vertebrae to maintain that lift and length between our vertebrae as we round up and forward so that we're not slouching and falling into it, which is why the arms pull in opposite directions here as well, right where your head goes, which is often a question right where your gaze goes. If the shoulder on one level or if they actually open out well that just it itself based on how open your spine is. All right, so I want to just show the options one more time with her here. Go ahead and bring your arms outside, twists to the right and then just take your saw. Again, be prepared to stay there a little bit longer, right? Our first step might just be to keep the head straight down, keep the shoulders plain with one another and really think of this as a spine stretch forward.
If you can go far enough and it feels like your spine is open enough to reach the hand to the outside of the leg, you can press against it and start to open up against that without slouching or hinging into any part of your bag. Thanks for demonstrating that, but still finding that sense of puffing out the spine against the arms reaching. You can go as far as this, lift yourself all the way back up through center and just to even you out. Let's do it on the left side one more time as well. Think spine stretch forward first the head stays with the spine straight down. This is the first direction you want to take, but again if you want to add more rotation to that, you can use the opposition through the arms to find that corkscrew like action here again, right, which is our previous exercise.
So slowly come all the way back through center, release the arms down by your sides. And that is our saw and that finishes kind of our second circuit in the math class where we start to revisit some of the skills we've built in the first chapter and add and layer skills to escalate them into more complex exercises and what we think of as more advanced versions of them. Yeah.
Chapter 3
Exercises 12-21
So next up is our swan dive and a couple of exercise that take us onto the stomach, working on the backline of our body, working towards extension but actually also revisiting a lot of the skills that we've already been working on. Just flipping them literally around. Um, one thing I like about the saw being directly before this one dive is the fact that we've been working in this position and especially with that hug of the shoulder blades, really creating that massive with across the chest and that wingspan from one fingertip across the chest to the other side, which you will need in your swan dive as well if you want to let that baby fly. So from here, go ahead and lay it on your stomach. Head over there and then we'll actually just start with that as a sense of activation, right? Swan dive is a really difficult exercise to rock your body forward and back successfully.
It's literally the opposite of rolling my cabal where we're completely flexed in here. We're completely open trying to sustain that shape. Why don't you to start with your arms out to the side actually like a t shape. The hairline forehead is down on the mat so that the back of the neck can be nice and long. The legs are together as much as that is available to you and the hip bones are pressing gently down into the mat for a sense of activation. The hips, the low back stays nice and long. Now I want you to think back of your hundred. In fact, our first exercise and thing, we're doing something very similar here on our stomach, which is to unweight most of our body's weight against stretching the head forward so much as lifts, but the spine moves from ears to hips.
You lift your chest up, you do the same with your legs, you stretch them out so far to the bag that the legs lift up to in the arms. They stretch left and right so far that they lift up and yeah, you might come pretty high if you're Meredith Rogers, it may not come up this high, right? Slowly come all the way back down and release back to the ground. The point being rather than range, if you have it, use it by all means, right? But the point really is finding that opposition and finding that the leg lift comes from the idea of lengthening out first hips, pressing down, legs lengthening back. So much they lift in for your body. Specifically, I want to invite you to lift your head up only to the height of your heels.
Try to match that and then re get really long. Instead, why? Through the arms gaze lightly forward from here so that your neck follows the line of your back. That is gorgeous. Nice. And then slowly coming back down from there. Right? So when we're looking for more than a back bend is the idea of evenly energizing the back of the body evenly opening up the front of the body. Right? Which is a position we haven't been in yet, but we'll need for the rest of the sequence.
Come all the way back down from here. Rest for a second. Alright, so that is a great place to start. And for many of us, this will probably be the place where we work on this the most. All right. This sets us up for success in the one leg kick and the double cake which are about to follow. But we now want to look at that rocking action for a second, which is again, really hard to do well because we need to sustain that energy in the back of our body from start to finish without a break at the hip without creating any extraneous momentum all while holding the shape. We want to give ourselves a good place to start from. So for this preparation here to separate your hands, sort of underneath your shoulders with your elbows back exactly. And then just pull your chest forward and up your legs behind you and up the same way you just did, but just using your hands a little bit for leverage here.
Give you more of a lift. All right, from here we'll do one swan dive where she's reaching arms out to the side, tossing the legs up behind her and catching herself back in this position. All right, so from here, pick the chest up a little higher swing you arms outside, lift the legs up and catch yourself back in that start position. We'll try that one more time. Arms reach out to the side. The shapes stays the same as she rocks forward and back to find herself back into this position. Ultimately, the way you want to approach this is to stay in the rocking motion while keeping the effort from ears, two hips all the way back into your heels. The same from the shape. Doesn't change the arm, stay outside so that we cannot use our arms to create more momentum and really holding onto the strength of our back. So whenever you're ready, pick yourself up and go Fred. Down and up, down and up, and you see how she's doing an amazing job holding the shape throughout the entire range. Again, you might not rock down and up this much, right?
But that's the goal. You have evenness and connectedness. Nice computer break. Beautiful. Sit yourself back over your heels. Take a quick little calendar stretch. All right, so there's all kinds of preparation exercises that go into the actual rocking motion that Meredith so beautiful, just demonstrated, but know that the initial lift that she showed before, that is probably a really good place for you to work if the rocking isn't available to you because it still is going to prepare you for the next two exercises, which are one leg kick and our double kick. How are you doing back feeling alive? Yes, so similarly to our swan dive, the position that we started is actually quite similar. We won the head to be forward and up while the legs are already a couple of inches lifted away from the ground. All right, so start with that.
Bring your legs up a little bit. Beautiful. Nice. And then see with out your legs coming closer to the mat, how high you can lift your chest forward and up. Nice. And once you found your height, then you position your arms. If you come up as high as she does, you can bring your elbows all the way underneath your shoulders, but you might find that often. This brings your legs back towards the ground. If that's the case for you, it's best to walk your elbows farther forward or even farther outside to find a more sustainable position because we want to stretch the front of the hip and for that, according to the original instructions anyway, the thigh is lifted slightly off the ground so that as she kicks one heel to her seed, she stretches the thigh and the knee reaches it back and then we go to the other side.
It's like a thigh stretch here where the thigh is slightly lifted against the hip bone pressing down. You can see she already adjusted her arms a little bit to accommodate her body better. You can even do this with your hands underneath your forehead. If that is the best place for you to work on this openness through the front of the hip. She almost kicked me in the face. She's totally my fault. Kick, kick, stretchered back and right kick, kick, occupational hazard, right cake cake. Reach it back one more each side. This is a perfect place to work if bringing your chest forward and up just puts a massive dent into your lower back, right?
If you have the amount of extension that she has, then the original instruction is of course valid. Make sure that you use your arms in a way that feels as if you're pulling your chest forward, pulling the ribs up and against it while keeping the front of the thigh lifted off the mat for that excellent stretch, even out your reps and then let that one go and that's your one leg kick. It seems like a really simple exercise, but if you really pay attention to the details, it can be quite complex. So hopefully that was helpful because we'll need all of this in our double cake for this. The hands come to the lower back. She places her hands on her back and we'll keep this one simple according to the original instructions as well.
We we take the head turn out where the hairline is down, straight down on the mat. So bring your head down towards the mattress. Look down exactly and we're just going to keep it simple. At first the neck turn was added later and it's a wonderful way to get some rotation into the neck, but it can initially also be quite confusing. So we'll keep things nice and simple. Going back to basics, right, you press your hipbones down to start to lift your thighs back up. Any a match about a couple of inches.
The idea is that you keep the knees lifted away from the Mat as you kick your heels to your seat once and twice. Now from here the legs go up and back. The arms go up and back, but the chest goes forward and up against that shoe. So she's pulling herself apart. This is the first time we explore the action we'll need later in our rocking exercise. From here. Take your head straight down. Relax the arms kick again. One knees lifted two legs, up and back. Hands up and back. Chest forward and up.
You can play with how high. Lift your hands here to create more opening across the chest. Still making sure your lower back is nice and long. Come back down and do a couple more. Kick one kick to stretch the legs back, arms back, chest forward and up. One more time. Stretching thighs. One, two, reaching back. Chest lifts up slowly come all the way back down.
And now that her back is nice and warmed up, go ahead and sit back over your heels just to take a little break. We're actually revisiting a couple of exercise we set up at the very beginning, which is a roller. We now call it the neck pole and it's a lot harder. How are you doing here? Great. Doing good on those exercises. All right, come on up and then turn around and set yourself back up. So now we flipped the body around again, right? We've just created a lot more strength in the back of the body.
A lot more awareness. We bent the spine into a new direction, so hopefully at this point we're fired up to do the neck pulse successfully, which is a roller with added weight, which is the weight of your arms, which is the weight of your torso. All right. This exercise often gets choreographed in ways that are kind of complicated and I want to make this really, really simple to start. The legs are a little bit wider open here rather than together. Again, the same rules apply for the first part of this exercise. If your hamstrings are tight, you can sit elevated because we'll just do a seated version of this. It's called the neck pole, so the idea is really that you press your head back into your hands and your traction, your neck upwards, like you're pulling your own head up towards the ceiling.
Think of your spine stretch again where you sat, Evers I behind the sitz bones and then round yourself forward and down against your ribs, puffing back and up. Now even in this position, she's not actually pulling her head down, but she's pushing her head up into her hands to create more space in her upper back and her neck and to find that space all the way down her spine. She restocks her spine back up. That is part one of the neck. Polen if neck pulling generally is not available to you fully just work on this, it gets the job done because at this point we're trying to go back into it. We're trying to build some awareness of how we can accept some load into the neck and upper back because next up we're standing on this triangle for the scissors and the bicycle. Roll yourself all the way back up. Sitting up tall. Feels kind of Nice, doesn't it?
Closest to feeling like you have a neck stretcher around your head. If you've ever seen one of those. Take one more like that. Rounding forward, rounding down. We're moving at a fairly slow pace now just to demonstrate this variation on the exercise. Next up all do the whole thing. Lift yourself all the way back up and then just go ahead and relax, lie down on your back. We'll start the exercise on the back and that same hand position behind the head and again from the star, the head presses down into the hands with the idea of stretching the head away from the shoulders, creating more length. The heels are fired up out in front of you.
I'm going to give you a little opposition here and then go ahead. Let your elbows come up just a tiny little bit so you really feel a space between your shoulder blades widen and then just think roll up. You Roll yourself up, Chin over, chest rounding over the legs, finding that stretch you just found. Set yourself up behind the sitz bones and then again, push the heels forward. Roll yourself down with control and release the head. She does it wonderfully.
Let's do it again. Lift yourself up. Beautiful. Round over the legs. Keep that reach forward and your head pushing up into the hands. Lift yourself up, tar and roll yourself back down. Heels and elbow, slightly forward, release, back down. Take it one more time. Rolling up, rounding over, finding that length. Gorgeous. Sit yourself up and then just think roll down, right? No hindering the heels and the owls can push slightly forward so you can really melt your spine onto the mat.
Really delaying the descend to build that little extra oomph after we've done a rollout a few exercises ago. It feels like a long time at this point, right? But if you practice through this quicker, it's not so far in your past, right? So it's taking the roll up to the next level. Right? Very often we see a hinge built into this exercise. I'm taking it back to basics is really just that. It's a roll up with your hands behind the head still a lot harder than you would think.
What it prepares us for is to create some awareness of the triangle between our head and our shoulders and stretching that open because in the next two exercises, we will stand on it, right? We're now starting to visit our shoulder stance more intensely with our high scissors, a bicycle or shoulder bridge or jack knives happening soon. And we'll take it ultimately all the way to our control bounce, right? So at this point we've been visiting that by rolling back and forth onto it. Rolling like a ball, open leg rocker.
Now we stretch that open a little bit and hopefully it is available for us now. Scissors and bicycle, a really difficult, if there's tenderness through the elbows, through the wrists. If the hips didn't successfully lift in a rollover in your practice yet, you will have a hard time getting your hips into a place where your hands don't have to carry the weight of you. And that is where this exercise often goes awry a little bit. So we'll set that up quite carefully to see where that sits in your body and to show some options here as well. Go ahead and place your feet flat down, arms long by your sides.
And then just go ahead and lift your hips up towards the ceiling, shoulder bridge style. Good. And then go ahead and just bend your elbows up, right? And just take your hands sort of to the side of your hips coming forward slightly. So you'll see that the hips usually don't come up high enough for the hands to fully carry the weight without putting that weight into the rest and into the elbow, right? Ultimately we want the hips to come up high or of course, but you can already see that in this position, her elbows would dig into the mat and it would potentially cause a lot of discomfort, right? So let your arms come down again, roll your spine back down, take your legs out. If you have a rollover in your practice that's next, stretch your legs out long. Lift your legs up and over. Let's set it up here. Good. So just like in any rollover, again, you make sure that the front of your throat is nice, long and open.
The hips are lifted without the weight cringing your spine together. And then from here you basically just want to fold up your elbows and your palms flat against the back of your hips, pointing towards your seat. And then from here you want to be able to Jackknife your legs up without that pudding, any weight into your heads, and that is the tough part because the higher the legs come, the more the hips want to roll away from the head. The more weighed lands in your reds and in your elbows. You want to be able to do this exercise almost without your hands, so see if you can actually lift your hips out of your hands using your hands just as a kickstand rather than a pedestal to restaurant. Are you doing there?
All right now stretch one leg away from you rather than letting the leg fall overhead. You want to think of the opposition here, challenging that connection you just found and then switching from there fairly rapidly and switch and switch and switch. Now, all this time, what's challenging is to keep the neck long on the mat, to keep a nice, even breath flowing in and out and not getting so caught up in any tightnesses in the risks or the shoulders. Here. Actually press the backs of your arms down. Beautiful adjustment to keep your collarbones wide. We'll transition that into our bicycle, which is next. One leg folds in and you're just bring it through. Essentially, we're just visiting several different choreographies here to get our body to get used to being in a shoulder stand for a little bit longer because so far we've only moved in and out of it. Now we're staying in it and we'll do stuff with the legs.
Go ahead and reverse it. After you've done like what, 27 of them and switch and switch over time, you'll start to notice the hips start to migrate away from the body. Keep that active rollover lift exactly so that the way it comes out of your hands, out of your elbows, into your upper body, lift both legs up. She has rosy cheeks at this point because all that blood just came from down as the internal shower. I'd bring your arms down by your sides and roll yourself all the way down. Get Nice and long. Let that one go.
Hug your knees into your chest for a second, right? So if you can not get your hands comfortably into that position is really no way to cheat yourself into a variation of this exercise that is productive, right? And often that has everything to do with how your rollover went with how mobile your spine is to get even into that lift. If it is however a pathology of the elbow or the wrist and you're crazy, you're strong in your century, you could explore doing this without your hands all together. All right? It would look a little something like this. Are you game to try this grand?
Bring your arms down by your side, legs up to the ceiling, roll yourself over, Jackknife your legs up. Can you scissor your legs from here and switch and switch and switch and switch and then take that to your bicycle. Reached through, which should across reach it across. Don't be afraid to take the hips farther away from you, so you really have to find that opposition. We verse Syd, switching through, switching through. This is not the nicest variation. Definitely not a way to make this easier, but maybe a variation that is available to you. If getting your hands into the right position or holding the weight there just doesn't sit right with you. Get both legs straight up, roll yourself slowly.
Back Down. Next up is our shoulder bridge where finally at last we get some more support. Again from our hands, how you're doing, it feels good to get your circulation to invert for a second line. It's really what energizes the body at this point in our practice. Lift your hips up for our shoulder. Bridge it. Getting into this.
This has this distinctly different hand position than scissors and bicycle where you want to get your hips up high enough so that you can rest the heel of your hand right against your beltline at the backs of your hips. Shimmy your elbows a little bit closer together underneath you if that's available and while you send the back of your head down into the mat and your hips up, make sure that your feet are part underneath your knee so you have a better angle there. So just walk your feet back a smidge exactly towards the body. So we're, if you turned this around onto her stomach's at the speed, we would be in a wheel like position in the rocking position. We're back in that double leg kick position, right? So the same effort is here. I want her to feel like she's pulling her heels back towards her shoulders without actually moving them and I want her to stretch one leg out along the ground in front of her. So just extend one leg out.
So she's on a spine corrector that she just made out of her arms. All right. I want her to keep her chest nice and open. Her hands are not there to hold the weight of her as much as just calibrating the rotation of her hips to keep that somewhat even right. Once the front of the leg is nice and stretched out, she's just going to kick it overhead and reach it back down. This is the original way of doing this exercise. Kicking up and down.
Let's do one more. Kick it up. Biggest radius possible down fold in Ian, especially the other leg out long and low and then up and down. So we are coming from this completely stretched open hip and trying to build a dynamic explosive keg, which is the first of many in the sequence. Fold the leg in, give your hands arrests, bring your arms down by your sides and again melt your spine down like you're trying to sit onto your heels. Beautiful Controller. Nice. You really enjoyed that role. Now we made it flow right? How did that feel in your hands? Yeah. Yeah. Often that is a really tricky position to get into.
One thing that is maybe hard to see that you want to avoid is to get your hands into this kind of angle, right? If you can just get your hips up one more time. Instead of parking your hands underneath your hips this way I want you to think of cupping the side of your beltline and then taking your hips and shoving them away from you. Right. This idea of creating more link through the body, taking weight out of the elbow and using the hands for traction and to make sure they work. Kind of like taglines rather than holding the weight of you because I think what helps you get weight out of your elbows. However, if that is not in the cards for you still because of form length, because of lack of hip lift, arms down by your sides and just working on that initial roll up and roll down. As we've been practicing since our rollover preparation is a great place holder for the original shoulder bread. All right. And then we come back up to a seated position or next exercise, the spine twist.
Okay, come on up. Not much new here. We've been in this rotation before. It's like the saw except that we're not bending over the legs this time, which makes the twist itself a little bit more intense and which is even more intensified by keeping the legs together this time. Right? So your base of support is much more narrow, which really helps you find that central access lift as you go into a deeper rotation. But the arm position is exactly the same as the saw. So maximum wingspan out to either side, shoulder blades, hugging together legs energized. Same rules. Apply Hamstrings, tide, elevate your hips or soften your knees, right?
We'll go up and around with a triple Paul's. You twist, twist, twist farther. Then you lift back to center, taking a deep breath in and you take it the other way. Twist once, twice, thrice up and around, coming back to center. Take one more each way so you'll see that she goes a lot farther into rotation than she did in the SAR earlier. Going up and around, coming back through center. Take your arms out in front of you and then slowly roll yourself onto your back. We're now getting ready for our Jack Knife, which is our next shoulder stand. Now you've me say Jack Knife a lot, right?
We've been exploring the idea of taking the legs up into the shoulder stand. Since corkscrew, we've just done it in our scissors and our bicycle. Now we do it again. What is different this time is the rhythm, the idea of Jackknife. If you look at the original instructions and any footage that exists of the Jacqueline has been with practice back in the day was that we're not moving through it slowly and carefully, but just like an actual Jackknife, you're just folded open and you dynamically pull yourself back down. So the idea here is really that we're adding rhythm and our NAMIC to the exercise because we've been here so many times already. All right, so I want you to think the rhythm is something like this. You go over and up, you take your time coming down over an up and coming back down. All right?
That's really the only thing that's different here. The position otherwise is really not that unfamiliar at this point because we've been there so many times. So use your arms against the ground. Again, you have the option of bringing your arms overhead if that is available to you by way of dowels or having an elevated mat you can hold onto if you want to explore that, you could go ahead and take your legs up, roll over Jack Knife up and roll yourself back down. Legs go one waist, stomach pulls the other, take it down over up. Beautiful. Push the mat away, roll yourself down, gets super long. We've been practicing that roll down action right in the previous exercise as well, so just like coming out of your shoulder bridge, you get really long through the body. Take your last one over and up and down. You come rolling yourself longer, challenging your body with this very intense rhythm, lovely. Lower the legs all the way down and we're done here.
Body's nice and invigorated at this point, right? When you say, all right, we're slowly now making our way to the teaser. We have one exercise before that, which is the sidekick. Now the sidekick often turns into its own series of exercises where we find ourselves being on our side quite a while to work the leg. Traditionally, I want you to think of this exercise as a preparation for teaser where it almost feels like you're just swinging out the leg in the hip. All right? Originally we see that spinal movement was not just happening. It was encouraged, right?
So I want to take a closer look at that because this again can feel borderline sloppy. That's not the point, right? The idea is that the spine really catches and navigates this movement just as much as just the leg. All right, so let's have you on your right side facing this way. Bring yourself closest to me on your mat. A promise I will not let you fall off and originally both hands are behind the head, which as an exploration of just getting into your start position, you can unfold this leg on top of the other, which is a really good way to start finding your balance here. Just like a neck polar, I want you to push your head actually into your hand and feel like you're pulling in away from the shoulders. Exactly, so that already probably gives you a little bit of a lift on bottom side of your waist without actually having to create a lift there, right?
The legs are slightly in front of the body here so that you just have a little bit more surface contact and a little bit more of a stable base. Your top leg now lifts parallel to the Mat and then you take that leg behind you as far as you possibly can and we'll just stay with that. You see how her body has the organic tendency to roll forward against that and 100 you actually indulge in that as long as she keeps trashing her head outward, keeps her hip stack and is enjoying it. So keep stretching your chest forward away from your foot. That's pointing back. Keep lifting this elbow up into my hand and traction your head across the room.
Beautiful. And then rest your leg on top of your bottom leg for a second. Right? So from the side it should almost look like a swan position where the extension of the leg behind the hib travels all the way through the rest of her body, out the head to way stretch all the good stuff. Lift the leg up one more time. Take the leg back behind you. And this is not so much about adding a backbend and active Backman to it, but letting it organically happen in your body, right? As long as you don't take it so far that you start falling face down. Right?
Cause that would be sad. Now from a year we're in our swan on the side. Think of this as it teaser on the side. You swing this leg down and forward and your spine might express itself the opposite way as long as again, her head is tractioning out. It it feel nice if somebody is holding your leg here, just do that for me thing. Well I'll send you my rates later. Send them like down and back behind you.
Let the chest go forward and let's swing it through one more time, right? I'm holding the leg here because we're just outlining this very slowly. I want you to now explore that with your own sense of flow. Kick the lake forward and swing it down and back. Beautiful and swing it forward and bring it back so the hips stay on top of one another. But if her body has to rotate in and out against that, I'm completely fine with it because the ultimate takeaway and hope for you is that your leg feels a little freer. Forward and back. One more time, kick, kick, reach it back. And this is the sidekick.
Release the leg down through the other side. So roll on over because once we go into our teaser, which is the next exercise, the idea is that your legs float up in that same exact way. Hopefully fingers crossed, but we'll start it right here, right? So again, bring your legs forward just a little bit. Make sure you're in a good position there. Nice. So on this angle you can really beautifully see how this is our neck.
Pull all over again. She's pushing her head back into the hand. She's tractioning her head out and away from the shoulders. Hips are stacked on top of one another. Top leg lifts. Reach the leg down and back. Let that stretch that we found in our swan dive. One leg kick double. They could come back and it express itself in your spine.
I'll get out of your way. You kick the leg forward and bring it back and forward and back. Now let's talk choreography. Can you double pulse here? Absolutely. It's often done. It's a nice way to take the leg a little farther without the momentum that you build from the swing, right? Kick, kick, reach it back back. Let's do one more, kick it forward, forward, reach it back, back, rest the leg and know that again, just finding this position here and going slowly from bringing the leg back behind you to forward could be a place order for this exercise if you really lack stability. All right, relax that and let's come up to a seated position for our next cluster of exercises beginning with teaser. Next up.
Chapter 4
Exercises 22-28
Our favorite exercise teaser. Yes, we made it. We made it. Now the teaser is again an exercise that we've already been working on this entire sequence, so it's not this brand new kid on the blog and then skill. We've been building up towards it this entire time and so the original way of getting into this exercise is actually a lot like our transition into the open lake rocker. I think it's quite accessible. We start from a seated position rather than being down in our backs so that we already have our center of gravity lifted up. Roll yourself back and down from here and try to find that spot again where your torso and your legs weigh the same so that you can begin to lift your legs up out of your body, up to the highest level that's sustainable to you.
And then from there, once your legs are up at this height, they go higher than 45 you try to pull your fingers up and forward towards your toes as if you're trying to touch them from here. Just lower the legs back down and sit yourself back up to come out of the exercise and lift yourself up tall. So this is pretty much how the exercise was outlined in return to life. I'm going to do it one more time like that. Roll yourself back to the place where you feel that you can lift your legs up, see how high they come up. If they live past 45 degrees, then yes, do the whole thing and lift up and out of your waist.
Reaching forward and finding that lift from the middle back, making sure that the arms don't pull the shoulders up as much as forward, and then lowering the legs back down, sitting yourself back up from here. What I love about this original version of the exercise is that even if your legs don't come up super high, you still get the effort and the activation even as your legs lift an inch away from the ground. Even if your legs don't come to 45 degrees, even if you have to bend the knees in. So we'll just mark that up for a second. All right, so go into it the same way you sit up on straight legs with a straight spine. You roll yourself back, ears. Two hips bend towards one another. Once your legs start to hover up and again, you might have to come down quite far, you can now begin to soften behind the legs of hamstrings like civility or inflexibilities the issue and then try and lift yourself forward and up from there. All right, and the effort that's in the body right now is exactly what we're looking for in this exercise, so it doesn't have to be the shape in order for it to be successful, right?
Go ahead and lower the legs back down. Sit yourself back up and I assume you faking that shake, right? That's still [inaudible] still means the exercise is accomplished. Now, once the shape that we are looking for is sustainable, you feel secure in it, you feel like you want to take it to the next level, you can and we will. Your arms are forward. Again, roll yourself back to that spot. Now you can confidently find that teaser right away. The legs now stay. Her body rolls away from the feet any amount to then lift back up and it could go as far as head down onto the mat arm.
Still reaching forward over her head and lifting yourself back up from there. No, you did it right. Do it one more time. Let the arms go all the way overhead. If you come down this far, lift yourself all the way back up, lower the legs back down and why don't we take a teaser over the legs here rounding forward, which is that same exact shape she was just in. All right, so in that way, the teaser in and of itself is actually quite simple as well and hopefully you see how it connects straight out of everything we've been doing so far. The teaser is yet another warm up for the next exercise, which is our hip twist. Not going to lie. Now my favorite exercise, now mine either. Well, great. Here we go. We have that in common now. Hip Twist, the way to make sense of this for your own body, you've done your one leg circle, the rotation of the hip.
It went into your corkscrew, the hip lifts up again to take both legs down, around and up. Now we combine our teaser with the corkscrew and we've got our hip twist. All right, so for this exercise specifically, it's really helpful to have something to hold onto behind you, right? So whether that's the corners of your elevated mat or the wooden dowels that you have, some of some of the traditional maths, it's really good to have something to press your hands into. So we have the luxury of using that here. If you're on a rollout match, you're not so lucky, which often means you have to really energize your hands down into the ground or open them out a little wider to the side. All right, we'll explore a couple of options here, but go ahead and place your hands behind you and just bring your knees in towards your chest to start. You can lift your knees up and in. Good, and then just go ahead and make sure that your arms are stretched out so that you can really push yourself away from what you're holding onto.
And since you have the corners to hold onto here, hug your arms in towards one another, right? So with this activation of her back again, she can find that ear to hip connection, let her back soften into the shape she's in, and then from there, possibly extend the leg straight up to the ceiling and that's super heavy, right? Bend your knees back in, make a different decision with your hands. It might be a little farther back if it was really difficult for you to get the legs up. So that's how you monitor that. I'd make this sustainable first before throwing any movement into this, right? Your arms are there to keep the chest open, but there's still that teaser spine happening here. Bend your knees back in.
All right. Once we found a good position, ultimately the way to get into it is to have the legs straight and pick them back up like we've been doing since exercise number one. So it's the tailing thing towards the heels and picks the legs up towards you. Then the left hip lifts or take the legs to the right, circle it down around and back up using the arms to recalibrate center, left side down, around and up, right side, down, around and up. One more time. Then we take a little break, lifting up, vend Unis in and go ahead and let that go. You can set yourself all the way up. So ride that hook of the hands into something is super, super helpful when you agree. Yeah, I like the squeeze. Yeah, but I feel like you could also do that.
I mean just the image of squeezing with your hands on the floor as well. Exactly right. So we're going to demonstrate that it's, again, it's not as effective as having something tactile to hold on to, but if this made sense in your body physically, right, this activation of your arms pulling towards one another, we'll do something incredibly similar. Even if it may be is not as helpful. But keep that in mind and I think you'll find more success in the exercise. So go ahead and place your hands on the mat this time so it'll be a little closer together, right? Maybe fan your fingers out to the side a little bit so we can have that energy of your arms pulling towards one another. Coming back in here.
Stretch the legs out of your body to pick them up. Notice from ears to hips or spine Benz evenly. We'll just take one round each way over the left, down, around and back to center and once more to the other side finding center. Hold it here, bend your knees in for a second. Now modification on this or a variation that we see quite a bit is to just be on your forms here, right? So you can go ahead and do that.
Now there's an advantage and there's a disadvantage here. The advantage is it's now a lot easier to get the legs up. What is a lot harder is to find that full on back activation here because it's seems to the body like it's an invitation to start to sing it, right? So make sure that as you use this position here, you press your arms not just into the mat, but also energetically towards one another. Go ahead, take your legs to the right, send them down around and up. You probably know it is.
It's a lot harder to stabilize through the center line here. Take one more each way down around and up. Last one, and then release your legs all the way down and come all the way up to a seated position. So the most advanced version of what we started with our one leg circle and the corkscrew, which means we're now done with rotation. Next up as I was swimming, Yay again, which is our antidote to all of lecture based exercise. We just did, we now get to go back into the front of our body, stretching and wide open. Now if you have a posture that is kyphotic, which is when the head is coming forward, the upper bag is incredibly rounded.
You'll have a really hard time getting this exercise to feel successful, right? So we'll, we'll start with a nice and easy one to just get back into the front of the hips. Mary has her hands underneath her forehead here. Shoulders are drawn away from the year, so mostly so that she feels a nice long neck and a wide upper back. The elbows can even press down into the mat and energetically a little bit. That feels good, right?
And then you go ahead and pick up your legs just like you did for your swan dive. If you want to like Haig, your AA kick and you just flooded the legs simultaneously, alternating sides, all the while keeping that length through the back and this energetic movement of the arms pulling back the head stretching forward. So we're still looking for length in the spine here and then slowly release the legs back down. Another way to go at this would be to take one arm at a time out in front of you or rather lifting one arm at a time up against the legs. So we're going into that next one arm, the opposite leg lifts. But we're not going to flood her here.
Just want her to hold that position so next time you're up, just really find that diagonal energy from the fingers across the body into the opposite leg, exploring your lift here, seeing can I breathe in this position and then coming back down. Let's do one more each side. I always recommend, especially if your body feels a little wonky on any given day, to start with this before going into a crazy fast swimming because very often it becomes a throwaway movement, but there's so much beauty to be found in firing up the back of this way. Once you feel ready, go ahead and lift both arms, both legs and begin your swimming here. Now again, I'm not upset if her body starts to move around a little bit. Maybe rotate even with a little bit through the upper body. I do on both of our hips to continuously press down into the mat so that she has a sense of center from which to move around. Take three, take two, take one and let that one go.
Now this one is really a fairly brisk exercise. A quick one. It's kind of like the a hundred in that way. It's very dynamic and it's just about fast and quick enough to get us ready for what's next, which is our leg pour, which was again kicking exercise, a fluttering exercise of the legs in a plank up in a reverse plank. Right? So I like to highlight the transition from one end to the other for a second. Go ahead and extend your arms forward again and your legs back.
Lift yourself up into what was the finish of your swimming exactly. And then from here, just place your hands underneath your shoulders. Tuck your toes under and push yourself up into a plank position. All right, so the activation that you found in your swimming that strengthen your back. Can you carry that into your plank? Let's do that one more time. So come on down. Find your swimming position.
The whole backline of the body is now fired up. Can you take that with you? As the hands come down, as the feet come down, can you carry that up into what will become your leg pull? Go ahead and press yourself up. Nice. Pull your chest through the arms. Find that, lengthen your upper back. Yeah, readjust your plank position here. Come to nice, long line. Good. Going into it from here.
This is an exercise that gets interpreted in many different ways, but I want you to essentially just 0.1 third and kick it up towards the ceiling once and twice without putting a big dent into our backs of find that length here. Now flex your foot and actively pull it down towards the ground to the other side point and kick it up, up, poly down. Nice. And again up up as it comes down. Pull your chest through your arms and our position so really feels like an elastic stretch into directions. Kick, kick ticker down. It's finished it one more and good. Come all the way back down onto your stomach here and rest back over your heels for a moment, right?
So hopefully you can see that swimming and the first leg pull here are really, really connected into one another. Finding that same freedom and the hip, again, against the stability of our plank shape that we're in. How are you doing there? You're ready for your leg, pull back. All right. Now I often confuse the names of those two, right? But I think of it just like the one we just did. It's the return portion where the pull happens, right?
So you kick the leg up as you pull it down when you're facing the other way, you're on your reverse plank. In the next exercise, you kick the leg up and you pull it back relative to the body. So that's how I remember that. I'm not sure that's why it's called that brought yourself all the way up, but it's a little helper from you kick into the back of the body right here, kicking to the friend. That's what you're saying, right? Yeah, exactly. So this is another exercise that is very tricky for, for elbows and wrists, and that has Todd many, many different ways. In the original book, we see that the hands were all the way fanning back, often a modern teaching. We see the fingers pointing forward.
And then some people have it somewhere in between. Now I think a good way to decide is to figure it out for your body. And here's how I want you to actually start with your hands out to the side, back behind the body, and then without the expectation to go through the full exercise, just go ahead and take weight into both hands. Curlier tailender, Ben, from ears to hips to lift the hips up. Good eyes towards the toes so that the neck doesn't get loaded and just check in for a second. How does that feel in my elbows? How does that feel in my wrist? Do I have stability and with across the chest, can I breathe?
Am I having fun? Slowly lower yourself all the way back down. Come out of your hands and dial them a little farther back and then do the same thing again. Exactly. And then shoulder bridge up from here. Curl your tail under. Lift yourself back up into that position. So we're not going into our kicking just yet. We'll just make a decision. How does that feel? Better, worse, the same? Unnoticeable, noticeable differences. Slowly lower yourself all the way back down.
Dial your hands all the way forward and do one more like that. So by making small adjustments through the position of your wrist and just exploring, can I load weight into that? You'll probably find soon enough which position is appropriate for you. So go ahead and lift up, make up your mind on how that feels in your body, and then slowly lower yourself all the way down. So this is going to feel different for every single person. Right?
Which position do you think is the most appropriate to you? Side, back, forward or somewhere in between? Perhaps all feel pretty good. I don't, this was nice because it was like, well that's kind of like not a real situation if you're just having a mat. Right? Right. So you tell me, what would you like for me to do with wedding Joe? Dear Joe had them all the way back. Okay. So the only thing you want to look out for if you go and take your hands all the way back that way is that you want to make sure that you're not just rotating from the elbow down or from the rest out, but you'd take that all the way up into the chest and that you can sustain that throughout the full range, right? She can do anything. So we'll do it in that position and see if we can load more movement into that, right? So make sure that your fingers really spread into the mat.
It's not just the heel of your hand digging down year two hips, you bend to lift and then you take weight into your left leg to kick the right leg up, kick kick and pull it back relative to the hip and kick kick. Pull it back and kick, kick pullets, switching sides. Kick, kick and down. Good. So typically we alternate side to side here, just even out and do one more each side. Right and left up, up. Pull it back. And last one up up. Keep the weight even in your hands as you slowly roll yourself down Loring self onto your seed. So yeah, again, play around with how your hands behave in the different positions before you make up your mind or before you let somebody else make that decision for you. It has to go all the way up into their shoulders so that you're not putting a torque into your elbow or all the weight into the heel of your hand because that will inevitably start to bother you and your practice. All right, and we still have pushups coming up and a whole lot of other weight bearing exercises.
Next up in the series is our kneeling sidekick. Okay. All right, so just like our sidekick down, we try not to get so stuck at the hip and maintain the sense of rigidity through the torso, but again, allow the leg to kick freely against movement of the spine, right? There's tons of opportunities for activation here as well. So let's find them in this particular position. Let's go ahead and phases that way. And I always like to go into it sort of from two knees onto one.
So that the body again has to kind of figure out what type of effort it needs to get into that starting position and what will help us to actually go into the movement from there. Go ahead and take both hands behind your head whenever they're there. Go ahead and push your head into the hands. Go ahead and pull your head upwards in space so you create that traction in your upper back. From here she's taking her right hand towards the Mat and stretching her left leg out to the side. So in this transition, there's this moment of balance.
Her hips have to decide how to get into the side split leg moment and one her hips to push forward in space so that again, we have to stack the hips just like you know, sidekick on the ground, right? I want the hand, the right hand and push into the mat. There's a hint of a sight bend in here. Her left elbow reaching up to the ceiling and just like our previous side cake, we start with a nice swing back of the leg. Letting that translate into that back then lake shape through the upper body.
Ah, yeah. And then bring the leg forward again, allowing that to translate through the rest of your body as well. And swing the leg back. Keep that width from your right hand into your left elbow and swing the leg forward. Try to avoid bringing this hip back though. Keep it nice and activated and now swinging the leg back and do three more sets on your own. Kick it fall, reach it back to and forward. Reach should back. Beautiful. One more time. Forward and back.
Bring the leg outside and come back onto Tunis. We're gonna face the same direction for the second side. Take your left hand down. Reach your right leg out to the side. Now again, just this transition from two knees onto one back onto two might be your exercise, right? You push your left hip forward. This is a place where we usually sink back a little bit.
I want you to really extend through the left turban as the leg goes back again, that that translate into your spine rippling into hint of a back bend here. Beautiful, and then let's swing the leg forward. Good. And swing the leg back. I'll let you go on your arm. Keep activating your left hand into the ground. Keep pushing your head back into the hand as well. Take your final once, swing it forward forward, bring it back, bring the leg out to the side and come back into Tunis.
And clearly as the name reveals, it's the same as side kicked down. We're just up on the nice, right. Um, if you want more information on this exercise is actually a whole other tutorial that I fill in previously so you can check that out as well. Uh, but we'll go right into our Siteman next up. Now the side bend, we just prepared for it somewhat right? The kneeling side kick is not necessarily a straight spine out on a till, but there's that sense of excitement already built in. Knowledge is take more weight into that arm where on and finding that side plank, like action. There's four distinct steps that are part of the exercise and we'll take one at a time so that again, you have options as to how far you take your site.
Then all right, and so facing that way you're already in a good position right there. Your right hand, your right hip and your feet are sort of in one line along the math sort of eyeball that bring your right head out a little farther than you think you need to. You almost want to go close to a 90 degree angle here. All right, so what Mary already does beautifully here is to use the right hand against the mat to activate the back of her right arm and the side of her upper back and wastes to create almost like a t pole like action, like she's dragging the hand towards the hip. From here she started with her feet stack, which is a great place to start because it gives you more stability and more support. She's basically just straightening out her legs, carrying her weight all the way up over her right wrist, and she can even leave her arm on the side. For now, we're just really going into the side plank leg action. And then it's her bending her knees and sitting back towards her feet. That takes her down. And that step one through that. One more time.
You press out, recalibrate, you're stacking here. Nice. And then bend your knees, sit back down. Now step two is a site bend down, right? So rather than going up and over into this arc like shave, we're actually taking the hip down towards the ground. So look straight out, press back out, lower the hips towards the mat and look over your left shoulder. Keep pushing the hand away from your come down even farther if you can.
So you really feel this side stretch happening here. Press yourself back to step one and then sit back down. So that's step one and two. Are you ready to go a little farther? Yes. All right, so stretch it up. One side, bend down, look over your left shoulder to now step three is to bring his arm all the way up and over and turn your head all the way down to the hand. If you want to get super Mancy and then you come all the way back down, bending loonies let's do one more like that. Stretch it all the way out.
Of course it's optional to add the neck and head choreography in there, but it adds a nasal sense of rotation here and gives you a little bit more organic movement all throughout the range. Come all the way back down. Nice. You started noticing that her body shifted in space a little bit so that at the end the hand was a little farther out rather than being right underneath her shoulder. So let's look at that. On the second side. You can just, um, swing your legs over the other way. Hmm. There we go. So you can make sure that your feet are lined up. If you want to make this more challenging, please both feet on top of one another, but don't feel like you have to ride. The value of the exercise lies in really loading up that one arm and finding your stability on that side so that you can move around your shoulder.
Press back out into step one. We'll go right away into the full choreography here. Lower the left hip towards the ground until your left calf touches. Look over your right shoulder and then lift all the way up and over. Keep pushing the mat away and then slowly bring the arm down.
Bend your knees and come back in, right? So this is where the body starts to migrate over this way. Make sure that you keep the same distance and let's go two more times. Stretch it up, getting sweaty and lower the hip. We'll go over the right shoulder and press all the way of lift right up to the ceiling. Lift the left hip to the Zealand. Do good and come all the way down.
Let's take one more stretching out side, bending down. Gorgeous. Nice. Up and over you go. So our spine bends in both here, take it all the way down and that's essentially the only actual sites stretch we do in the traditional sequence. But it's a really fun exercise and you can make it easier by having your feed stack or rather staggered like she has. If you stack them, you'll have less base of support. It makes the whole thing a lot harder. Yeah, I prefer the easier version. I prefer to,
Chapter 5
Exercises 29-34
so we're now moving into the final cluster of exercises, which is back to some of the exercise we've been doing all along, but speeding them up a little bit. Escalating skill reenergizing rejuvenating the body through a lot of rolling exercises. We have our boomerang, we have our CEO, we have our crab, which are all escalations from rolling like a ball. Then it's followed by rocking, which is, as we said earlier, it comes out of the double kick essentially.
And we finish it with control balance, which is our most skillful variation on the Jack Knife or any overhead exercise. So now at this point you can always supplement those exercises with their predecessors, with their more fundamental siblings. If you will. Um, but we'll take a look at boomerang ceiling crab and how they belong to one another, coming from a very open shape and slowly zooming in and getting a tighter and closer and getting a deeper role into the body. All right, so let's have you feed this way and again, there's another more in depth tutorial on the boomerang that I've taught previously. For this one, we're just going to keep things super simple and showcase the relationships between the exercises, right? So for this one, there's very little arm choreography, but there's a lot of activation in this one. I want you to start with your hands by your hips. Exactly. Sitting yourself up nice and tall and feel like you're trying to pick your legs up already from here.
So your spine rounds back just enough so that you can lift your legs up in front of you. And then from here thing, the legs roll over like the roll over the arms, push into the mat. You're just crisscrossed the legs here, switching them from here. The arms slide forward and up, lifting you into your teaser. The shape remains that you're in. Beautiful. And then from here, the arms swing down in bag as the legs tilt down and you'll round yourself forward as the arms swing up behind you to park them again by your sides. You Roll yourself up and you'll start the whole thing again.
Ribs drawback to pick the legs up. The spine now stays in that same shape as the leg switch. The arms reach forward and are pulling her into that teaser. The arms swing down in back as she rounds over her legs. You can take a little pulse here. Now let that boomerang fly.
Go a little quicker. Rolling back, switch teaser or up arm swing through AV. Some fun. Where there one more time, right? That's the idea of the boomerang. You let it fly and you let it come back to you. You continue that momentum through a doesn't ever stop. One more time. Lifting up, um, swing down and back, round up and over the legs. And then, yeah, sit yourself all the way back up.
Right? So it's a little bit different in the arm choreography. There's not a lot of stuff added. You just kind of want to organically swing them through to carry your torso forward over your legs. So let's do the boomerang one more time. This time I will not interrupt you. Just let it swing from one shape into the next.
Lift it up, swing the arms down in background over. Beautiful and then come back one more time. Last one, rolling back leg swing over. That's it. It's a continues nonstop motion continues into our seal from here and that the action of keeping around shape and carrying it back and forth remains. We'll just take a somewhat awkward position with the feet here. The souls of the fee pressed together like a prayer.
You're taking the Young's around and you want to cut the hands right around the outside of your ankles and the outside of your arches. Dial your big toes towards the head. No, this is a really awkward way of organizing your feed, but you might find that this actually stretches the outside of your ankle somewhat as well as getting you deeper into opening your inner thighs right now. From there, press your elbows into your legs and the legs back into your arms and then we'll take that shape back and forth. Let's not worry about the feet clapping just yet. You just take the shape back. You can take it as far as your toes touching to the ground and then lifting yourself back up.
Your spine is probably feeling a little lengthened out. Compare to you're rolling like a ball so that you can suspend your spine in both of those directions. Now to even that out, we add the claps as a rhythmical challenge. Can you suspend three, two, one can you lift up and suspend three, two, one. Let's do that a couple more times. That's the full seal, but again, the clapping is optional. If you're still just working on the position and rolling like a ball would be the alternative if the position just doesn't sit right in your body. One, two, three and let that one go and then we'll take it a step farther. So at this point, almost think of crab as the next step of seal rather than its own exercise, right? We're just continuing the same narrative from a to Z, from a hundreds report shop.
And we are at this point now where we make the seal a little tighter, turns into a crab. It's like a zoo, right? Cross your right leg over the left and go ahead and pick up the inner edges of your feet. So we actually almost want to hold them, um, from above holding them this way. Exactly. And the only reason why that is important is you can use your hands, pull your feet apart, bring your knees closer to your shoulders, get your tailbone under you and find that same round as again from your ears all the way down to your hips. Now one thing I like to do before adding the rolling back in is to just let go for a second. Pull the knees apart. So go ahead and let go of you. Feed. Pull the knees apart to switch the legs, bring them back together and tighten it back up. Let's just do that part again.
You pull the knees apart, you bring the legs to cross again in the other direction you pull apart. One more time, pull apart clothes back in, and then we roll like a crab. You roll onto your shoulders, you do that switch over head. Pull yourself back up and pause right there and just do that part. Do that again. You roll yourself back, you pull the knees apart across the legs and you switch. So notice the difference between just crossing your legs versus pulling the knees apart to switch, right? So let's do that one more time. Going back, knees apart. Yes, you got it. And lift yourself all the way back up.
So that is the backward portion of the crab for the forward portion of it. This is where tat of a headstand comes back in where we're looking for a similar sensation than in our neck pole. By positioning our body into what feels like a headstand about to happen. She's pulling her feet against her seat, rock unto the knees. She lands her head down onto the mat and then without dumping any weight into her head, she's trying to lift her hips up, puffing her back up towards the ceiling so that she grabbed some traction into her neck and upper back. From here, she sits back behind her feet, rolls all the way back, switches the legs open, close, coming back up, pulling the feet against the seat to find a position in the mat is just about long enough for her. That's good news for both of us.
Let's do that one more time. Rolling back. Open, close. So again, don't think you have to put a lot of weight on to your head, right? It should not be much more than just patting your own head. It's much more puffing up of your lower back towards the ceiling that the exercise is about, as well as the traction you look for in your neck here. Slowly sit back behind your feet and let that one go. So later on, we'll sequence all of this together a little quicker so you can really see how one goes into the next, how the body gets into a tighter and tighter shape throughout. But that's your crab.
We'll now flip onto the stomach again after all that and go into a rocking, because I mentioned it earlier, I want to showcase the relationship between double like cake and rocking will quake. So bring your hands to your lower back like you did before. Lift both legs up and kick your heels to your seed for your double kick. Stretch your legs up and back. Hands back, chest forward and up. And then come back down to start it again. We'll pause in the middle on this one. Kick once, kicked twice. Now hold.
Now see if he can hold on to your feet and thing that you continue the same action. So you pulse your heels against your seat, like that double kick and then you stretch your legs back in, up your arms, back and up, your chest, forward and up. So your legs never get to unfold because your arms are holding on. But it's the same active extension of the legs that gives you that beautiful position that gives you that beautiful activation to the back of the body here from here, deflate the shape you're in, release down, and then start again with the kick, which is really a little tug. Here's your tongue and you turn and they kick your feet back into your hands and lift your chest forward and up.
Roll the weight onto the hips more than the stomach. Nice. And deflate the shape you are breathing, right? Good. Just checking one more time. Well now add the rocking in here, which is your swan dive in a way, right? So once you found this position here, start by lifting your chest a little higher by pushing your feedback and then take that momentum with you swinging forward and back along the length of your stomach, your center towards the bottom ribbon up. One more time. Hold and deflate the shape. Ah, exhale. If you haven't in a while collapsed. Goofily no, go ahead and sit back over your heels. Give yourself a counter stretch.
All right, so you see the relationship from this exercise into something we've been doing all along, right? Adjust the final step of this. If this is not available to you. [inaudible] a double kick at this point. All right. We got our control balance next, which is, as I said earlier, a final expression of all the shoulders stands we've been doing trying to keep ourselves so supported from our center that we don't even need our arms overhead or by our sides anymore. Tucking in my shirt. Go for it. Ready? It's a good idea at just go ahead and extend your legs out long on the Mac. All right, so a good way to go into this is to, again, just think of your rollover. You lift your legs up and overhead.
Think of how we did scissors earlier without the hands, right? The legs Jack Knife up from here, but it's this idea that the hips stay far away from the head. From here, reach your arms out to the side and overhead.
This is when you can start playing with your control balance. You pull one foot into the mat so that you can extend the other leg farther and farther away from you. In the meantime, the hips lift up towards the ceiling and then you switch to the other side. So yeah, take it right to that level where it feels like you're about to lose your balance, right? It's about playfulness. It's about making sure that the front of your throat remains open rather than sinking into it. You got it. Switching, pulling the legs apart. It's like your high scissors all over again. Take one more.
Then bring both legs up. Slowly. Roll yourself all the way down.
So this is just the final escalation of that and it's the final exercise before we go into our pushup.
Every millimeter that we approach the ground and as we push it away. So in the plots context, I don't think of this as a pectoral exercise or a strength exercise as much as a unweighting exercise. Combining all of the little takeaways that we've had from the work so far, putting them into this very strong, intense drill, which is a pushup. So let's explore that in motion. You take your arms up towards the ceiling, right? There's a lot of elements of what we've been working on in this first roll down.
Even she's articulating herself down, placing her hands flat down in front of her big toes. The knees can soften at this point as much as you need to to get your hands flat down. What I want you to really find that level of comfort that you on hands and feet before you start walking yourself out into a plank. Once you're in a plan, we talked about the idea of plotty stands earlier, right? It's not so important. Again, what position your legs take, but I want you to have a sense of activation through your legs so that your body is in one strong, long line. Your hands pushing evenly into the ground, your chest pulling forward like you're stretching your spine out like a spring. That's an opening, right?
What's come out of the plan first before we add our pushups. So you just lift your hips back up your walk, your hands back towards your feet. Flat, hands, flat feet again. Your knees may have to bend quite a bit at this point. Let that happen and roll yourself all the way back up.
Take your arms up to the ceiling, which is not just a choreographic detail, but it's also a way for us to come all the way up into fully extended upper body. Right? Take yourself down one more time. We're going to add our first push up. Roll yourself down. Walk your hands out into your plank. Good. Now when the, when the pushup comes around, we think that our goal is to get as low to the ground as possible. Instead, I want you to think how long can you make yourself between your head and your heels? Add a softness to your elbow so you bend the elbows. Bird, you only come down as far as you can. Make yourself longer, longer, longer, long, and then push the ground away to lift yourself back up. Do that again. Let's say right here and the elbow. Stretch yourself longer.
Push the ground away. You've got one more of these. Bend the arms any amount, but get super crazy long. Lift the hips up. Walk your hands back towards your feet and then slowly roll yourself all the way up. Right arms lift up towards the ceiling. Does that make physical sense to you? This idea of lengthening out, right? So you almost want to think that you healed. Just like you're standing here right now. Your heels up, pushing into the ground so that the roof of your head can lift.
Translate that into your pushup. I'll let you go into it one more time. Roll yourself down. Find your hands in front of your feet. Soften the knees as much as you must and walk it out. Three pushups here. Become longer pulley. Elbows back the body weight shifts. Four where she pushes back up for two heels kicking back the entire time to extend that leg out through the back of the body as well. Hips lift. Amazing.
Walk yourself all the way back. Soft knees. Take your time rolling up. Your arms can stay down by your sides. Ah, find a nice little lift. And that is as workshopping all of these different exercises to showcase that they're really just one exercise, 34 different movements built in. Right. Hopefully there were enough options for you to start supplementing if an exercise is not available to you. I'm getting clear on the purpose.
We'll do one more thing for you, which is to show that by going through the entire sequence, one more time, flowing through it with very minimal repetitions to really see how the work expresses itself as one flow of movement.
Chapter 6
Seeing How They Thread Together
How you see the same shapes repeated as well as how you can flow through them. So expect to see less repetitions than you're used to. And also hearing the language that it talks more about the connectedness of the exercises. All right, so starting with the a hundred Mary, when you are ready and Wade the legs out of your body, find your level of leg height and reach the arms forward and up. And when you're ready, begin to pump. Breathing in and breathing out. Really mobilizing the shoulders, waking up your body, stimulating your circulation while holding your body in this really intense position. Take one more breath in, quick pumps, even breath and then release all the way down. Relax completely.
Stretch your arms up over your head. Set up for your roll up. Find that energy through the legs again. Pick yourself up. Take a stretch over your legs. Rounding forward. The second is gets tougher. As you find your sticky spot. Think of your hundred again, right? Roll yourself back and down.
Stretch the legs out in our position. It's one more lifting up when a transition. This one into our roll over our next exercise. Roll yourself all the way down. Let your arms come down by your sides. Pick your legs up, stretch up and over. Roll over, head open the legs and like the roller descend coming down by pushing your arms into the mat. Stretching your head back and finding our position.
It's go once more. Up and over. Open the legs. Roll down. Push the mat away. Keep your chest broad. Reverse the circles open. Lift up, bring the legs together. So roll up, turn upside down, and we're warming up and getting ready for our single leg circle. Next as you come down, bring the legs together, push the mat away, lower yourself all the way. Bring the legs all the way down to and then lift your right leg up. Remember the hip is invited to move here. Pick it up to take the leg across.
We'd go twice each way and up and over, down, around and up. Reverse it. Activate your left leg strongly into the match to keep a sense of center. Switch your legs right down, left up. Push your arms into the mat. Free of breath. Yes. One more down around it. Up. Reverse it as the hip lifts. Keep the opposite shoulder nice and steady.
And now that the back is stretched in all the ways we go into rolling like a bar, pick yourself up. Bend your knees into your chest, build your ball, draw your heels to your seed. Off you go. Massage your back. We've now warmed it up. We've been in these two positions before. It's a rollover. It's a roll up. One more time. Roll over. Roll Up. Now that we've warmed up for a squad, we'll go into our single leg stretch. Come on down. Release completely for a second, and then pick yourself back up.
Draw your right knee into your chest, into your one leg squad, left leg lifts and a switch and a switch. Find a rhythm that makes sense for your body. Match it with your breath and use the pull of your arms as an opportunity to bring your chest wider. One more right, one more left. Let's transition into our devil EQ stretch from here. Legs long and low. Draw your reds back and our position hands pressing into your thighs. Inhale, exhale. Knees go up in air and you give yourself a squeeze in a hug.
It's one more. Inhale, reach legs long and low. Puff out your back. Exa Come in, rock yourself up to seated and we'll go right into a spine stretch. Bring the legs out in front of you. Remind yourself you can sit, elevate it here if that's available to you. Bring the hands down to the mat. Push yourself slightly behind your sitz bones and then round forward puffing out your back, especially the upper and middle back. Energize the legs and then rebuild your spine. Lifting all the way up to the top.
We'll do one more and then transition into our rocker. Chin over chest bend both ends of your spine towards one another. Strong through the legs. Lift yourself back up. We're going to find that shape now. Balancing behind the sitz bones. Arms lift. Roll yourself halfway back. Find your transition into your rocker.
Gorgeous. Puff your back away from the legs. Press your feet forward and off you go two times. Lift yourself up. One more time. Rolling back. Here's your rollover. Here's your roll up. Hold the shape. Bring the legs down. Bring your arms forward, roll yourself all the way onto your back. Next up is our corkscrew. Take a moment here to gather your arms down by your sides or overhead legs.
Lift up. We started with a rollover first. Jack and I for a shoulder. Stand. The legs lift up. We come down on the right side. Now, just like our one leg circle, we're taking the spine into rotation. Come down on the left side. We'll just do one each way here. Circle the legs around, pick up on the right, come down the middle, lower the legs all the way down and then sit yourself up. Getting ready for the sauce so we continue the theme of rotation. Legs. Open arms. Why? Hug your shoulder blades together.
Feel that with across the chest. Lift up to twist to the right. Round over your right leg. Stretch the arms apart. Beautiful. Going back into that deep deep rotation. Coming back to center. Take it to the left twist. Rounding down. Find that within your arms as you come back through center. Holded. Therefore, a second, maybe press your arms back a little bit in space because the next step is I'll swan dive. All right, so this is the width in arms that we want to find there.
Go ahead and bring the legs together. Release the arms break. Dance your way onto your stomach. Exactly right. Take your arms underneath your shoulders here. Elbows back, legs together as far as that's available. Now we change our dynamic a little bit from being on our back to being on our front, being fully extended, holding the shape, rocking forward and back. Build it up. Lift your chest forward and up your legs back and up.
Once you feel like you have enough height and feel ready for it, swing your arms outside. Bring the legs up, lift the chest, lift the legs, lift the chest to up. Last one, slam on the brakes. That was it. Come all the way down and position yourself for your one leg kick like we're continuing that same idea. The legs lift the thighs, live a couple of inches off the ground. Perfect position. Go ahead and kick. We'll just do two each way. Kick, kick one more kick, kick and kick. Kick. Stretch it back. Hold it there. Leg stay lifted. Hands to your lower back.
Head straight down, and we go into a double kick. One, two legs back, arms back, chest up. Let's take one more kick. Kick stretchered back and lift. Take it all the way down and we're getting ready for our neck ports. We turn the body around yet again. We'll just do one repetition here. Starting on the ground. Hands behind the head. Flex your feet. I'll become your strap.
Remind yourself that you can allow your elbows to come forward. We're now reversing the shape of the body again by flexing up. So go ahead, push through the heels up you come round over, pressing you head up into the hands. Lift yourself up tall. Come back down. Remind yourself, we're also starting to accept load into the upper triangle. Head to shoulder so that we're ready for scissors and our bicycle. Bring your arms down by your side. Rollover.
Park your flat hands against the back of your hips, pointing up towards your seed. Both legs. Lift up. Here's your shoulder stand again. Make sure you keep weight out of your hands. Scissor, scissor. Let's do one more scissor, scissor, bicycle. Ride through like it's the same. Exercise is this. Reach and reach and reach. Reverse it.
Good. Remind yourself that your hips lifting away from the hands so that there's no way new elbows comes from your center. Again, it's the rollover action. Bring both legs up that your hands can free. Roll yourself all the way down and lower the legs away from the body as well so we can start our shoulder bridge a new, so bend your knees, place your feet close to your seat. Lift your hips up. Get your hands to cup around the size of your waist.
Pull the hips away from the body. Extend one leg out. We'll just one kick on each side. Kick it up and over your head. Reach it away. Bend it back in other side. Already thinking of your sidekicks here and how that kick travels to the whole spine. Free Arms. Roll the spine slowly down, getting ready for spine twist. We come up to a seated position reminding the body of the soft. Flex the feed.
Reach the arms far apart. Find your wingspan. Lift up out of the waist, twist to the right for a trip. Paul pots. Come back to center. Inhale, take it to the left, one to push to the heels. Three come back through center. Arms forward. Roll right back down or next shoulder. Stand our Jack and I've. When you're ready, pick the legs up. Roll over, lift the legs to the ceiling with control. Roll yourself back down.
One is fine. We'll take it right away into our sidekicks. Roll over into the right side. Getting ready for those teasers. Hands behind the head. Legs slightly forward. Leg goes up. Remember we just go forward and back on these. Take the leg back behind you. Let your chest go forward and up. Let's do three cakes here.
Forward and back. Think teaser. Think Swan. One more time. Kick forward. Swing it back and then just find a fun way to get to the other side. There we go. That's fun enough for me. Take your hands behind your head. Legs forward. Yeah, just slightly forward of the body. Take your topic.
Know he'll get there. Take the top leg up, right. So again, if you look at this from the side, you want to let the body go through this full on back. Bend into what feels almost like a teaser shade, because that's where we're headed. Take the leg forward and back. Three taps. Kick. Reach it back to kick. Reach it back one more time. Kick it forward. Swing it back. Sit yourself up from there. Bring your feet towards me. Just come ahead.
Go ahead and set up for your teaser. There you go. Stretch your arms forward. Feet and legs long left out of the waist. Think your open leg rocker transition. You've been here before. Roll back to the point where your legs become lighter. Lift yourself up. Free up your breath. Yes, exactly. Good. It's like you're trying to touch your toes one day.
You will then lower the legs down. Sit Up and out of your ways. Take a stretch over your legs here. Hip Twist set up. Same idea. Your hands travel back behind you. You can hook your hands around the mat if you have for that available to you from ears to hip. She bends her spine evenly. She teasers or legs back up and she corkscrew them to the right, down, around, and up and to the left, down around an up. Lower them slowly down. See, that's a nice one to only do one repetition of.
Go ahead and turn it over to your stomach. We now flip the body around into swimming as the antidote to everything we just did. Press the hipbones down. Lift both arms, both legs and go into your swimming. Allow your torso to rotate any way you need. As long as the hips stay nice and steady and activated. There we stretch the sides of your body. Three, two, one.
Hands under shoulders, feet tucked under. Brush yourself up to your playing. Find your chest, pulling through the arms. One leg kicks up. We'll just do one each side. Kick it up up like a swimming leg and one more kick kick. Lower it down from here. Come back to your stomach.
Turn yourself around there and we'll transition into our leg pulled back. You can just set yourself all the way up from there. I know there's fancier transitions than that, but we'll just keep things simple for Zay. Okay? Take the hands behind you. Remind yourself of the position that felt good for your wrists. Years too. Hips even bend the hips. Lift up.
You take the weight from two feet to one, one kick each way. Kick and kick and down. Simple as that. Lower where the hips back down. One more kicking. Exercise, kneeling side. Let's face this way. Both hands behind the head. Remind yourself whenever the hands are here, the head pushes back into it.
Right hand down, left leg out to the side. So first side bend getting ready for the next one. Stretch the leg back behind you to wind it up. Two kicks. Kick it forward, Richard back one more time. Kick it forward. Push the ground away with your right hand sweets. Come back to two knees. Transition to the other side.
Remind yourself to push that left hip forward slightly gorgeous. Bring the leg back behind you, that that travel through your full body, just like the sidekicks we did before two kicks forward and that last one. Kick it forward. Reach back, stretch the leg outside. Float yourself up onto two knees are right and then sit down on the right side of your knees. Take your right hand now for your sight bend. Exactly again, making sure hand, hip and feed line up staggered or stacked. Go ahead and press out into your first step. Find your side plank here. Side.
Bend the hip down. Looking over your left shoulder full circle with the arm. Head turns down towards the hand that's still pushing the ground away and you come all the way back down. Transition to the other side. Just swing your legs over. Just one each way. Going through all those four steps. Activate your left arm here. Go ahead and stand up on both feet. Side Bend Down, side bend up, lifting right hip, left hip up towards the ceiling.
Gorgeous and sit back down towards your feet. Swing your legs over this direction and we'll get ready for the rolling sequence. We have a boomerang followed by a seal followed by a crab. It's a zoo telling you, lift the legs up against your body. Let that determine how far you have to roll yourself back.
Swing your boomerang around. Open, close. Reach the arms floated up. Let the arms swing through. Round over. As you roll yourself up, go ahead and bend your knees. Prayer your feed. Find your CEO position from here. Continue that same train of thought spine is rounded. You roll over onto your shoulders. Hips lead the way towards my touch or not.
You'll lift yourself all the way back up. Let's do it again with a clap, right? So spending yourself back. One, two, three. Coming up on two, three. One more time to make sure that you have enough time in both directions to maybe do other things like the crab lifting up. Cross your feet. Grab on, pull the feed apart. Bring your knees to make the shape tighter.
You're synching a tighter. Roll yourself back onto your shoulders again. Open, close. Pull yourself up. Draw your feet under your seat to roll the head down. Puff the ribs up towards the ceiling. Get more space into your back with two. One more because that looks a yummy. Rolling back, open, close. Roll yourself up. Take your final one.
We're going to unfold there now in the opposite direction for our rocking. Sit back behind your feet. Find your way onto your stomach. Think of your double leg kick again, but we're starting right with your hands on your feet, so go ahead and grab them where at least your head down, a little tug. Double Tug, heels to seed. Press your feet back, lift your chest forward and up. Just turning the body completely around from the effort we just found and rock forward and back swan dive and forward and back.
Hence continuously pulling the feed feed continuously pulled back into the hands. Slowly deflate the shape you're in. Stretch your legs out long. Find your way onto your back. Two to go to years to go. We have our control balance and then we make our way back up onto our feet. Whenever you're ready, arms long by your sights. Remember you've been here before, you hundred the legs out of your body, you roll them over, you jackknife them up, you swing your arms around you.
Now on your shoulders for the first time you dropped one leg, you scissor, you switched the legs, you pulled them apart, the hips continuously and perpetually lift up away from the ground. Good. Do One more and then find your way up to standing. You could roll yourself all the way onto cross feed to lift all the way up into a standing position to turn your way around. You have all of the mat in front of you, not been on your feet in a long time, right? So just find your balance here. Again, to take any potential lack of space out of your chest, go ahead and lift your arms up to find that space again. Take it with you as you roll down. Hands flat down in front of your big toes.
We just have one pushup. Walk it out. Find your planning. Find your new relationship to gravity. Own it. Make yourself longer as you bend the arms, take yourself down, push the ground away. Float your hip creases up, walk your hands back towards your feet, soften your knees, roll yourself all the way up. Restack your spine and you just return to life. Good job.
Closing Comments
And especially when we went through them without stopping, I could feel their connectedness in the rhythmic nature of, of them and how they fit together and how it's, you know, one builds upon the next until you start lying down and you finished standing up and the whole time you're just connected into moving. What's next in the breath and the energy around the movement I found really, really beautiful. Well,
So I just wanted to ask if there's anything that particularly not necessarily conflicted but it goes against the grain of how you usually do the mat work of how you usually see it.
We're never just rigid and holding something still or stiff while something else moves. There's always a reciprocal action happening in the body where something works in, in more than one direction at a time. So since we're all at different levels of accomplishment and different levels of control, I think allowing somebody to be free in their decisions and to see how their body expresses that I think is really powerful and is part of the reason why the original work really inspires me to this day.
How do we fit into the work and what does it feel like in our own bodies and how can we allow ourselves to express that? Now, um, one of my motivations to share this, my interpretation of the original work is not so much to introduce yet another new law on how to do mat work, but rather use it as a, you know, bring what you've got and take what you need from it. As in, you know, if you experienced this sense of energy in the sense of connectedness, how can you take that into your own practice no matter what style of Mat work you're practicing, what set of exercises are being prepared for you in class. There are certain things that are so unique to the original work that I find so inspiring and hopefully it'll help, um, you the viewer to find more ownership in that as well.
Very clear in your cheek teaching. Very, a gentle with your corrections and, um, but I think that if there's any other questions out there that you guys have for Benjamin that you should not hesitate to ask.
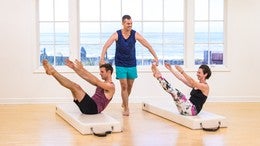
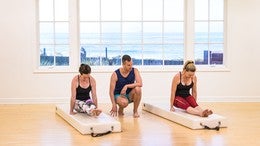
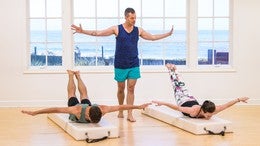
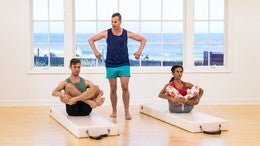
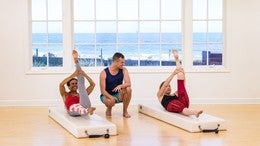
Workshops: Free Workshops
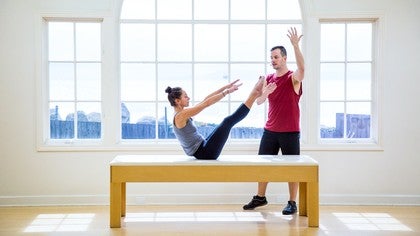
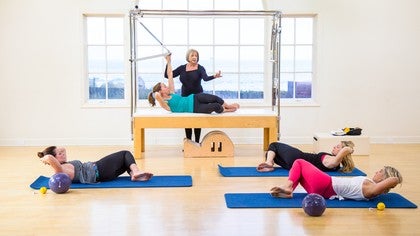
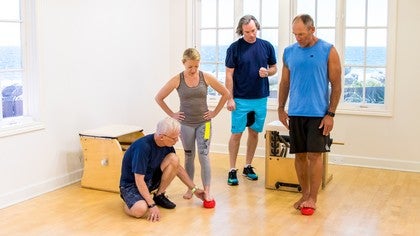
Mention
 |
Benjamin Degenhardt (Teacher) |
 |
Melissa S |
 |
Katarina S |
 |
Christine H |
 |
Anastasiya S |
|
|
June M. |
 |
Anna B |
|
|
Christine S |
|
|
Natasha H |
 |
Clare G |
|
|
Helen |
|
|
CecyA |
 |
Lady Luz D |
 |
Daniel T |
 |
Ryan B |
|
|
Debra H |
|
|
Joanna G |
|
|
Pamela A |
|
|
Nicole M |
 |
Zeren Joy |
 |
Ana S |
 |
Celeste E |
 |
Rajashree Srirangarajan |
 |
Direk S |
 |
Ivan Z |
|
|
Julia W |
 |
Nikki D |
|
|
Ted C |
|
|
Hen C |
 |
Caroline B |
|
|
Shannon |
|
|
Deana |
 |
FIRUZE B |
 |
Jennifer S |
|
|
Zoe M |
 |
Christine B |
|
|
Pink |
 |
Brenda A |
|
|
Heta K |
 |
Martha "Mars" Hart |
 |
Kaitlyn B |
|
|
Steven W |
 |
Diana Doody |
|
|
Alex D |
 |
Margie N |
 |
Lore Miller |
|
|
Natasha L |
|
|
Sabine G |
 |
Sueli F |
|
|
Maktub |
|
|
Ciara F |
 |
Connie M |
|
|
Victoria P |
 |
Meredith Rogers |
|
|
Theresa Raess |
 |
Cheryl B |
|
|
Tova A |
|
|
Marcela M |
|
|
Burçin A |
|
|
Vidya M |
|
|
Hannah H |
 |
Sarah B |
|
|
Teresa L |
|
|
Mayu |
|
|
Nancy J |
|
|
Cigdem A |
 |
Pilates Emma |
 |
Beverly L |
|
|
Lauren B |
|
|
Mary T |
 |
Mickie D |
 |
Nicole F |
 |
Donna G |
|
|
Gina |
|
|
Cecilie J |
|
|
Nina H |
|
|
Lauren McCarthy |
|
|
Madhavi A |
|
|
Lynn H |
 |
Joni N |
 |
Judit K |
|
|
Tracy M |
 |
Kristi Cooper |
|
|
Karrie G |
 |
Melanie S |
 |
Ewa |
|
|
Beth C |
 |
TwinPalmsPilates |
|
|
Susan B |
Comments

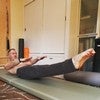


It was mentioned that there would be additional information to download. I didn't see that option. Thank you again!!

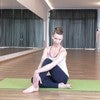
 Thank You very much
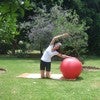

You need to be a subscriber to post a comment.
Please Log In or Create an Account to start your free trial.
