Description
About This Video
Transcript
Read Full Transcript
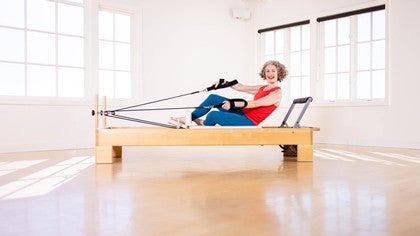
Hi there, everyone. I'm Claire Sparrow. And today, we're going to do a whole body pelvic health class using the reformer. I'm super excited to share this class with you. It's one of my favorites.
We're going to explore some of the familiar movements with a little bit of a twist to them. We'll begin by introducing ourselves to our pelvic floor today We'll do that by sitting on the edge of your reformer. You are going to have some springs on. I would suggest that we put on the spring going to use for our first movement. So we're prepared.
I'd like you to have 2 red springs and one yellow. If you're using a different model of reformer, you might find your springs a little stronger. So drop the yellow off and just do your 2 reds. So let's go ahead and sit tall, plant your feet on the floor, and then you're closing your eyes. We're just gonna take a moment to navigate our pelvic floor.
Make sure we're all acquainted with it. Our pelvic floor is a diaphragm A series of muscles attached to your pubic bone at the front, your tailbone at the back, and each of your sitting bones at either side of your pelvis. So as you sit here, just adjust yourself to make sure that you can feel or sense you found yourself sitting a little far back and you weren't feeling your pubic bone underneath you. So bring yourself into a more forward position on your pelvis. And then we'll pay attention to the movement of our palpit floor, the diaphragm of our pelvis with the diaphragm of breathing.
So as we inhale your breathing diaphragm and your pelvic diaphragm are contracting downwards together, expanding down and out. As you exhale, they're drawing in and up together. So there's this beautiful symbiotic relationship with your breath and your movement of your pelvic floor. So inhale feel the expansion of your hubit bone and tailbone away from each other and you're sitting bones away, and then exhale. Feel them rising. And it's not that we're moving our pelvis around.
You are just tuning into the natural rhythm the natural motion, and maybe you're heating me. Use the word natural, and you're thinking, well, it's not natural to me. That's why we're here. That is why you are here. The more attention that you give the more that relationship will become stronger and clearer.
Let's go ahead and open our eyes now, and that's a practice you can do anywhere, not just at the beginning of our class. We're going to do a release technique for our diaphragm now. So place your fingertips lightly along the edge of your ribs. You're going to be somewhere in the middle, not up by your sternum and not down in the floaty ribs somewhere in the middle. We're not poking our prodding. You're just gently placing your fingertips there.
When you next exhale, you're gonna slump forwards. Over your fingertips. And then as you inhale, bring yourself upright again. Again, so we breathe out your fingertips are just going to slot in underneath your ribs because of the movement you're doing. You're not pushing or prodding them there, you fold over, and they almost get kinda sucked in under your ribs. And the reason we do this because your diaphragm is attached along here.
And sometimes if you've maybe had an upper respiratory condition, or maybe you've had some tension in your body, some stress from life that shows up in our body, or maybe you've been pulling in and even not necessarily knowing that you've been pulling in, it can restrict the motion of your diaphragm. And if we've restricted the motion of our diaphragm, we've restricted the motion of our pelvic diaphragm, which we were talking about before. We're gonna go ahead and lie down Just double checking our springs. We've got 2 reds in the yellow, and we're gonna go ahead and lie down. I like to come to the edge of the carriage So I'm even lying down in a caring way for my body, rolling over onto your side, slotting your head in, and then rolling over.
Center yourself in the carriage. So checking with your hands that your pelvis hasn't landed all the way over to one side, it feels in the middle. Shoulders are gently against the shoulder rest, and we're gonna have our feet on the bar just above where your heel is. So just where your arch begins, then go ahead and cross your right leg over your left leg. If when you do that, you've twisted your pelvis in order to get your leg into position, Go ahead and just move your bar a little bit further away or a little bit lower.
From here, when you're ready, you're gonna start to roll across your pelvis from side to side. So we're mobilizing our spine, and we're also working on the tension through the deep hip muscles. And those deep hip muscles can be cooling on our pelvic floor, making it difficult for our pelvic floor to respond in the activities that we need it to respond in. Let's do 2 more from side to side, allowing your breath. To come in and out freely and then bring that back to the center uncross your leg, and you'll feel straight away, there's a big difference in the way that that leg in the socket and the back of your pelvis is relax more.
Go ahead and cross your left leg over. Again, making sure you can get into this position without twisting your pelvis. So make sure your foot bar is set according to your needs. And we roll across. Now when you're going from side to side, aim to go straight across.
As you're going to the left, your pelvis might try and twist a little bit. So can you go right across so you feel the teasing out into the back of your hip and pelvis. Let your breath move freely in and out. Feel the back of your shoulders spreading into the carriage. Last two now, so important that we release this tension.
And when you complete that last one, you're gonna bring yourself back to the center, uncross that leg. Hopefully, you've got an even pair, and we're gonna take our feet nice and wide on the We're still on that same position, so where your heel meets your arch. From here, we'll do some footwork. So let's send pause here. You're reaching the foot bar away. The crown of your head is reaching back. Turn your thigh bones in so your knees point towards each other and return your carriage.
Spin out. Press the footbar away. Spin in. Use your feet to bring you back in. So this is called botterfly footwork.
We're working on this kind of butterfly wings opening and butterfly wings folding in. So the butterfly wings are your pelvic floor. And your inner thigh muscles. Your feet are following the movement on the foot bar, but you're not excessively twisting your feet. You might feel tension through the front of your ankles if you're using twist in your feet too much.
Let's reverse this time. Find your feet. Push the foot bar away turn and come in. Sometimes what happens is we're thinking about pushing ourselves back and that can shun to us along on the carriage. Whereas if you think of pushing the foot far away, you're going to invite this wave of connection up through your pelvic floor and stay really strong and stable through the center of your body. Let's go ahead and do one last time.
We're nice and mobile in our hip sockets now. Bring your feet closer together on the bar, and we're gonna take our straps ready to put our thighs in. So you want to make sure if you've got a double loop like I have that the long loop is to the length of your shoulder rest. And we're continuing with the same spring. Now instead of putting our feet in, we're actually gonna go all the way through past your foot onto the back of your thighs.
So you're going all the way through into your long loop, and we're gonna be here. So the first thing we're gonna do is find the the sweet spot where you can almost just relax and hang out in the support of your straps. And in that sweet spot, wherever that is today, bring your attention back to your pelvic floor in the way we did at the beginning. So at the start, we just navigated the landscape of our pelvic floor, pubic bone to tailbone, sit bone to sit bone. As you hang here, you're going to focus on inhaling, opening that landscape, and hail, allowing it to narrow, inhaling, hand exhaling.
You might find that you want to have your legs slightly apart. That might help you to open up and lengthen your pelvic floor. Okay. You can hang here for as long as you like, but we're gonna move on today. Bring your legs together, we're doing a movement called bent knee openings. Your feet are gonna stay closed, and your knees are gonna open.
You're gonna keep your courage quiet. There might be a teeny tiny wee bit of movement. The goal is to keep it to a minimum. We're focusing as we so often do when we're moving the thi bones, moving these femurs, They are the puppeteers of your pelvic floor. So as you're opening your knees, I, we're at actually narrowing in at the base of your pelvis, keeping your carriages quiet as you can. Let's do one more.
And now we're gonna keep our knees together, but open our feet out. So our shin bones spin out and our thi bones spin in. So now when your feet go out, your sit bones are opening, you're widening. The base of your pelvic floor. So let's use our inhale and exhale to bring them in inhale.
Open. So your sitting bones are like sliding doors, and you might find that your left, for example, is a sticky sliding door. So you need to pay more attention to that one opening. Spinning your thi bones in. Let's go ahead and do one more and then pause. Go back to the bent knee opening and just keep your knees open from here.
We're gonna dip forwards and then back up. This is like a frog movement. So place your hands on the front of your pelvis. And as you are four words, your pelvis is going to stay quiet underneath your hands. Now as you go forward, use your exhale.
And as you come back inhale, When you go forward, there's a tiny narrowing of your knees. They get a wee bit closer together and then wider again as you come up. Webitnot or and wider. One last one like this. And because our femurs are the puppeteers, we need to go the other way as well. So spiral and glue the inner edges of your knees, point your toes and where our king forwards, keeping the knees together.
So you might even feel the different areas of your pelvic floor wakening up as we're moving the thigh bones in different directions. And against the resistance and assistance of your springs. I absolutely love this on the reformer. This is great for the anterior wall of your pelvic floor. So up the front is where you're more likely to feel this. Let's go ahead and do one more.
And then relax. Take your feet 10 thighs out. Pop your foot on the bar. You're gonna replace your straps over your shoulder rest or your posts so that they're out of the way. And just settle into the carriage for a moment.
Notice how it feels. Maybe you feel warm tingly awareness through your pelvic floor. Maybe you feel it through the lower abdomen. This is all good information. And then let's come up to sitting.
So roll over on to your side. Swing your feet and come up to sitting. We're gonna change our spring. Let's go ahead and change the spring to one red. So clearing the other springs carefully off and we're going to get into a mermaid position.
Bring yourself into a zed set. You've got your shin along the shoulder rest at the side and your other shin along the front of the carriage, hand on the foot bar. I like the hand to be placed slightly in front so that it helps and it's sympathetic to your shoulder alignment. Before we get into the mermaid, we're gonna do a little bit of work and movement with our pelvis. So this side is going to lift up.
So the side closest to your shoulder rest, lift it up and forward, and then drop it back down. Lift it up and forwards and drop it back down. You might find that your gaze comes around with your pelvis, that's absolutely fine. My gaze definitely wants to come and look at the beautiful view here. So you can just imagine you're with me looking at the blue sky in ocean.
Last one, and you drop your pelvis down. Feel how much more contact you're now making with your courage. We're ready to mermaid. So reaching your arm out into the free space. Reach both arms away so you grow tall and then coming out into your mermaid.
Slowly return. We're gonna do another simple one like that. Reach both arms so you get taller. We come over into our mermaid. On the next one, we're gonna go out there and we're gonna stay and play. So you reach we come up and over. Now in this position, you're gonna move your pelvis.
So you're gonna push the carriage away with your pelvis and then scoop it back in. Push away and scoop it back in. All the while this arm in the ear is gonna reach over a little bit more. So each time the carriage comes in reach a little bit more. We're motoring this movement from our pelvis, from our pelvic floor, scooping in, scooping out.
Lovely, lovely sensation. Let's just do one last one when the carriages in slowly return. Okay. We're gonna get off and walk all the way around to the other side because I think that when we stand up, we get the chance to feel the changes that we've already made in our body ready to do the other side. So I'm really looking at the view. You enjoy the view with me.
Find your zed, sit in along the shoulder rest. And shin across the front edge of your carriage. Remember to place the hand slightly forwards on your foot bar, and we're gonna have fun with your pelvis to start with. So your hit comes up and forwards and drops back and down. You might find your gaze going around with you. Pall this up.
And down. If you've done any of the maths classes with me, you'll remember the movement pelvic yawning. It's got that same yawning open feeling at the front of your hip. Let's make this the last one drop it down. Reach your arm out. Reach into both arms so your spine lifts up ready to mermaid. Brilliant. You can inhale as you go up and over and exhale as you return.
Let's go ahead and stay over this time, and let's do our pelvis leading. Each time the pelvis swings underneath, you reach your arm over. That little bit more. Lead with your pelvis. Think of your pelvis being a pendulum swinging underneath you.
Reach your head in your hand away. We'll go with one last swing. And then return. Well done. We're gonna stay with the same spring, and we're going to come round and face the carriage.
Bring your left shin across the front and your right leg back. So we're in a similar zed sit position, but we're facing the foot bar. So it's a little bit different. Place your hands on the bar. So you've got your left shin along the front edge.
Your right shin is back out of the way wherever it can go for you. Sometimes it needs to just scoop around the actual shoulder rest. Sometimes it can go in front. It depends on the day. We're going to send to ourself because your body's gonna list over to the left.
I want you to send to yourself. And this might be enough of a stretch for you. Listen to your own body. Breathe here for a moment. This left tip is getting deeper.
The thigh bone is sinking in. Now if you feel like, yeah, this is good. I've got some more movement to play with here. We're gonna go into a little bit of swan. So you push away, and then your chest rises up and through. You push away. And then your chest is gonna rise up and through.
I like to use the image here of tail feathers and chest feathers. So you're lifting your chest feathers up and you're sending your tail feathers out. Check-in with yourself. Has your body sunk over to the left? Are we staying center as center as you can. Last one, sending it back.
Tail feathers out, chest feathers up. And, really, swelled sun. So let's go ahead and do the other side. We're gonna bring the right shin across the edge of the carriage and then scoop your left one out the way. Hands on the bar.
And you'll feel the difference. I know we always notice the difference one side to the other. It's normal. Centering yourself as much as you can. And then we go into that lovely swan movement. So making sure that you're lifting your chest feathers up on your centering yourself to your leg, to your shin. Chest feathers up, tail feathers out.
And when it comes to your breath pattern, if you feel like there's thought space to coordinate that too. You're gonna be inhaling up, exhaling down. Inhaling up. And then exhaling down. Inhaling.
And exhaling. This is our last one. Up. Oh, glorious. You're gonna feel so good from that. We're coming into a quadruped.
So we'll change the springs again. I like to use the red and a yellow for this. You might find you need a little bit more feedback and support in which case you could go up to the red and the blue and go with the red and yellow. If you can fit into quadruped with your foot bar there, just leave your foot bar there. You're not faffing.
If you need to move it, go ahead and move it out of the way. We're gonna come into a quadruped position with our feet against the shoulder rest toes tucked under, but your knees are going to be together. So this is where it's a little different. So your knees are together. You've got your toes tucked under towards the base of the shoulder rest.
And all we're gonna do is press the carriage out and scoop the carriage back in. Keep your inner knees together press it out and scoop it in. Exhale out. Inhale in. So imagine that you're balancing something on your lower back or the back of your pelvis, and you're gonna keep it there. As you press out and in.
This is really bringing into quadruped what we did with the thighs and straps when you were lying on your back because we need to think about the r king away that we did when we were on our back. Last one now. And rest there. So for a moment, take your knees apart so they're hip socket apart. We're gonna do the mini cat. The mini cat is just the movement of your tailbone and your sacrum's tiny. It starts with your tailbone.
Your tailbone at the very end of your spine curling in and then your sacrum. Curling. It's really tiny. It's almost as if your sacrum goes up and back. Rather than just curling in place, it goes up and back. Maybe as if it's going around something.
Around something. Let's do this one more time just like this. Okay. Now bring your knees back together. So we're back in the position we were in a moment ago.
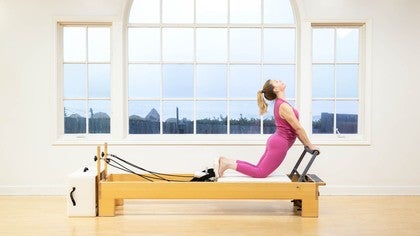
We're gonna do more of a full cat stretch now. But we start with that mini cat. So find your tailbone and your sacrum curling around. And then the movement continues until you're looking towards your knees. And then we're gonna repeat the quadruped we did a moment ago, your knees are together, you're maintaining the cat. And I always said on your back, when we are in different positions with your thi bones and with your pelvis and now a different orientation to gravity, it helps to focus our attention on different areas of our pelvic floor. So this is really good and strong up the front through that anterior wall.
It's lovely. Just do one more. And, of course, you're breathing all the time. And then rest there. Come sit on the edge of the carriage for a moment just to take stock of how everything feels in your body. Now we're gonna change our springs.
We're changing to one red and a blue. So you've got a red and a yellow right now. You're just gonna swap that yellow. For your blue. So red and the blue. Turn around now. I'm getting quite excited.
This is one of my favorite movements. So I'm I'm thrilled to get to share this with you. You're gonna take your straps. You're gonna take your hands through the little ones and grab on. I've got my right foot on the headrest, and my left is hooked underneath, so it's crossed.
Underneath my right leg. I'm checking for safety. I've got a little bit of space behind my bottom because I'm going that way. So do make sure that you're not gonna fall off the end of your carriage. We're gonna go for a little roll around the side of our pelvis.
Your right foot is gonna push the carriage forwards whilst you roll into your left bottom. And then roll around your left bottom to come up. I know it's great, right? So you feel all the tension melting away as you roll back. Remember to use your right foot to press four words. And what you can also do is if you pick up your head rest, it gives you some more feedback and purchase to push against if you feel like that's tricky to access without. So you press away roll through. And maybe there's a little spot that you wanna be, like, below the bear and just have a little wry the round and roll to release the tension in there. So important that we do these movements that release tension around the side of the pelvis these deep hip muscles that end up pooling on your pelvic floor and stopping it from being able to function fully. This is our last one on release.
Switch over to the other side. And hook in. I'm smiling because I can already feel the difference one to the other. So you've got your left foot now on your headrest. Right is hooked under And you're holding on. You're holding in this way so you can hang out rather than pulling on the court.
It's definitely not about the upper body. Push through your left foot roll around the side. Of your pelvis. You can use your exhale to roll, and it's okay if you're making funny faces as you do it, I'm definitely can face this as you meet those little niggly, grizzly, pops, and different things, the tension in here. Now if you think about your pelvis, you know, if you imagined a skeleton of a pelvis, those bones go in their hollow, weren't they? But our bottoms are definitely not. So it gives you a really good idea of how many layers and layers there are packed in there and how many very important nerves are running through there, especially for your pelvic health.
If we have your pudendal nerve, which runs through there, and then you can get pain in your pelvic floor, which is not a nice feeling. So if we can keep this nice and pliable and soft, we'll do one more. It will help our pelvic floor health. Great. And let's come to the middle now, and you can do this again, store with your head rest stuff if that was feeling useful.
Make sure still you've got space behind you. Bring your knees together and feet together, and we're just gonna roll your sacrum back now. Feel the freedom. Freedom, your sacrum, your tailbone, your sacrum, they roll back without the interference of your glutes and your hip flexors. That's the freedom that that little roll round gives you.
Push through your feet. Your tailbone and sacrum go first, and it's almost as if the two halves of your pelvis, those wheels roll back just a split second later. So tailbone, sacrum, and then the sit bones, the halves of your pelvis roll. So we'll just do one last one here in the middle, tailbone sacrum roll. And I know you're gonna be loving that one here.
Pop your straps back down. Let's come up to finish with a standing movement, we're going to do standing hip stretch with just one red. So we're taking that blue spring, place it safely down. Come to stand to the side of your carriage. Place your right foot. So if you're over on this right side right foot on the floor to the edge as close in as you can.
And then we're gonna have the ball of your foot onto the base of the shoulder rest, so we're not pushing the flat of the foot. It's more into the ball. Like, you're waving a high heel. Depending on your height, you may or may not have your knee on your carriage. My I'm pretty much square when my knee is on the carriage, but you do you. We're gonna start off pressing through the ball of your foot till the leg is straight and sending the arch of the standing foot down.
Keep going, allowing your right knee this front knee to reach forwards and then slowly rising up and coming forward. So the ball of your foot presses back, the arch of your foot presses down. And then slowly rising up and bending in. So we're gonna go again and hold it. When we go out here, this front knee, the inner knee that will not believe it on the inside is reaching forwards. And the nobbly bit on the back leg is reaching back. So we're tapping into this button fly that we spoke about at the beginning, the inner thigh pelvic floor butterfly.
So be here and breathe here, push into the ball of the back foot arch of the standing foot you're breathing. You've got the two halves of the pelvis. This one's rolling back. The other one is rolling forwards and then slowly bring that up. And come off the carriage.
Oh, feel the lopsidedness. Let's walk around and do the same thing on the other side. So you nestle in nice and close, hands are lightly resting on the footbar ball of your foot to the shoulder rest. Square yourself. And then we start with the press out through the ball of your foot.
Arch of your foot down into the floor. Really connecting there. And, of course, we've got the benefit of hindsight, so you might already be thinking about the adductor butterfly, that inner knee to inner knee connection, lengthening out rather than sinking down. Now you might find that when you come to this side this shows up the imbalance. So for most women who have a birth injury, you're going to have more tightness into that left side. So you might feel a little bit wonky.
Let's go ahead and hold it out in the stretch. Reach your front knee in her knee. So really specific, that normally bit reaching forwards. And the same internobly, but of your knee reaching back. Squaring your pelvis keeps telling yourself to square.
We practiced it on the carriage with our swan. Breathing. Breathing. And then slowly coming back up. Just stepping off the reformer now standing on both of your feet feel the differences, the learnings, how much taller you are.
I definitely feel taller, which is always a great feeling for me. And feel the the lift up from your feet right from the arches of your feet. Feel the connections that you've made to your pelvic floor in a really healthy way. Thank you so much. For joining me in this reformer class.
It's been such a joy to share with you some of my favorite movements for pelvic health on the reformer, and I'll look forward to seeing you again in more classes. Thanks, everyone.
Reformer Workouts: Beginner Classes
Mention
 |
Claire S (Teacher) |
 |
Beverly L |
 |
Nichole |
|
|
Karen J |
|
|
Carla R |
 |
Sofie van der Sommen |
|
|
Lisa C |
|
|
Janice M |
 |
Vicky |
|
|
Mary J |
 |
Rachel L |
|
|
Eva K |
Comments


You need to be a subscriber to post a comment.
Please Log In or Create an Account to start your free trial.
