Description
About This Video
Transcript
Read Full Transcript
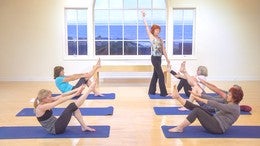
Hi there. I have um, read a lot of the requests on the website for introduction to intermediate and how do we progress from beginner level to intermediate. So I'm going to start doing some classes that will progress, really move through the material. It's a little bit more challenging to move through intermediate and advanced and it is at the beginner level because some people will never get fully through intermediate or to advance. It depends upon the physical level, depends upon how many times they are working out throughout the week. So it's not quite as generic as take 10 lessons and you'll be ready for intermediate because sometimes like some of the students that I have in my Monday night math class, we'll never do full, intermediate or advanced because I do one class a week, they're a little bit older. This stiffer, this is more maintenance and keeping them connected up, but they will not be able to move into the range of movement that's required at the high more advanced exercises. So I will be giving modifications and explanations as we move through and hopefully those of you that are ready and can grab hold of that will get and gain confidence in, in moving ahead. I'm going to use a little, this is a little cushy ball, not necessary. You do not need it.
It just something that gives an ability to find the inner size and I have the equivalent of a little pillow with me that I'll use in some of the exercises. For some people that's important, but for now the most important thing once we step into higher level is detailed to the quality because some of the exercises are the same, but the expectation of how you work your body, how much, how much you multitask becomes more expanded. So before we start on the actual mat work, just going to do a little something to get a sense of lengthening the back of the neck because all the times we lift our head for hundreds. Sometimes people just poke their head forward. But if you put your hands behind your head and literally lift the back of the skull up a little bit in, tilt it with an attempt to feel the length through the neck.
That's a sensation you want to get that you are lengthening the neck, not just crunching in the front. Also a sense of as you lengthen up through the neck, the whole spinal column elongates because you're looking to achieve that in all the exercises a lengthening out. So starting out with hundreds, I'm actually going to take my little ball and place it between the ankles to help me connect in with the inner thighs. So now we're working deeper than just the stomach. And while before it beginner level, I was just saying press your back into the mat.
Now I'm looking to get links from the tail through the crown of the head. So as I'm lifting up, I'm staying very, very long and working my innercise. So I'll do my hundreds here and as I'm doing this I'm focusing on lengthening out through the back of the neck and lifting up. So the shoulder, the two only the tips of the shoulder blades are touching the mat and the size along and I'm feeling my inner size and my outer sized squeezing together. The legs can go as low as can be held with the same integrity in the trunk. So I'll do two more inhalations that exhalation and one more [inaudible] and then I'm bending the knees cause I have the ball there and putting the feet down for roll up. Just once. I'll work with the knees bent.
I'm taking my legs further away now and working my innercise so I can feel the inner thighs and the hips narrowing and this length through the spine. So I'm not just packing, I'm checking that the low back is nice and long and the stomach is fully, fully engaged for me. I'm rolling up and then rolling down, not slowing down but B, becoming far more sophisticated that the role has nice intelligent articulation. So now moving into the full roll up with the legs, long, slightly soft knees. So the inner and our size of more fully engaged rolling up so the hips are almost not moving. And then rolling back down.
Okay. And rolling up using the stomach. So I'm not just crunching in and getting up our willy nilly, which is more beginner level. I'm really attempting to engage the front trunk and then rolling down, but keeping the spinal column very, very long. So there's a lot more detail coming in.
Every time I stretch my arms back, I checked it. I have a sense of a corset from my ribs through my waist, through my hips, through my inner thoughts. So once this quality is gathered, you can work a little bit faster to roll up and roll down and roll up. I wrote down from here, I'll let the ball be single leg circles again. I checking our two hipbones down. Don't want to be over-talked or arch.
So a nice long sacrum and integrity. I had both legs up with this ball. There would be an integrity in the hips. So without the ball with only one leg up, I narrowing these hips together to create a lot of stability in the lower trunk. And then I'm doing my circle and now the circle gets a little bit bigger.
It goes down around and up without me using w I should say without me losing my trunk. So nothing is flapping around. So the size of the circle is pending the stability of the trunk. So very, very important as you increase the challenge of the movement that nothing changes in the center. Once I'm finished with that, I give the legs a bit of a stretch. Again, making sure that my spine stays really long, not just arched up. So lengthening the sit bone way down, floating the leg down. I got, I've got my little ball there, although that's just not important. Checking that both hips along and constantly checking is my spinal column long. And is the rib cage really length and away from the hips?
The leg that's on the floor works very, very hard because it's a stabilizer. If I was doing this in the air, that would be the leg I'd be standing until it's the anchor for the movement. So for me, my left hip and my right hip are extremely different and I have much greater lengths of movement available to me in my right hip. So I have to work a lot harder not to let myself flop around and I slightly work a smaller size with the left leg in order to sustain my stability. These all detailed start to come in at intermediate level, rolling up from here, going into rolling like a ball, which I like to use before I do roll over, which is definitely intermediate. Some people consider it in advanced exercise.
So starting out with the normal easy position, rolling over and rolling up, rolling over, rolling up. So for articulation, what I'm looking for here by the time people are at intermediate is that they're not flopping down, but they're really connected into the powerhouse and there's a relationship between the front and the back body. So once I can see that four, I will show rollover. And then also how we break it down. So rollover is done from a lying down position. The legs are lifted up from here using the powerhouse. The hips are lifted and the whole, uh, trunk is lifted and the feet float down over the head to the mat.
Press, press, and the legs lift slightly. And this is the articulation, very, very similar to roll up except it's the reverse, the bottom lifts, and then the, there's a lovely stretch of the legs and then you roll from the top back down. So it's opposite to the sit up. So the roll ups with the stability in the control. So at intermediate, when we start doing this exercise, the challenge is to get the bottom up in the air and I will start people from a rolling like a ball where they first, they roll back in up a few times and then I have them pause here, stretch the legs, bend them back and roll back up, roll back, stretch back.
And one more time, roll stretch back and come up. Then we take it to the next level. So it's what I call bottom up. If you have your legs, a table Top, you roll up just the way you did, rolling like a ball, stretch your legs and roll down. If you need to bend the knees that fine. So you start to learn to power the pelvis up, using the powerhouse and control it back down and not flop down.
Some people cannot stretch their knees because the hamstrings are just not loose enough. One of the things you work for is a strong pressure with the hands down. So I'm really pushing my arms and engaging my upper, my lads and my triceps to activate this position. So from here, tabletop, push down with the arms, use the stomach to roll the hips up, stretch, bend the knees a little bit and roll down. And one more time. Roll up, stretch, bend the knees to roll down and come up to a sitting position.
So this we will over the next few lessons, keep developing into the full roll over. I just wanted you to see where, where you're going with this. That single leg stretches. So bringing the knees in. So here again, a lot more tension of length of the spine, beginner level. We pull the knees in Willy Nilly just to get the hips and lower back to stretch out. Now before we lift up, we lengthen the spine quite considerably and again that lengthening in the back of the neck and then working the stretch without letting the lower spine shift in any way. At all. So sometimes the angle that the knee comes in, it's a little bit different with a much stronger whole position and length through the spine. Bending the knees in, I'm lowering back down, lifting up for doubles, like stretches against same thing, same exercises, beginner level, this more attention to detail, really making sure the whole spine is long, showed up, only tips of the shoulder blades, touch the mat and coming back in long spine. And sometimes you can do a little stretch just to open and loosen up the back,
So the whole area of the waist is very, very long and active lengthening through the back of the neck to lift up. There's a tips of my shoulderblades. That's exactly the height I go up to and taking the right leg if there's a range of movement available higher and stretching the legs away from each other. So a lot of reaching through the legs, but only if the spinal column and the pelvis is very anchored so there's no flopping happening in the back or in the pelvis or in the stomach. So the weight of the legs, sometimes I'll work it like this to check that I'm fully engaged and I'm floating the legs from the powerhouse and not from the quad.
So there's a huge connection right up into the center of the body, lowering back down, placing the hands behind the head. So I'm not clasping my hands, I have my fingers broad and the elbows wide. So from here again, lifting the legs up, slight external rotation again, what happened to my little ball, my little ball is on the other side. So if you could play something between your legs, it's a lovely way to get the inner and outer side starting to work. So not so much quants, but really this narrowing of the muscle to the bone.
So here my legs are slight, slight external rotation so that the area of the hips are really active and engaged. Length through the back of the neck and lifting up with a tail. The tips of the shoulder blades are off the mat, keeping the inner thighs working and reaching narrow towards each other. I'm working the down without any change in the trunk, so there's usually a weakness in the upper chest and it wants to drop. The other thing I'm starting to challenge more is the elbows staying wide, which forces the chest to work harder and then bending the knees, putting the feet down on the mat for criss-cross.
I will have, there's a few different ways to prepare into it. At intermediate level you start adding crisscross, which is the rotation from side to side, but people have quite a bit that can be quite challenging. The obliques can be weak, so I'll often have people start with the feet down again, get this length through the spine and then curl up. So from here I'm rotating from the waist up as far to the right as I can and rotating this elbow way back. So that's all I'm doing. I'm twisting to the right and put taking my right elbow back, lifting way up, twisting way, way, way over to the left, lifting up, twisting way over to the right, lifting up, twisting way to the left and up.
One more time to the right and to the left and lowering back down again. That's one that will keep developing over the next few lessons as we go along. So from here, coming up into find stretch forward. If you can't sit up straight with your legs, with your knees straight, bend the knees, you're really looking to get the hips up and the lower spine up. If this is still a challenge, definitely put some books under the hips so that you can get the the whole spinal column lifting.
Sometimes you can have tight hamstrings are very tight, lower back, and this is as straight as a person can get. You want to do everything you can to get the spy lifted in the lower part. From here, this narrowing of the hips, I hope you can see it. I'm tightening my buttocks and taking my thighs towards each other and they literally, I'm popping a little bit higher, so nice lift. And then from there lengthening the back of the neck.
So there's a lift up through the spine to start to articulate the spine forwards. I'm really rounding the back but I am lifting in the stomach and then lifting up, lifting up. If you need to bend the knees to get that extra height. So big lift up through the spine, soften through the sternum. And Steve, you can get each segment of the back really working. You opened between the shoulder blades, lift and push back in the show in the space between them and then the open up the back ribs, trying not to drop down and roll back up, stacking the spine up. So a lot of sophisticated detail to get the deeper qualities coming into this exercise. So again, curling, rounding and rolling without letting the waist drop down and rowing right back up, lifting up nice and tall from here. The next one is open leg Brocker.
Hopefully by now you can balance, so some of you will be able to balance with your arms here. Some of you will be able to balance with your arms here. Either place is fine. The important thing is that if you are doing a roll op or the hundreds, the ribs are closed and the spine is long and the weight of the body is layered into the apps. It's the same shape here so the back is long but you're holding the control from the stomach muscles, so without anything changing you start, you're rocking back and you're walking up so eventually you want to be like a China doll and the danger in this one is that people collapse and hike up. So you want, if you feel that this is what's happening to you, see if you can find that place better to modify a little bit and control the roll in the truck because it's all about the articulation of the spine.
That's the goal in open, like Drucker, which we'll feed you into the more technical roles like roll over that we just started working on now coming into court screw. So rolling down, I'm taking the ball again to help me connect in more with my inner thighs. So beginner level, slight external rotation, check that the hips, the heels are right above the hips, the spine, as long and without anything changing in the trunk, beginner levels, um, corkscrew is literally massaging around the sacred. So you built up a certain amount of stability and strength in the legs and in the powerhouse and perhaps you're starting to take the circle a little bit deeper and then we start to get the bottoms up. So press the hands down and lift the hips a little bit.
Roll down, take the legs right down, left. Lift the hips up and I'm pushing down with my arms to help connect the lift to my um, chest area. Left down right and lift. If that is too much right down, left, bend the knees and lift your bottom up a little bit. Straighten the legs left down, right, bend the knees and lift a little bit.
So now we're really working to get as much strength in the lower abs as we were doing at the beginner level in the area of the chest and the shoulders. So it's a much more sophisticated evolution of the material and circling around and coming up. And then if you're nice and strong, you lower your legs all the way down to the mat and roll up for salt. So the legs, again, if you cannot sit vertical with your legs straight and down cause your hamstrings are back or tight, bend the knees or and pop your bottom up on a stack of books. Just get as high as you need to be so that you can actually feel what it's like to sit up straight with your whole spine straight. For some people it's a first in their life to get up there because they're so locked into the body is so pulled under. So it takes some work.
Be honest with yourself and see are you feeling your sit bones? Are you on top of them or are you back? Kind of struggling to get yourself up. So the goal is vertical, the arms out to the side. The first movement is twisting way over and now rotating a lot of opposition. Really pull the arms apart and the head goes down towards the knee.
Just like spine stretch forward, but deeper. So you're going towards the knee stretch, stretch, stretch, and come back up. Now I know not everybody's going to be as flexible as me. So you do, you make sure you get the oppositions stretch the hips stay square and even, and the bend and the twist comes from above the waist. Then you do, you reach in the direction of your little toe. So no matter what your range of movement is, even if you're stiff and tight and this is what you can do. Usually when I tell people to pull their arms apart, there's movement there, which means more stretch and more twists in the rib cage, which is what we're going for.
So reach and stretch to three and up. Twist and stretch to three an up and twist and stretch two, three and up. So up til now we really hardly done anything more than the beginner level material, but we've done it with an intermediate attitude and that's actually really the biggest difference is how much detail you're working towards and how much attention you're taking in this next part. So when we start going into swan and swan dive, I will sometimes have people put a little map, a little ball between their feet. Again, this is not essential, but you're looking to see if you can figure out how to get your upper hamstrings and your inner thighs the start to work.
So sometimes I'll have people just bend their knees, squeeze and lift the legs a little bit because this movement of lifting and contracting into the glutes needs to be utilized when you get into this one. So now that I've gotten those muscles to work, I am keeping them active and I'm bringing my hand at the beginning, quite high, maybe in line with my ears and just keeping those lower hamstrings and glutes active. I'm just lifting up, making sure the shoulders are down and the neck is long so the legs are active, the hamstrings are engaged into the glutes and I'm lifting up, getting length through the stomach and thinking of extending my chest forward, not back. So the goal isn't to push back with the arms is to release to stretch the front body. Then on the third one we'll start the beginnings of a swan dive where I bend the elbows a bit and stretch, bend the elbows a bit and stretch. I just get this sense of how the legs lift and stay up.
So if you notice I'm actually keeping my legs in the air, which will help as I get into the more active swan. So just to test it, I brought my heels together, narrow the hips, get those hamstrings and glutes to work and lift up again because eventually the heels are supposed to stay together. As I do the full swan. From here I'm bending my elbows making fists and you can rad today we'll wrap one hand over the other. Just there's a few different variations of hand hold. So with the hands pressing down, I'm lifting up.
Lengthening the stomach out is a few different ways this next position can be interpreted, but the most important thing is the sense of elongating the rib cage away from the hips so it's not just kind of collapsed down. As always, you want this tractioning of the trunk forward and up. Everything in plots we do is we looking to create traction and length throughout the body and then tightening the muscles to the bone. So with that in mind, bending my right foot, kick, kick,
Very important not to let this happen. Very common because the hip flexors and the size a tight, so less important than getting your feet to your bottom is making sure the hips are long and the stomach is long. So nothing is moving in this lower back. And then the chest works hard. Nothing is moving in the lower back and the chest works.
And one more time, nothing is moving and the chest and last one and the chest. And then from here pulling back, deepening the powerhouse into the spine. So I'm opening up my lower back arching. So not just pushing back to child's pose. This transition is being used to elongate the spine all over again and then rolling up again. I'm using my stomach, I'm tracking up the spine to get a sense from my tail through the crown of the head. A lot of length and this sense of a Corset, you want to get really, really familiar with the sense of a corset.
So now n Neck Pole, a lot of people have trouble rolling up from in, even in roll up with the legs straight. So I won't use, usually start this one. Um, sitting not on the floor to get the exercise a little bit more familiar and getting the parts that are important. Again, if you can sit vertical bend, the knees will get popular, pound them up on something. It's always the same cues. So I'm placing my hands behind my head, elongating the back of the neck. Often people will have their head forward. Say you want to bring the skull right over the shoulders and then literally feel like you live like cat.
Cat is grabbing the knap of your neck and you're being elongated from there. So starting with a big lift here, I'm bringing my head forward, but opening up the back of the next time, pushing into the back of the neck and then growling down or articulating the spine towards my knees. So this is not a long stretch. This is a compressed stretch that is far deeper in the is in separating the vertebraes out. And then on the way back I'm checking am I really lengthening the back of the neck and lifting. Then once I, the body is nice and long, just a slight elongation back not dropping. You may only be able to go a few, a little tiny bed and coming back up.
So big lengths pressing up into the back of the neck and starting to roll down PR, opening up this whole area is very important to press up into there to open up and lengthen the back of the neck as much as possible and that will carry through through the whole spine. And then on the way up I'm stacking up my back up through the rib cage and then this last part lengthening up through the back of the neck, lifting up some nice and long. And then as I hinge back I feel the spinal column like a straight line. One more time lifting, curling down, curling down, making sure that my shoulders stay wide rolling back up, lengthening up through the back of this neck. I keep pulling my neck back and up because again, what happens with people's necks as they start to go forward to the goal is to get it back and then nice and long and feel the connection of the neck to the whole spinal column. Leaning back a little bit, coming back up and then rolling down onto my back.
The next one will be bridge. Actually I am going to keep it in front of my ankles. I'm know I'm going to move it up between the size. So it's easy to have the legs here, but I'm starting to take the legs further out. So again, the feet and the hamstrings will work a lot more. So from here, a slight compression of the inner thighs.
More important. This wrap of the outer side is a band of muscle. That one's from your hip to your knee that you want to start to activate and slide it into the hamstring. So with that sense of narrowing the muscles to the bone, I'm rolling up through the trunk. So I make a long diagonal.
So from the knees to the armpits, there's a long flat line. The stomach is long, the ribs are not piked up. And then I'm articulating all the way down through the spine, making sure I elongate the tailbone. If the feet are closer in, there's usually less of a tendency for the hamstrings to work more the glutes in the back. There's nothing wrong with that. And sometimes I will use that for people depending upon the condition of the client.
But if you want to kind of get more of a full challenge into the back of the legs and the spinal column with the legs being further out, much more useful than when, um, the legs are closer in. It makes the legs have to bear a lot more of the stress of the pose. And later on when we develop this exercise, that is a much more important part. So from here we'll roll over into the sidekicks. So a lot of people work in this position and that is fine.
If you, one of the people where my little towels that are working because you have neck problems or this position hurts, I would put a towel between your arm and your head. So literally you're looking to have your body, your neck more or less straight. Um, versus right now my head is a little bit on a diagonals. I think for me, probably here would be the right position and I have my legs on the diagonal forward. For those of you who can be with the elbow bent, that is a position you're striving to be in.
But the big thing now is, is a spy long again or is it kind of crunched down? So from your elbow I will sometimes place people with an elbow, your shoulder and the hip against the wall and they feed forward and it's quite regulatory as to where the alignment is supposed to be. So now I make more of a fuss. Are the hips really stacked up? Not Falling back because that's the aspiration of this exercise and it's a more length and integrity. So the head becomes a very important part.
Usually the head falls down in forwards. He want a very long neck and both shoulders down and literally can you create this link through the whole truck before you even start the exercise. So moving right into the first one, which is forward and back, I'm checking that my hips are stacked and taking my leg in front without anything changes, anything changing. In my trunk. So I would definitely recommend starting with rather small movements because the side of the movement is monitored by the control in the rib cage, in the buttocks, in the ribs and checking all those hips. Really Stack one on top of the other.
This will be my last one bringing the legs together. I double check that my hips are still stacked and take the top leg and turn it out a little bit. Now one of the things I notice is is this top hip long or as it started to collapse down cause ideally one hip should be right on top of the other and again, even though the hips along is my head long in our positions, a lot of work just holding the position without anything changing. I'm starting my sidekick so I often at the beginning we'll have people really swing the legs just to get looseness in the hips and start to get mobility because most people hips are really tight and stiff and they haven't moved. Once we have that ability to move down, we want to start to control it more so the hips are not flopping around.
So I am really anchoring this pelvis down and long to keep from moving all over the place. And then I've done five to eight of them. Slight rotation again is my hip stacked up on top of the other one and the little circles, little circles are usually done in front and that's not correct. The heels are together, half in front, half behind, half in front, half behind. So very importantly, integrity. And if your hamstrings and glutes have been woken up a little bit earlier, you should start to fade.
Feel them working quite a bit every time you go to the back. Then back, same thing. Half of the circle has to be behind. Half of the circle has to be in front. Now we add to this, the passes to the side, so we're adding more material now. Hips along, sliding this leg up to the knee without letting your pelvis get short from and checking the hips stacked. This knee is as open as it can be without the hips becoming unstuck too.
Some of you will have your knee quite forward and that's where you're at. Then you develop the light out and bring it down. So nothing is moving in the pelvis, lifting and bringing the leg down, lifting. So if you notice I am not moving my pelvis at all, but I'm actually working really hard now. I'll reverse it. I'm lifting and bringing the light down and lifting and bringing the leg down.
One more time. Lifting and bringing the leg down and now working into the inner thigh, which we do it in me at beginner level, I'm checking on my hips stacked. Same thing, just more detail. Turning the leg out, lifting it, lifting it, checking that I'm very even here and I can do this with my foot flex. I'll do a few more with my foot long and reaching and then I do a few circles, making sure that the leg is really reaching out and my upper body is still long so I'm not compromising my upper body for the sake of the lower body. So if anything, the feeling is that that lower leg is being grabbed by somebody and being stretched in one direction. And I'm going, no, no, no.
I want to go in that direction. Then from here, bring the legs long and together lifting the legs and lifting the legs and lifting the legs and lifting the legs and lowering the legs down. Coming into the little beats again. Sometimes I will have people bend a bit and lift just to find these hamstrings and glutes, extending the legs out and then doing the little beads, staying very long in the spine, making sure the hamstrings are bearing the weight and then sitting back into the heels to stretch out the back.
So I will be with my back to the camera for this part so you can see the variations. So here we are woopsie daisy. I'm going to be on my other side with my back to the camera. So I'm checking my hips should be at the back of the table. My l my elbow and my shoulders should be right at the back of this mat here. [inaudible] nice and long feeling length up through the crown of the head and down through the foot. So for me, I'm lifting the leg, hip height, slightly externally rotated, and the external rotation comes from the hips and the glutes, not just from jamming the knee out.
It's right here that I'm controlling all of this movement. So without the hip moving, I'm doing a test run. How far I can take my leg forward and back usually to the back is not as easy to the front because of the range of movement that's naturally there. But what we're starting to do is really strengthen in the glutes, strengthening the upper part of the hamstring so that at advanced work we can make the movement much, much, much bigger than I bring the legs back, check hip on hip, swing the leg up and bring it down. So what am I watching for?
I'm watching that my hip stays wrong and on the way down and slightly narrowing and tightening in the buttocks, lift and down, lift and down. And one more time lift. And I'm going into little circles, checking that my legs, my heels are still together and my trunk is long forward, up and back. This is such an important part. Forward, up and back. Forward, up and back. Forward, up and back and back, reversing it and forward. Back up, forward, back up, forward, back, forward, back up. Forward adding in passes, which is definitely not part of beginners. Hip on hip, long waist, bending the knee up and checking. How far can I get the knee to open? Nothing changes in my bottom and my pelvis as I unfold the leg.
So you work the range of movement that your body is able to give you. And some of you, as I said before, the knee will be quite forward and you may have the exercise happening at that angle, which is fine, it's correct. Then reversing it up, bend the knee, slide the like out, up. Then the knee, slide the leg out. One more time. Up. Bend the knee and slide the leg out. Bending the leg in front, turning the inside like out, lift it. So this is a lot of work into the inner thigh, lengthening the leg and long open circles with this leg to lean out the inner upper area of the thigh and at the same time check is the neck long is the rib cage.
Long as the navel pulled in and up is the back being supported from the stomach and the back. So there's an integrity. Both legs come out
Some of you may not be able to do that yet, in which case you can try starting up and then see if you can roll down. And that usually jumpstarts you. If you can't, you come up again, extend the leg and roll down. Now once you've done both sides have some little tricks of the trade. I'm coming back to my little ball, which you don't have to have, but you want the ball between your legs. If you have something like this to engage the inner thigh and give you that sense of firming up the inner thighs cause usually the legs are kind of flopping out there. If you notice, I'm very slightly externally rotating to get the out and I'm doing this from my, the sides of my hips. In my sit bones there's this narrowing.
It's like I'm taking the hips and anchoring them in to give the upper leg stability. So from here rolling up, just like we do at the beginner level, rolling up, trying to get more roll and roll up. Now we'll add down and up, down and up. If you can do it. If you have your knees bent, you can hold like this. So you start to get more ability to control the strong and then lower and lift the legs lower, lift the legs lower, lift the legs lower down to the floor and rolling onto the stomach for swimming. So swimming is similar like Swan. Remember we connected into these muscles right here.
Your arms are going to be long in front of you and first of all just lift the legs and the arms up. So the glutes, the lower and middle back is working and the arms are working. So you want to lift and lower a few times to get familiar with how much your back body works. And then you start to doggy paddle. Imagine you're balancing on a rock in the ocean and you're just above water and if you dip down too low, you're going to be drowning. So you have to keep lifting, setting up, lowering back down, sitting back into your heels again.
And now I'll turn sideways for you because we started to get into mermaid. And Mermaid is a beautiful, beautiful exercise. Again, you have a sense of lift if you can. You're sitting, you start by sitting into the heels and bringing the hips to one side. Now not everybody can sit like that. Some people have to have the knees wider. Occasionally people have to sit cross legged.
Occasionally they just stay here because they just, the hips won't allow that slight shift. But if you can, you want to be on one side and there at the beginning you grab your ankle and bring them farm up. So most of the time, this is the starting position. People are kind of like falling down. So you want a lift the chest as far as you can, way way up. So from this hip to this armpit length. Now the other thing is this arm, straighten it and get it right by your ear if you can.
It will want to be dropped. So you want a huge tractioning up of the arm and bending over. So there's a big, big, big stretch in the side of the body. This hand is pulling a huge amount, lifting way up, placing the handout. If you notice, I've lifted these ribs a bit and stretching the other side. So this is a little bit more of a long trunk. Here I go, flying up, lengthen even further out, up and out and long lift and making sure the ribs on this side are not dropping down, but in, so there's length in both sides of the hips.
I'm thinking both sides of the hips and then once I start stretching, it's this side that's getting a huge, huge, huge stretch. You can add this last wrap down of the head to get deeper and coming back up. Now there's a fun transition here. You lean on this hand, stretch the legs out, swing them around and bend them back and you'll have fun figuring that out. It's just a lovely little graceful thing to do. This arm comes way up, lift, hey, way, way up. So now I'm stretching all of this side if I need to.
I'm using this hand to keep me from falling down and stretching over, opening up the ribs. It's not so much how far over I go, but how much I open up the side, body, side, ribs, and then lengths and out in opposition. Flying up, lift and stretch. Lift out of the hips and long. So if you've been warming up your body the right way, there starts to be this buoyancy that comes into the trunk because you've been stretching it and you've been toning a lot of the supple muscles, which is a wonderful, wonderful feeling. And then from here, stretching the legs out in front of you and we'll go right into seal. So bending, I'm bringing my hands in front and just like rolling like a ball. Clap, clap, clap and rolling back to the shoulders and coming up.
Now at intermediate we start to have a balancing at the back. So just like the bottoms up and open leg rocker, there's a point of balance right on the sh just in the shoulder blade area. So clap, clap, clap. I have to get my bottom in the air and balance here. Clap, clap, clap, roll up again, clap, clap, clap. This is very key for all the intermediate material.
This ability to get your bottom up in the air. If you can. You put your hands down and push, clap, clap, clap. Come up and grab. Clap, clap, clap. Balanced. Push, clap, clap, clap, balance up, clap, clap, clap, which you feet down. And I hope this gave you some clues as to what to do. What I'm going to keep doing is adding on more detail, how to approach intermediate, what to look out for, how to add more and more complicated exercises.
Maybe even move it into advanced work. Cause the mat work is truly the gold. The equipment is wonderful, but you don't need anything for math work. You don't need equipment you don't need. If you know how to work, you can be all alone in your room by yourself and really transform yourself. So I firmly, firmly support you. Get as good as you can, keep practicing, have a lot of fun.
And I hope you found this information useful. Thank you.
Beginner Mat Workouts: +50-Minute Classes


Comments


Thank you!
Ginger

May being a teacher continue to bring you much joy.

You need to be a subscriber to post a comment.
Please Log In or Create an Account to start your free trial.
