Description
About This Video
Transcript
Read Full Transcript
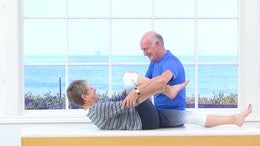
Hello, I'm Alan Herdman. Today we're going to do, the first class we're going to do is absolute beginners. It's not just pre polite is it's pre pre is. And what I like to do when I've got a new person is to just take them through some very simple moves so they can find out how their body works and get the feeling of the very basic like where your abdominals are, where you're the Latissimus Dorsi is, how the the leg moves. Because a lot of people just don't know when they come in. So rather than throwing them into some complicated exercise, I want them to gently feel what's happening, which will mean they can take it away with them and practice on their own.
So we're going to start in what I call a semi supine position. And I think the setup for the exercises is almost as important as the exercises because if you're not in the right position before you start, the exercise won't work. So the semi supine position has to change depending on the body that you're working with. So I have demonstrated here we've, she'd like to come up on the table. I feel as if I'm in a cookery class here with if you'd like to lie down on Sunday with your knees bent.
Now what I want is to think of each part of the body that is in contact with the mat. So you have your legs at 90 degree bend and the feet are in line with the hip joints. They're not together, they're in straight in line with the hip joints. And I want you to think of your foot as a triangle. So from the front of the heel across the metatarsal as it's a triangle. So this is the apex and this is the base.
So you feel that on the floor throughout the whole time your feet are static on the floor. So we get the triangle, which helps to hold the knees in place. We then go to the pelvis and again, think of another triangle. The apex is the Coccsyx and the base is across the top of the pelvis. So that gives you the neutral pelvis that we need to work on. We ignore the lumbar spine and we go to the rib cage and I want you to feel that your ribs are just very gently, almost spreading along the mat that's comfortably down on the mat.
And then you go to the head. And what I want is this part of your neck to be completely relaxed. So if you're too far back or too far forward, it has to be padded or put into a better position. Now with Sandy, you see that her head is quite far back, so there's quite a gap where her neck is. And I would like that gap to be slightly closed, so it's a little more comfortable for her. So we can use, you can use folded towels or sometimes a bed pillow for this, but I'm just going to bring her head up and just close.
So I close that gaps. In fact, the muscles of her neck is, is are much softer. How does that feel? Does that feel comfortable? Okay. Now we've got, we've got all this in place now. Next we're just going to think of the, the lumbar spine. Well, we're not gonna think about it actually. We're just going to allow the weight of the organs just as the abdominal wall is just settling down onto the bed, so there's a softness here. I don't want it to be imprinted and even when you're doing some of this basic work, there's not a pressing down to the back.
It stays soft throughout the whole thing that do you mind staying here while we do this? Then lie down in this position, have your tailbone towards the front of the beds that your head is on, on, on the bed all the way. Have your feet roughly hip with the part 90 degrees and think that triangle from the, the apex is the front of the heel. The base is across the Metta Tassels, not go up to your pelvis and I get feel at other triangle from the apex is the Coccsyx and the base is across the top of the pelvis. Now go to your rib cage and just feel the ribs are really nicely spread onto the floor. Just relax onto my hands here. Just let go. There we go. Just actually, if you just imagine you've got a pair of hands around your rib cage and just let your ribs soften into the hands, you can choose whose hands they are.
The choice is yours. Now Bend your elbows very softly. Good. Now just imagine someone's taken hold of your head. V in fact, do it. Just take hold of your head with both hands and just give yourself a little traction on that. Just gently pull the head away and then bring your arms by your sides. Now think of your lower back or the area around the lower back and just feel the weight of the organs. Just gently dropping down to the spine. Okay.
Close your eyes and just relax completely that without thinking about anything else, just take a deep breath in through your nose. I don't care where the breath goes, goes deep as you can and then slowly breathe out through your mouth. Just think of the air breathing out through a straw. So breathe in and slowly breathe out. Just relax. The stomach muscles. Don't try and held them in that the diaphragm drop as you breathe in.
So breathe in through the nose and breathe out through the mouth. Just relax the shoulders, just a little here and breathe in and slowly breathe out. One more time. Breathe in and breathe out. Now this time I want you to think of the distance, the position between the hipbones and the low rib. That's the area you're going to concentrate on and as you breathe out, you're going to think of that distance narrowing.
So from the low ribs and the HIPAA, you're going to think of narrowing the waist. Just imagine you've got a bay wide belt around the waist and you're going to just tighten it so you're getting the closest knots you can to the end. So take a deep breath in and as you breathe out, gently narrow the waist. Think of that belt tightening and when you think you've done enough, just get a little another notch and then relax. Breathing in and read out. Just pull in, just relaxed the ship. Let's just meet in and breathe out and breathe in through the nose and slowly breathe out through the bath pool.
One more time. Breathe in and breathe out and just feel the muscles around the waist. Just bringing, coming in to the center. You should feel the obliques and the transverse on that. One more time. Breathe in and breathe out. Do you feel that through your waistline was you? Do that good?
Just watch for a second. We're going to from there, just turn your heads in this direction. We're going to take it into a very small pelvic tilt. So you start the same way. You take the breath in and as you breathe out, you gently narrow the waist and then take it into a small tilt as if your tailbone is curling through the legs towards your navel. And then just relax back down, breathing in.
So it's as if you're rolling your lower spine, up into, into a ball. So take a breath in and breathe out. Draw narrow the waist and curl the tailored drawing, the navel down as a tailbone comes up, and then just relax it back down. Breathing in. So you're feeling the lower stomach muscles working. Just quite a small one. You read the in and breathe out narrow first and then just tip just to there.
No more than that, just to get the lab at working. So you feel it through here. And then relax that. Let the breath go out very quietly in through the nose and out through the mouth. But I don't really want to hear the breath. So breathe in and just let it go very softly as you're as if you're playing through a straw. One more time
So take it baby almost to the rib cage if you can. So take a breath in that's better and breathe out. Now draw in and curl the tailbone. Just lift it off. Make sure the feet are firmly on the ground. Hold the breathing in. And then as you breathe out, slowly go back, dad, go a little higher on this. Breathe in and breathe out and curl up. Curl up, lift, lift, lift, lift, lift, lift, higher up. You Go. Up, up, up, up, up, up. Good. Hold it there.
Breathing in and slowly breathe out as you go down. Okay, rest for a second. What are you thinking when you wrote down, when you wrote down from the car, what, what are you thinking about as you do it?
Which part of the body are you concentrating on when you go down?
So when you wrote down, you think of what's happening through the stomach. So you lift your pelvis up, ignore the back, and just feel the cold. I'm from through the front of the torso. Okay, don't think of spine. Let's try it. Take a breath in and breathe out and curl up goes. If you can go as far as your rib cage.
Now hold that breathing in. Now slowly think of softening through the front of the torso. So start right where the the breastbone is. And now take it down bit by bit. Slowly breathing out as you do it.
And you get a much softer, easier curl. Breathe in and breathe out and curl up thick like a hammock in this position. So the stomach is well that that read in. And I'll slowly go down. Pull, pull, pull, pull, pull, pull, pull. Okay, one more time. Breathe. Slowly. Go down. Not too deep, not too slowly. So breathe in and curl up. Up, up. Hold that breathing in. And now soften from here. Breathe out, slowly. Go down, pull in, pull in more, pulling more, pull in, more. Pull in, more right to the pubic bone. Pull, pull, pull, pull. There you go. So in fact, you're getting the a good workout in your downloads straight away.
Last one. Breathe out as you curl up and curl. Breathe in and slowly breathe out as you go down again. That's good. How does that feel? Okay. Holding you back.
It focuses on the center much more. Okay. Right. Just let's release the shoulders a little. Fold your arms very lightly like this. So the risks are in the center of the sternum, so you're up in this position so they stay, stays in that position.
Breathing in, breathe out to come through center and then breathe into, go over again. Soft, easy breath, keeping it up. Set me straight on that. Okay guys, far as you can, but try not to lift the opposite shoulder off the ground. Stop the shoulders down. One more to each side. Got a little further tip just over this way. There we go. So you get the pull through here. Nice. Come back through the center.
This time you're going to change the breath. You're going to breathe out as you go. Just watch this position first. You're going to breathe out as you go over. Then as you breathe in, you're going to take that elbow in a quarter circle up over the head and around to the other side and then back. Okay? So you're going to breathe out, go over, breathe in, and reach all the way around and then back.
So you're gonna make the breath relax last throughout the whole movement. Take it across. And think of that quarter circle going around, goes far behind the head as you can, and then come back. And Joe, I would like the shoulders to come up. So when you go into this position, the shoulders are up into it is.
So when you come back, you take them back down again. So you're getting a full rotation in the shoulders out. Took a over a breathe in a, this elbow stretches way back that the show does come up. This other pulls down and the shoulders come back into position and then back. Okay. And then the other direction, that's it. Keep this shoulder down. There you go. And a circle.
This elbow goes straight. That's it. And I'll show the blades come down and then back. Okay. But two to each side. But again, allow the shoulders to slide up towards the ear so you get a full rotation and it doesn't matter if you don't go too far back, it goes as far as you can to begin. And then just rest your arms when you've done the two. Ideally the torso does not move itself.
It's just the shoulders that do the movement. Okay. And rest your arms by your sides. Now on this one, do you want to come down on your bed again? Thank you very much. That's was great.
And it's really to tell people how far they can move their leg forward without moving the pelvis. So if you're in this position, you're lying down. Let me show you this way. You're in the position where it's sagging. As you breathe out, you're going to slide the leg awake, making sure that the pelvis is completely straight, there's no pelvic movement or low back movement at all. And then you breathe in and bring it back. And then to the other side, I'm going to ask you to put your fingers onto your hip bones here to feel what happens as you rolled out. Slide the leg out, and then come back. So you're going to read out to go out with the leg and then into come back. But let's do it all together. Put your hands back onto your hips. Let's have you straight on that. Okay.
At right. Okay, good. So just think of the heel sliding away. So just don't try and keep the foot pointed. Just let it slide away. But the focus is what's happening to the pelvis. So breathe out as you slide away and then breathe in and then come back.
If you feel the pelvis move, you stop the movement and then come back. It doesn't have to be completely straight, but the pelvis must stay absolutely still little slow as you go out. So you can feel what's happening to this whole area. The pelvic area.
Draw through here a little more.
That's it. Yeah. Do you feel the difference on that? And then back. So you feel that as your arm goes back, the shoulder blade is sliding in the opposite direction rather than doing that, try that with that sensation of opening that angle out. So we do have the right, just one to each side, right side and then lets, I bet, think from the elbow to the rib cage, opening out as much as you can and then come back.
You can breathe in as you do it. It's up. Change the breath. Occasionally. Keep your arm base straight as you go back. [inaudible] okay. That's it. Yeah, that's it. Really stretching through your arm. Good. Okay. At rest, the next exercise we use physio ball. Um, not everyone has a physioball at home, but it's quite a good thing too to sit on to use it in the house. Said, we're going to this. We have two balls and we're going to do, we'll we'll do the first exercise with two people and then we'll change over. Ideally what I'm aiming for is to have a ball the size that when you, your knees are bent, you'll lower leg is parallel to the floor. Okay, so we're going to start with the ball tucked in to the back of the thighs there so that you're going to know from there, that's where your heels are going to stay.
So can you put your heels in the center of the board just to that. Okay. Now just straighten your legs in this position. Okay, wait a minute. Can you bend your knees now straighten days and push the ball away. There you go. That's it. So the ball moves away. That's it. So what you're going to do, you're going to focus, first of all, you're going to focus on this narrowing of the waist.
And then as you breathe out, you can start narrowing the waste even more and slowly rolling the ball towards you. Thinking of the very low abdominals pulling in. Think of a gentle movement in the pelvic floor, but not very much. And pull the knees as close to you as possible, and then breathe in and stretch away and breathe out and pull in, and then breathe in as you go down to get a lot of work in the deep abdominals on this. Okay? Now, if you don't have a ball, what you can do is lie down and just put your feet. Imagine my hands on a, uh, by arm. Here is a chair. So you have your heels on the chair and as you breathe out, you just draw your heels towards you and then slide them away at ball is good, but a chair will do. And that back, in fact, would you two work together? Whoops. And you two work together.
Come together and just hold the, um, so low down. Just imagine that you're s they sliding away in that position. Okay. And as you pull back, you're gonna draw in here deeper, deeper, deeper, deeper, deeper. That's it. Yeah. And how's that? Do you feel that working there and the closer you bring your knees to the, um, the rib cage, the more work you get into the Leb dominoes. Ah, two more balls to you loaded. Would you like a ball?
Just try a couple of them.
How does this feel? Do you feel that working here slower is better? Slower as good? Yes. How does that feel guys? Do you feel it working? Relax your shoulders there. That's it. I think I like you with your pad and your head might take that home.
That's it. Look, we'll count them before you go. Okay. And rest. Okay. With the same ball. You put your legs over it so your thighs are at right angles. This doesn't work with the chair, okay? And what you're going to do, you're going to do a hip row, spine twist, but with your legs on the ball.
So the ball allows you to move all in one piece over. But what you have to be back half with it, the knees must stay together. So in this position, we're moving to the left. So you initiate the movement from the opposite side. So you take a breath in. As you breathe out, you allow the right hip to come off to allow the knees to stay together.
As you go over, you pause the breathing in, focus on the opposite side of the waist, the obliques, and slowly bring the ball back and then over to the other side. Okay? But Watch, make sure the knees stay together on that. So just
What she needs to keep the slide this leg up a little more? Yeah, you go. Okay. But make sure the rip stay down as much as you can. You can use this. Yeah, use it a little more. I'd come back, pulled back. Poor, poor, poor, poor, poor, poor. That's it. And rest. So y'all really watch you're practicing to do is gradually work. When you do a spine twist sitting up, you're focusing on the right part of the torso to do it rather than trying desperately to get round. Okay, let's remove the balls.
How'd you feel? Good. Okay, we're going to sit up. No. Ideally this is done on a chair. But anyway, let's just, what we'll do at home, if you're doing a hope and program, if you sit on a chair to do it with your feet firmly on the ground, it helps you to stabilize the pelvis. Okay? So we'll do it standing up to take, give you an idea of what it's like. Okay. So standing up, complete standing straight.
Again, imagine how it feels if you're sitting with the um, the knees at 90 degrees firmly with the feet firmly on the ground. So all you're going to do is in this position, as you inhale, you're going to be vade gently push your hands behind you and then inwardly rotate your arms as it goes past the hips and think of your fingertips stretching to the floor. And then we out to come back. So you longer, just before you start, I want you all to imagine that someone standing next to you and just giving yourself a nice elongation at the spine. So feel that lift through the top of the spine and now breathe in. Push your arms back. Cause if you're pushing almost, if you're in water and rotate, lift the sternum.
We'll take your arms outfits on and lift your sternum a little more and then breathe out to come back
But don't push your ribs out as you do it. Just a gentle push back and the lifting of the stone. But again, we're working to hold this around the waist as much as possible. Okay? Okay. Now sitting down on your mat, cross-legged, like so back straight. Now take your fingertips or the fingers together like this. All of the three knuckles touching and place it the fingertips in the center of your breastbone and you must keep your, your knuckles touching all the way through and allow the shoulders just to relax in position long, long fingers. So the risks are way. Now as you inhale, you're just going to age gently.
Turn to your right, keeping the nose in line with your fingers. Breathe out to come through center and then breathe in and go to the left. Keep the spot in lifted as you go through a back. So you feel the movement in your spine between the shoulder blades, the thoracic spine, and in turn and then breathe out. Come through, keep the knuckles together all the time. And so the know stays in line with your hands all the way through.
It's the less breathing when you breathe out. Ideally, I don't want to hear the breath in through the nose. Oh through the mouth. That's, that's good. Let's try something. Come through the center, breathe in and go to the right. Pause there, breathing out that breathe in and go a little further and breathe out to come through center and breathe in and turn. Elongate the spine. As you go. Pause, they're breathing out. And then breathe in and go a little further.
And then back. One more to each side and turn, breathe out. Just relax as you breathe out and breathe in and turn a little more, a little more [inaudible].
Breathe in. Relax the shoulders that yes, that's it. And or you good. And then breathe out and dressed very good. And stand up and put your arms by your side. Okay. I want you to think of using these muscles here. So now at home or wherever you can, if you held on to something to do this. Okay?
So can you come into the center too with your partner and you're just going to hold them like so not too far away that separate your legs and base likely outwardly rotate the legs and without pulling as you breathe in, you're just going to think, think of the w, you know where your, um, the, the leg bone, the femur joints, the pelvis. Think of that narrowing. Think of it coming together. So what you're going to do is to slowly lift your heels and squeeze that part of your leg together and think of staying up that and then slowly lower down. Try not to hold onto your partner quite so much as that. And I just feel it. Tightening. Squeeze, squeeze, squeeze. That's it. That's it. That's it. As Dad,
Girls don't express it. Pull away from each other. [inaudible] pull away. That's it. And a squeeze. Squeeze. Do you feel that in the top of the legs and, and uh,
Now that can be done anywhere. You can do it supermarket queue while you're cooking or whatever. But gradually you don't need your partner. You just need to feel that feel pulling up. It works the top of the legs, the glutes and the inner thighs. Okay, now take, hold your partner again. Very, very likely this time, parallel legs app-based straight. Now without moving that, we'll start with this side first.
Just lift your right leg up. Just what? We'll just do one side, just this side first. Just so lift your right leg up now. Feel your balance. And now just gently lift your palms up away from your partner and hold the balance. Good.
And place your hands back and take the leg down the other leg and lift up. Oh, take your hands away and take them down. Others. This, the side here, changeover. And now before you do it, really get the feeling of what's happening around your tummy. This narrowing of the waist. Now lift one leg up and take your hands off and place your hands back.
Now think of leaving your head where it is now. Slowly lower your heels down. Slowly, slowly, slowly that keep that lift and everybody lift the right leg up and take your hands away groups and place it down and feel it the other side and are lit up lower down and the other leg off. Hands away and relax. Thank you very much.
Comments


Love the cues! thank you!


You need to be a subscriber to post a comment.
Please Log In or Create an Account to start your free trial.
