Description
About This Video
Transcript
Read Full Transcript
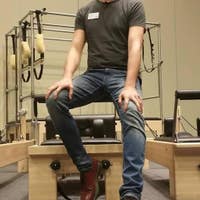
Welcome to this class. This is Aston Kinetics for anybody getting ready to do a workout, a pilates class, your workout at home. This is a great preparation and we're going to start with a pretest. I've asked this group to do the roll back, the seated roll back as a pretest for the class that we're going to do, so you might want to join us now. Christie's going to go ahead and just call out the queuing.
Stay curved almost like your waistline is being held back and then straighten up the spine from the bottom to the top. Inhale, we'll do it again. Exhale and roll it back. Just finding your way to the mat. Almost her mid, low back. Good. Inhale and exhale. Keep the curve coming forward. When your shoulders are over your hips, you can start to begin to straighten the back. Inhale and exhale, roll back.
We'll be doing some movement designs on the chair and we'll come back to the maths later. Okay. So I have you standing for a moment because I'm not going to have you do something that I want the people at home to do and to take the time. And that is I want you to find a full length mirror, if not a good window that reflects your body and look at your body from the front and what do you see now? Have the nice voice in your head. Okay, no cellulite, no seeing anything like that. Just look at your body and see what you see. Do you look pretty, even one side to the other or are your hips shifted or your chest is shifted or maybe your head is tilted? Just take a look. Okay.
Then turn to the side. Get settled and feel the weight on your feet and I can have you do this with me right now. Just sit with your arms by your side. Just stand there. Feel how the weightbearing of your whole body coming down is distributed on your feet. Is it mainly towards your heels? Is it mainly on one foot or the other? Is it one side is on, the weight is on the outside of the foot and on the other foot is on the inside.
For example, register the weight-bearing. Then look in the mirror that you have at home and see whether or not something goes forward. Something goes back, like my pelvis goes forward, my chest goes back, or my pelvis goes back, my chest goes forward, or does my upper chest round and my head goes forward. And when I look, I see this curve in my upper body. Don't judge it. Just notice it. Okay. So turn the video off for a moment.
We're back.
Now there are ways of modifying chair, so please don't just run right now and toss out all your chairs out the window. But I just want you to appreciate that the chair design is such a strong influence on us, whether we're eating, whether we're at the desk, whether we're working at the computer, et Cetera, et cetera. So the piece here is feel it.
How far can you turn to the right and compare that, how far can you turn your head and neck to the left?
Third, we'll actually be including the exercise, the pilates exercise, the seated roll back. This will be number three, four. What I want you to do now is to touch the floor with your index finger and just feel what you do to get there and get back. Feel what your body does to touch the floor
When you have comparison, you say the way I did that made me feel worse. The way I did that exercise. I now have limited range. Something's wrong. You become your own feedback system. I feel it's very, very important. So let's just start with one of the ideas we'll you sit forward so that you're just sitting on your pelvis and not the back of your thighs that far forward with no coaching. Other than that, turn your head right in left and tell me what happened. Do you feel like you could do three 60 so what do you think? What causes that?
I'm going to have you roll your pelvis back and your thumbs or go down and roll your pelvis forward. And this time really notice what the rolling of the Palestine to your chest, your head in the neck and what it does when you have bring the pelvis under the head and the neck. Beautiful and again
So he got them in your hand. Remind them to be soft so nobody can see. Isn't as clever of me to have you cover your stomach. Does it feel like a big stunt? You know you're actually pumping. Okay, now relax the ABS and do this movement again and come on out of it now. This time, just waiver ever so gently, right and left as you're going down, down, down.
So we want to get some rehydration and a little bit closer to the spine and this is a way to do that. So let's progress the exercise. Just watch me once. So I'm going to let my pelvis waiver back, my chest in my neck and my head. Please notice my chest, my neck and my head are falling down because I've taken the support from mine, chest, neck, and head out. And as my pelvis goes back, this will fall. Please don't lean back or you'll be toning again. Again, excellent way to tone. The ABS. Lean back from tone, the pelvis rolls back and the chest, nick and head fall. I want you at the bottom here to exhale and then just come on out of it. Let's do it together. That's your pelvis, slightly micro-movement feather, feather, feather.
Blow the air exhalation out to inhale while you're down here again, blow the air out. Slide your palm of your hand up to your pelvis. Lean forward a little bit. Push off your feet, push off your hands and traction yourself up in long, long, long to the front, the ceiling. Release the hands in. Let go and see where you settled. What do you think?
Shall we get a lot of that dead air out? Then as we roll forward and we're going to now rather quickly spring load, we can fill the lungs with fresh air. Okay, so let's do this together again. The pelvis just feathers, waves very gently, maybe asymmetrically side to side. Blow the dead, air out another inhalation and blow it out. Lean forward a couple of inches. Slide your hands, push down on the heels, push down on the hands, come on up. Inhale and let go. How's that? Okay. Nod your head and see if you can feel your pelvis move.
Just go back on the chair and nod your head and see if you can feel your pelvis, man.
Instead leave them bent so that you really do, we'll get this open in this area that so used to being dragged down by our car seats in our chairs. Okay, so let's do this again just for all the pelvis back. Really let the breath start to go out. Once you get down there, really blow the air out. When worry, inhalation, exhalation, lean forward a little bit. Slide the hands, push on the heels, and rather quickly push, push, inhale and settle where the front and back are about the same length. How does that feel? Not your head. Very good. Now from your hip joint, I'm going to have you hinge whole trunk forward. Okay, so from here, put your thumbs right there. Just as a good reminder. Just let your body fall forward. Yeah. And then push off your feet to come back and just fall forward into gravity and push off your feet to come back.
Now fall forward. But don't push off your feet. How do you get back back muscles? Okay, so here's the deal. We all know about gravity. It's not partial. It pulls everything to its center. However, anything that crosses it, it will pull on as well. So when we're aligned in that relationship, it's very different than if we were a person who needs a walker because there's so much flection in the body forward, they need that walker or perhaps that cane. So here what happens is that a lot of people don't know this opposing force to gravity. They know about gravity, but there's secondary force in, it's called ground reaction.
It is pushing from the earth toward the stars. And since we're on the earth, it pushes us toward the stars and we can maximize that if we know how to use it. So as babies, as soon as they can, and you're holding their little hands even on your lap and they're going and pushing up their feet, right? You put them in one of those little Johnny jump ups, they can entertain themselves for hours pushing up their feet and jumping, jumping. That's using ground reaction force. So what happens is a dancer, you learn very quickly as a skier, all these exercises we do where you're pushing off the earth to be able to jump. Okay?
So what I began to notice is a lot of people knew how to push up, but it didn't come through their whole body. I wanted to come through your whole body in a recycling way. So this is what happens when you're here. You push off the feet, you push up the hands and you get to a certain place at the diaphragm. You suck that area and that spring loads the thoracic up and you get unweighted toward the SARS and then you settle on to gravity into gravity.
Okay, let's do gravity phase again. Flection feather down. I'm going to interrupt you and myself. Come back to where you started. I want you to feel something. The reason I have you feathering is because the body is asymmetrical and when we move exactly symmetrically, one side mix, the other cycle on hold.
So you're not necessarily improving the side that can't move. You're just restraining the side that does have more movement. So I want you to do this symmetrically, the flection symmetrically to feel the difference of the range and how it feels and how far you go. Symmetrically flex, feel where you end and what it feels like and come out of it. And now go to this feathering, the slight asymmetry and settle into the weight in the spine and the fossette joints. Did you go any further? Did it feel any better? If you wiggle your head, does your body wiggle? Alright, now slide forward and use this year. Push out the hand, push off the heels of the hand, spring load, walk and set up right the front back or about the same length.
Very nice. Look at you. [inaudible]
And come on back. You like that? Now don't push off your feet. Don't use Jira from the feet. Just use it through your pelvis. Push off your pellets. Okay, come back, push off your left foot to go to the right. Push off the right foot. Push off the pelvis. Go all the way. Very nice in come back. Let's do the other side.
Push off your rifle to your left foot to turn you like that. And good, very nice. So now with this elongated body, she's in [inaudible]
Okay, fine. So then coming up
Can you remember how you did it before you were sitting back? Just a little bit more on the thighs. You weren't a lot on the thighs, but you were a little bit more, do that one again and feel what that's like a little more effortful to get out of the chair. Did you feel that because of that time?
Okay. Take a moment and just remind yourself of what we've done with the arguing exercise, the breathing, the feathering, the gravity, and GRF. We started with you doing the exercise at the seat of rollback. I had you stand and feel the weight bearing on your feet, which we're going to do right now in just one moment, but I've also had you teach yourself to compare between one way of sitting, one way bending, one way of inhaling. So just for fun, do one more exercise just on your own. One more flection, arking exercise.
Slide your hands up, come forward, and then settle where your front and back are about the same length. This is what we call your starting position. Neutral. It doesn't have to stay with you very long if you're doing something where it rolls or dens, but the point is, it's a great starting position. Okay. So what I'd like you to do is just come to standing just behind your chair again. One more moment.
Okay. Very good. So let's go down to the floor to do the seated roll back one more time. So just to take this same arking exercise that we did on the chair, let's take it to the floor. So bring your news like so. Okay. And just start to roll back with your, think of your sacrum going back. There you go. Okay. So you set it with the sacred in your mind as opposed to the lumbars shaken first there. Now from there, come forward, push off the feet, push off the pelvis and let yourself come into extension.
Do this one more time and then come on out of it.
And then when you feel yourself over your hips of history.
Push off your feet and sit up tall.
Comments


You need to be a subscriber to post a comment.
Please Log In or Create an Account to start your free trial.
