Description
About This Video
Transcript
Read Full Transcript
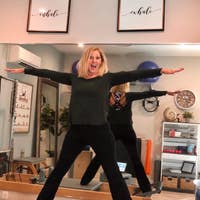
Hi there. My name is Leah Stewart and I am here today to give a one to chair session for your prenatal clients or for yourself if you are pregnant. Today I am 36 weeks pregnant, so I'm well into my third trimester, just a few weeks away from the nice entrance of our baby boy here, which we're very excited about. So I've had to really kind of alter some of the movements according to my needs here in the third trimester. This one to chair class is really geared toward the intermediate client and again, you can use modifications and variations to make it a little bit more advanced or to make it a little bit more at a beginner level according to your needs or to your client's needs. We're going to begin with a seated warmup.
We'll move into some footwork and we're just gonna kind of move through the class, uh, appropriately. So go ahead and join me here.
The Mes are going to get nice and lifted as much as you can at this point. Take a nice big breath in through the nose and with your exhale you're going to pull the abdominal wall in and you're going to curve that back out and inhale back up to the top with an excel and inhale. Exhale. Now what feels really good for me in particular as as I come up into the extension, I like to almost go past it a little bit just to kind of get that little extra opening and then Xcel to come back into that nice curve and inhale back up to the top and inhale and just start to draw your body awareness deep into your pelvis, into your torso and Baca. And one more time
We're going to roll that back into flection, out to the left, and then around. So this is more of a free movement as opposed to a controlled or confined movement. And I just want you to feel that release as you do this. Only making it as big as you feel comfortable and around. And you'll find as you do your rib cage circles, your pelvis is going to start to move with you. So it's this really nice circular flowing movement through the entire body.
As you roll, you can let them move, make it as big as you'd like and all the way around to more just loosening up that spine, drawing the energy into the center body, avoiding the elevation of the shoulders and pause in the middle. Take the breath in and exhale. Go the other way and back to center. And I want you to imagine that inward spiral or almost like a whirlpool in your body as you spiral it around all the way. Just imagine that all that musculature is just in closing in and then it opens up and closing in and it opens that you're gonna give me three more
You're just going to do a nice gentle side. Then to the right and back up to the middle and to the left. Again, just working on kind of loosening up that spine, does it have to be a lot of structure or form to this? It's just a little bit more freedom. Nice easy breath. Take your arms here.
Once you interlace all the fingers, Shrug your shoulders up to the ceiling. Lift them up nice and tall. Get that rib cage elevated up off the waistline and release and come all the way down. Now what I've done here is I've taken two therabands that are of the same resistance and I've tied them on to the notches on the outside. That's usually where we put the pole in, the one to chair, and I've tied them to be pretty secure there. And we're going to use this, um, for a warmup and later we're going to use these there bands for our arm work therabands work. Sometimes I'll use a little variation with the spring, but I find that his brands are most accessible for people.
So that's why I've chosen to work with therabands today. What I want to do is place your feet up against the one to chair on your heels. And this is kind of going to avoid that one to chair kind of flying towards you, which we don't want. And you want to keep your hands just on the outer part of the shins and you're going to sit with a nice flat back here. So what you're going to do is you're going to just start by pulling the elbows back with an exhale
And one more time
You're going to curve that lower back into Matthew. Continue to go down. You're going to twist to the left. Bring yourself back to the middle
Rotate to your left to the center and add taking your palms facing down. If you need to release the grip for a moment, you can. We're going to do our arms back one and center. Elbows out to the side too, and center. Now the challenge here is to set really vertical right on top of the sits bones.
Feel your pelvis open onto your mat, but keeping your torso nice and steady. Fill in the upper back. Work the back of the shoulders. Work four more. Keep the movement coming from the shoulders. Keep yourself vertical through your torso and last to breathing out as you draw those arms back. Last one. Great. Now we're going to take the palms. You're going to go in some spacing up toward the ceiling and we're going to do a little bicep curl. Again, nice and vertical, keeping your arms nice and steady.
Continue with that bicep curl. Nice and tall. I'm trying to practice that. Stabilization. Five more for me. Five, getting tolerant drawn in the abdominal wall into, excuse me, four and three I tend to like to count down and two last one, squeeze it and hold it and slowly release all the way down from here. We're just gonna finish. Nicest simple. We're going to cross the legs here until a little bit more of a controlled side bend. So actually face you for this exercise so you can see it a little bit more clear. We're going to go over to the right with the breath in.
You're going to XL, twist your torso, inhale, twist it back to the lateral flection and Xcel. Bring it back up. So reading a little bit more mobility through the spine as we do that. So over with the breath in XL, use your obliques to twist that rib cage around is if you're trying to look back behind your bottom, keeping your hips nice and square. Inhale, come to the lateral flection and XL up in hell over to the side. Exhale,
Inhale over. Now it's very easy to let the work come from the shoulders or even from the neck or the head. You want to be very disciplined that it really comes from that waist. Even that spiral. It comes from the waist. You release it from the waistline and then you draw it up from the waistline.
You want it to keep that focus that keeps the integrity of the movement, that nice and muscle focus here in how? Back to the lateral flection and XL up. Let's do one more time each weight. Inhale.
Inhale back to the middle and XL. We draw that. We're going to move on to two last exercises in our little [inaudible] are longer, I should say warm up series. We're going to do a modified version of the pike sit or the sitting pike so you can kind of just toss those therabands out of the wave. I put your spring one spring on two, which is the second setting up. We're going to take the legs out to the side. Generally we do the pike sitting with the legs on top, but due to the physical changes that accompanied pregnancy, that position is no longer really accessible. Okay, so the arms out to the side, or excuse me, not the arms with the legs out to this side, just nice and easy.
You don't have to get into a big stretch. You're going to place the heel of the hands right on top of the black part of the pedal. And again, what I like to do is kind of start with a little bit of a spinal mobility on the fifth one we'll find the position, we'll hold it and then we'll go into our pike. Sit Breath in. And we curved
This'll be the fifth one. Exhale. Now I'm going to hold this position so I have this nice posterior tilt, my pelvis. So if my pubic bone is coming forward and up, I'm going to squeeze my arms down,
This time we'll go right into that nice position. Looking down at your mat five more times. Exhale. So I don't want to see your body moves. The shoulders are the only joint. This moving last one, arms come at first and body goes second. Next we move on to annealing exercise and you can take the spring up to one spring on three or four.
So it's going to be your highest setting or your next level down. We're going to come up to the kneeling position. So again, when we get past a certain point in pregnancy, we can't do abdominal work the way that we would do if we were pregnant because of the stress that it puts on the abdominal muscles. But we can modify certain exercises so that they become safe and appropriate for the needs of the pregnant women. So we want to still strengthen the abdominal strength and the obliques, strengthen that transverse abdominis in particular to help keep that support and will also help us in labor. But we have to modify the movements. So this is a fun exercise that I enjoy doing and hope that you enjoy it as well.
So we're basically doing a kind of cat stretch, chest lift exercise. You're going to come onto the your kneeling position, you're going to place your elbows up on the pedal and take your knees back to where there need to be appropriately. You're going to gently Enlightly place your forehead onto your arm. And what I need you to do is start with a nice flat back. So from here you're going to think about
Just that to the pedal floats over the base of the one to chair. Then inhale, you're going to articulate back to a flat back. Exhale, pool the belly button in. Draw the abdominals deeper. Look down at the pubic bone until you keep going deeper, deeper, deeper, deeper, deeper than inhale. Now one tempting thing
We're going to come up the sitting right at the edge of our one to chair. The heels are going to come up on the pedal. Now again, given the ever growing belly, you might feel more comfortable with your legs being a little bit wider and that's certainly fine. I'm going to choose to just keep my arms down nice and steady today so I can focus on my postural control and I can focus on my legs. But some days I choose to do some arm work with this. So whatever you feel is necessary or appropriate for you for that day.
So arms are just going to dangle down by your side. You're going to feel really tall and lifted through your torso. Feed are nice and flex and I want you to think of breathing the belly up as you push the legs down. So essentially energy. The torso is going up, energy. The legs are going down in opposition. So take a big breath in, prepare, and we press down slowly drawing it. So again, breathing up with the belly and inhale.
The more space we create create there. It just feels so good. It feels so freeing and we want to feel strong in our body here.
Breathing that belly up and in how? Lifting the torso. Taller
We want to decompress that pressure that's already placed in the abdomen. This rd priest in our rib cage, Xcel down
So using your breath to guide you is just staying focused on all of those rules, all of those little details of the exercise that you want to accomplish. And each time you repeat the series, you're perfecting that ability to draw your energy in deep, to draw your focus so that we get that nice precision in the movement.
If you want to play with balance, you're certainly welcome to keeping your hips nice and square. We press through the foot with an exhale slowly up
And we push through and I want you to think of extremes here. I want you to think of getting as much point as your foot can allow and as much flex as your foot can allow. Point, draw it up with the flex
And the reason I like to do that is that you can feel really balanced and centered prior to moving into the one leg position if you need to for a little extra balance, you can place your hands gently behind you and you'll get a nice little chest opener as well here. Once you've established that position without transferring your weight, you're gonna lift one leg up off the pedal. Keep it up at tabletop, draw the abdominal energy in. Same rules applies. We press that leg down slowly up.
In order to help that leg go down. We want to keep ourselves really square. Two more
No. Again, as you push that leg down, you're feeling taller and longer through your torso.
So we've completed our footwork series. We're gonna move on to a couple of Nice gentle abdominal exercises. We're gonna take our spring. I'm going to place it up too. One spring on three which will be their second interval down. And we're going to come onto the back portion of the chair here.
Now this exercise is called reverse standing pike.
Now, what we're going to do here is with a breath in, we're going to extend this mine onto a real distinct diagonal line, so once your back extensors to be active, I want you to feel a little bit of hamstring stretch, but I want you to avoid locking out with your knees, so just keep those hamstrings slightly contracted and keep your weight a little bit more forward toward the balls of the feet than here. We thread the belly button in and we come up into our pike position. Inhale, we go into the extension of the back without shifting the weight onto the feet forward or back to match, and then with an exhale we draw it all the way in, in how? Articulating the back, using the full back, lounging that palace to open. I'm going to have you do three repetitions and you're going to roll yourself all the way back up. We're going to repeat breath in, Chin to chest. As you roll yourself down, articulate through your spine.
Find that articulation now here filling the whole pelvis is open behind you and then close the abdominals close at pelvis. Get that energy up through those inner thighs and inhale, articulate back a lot of that nice movement that flow through the spine and inhale back, finding grace in each part of the movement. The third one, we roll all the way up to standing. Practicing that abdominal control. Three sets, breath in. This is our third one, we act. So roll down chin to chest, hands on the pedal and articulate. So finding the flow. Exhale, draw up.
Get the pelvis underneath you and we roll up to the top.
You could elect to keep yourself up on one spring on three. You have to just find what feels best for you. So we're going to do two different lying side leg series here, or leg exercises. So getting yourself stepped up on your shoulders and your hip, you're going to place the entire part of the inside of your foot right on top of the [inaudible]
So I want you to feel that real distinct strength coming through the inner thighs. Well, what happened naturally is there'll be a little bit of hip flection, a little bit of knee flection, which is completely fine. And if you're feeling a little bit of undue pressure on the inner part, the medial aspect of the knee, you may want to play with a little bit of the rotation of the thigh to make yourself feel more comfortable and exhale
We're going to rotate the leg outward, so make sure the hip is externally rotated, the pelvis is nice and open. You're going to be on the back portion of your heel and you're going to bend your knee and squeeze the pedal down and slowly yet. So you're going to feel immediate aspect of your hamstring rotator of the hip
Go ahead and pull yourself up as slowly. Turn yourself around and we'll do the other side. So we lied down hip over hip, shoulder over shoulder. We placed the top foot on nicest square. We're going to start with the abduction of the hip, so we draw the five straight down and slowly at, so again, just maybe playing with your position until you find a position that feels most comfortable.
So we're toning those size and at the same time we're practicing that stabilization because you will feel the appropriateness to tighten your abdominals. You'll feel that contracting in the pelvic floor as you abduct that hip. So I tried to focus on drawing that leg down. One more repetition as we move into the external rotation of the hip, keeping the hip nice and open. The pelvis is stacked one hip on top of the other, flexing the foot, the back of the heel is on the pedal and we get a little hamstring curl as we bend the knee and slow to bring it up. So again, you're going to get that additional benefit out of the work.
If you slowly take that pedal up to emphasize that East Centrica, that lengthening contraction. And again, don't sacrifice your stability to get the pedal down further. You want to only move as far as you can. Keep your pelvis absolutely steady. Keep the thighs spiraling outward.
So we're going to pull the arm back. Exhale.
We're going to start with external rotation. She just want to take your theraband. The higher up you hold it, the more tension you're going to have. You want to just kind of kind of fold and wrap the theraband into your hand. Thumb is facing up, hand is on the waist and you do an external rotation
So we want to try to keep everything steady and just put the work into that external rotation, about eight to 10 repetitions and you switch hands so you can grab a little bit shorter onto the [inaudible] and then the other shoulder is going to do internal rotation side myself, a little bit forward
And this is called the cross arm. Pull elbow up. Extend the elbow here and bring it back. So you're going to think shoulder,
This is where you need to deepen into your breath. Practice your control and back in one more time. Xcel all the way out. Inhale all the way back in and go ahead and just gently place that theraband to the side and we'll do the other side. Starting with external rotation. Again, keeping yourself nicest square. We're going to grab, we're going to fold the thera-band grab with the thumbs facing up number.
The more tension. If you want more attention, you just grab a little bit further in a bow out to the side or elbow into the side and we rotate the shoulders so the fist goes out to the side strong back. So remember no rotation in your torso. Getting the work only from the top of that shoulder, the rotator cuff muscles working here nice and steady, eight to 10 repetitions. Once you've completed the external rotation, you switch hands. You can grab a little bit further in for the internal rotation and we twist in.
You may want to come a little bit further forward. Keep the elbow tight to the waist.
Let's go about four more to finish the side. Okay. The cross arm pulled the last exercise. So remember palm facing in towards you. You're going to grab with a thumb facing down or excuse me, the thumb right on top. And we take the arm up, elbow, shoulder up I should say. And then extend the elbow then the elbow and bring it down.
So you want to feel that nice distinct opening of the back. Strong upper back. So you're working the deltoid here, holding it there as you the elbow with the tricep.
Inhale to bring it back in XL all the way out in how to draw it back in XL all the way out in how to draw it back in. One more time. Exhale all the way out and inhale to pull it in. We're going to move right along to finish our work series here and we're going to do one more. Try to make sure those there, man, stay nice and tight. You're going to sit facing away from your chair. Yeah, I like to bring my hips all the way up to the edge of the chair and I want to grab the therabands here and I'm just going to pull the arms together and bring it forward and bring it forward
Last two, last one. Now from here, I'm going to take my elbows, I'm going to bend them and I'm gonna lean forward a little bit. Keep my elbows nice and lifted and I'm going to extend the elbows out and I'm slightly leaning my body forward. And why I'm doing that is to give me a little bit more tension with the theraband. And here I'm doing a tricep exercise as I'm doing my elbow extension, but notice how my upper arm stays really nice and steady.
We're going to take the spring one spring on three we're going to stand up to do the leg press standing exercise. Now balance for pregnant women can be a little bit of a concern because as our bodies are shifting, it tends to throw our center of gravity off, which tends to make balance a little bit more of a struggle. So you're always more than welcome to hold onto a pole or you can hold on to a foam roller or anything that you can think of to help maintain your balance. If you feel secure and confident in your balance, you can try it without. So we placed the right foot up onto the pedal. The heel is going to be up.
And what I like about this exercise is not all of the additional leg work, but also that s that aspect of control in the body arms are going to be out to the side nice and long and we're going to gently push and pull the pedal down and slowly bring it up and slowly drawn up and slowly. Yeah.
Remember if you need to hold onto something for balance due. So we certainly don't want to compromise anybody or compromise yourself to where you feel like you're going to fall over. You want to get the benefit of the leg. Exercise a torso control while maintaining your safety. Last one, and we come all the way yet. Now we're gonna move on to our side work here. So we're going to come into a side stretch.
You're going to place yourself sitting right in the middle of your chair. You're going to wrap your heel around the chair. You're going to place your other foot out. So your big toe is resting on the mat or on the floor. You placed the heel of the hand down right in the center of the pedal and your other hand is going to go behind your head.
We're going to go into a nice big side stretch here, so you're going to really accentuate that side stretch, keeping your shoulders nice and calm. With exhale, you're gonna engage your abdomen and you're gonna lift yourself up. Inhale, you're going to side dive over XLU, squeeze through the obliques, glide the rib cage down toward the pelvis. Then inhale a big side stretch. Now when you do this, you want to make sure that your alignment is very precise. You want to make sure the shoulders, the hip, the knee, the ankle, even the ear, or in a nice straight line as you move here.
Now I'm going to stop you here. What I'd like you to do here is you're going to take your rib cage, you're going to rotate it up toward the ceiling and bring it back to center, and then you're going to rotate it down with a little bit of a curve or a pike and bring it back to center. Exhale, rotate up.
Take your breath in and just finish with a really wonderful stret all the way over and slowly bring yourself that. So again, the beauty of these side stretch exercises, it really just opens up any sort of tightness or constriction that you may be feeling in your rib cage due to your growing belly due to that pressure that's coming up onto the diaphragm. So giving ourselves the opportunity to do any exercises like this is going to kind of relieve some of that sensation. It feels really wonderful. You might feel you can breathe better. Uh, you just, you know, you might feel like you can move a little bit better, a little bit better after. So these are great exercises to incorporate into your Palase practice. Let's go the other side so we sit straight in. The middle.
Big Toe is resting out. You want that nice alignment coming all the way up your side. Body, heel, the hand onto the pedal, hand behind the head, breadth into side dive all the way over. Use Your obliques to pull the rib cage down in him. That's what I'm going to do is six repetitions here. [inaudible]
We twist up to the ceiling with the next inhale. Inhale back to center and we pike the body. Exhale. Inhale back to center. Exhale, twist that. Rotate a torso up toward the ceiling in how? Back to center and find that Nice Pipe in how? Back to center and rotate. Rotate.
Allow that back to open. Inhale, back to center. Exhale, nice pipe.
Take your arm out and give me that wonderful side stretch. Let your head go, feel the beautiful stretch here and slowly bring yourself all the way back at it.
So what I like to do is place my hands on the pedal and what I'm trying to mimic here, the exercise that I'm trying to mimic is actually called Swan on the floor.
Arms come down with an XL head, neck, chest, and what I love about this position is although I get to get a lot of Nice deep work through my shoulders and through my back extensors, I have this really nice open position of my pelvis and of my hips and exhale. So I'm really getting two major benefits out of this deep kneeling position. And slowly I take myself back down and exhale up strong, upper back, strong shoulders, and slowly I take myself down. One more time to complete it. Shoulders are strong,
Now I want to do one more back extension, very simple. But what I like to do here is to promote this nice open quality of the hip flexors. So I'm basically just gonna use a chair for a little bit of balance here. Something to kind of secure myself with. I'm going to take them at [inaudible], excuse me and take my breath in. Take my breath out now with an inhale to lift the sternum up and when you think of arking my back, pressing my pelvis forward to get that nice opening
Pulling that back in, down on that pedal and slowly bring it down. One more time. Hips come up and go all the way. Reach, reach, reaching up and slowly bring it back down and bring in. To finish our class with the very easy shoulder stretch, you're going to come back onto the back part of the chair here. Your hands are going to come forward.
You're going to open your legs appropriately. You're going to bend your knees and you're going to sink your chest down. You can reach forward and grab the front part of the chair and get that nice stretch. And once you hold there, I want you to drop your hips all the way down into a nice deep squat, allowing your pelvis to open. If you can keep your heels down on the floor, please do so. If they need to come up, allow them to come up, press your heels back down, take your hips out, hold this position one more time, getting that nice lat stretch, and then the last time just drop your hips down, letting the head hang slightly. If you feel like you kind of want to sway yourself back and forth, you can just allowing that pelvis to open those hips to open. Bring yourself back up and slowly roll yourself up. Dropping your head all the way back.
Go ahead. Let's walk forward onto the front of the mat and just standing here and let's just complete the cost with two roll downs. Breathin with an exhale, slowly rolling yourself down. Allow your knees to bend and just go as far as you feel comfortable allowing your head to relax your arms. Relax. Big Breath in and with your Xcel. Thread the belly button in. Rule yourself nice, nicest, strong in your legs.
Breathing in and Chin to chest. Opening up that back, filling that beautiful stability of your trunk of your size, breadth in an app you go. Once you get to the top, I want your arms to just float up to the ceiling. You can look up if you'd like an XL, bring them down. Very simple. Just arms come up, lifting that sternum up and exhale down. Good. Once you're down, just relax.
Shake out the shoulders a little bit and thank you so much for joining me on our prenatal one to chair class.
Comments


Take care!


You need to be a subscriber to post a comment.
Please Log In or Create an Account to start your free trial.
