Description
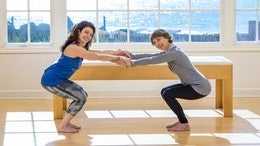
If you don't have access to a partner, these exercises can be done with a wall.
About This Video
Transcript
Read Full Transcript
Hi, I'm Rebekah Rotstein and I am back at Pilates Anytime for this eighth experience, this eighth year, with a new mat class that's going to incorporate some spirals, but also a little bit of partner work so that we can help each other find the tensegrity in our bodies. So let's get started, we're gonna lie on our backs. And we're gonna start off a little gently. So that your feet are planted, your arms are by your sides, palms face up, just really relaxed and we're gonna start by crunching our toes and then releasing them. So we're gonna do this a couple times, just to awaken the receptors in the feet, which actually can relate directly up into your spine.
And then we're going to move our ankle side to side, so we're gonna just roll a little bit side to side, and then we're gonna roll to the right and let the knees follow for some knee drops. And don't go too far, just go into your comfort zone and then you're gonna go to the other side and come back up. And just observe where you might feel a block, where you feel like, mmm, doesn't feel so good, stop there and come back up and then you're gonna go to the other side and come back up. This time we're gonna let the knees fall all the way over, circle the opposite arm, so if you've gone to the right, you're circling your left arm overhead, and you're gonna lower or place your bottom arm underneath your head so that you're fully on your side. I have to scoot back so I don't fall over on this and then you will take your top leg and straighten the knee, so straighten your top knee.
Reach your top arm and your hand will face away from you. Arm overhead, Ruth, yes, there you go. Now imagine that you're pulling in toward yourself, so you're gonna pull the elbow in toward yourself, spiraling so that the fist faces you and then push away. I probably should have had you start facing me, but that's okay, and pull. And now reach back with your heel and now pull, pointing the foot, spiraling through the wrist and reach back through the heel, this time point the toes and flex a foot as you pull in (exhaling) and point the toes to reach back, and flex the foot to come in and point the toes to reach back and feel that nice stretch through the lateral line of your top side (inhaling).
And slowly pull it back in, but not all the way so you can plant the foot and you can spiral back onto your back and then we'll go to the other side, so you'll probably be able to see me a little bit more easily on this side, you'll swivel your feet, the knees will follow, you'll circle that top arm around and the bottom arm will position itself underneath your head I'm scooting back again so I don't fall off, and palm faces away from you as you reach back, reaching from your heel, point the toes as you pull, inhale, lengthen, so we're flexing and pointing, and we're activating through that whole back line, even though we're stretching through the side. And once more, stay here now, point the toes and flex as you pull (exhaling and inhaling) reach and point, flex as you pull, reach and point, last time, flex as you pull, reach and point and feel the stretch, alow your shoulder to elevate, it's okay, it's legal here and then you pull, but then you gently position the foot down and you roll onto your back once again. So now we'll do some bridges. Palms will be by your sides, feet are gonna be hip distance apart, inhale, exhale. We're gonna curl up (exhaling), lifting the hips, staying soft and heavy through the chest and lower yourselves back down, inhale at the bottom, exhale to rise again (exhaling).
And lowering yourselves back down and again, bridging up. So as you bridge up, just observe, do you feel less connection into one buttock than the other? And lowering back down and last one, staying up. Now we're gonna lower one butt cheek and then lift it again. Lower the other one and back up, so we're letting go and controlling again, so it's more like a release, contract, release, contract.
Dip, lift, dip, lift, dip, lift, dip, lift, last one, and lowering yourselves back down. And rising back up again, now we're gonna circle it down and up, so we go all the way down on one side and then down on the other, then up, up and continue. And two more, so you get this nice wave-like action and go the other direction and down, up and down, up and down, up and last time, down, up. Stay up, lift your heels, lower the heels and lift, so we're doing heel lifts here, while we stay connected through the gluteal region, four, three, two, one, lower the heels and slowly lower both hips. Now bring your knees in toward your chest and lower your feet again, lift one foot up toward the ceiling, grab the back of the thigh, slide the other heel out in front of you and let it float up into the air because you're pushing out through your heel so much.
Now, push out through the crown of your head, so that it floats up as you nod and curl just a little bit. Hold it and lower and switch to the other side. So we grab the back of the thigh, we slide the other foot out in front of us, we push out through the heel and the head so much that we come into just a slight nod and curl. And lower all the way back down. Now you're gonna come a little closer together at this point because we're gonna create a little tensegrity figure between you two.
If you don't have somebody to practice with, you can do this against a wall. You're gonna lower yourselves all the way down so that you have a little bit of pressure against one another and try and keep your knees straight for this first part. Yep, but enough that you have, or I should say far enough away from one another that you have enough pressure that you can push into each other because we're going to go into the hundred now. So you're gonna lift your arms all the way up overhead, breathe in, now reach your hands away from your trunk and now relax those shoulders, reach into the heel so much, lifting the arms up overhead, push down into your feet, away from your head and then your feet float up. (laughing) and we'll push, one, two, three, four, five, six, seven, eight, nine, ten, now pump, two, three, four, five, six, seven, eight, nine, ten and lower all the way down.
Try that once again, pushing out into the feet, while you push in the opposite direction through the head and it lengthens you so much that you narrow through the midline. And now we'll do traditional, inhale, two, three, four, five and exhale two, three, four, five, inhale, two, three, four five and exhale two, three, four, five. Inhale, two, three, four, five, exhale two, three, four, five and relax. I know, I don't think I've ever filmed the hundred in like eight years here (laughing) and lift the arms all the way up overhead. Now bend your knees, just that same experience that you had with that nod and curl where you lengthen out through the crown of the head.
See if you could use that to help you sit up here. Nope, you're just gonna have your feet down because you're gonna come up to one another and now press your feet into each other. So we're gonna help you as you start to lower yourselves back. Ooh, I'm sitting on the-- So, push your feet into each other and that's gonna give you that drive of the pelvis rocking back. So you have something to push your feet into while you lengthen in the opposite direction.
And then come back up so that you don't crunch, but rather find that directional opposition. And exhale (exhaling) and back up (inhaling) and again exhale, so the pressure moves from the sit bones, actually toward the tailbone more, but you continue that sense of pushing, pushing, pushing, pushing and returning up and one last time, push (exhaling), now hold it there. So don't go too low so that you don't crunch, but that you find that lift, lifting up and forward. Yes and come all the way up so that you're seated on top of your sit bones now. Breathe in and exhale, if you want, hold onto the backs of your thighs so that you lower yourself, keep going, going, going, going, going and lift the arms all the way up overhead and arms down by your sides.
Let's take your right foot up towards the ceiling and we're gonna go into single leg circles, so you're gonna be, flex through the bottom foot, but you're gonna point through the top foot. And circle down, around and up. And down, around and up, and down, around and up and down, around and up, reverse, down, around and up, so I'm pushing out through the bottom heel, whether it's into the air, into my partner or into the wall. And I lost count, but let's do one more. And switch feet, so you're gonna have to find your partner, good, and point the foot that's up in the air, and circle, crossing over the midline.
One, great, and two and three and four, reverse. And I don't like to use the cue of bolting down the hips, I like to think of the push, which automatically is gonna stabilize the pelvis and one last time. And lower the feet down. Alright, let's flip over onto our stomachs. And we're gonna do a little swan work, so we're gonna do a swan prep though, where the feet are either pressed into the wall or into your partner.
So place your hands here, directly by your chest so that your elbows almost point upward and I want you to try and straighten your knees so that you really feel the pressure and the feedback of what you're pressing your heels into. And just hold that there, we're gonna hold that for five. You can keep your head down, yeah, just feel the connection into the hips, four, three, two, one, relax. Do it again and push. So as you are straightening the knees, it's gonna give you this little connection through the gluteal fold, but which will take out that excess tension in the lower back.
And relax again. This time straighten the knees, feel the connection into the heels, push your head away from your heels so that your head floats up, just an inch or just a little bit. And now you can come up even a little bit higher, but you're gonna stop before you feel the connection, or I should say the disconnect, by getting pressure into your lower back. And lower your head, relax. One last time, press into the heels, lift the hands, reach out through the crown of the head so it floats up come up as high as is comfortable, push down into your hands if you want you can even come up higher, if you'd like.
Elbows by your sides and lower yourselves all the way back down. Your butt might be a little bit tired now, so you can release your feet from one another, and shake it out just a tiny bit. We're gonna go into a little diagonal version of this with some spirals. You're gonna open your arms so that you're in a v-shape position with your hands. Lift your, I guess I would say lift the foot that is closest to me and you're gonna start to cross it over your midline and then return it back down.
Beautiful, now keep your feet a little bit more separate, Amy, that's it. The other side, lift the foot and return it back down. Keep going like that, so you lift, now, pause here. Reach the hand as far away from the foot as you can. So right foot away from right hand, vice versa.
And lower down, so whichever is the foot, next side, that is stretching, you're reaching the hand away. So that again, you build in your own tensegrity within your body and down. This time we're gonna add in a little bit more variation. So you're gonna lift the foot, lower that foot back down, reposition your hands or slide them so that you come up into what would be like a swan and then you can either slide or lower yourself down. Other side, reaches across your body, lowers back down, reposition your hands, lower back down.
If you're on mats that are not sticky or that are sticky like these, you will just reposition your hands. Otherwise, you'll do what I'm gonna do, where you slide up and you dive down and you lift the foot crossing the body and lower and lift, great, and down. Other side, lift, lower down and slide, so it's like a seesaw and lower and last one and down and up and lower yourselves all the way down. This time, you guys will go into your side to face me, well no, pause for a second, so you're gonna stay here, you'll both lift the foot that's closest to me, just like you did before and let that roll you onto your side. Yes, I finally planned it out well (laughs).
Lift it, move the bottom foot closer to me, exactly. So now, people can see me and I can see you. Yay, finally, it's only taken eight years. So we're on our sides here, the bottom leg is straight out in front, the top leg is in slight hip extension. Stay here, we're gonna do a set of front back leg kicks.
So we can flex both feet and we'll go forward, kick, kick and back and forward, kick, kick and back. And forward, kick, kick and back. I love the sensation of the bottom hip here. It gives me such a sense of connection and stability into my supporting side, last one and back. Now let's passe the leg in and swivel in and out.
And whatever is possible in your body and notice we could make it sharp, hit, like a ping, ping, ping, ping or we could swivel, smooth, smooth, smooth, smooth, two more, last one, so we can change the quality of the movement. Now we're just gonna straighten the knee, so the leg is directly in a straight line with the head and go up and down, one, two, sorry I can't count, three, and four, move your foot a little further back in space, Ruth, five, six, so yeah, place your hand at the crease so that your body recognizes where the movement should be coming from, not up here at the waist, two more and last one. Now you're gonna hate me, but you're gonna bend the knee, reach the foot forward and go up and down here, one, two, three, four, I like to place my hand on my sit bones so that I can still feel this. I have found this to be one of the best cures for some low back pain issues. Six, seven, eight, and relax, shake that out.
Now, reach your foot behind you, get a nice stretch, that diagonal stretch once again. Breathe in, now bring the bottom foot closer to the top foot so the bottom foot is gonna move back in space so you can roll onto your stomach again and lower the foot down. We're gonna do the same thing onto the other side. So we basically take the other foot, cross it into hip extension, and roll onto our sides, I'm gonna scoot forward. Actually I'm gonna turn around so I can see everybody.
Yep, so your bottom foot is forward and your top foot is back now, yep and we go into our front back leg kicks. And kick, kick, and reach back, I'm gonna move forward. And kick, kick, and reach back. And kick, kick and reach back. And really driving out through the heel (exhaling) and reaching and you may feel the experience of the stretch all the way into the waist.
Two more, kick, kick and reach back. And last time, kick, kick and lengthen and reach back. Now you're gonna passe it in and we're gonna go very sharp, staccato, touching the knee, touching the toes. Bing, bing, bing, bing, bing, bing, bing, now swivel, smooth, smooth, smooth, smooth, no edges, just like the water around us (exhaling). Last one and relax.
Now we go straight up and down for the leg lift. So bring that top leg in line with your head, even though your front foot, or your bottom foot I should say, is slightly forward, going up and down. So Ruth, move your bottom foot forward toward the mat and move your top foot back, that's it, up and down there. One, two, Amy, same thing, so move your bottom foot forward, yeah, so it's a split stance, four, five.
Flex, six, seven, eight, bend the knee and reach the foot forward, shake it out if you need to, I just cramped and reach the foot forward and we're gonna go up and down here. One, two, three, four, five, six, seven, eight. And now bring the foot back. Let's go into a little child's pose for a moment here. So we'll sit back and actually, you know what, I will turn because it'll be the original way I was facing.
So we sit back here, a little child's pose, lower your head, rock your hips side to side, breathing in, exhale, now see if you could breathe in just a little bit more into the mid and low back area because we're gonna tuck in order to rise. So tuck the tail under, essentially tractioning the sacrum away from the upper spine and relax. And look at me just for one moment here. It's actually not rising up, it's just that because it's gonna lead us directly into our next exercise. So this is a preparation for so much of the rolling movements and release and once more.
Traction that sacrum, so we're essentially nutating the sacrum, if you wanna get technical, but I try not to in teaching classes. And rocking backwards there without moving the upper spine. Now keep that shape, so you're gonna feel a lot of belly action as you start to crawl upward, keep the shape of that tail tucked under, now walk hands forward, keep the shape, keep the shape, keep the shape, keep the shape, keep the shape, keep the shape, keep the shape here. I thought we were only (mumbles). Sorry and from here we're ready, in the shape, for our open leg rocker so if you don't do the open leg rocker you can just hold this position.
If you do do it, you're gonna rock back and return up. And (laughing) if we don't do it, it's okay, I don't do it and back up. So the movement is from that tail tucking, or if you wanna think about it, it's from that traction or as my friend Barbara was talking about, my dear friend Barbara Stamos talking the two-way stretch, right, so how you're gonna find that length, going back into the Jay Grimes lineage there, finding the two-way stretch of reaching the tail while you're reaching up in the opposite direction here. It doesn't mean you compress, it means that you find more length and lift, last one. Now stay there, lower the feet, place the hands behind you, inhale, open the chest, keep that same position, so notice, here's the position, we tuck that tail, but more importantly, you find that space in the low back, which for people like me who are really tight in the low back, it's really helpful.
As we now go into our hip circles, one, (laughs) two, three and up. Reverse, one and two and three and find the lift through your collarbones, even though you haven't repositioned the feet. Lower the feet now and let's go onto all fours in a quadruped position. So move your tail around a little bit (exhaling), free it up, breathe in and exhale (exhaling). Just move in a couple different directions, see what options you actually have.
Now let's shift our weight forward, over our hands, and then back off a moment and shift our weight forward, over the hands and back off. Now be very strong as you push into the ground, but you don't wanna round the back. At the same time, you don't wanna collapse. Staying lifted through the throat, stay right here, we're gonna add in a little bit with the fish tail. So we're gonna slide one foot behind us, and we're gonna bring the leg out to the side.
I'm gonna have to slide over here a little bit. And we're gonna kick it and look in that direction. And flex the foot, so we bring in a nice little PNF pattern and whip and down, whip it and down, whip it and down, whip it and down, other side. I have to slide over (laughs). Slide the foot behind you, bring it out to the side, you're gonna look toward it and whip it.
So the foot is flexed as it lands to the ground and internally rotated and then turns out, pointed. And whip it and down, whip it and down, whip it and down, last time, and whip it and down. Nice (laughs), you alright? Uh huh. Good, let's go on, let's practice a little bit with our side kneeling, so just as we are right here, slide the first foot out again.
Now come onto your side, in fact, why don't you guys do the opposite, so take the foot that's closest to me, bring it behind you, then pivot so that you're facing me here. You're gonna lift that foot up and hold it. Breathe in and lower the foot. Now help yourselves sit up. Reposition this foot so that you're now in parallel.
Just as you would get into a side, a side kneeling position. We're not gonna go into the full side, or kneeling side kick, we're gonna get into the transition, the balance part and holding it. Whoo and hold. And then we can tip over and let's just go into a side stretch here (exhaling). And rotate and return and rotate and return and rotate and return and heck, we may as well just lift the foot for a moment, and kick forward and back and forward and back, last time, forward and back.
And now help yourselves come all the way up and then let's go over to the other side. So it's a little bit different because we're gonna start on a quadruped, just like we did before, so you slide that foot that's away from me, yep, that's toward me, I guess, and then you're gonna come onto your side and you're gonna get this nice side stretch. Breathe in and exhale and stay and then we're gonna move the other foot behind and then curve, I don't know if that's exactly what I did,
And come back up and then we gotta balance one more time, hold it, hold it, hold it and then come over, bring the hand behind your head, and then go forward, one, and two, three, last time, and four and then maybe this is when we did the rotation and back up, sorry about that, and two, let's actually just do one more, so that we get that nice rotation here, three and then we can come up, all the way up. Let's try a little bit with rocking. So we're not gonna do the rocking, but we're gonna experience how to safely get into the position. So onto your stomachs again. Grab each ankle, if you can, but as you do that, I want you to push down through the pubic bone.
So you feel a length and a stretch and almost like a yoga Shalabhasana, stretching, or I should say flexing your feet and pushing your ankles, yes, and you can come up a little bit, if it feels safe, but if not, just feel the stretch of pushing into your ankles and feeling how your collar bones can lift up and float backwards ever so slightly, as if you have eyes right there that are opening. And lower yourself back down. Let's add the breath, inhale as you do it, pushing into your hands with your feet (inhaling) (exhaling) and down or I should say pushing into your hands with your ankles, last time. (inhaling) And hold it and come up higher if you'd like, but try to stay out of the low back too much. And lower yourselves all the way down.
Let's come back into a child's pose, sitting back here. Now, look forward this time instead of relaxing your head and keep stretching, even a little bit more, reaching your fingers a little bit more, a little bit more, a little bit more. Breathing in, taking advantage of that freedom in your back. How much could you traction and stretch it? Inhale (inhaling) and exhale (exhaling) and last time, inhale (inhaling) and exhale.
Come back onto all fours, bring your feet, your knees close together. One more thing, slide one foot behind you. The foot that is closest to me and now pivot down once more and lower and pivot and lower, pivot and lower, take your hand that is the same side as the knee that's on the ground and reach up toward the ceiling. Now push into the ground while you reach for the ceiling. And we're gonna try the other side.
So you're gonna slide the other foot behind you, pivot the heel down and return, pivot and return, pivot and return, now reach the hand that is the same side as the knee that's touching the ground up and you're gonna get a nice stretch. Breathe in (inhaling), exhale (exhaling) and return. So tuck your toes and crawl backward now. I'm gonna get onto the ground to join you. So we're gonna practice a little bit with our squats.
And, in fact, you can stay, yeah, why don't you come onto, off the cushion here. And as we've learned in our squat tutorial, this is really just about how you can release through the tail so this can sometimes be a nice practice to do before you do everything else, cause we've been talking about how you can find that traction here in the low back. So let's start by just getting a little rotation. And pushing one knee out to the side, the side you're rotating toward, just try pushing that knee. And just stay with what is inside your comfort zone.
And back and now let's walk our hand over to the side and lift the arm, yep, so it's like a side bend, over to one side and down and a side bend up to the other side and down. And up and down and up and down, once more, up and down and up and down. And what would happen if you tried to move your hips forward and forward and forward and forward, doesn't it feel like a disco, whoo, whoo, (laughs) forward and forward and pause, hands down to the ground. And start to straighten your knees and bend them and straighten and bend and straighten and now slowly allow yourself to unravel (exhaling) so that we're facing one another. Ahh, walk in to each other so that you're really close by each other, placing your hands against one another.
And we're gonna integrate everything we've done because as you know, the way I usually like to do stuff is find the release first, then start to find where the stability is, with the mobility, and then functionalize it, so here's our functionality. You got this pressure and this whole nice tensegrity model that you've created of your own architectural configuration here and as you have pressure into one another, yes, feel the connection into your trunks so that we don't flare the ribs, but you feel how the breath moves into the back body and you're gonna lift both heels. (Ruth and Rebekah laughing) So you're gonna push down to go up. And down, yes and finding the lift and lower and now stay up, lift your foot that's closest to me, and lower yourselves, nope, lift, stay up, you're gonna lower yourself on that foot, yes, cause you lift yourself without repositioning the other foot, yes, and back down. Try the other foot.
So we're gonna switch sides, you're gonna go up on both feet you're gonna lift the foot that's away from me, yep, stay there, use each other to help one another. Amy, push into Ruth a little bit more. I'm too close to her to get that like. Ahh, I see, there we go. Now I can push. Yep.
Yes. Oh, ooh. And down, so you can do this against a wall, but it's a lot more challenging when you do it against a partner because you both have to adapt to one another. Again, finding the tensegrity within that structure. Trying once again, so we lift both heels, (laughing) I cheated.
Uh huh, lift the foot that's closest to me, I guess, yes, yes, and lower and try the other side. So Ruth, step inward a tiny bit, I think, yes. So now we've got proper angles and lift both heels up, and lift the other foot, breathe, breathe, breathe into your back body, see if that helps, (all laughing) And our building topples over, but that's okay, but it's a great lesson to see where you are in space, where the partner is, where you hold your tension, where your pattern is, where your weakness is. Weakness is balance. Alright, we're gonna do one other thing.
You're gonna hold each other's right hand, excuse me, your right wrist, yes, bend your knees, step, uh you know, actually you're fine where you are, bend your knees and pull, yes, and allow your backs to round. And it's interesting, notice how you automatically want to rotate, now allow yourself to go into that rotation and then return to face one another and come back up, try the other side. And grab and pull (exhales) round, now rotate and return and rise back up. So it becomes a lesson in stability, it becomes a lesson in sling systems, it becomes a lesson in whole body tensional support networks so take a step back and let's do one other thing before we end. Let's take a wide stance and knees actually facing forward.
Bend your knees and notice how it becomes a little bit awkward. Now turn out just a little bit and sit back and keep going, going, going, until it's just where it's comfortable. And then place your hands on the ground, and lift one arm up toward the ceiling, and lower down, lift the other arm up to the ceiling, and lower down and straighten the knees and bend, place the hands on the thighs, actually on the knees here and look up and rise and now walk your feet in. And lift your arms up and reach one hand up, reach the other hand up, lift both hands and lower. Thanks ladies, it was great seeing you again.
(clapping and chatting)
Mention
 |
Rebekah Rotstein (Teacher) |
|
|
Cigdem A |
|
|
Julia L |
 |
Chiara C |
 |
Kandie A |
|
|
Lynne S |
|
|
Deborah W |
|
|
Lorraine Y |
|
|
Denee D |
|
|
Kathleen S |
|
|
Isabelle C |
 |
Leonor F |
 |
Rondi L |
 |
Lorie H |
 |
Galina D |
 |
Jocelyne B |
Comments


You need to be a subscriber to post a comment.
Please Log In or Create an Account to start your free trial.
