
The 8 Best Pilates Exercises for Back Pain
Back pain is one of the most common reasons people seek medical care. For some, it’s a constant or chronic condition, one that’s aggravated by our sedentary lifestyles. 90% of us will suffer from at least one episode of back pain during our lives, and that figure is expected to rise. Pilates is often recommended to those with back pain because it strengthens the core, a band of muscle that supports the back much like the weightlifting belts used by powerlifters. Pilates also stretches and strengthens the hips, further stabilizing the lower back. By teaching us how to stand, sit and lift properly, Pilates can help us replace less desirable postural habits with healthier ones. Read on to discover specific exercises that can help banish back pain.
Incorporating these 8 simple—but not easy—exercises into your routine will keep your spine supple, your hips relaxed, and your hamstrings lengthened so you can keep doing the activities you enjoy. Work up to 10 repetitions of each exercise, moving slowly and mindfully to get the most out of each one.
1. Pelvic Tilt (Imprinting)
Imprinting is used to mobilize and stabilize the spine. To begin, lay on your back with knees bent and feet flat on the floor. Maintain a natural curve in your back (neutral spine). As you exhale, corset the abdominal muscles and imagine dropping the vertebrae one at a time into the Mat without tucking the pelvis. Feel the vertebrae behind the ribs, sternum, and neck “Imprinting” the Mat beneath you. Inhale and feel the muscles of the spine relax and return to their original shape.

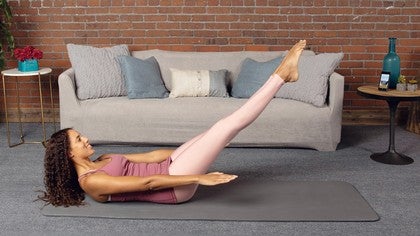
2. Dead Bug
Begin on your back with knees bent, feet off the floor in the Table Top position and arms extended up to the ceiling, in line with the shoulders (“Dead Bug” position). Inhale to prepare. On the exhale, extend the right arm back towards the wall behind you while simultaneously extending the left leg long, keeping the foot off the floor. Inhale to return to the starting position. Exhale and extend the opposite arm and leg. Take care to keep the abdominal muscles engaged (imagine a corset around the core) so you don’t strain the lower back.

3. Bridge (Hip Hinge)
Weak hamstrings and gluteal muscles are often a culprit in lower back pain. Lie on your back with your knees bent, feet flat and hip-distance apart with arms long by your sides. Inhale and begin to lift the hips off the Mat. Continue to lift one vertebra at a time, until the hips, knees, and shoulders are in a diagonal line. Press the back of the arms and the heels of the feet into the floor as you do this. Pause at the top. On an exhale, articulate your spine back towards the floor: upper back, mid-back, lower-back and ending with your pelvis on the Mat and the spine in a neutral position (maintaining the natural curves of the neck and lower back). This can also be done without spinal articulation if it bothers your back, in which case you will hinge the hips and spine up and down using the glutes and hamstrings.

4. Toe Taps (Table Top)
Begin on your back, knees bent, feet flat on the floor, arms by your sides. Lift your feet off the floor so your legs are in a Table Top position (knees above hips at a 90-degree angle). Keeping your chest open, shoulders back and down and back flat on the Mat, inhale to prepare. Slowly lower one foot towards the floor as far as you can without your spine changing shape. For some, the toes may touch the floor or hover. Exhale, and return the knee to the starting position in line with the hips. Inhale and slowly lower the other foot towards the floor. Exhale and return to the starting position.
5. Modified Swan
Spinal extensions like this modified Swan exercise strengthen the muscles that run along the spine, helping to prevent back pain. Lie on your stomach with your elbows bent and hands pressed into the Mat by your sides, your legs hip-width apart and your forehead resting gently on the Mat. On an inhale, gently press the pubic bone and hands down into the Mat as you lift the upper body up, finding length through the lower back. Reach out through the crown of your head as if “taking off” in flight. Think of finding length in the spine rather than lifting up as high as you can with your upper body, as this will just put undue pressure on the lower back. Exhale and lengthen the entire spine as you lower your torso and head back down.

6. Bird Dog
This is a true full-body exercise. In addition to challenging balance, it works the entire powerhouse, including the glutes, hamstrings, and back muscles. Begin in a quadruped position, with wrists under the shoulders and knees under the hips. Extend one arm straight out in front of you in line with your shoulder and only as high as your shoulder. If you feel stable, extend the opposite leg behind you, in line with the corresponding hip and only to hip-height. Create a long line from the fingers of your extended arm to the toes of your extended leg. Pull the front ribs towards the back ribs and draw the navel to the spine, as if someone is tightening the strings of a corset around your mid-section. Hold the position for a moment and then return to the original quadruped position. Repeat with the other arm and leg.

7. Side Lying Hip Work (Clam)
Strengthening the muscles that lift the leg away from the midline of the body (hip abductors) helps to stabilize the pelvis when walking and performing the tasks of daily life. Lie on your side with your head resting on your outstretched bottom arm, or on a pillow if it’s more comfortable for your neck. The top arm can be bent with your hand on the floor in front of you to provide stability. Bend your knees to a 90-degree angle so that your knees are in front of your hips. Keeping your hips and shoulders stacked, lift your top knee to form a diamond shape while keeping the feet together. Try not to rock or tip the pelvis as you open and close your knees in a “Clam” shape.

8. Figure Four Stretch
Tights hips and glutes often contribute to back pain. The Figure Four Stretch is an effective way to open up those areas. Lie on your back with your knees bent, feet flat on the floor. Keeping the knees bent, lift one foot off the floor and rest the ankle on the thigh of the supporting leg, forming a “Figure Four” with the legs. Clasp your hands behind the back of the thigh of the supporting leg or, to increase the intensity of the stretch, grasp the shin of the top leg. Hold for 30 to 60 seconds. Lower the leg, release the hands and repeat with the other side in the “Figure Four” position.
Remember consistency is key when introducing new movements into your routine. If any pain or discomfort persists or increases please contact your doctor.

Alison Manheim
Comments

You need to be a subscriber to post a comment.
Please Log In or Create an Account to start your free trial.


