Description
About This Video
Transcript
Read Full Transcript
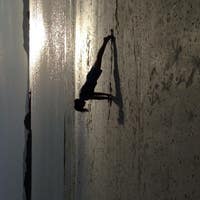
Hello everybody. It's a beautiful day here at the beach and I'm so grateful to be back at [inaudible] anytime. Filming some more classes. Uh, today I'm going to explore quite a bit with the idea of range of motion and flexibility, balance all things which are included in PyLadies but also included in yoga. I've been doing a lot more yoga lately and found that I'm lacking somewhat in flexibility and am trying to infuse more flexibility driven exercises into my workouts and those workouts that I teach my clients. So here we go. Kayden is going to come on in and be my student today. Thanks for coming back Qaeda.
And we're going to go ahead and start right here with feet. The way I'll um, position my own feet is so that I can't see my toes. If I look down at the wood chunk, it's perfect for me, but everyone's going to be a little different. I almost feel like I might've taken you too far back, too far forward Qaeda. Perfect.
The other thing to be mindful of here is that if you're working with a standard foot bar without a locking mechanism, you want to be careful not to lean forward on this bar. We happen to have a locking mechanism, so I'm not worried about that. I'm on one blue spring and we're going to begin inhale through your nose and exhale through your mouth, lengthening up through the crown of the head, taking a moment for a standing motivation, a motivation, a standing meditation motivation. That's cool to reach your arms high up to the ceiling. Please. If we can't have fun with our mistakes, what can we do?
Take your arms down by your side and start very gracefully by nodding your head forward and rolling down one vertebra at a time. Allow your arms to hook over the bar or reach over the bar and then hook onto the edge of the reformer. Just pause there. Push into the reformer to round through your back a little bit more and enjoy that stretch. Take a breath, release your hands and round and roll up through your back. Once you fleet it, feel yourself standing on both of your feet. Take your arms wide and up, lifting your ribs away from your pelvis. Inhale here. Exhale. Allow your arms to circle down and then peel down one vertebrata at a time. Hook the hands on the edge of the reformer, pressing into the reformer, round up, drawing your belly even more active, round and roll all the way up to a standing position.
Take your arms wide and up. Lifting your ribs away from your head. And one more time. We're going to continue to move. Peeling your body down. Catch the heels of the hands on the edge of the reformer. Push the carriage forward, creating a pyramid type position. Flattening out your back.
Notice a connection on the bar without leaning forward. Here. We're going to round through the low back articulating just to the point where we've maximized our round back and then extend through the back. Use an inhale for that exhale using your abs and the backs of the legs round up. Use the inhale to extend through your back. Add a little thoracic extension, lifting your head slightly. Exhale to round that through the back and inhale to extend, enjoying that nice flat back and then going just a little further.
Two more like that. Rounding and in how to extend. Enjoying the stretch in the backs of the legs and rounding this time. Rounding all the way in, finding the spring at rest. Transfer the weight to your legs and lift up again, sending your arms why lifting your ribs, lengthening through the crown of your head. One more time. Inhale, exhale. Rounding forward one vertebrae at a time.
Find the edge of the reformer and then push out. See again if you can feel that connection of whatever's touching on the bar stays touching here. We round through the back using the hamstrings a little bit as well. Inhale, extending, lifting the head, opening the heart. Exhale to Rao, finding those abdominals. Beautiful Movement.
Inhale, extend. Perhaps finding a little more thoracic extension and round. Exhale and extend. And one last time and round and roll all the way up. Keeping the weight equal on your two feet. Roll up to a standing position. Beautiful. We're going to move right into our footwork. So Katie, you can lie down on your back. I'm going to put three red springs on.
Sometimes I like three reds and a blue. Sometimes I like three reds. You choose what works for you for footwork. We're going to put the heels on the bar separated about hip width, distance arms by your side. Find yourself here, grounding the back of the body, feeling length through the crown of the head. Exhale to press out using the backs of the legs and inhale to come in. We're going to do about 10 here. I always say about, because it's really a matter of whether we're in the right spot, we might move a little faster one day a little slower another day. Sorry, I've got a little hair on you. Keto, I'm going to take away.
We want to pay attention to dropping the pelvis in neutral as we come in in our thighs. Nice and active. Chest Open. Give me two more here where you're lifting your heart a little bit and when you lift your heart, you're also keeping your chin away from your chest and then go ahead and put toes where heels are. So when we put the toes on the bar, we want to make sure it's really the balls of the feet or the metatarsal joints. We're going to flex the toes back a little bit today, somewhat similar to what we might do in a yoga class, just to feel what that feels like. And out you go. Exhale. Good. Now I don't want the toes to be overactive. I just want to explore really paying attention to equal weight across all five Metta tarsals. And I think sometimes when we use the toes too much, we miss out on one of those mega tarsals.
So see if you can feel all five of the balls of your feet weighted on the bar. And then if you feel comfortable putting your toes back down and keeping that weight, then go for it. Give me a little more inner thigh connection as you press out. Lifting your sternum. Beautiful. Come on in one more like that. Lifting your sternum and come on in, slide your heels together and we'll make small v position. Same Focus.
All five metatarsal is weighted and press out and come in. So once we've created the flow, we start to fine tune things a little bit. I want you to think about keeping your feet really still in space. Pay attention to this feeling of pulling the heels together. Yes, you're pressing into the balls of the feet, but make sure you're not pushing your feet away from each other. Again, if you found that you have a good connection through all five of those metatarsus, then feel free to relax the toes back down. Otherwise feel free to keep them lifted at the end here.
We'll do two more where we really think about lifting the sternum, creating more heights, and really pulling those inner legs together all the way through the end. Beautiful. C'Mon in the heels wide on the bar. Ankles powerfully flexed. Please exhale to press out. So here at Kato's got a lot of range of motion so she could go really wide, but I'm going to hold her back just a little bit today and I want you to really feel the muscles on the outer part of the leg working as well as the inner part of the leg. So yes, the inner thigh is working, but since the outer hit for me, it almost feels like I have to pull my hip into my socket in order to get that feeling. I'm not actually asking so much for you to squeeze your glutes. I'm just asking for something in the outer part of the leg to waken up.
Oftentimes I like to really play with this idea of pressing into all five of my metatarsal is when I come in, so I think about pulling in helps to wake up the hamstrings. We hope you can also think of pulling the bar together a little bit to create a little more inner thigh engagement as you come in.
Same pattern lowing lowering the feet down and up, and then pulling the carriage in. I want you to think here about lifting your toes when you pull in, so lift the toes to pull in. It might help you wake up the hamstrings a little bit more. We'll just do two more like that and then we'll really play with the calf raises. Really enjoy the work and the stretch. Beautiful. That was the second one, right. Press out and hold.
Feel the inner thighs active as you lower your heels under the bar. And then for us up through all five metatarsal is lower the feet under the bar and press as you press that. Pull everything together and grow a little taller. See if you can embrace this idea of lifting with your abdominals, kind of odd lifting with your abdominals. Yes, your feet are doing the movement, but creating that connection first might change things a little bit. Beautiful. Just one more. Go right into your prances pressing up to go down.
Each time you press up, grow a little taller. So I want the pause actually to be in the up rather than the down. Yes, I'm going to give you an opportunity to stretch, but reach and reach and reach and find the breadth that suits you. I'm not so committed to the breadth being, um, too, uh, molded. If you will just breathe, enjoy, and then hold on one side. Okay. So I'm going to ask you to take this foot that you're stretching.
Whichever it is is fine and move it up the bar quite a bit so that the weight of the bar is just above your heel. Okay. You're gonna let the bar in to your foot. Bend your knee ever so slightly, maybe only an inch or so, and let the bar in a little more and then lengthen the leg. Maybe not all the way to straight, but maybe. Yeah, Ben let it in. Beautiful. Something might show up and straighten. Try to let your foot relax a little bit over the bar. Good.
And then stay there. Move the foot down slightly. So you're more at the bottom part of the arch. Let the bar in bend a little and let your foot kind of mold over the bar as you lengthen. Yeah, the heel and the toes. Bend a little and let the foot mold over the bar. Beautiful. And we can do just one more like that. And then as you can imagine, we're going to go up to the middle of the arch or the high part of the art.
Shouldn't do the same thing. See if you can really let the bar in, let your metatarsal is mold over the bar, your are gonna reach over the bar. So I'm doing this really beautiful assist for the student that's in front of me. A person could use their own foot to do something quite similar. It's not exactly the same, but if you feel that you have one part of your foot that needs a little bit of a mold, you could use your foot, you can put your foot down and I'll be happy to help you letting the heel reach under the bar, letting the toes reach over the bar. Beautiful. One last time. You'll take your foot down just a little further.
Spin the heel in ever so slightly and really receive a beautiful calf stretch. And perhaps it's a little deeper than it sometimes is.
Bend your knee just a little bit and then lengthen. Beautiful Bend. You need just a little letting the bar in and lengthen so a person could bend their knee further and that would be fine. But I'm just exploring this kind of small range here and just checking out. What I'm really looking for is as much movement in the ankle as the knee that it's really an ankle movement, not a knee movement in my mind. Yeah, keep the legs straight. OOPS, I lost my balance there. And then move down just a little bit so that you're at the low part of the arch.
I like to do four positions. Let the bar in, let your foot maneuver or mold over and bend and straighten. So what are the things I'm looking for here is this softness, this ease across the top of the ankle so that as you bend and straighten, the ankle is at ease and the muscles on the bottom of the foot and the back of the leg are stretching. Oh, that was nice. Right there. I like that. And lengthen and then move the foot down again. So now here work really at the top of the arch, right? You're going to let your toes, not so much your toes, but your metatarsal is the foot. Ah, they're not really the foot fingers, but the metatarsal is, are kind of spreading.
Those of you dealing with Burundians or beginning beginnings of Bunyan's, this might feel quite nice. That doesn't feel nice. Definitely don't push on the toe.
Hopefully about the same amount of time we did on the other side. So working on working the body, but also trying to increase a little bit of range of motion. Beautiful press set. Bend your knees and come on in. So I'm going to keep the spring tension the same for single legs. I'll ask you to put your heels on the bar a little narrower than you normally would, so they're closer to the midline, although they don't need to be touching.
Let's keep the left foot on the bar and lift the right leg up and we're going to flex the ankle and go into a figure four type stretch. So try to make sure that your foot isn't on your thigh here, but that your ankle somewhere is okay. And then now we do single legs like this. Exhale to press out, keeping your pelvis still and inhale to come in. Beautiful. Now you want to pay attention to not jamming your foot into your thigh when you straighten your knee, but to keeping your leg from hyper extending.
That's the only thing that I would be cautious of here. We'll do one more like this, using your inner thigh to support and then come on in option two, you can go to kind of a half Lotus position, bringing your foot to the crease of your hip and then holding that foot with the hand. Try to organize your neutral pelvis here. Use your inner thighs as you press out in in. So the inner thigh of that standing leg is really crucial. Notice that the thigh here is going to go down as we find this stretch and we want to use the muscles of the back of the leg to help you create that feeling a little bit more each time. Beautiful.
So I'm looking for five in each position. Should you do this class again? You could choose one position and do all 10 like that if you, if you prefer. I think that's the last one. Perfect. Let's switch legs. So here, once again, we're going to put the heel a little closer to center than we sometimes would cross the leg over and we're in a figure four. Really enjoy this stretch here. Tailbone down out you go. Exhale. Notice again the thigh, that stretching is going down and up in space, so there is some activity in the back of the leg to create that position. Also notice that we don't want to hyperextend the standing leg.
We want to feel the inner thigh working of the standing leg, almost pulling the inner leg to center. Good. And then we shift positions after five pulling the foot to the crease of the hip and here you can let the foot be pointed if it makes sense. Keep it flexed. If it's better for you, it's really up to you I think. And then same thing, we'll exhale to press down. The thigh goes down and we lift up. The one thing I am going to caution you about is making sure that with your foot in this position that you're not jamming the knee down, but that you're really focusing on the lengthening up. That becomes really important I think here.
But this feels gorgeous in my opinion, and we have five there and we'll switch legs going to the toes so we have the ball of the foot on the bar, the toes slightly lifted. Experience that position first, and then if it feels right to relax them down, go for it. Cross the right leg over the left and squeezed the thigh together. Really focus on squeezing the thighs together here and then press out holding that position for a moment. You may not straighten your leg all the way and I'm okay with that. Pull the carriage in. Exhale to press out, squeezing the thighs together as the focus and gently pull in.
What you'll find is as you continue on, perhaps your leg will get a little straighter, but really make it more about keeping the squeeze of the inner legs toward one another than the need to straighten the legs. Beautiful. I believe that we are on five now. Perfect. I'd like to get to about eight in this position, so we'll call this one six.
So the standing leg is the one you have to pull in. I think the cross leg will push it over if you're not careful. Think about that. The standing leg pulls in. I believe we have two more. Yep. So the goal was to do eight and I think we were correct there. If you found that you wanted to do an extra few a little faster or go a little slower, that would be fine to have your legs into your chest please.
We're going to go ahead and change. I'm changing this spring to a red and a blue and this is what we're going to work, um, our arms a little bit and abs on. So with your feet now on the bar for me, reach back and hold onto the straps. We're going to take the hands above the shoulders, press out just a little bit with with the legs. Option one, we take the right leg over the left for just a basic cross leg. If your thighs and hips allow, you can double bind and this is an eagle bind that we might do any yoga class.
And then here the legs are going to go ahead and float up. Just hold this position for a moment and explore a little rotation side to side. Very small. And notice how with the right leg on top, when you go to the right, you feel more stretch through the left side. That's a lot of right and left. But the one that is underneath is going to feel a little bit more profound. Stretch here, pause there, squeeze the thigh bones together and press your arms down three times.
Beautiful. Squeeze the five bones together. That's the focus. Make sure you're not hooky and pulling apart, but you're squeezing. Yeah. So we added chest lift here. We actually out to lift the head and chest as the arms come down and we inhale to lower down. Exhale to the left, hold that curl real powerfully. And inhale down. Squeeze the five bones together and we stay here.
So you're going to give me a little tiny rotation to your right. Good. Back to center and lower down. Lift the head and chest. Nice and high. Give me a slight rotation. Lower half of the body to the right. Lower back. I didn't say that correctly. I'll say it correctly this time. Lift the head and chest.
Slight rotation of the pelvis, come back to center with the pelvis, lower the body and we'll switch sides. Yum. Okay, so we now cross the left leg over the right. Add the double bind if it suits you or just choose to cross the legs if that's a better choice before we go anywhere. The legs are lifted and we do some little rotations. So the rotation is with the lower half of the body side to side. Notice now that when you go the other way, when you go to the left, you're going to feel more stretch on that one leg and that's part of what I'm trying to achieve here. To open up the hips.
I found that I was very tight in my hips and I'm really working on it. We'll stay here. Exhale, press the arms down, opening your chest as you do in how to lift up. Exhale, harassing down, opening the chest, enjoying the movement. Good. Keeping the inner thighs squeeze. I know, I know all the tricks. We Hook our feet and we pull them apart. You got to squeeze them together. Lift your head and chest. That's where we are, right and lower down.
We'll do two more. I got a little loud and boisterous there, didn't I? I wasn't supposed to do that. Huh? Stay here. We do a mini rotation. You're going to go that way and come back and lower down. So we're rotating to the left. First we lift.
We do a little pelvis tilt or rotation. Come back to center and we lower it down and we do one more like that. Beautiful. A little rotation. Come back to center and we're going to lower down with your feet on the bar. Relaxed carriage in. Hold your strap still, but just take a couple of nice ways you can work wherever your hands want to be is fine. You could rest them if you wanted to.
I just want you to loosen up your spine. Today's workout is meant to be a workout, but also one of those workouts that you walk away from the feeling
Pay attention here to keeping your ankles flex the whole way through today. So really flex those feet back and press out. Good. So one of the things I like to pay attention to is I keep my knees just a little closer to the ropes so that I can be sure that I'm not wobbling out in, in. And when I press out, I'm focusing on opening my feet a little wider without my knees and I suddenly wake up my hip rotators in a really gorgeous way. And when I say a little closer, it's really all relative to your hip flexibility. But experiment with that and we'll do two more like that. Beautiful, beautiful. And we'll keep the legs out to straight.
So let's take both legs up toward the ceiling, feel the backs of the legs and press down. Good. We're going to play with this a little more momentarily. Inhale up, keeping the thighs pulling together. Press down again, we're making sure the pelvis is in neutral, the chest is open, and we're moving with a certain amount of ease here. Trying to find our edge without going over it yet we've got a little work going on in that inner thigh. So now we're going to lift up and hold. Okay, so let's take your left foot out of straps. You'll hold the strap with your hand and then Tuck the foot underneath and hold on with your other hand. Now if this doesn't work for your body, if your knee doesn't allow you to do this, you could always just rest your foot on the bar and use that as an assist for the rest of this series. But Kate is just fine with this. So she's going to get her foot in that position.
She's going to try to push the thigh down and stay here. Good. Now for now, this arm is not going to do much. We're going to try to press straight down with just the right leg, keeping that pelvis nice and still drawing those abdominals very active as you lift the leg up, feel as though you're drawing your tailbone or dropping your tailbone down actively and press down. So because we're moving with the right leg, when you lift up, think about lengthening the right side of your body so that you don't shorten too much there yet and press down. Very calculated movements here. Good. And we'll do this one more time. So I've got Keto in parallel alignment. You certainly could do this in external rotation as well, but today we're working in parallel alignment and come on up here and stay.
Now this is where this arm is going to be crucial. Both arm and leg are straight and have a little bit of tension without changing your pelvis. Take the arms and legs open. Good. And then come back together and take the arm and leg open supporting with your core. And again you're starting to feel hopefully a really nice stretch across that left thigh, open through the hip. That's the point. Good. And then on the next one we try to add on open and you're going to use your arm and leg simultaneously to pull everything back to mid and a low position.
Your arm will lose tension, the leg comes up, we open arm and legs simultaneously. Use the arm and leg together to pull together and come back up. And we'll do just one more like that, the arm and like open and we pull everything together, lift up and carefully unravel your body and switch positions or switch legs. So you'll put the other foot in strap, remove the strap and hold onto it as a safety. I think that's important. Notice once again, we've got a nice hand on the top of the foot there and we're trying to really reach that thigh bone down. Yeah, if you needed to put your foot on the bar, that would be just fine and you'd still get a nice little bit of single leg balance work here. Beautiful. So we're going to not use this hand too much yet.
You use primarily just the leg and press that leg down again in parallel alignment in hell to come up. So we're looking for the left side body, staying along. So in your mind, as you lift your leg up, your left leg up, you want to lengthen that waist in order to make sure you don't lose your pelvis position. Right. We have one more I think. Yeah, I'm trying to do three in each of these positions. So you have enough time to feel it, but also so that I can keep count, reach up and stay here. The arm now bears some of the spring weight and we hold here and we open the arm and leg simultaneously. We'll do three of those as well.
Beautiful and come back up. So notice your arms should really bare as much spring as your, as your leg is here so that you can kind of even everything out. And we're working this opposition here and then we'll pull everything together with the next ones. So we open arm and leg working together to pull together low and then come up and you'll feel when the arm will kick in again, make sure you have a little tension on that arm. Good and beautiful. So it's really a half a circle with one leg, half circle with one leg, which is quite nice. Oh, next time I'll have to add the piece. I forgot. There is such a good piece. Oh yes.
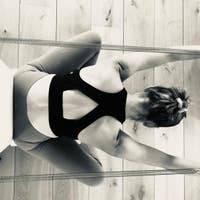
You may take your feet out of your straps and unravel that. That's okay. Part two. Next time we'll do it. Okay. I'm going to change the springs. I'm just adding a red spring. So we're on two reds and a blue and this is okay to feel supported while she does her pelvic curls. If you wanted to really feel your hamstrings, you could keep the same spring and that would be just fine. Do a pelvic curl up for me. Engaging the ABS. Feel those hamstrings supporting.
Enjoy that nice openness through your chest, high through the pelvis, inner thighs active. And when you lower down, think more about lengthening. Use An exhale there. Yeah, so I like to do this with two breaths and inhale to pause and exhale to peel up. I've placed a cadas feet just above her heels, so she's actually not on her heel. She's actually on that same spot. We stretched, peel down. I realized I didn't verbalize that. So you might want to adjust your feet and feel that for me. It's really nice.
It makes me feel my hamstrings a little more. Go ahead and peel up one last time and we're going to stay here. So in this high position, I want you to think about reaching out through your knees even more, hugging the carriage to the stalker a little more powerfully and then press out and then pull in, hugging the carriage and even more and press out. Beautiful and pull in. What's nice is she's almost going to a straight knee, but her pelvis hasn't changed. That's what I care the most about. I'll take one more there. This is a heavy spring to press out in, in on, but it also feels kind of Nice. I think roll down one vertebrae at a time.
Feel supported. Beautiful. We'll do that one more time before we add on. Inhale. Exhale to peel up using those abdominals. Prs that pelvis up nice and high. Really leading the way. Lengthening through the back of the body, so I meant to say leading the way through the pubic bone. Exhale to press out and pull in. Lifting and lengthening through the back of the spine. More. Go again. Yeah, and lifting and lengthening.
It's not wrong to use the arms a little bit here to help keep the upper back involved. Don't be shy. Last one, pull the carriage all the way and see if you can create even more length in your spine as you articulate down beautiful movement, holding the pegs behind you, side to side with the legs.
And so we're going to revisit the cat stretch standing that we did at the beginning of class, but add some balance here. So your feet in the same position they were in. Roll forward catching the edge of the reformer as you do and push the carriage out. So we revisit this wonderful down's a downward dog. If you're taking yoga or pyramid position up, stretch position in [inaudible]. So here I want you to do a couple where you round your belly or around your back and then extend.
So notice that I would like you to stop at the point before the carriage comes in because of our movement. So you're rounding, using your abs, beautiful and extending, really focusing on your upper back. Now stay here. I like to feel the connection of something on the bar here. So I've actually, I can, I'm the perfect height and can press my hipbones just a little bit into the bar, but be cautious not to push the bar over. If you don't have a locking mechanism. Let's take the right leg straight up and back and pay attention to not letting your pelvis shift. So we're really using the hamstring here to perhaps lift a little higher, higher. Beautiful. I love it. And now let's take the opposite arm up.
And this is quite a big balance game here. From here we're going to round through the low back, bringing the knee and the elbow in toward one another. No need to touch and extend. Beautiful. And we're gonna round through the low back, bringing the knee. I want a little more rounding here. Good and extend.
And perhaps your arm can come in a little more if that's a better idea. And round, round, round. Good. You are just beautiful and extend. And again round. I want one more and extend. Now this is where it gets challenging and juicy. We're gonna round hold, bring the carriage all the way in and try to roll up to standing on one foot. Reach your arms high, take a breath or two, and then put your foot down. Inhale, exhale around end roll forward, bringing your arms now onto the edge of the reformer again and extend your back.
Aim that tailbone up. Draw the belly active. Lift the opposite leg and check it out. It's probably going to feel different on the two sides. See if you can lift yet a little higher with the leg. Gorgeous. Lift the opposite arm here. So we've got arm and leg lifted.
We use the exhale to round through the back, bringing the knee and the elbow in and we reached out that first time. I think switching to the second side, the body is confused and so it takes a moment or two to figure out what the heck you have to pull from. That's where my giggle came from. Good. And we round in. Is this the last one? Did we have one more? Okay. Pull it all the way in and you're going to try to transfer. If you need to put your foot down, put your foot down. But I encourage you to try to not lift your arms high.
Put your foot down. Beautiful and rest. Now come around to this side and you're going to go ahead. And what I want to tell you is that if you stand, you can stay right there. If you stand further away from the bar, the challenge is more stretch wise. If you stand closer to the bar, the challenge is slightly easier.
So because I know the body in front of me, I'm going to say her foot is going to be lined up somewhere around the edge of the reformer bed. Okay, so you're standing now on your right foot, you're going to lift your other leg up. Flex the ankle and put the foot on the bar on the foot bar. So we're creating a standing figure. Four mm juicy stretch. Drop the pelvis down a little bit. Draw the belly in and enjoy bending the knees slightly. And as you press up, lengthen through the crown of the head.
Bend the knees slightly and lengthen through the crown of the head. Bend the knees slightly. Lengthen through the crown of the head. Stay here. Put one hand on your knee, one hand on your foot and fold forward a little mm working balanced. Wow, I'm impressed. I can do this with no assist. Come all the back up. As soon as I say something, I'll probably fall over, but I'll try not. Okay, now this is the hard part. Are you ready?
You're going to keep the shape of the leg and lift your foot off the bar. Reach your arms up and hold. Grow Taller, perhaps press to the ball of your foot and then bend the knee or reach back. Same arm, his legs. So I'm holding my left foot with my left hand and go into a quadriceps stretch. Stay here. Lengthen up through the crown of the head. Beautiful. Think about pressing your pelvis forward slightly.
Your thigh bone back a little more. Oh, bonus Keto. We're going to stay here. Friends at home. This is a bonus. I didn't plan this but I love it. We're going to fold, reach, reach, reach, reach and reach. Stay there. Kick your foot to your hand. You could put your hand on the bar if you needed help with balance, you don't need it. Here we go. Stand tall and hold good or at least the foot, but don't rest.
The foot is going to rest on the reformer with the toes right up against the shoulder. Rest. Stand tall. Let your hip drop down a little bit. Feel the rotators, the deep external rotators. Turn on. I kind of like the arm up. We're going to keep that. Okay, and then you're just going to push that carriage out and gently come in. Be careful not to push with your quad. See if in your mind you can push with your rotators. Now. Yes, the quad is bending in still. Well, the quad is assisting in straightening the knee and then the hamstring if you will, is pulling in.
But I want you to really think about what's going on in the hip, not the knee, and it's a gorgeous good. That place where we slow down is right when we're trying to straighten the leg. Really working on the up good and we'll do one more there. Up, up, up, up. Good. Bend the knee, come all the way in. Lift the foot up. Then if you want to just for fun, you can extend your leg, then the knee and take a moment to rest.
We're going to now turn to face the foot bar and you're going to take that same foot. We've been stretching the same leg. We've been stretching. The foot is up against the shoulder rest flat though so the toes aren't curled under and then the leg is going to be basically aligned with the other leg when you're standing. That's a perfect way to start. Okay. Then reach forward and hold onto the bar and take your body flat. Parallel with the horizon. Yeah. Okay, so here, soften your standing leg a little if you need to, or keep it totally straight. If it works for you, extend the leg out to straight hand.
Gently pull in, extend the leg out to straight and gently pull in. Now take your right arm out to the side so it's the same arm or opposite arm rather as leg. That's moving. Good. One more. We're going to stay there. You're gonna find your balance. Keep the press through the back legs. See if you can let go with your other arm. Reach your arms straight out to the side or overhead by your ears. Stay there.
If you need to put a hand down, you put a hand down, that's fine with me, but perhaps you can bend both knees and bring your body upright to standing. Lifting the arms high, the knee will come in. Now you're only gonna press back as far as you can. Keep your pelvis still press back and pull and press back and pull in. Beautiful. Press back and pull in.
So we're really focusing on hamstring here. The glute may kick in. That's fine with me. But I'm really looking for a little hamstring engagement. Pause there and rest. Shall we do the second side? [inaudible] hmm, I'll do the second side facing you. Oh, that'd be fun. I think. How about that? Cause I did the first side. So we're going to take the foot.
Remember you'll find the placement that best suits you. I like to take my legs sort of straight out in front of my hip so I'm getting a really nice stretch there. Okay. I'm also able to use my inner thighs a little more there, which is useful for balance. Stand nice and tall. There we go. Balance and be here. Okay. Bend the knee and lengthen up and then the knee and lengthen up through the crown of the head and bend the knee and lengthen up and hold. I'm impressed too. Huh?
And pulled forward. Uh, you get to see your teacher wobble and shake here. Good. And then we're going to come back up and stay here. Now this is the challenge. What I'm ultimately looking for is that you can keep the shape of the leg, but just remove it from the bar. Most of us aren't going to be able to, but it's worth a try, right? Take the arms up here, lengthening through the crown of the head, beautiful, and then bend the knee and reach around and hold onto the top of the foot. Now certainly the bar is available for you if you need it for balance.
Stay here, bend the knee and length in pressing the pelvis forward, enjoying the length through the crown of the head. Bend the knee and lengthen. Now think about bringing your pelvis forward slightly. Your thighbone back one more time. We'll bend enjoying the stretch through the quadricep here.
Also the hip flexor. Now we're going to fold forward. Taking that leg back. Find your breath, kick the foot to your leg. Reach, reach, reach, and come on and hold. Again. Finding your balance. I think we kept the arm up, didn't we? Going to relevant and lower down and then put your foot right up against the shoulder rest so you have something to work against and hang for a moment. So the arm could be up, down, out, whatever works for you. That doesn't matter so much for me. It's what feels good. I, this is very balletic if you will. And you could take that. If you want a with my foot there, it's going to hold you back. I should take my foot off. Try to square your pelvis as you push out. So what I, I failed to mention on the other side and I should have, I just realized is we in a little bit of external rotation.
So your standing leg, it would benefit you to be in external rotation here and CAE to naturally turn to that position. I think, um, that's something that would be nice for you to think about next time you do it on both sides. Feel that wonderful rotation pressing out. So we're really deemphasizing the leg movement and emphasizing what's happening at the hit. Beautiful. Take two more there
So the foot is now up against the shoulder rest. I like to start with my legs aligned when the carriage is basically at rest. And then I'm going to fold forward, lengthening out my back and then lengthen out the body. So we're endeavoring, your arms can bend, they do what they need to do in order to try to feel a straight line body as best as possible. Abdominals, quite engaged, beautiful. Bend the knee to come in and press back. So option one, we would really just stick with the leg moving out. And in option two you take the opposite arm straight out to the side.
And option three you can take both arms and really work balance, big challenge. And then you can take your arms overhead. Good. Bend your knee to come in and stand tall with your body. Once you've got that tall standing, body, arms are up. Beautiful. Draw that belly. Nice.
And if we keep the pelvis still and just move back with the thighbone. So really think about moving with your back fi rather than pushing with your quad. You want to feel that hamstring working. I can see cadas hamstring. Really just working right around that horn. It's nice.
And we'll go ahead and rest that
Use the inner thighs a little bit to sit taller. Inner thighs and hamstrings. Taller. Good. Now from here we're simply going to do a side bend. Keeping the carriage still come back to center. Side bend, keeping the carriage still come back to center. Next layer we extend the upper back. A little side bend, keeping the carriage still. Oh, it's beautiful and side bend. Good. Now adding a little more of a rainbow feels. Side Bend.
Add the arms to it and come back through center side. Ben had the arms too, and again, reaching, reaching, reaching. So all about the spreading of the heart, the spreading of the shoulder blades. That's what I'm looking for here. One more time. Each side. Good, Huh? Oh, we come back to center. We hold. Sit Tall. Let your arms rest forward and take a forward fold.
Still holding the straps were not done. Three breaths. Remember, the longer you stay in a stretch, the more the muscles release. So don't hesitate to really enjoy that feeling of stretch and release.
Take to add a little more flair. Yeah. Okay. So spreading nice and wide. We're going to find thoracic extension and then we're going to lean back on the, at the hits and create the rainbow up and over. Stay very engaged in your abdominals, up and over. Now if your body, your back, everything feels good here. You could move a little faster up and over. Don't rush it. But in Joel Rainbow, beautiful. Up and over pressing. I'll tell you this, except those rear deltoids in such a gorgeous way for me. Beautiful. So many other things to the whole back body. Last one.
Good. Round a little fold forward and enjoy your forward fold all the way. Head is relaxed. Three breaths. Oh, I'm moving the reformer for you. Oh, here we go. Little ride. Uh, let's come up from there and turn around to the other side.
Keeping the same spring tension again. We're working with a light spring tension so we can work on imbalances between the two sides. So here you go. Your legs are straight. I have to say, I actually really like working this these days with my knees, a little bent. I come forward just a little so I cannot touch the shoulder rest and I have to really lift up all the way. And then I hugged just a little bit to feel my hamstrings. That feels really nice for me. It's not an end necessity, but I really like it.
So this creates this wonderful anchor for a nice tall spine. Some of us can't quite do that with straight lights. It's up to you. Send your arms out in front of you and spread here. Now stay for a moment. We want to really get this widening through the front and the back of the body. So just as much widening between the shoulder blades as the collarbones k to take your arms a little more open. Yes, I love that.
Let's do a couple here. So for two arms. This is a pretty light spring of blue spring, but we are going to move into single arm here. So be a four warned good. Just do that one more time just so we can kind of experience the range of motion. And then here we are, we're going to absorb the spring with the right arm, taking everything around. Wonderful spinal rotation, lots of peck. Work on this one arm on wine.
Good absorb with the left arm and rotate around spreading those collarbone.
Perfect. So I want the arm movement to come first. So we rotate first with the body and then the arm comes through, the arm opens, spreading again and unwind. Yeah. So we're going to rotate first with the body, bring the arm around. Take the arm back where it came from and unwind. Yeah, rotate. Last time.
If for some reason sitting on your knees doesn't work for you, you can find another way to sit. You could do the mermaid stance if that's more suitable. We're going to take the rear strap in the outside hand. I'm still on this same blue spring, I'm assuming to love that today. Love. I'm loving the blue spring today and then notice the hand here as a brace.
Okay? You want to use this arm to help you stay connected to the side, but also to create an anchor for stretch. You'll see, so we're going to take this right arm and reach out on the diagonal. Cross our impulse style. Keep this arm totally straight and round like the mermaid. As you rotate, beautiful. Take the arm, reached a little further, bend the elbow and touch the other shoulder rest to reach even more. K to, I would like this feeling and I think you can give it to me. It's gorgeous. And then press up using your bottom arm and restack your spine.
Reach out, the straight arm goes open, enjoying the stretch at the very end. Bendy elbow and stretch deeper. Rounding a little more through your back. Good in case here. Beautiful. Press up with your bottom tricep stack your spine. And we go again and we rotate. Reach for the stretch, feel the opposition and then full deeper prs up.
Good. Let's do one more. One more feels right and reach a little more.
And then you're bracing yourself with your other arm. So here we've got that cross arm open, that pull feeling right, and then we rotate around. Reach, reach, reach at the end of the movement, fold a little more, bending your elbow. So it's really about getting more spinal movement here. Good, but also a wonderful stretch. Press up using your tricep unwind, stacking and we pull out and we reach using that opposite arm to really help you with the opposition here. Fold round a little more. I should say. Reach, press up with your arm, stack your spine to more we reach.
And really I didn't give a specific breath pattern here because I want you to enjoy the movement in the breath, Brie, there's the most important thing per dress up with the arm and stack and this will be our last one. Feel that wonderful rotation around wonderful flection. Beautiful stretch here.
One final exercise before we officially close up here. We're going to be on the knees up against the shoulder rest. Okay. Now this can be a little bit funny because I am going to ask you to come all the way forward and hold onto the risers here. So if you have a different make of reformer, you might have to be a little creative. Um, so I'm on a blue spring, still walk yourself out and then reach up and hold on and notice the grip here. It's a lot more comfortable with the hands hook like so.
Certainly if that weren't an option to you, you could explore the exercise. But this is the way I like the hands to be. Sit Low and really enjoy the pull the stretch first. Oh, it feels so good. We decided to call this exercise a Yummy [inaudible]. So here we're gonna work with the pull up a little bit here.
So you're just going to bend your elbows to pull your head between those two risers. Good. I don't want you to put a whole lot of focus in drawing your shoulders down that sometimes will stifle the shoulder here, although the shoulders shouldn't be elevated. The first action is really bending the elbow. So pay attention a little bit to that. You may find it makes this movement more successful for you, more doable.
Now here's where we play. We pull forward and we stay. So here I want you to think of opening through the shoulder blades and the collarbones and pull yet a little further forward until you start extending your back. Lifting your heart, pulling your sternum forward. Once you've maximized your thoracic extension, we're going to start to round the back and straighten the arms. So you're pulling that carriage all the way in, maybe to maximum here. Beautiful, wonderful stretch to the back, lots of Ab work.
And then here you're going to unravel the spine and find neutral and keep the arms straight. And once again, we're in this wonderful stretch. I like to go a little lower. If that suits you. Okay. Bend your elbows, pulling forward. Nice. Extend your back lifting, opening the heart, really enjoying that back extension. Wow. And now round your back. So ripple here, gorgeous. And the elbows are straightening. Wonderful. And then we unravel the spine back to a neutral position controlling the spring as it goes back. Let your hips sit low if it suits you here. So bend your knees a little more. There you go like that.
And then you're going to go ahead and pull with your arms. Good. Extend through your back. Wonderful flow here. Round through the back. And as you do, the elbows will straight and you get a wonderful stretch there. And then sort of let things unravel a little bit. Sinking your hips low. One more please. And pull. Chest is open.
We extend the upper back. Good. Beautiful. We've got it. And then be careful when you come out of this, your arms might be a little tired. So as you walk your hands back, please don't give yourself little rug burns or wood burns controlling all the way in. Take one moment in this rest position would like to come to standing to close up today. So from here, please come to standing facing the front with your feet underneath your hips. Take a breath and roll down. The head goes first.
Just check in, see what feels different. That's your arms dangle. Perhaps bend your knees a little bit. Hello, you're back to release. Don't even really need to hold back here. Enjoy the stretch if that seems like a good idea, but before you roll up, give your knees a little softening. Use Your abdominals and then roll up through your back. One Vertebra at a time.
And as you come to standing, focus on lengthening, feeling your feet rooted in the earth, but also levitating out of the Earth a little bit. It's kind of an odd cue, but this idea of
Comments


You need to be a subscriber to post a comment.
Please Log In or Create an Account to start your free trial.
