Description
About This Video
Transcript
Read Full Transcript
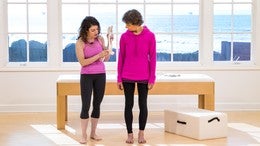
Hello. I'm Rebecca Rotstein and I am here today to talk with you about one of my very favorite topics, which is how to squat and I'm with my friend Ruth Alpert who is now apparently my goto for tutorials because we enjoy spending time together on camera. Squatting is so incredibly important and you probably are aware of this and you're also possibly aware of it because I've been having a lot of big social media campaigns emphasizing and promoting squatting to people. It started out for me with the fact that I didn't really realize how important it was when I was 28 I was diagnosed with osteoporosis and I started working with a trainer at that point because in addition to Palladio's and all sorts of other things, I needed the extra weight through my bones to start strengthening them and I just took squatting for granted because I was young. It was easy. You know when you're younger, it's not something you really think about, but if you've ever worked with anybody that's a little bit older or even current age, it's not as easy as it used to be. And as people get older, there's a loss of strength in the lower extremities. That becomes very common.
And also just loss of ability to do daily functional movements again, that we usually don't necessarily think about. But this is really more in western societies. So for instance, when I'm teaching in Japan or in even in Malaysia, I've seen squatting toilets, which is fascinating to me because in other cultures it's very common that people don't use or in certain parts of the cultures, they don't necessarily use toilets, but they use a hole in the ground and there's a real difference that it makes on your digestion, but it also is healthy for your knees. So I'd like to take a look today at squatting patterns and just giving you a very, very brief idea of some instruction of how you can guide people into it. Because you probably experienced this, Ruth, when you're teaching people. And if you were to say something about let's, let's try to squat, what is one of the most common reactions that you have? She says, I can't do that right there. There's, there's resistance or Oh I, this is absolutely not something that I can do.
It hurts my knees is usually the other response. And I should explain to that as always, whenever I'm filming with Ruth, I've never told her beforehand what I'm going to do. So this is very much live action, a reality TV right now. So exactly. That's the, that's the reaction that we get from people. So I wanted to break this down and identify what the problem is that inhibits people in their squad or makes it hort port, makes it hurt or gives them trouble with it and how we can quickly remedy that for them to restore this very, very vital functional movement that every single ambulatory person has to be able to do if they expect to leave their house, maybe sit on a bus or get in and out of a car if they expect to get up and down from the bathroom in the bathroom from the toilet. So everybody needs to be able to do this. So let's set up the, or let's identify the setup at the very beginning.
So what is the contact point with the ground of your body? Your feet. Exactly. So we talked about this last time in our foot tutorial, but if we look at the foot and that if the arches are collapsed or the feet are rolling in, and then you ask somebody to squat, what is it going to look like? This. So when you see, when you see the knees swerving inward, the first thing that you automatically want to do is to correct the knees. But I don't begin with the knees. I begin with the feet because that is the relationship to your sub straight to your ground.
So my first exercise for people is actually one of our buff bones exercises, which is a simple movement to restore the arches by lifting the toes. We call this toe lifts in buff bones. So you simply lift the toes and notice how there's an automatic elevation and restoration of the three arches of the foot. We're not going to go into our full exercise of the toe lifts, but this activates the bottom of the foot and it also restores something called the windlass mechanism. Whole other discussion, but when you lift the toes, you'll notice the buoyancy restore to the arches of the foot. Now keep that buoyancy and just let the toes slowly lower and you'll notice that that restores or maintains the arch positioning. So that after doing that, now when I bend my knees, my toes are simply, my knees will direct over my toes as opposed to swerving and together.
So that's the first part. Then next is, let's look at what the weakness might be or where the activation needs to occurs needs to occur. When you do see somebody who lets their knees fall inward, even perhaps if their arches are aligned or their arches are restored, what would that usually indicate? If somebody's knees swerve inward, right? The lateral hip is not activate as an activating as it should with the rotators, the glutes pulling the knees into its aligned position. So it's a weakness of those rotators and the and the glutes of the lateral hip muscles, let's call them that are enabling the knees to drift inward. So that's the second component. But the other thing that I see really, really commonly is the one that I want to spend the most time on, which is the sequencing and the pattern.
So the patterning and sequencing of the movement in many goes awry. Let's talk about this for a second. If you're a little kid, you spend time around say a toddler. Usually there is, there's a little bit of a unsteadiness in their walking because they might not have mastered the sophisticated movement patterns that are involved with gait. And part of that also has to do with rotation in the trunk. But part of it also is how they're still navigating and negotiating how they can orient their pelvis over the femurs from the crawling position. Yes. And part of it exactly has to do with the hip development, but that will be the next tutorial. But that's actually a really great point.
So what do you see them do when they try to pick something up from the ground? Yeah, they'd go like this, they stick out their butts. Right. And they go, look, mommy, you know, it's, it's, it's a dead bird. How exciting. Right. Or something like that. But they lower themselves down by sticking out their bumps. And when was the last time you ever heard a toddler say, oh my knees hurt, right? It just doesn't happen. It happens in later life.
But it's the movement patterning. And when I ask people who say, oh, I can't squat, when I asked them, oh, let me see you squat, this is what I usually see.
And so here's a simple exercise I developed for a client to be able to do this. I have a client who has had all sorts of interesting neurological patterning issues and she moves very, very rigidly and very unnaturally. So I've been going through the past two years working through a lot of developmental movement, sequencing with her and helping her restore what leads to normal movement patterns. So come across from me and we're going to do this as a game together. We're going to place one hand or actually a hand on top of a one hand on top of the other, on your role. [inaudible] come a little bit closer in. So we're gonna pretend now that this is your partner.
So you know this is going to stem a little bit from my interest in tango. So this is your, your little tangled partner, but you're going to move together with your partner. So I want you to sit your weight back into your heels and your partner's going to as well. So can you see that these two structures will essentially match one another and then we're going to come back into center. And again, so we're gonna pretend that this partner has really long legs cause this is the end of the femur and returning back to center. Now interestingly, what would happen if your partner moved more than you? You'd fall. What would happen if you moved more than your partner, right?
You're not listening to one another. So I want you to listen to your partner as well as to yourself. So you're going to move simultaneously. There you go. And come back in and once more and returned back in. So now we can do it without your partner. Say Goodbye partner there. Well, so let's try it without that said partner.
We're going to shift our weight into our heels just a tiny bit and return and shift the weight and return. And now shift the weight hinge, bend the knees, and you're exaggerating it a little bit more than I think you have to start your weight shift now. Start to hinge and bend your knees at the same time. There you go. So that your weight goes even further back and hinge less cause you're coming really far forward. So try it once again. Send your weight into your heels, bend your knees, keeping your trunk a little bit upright. Yes. And so she brings us now into one of our other discussions, which is what has to happen in the upper thoracic. No, it's okay. But there has to be some upper thoracic extension involved as well.
So we've now discussed the sequencing patterning of how you rock and shift the weight back in order to initiate the squat. But what happens if somebody is really tight through the chest, they might be able to get the lower extremity component but then they might be hunched forward. So we have to bring in an address extension as well. And we're going to look at this in our, in our class that's coming up additionally in the Cadillac class that will address some of this on how we can apply this with the squat. The other in the final, a component of this where I see challenges is in joint restrictions. So you might have the problem or the restriction in your ankles that maybe your ankles can't actually bend any more than this.
So how are you going to squad any further, and let's talk a little bit about that. So if you're not able to Dorsi flex completely at the ankle, what can we do? I'm going to show you a little technique. Come over here and I'd like you to kneel on this, but keep your, your feet hanging off. Yes. And I like to keep the feet hanging off so that it doesn't put too much pressure on the instep of the foot. And also for some people especially, I'm finding that as people get older, myself included, there can be a tendency for people to cramp. So this allows you a, not to cramp, but also to get some dynamic work through the release. So you're going to start with a half roller. It doesn't matter how long it is, you're going to place it on the calves and now you're just gonna sit back.
And I find it's actually really helpful to do this when I'm hanging off the Cadillac so they can hold onto the fuzzies so they don't have to work so hard to keep my chest forward. See if you could get a little bit further forward. Yes. It's actually on the calf's. Ooh. You feel that or not much? Absolutely. Okay. That's what I want. I was kind of surprised because I thought she was indicating that she didn't feel it in her calves at all. And I was thinking, yeah, I'm just holding her.
I'm going to place my hand here on earth so that she doesn't have to work so hard or feel a little bit of strain in her. So as she tries to keep herself upright. So yeah, allow yourself to fall back against me a little bit. Does that feel a little bit more natural now? Okay, great. And just allow yourself to sink your weight into the role and then the role into the calves. Now move your ankles. So flex and point. Yes. Yeah.
Maybe it's come back a little bit further. There we go. So now we're getting essentially the same thing as some manual release, but manual release with movement, which can often be much more effective than just the body work alone. Yes. And pause for a second. Let's move it back a tiny bit more. Good. And once more. So we're getting at another point and you can lean back against me.
I'll let you know when I'm going to let go. Do you notice a difference that if I weren't here, you're, you're holding on and gripping a little bit with, um, really it isn't around the PSOAS and move, move, move, move, move those ankles. Yes. Good. And last one. All right, I'm gonna let go. So you're going to come forward and let's have you stand up. What I probably should've done for demonstration purposes was a before and after to see how much the range of motion at the ankle joint has improved.
But let's see, just let's try your squad again. So we shift our weight into the heels, bending the knees. Unhinging simultaneously, you can hinge a little bit more. There you go. But unlike a dancer style, which is what you're doing, which is keeping the head in, linemen with the whole trunk, I want you to maintain your gaze with me and you're gonna notice it brings you into the upper extension as well. Upper thoracic extension. So we rock back. Ben, who busted, we rocked back bending the knees.
Unhinging simultaneously. Yup. Now lift your arms up. And do you notice how much more effort occurs in the upper body here? Good and come all the way back up. So that's the first joint restriction, the other, and actually the second one as well being the thorax, the third joint restriction. The final one that we're going to talk about right now is within the hip joints itself. And I have an interesting story to share with you about this.
I for a number of years have been having a lot of problems with my right hip and just in the last month my hip problems, which also stemmed into my low back have alleviated because of this one release that I've done, it has to do with the pelvic floor and it also has to do with the Fascia that's around. They're going through the operator as well as through some of the inner thigh musculature. That whole region can be tight and can restrict the gliding of the femur within the Acetabulum or within the socket for layman's terms. And if that joint can't move, the ability to do a deep wide squat will be inhibited as well. So you'll get to about right here and then you can't go any further because the femur is not gliding backward and it's also not able to glide medially.
But now I can get into a really, really deep squat in a way I couldn't before. So I'll show you just the quick thing that I've been doing in addition to all sorts of other things like, uh, in my roller class. I think we had done an inner thigh release years back where you can, uh, it's another technique that you can do, but I'll show you what I've been practicing just lately. Take a wider stance with a slight turnout, not quite so balletic less, less. This is, it's like a bad joke. What happens when you get to former ballet dancers and [inaudible] instructors together in a room? How many light bulbs can they turn?
Turn inward just a little bit, even a little bit more? That's good. Now let's try our squat again. Send your weight back. Bend your knees. Look ahead. Good. Yup. So yes, there we go. Now please. Your hands on the outs or the insides of your knees. And now push your knees into your hands. Yes. So you're gonna, you're actually gonna embrace the tension. Embrace attention, keep pushing, pushing, and use your fist. Here, push. I, you don't really have this issue, but for me it's easy for me to allow the subtalar joint to collapse from my ankles to roll inward. So I'm still trying to find the lift there. And now slowly let your pelvic floor go.
Something that in Palladia is, we have a lot, a lot of us, a lot of us have trouble. Ruth is saying that she's older than me, so their pelvic floor has released a long time ago. Now contract again. Find the pelvic floor contraction. Find the contraction through the inner thighs through the fifth and now slowly release so that you can feel the inner thighs. Let go a little bit. Yeah. And you just got nice and low and now we're going to rise back up. So this is another technique that you can use to improve any joint restriction that might reside there within the hip area. So we'll let's try our, our squat one last time together, and we can do it in any way.
We could have done it in the wide sumo manner as well. But just to revisit, send your weight back, bend your knees and hint simultaneously. Lovely. And that is our tutorial on squatting.
Comments


Thanks!!????


You need to be a subscriber to post a comment.
Please Log In or Create an Account to start your free trial.
