Description
Monica focuses on creating a strong mind/body connection so she doesn't add Hand Weights to the standing work, however, she encourages you to add this prop if you would like to challenge your upper body more.
About This Video
Transcript
Read Full Transcript
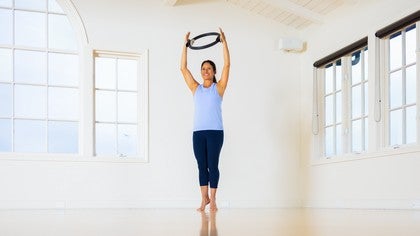
Hi, I'm Monica Wilson. Welcome today to my standing mat class. Sometimes at our conferences at Romana's Pilates, whether it's a workshop or a conference, we don't always have enough space to do all our fabulous legwork and arm work and it's just too many people in a room, so we actually play around with some standing work. So I thought I'd invite you today to come have some fun with me, join me in this standing work and let's get a good workout. I'm purposely not using arm weights today because I'm trying to get such a strong mind-body connection that I am feeling the weights without using them.
But feel free, I'm not gonna judge if you wanna grab some two pound weights for any of our weight series. I will, though, add a magic circle. So if you have one, that'll be some great standing leg work and some great arm work as well. Okay, so I'm gonna turn to the side for our footwork. Super important strong base.
We're gonna have the toes about two to three inches apart. You know this. Actually, I'm gonna have you start with the toes together. Why? Because from the hip bones, not from the knee joint, I want you to slowly rotate the thigh out and the toes will separate an inch.
Let's see if we can do that just a tiny bit more. And now you have effectively engaged all of the wrap muscles and all the gluteus muscles. Let's draw the belly in and up and we should be able to lean forward like the leaning tower of Pisa slipping a card under. Remember, this is supposed to be uplifting and lighten your load. So let's go ahead and practice that.
Ah, we can lift up easily and down. We're gonna drop the arches, inner thighs pelvic floor powerhouse up to the crown of our head and down. Let's add some footwork. We're gonna draw it up, up, up, up. Hold it up.
Bend the knees forward over your toes, as you lengthen down roll down your foot, your feet, your heels and use the strong wrap muscles while lifting and pushing the earth away. Let's go ahead and rise on up. Bend the knees forward while holding your balance with the heels up. Roll down, big stretch on the calves and achilles tendon. Lift up everything.
Nice wrap and seat. One more time. We're gonna rise on up inner thighs, pelvic floor, lower belly. You're gonna bend the knees forward while keeping your energy up. We've been sitting for too long.
We're gonna roll down our heels. We're gonna squeeze everything up for the reverse. We're gonna bend the knees as forward over our toes as we can while keeping our energy up. Roll up here. We're really gonna push the earth away as we lift everything up and come down on an eggshell with control.
Bend the knees forward for two. Roll up onto the ball of the foot. Press the earth down as we engage all of our Pilates muscles and come down on that eggshell last time. We're gonna bend the knees forward stretching the calves and achilles tendon. Roll up the heels, wrap the thighs zip up those inner thighs and come down on your eggshell.
Okay, so you should have really established a nice strong lower body. Let's do a roll up as if we are not gonna push our bottom behind you. It's gonna move, but try not to too much. So we would lift our arms up off the ground. We would lift up into our upper back, filling up this area And then keep rolling.
Not five vertebra at a time, but one and the next. Lifting up into each vertebrae, trying to keep your hips over your heels and stretch down in that nice C curve. Trying not to just let your bottom go. And then send the tailbone down towards your heels. Lifting in the waist, lifting one bone at a time.
Arms and a big stretch up and arms forward. Two more. Press down as you grow taller lifting up into an upper C curve and middle back you're really filling up those lungs, exhaling working those legs. And we're gonna keep stretching forward. Forward and purposely not touching the floor.
We're rolling up, zipping everything up, aligning your back and arms come here and lift. One more time. Energy up, arms forward crown of the head. Come forward lifting up into the upper back, zipping up those inner thighs, lifting everything up into your spine, creating space in between each vertebra and rolling up still energy in those feet pushing the earth away. I'm really working every muscle in my body, rolling up my nice long spine.
Arms forward and arms up. All right, now we're gonna go into a rowing sequence. You could use your two pound weights at this point. So we're gonna go into the zipper. The zipper has the weights or your hands touching right here.
And guess what? Everything's zipped up. So I'm gonna keep pushing my shoulders down as I lift my elbows as high as I can. And then I'm gonna push down something really heavy as I grow taller and I'm gonna zip up my jacket and I'm gonna push down so the work is in the shoulders as they stay grounded. As you lift your elbows up, up, up and pressing down two more, zipping up.
Everything else in your body is always working. It's very hard to do standing work 'cause you have to have all the thighs and the powerhouse. One more time. Zipping up, up, up. All right, now we're gonna go into the rowing.
So we're gonna come down and we're gonna reach down all the way down to the floor, grabbing onto our ankles. Head down, reach those arms up and around to our ankles. Rolling up two more times into the zipper, then going down. Enjoy this stretch. Hands coming up and around, circling grabbing onto your ankles.
One more time. Everything zips up, shoulders down, up, up, up and pressing down. As you reach down to your ankles, reach behind you. Big, lovely swan lake. Arms forward, roll on up.
Now bring your arms up at a 90 degree angle and we're gonna pretend we have weights or use them as you pull into you. And resist extending those arms and pulling them in for four. And resist. And pulling them in for three. And resist and tightening the bicep or the top of the arm.
And resist. One more. Here we go. Zipping it up. And good.
Now this time we're gonna go and hold here and do a little cumbre with the back a little upper back bend. And then reach forward And stretch down again. Big circle swan lake. Arms forward trying to keep your hip stable. Roll on up.
Little cumbre. Come forward Reaching down. This would be the second rowing series on the reformer. One more just playing around with it and enjoying it in your body. Lifting up and forward and reaching.
And big swan lake. Good. So the next one would be from the chest. So we're gonna start, our elbows and our inside of our arms are really glued and our elbows are here and the hands look like they're coming from the chest. And I'm actually gonna turn to the side for this one.
So we're going to reach forward and now grow taller. So tall that you rise up for chest expansion left forward and resist. Bend the elbows again. You're gonna reach up at an angle. Press down as you grow taller lifting the belly all the way up to the crown of the head.
Look left and right and forward and release. One more set. We're gonna reach up. We're gonna press down outer thigh zip up the seat, stomach. Hold, right, left.
Forward and release. We have one more, we're gonna reach up. Press down. Stomach lifts in and up for chest expansion. Look left, look right, look forward and release.
Great job. Okay, the next one after chest expansion is from the hips. So we're gonna start right from here and we're gonna pretend we're sweeping down to our feet. Roll up all the way to the ceiling and open everything up. Should feel good.
Two more in with the air. Rolling up lower back, middle, upper. Always rolling and working through your body. One more. Reaching down, sweeping the floor.
Rolling up, up, up. And lift, lift, lift. Nice job. And now we're gonna do shaving. So we're gonna bring the thumb and index finger together.
Push the elbows behind your ears and reach up. Good. Be careful not to move the head for your hands. Your hands and arms challenge their range of motion around your good posture. You could be holding your two weights together right here.
And reach one more. Bringing those elbows wide and lifting everything up, up, up. Open the arms in front of you, let the water trickle down. Don't let it get caught in your elbows. You gotta lift up the elbows and in with the air reaching around a big oak tree.
Exhale, push away a crowd that's formed around you in with the air. Full body. Exhale, pushing away, in with the air. Exhale. Hold it here, take a breath.
Exhale. Switching the breathing in with the air opening. Exhale bottom. Still pushing forward in with the air. One last one, exhaling and in with the air.
And give your arms a little break. Alright, now we're gonna do a little bit of the series of five. So make sure you're balanced. Draw in and up. And we're gonna bring the right knee in.
Right hand on ankle. Stretch, stretch. Place it down. This is kind of like a little precursor to our finale so make sure you know how to plant your foot. Use your powerhouse to pull up and down and nice strong arms.
One more set lifting with the powerhouse. Strong, stable leg. Good, ooh, let's try double leg stretch. Reaching up, up, up. And scoop and grab onto your ankles.
Exhale, in with the air. And exhale. Two more in with the air. And exhale. One more.
Lifting all the way to your fingertips. And exhale. Good, now place the hands behind your head one over the other. And crisscross. Bending the right knee.
Place it down, left, place it down, bringing them together. Place it down over and down. Great job. Okay, we're going to grab your magic circle now for a little bit of arm work. We're gonna start off with the arms low at a low 45 degree angle.
So you're gonna hold them just in front of you your nice strong tower of Pisa draw everything in and use it as a powerhouse circle. So I like to say, pull in your powerhouse and then squeeze 2, 3, 4, 5. Release, two more sets. Holding for 5, 4, 3, 2, 1. Release, grow taller and everything's working.
2, 3, 4, 5. Release, bring it up at shoulder height pull the belly in and press 2, 3, 4, 5. Release. Shoulders down, press 2, 3, 4, 5, neck and head. Reach up outta your shoulders.
2, 3, 4, 5. Release. I'm gonna turn to the side for this next one so that you can see that as I lift my arms from shoulder height, I do not rock my upper body backwards. So we're up at an angle now, still leaning to our Pisa. Press 2, 3, 4, 5 release, pull it in and press 2, 3, 4, 5.
Release, keep lifting your chest up don't let it sink into your lower back and release. We're gonna put the circle behind us for tricep work. It's a little more mind over matter for me. We're gonna pull the belly in maybe for you too. We're gonna press two.
I don't feel it pressing release. Two more sets. What's more important is that your shoulders really open and that your chest is open and release. One more time, pull in and press the bottom forward. Squeeze that circle.
I think it budged a little bit. Last one here, we're gonna do eight counts up keeping the body steady. We'll do two reps with our heels down two reps with our heels coming up we're going to press 1, 2, 3, 4, straight ahead 5, 6, 7 and eight and down, 2, 3, 4, straight ahead. 5, 6, 7, and eight. Again, heels are staying down.
3, 4, 5, 6, 7, and eight. And down, 2, 3, 4, 5, 6, 7, and eight. And slowly rising. 3, 4, 5. Zipping up those inner thighs.
Heels stay together. And 2, 3, 4, 5, 6. One more time. Here we go. It's 1, 2, 3, 4, 5.
Lifting heel. Stay together. Inner thighs are zipped up. And 1, 2, 3, 4, 5, 6, 7, and eight. All right, now we're gonna press it onto our side.
So I want you to find just that little indent right below your hip and you're gonna put your circle right there. Try to have your nice Pilates box. Left hand can be on your hip or it can be out to the side. I'm gonna place it here. It could also be down either one, but roll open your shoulder, don't let it point forward.
Elbow points back, pull the belly in and grow taller as you pull it towards you. 3, 4, 5. Release two more. Pulling in working all parts of our arms today. And release.
One more. Pulling in, in tall. 2, 3, 4, 5. Release, bring it up just below, like on the outside of your rib or right below your bra strap. Same thing.
Just kidding. We're gonna move it down to your hip right here. Okay, here we go. Pulling in and press. We'll get to that bra strap in just a second and release scooping in.
And press pulling in. Two, three and release. And one more time. Pulling in. 2, 3, 4, 5.
All right, here we go. Up to right on that rib cage. It all just works. Different parts of your arms. I'm gonna place my left hand here making sure I don't move that shoulder.
It's super important, it likes to roll forward. We wanna anchor it, work it correctly maybe even work some underarm muscles. One more time, pulling in and press 2, 3, 4, 5. Alright, other side. Here we go.
Right in that little spot right below your hip bone, shoulders rolled open. Pilates box powerhouse lifts. And press 2, 3, 4, 5. Release and pulling in and press 2, 3, 4, 5. Release, one more time pulling in and press 2, 3, 4, 5.
Release now up onto that waist and three more sets of five pulling in. And press 2, 3, 4, 5 and release. So it's really good. Two more sets because you don't wanna be pushing your body over and release. We're gonna need that stability in a second.
And pulling in in press 2, 3, 4, 5. Last arm press is up on right on the rib below the bra strap and press 2, 3, 4, 5. I'll do the same thing on this side, even though this shoulder doesn't like to roll forward as much as the other. And release pulling in and brush. 2, 3, 4, 5.
Great job. Now let's move on to the legs with our magic circle. So we're gonna place a circle between our ankles and we're gonna start off this is tricky if you're on a yoga mat or a exercise mat. Might wanna move to more stable ground because you want good balance. I'm lucky I have this nice hardwood floor here.
So we're gonna pull our belly in, lengthen our tailbone down and I'm gonna start on my left leg as my standing leg. So I'm just gonna ever so slightly shift my weight to take my weight off of this right leg. Both legs are gonna turn out. I'm gonna lift up and almost as if I'm dragging that right leg I'm gonna pull it in and press 2, 3, 4, 5, release. And I'm pulling in and I'm gonna press keeping that hip forward, four five and release and pulling, growing taller.
Really great leg toning work here and release. Now I'm gonna attempt to rotate that circle forward. Sometimes it likes to move a little bit so I'm just gonna adjust so that both pads one in front of the other square off the hips, scooping in. And we're gonna now pull the front leg to the back one and release. Make sure the back leg is also squeezing to the front one and release.
And one more time pulling in and taller as both legs work together and release. And you probably guessed it we're gonna go all the way to the back now. So we're gonna take it to the side and then we're gonna take it to the back. This guy's not wanting to cooperate too much. So there we go.
And I'm gonna get more on my front leg, my left little less on my back leg. Really important to feel like you're lifting your pelvis up to your chest as you pull in that back leg. Two, three and release. It's really five counts. And pulling in and squeeze two, three, lift release.
One more time, pulling in and lifting. 2, 3, 4, 5. Release, other leg. Here we go. So we're gonna start with it between both legs really find your stability and then we're gonna slowly shift our weight to that right Stable standing leg, stable hip, stable everything.
And the left leg. Now we're going to pull it in and press 2, 3, 4, 5 and release and pull it in. And I hope you're feeling that outer thigh, the inner thigh the bottom stays under you. One more time, pulling in this leg. Still working too.
Don't wanna get pushed over and release. Let's see if we can take it to the front. So we're gonna rotate it. This leg is a little bit more behaving so we're gonna pull in always getting the hips under us and dragging that front foot towards your back. Four, five.
That back leg is also pushing forward from your hips. 2, 3, 4, 5. And one more time. Pulling everything together, zipping everything. This helps with your side splits as well.
We're gonna take that leg behind us. Last one. So we're gonna take it behind and I'm just gonna adjust it a little bit. And the front leg is still a little turned out. Okay, and so I'm gonna get more dependent on that front leg.
And I'm just gonna hold my hands out here for balance and I'm gonna squeeze both legs together. Lifting my pelvis, always up to my chest and release instead of taking in the lower back. That's not good. So pulling up two, three buns on fire and release. One more time, pulling it in.
2, 3, 4, 5 and release. Bring it back out to the side. We're done with that circle. I'm just gonna put it over here. Good, so now onto the really fun part.
So I want you to separate your legs about a little wider than your shoulders and just reach up and feel nice and free. Maybe hold both hands. Stretch over to the right side. Two, three, switch hands and stretch over to the left side. Two, three.
And now I want you to stretch over and reach all the way to your right ankle. I am aware of what my hips are doing. Just so you know though, I'm not trying to sit and go center, reaching through your legs. I'm trying not to just let 'em move the other way. So trying to hold them a little center as I reach to the other ankle.
And then I'm gonna come up using my abdominals the other way up over so I'm not pushing my hips. They might move a little bit but you're trying to keep 'em kind of centered and squared. Reach through it. It lets you have a better stretch. Reach to the other ankle.
Delicious, and come up. Let's do a little twisting. So we're gonna rise up, we're gonna rotate. My back's gonna go to you. Lower your heels, bend the front leg as you reach for the back leg and then reach behind you as all of your energy lifts up.
Rotates all the way to the other side. Lower your heels bend the front leg, reaching back, reach behind. Rise up, coming back to square and lower down. Pull yourself back together. Cross your arms to end with some energy here.
Using your belly lift to the right knee, plant the foot, lift the left. Plant the foot, right, plant the foot, left. One more set right and left. Now arms out to the side. Warming up those hips right and powerhouse left.
Always having to use it to help up to the elbow. One more set and left. And now get nice and loose. Nice 'cause we're ready for the day we've been sitting. We wanna get energized.
Let's start thinking about maybe flying, maybe jumping maybe a lot of energy up. So let's go down one more time. We're gonna jump down and jump. Let's go down. And jump.
And one more down and up. I feel fantastic. I hope you do too.
Rhythm and Dynamics: Advanced Mat Workouts
Mention
 |
Monica Wilson (Teacher) |
 |
Marissa |
 |
Sue S |
 |
Ingrid Grace Beeman |
 |
Vivian B |
 |
Your Pilates Sidekick |
Comments


You need to be a subscriber to post a comment.
Please Log In or Create an Account to start your free trial.
