Description
About This Video
Transcript
Read Full Transcript
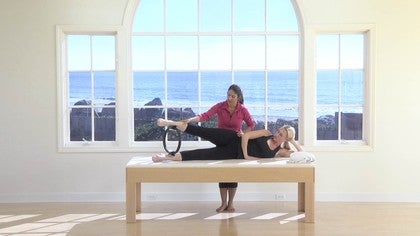
Okay. So a lot of times people ask me how they can improve their rolling or their rounding lot of exercises in is really work on keeping your spine flexible. So you want to massage your vertebra down one by one and it's a little bit hard if we're stiff. So I'm doing this class kind of a tutorial yet some mat work on really helping you get to a rolling and rounding down a capability. So a few things, props are important when you want to work on this.
So a ball you could, um, that you don't inflate completely. If you don't have a ball, you can use a yoga mat and roll it up and then use it to be under your tailbone. That's fine. So we're just going to have an under our bottom for a little bit and you also want a magic circle. Those two things would really help you out. But if you don't have a magic circle, I've used just a towel to squeeze between a rolled up towel, um, can do the same thing and you can actually use that same towel. Now that I think about it, you can roll that under your tailbone.
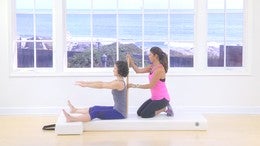
So we're gonna use the props that we have though. But the first thing we're gonna do is get really aware of our spine. So let's get on our hands and our knees. So I want your hands shoulder with the part. They're basically flank framing your [inaudible] box and your knee should be directly under your hip bones.
And I want you to go ahead and lift your head up and let your back just hang. So there's the top of your spine starts right between your ears and when your head's up, it promotes the rest of your spine to do this, which is what we call him [inaudible] and arched back. So go ahead and bring your chin to your chest now and that kind of automatically promotes your back to do this, which is around back. Okay? So your shoulders stay over. Be careful not to shift your weight back and forth to straight up.
And let's go ahead and lift your head up and let your back hang and arch again. Your belly might even hang. But let's talk about this. So your Chin's far from your chest in an arched back and your chest is basically pushing forward or out and your ribs are basically open, not protecting your internal organs. If someone was going to, if you're in a boxing ring and they socked her, you would not be protecting yourself. What happens when our chin comes to our chest? So Chin to your chest, you pull your chest up with your chest bone into your upper back to round that back, and now your ribs have come kind of together and are protecting your internal organs right here and they're pulling up into the shoulder girdle muscles. Excellent. Go ahead and lift your head up and arch again.
So you've got your head up far from your chest. You've got your chest out. Open your chest a little bit more for me. You Go Juliana, and you've got your ribs open and your belly is pretty much hanging. Okay. As well as the bottom of your politesse boxes, your head are your hip bones. They're pointing down towards the Mat. Let's see what happens with your chin to your chest. Chin. To your chest, pull your chest up into your back, really rounding your upper back.
Great deejay. Your ribs are coming into your shoulder girdle muscles and feel how much your belly button can pull your navel into your lower back. Rounding that part of your back and go ahead and lift up your head and do the opposite. So you're really opening up your chest here. Excellent. Your ribs are open, your belly is a bit hanging. Those hipbones are down and your tailbone is a bit up towards the ceiling.
I like to say this is like my happy dog when I come home from work and he's super excited to see me. Okay, and now we're going to bring your chin to your chest and you're going to pull your chest back up your ribs and your navel is really pulling to your back. Those hipbones are actually now pulling really far from the mat and your tail bone is pointing towards the Mat. I want you to even exaggerate it more. Imagine that your spine doesn't stop at your tailbone, but at a tail and then you pull it between your legs. You're curling that tailbone under so much. Great. And do the opposite again. So this is our arched back. Super important to understand. We have arch, head up, chin away from chest, chest, open ribs are open, belly buttons hanging down.
Hip hipbones are hanging down and the tailbones up towards the ceiling. And let's reverse it. Chin to chest, pulling up the chest into our upper back, our ribs round our upper back. Our naval pulls into beautiful our lower back and our tailbone continues to a tail and we pull it between our legs. Wonderful. One more time. Head up, arch your back. So now I want you to picture the mat. If I flipped you over and you were lying on your back, the mat would be right here and you would have space under your lower back. And then if you round up chin to your chest rounding and the Mat was here, you would almost be rounding through the floor rounding deep. It's really nice.
Keep that nice round back and as if someone's pulling you back by your stomach and your hips and on back on your heels and stretch. That's it. Good. Nice. So it's really important if you're learning how to roll to understand what an arched back and around back is. Go ahead and grab your ball or your yoga mat or your rolled up towel and lie down onto your back. And we're going to do some stretches to warm up our back so you're gonna lie down onto your back. And these really are all not quite Palazzo [inaudible] techniques.
Go ahead and lift up your bottom and put the ball under more your tailbone. Then your lower back, my balls a bit too deflated, but we're going to work with it so that if I had just your pelvis, it would be like a bowl of soup dumping into your chest. And I want you to start with your hands making an l and we're going to put point your thumb back towards your ribs, the back of your ribs and lie down your forefinger and the all of the other fingers down on the front of your ribs. How'd we do? Pretty good. All right, while your fingers down. Beautiful. All right, so take a big breath and exhale. We have our hands here in with the air because we want to build awareness of how little or much our ribs move. Ideally they should be able to inhale out to the side and exhale down into the mat even more.
But most importantly is that you have connection on the mat with the back of your ribs that you're not lifted up right there, that it's anchored there. Okay. All right, so now I want you to rest your arms down by your side and again, super important to understand our spine. If we're going to do rolling, so starts with the Vertebra between our ears and I want you to go ahead and just kind of nod your head yes and that starts the feeling of that bone right between your ears is on the mat and we're going to see if we can get the next bone down from it on the mat. We're going to work our way down towards our tailbone. Of course, right behind your neck. You're not going to get those really anchored, but how about between our shoulder blades? Is that like a arch there or can you anchor into the mat? Start warming those bones up. How about behind your ribs?
Is there a tunnel there or can you get more connected? So we're working our way down towards our tailbone. Here we go. Now we've got our belly and our lower belly on our naval. Are we able to make the distance between our naval and our spine more like four inches rather than seven or eight inches. It's not really a tightening and that's super important, but more of a just allowing your belly to just sink into your back and use a big Suction Cup muscle called Your Trans vs. Okay.
And finally we have our sacred men tailbone that are tilted towards us. So we've almost done around back again because we're so connected to the mat, nothing's lifted off the mat, maybe a bone or two behind your neck. Take a big breath and as you exhale into the mat, bring the right knee into your chest. So again, a lot of times, and we're going to inhale, put that foot down and do the same with the left. Exhale left. We are can't roll because our back is really tight and inhale, put that foot down. Our stomach might need to get stronger. So use your belly to pull in that right knee.
Now stay here with that right leg and we're going to straighten it up to the ceiling. Putting your hands behind the thigh and point your toes and flex. Now if that's super easy for you, then grab behind your calf. Never the knee though, point and flex. But if you're having a hard time rolling, I'm assuming that you're really tight in your hamstrings as well as your lower back and you probably need to put your hands behind your thigh.
Now I want you to draw a circle with your foot three a circle, three times, not a letter d but a circle. And then reverse looking good. And now without popping your ribs out, stay connected to the mat and bring that right knee back into your chest. And inhale as you put that foot down. Exhale as you draw your belly and to bring in the left, stretch it in straight and that leg a little turned out to the ceiling and grab behind your thigh again and point again.
Crawl up to the calf if it's too easy, but we're pointing and flexing three times.
So we don't want to have any, um, our lower back working. So we're going to exhale and bring the right knee into your chest using your belly and understand your lower back is flat right now. Stretch up the right leg and it's still flat. Now put your hands down by your side and lower that right leg down the middle of your body where you can keep your lower back flat and might be actually, let's stop just where the thighs are at the same height and feel your stomach and then see if you could lower a little lower and keep your belly working. Good job DJ, and then just a little lower. Nice. Juliana, make sure you're not rolling in that leg and then pull it up with your stomach and do that two more times.
We're going to go down only where you can keep your belly in and your back flat and then pull it back up. And one more. This isn't a leg exercise, it's a powerhouse. And pulling it up and hug that knee back and put the foot down and exhale to bring in the left. Straighten that leg up either behind the thigh or the calf arms by your side and we're gonna lower it so that it's even with the other thigh stomach's holding it. Good job and then go down a little lower stomach is really holding that leg and then as low as you can go without arching and then pull it back up with your stomach and down and scoop it up. Again, not a leg and quad exercise. One more, but a powerhouse. Four-Inch band here. Hold and hug this Nian. All right, we're going to add one more stretch here.
It's going to be the ankle crosses over your right knee and try to keep your body square as you bring the right knee towards you. Right hand goes behind the right thigh, left hand, pushes away the left thigh. Sometimes we go crazy with our shoulders here. Keeps Square. You can either change in the air or put your foot down and the other foot and then cross your right ankle over your left thigh. And we're going to pull the left thigh towards us with our left hand.
And if you're right handed, this is probably your stiffer side where you push the right thigh away. If you're lefthanded it's the other way usually, but you're trying to get a stretch right here and switch again either in the air or putting your foot down. Right hand behind the right thigh. Left one, pushing away. This is sometimes called the number four stretch cause you make like a number four and switch.
And then we're going to hug your knees into your chest. All of these are trying to help warm you up. We're going to take your ball away and put your feet flat on the floor and hold your hand ball in your hand. All right, just staying. There needs to be their feet together. All right, so if you have a bad lower back or a delicate lower back, you really shouldn't be rolling anyway. But if it's maybe just a little stiff a sometimes in this can help stretch it out.
So let's have your knees fall to the right and then reach your arms to the left though. That one too. Awesome stretch, reaching good. So you're trying to have your knees stacked, one on top of the other, your hip stacked one on top of the other, but your belly pulling in the opposite direction. Always roll through your spine to go the other side. So get your back nice and flat and then let your knees fall to the left and reach your arms the other way. Great. If that's super easy for you, can it stretch you more? All right. If it ends up being super easy for you, be aware that we are also working with the upper body. So we're going to roll through our back and switch.
Now Ho actually stay there with the ball straight up to the ceiling and the back of your ribs are flat, right? Try to keep them fighting to stay there as your knees go one way and your arms go the other. So try not to let your knees just pull up your whole ribs. So when you're keep trying to anchor there, then all of a sudden you get this deep or stretch that's just wonderful and roll through your back for the other side. Nice. Good with the ribs. Good twisting. Good. Having the hips right on one on top of the other, knees on top of the other, Ya'll. There you go.
Nice and lie flat on your back. All right, put the ball down. And this is when we're going to use the magic circle. So you can again use a rolled up towel and put it between your inner thighs or a ball. But in magic circles, the nicest bed, it's going to be right between your inner thighs. For this next exercise, it sometimes really hurt some lymph nodes or some things you might need to adjust it. All right? So the feet are going to be hip with the part. Awesome. And maybe a little. And actually that's good.
You don't want them to forward in front of you. Little wider with your feet. Perfect. Okay. All right. And we're gonna be again, very aware of our spine. So I want you to tilt your pelvis towards you. Awesome. Like dumping a bowl of soup into your chest and dump it out away. And now you have a little tunnel under your back.
We just did this on our hands and knees, right? And now this time when you dump it towards you, I want you to try to find some different muscles. See if you can squeeze it with your seat before your legs. Add your inner thighs, your pelvic floor, and your lower belly and use those to tilt towards you. Good.
Now keep squeezing using the back of your thighs and your seat and I want you to picture your back like a strand of pearls and we're going to lift up one pearl at a time. So lifting up one vertebra, the next Vertebra. Awesome. Until you're a straight line between your shoulders and your knees, be very careful that this is a beautiful line. Can you tilt the other way for me? This is very often when the back is tight, so come up only as high as you can come up, keeping your hip bones tilting towards you. Hold it there, squeezing tight, and let's articulate down starting with the upper back. Then the next and the next until you're all the way flat. Nice job.
All right. Again, squeezing with the hips. Find your inner thighs, pelvic floor, lower belly on, rolling up that strand of pearls. This time we're going to add some bottom work. Hold it there. And let's do 10 beats. One, two, three, four. Imagine that you're lying on your belly and that you need to have the hips on the mat. So we'll keep lifting those hips so that you use the back of your thighs and seat after 10 hold tight and melt down.
Starting more with the chest bone than the next bone. Then the next, all the way down to your tailbone. Good. One more time. So you're going to squeeze that circle? Yeah, you can adjust it if it's hurting and curling it up. Good. And then once you're up there, we're going to do 20 this time. So be very aware that even the little bit of sinking makes you not use your hamstrings or glutes enough. So try to really press those up. As long as you're not our chain. And let's do 20. It's one, two.
We're not low. Uh, lifting and lowering. You're holding your hips up at one level. You really want to feel how deep your stomach scoops in with that. Let's do five, four, three, two, hold tight and then really articulate down scooping, scooping until the tailbones all the way down. Awesome job. Place a circle between your ankles and put it down on the mat.
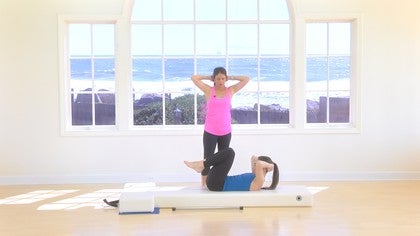
So now we don't have a ball anymore to help really stretch out our back and we still have to be flat on the Mat. Okay, so we're trying to actually work on our pelvis being like this rather than completely tilted. That's when we get more advanced. We'll be a little more just right here, but for now I want you to put your hands one over the other behind your head and take a big breath into the mat and exhale. Inhaling into the mat and exhaling. Now on the next exhale, I'm going to want you to round up your head and shoulders. So inhale, but I want you to have it come from your powerhouse as if it's scooping into the mat. And that's what rounds up your head and shoulders. Look at your belly, take a breath. If it poked out at all, pull it in and try to come up a little higher. Take a breath, look at your pelvis. If it's overly tilting towards you, relax those hip flexors. Exhaling. One more, trying to get up a little higher. Big Breath and exhale, drawing it in and coming up as high as you can. And then take a breath and this time press your head into your hands as you roll downs here, stretching your neck and upper back. Inhale, [inaudible].
Exhale. Draw your powerhouse in and round up your head and shoulders. As you inhale, look at that pelvis and fix it. If you need to an exhale, come up higher, elbows wide, take a breath and come up a little higher with your belly pulling in more. Take a breath and exhale. Roll down, pushing your head into your hands. We're going to go right into the a hundred now, so take a breath and exhale, pulling into your lower back to round up. You're really using your powerhouse under that pelvis. If you need to.
Looking at your belly. Exhale, come up higher with the belly in. Take a breaths. On the next exhale. Bring the knees over your hip bones, take another breath and exhale, arms long and start pumping. Inhale two, three, four, five XL. Drawing that belly in to stay there in with the air. Two, three, four, five. Exhale, so you're trying to squeeze a circle so that your belly really pulls into that mat. If your neck gets tired and head gets tired, lower room down, but make sure your belly is pulling against this.
Circle that squeezing deep into the mat. Let's do three more in with the air. Two, three, four, five XL scooping in. That's what I want to see in with the year. Two, three, four, five. Exhale. Last one. Make sure you're squeezing with the seat too. [inaudible]. Exhaling and hug those knees into your chest. Great job.
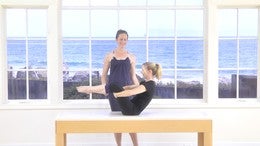
Go ahead and sit up and here is the real tests on if we're going to be able to roll or not. You're going to put the circle between your inner thighs and feet or hip with the part and sit up tall so that you feel those sit bones in your bottom and on the floor. And I want you to draw your belly in like there's a big suction cup muscle in your aligning your whole back, which there is, and it's going to round your back. Remember how we were on our hands and knees? So your shoulders want to be directly over your hips. Your tailbone wants to be pointing towards your heels.
Your hipbones want to be pointing up towards your ceiling, your navel into your rounding, your lower back, your ribs, your chest is pulled in. Very important. Squeeze that circle and pull your belly in to pull away from your leg. Let's see if we can get our waistband down. Take a breath and exhale. Come forward scooping in again. Squeeze with your seat and pull your belly in. Tailbone is pointing towards your feet.
Straight arms take a breath and exhale, scoop. And then we've got four more like that and squeezing. So we're just trying to have our belly pull into our lower back so that we're going down here and we're gonna make sure our waistbands trying to get to the mat, take a breath, and then exhale is the belly continues to hug in beautiful round back member when she was on her hands and knees and two more. Squeeze your seat and draw that belly in and use it to pull against your hands. Take a breath and exhale drawn in. That's Nice Juliana, and we've got one more.
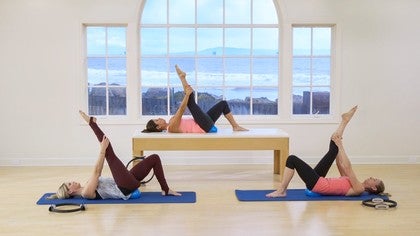
Squeeze that circle with your seat and her thighs. Find your pelvic floor and belly pulling to straight hands and exhale forward. Great job. All right, put that circle down. We're just going to do a quick single leg circle, so you're going to lie on your back and you're nice and square. Hug the right knee into your chest and straighten that leg up.
If your lower back is tight, you're probably stretching with the hands behind your thighs. Hands down by your side and you're going to draw a circle on the ceiling nice and quick because if you do it too slow, your quad starts cramping up reverse. You're just trying to not move. Your Pilati is frame last one and hug the knee into your chest, but the right foot down, hug the left knee in and then straighten that leg against stretching it. It helps if it's turned out.
Put your arms down and you're going to use that belly to circle one. You're using the belly to not be like all over the place. You're just staying nice and centered. Last one and go the other way. One, two, three, four and five and hug in that knee. All right, go ahead and sit up any way you can. Good. And we're going to lift your bottom forward towards your heels, but this is, you want to keep your hands on the mat. Okay. So keep your hands and actually your weight is still on your hands and see if you can keep your pelvis scooped and tilted towards you.
And we're going to use your belly to, um, balance with one foot up and bring it down. And then the other. Alright, good. So we get the idea, but now we're going to not arch or lower back as we bring over a hand under your knee. And then the other, okay, so we just did the roll back. So you want to have that feeling of your belly really pulling into here because on rolling like a ball, if you don't have around lower back, you're gonna sound like a flat tire when you roll. And that's what we're trying to do today's class. So holding your stomach navel close to your spine, pelvis tilted towards you.
Can you balance this time? Don't lift the leg like this. Lift almost as if there's a little sling around your right knee and it comes up a little bit and put it down. And now the slings around the left and adjust comes up a little and put it down and we're going to bring up the right hold. Can you add the left without arching the lower back? Nothing changes in that back. Put 'em down. Let's do that again.
Scooping in the left. Sorry, we're starting with the other leg. And then the right goes up and hold and down. Good. So now we're gonna add, rocking, rolling like a ball at. But I want you to think of a rocking chair, how there's a rocker, and that's what you want to do. You want to rock back and rock up. And your whole purpose is when you rock up, do not support with your lower back. So we're going to balance with the right foot up an inch and then the left.
Good. And now imagine your rocking chair and you're going to rock back and rock up. So if you come up and you go like this, then regain it and try again. And inhale and exhale. Also, you want to be very aware. Okay, so we practice round back, arch, back. If I take my head back, I'm going to go flat.
You have to have your chin on your chest and roll back and chin on your chest Rola. If you stick your chest out like we do with a happy dog position, you're going to lose the round back. So chest is in ribs or in and inhale, roll back. Exhale, roll up, hold all of that. Great. Three more. Inhale, good chin to the chest. Exhale, that's it.
And two more. I like to picture a six pack and you use your lower set of your six pack to roll back and your upper set to come up and hold and rests down your feet. Good. Go back to the middle of your mat and we're going to do a quick single and double leg stretch. So lie down on your back and use your belly to bring in your right knee and hug it and then put it down. So you're an hour into the left.
We've done this a hundred times. You're like, this is easy. So now you're going to bring in the right leg and stay there and lift your head up. But you should still have that same round back position as you did with um, the Rao arched back and on your knees, left legs going to go almost to the ceiling and switch and switch and switch. Just really focusing on your belly, pulling into your lower back, incurring stretching. Switch two more sets, right and left. Nice rounded shoulders, Chin to the chest. I love it. Last set, right and left.
And now bend both knees in and grab both angles. Rest your neck first, second. All right, so we're going to regain that round back. Chin to chest. Good. And her chest is pulled in, her ribs are pulled in. Let's get your knees just a little more. They're excellent. And I want you to reach your arms straight up and legs right here and then pull yourself together. Inhale, reach arms straight up and pull yourself together. Awesome.
Inhale, still getting that round back and exhale. So if d keep going. Three more. So DJ's hitting this nice round back position. You don't want to be here, right? So we're gonna go Royal Beck and then pull yourself together and one more in with the air. Exhale and rest your neck and head. And Go ahead and sit up. And we're going to do spine stretch forward.
So the spine stretch forward is re really benefit at this point. If you could press pause and go against a wall because you would feel more about your lower back and specifically right here, whether it's going to flop forward or not. So make sure your back's nice and straight. See if you can sit up against the wall. If you can't sit up tall because the back of the legs are so tight, bend your knees, but arms straight up at shoulder height. Okay, pretend I'm against a wall and take a breath and I'm going to peel off my strand of pearls, worn bone. Then the next, then the next being very aware that my hipbone stay over my sip moans as I go down rather than going forward and lower and then roll up your spine, one bone at a time and take a breath and exhale down.
Really important this development of strength in this stretch of the lower back and roll up one bone at a time. Three more. Taking a breath and head down and exhale. So the chest pulled in, the ribs pulled in, then the naval good and roll it up. So all those concepts that we went into so much detail and one more exhaling, head to chest, good. Pulling the chest in the ribs in. You really will get a great lower back stretch and great abdominal work and rolling up nice and tall, beautiful and relax and you are all done with our rolling tutorial ketchup guys.
Nice work.
Pilates with Monica Wilson: Beginner Mat Workouts
Mention
 |
Monica Wilson (Teacher) |
 |
Maria B |
|
|
Silvia O |
 |
Francesca Stocchi |
 |
Sara A |
|
|
Andrea M |
 |
Monika P |
|
|
Maria S |
 |
Gia Calhoun |
|
|
Bev V |
|
|
Helen O |
|
|
Julie A |
Comments


Great class.


You need to be a subscriber to post a comment.
Please Log In or Create an Account to start your free trial.
