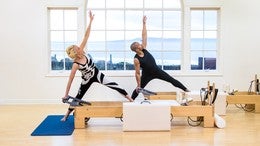
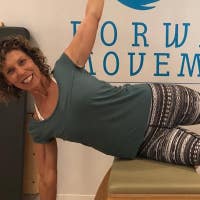
Description
About This Video
Transcript
Read Full Transcript
Welcome to Pilates Anytime. I'm Elizabeth Larkam, so honored to be back with you my sixth visit now, my sixth year for Pilates Anytime, and very honored to be with you the global Pilates community. Let's take a fascia focused approach to some of the mat exercises that we know from J.H. Pilates. Come to lie on your back for the hundred. You're thinking oh my goodness, she's starting with the hundred?
Well, I'll give it a try. So here you are and we're going to use the movement of the hands, the movement of the tongue and the movement of the eyes to organize the hundred. Inhale wide to the back of your nostrils deep to the back of your lungs. As you exhale, internally rotate slightly and slide your heels along the mat. Nod your nose downward as if to see behind the cheekbones of your face.
Press your tongue into the lower lip. Press your thumbs down into the ground and roll your head, neck and shoulders up. Bring your shins parallel to the ceiling. Inhale, palms up wide. Inhaling wide to the back of your lungs as you exhale, palms down, sliding your legs a little bit away from you.
Inhaling, feet pointed, as you exhale move your gaze down in the direction of your pubic bone. Inhale, palms wide, fingers spread, gaze to your toes. As you exhale, flex your feet and that will engage your abdominals more strongly. Inhaling, toes point, tip of your tongue to the roof of your mouth behind your upper teeth aiming your gaze at your toes. As you exhale, gaze down behind the cheekbones of your face, dorsi flex your feet, palms down.
Once again, inhale palms up, gaze at your toes. As you exhale, flex your feet as if your thumbs could aim down to the mat. Lower yourself onto the mat or in my case onto my mic box. Now we're going to add some rotation of the cervical spine to that version of the hundred. Inhale to prepare.
As you exhale, bend both knees and drag the soles of your heels onto the ground. Bring your shins level towards the ceiling, nod your nose downward, press your tongue to your lower lip, aim your gaze behind the cheekbones of your face. Inhale, palms up, gaze at your knees. As you exhale turn your gaze and your tongue down towards the right. Inhale, tongue to the middle behind your lip.
As you exhale aim your gaze and your tongue down to the left. Inhale, palms up, feet point, gaze at your knees. As you exhale flex your right foot, point your left foot and aim your gaze down to the right. Inhale, palms up, gaze at your toes. Exhale, palms down, flex one foot, point the other.
Inhales, flex both feet. Exhale, point one. Inhale, point both feet. Exhale, point one. Bend both knees.
Slide out. And by now you're probably thinking well why doesn't she just make up her mind? Are we pointing the feet or flexing the feet? Here are the benefits of each one. Dorsiflexion of your ankles will tension, will activate the deep front and superficial front myofascial continuities which connects the top of your foot to your pelvis, along the front of your spine all the way up to your tongue.
So if you want more strength, more abdominal activation, dorsi flex your feet. So then you would way well, why don't I just keep my ankles dorsi flexed the whole time since after all this is an abdominal exercise. Well it's because the nervous system, the brain, the neural myofascial system really loves variety and if we just did the same thing all the time with the ankles or with the hands then the fascia wouldn't listen anymore. The proprioception would just be boring. When you point your feet you will activate more the back of your body and activate in the direction of spine extension even though you're still holding your abdominals.
Then when you return to dorsiflexion you can reinvest in that abdominal strength. The reason for adding rotation of the cervical and the upper thoracic spine is again for variety because we can and also because the neural myofascial system has practically infinite variety of vectors and every time you make a slight change in the movement you open the possibility for reinventing yourself for, and you know, when you've been in this business for as long as I have it's really important to reinvent yourself. Let's take on the roll up, the roll over, and put a teaser in between 'em. Come to lie on your back. Place one heel, say your right heel, in line with your tailbone and put your left achilles tendon between your first two toes.
Now that's not necessarily a usual thing to do and may not be so comfortable for your foot. No problem, you could cross one ankle in front of the other and it would have a similar effect. Why is this important? Because the roll up normally is a symmetrical open chain activity, but as we've discussed life in the body is not symmetrical. We never were, we never will be and we'll never stop trying.
When you put one foot in front of the other or one ankle in front of the other it, up the chain it gives information to your pelvis that it's time to turn in the direction of where the top leg is aiming and our job is not to turn that way but just to roll up as if we could roll up along the center axis. Palms together, inhaling, take your arms high above the top of your head. Press the palms of your hands away from the top of your head, nestling the back of your ribs and lungs down to the mat. As you exhale turn your palms towards each other. Press the little finger side of your hands against each other as you slide your shoulder blades down your spine, hands coming in front of the xiphoid process.
Now change the hand attention so you press the thumb side of your hand against each other, nod your nose downward, tongue behind your lower lip and roll up. Press your palms away from the top of your head. Squirm a little and have the idea the you could bring the cheekbones of your face towards the sitting bones of your pelvis. As you inhale wide to the back of your lungs perch high on your sitting bones. As you exhale bring the little finger side of the heel of your hand against each other and that will encourage your shoulder blades to slide down.
Bring your gaze to your toes, to your ankles, to your shins, to your knees. Press your thumbs against each other because you need more eccentric control of your abdominals. Sure, that's what I always ask for for Christmas. Okay, then roll up and back. Here comes the roll over.
Press the palms of your hands away from the top of your head, aim your sitting bones up to the ceiling. While you're here change so now your achilles is between your first two toes. Or, crossing your ankles as you wish. Pressing the palms of your hands away roll down as if you could roll down the central axis, the middle of the highway, roll up. Pause here into an asymmetrical teaser and then as you lower your legs we're ready for the new side.
Inhale to come up. As you exhale all of the above, all of the previous, little finger, gaze, tongue. Hips up, palms up, sitting bones up. Change, the new foot on top. Now we've already done two roll ups at least with your heel in line with your tailbone.
Now we're going right heel in line with the right sitting bone. So you're going to come down on the right side of your spine probably. Staying on the right with your heels in line with the right sitting bone, maybe we're going to make it up. Yes, it's a good day at Pilates Anytime. And then, I mean a good day for me I should say, and then bring the cheekbones of your face to the sitting bones of your pelvis.
Inhale to come up. Your ribcage aims forward. Your hands aim forward. Your feet are off to one side so the left side is longer than the right side here. Hips up.
Change, the new foot, the new side. Aim your sitting bones up to the ceiling. Now you're rolling down on the left side of your spine. Nod your nose downward, tongue into your lower lip. Pause, ooh! Whose kinesthetic blind spot is that?
And then make your way over. (chuckles) Rather fast. Inhale to come up, roll right down on the left side. Inhale to come up, sitting bones towards the ceiling. Come to the center, ankle bones together, medial malleolus close to the center and have the idea the you could come right down the central axis painting the line right down the middle of the highway and come up, probably, and make your way down.
Now yes indeed there are certainly more variations where those came from 'cause that was not an exhaustive set but, you know, life is short and we have a lot to do. The next event now is rolling like a ball. So adjust your mic box and buckle up, here we go. We're going, for rolling like a ball we're going to use the ankle plantar and dorsiflexion. Remember dorsiflexion of your ankles will engage the abdominals more whereas plantar flexion of your feet will engage the spine extensors and the hamstring area of your legs.
So here you are, holding onto something that belongs to you. Wrap your hand around to the opposite side of the ankle. Bring the cheekbones of your face towards the sitting bones of your pelvis and slide your shoulders down. Now on the inhalation you have the idea that you deepen your spine, you deepen your abdominals, dorsiflexion of your feet and aim your sitting bones up to the ceiling. Inhale, sitting bones up.
Exhale, sitting bones down, sort of. Inhale, sitting bones up. Exhale, sitting bones down. Now you could do that the other way but it, so try and see what suits you best. If you took the inhale and had your feet pointed and the exhale and have your foot flexed the flexion of your feet would bring you forward sooner.
Inhalation, we keep, come on, we keep your sitting bones up, exhale would bring your abdominals in. So there you have some ideas to try. I suppose you could play with alternating plantar and dorsiflexion but I don't know that would have such a good outcome. We could try it. Okay, we're going on now to the one leg circle, the one leg circle in both directions, initially with the pelvis steady and then with the pelvis and lumbar spine rotating.
Now it's conventional I believe to use an ankle strap over the top of your foot. That makes the top of your foot in dorsiflexion the closed chain area, the area that's getting, the area that's getting the support. It's my preference, given the opportunity, my preference to give the sole of the foot, the plantar surface of the foot, the closed chain experience with something solid. Now, you know, last I checked this perfectly framed shot didn't involve any walls so I'm just going to pause and get a moon box so we can have a pretend wall. You know, on Pilates Anytime you just ask and you receive.
Look, here's a box. Now we're pretending that it's a wall so at your home or your studio you don't have to find a small box. Just put yourself next to a wall and plant the sole of one foot into the wall so that the plantar surface of your foot is getting a lot of feedback from the foot pad pressure sensors and you can use the pressure of your big toe, the pressure of your heel, the pressure of your whole foot into that box wall. Now, your sitting bone of your lifted leg is aiming towards the ankle bone of the steady side leg. Palms are together and fingers interlaced directly in front of your chest bone, your xiphoid process.
As you inhale cross over the midline so it would be adduction of your femur anchoring your shoulder blade onto the ground. Press your tongue down and to the right. That will, not only is it attractive, but it will help to keep your pelvis level on the ground. Generally speaking you can use your tongue to guide your pelvis, to steady your pelvis or to guide it, whereas you use your eyes to guide your head. More on where that came from shortly.
When your right leg crosses over the midline aim your left hand into your right hand. As you exhale sweep down, push your foot into the wall, press your right hand towards the left and circle. Inhale to cross over, press your tongue down to the right. Press your tongue down to the left and come up. Here's why that is.
When your leg crosses over the midline your tongue needs to keep your pelvis at home on the mat on the right side. Tongue's on intermission right now. Now put your tongue down to the left because the tendency is the pelvis would follow your leg. Keep the tongue and the pelvis home on the left side. Change the direction, inhale to move away from the midline.
Right hand pushes left, exhale left hand pushes right. My mistake with the breathing. Exhale, right hand pushes left. Inhale, left hand pushes right. Change now to the new side.
Stand the sole of your foot onto the wall. Unfurl your leg to the ceiling. Having your knee bent will make a little bit easier to articulate your hip joint, articulate your femur head and your hip joint. As you inhale, cross your left leg over the midline pressing your right hand to the left. Tongue is down to the left, exhale.
Now press your tongue down to the right and press your left hand to the right. Inhale to cross over the midline, tongue goes down left. Exhale, tongue goes down right. Once again, inhaling, keeping your hands steady in front of your xiphoid process. What you change with your hands is the pressure whether your left hand goes to the right or your right hand goes to the left.
Change to the new side. Exhale, the tendency would be for the pelvis to go to the left so keep it at home by pressing your tongue down to the right. Inhale, cross the midline. Pushing your left hand to the right to counterbalance the movement of your left leg, pressing your right hand to the left to counterbalance the movement of the left leg. Once again, exhaling, and inhale.
That's one leg circle, both ways. Now you could add rotation of the pelvis and the lumbar spine. On the first side, here's how that would be different. Dorsi flexing your lifting leg will enhance the abdominal activation. Inhale to cross over the midline and keep on going.
Keep on going so that your pelvis leaves the mat, turn your head, neck and eyes opposite the direction in which the pelvis is turning. Exhale, now you keep your pelvis and your arms at home without rotating. So rotation of the pelvis and the lumbar spine to follow the lifted leg only occurs when you cross over the midline. Anchor the back of your right shoulder blade when your right leg is going across the midline. Exhale to come here.
Turning your head, neck and eyes way around to the right. The rotation of your head, neck and eyes will counteract the rotation of your pelvis and keep your more steady. Now we'll go the other direction going away from the midline right hand pushes left, left big toes presses into the wall. Now turn your head, neck and eyes opposite the direction in which, I'm gonna blame the environment now. You know, I could rotate a lot more if I weren't rotating on to this mic box.
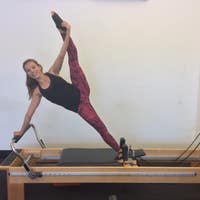
So, but now I've, remember if things don't go well blame the environment. Okay, now we're done with that, with the one leg circle and we're also done with the, actually we're not done with the wall. We'll just keep the wall because it's time for the side leg kick. You will be on your side and press your floor leg into the wall. Have your arms forward of your xiphoid process just where they were before but now you're on your side.
Creating a ground force with your foot into the wall and you create a ground force with the side of your shoulder into the mat. When you press the side of your shoulder into the mat lift up your ribs and lift up your waist as if you were balanced on a ruler's edge with your floor palm, that's your right palm in my case is pressing up into the left hand. As you inhale, push the sole of your right big toe into the wall, press your floor hand, your right hand up. As you exhale, sweep your leg long behind you pointing your foot, lifting up your ribs and lifting up your waist. Inhale, creating a ground force with the upper arm that's close to the ground.
Exhale, lift up your ribs and lift up your waist reaching your toes back behind you as if you could draw your navel towards the big toe. Once again, I'm losing my portable wall. I trust that your wall at home is serving you well. Lengthen the top waist, lengthen the bottom waist, lift up your ribs and lift up your waist. There we go.
Change now to the new side. I'm gonna change to the new side so you can see that I'm not lying about that mic box, okay. Here you are on your new side. Creating a ground force with your palm, the floor palm, that's the left palm in my case, is pressing upward. Aiming the top sitting bone towards the bottom as if you could tail wag towards the floor.
Inhale to lead forward, as you exhale lift up your ribs, lift up your waist, take the longest distance behind you connecting your lower ribs to your pelvis. Inhaling, balanced on the side of yourself both sides of your waist are long. Exhale, (laughs) pushing in to the wall and moving it a whoa, a little bit. Inhale to come forward. Exhale, this is my less sturdy side so you can see that I would be happy to have a more firm wall.
Now, we've finished with the side leg kick and I'll get rid of the moon box for the moment, for the time being, and we'll come to high kneeling side leg kick. So here you are kneeling with your knees as close together as is reasonable to have them. As you inhale, your ear listens to your shoulder, right ear in this case. As you exhale, slide your fingers down the side of your thigh, fanning open your side ribs. Reach this arm wide to the side so that it will be there to catch you when your pelvis cartwheels over the head of your femur. (chuckles) Now, you can have this hand behind your head, this hand on your shoulder or underneath your ribs, underneath your waist.
We'll start with a short arc circles here. The reason being is that when you circle your femur behind you and keep the connection of ribs to pelvis you are encouraging length through the hip flexors, length through the hip flexor area, length through the iliacus. One more here. When we do the hundred, the roll up, the roll over, reverse direction, the teaser, these tissues at the front of the hip joint, some aspects of the deep front line tend to not get their full range of motion in hip extension, so it's useful to prepare them this way. As you inhale, bring your heel forward.
As you exhale, press the little finger side of your hand into the ground and remind yourself to connect the pubic bone and the xiphoid process. I know you remind yourself of that many times a day. Anyway another way to say it would be to zip up your, from pelvis underneath your ribcage. Have the idea that you would take your leg up and back behind you. Don't cheat and translate your ribs forward.
Push yourself up from here. Relocate and the new side awaits. Inhaling, ear listens to your shoulder. Exhaling, hand slides down the side of your leg fanning open your side ribs. Reach your hand wide to the side and then your pelvis moves over the head of your femur.
Hand holds underneath your waist and circle your short leg there having the idea that you could stand high on your femur head. Exhale back, inhale to come forward. Exhale back, zipping from pubic bone up underneath your chest bone. And having prepared yourself, here we go. Inhale forward, exhale lift up your ribs and lift up your waist.
Inhaling forward, exhale climb up high on your femur head as your toes reach a long way from your chest bone. Inhaling forward, exhale to reach back. Have a seat now on the mat because it's time for spine twist. Heels wide, as it suits you, perching high on your sitting bones, and of course you can put a platform underneath your pelvis so that it's more accessible, more comfortable for you to honor your lumbar curve when you're seated here. If you find when you're seated for the side for the twist, the spine twist, if you find that you're being pulled towards a posterior pelvic tilt and spine flexion, that's, it's not good for your, the architecture of your spine, of your discs, and it's not good for the twist either.
So get up high on a platform aiming your pubic bone in the direction of the ground. Inhale to prepare, as you exhale slide your shoulder blades down and wide as if your shoulder blades could come towards the little finger side of the heel of your hand. Collar bones go wide as your finger tips go out and your fingernails. Now reach out wall to wall to wall as if your arms started at the center of your chest bone and finished beyond your third fingernail. Bend your elbows now, hold on to your elbows.
Now keep your left sitting bone anchored she said to herself, and to you. Keep your left sitting bone anchored and press your tongue down to the left. It's a good look, but you know, we have to do it. Now pressing down with your sitting bone your eyes will lead you to the right. Turning your left lung in front of you, turning your right lung behind you, your tongue stays down left, saying to the left sitting bone stay home.
This is thoracic rotation. Come back to the center. As you inhale, press your tongue and your right sitting bone down to the right. Eyes track around to the left as if your right lung could come in front of you your left lung behind you. Eyes go up and to the left.
Come back to the center. As you inhale, point your right foot. Keep your left foot flexed, tongues goes down to the left. Eyes go up and to the right. Lungs turn around your axis.
Reach out your arms wall to wall to wall, eyes up to the right. Right foot points, right palm up, left palm down. Swing back to the middle. Right foot flexes engaging your abdominals, your sitting bone down on this side. Left foot points, that will activate your spine extensors on the left side.
Tongue down right, eyes up left. Inhale to rotate, exhale to extend. Turn your back palm up. Inhale to turn more. Eyes leading because you can.
Exhale and come to the center. Let's go now to the prone single leg kick. Come on to your front. We've prepared for spine extension in a lot of different ways through side bending and through rotation, so now it's time to prepare the front of the hip joint more for spine extension. Coming on to your front, come on to your forearms, palms together, fingers interlaced.
Tuck your toes under and then move into a posterior pelvic tilt and spine flexion. This is lumbar flexion. Now one foot stays tucked under as you wish. Or not as you wish, as I say, sorry. (laughs) Sorry to be so bossy, but you know, it's my job. Okay, tuck your toes under, your right toes under.
Point your left foot, bring your heel to your sitting bone. Now bringing your heel to your sitting bone with the foot pointed will encourage your hamstring activity. However, when you bring your heel, when I bring my, speaking for yourself, when I bring my heel to my sitting bone the tightness in the front of this thigh in particular just makes these dump out. So dorsiflexion of the foot will engage the abdominals more. You have to pick your battles here.
And then send your knee away from your hip joint, dorsiflexion, plantar flexion, it'll go a little higher, and come down. Heel to your hip once, twice, dorsi flex your foot, send your knee away, engage your ground force of your elbows and bring your ribs up and come down. Inhale, heel to your hip. What are we doing? Heel to your hip once, twice, exhale, send your knee away, and down.
Heel to your hip once, twice, and your knee away and take your sole of your foot to the ceiling. Once, twice, tongue to the roof of your mouth behind your upper teeth. Inhale, last time, heel to your hip. Exhale, stand your foot onto the ceiling. Come down from here now.
You can see that with all this cuing of eyes, tongue, feet, hands, you kind of wonder well what about the abdominal cuing that we've grown up with you know, for the, since Joseph Pilates started his work. That's relevant also. But here's why that this additional cuing is valuable, is useful. From neuroscience we learn that the, that the amount of the surface area of the brain of the motor cortex and of the somatosensory cortex that's given to the hands and to the tongue and to the lips, those three areas get a lot more real estate than do the area of the torso or the area of the abdominals and of the spine. So all of our cuing that we've learned through the years, through the decades, to facilitate abdominal control of the spine is all beneficial.
We can enhance that cuing when we add the tongue, the eyes, the hands, just because so much more of our somatosensory cortex is devoted to these highly sensitizes areas as you know from other areas of your life. Don't need to go into that. Now let's go into shoulder bridge. You're very well prepared in terms of the mobility in hip extension. Stand the soles of your feet on the ground bending your knees so that your heels are getting close to your sitting bones.
As you inhale, plant the soles of your feet firmly and aim your pubic bone up and up and up and up and up, aiming your knees away from your hip joints. Walk your feet closer to your pelvis lengthening the back of your neck. Now rise to your toes so your heels are lifted up and that will give you some room so that you can put the palm of your hand behind your sacrum or behind your pelvis and the palm of your hand behind your pelvis. Now, bringing one leg towards the ceiling as you exhale dorsi flex your foot, that will engage your abdominals. Inhaling, tip of your tongue to the roof of your mouth behind your upper teeth.
As you exhale tongue into the lower lip. Once more, tip of your tongue to the roof of your mouth behind your upper teeth. Exhaling, all the abdominals active on the way down. Inhaling, unfurl your leg to the ceiling. Exhale, tongue behind, tongue down below.
Point your foot, plantar flexion. Exhale, dorsiflexion. Inhale, tip of your tongue up. Exhaling, polish the floor away from you. Let go with your hands.
Come down from this now. Let's move now to leg pull front. Roll to either side. Make your way up from here and come on to hands and knees. Palms wide, fingers spread.
Creating a firm ground force with the heels of your hands. Reach your, reach your leg, one leg back behind you, dorsi flex your foot, tuck your toes under. Now, as you exhale press the little finger side of the heel of your hand into the mat and press your tongue into your lower lip because that will make your abdominals stronger. Tuck the other toes under, okay. Here you are sustaining a bit of a posterior pelvic tilt and spine flexion.
When you press the little finger side of your hand into the ground that helps to bring your chest bone up to the ceiling. As you exhale reach your toes back behind you. Dorsi flex your foot to get your abdominals more active and then plantar flex to lift it higher. As you exhale, slide your toes back behind you. Dorsi flex your ankle to engage your abdominals and reach your toes back behind.
As you exhale, tip of your tongue to the roof of your mouth behind your upper teeth. Tongue down, heel out for the abdominals then tongue up and foot points. As you exhale, tongue up, toes back. Tongue down, heel up. Tongue up, reach back behind you.
The logic of that, if there is some, the logic of that is that your dorsiflexion of your foot and your tongue down activates the entire deep front myofascial continuity from the sole of your foot to your tongue. In leg pull front exercise you need both support from the front and activation from the back, not only mobility of your hip joint in hip extension but also the activation of the back body of your hamstrings and your gluteals. Tip of your tongue up and foot pointing will help to activate your back body whereas tongue down and foot up will help to activate your front body. Now, and as in most interesting Pilates exercises, one of the reasons why we love them, why they're so effective and why they keep our attention year after year, decade after decade, is that they are whole body exercises. The entire neural myofascial system is busy keeping us organized.
Now, for leg pull you can have a little bit of external rotation of your legs if that's better for your, better for your knees. You have options for your shoulders and your wrists. You could have your hands forward. You could have your hands facing to the side. You could have your hands facing to the back.
As you inhale, press the little finger side of your hand into the mat drawing your shoulder blades down and have the idea of launching your pelvis forward and up. Chin in, tongue to the roof of your mouth behind your upper teeth. Flex your foot, polish the ceiling and reach out. Flex your foot, abdominals are active, point your foot, reach up and out. I suggest keeping your tongue to the roof of your mouth behind your upper teeth all of the time.
Thank you so much for joining me. It's really a pleasure to be with you year after year. I look forward to hearing from you and look forward to seeing you next time on Pilates Anytime, bye now.
Comments


I´m sorry, I don´t know enough English for a letter for you, Elisabeth, but I practice your exercises at home - Mat, Reformer. You are my teacher. Your´s sincerelly.
Viera, Slovakia

 . I look forward to meeting you somewhere. Thank you!


As a former Rhythmic Gumnastic Coach that had to deal with leotards for team, I know some very talented , creative seamstresses and their amazing work for Iceskating,Gymnasts and more.
Back to the lesson...
I would think that I should try to introduce one more detaill at a time, rather then eyes, tongue and all together..

You need to be a subscriber to post a comment.
Please Log In or Create an Account to start your free trial.
