Description
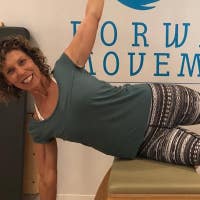
Joy is joined by her friends, Tiffany, Kristien, Rebecca, who are living with the experience of cancer. Joy has each of them show different variations to reflect where you or your client are in their recovery.
You or your client should be cleared by a doctor.
About This Video
Transcript
Read Full Transcript
Hi, I'm Joy Puleo and I'm so grateful to be here, and that Pilates Anytime gave us the opportunity to bring these work workouts to you. I am here with Kristen Briody, Tiffany DeMartin and Rebecca Phillippo. They've all flown in from New York, I'm from Sacramento California where I currently work with Balanced Body, but we all used to work in New York, out of my studio with a program called Body Wise Connection. And before that, all three of these ladies here in front of you were students in a teacher training program, and they've all been part of the Body Wise Connection program. And they've all myself included, sat on the other side of a desk to hear a doctor say the words, "You have cancer." And that's actually where we're gonna start here today.
What is that experience of cancer? And how does a client who has to now give themselves to the medical world, still feel and empower their own body? So we are starting very simply from the beginning. This is a workshop that is designed or a workout that is designed specifically for the post surgery experience. Our focus today is breast cancer.
However, all of us here have had a different form of cancer. So, this workout is great for anyone who has gone through the cancer experience. So are you guys ready? Yeah. All right, let's do this.
We're gonna start very simply with creating sensory awareness. And what do I mean by creating sensory awareness? What's the first thing that happens when you give yourself to the medical establishment, is they come in and they say, these are your appointments for your oncologist, these are your appointments for your radiologists, this is, and you go on and on and on and on down that tunnel. So this is an opportunity for us in our studios to create the safe space for our clients to come into themselves, to feel, to breathe. And because we are focusing on breast cancer, the first task for us as instructors is to focus on where the surgery is.
And that is on the chest wall. Just really quickly, every single client I have worked with who has had breast cancer, and I believe you guys have as well, will come into you and say, "Look at my range of motion." And they'll raise their arm up like this. Guys, this isn't shoulder range of motion, right? This is the clavicle rising up and the shoulder joint coming up towards the ear, and sometimes you'll see them cock their ear. What we're trying to do is establish a platform upon which the shoulder can move, leave the shoulder range of motion, especially in these early days of healing to the physical therapists, and to the OTs, okay?
So we are gonna start very gently by mobilizing the rib cage, mobilizing the thorax, creating just gentle if you will rhythms that can help and assist in the healing process. There will be no pulling on tissue, there will be no stretching too excess, just breathing, breathing leading to sensation, sensation leading to movement. So with that, I'm gonna ask you guys to sit up close to the edge of your seat. And firmly place your feet on the floor. Now one of the things that's really important, and you can close your eyes, you can keep your eyes open, but if your eyes are open, please let them be soft.
This is a time in which the nervous system is really fired, it's on man, and it's on all the time. It's like, you know those nasty applications on your phone that like when you've got too many open, the phone doesn't work quite so well. Well you can imagine all of your apps times 10 and how that can really impact daily, you know, daily life, daily activities, and how you feel about yourself. This is an opportunity to create a space for your client, where they can come back into themselves. Just gently planting your feet firmly on the floor and feeling your alignment in space without over-correcting is really a lovely place to start.
I am not a meditation expert and I highly recommend however, everyone takes some time to learn meditation. But we can start to build the meditative mindfulness, just here, just breathing, just sitting with each other. We as instructors like to fix, you guys are gonna keep breathing and I want you to feel the four corners of your feet. We as instructors like to fix, we like to be there with an answer. And with cancer, we don't have the answer, but we have a space.
Now let's take that understanding up from your feet, up and through your femurs and feel the relationship of your legs and your pelvis. And you guys, you can wiggle a little bit. And feel your pelvis rocking, just ever so slightly on the chair. Where are those sit bones? So I tend to use anatomical language.
You certainly can use imagery, but most importantly, you don't let the ad anatomy hit them. You don't let the imagery hit them, you let it land. Now what I'd like you to take your attention to is your spine and think of lifting up and rising up out of your pelvis. I often think of the pelvis as the root ball, and your legs as the roots and your spine as the trunk. And let your trunk rise up toward the sun.
Find the energy through the crown of your head. And the more you rise up, notice how the more your branches if you will, your arms start to just really hang off of the thorax. This is the first place, and this is the most important thing. Number one, find the rib platform, the shoulder girdle rides it. One of the best ways to find that rib platform and to work with an area, particularly after a mastectomy that has been scarred is through breathing.
So let's take this now and let's take this into just gentle easy breathing. Rebecca is gonna put her hands on the base of her ribs, Tiffany is gonna put her hands right on her sternum, and I'm gonna have Kristin put her hands behind her head. These three positions are all very different, but can help us elicit a different, a slightly different breathe response. So guys just keep breathing and I'd like you to think about breathing into, we'll start with posterior lateral breathing. And I don't love that, really breathing deeply into the lungs so that you're filling them so completely with air that your three-dimensional rib cage expands, and then as you exhale feeling the narrowing.
Now the diaphragm is really interesting and we in our world talk an awful lot about fascia, but the deeper your breathe and the more expansive it can be, the more recoil you can get in that diaphragm, which means the more you ringing out of the lungs and the better the purification of the oxygen in the air. That helps with the gas exchange, it helps with alertness, and it also helps us to calm the nervous system. It also is a nice platform upon which the rest of these movements are gonna flourish. You'll notice Rebecca's breathing goes wide. Tiffany, I'm gonna ask Tiffany not to even breathe a little more into her sternum into those upper ribs and her breath goes up and down a little bit more long.
And Kristin's breathing has this nice V to it where it's expansive. All three of these breaths are super valuable in releasing tightness through the chest wall by expanding the intercostals, by working on the accessory muscles, especially here of, the scalings if you will, and the neck muscles that support the upper rib cage and the pectoralis minor, all things we will explore in movement. And here we start to get the wings of the lats engaged. We start to see the openness from the belly button through to the elbows. And you can imagine how that's gonna help us as we move into extension movements.
Great, awesome. All three of you guys can relax your arms. And let's just start with a little hip mobility, very gentle and easy. Now you're probably thinking to yourself, I thought this was about breast cancer, why are we starting with the pelvis? Well one of the things that you're gonna realize is we have three main centers of weight, our head, our rib cage, and our pelvis, and they reply to each other.
It's a call and a reply. And so I wanna gently start the process of moving the rib cage. But if I go directly to the rib cage now it's damaged, what might happen is I get a response contrary to what I'm looking for. So, if we start with the pelvis and we start loosening up the lower body, we can start to work our way undulate if you will, our way up to the upper body. So very simply, I'm gonna ask them to do a little footwork here.
So let's have you press into the floor and lift up your heels. And then drop your heels and just lift up your toes. And then drop your toes, push down into the floor and roll to the floor and lift the heels. And then drop down and lift up the toes. So notice I'm giving them that idea of pressing into the floor.
Feedback, coming up through the floor is what I'm looking for them to feel and to sense. We're talking about clients who are post-surgery, but clients who are dealing with chemotherapy it might be dealing with chemotherapy on a chronic level, might be having neuropathy in their feet. And just having this little gentle movements of the feet are really helpful. Can you guys take this into a circle? So this is gonna happen all the time, and they're gonna look at each other because guess what I didn't do?
I didn't do this in practice, because this is Joy saying, "Oh, this makes perfect sense." (giggles) Which means I'm giving you license to take all of these movements, and whatever creatively you feel, please expand on them, yeah? These are ideas to get you started. Can you reverse those ankle circles. And notice they're all different. Great, and let's have you plant your feet again.
We're gonna do an exercise called the bent knee fallout. Typically it's done supine, but we're gonna do it seated. And part of why we're keeping this whole workout seated is because it might be too soon to lie your client down. It might be uncomfortable for them to get up, it might be uncomfortable for them to lie flat. And this is a lovely way to get them started.
So left leg is going to stay really nice and stable, and the right knee is going to open out to the side. And then that leg is gonna come back. And then we're gonna do the other side. Good, now let's go back to our three hand positions that we had before. Rebecca had her hands here, Tiffany here, and Kristin had her hands behind her head.
Now do that bend knee fall out again, and then come back. That leg is going off to one side, and I'm asking the trunk to remain stationary against a moderate, but still their rotary force. It's also this opportunity to just move the femur, disassociate it with the hip joint. And something that you will hear me say consistently, don't be satisfied with sagittal. I didn't start with a sagittal movement.
Look at how I'm having open the femur out, and bring the femur back, good. Now, let's bring you back to parallel. And I wanna play a little bit with internal and external rotation of the leg. And we'll start by taking your right foot and crossing the midline and tapping it down to the floor. Then you're gonna internally rotate that leg and tap that leg a little bit behind you.
And you're going to just play with this tapping forward, and tapping back, and tapping forward. Now look at what's happening to the reply up through the body. Can you see how this gets really kind of challenging for them to maintain their stability as they go internally and externally rotate? What I'd like for you both, all three of you to do is use the feedback in your hands. Rebecca, gently press into your ribs and lift up.
Kristin press back into my ha--, look at she just rose about an inch, and Tiffany, I want you to feel that sternum. Oops, see if that sternum lift up. Good, let's switch legs. When I add one more piece of stability here for you if you're really finding it hard not to stay relatively stable in the chair, it's feel the stable leg pressing down into the floor. It will help to give you a little bit of a rise in the spine.
So we use our stability to help to produce or support the mobility `cause these things live simultaneously in our body in real time and in real movement. Good, and you can bring your legs back. And now bring them really relatively close together. And let's just have you sway your knees to one side without moving the pelvis and the torso. And now I'm gonna have you take that a little bit bigger, and I want for you to notice the reply in the rib cage as they start to move.
Good, so let's come back center. Ready, come back center with your legs. Everybody go right. Everybody go left. Everybody go right, notice they have different timing, they have different ranges before the rib cage starts to come in.
As instructors, this is actually really useful information. Try to keep the torso stationary Kristin, we're just moving the legs, no rotation. There we go, feel different? Good, all right. Now, you guys, I'm stepping in front of you Tiffany for one second.
Widen your stance, and let's have one leg internal, one leg external. And then let's go to the other side. On the balls of your feet, and I'm gonna back out on the balls of your feet. On the balls of your feet, good. On the balls of your feet, you're gonna pivot.
Good, now rest for a second. You are all three movers. When I have you do that movement, you wanna go, don't ya, right? You wanna go? So I'm gonna ask you, take your arms and whatever position you want to take your arms, do that same movement with your legs, but the only caveat I have is that you'd move together, and take that movement where you want it to go.
So you're ready, we're going to the right. Everybody go to the right, and then come center and back to the left. And to the right, now make it as big as you want. Go, let the arms go. Good, for you are watching them, this is beautiful, right?
Let the-- just let them be free, allow the movement to happen. Because sometimes when we're so focused on that stability piece, we can forget that there's this richness that starts to happen. Now the arms start to integrate. Notice that's the head will either go, or the head could be focused straight in front. All of which is good, nice.
And one more. Good, now take it back to center, put your hands where you started and just sit. And do you feel a humming inside? Yeah, okay, so this sort of brings me to another important point, and you guys can let your arms come down. I think this is really important for all of us to know.
Is this is really a time when, who, our humanity mortality and our sense of who we are as women is challenged. And sometimes allowing just the undulation, allowing the movements, allowing the rhythms to find whatever expression they are in this body today, helps us feel grounded again, helps us feel sexy again, helps us feel like we can tackle what's going on out there. So that's just some seated mobility that we took into full body. I'd like to start now taking it into pelvic rocking, and pelvic rocking into some thoracic movements. So again these are small sensory movements.
We're going to go with an anterior or posterior tilt. If you guys could put one hand on your belly button in front, one hand on your sacrum in the back. And idea is it's gonna be belly, you're gonna rock forward, I know I said belly button first. I want you to rock forward on your ASI, on your sit bones and then curl back. Now when you come forward, pass through what we call neutral by lifting up as you rock forward.
And as you curl back really take the tail under, and curl back. Lift up and take that forward. Now, curling back, I really want you to feel those sit bones drawing under you, and then rise up your spine. Now, I don't care if you stay in sync, I want you to find your breathing with this. I ask that it's an inhale forward and an exhale back, and go as far as you can, it's forward, and it's back.
We are here in this beautiful setting and there's the ocean behind us, and you can almost feel the waving. And just like the ocean, when you pull back I want you to draw a current into you and give the power of that current to let you rise up and go forward again. (breathes heavily) So that pelvic motion turned into pretty quickly thoracic mobility. I'm not judging their mobility at this point, I'm not, I'm not putting overcorrection on it, I'm just trying to encourage it to come. Great, now let's have you take, sit up nice and tall, take your arms out to the side, and let's work with lateral translation.
Just shift to the right, and shift to the left. Shift to the right, shift to the left. Now let's start that shifting from the pelvis'. Right sit bone, left sit bone. Right sit bone left sit bone.
Kristin come with us, ready? Left, right to the left, come this way. Good, right sit bone, left sit bone. Now, go a little bit bigger on that and allow the ribs to shift, shift, there you go, good. Come back to center, and with the arms out, turn the palms up, let your eye gaze go up.
Don't go into full extension, but the energy of the sternum goes up to the ceiling. And then turn the palms down. So now we're adding internal and external rotation of the arms, and we're coordinating that internal and external rotation with the arms with really the bucket of the thorax lifting just slightly expressing itself in extension. And then folding those upper ribs into flection. Last time, and super, and then sit up nice and tall, put your hands on your thighs, and we'll move on to adding some props.
Okay, so listen guys, I wanna take those same movements, and I wanna move them a little bit more. So we started with a sensory experience, a little meditation, a little pelvic rocking, and thoracic reply if you will. Now let's use some of the props that we have in our studio to create feedback into the chest wall and something to give us an opportunity to reach out. And some of the best tools are elastic tools such as a ball and such as a band, right? So what I am going to ask is Tiffany, would you take your band?
And I want everyone to see this `cause the wrap is pretty particular. You take that band around the back of your neck, so we're going this way, like you're draping it over like a shawl, and then I'm gonna bring it behind her. And I'm gonna cross it behind her, and give the ends, and put them in her hand. So now she has this cross of the band behind her and this elasticity along the back ribs. We'll talk an awful lot about breathing in the back ribs and the importance of finding those back ribs, and when, especially when surgery is to the chest wall, those back ribs can get very, very rigid.
So even here, Tiffany, just breathe into the back ribs. Can you feel the elasticity there? And you can dial that in or dial that out by how much you straighten out those arms. For Kristin we're gonna do this in a little more simplistic fashion, and what's nice about this simple version is we can find where in her spine she might need the extra support. I think we'll start a little bit lower, but as we start to move and I know Kristin's body, I might wanna, I wanna encourage her to change where this band lies along the back of her rib cage, in order to facilitate a little bit better and more enhanced movement.
We're going to move into starting with flexion and extension or arch and curl. So I'm gonna ask Rebecca now to put the ball back here on top of her chest. Certainly if there's any discomfort at this time with the chest wall, you don't wanna apply a lot of pressure, or quite frankly, just a little bit of hands, crossed hands to the sternum will do the trick. Yeah, exactly, and right after surgery, this is really important because very often women become very disassociated with their chest wall. They'll be numb.
And the scar tissue as it's healing might really start to give some dissonance. You might, they might feel some stinging and some numbness in certain parts. And this is just a really lovely way to bring both some feel, some touch, and some energy to the area. So we're gonna use the ball. What I love about elasticity is I think of the rib cage as being elastic, right?
All of the connective tissue in there is very, has a lot of elastic property, and we're gonna harness that, and we're gonna start with arch and curl. So everyone is going to inhale and you're gonna lift your sternum up to the ceiling, and let your eye gaze go up, and then you're gonna curl back just like you did before, but now add a little rhythm into this. Inhale up, exhale back, good. Inhale up, now both Kristin and Tiffany can use that band and their arms. They can inhale up and reach, exhale back.
And all that depends on arm range of motion and where your client is in the process. For Rebecca, we've got more of a beginning level movement. Good, inhale up, exhale back. Last one, inhale up and exhale, and back. Great, everybody sit up nice and tall.
I wanna take this in two lateral movements. Rebecca I'm gonna ask you to put the ball under one arm. Now the arm that Rebecca has the ball under is the arm that we're gonna side bend to. So we're gonna do repeated repetitions to one side. If Rebecca can take her arm up overhead, I would encourage it, or she can keep her hand to her sternum.
Again, depending on where she is in the process. Now, before you move into the side bend, can we do a little lateral shift? Everyone shift to the left, come back center, shift to the left. Come back center, shift to the left. Come back center, one more time, shift to the left, come back center.
Now, can I ask you to shift a little to the right? And Rebecca just gently press on that ball. Everybody's side bend to the left. You don't have to shift, it's just another option to get a little more mobility in there. Lift up, and then come back to center.
Now what if we didn't shift to the right? Let's have you just gently press into the ball, and let's have you side bend. And now everybody lift up to return. Good, one last time, we're side bending to the left. And I'm gonna give that cue again to lift up to return, fill yourself balanced on your sit bones, and we're gonna go to the other side.
You guys can relax with holding the band as Rebecca changes to the other side. I'm gonna ask Rebecca to do something a little bit different this time. This time, as she side bends, I want her to use the feedback of the ball to come up and over. And you guys as you come up, I really want you to accentuate the wingspan, the width across your arms and let that help you to return. You guys take a look at that see if it affects any kind of change in their movement, sorry, ready?
Everybody sets, and we're going for the side bend. Side bend, feel that wingspan, let that wingspan lift you up and return. Good, and side bend. Use your breathe pattern that works for you. Feel that lift here Tiffany, as you come up think of reaching the pinky line up, and the ribs up and come to return.
Good, and one last time. Side bend, and lift to return. Great, now let's go back. Rebecca you're gonna take the ball, and put your, give me a hug a tree with your arms. Good, and let's go back to the ribs shifts.
Shift your ribs side to side, and just tell me if you feel any change, any difference. And just `cause we're in front of a camera, you don't have to nod yes, but if you do let me know. (laughs) Awesome, great, now you're going to rest. Good, so we did flexion/extension, we side to side, I'd like to add some rotation into this. Now the rotation is really key here.
It's gonna be something that we return to time and time again. And now when I think of rotation here, I want you to think of the central column of your spine, and one half of your rib cage rotating around the other. But here's the thing. I don't want you to think of rotating from the front. I really want you to feel that rotation emanating from the lowest and back part of the rib cage as you rotate, okay?
So now even though Rebecca has the ball to her front body, as she rotates, she's gonna let the sternum stop, the sternum soften so she could round around that ball, right? For Kristin and for Tiffany they have the benefit of having a band. Now is where I'm gonna want Kristin to raise her band a little bit so I can get a little more happening right here. Okay, ready, so everybody center, we're going for a rotation, and it's inhale and spiral to the right, come center, and then spiral to the left, and find your breath pattern. Ready, let's go.
(breathes heavily) Right, right and left. And make, give it a rhythm, right and left. You're gonna hear me say this all the time, undulate. Good, good, we get too stuck at our (breathes in and out). Right, that we don't really let the body go.
Now look at what's starting to happen. They're all going differently, and they're finding different ranges in themselves. This is a good thing. There you go. And then come on back and center.
You could tell I was really never a group instructor because I really don't ascribe at this point for this particular work to everything being 100% uniform. However there is a time and a place for that and there was a lot of energy in that. So, I'm just saying for this, it's okay. So how did that feel guys? Right, it felt supported?
Great, so we had the rotation now being a little more genuine to your body. So let's start putting some of these pieces together. Ready, we're going to start with extension. (breathes in heavily) And flexion (breathes out heavily). And extension (breathes in heavily).
And flexion (breathes out heavily). And extension (breathes in heavily). And flexion, last one, extension and flexion. Everybody sit up nice and tall, shift your ribs right. Shift your ribs left, shift right and left.
Now we even give this more go, go, go, go, go, go, go. Nice there, bring the arms in front of you. Rebecca stay right here where you are, get up nice and tall and rotate to the right, and let it go to the left. And right, left, right, left, right, left, three, two, and one. Great, everyone sit center, sit up nice and tall.
(breathes heavily) And how do you feel? Okay, so the idea here is we're starting to really let the tissues move as they would at this point. We're not putting a lot of stretch on them, we're not putting a lot of strain on them, but we are also introducing rhythm. And the rhythm becomes really important because we've got layers of connective tissue here that are starting to adhere because the scar tissue, there's an awful lot of scar tissue on that chest wall, and those muscles need to have their flexibility and their pliability. And we're not gonna do that just by pushing and pulling, certainly not at this point when tissues are really tender if you will, and really fragile.
Okay, so there we have it taking those basic sensory movements, moving them a little bit more organically using elasticity to help feedback, put feedback into the body. Okay guys, so we got that moving. You should, everybody just move around a little bit. You should be feeling really sort of nice and loose and flexible and great for us to go out and dance after dinner tonight, right? Okay, now I wanna change our tack a little bit.
And I wanna start, I just I wanna address the shoulder a little more specifically. So let's have Kristin, you're gonna take your band, you're gonna hold, you're gonna fold it, hold it with your palm up. So she's got a double band here. Tiffany, we're gonna have you take your band, and I wanna play with a diagonal for you. You guys are going to get sick of me saying this, but don't be satisfied with like just the basics.
I want you to play with different diagonals and angles of pull. So she's gonna, this is gonna be her stationary arm. She's gonna hold this arm here, an this arm, it can be here, it can also be up like this, right? We can play with this any number of ways. And Rebecca, we've got Kristin's right hand facing up, so I want your palm to face down.
Now, basically I want you to remember 1, 2, 3, 4, 5, when you start working with clients in training them through breast cancer recovery. The first part is the chest wall, which is very much a lot what we started with, and it's also gonna be where we end. The second part is going to be looking at the clavicle, I'll talk a little bit more about the clavicle in a minute, and then it's the scapula. So you're going around the shoulder joint, how that feeds into the body, and the fifth part is to look at the shoulder itself. But it is important to start to get a feel for the congruency of the shoulder in relationship to the shoulder girdle.
And these are just some very, very basic, just a little internal, external rotation if you guys would move out. And as you come in, please resist the band as it comes into the midline. So it's just some basic rotator cuff work. What I have here is different positions of the palm and a different diagonal or anchoring. And that's really something I want you to start to think about when you play with this idea here now we're external rotation.
Now I'm gonna ask you all to stop, and I would like you to hold the band so that your hand comes across the mid line. So you're gonna hold that moving hand so that it's closer to your midline. Now look at their arm now they're in internal rotation on this arm. Now you're not gonna get into full external rotation, but you're gonna move it out a little bit. So now we can work on the external, now resist the internal rotation.
So I wanna give you permission to start really playing with this. You've seen this 1000 times in 1000 different ways tying the bands to door knobs, to reformers, to foot bars, to legs, but I want you to play. Here's the next thing I want you to play with. Tiffany you're gonna take your right arm and bring it up overhead. You're gonna turn this palm down this way.
Rebecca you're gonna take your right arm and it's going to be straight out this way. And Kristin you're gonna go one band down towards your hip, okay. Now, if flexibility allows we can start to play with the ribs coming in with the arm movement all out, draw a sword in Pilates. So bring your arm into the center, and then open it out, sweep it out. And now add rotation to that as you feel.
And again, notice that their left hand is their anchor. And guess what, the left hand is working as hard as the right. Now here we've got this nice diagonal across the body, we've got a smaller diagonal so you can play, and I've got Rebecca keeping it at her below 90 degrees of range. Which is where I usually start with clients who are closer to coming out post-operatively, yeah? And then come on back.
Now, let's have you do that same movement on the other side. So, again these are just a little, some ideas, some tweaks into what you probably already know about using the bands for a rotator cuff work. But my focus here is not just on the rotator cuff work, it's finding that connection between the right and the left arm, one arm working isometrically while the other is facilitating movements of the rib cage. Good, awesome, and then come on back to center. So Kristin here by the way is also a PT.
This jive in PT land? (laughs) All right, so now everybody holds your bands out in front. Palms are faced down. And I want you just to give me a little, just a little feeling of a pull. And that little feeling of a pull if you follow me around, Tiffany is gonna come around the back, upper back of the body to the other side.
So I've got this connection through the front, and I got this openness through the back. So I want everybody to feel the openness through the back and the connection in through the front. Now we're gonna slowly start to bring the arms up above 90, look at your eye gaze don't go all the way up, and then bring the arms down. Good, now you can add that little bit of the pelvis going, and the rib cage going as you go up, and then as you come back. Yeah, as you go up, as you come back.
Use the pull to help lead you up and give you the feeling of the back helping you rise. Release a little bit the pull as you come in to feel yourself coming toward your midline. And see if that doesn't help deepen some of the work we were doing earlier. Now Tiffany has no issues with her range of motion, so I'm letting her go, and you can see. And you guys take it to your end range, yeah?
And last one. And then sit up tall. From here you have endless, endless opportunities. I'll start with Tiffany. Tiffany bring your arms up overhead, widen your hands a little bit on these bands, and you can now side bend and open, and then come back.
Right side bend, and open, and come back, all the time lifting up into the band. And if the band touches the top of your head that's good feedback. You can bring the arms a little bit behind you or a little in front of you to keep it, yeah? I tend to like the feeling directly overhead. For Kristin, I'm gonna bring it up just above her eye gaze.
And I'm gonna have her open one arm and look down. And this arm is working like crazy, and then come back. And open the other arm and look down, and come back. So you have endless, endless variety. And for Rebecca, I wanna go straight out in front, yeah?
And I'm want both arms to open, and then I want her to resist as she comes back to midline. Right, and both arms to open. Great, and rest, good. So they're are just some tips. I'm on purpose giving you variety of thought.
I have seen over and over and over again this rotator cuff work be very bland, and it's actually really super important for finding sort of that, that sort of truly finding that internal support at the glenohumeral joint. And if we don't have that, then as we start to, we're gonna start to ride the rotation of the clavicle, we could potentially have some issues there. So gentle, lightweight, and within the range and the comfort of your client. One hand isometric, the other arm is moving in and out at all different ranges and angles. Okay crew, so let's put those bands down.
We've already covered a good amount of stuff here. We've really started to mobilize the thorax, we started to play a little bit with glenohumeral stability or congruency if you will. And now I wanna talk to you a little bit about your clavicle. Nobody talks to you about your clavicle, and here's how I want you to think about your clavicle. Your clavicle on the shoulder girdle is the middle child.
It is stuck between the stern, sternum of the first born and the happy-go-lucky third child, that is your scapula. And actually it's rolled between the two, is perfectly surmised by those two elements because it's job is to relate the scapula on the back wall of the body to the front of the body, and it's a horizontal shunt that really helps us to shunt forces to and from the thorax to prevent them from going into the cervical spine, or being really a burden on our respiratory system, which resides inside our thoracic cavity. So, the clavicle is really important and it's movement is key. It's movement is key to placing the shoulder girdle on the rib cage so that it can ride high on the rib platform and to supporting scapula movement, both in stability and in control dynamically as we move through space. So we're gonna play with that now in a couple of different ways.
The first thing. Gosh, what was the first thing we were gonna do? Oh, we're gonna do arm hangs. Thank you, all right. So the first (laughs).
So the first thing we're gonna do is we were literally just gonna let the arm go. So let's let you guys drape that left arm off to the side. And feel the weight of gravity, and just let that arm swing, right? Now we actually did play just now with some congruency of the shoulder joint, and here's what we're doing now, is we're actually letting all of that go, we're letting gravity hold it. Now, all of you let your head tilts into gravity as far as comfortable.
And just notice that for all of them, they have a different, whole different side bend when it starts with the cervical spine. Goodness, swing a little bit forward and back. Good, and just, just make some circles or whatever gravity is allowing at the moment. The other hand, put it across on your trap, upper trap. Now you're gonna sit up, and then again you're gonna side bend.
As you side bend, let your top hand just gently brush along the upper trap. I would be remiss if I didn't tell you that this work is very much prevalent in the Eric Franklin work. Thomas Cook uses it all the time and it was, really left an impression on me and I started using it with breast cancer patients and clients almost immediately post-surgery, and this is a winner. How do you guys feel? I think this is probably a winner for you as well, yeah?
All right, so now you're going to go off to the side, let that arm hang, let the head tilt, and I want you to lift up from that ear, stack the head over the ribs, let both arms hang. And you almost should feel a difference left side versus right. Left side should feel wide and relaxed as opposed to the right side. Let's do the opposite side. So take the hand, put it on the trap.
Let's have you side bend. Let me give you just a little more specific queuing so that it's something you can use with your clients. The first time I do this I focus on the hang of the arm. You could even shake the arm out, but you wanna feel gravity. And then you start gently letting the arm swing with gravity.
So it's not pushing the arm forward and back, it's really just a pendulum. Underneath the eye of the shoulder you can make small circles. Now let's have you come up out of it. The first time inhale (breathes in heavily). Exhale with, start this with your head, then brush down your trap and feel that reach to the floor.
And you probably got a little farther in your side bend, and then come on up inhale. So we're doing a little different on this side, side bend and reach, feel that little brushing action, and then come up. And one more time let's have you side bend. Let the head go, and then come on up. Good, let your arms hang now alongside your body.
And that should feel really lovely, neck should feel, start to feel like it's loosening up a little bit. And while we're there, again bring your head back, find the length of the back of your neck. Don't look up, but I want you to feel openness in the front of your chest, openness in the front of the throat, and really feel the head resting or riding on top of the cervical spine. And can you all just nod like your is a little rocker bottom. Just nod, nod, nod, nod.
I want you to think of like a bobble head, nod, nod, nod, nod, look to the right. Come back center, nod look to the left, come back center. Never practice these exercises while your child is asking you for the car keys `cause you'll be in trouble. And then nod to the left and come back center. Now look to the right, let your nose look down, come back up, come center, look to the left that you nose look down.
So if I wanna start getting into the clavicle, I need to start working on the musculature that's gonna start attaching to these first few ribs and to that clavicle, and the neck muscles in the cervical spine become really important here. These are just some beginning ideas, right? Some very small beginning ideas. Okay, so we did our arms swings. We did a little bit for the clavicle now, in terms of the cervical spine.
So now we're gonna go specifically into freeing the clavicle. So number one, remember was chest wall. Number two, in terms of training protocols is free the clavicle as if it was caged, but you get the idea when you start doing this, that our clavicles are not moving as well as they should. So our clavicles have motion, and the first motion is up and down. And you basically did a little bit of this when you had arms to your side, when you had the arms swings.
You're gonna lift your shoulders up, and you're gonna drop your shoulders down. Now what is the clavicle doing here at the sternoclavicular joint? You're gonna lift your shoulders up, you're gonna lower your shoulders down. The clavicle is doing this motion, up and down. Good, now going back to what we do with our arms swings.
I want you to go up, and as you go down I want you to really length and toward the floor, and then rise up and down. If I wanted to add a little resistance into this, I could put a band under the chair and have them pull up on the band and resist the band going down, but this is plenty fine for now. Up, and down. Now there's another movement here I want us to focus on and that's clavicular movement as it horizontally shifts forward and back. So if you wouldn't mind, let's take your right hand and put it underneath your left clavicle.
And can you walk under your clavicle. And you guys do this right now. Walk onto your clavicle and find that little bulk of muscle that's poking out at you. And I want you to put your fingertips in there, and we're gonna see if we can loosen that up a little bit. Now shift that clavicle forward of the rib cage, and then shift it back.
As you shift it back the first few ribs, I want you to imagine opening them or lifting them. And then shift forward and back. So I don't want this to be a rounding forward and a rounding back. I don't want this to be about the scapula just yet, but notice what is the scapula doing? Of course it's protracting and retracting in reply to the movement of the clavicle.
But I want you to feel that shifting forward, that shearing forward and that drawing back. And as it draws back if you can just open those first few ribs, you'll feel that the shoulder blades actually, almost like a waterfall glide down the back of the body. Good, let's do the other side. So the muscles that you're working on here, there's one that I want you to look up as soon as you're done with this. The subclavius, I think it is, it's hidden in our work, and something that we should be looking at a little bit more specifically.
And also we're starting to work on the attachment of pec minor which goes underneath that clavicle, and the pec minor is gonna become very important in terms of restoring movement to the thorax, okay. So small movement, hugely important. And actually, you guys let your arms hang and swing your arms a little bit. And tell me if feel any difference there in the swing of your arms, okay. Now let's talk about the swing of the arms.
I'm gonna get these gondola poles. I have become a huge fan of the gondola pole, and I don't know if it's because it's like a, you know, position of authority when you've got this big giant pole in front of you, but we're not gonna part the sea behind us. Instead, we're gonna use these poles to feel the rotation quality of the clavicle. So, I'm going to ask that Tiffany stand up and we move her back a little bit `cause remember ladies, she's got quite the wingspan. And you guys are going to stand up and move forward just a little bit, and then have a seat again.
Tiffany, do you have, you have movement their, ability? Okay, have a seat. So, I'm gonna hold this up for you a second. Your clavicle, right? Your clavicle is like a yolk that rides on top of your rib cage.
And as your arms come, start to elevate, your clavicle starts to rotate. It's this little bit of rotation in the clavicle that becomes really important. So the arms come up, the clavicle will do a little of this, and a little of this. And why that is important is because your clavicle meets your scapula right over your shoulder joint. And it acts like a paddle that initiates movement or supports movement of the scapula.
We free this clavicle, we start to free up the whole shoulder joint, and we can then start to focus on scapular mobility and control. So here's what we'll do. We're gonna start with your arms, can be as wide, and this is why you're using the gondola pole. As wide on this pole as you need to have freedom across the front of your chest. Now we have been keeping movements at or below 90 for clients who are newly out of surgery.
And for those who have greater range of motion, we've started to let the arms come up. Same rules are gonna apply, you come up to your range. So it's inhale arms, come up, no reflection yet of the thorax. And exhale, come on down, inhale up, and exhale down. Now, I want some reflection of the thorax.
Inhale up, give me that little bit of extension, exhale, curl and draw back. Start with the pole leading you up, and down. Okay, and one more time up. All right, good. So this is what happens when you bring a whole bunch of New Yorkers to Pilates Anytime.
Everybody does, okay. (breathes in heavily) (breathes out heavily) But here's the deal, your clavicle in real time, roles to movements that are happening like this. So we're gonna pick this up, we're gonna let you guys find your rhythm, and I'm gonna ask you to sit even a little bit more forward on your chair, let the pole come in front of your knees. Okay, so you're already in a little bit of a flexed position. You're gonna come up your spine, that pole was gonna come up in front of you, you're gonna inhale, I know I'm in front of you Tiffany hang on.
And then you're going to exhale and you're gonna come forward and back. Good, and then come on up (breathes in heavily). And go forward (breathes out heavily). Good, and up, and take it forward. Yeah, that's what I'm talking about.
Two more, last one. And great, sit up nice and tall. Nice, okay feel a little different. What's the energy of that like? Okay, you do that in a room full of people, the energy just like go skyrocketing.
And what starts to happen is wherever the natural range of motion is, it starts to come into place. And what does that look like when you start, when it's a little out of sync? So I'm gonna have Kristin come up and if one arm is little, right more, you'll see, the pole will give you an indication as a teacher, and you will tell the client don't come up quite so high, just come, come to that place where you can keep the pole parallel to the floor, okay? All right, now I wanna do that one more time and I'm gonna give you one last instruction. Everybody hold the out like this.
Okay, the wrist and the arm line is really important for us to start working on. And I like this hold to the pole. I want you all to flex your wrists, and I want you to drop the pole down. That's remarkably challenging, is it not? Flex your wrist, and then down.
Good, flex your wrist, bend your elbows. Lower the pull down. Arms go straight. Flex your wrist, bend your elbows, lower the pole, arms go straight. You're rowing now, bend, go.
Good, out, up and down. Synchronize the wrist and the elbow movements. At or below 90 to start. Good, now take the pole forward, shift your rate forward and go up overhead, wrist, elbow, and bring that pole in front. Go down, forward, up, wrist, elbow, down.
D--, up, wrist, elbow, down. There it is. Forward, up, wrist, elbow, down, up. And last one, nice. Well done, you guys are really good at sort of taking it in stride.
I totally just threw that at them (laughs). Super, let's take this up to standing, okay. Now, I'm standing off to the side because they've got big poles, and I'm not exactly sure where to stand where I'm not gonna get in trouble here. And again, I know these three and their range of motions are quite good, but I'm gonna have them do this at three different levels so that you can see the difference. Rebecca arms will be straight out.
Kristin you're gonna take your arms to just above your eye gaze. Tiffany you can take your arms into full extension, she can go back up to here, okay? So, bring the poles down, and let's just inhale bring them to that level. And then lower them down. Yeah, just to that level and lower them down.
And inhale up and down. So you can see, you can work this in three different levels, three different ways up, down. Now take it to your end range, hold it. Good, rotate to the right, come back center, rotate to the left, come back center. Rotate to the right, and center, and left, and center.
Bring the pole down. Now you're gonna go into the rotation with the pole moving. So it's rotate, find your range, and down. Rotate, find, and down. And find, and down, up.
We're starting to incorporate everything that we did earlier to standing. Good, last one. Great, take it around the world, shall we? Let's go up, around, and down. Now go up, around and down.
Go up, there you go. Remember, if you go to Japan it's a return engagement, right? So you go up to the left, then you go up the left to the right, that's it. Unless you get it around the world ticket. (Rebecca laughs) And last one.
Super, take the pole out in front., bring it up overhead. Good, we're gonna roll all the way down to the floor. Wait a second, bend your elbows, bring the pole in front of your nose. Right there, hold it. Nod your head and roll the pole.
Now start to lower down to the floor. Good, wherever your range is. Starting with anchoring your feet, that pole is gonna come up the front of your thighs, you're gonna feel, right there stop. Okay, keep rolling up your thighs. Keep rolling up your thighs until you're standing, stop.
Bring the pole up to your chest. Extend into the pole. Come back to standing. Good, extend into the pole. Come back to standing.
Now take that pole up overhead. Look at the pole with your eyes. Good, all right, your eyes are gonna follow that pole ready, you're gonna come down. Bend your elbows, bend your elbows, bend your elbows, eyes follow the pole. Eyes follow the pole, down into the rabbit hole.
Great, pole now is gonna follow the pull of the back of your body, feel your heels anchored, feel your hamstrings, let that move the pelvis, feel the lumbar spine coming up, feel one vertebrae at a time stack. Let the pole come up in front of you. Good, take it up overhead, and give me a little bit of extension at the top. Neu--, find your neutral moment in space, bring that pole down in front. Good, good, and then you can take that pole, put it right next to you, and congratulate yourselves on a job well done.
Breast Cancer Recovery: Training to Heal


Comments


You need to be a subscriber to post a comment.
Please Log In or Create an Account to start your free trial.
