Description
About This Video
Transcript
Read Full Transcript
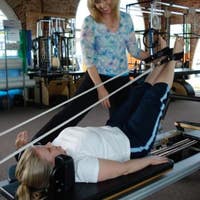
I'm Debra Colet and I'm here with Christy Cooper. And today I'm going to show how to take what might look like some very, uh, ordinary foot correcter exercises into a progression that, um, you might find interesting. So we're gonna start with the foot corrector and we're gonna move to a couple of different pieces of apparatus and just show how the, the basic stance that we take with a foot corrector is really the foundation for our walking, our lunging and even, uh, bigger movements. But, uh, we'll just start right here. Okay. Okay. So this may seem a little silly, but how I look at it is that you were just walking down the street one day and you happened to step on a foot corrector and there it was. So that's the attitude, you know, of your body that I want you to take.
So you're just, you're just walking, you're just walking and then you stepped on a foot corrector. So there you are. Okay. And so what the placement of it is, is that your heel is centered on the curve of your foot corrector. And then of course all the foot characters have a slightly different saddle and these things are sometimes they're like really big screws. I think it's um, you know, it's actually kind of like a, a good thing because you don't want to hit yourself on those. So it's kind of motivation. It's motivation to keep your foot centered. Okay. So you take a step and you would bend into this front leg as if you were going to continue on. Okay.
So what I want to do is stop you in motion in a sense. Okay. And think about the back leg because one of the things that we tend to do a lot is hangout out in our quads, right? We tend to just sit in our hips and sit in our quads. So I want to find the support for the action of the foot. Correct.
Or movement starting all the way in that push off of your back leg that took you into that step. Exactly. So, given that we all have a tendency to kind of hang out in this thigh, we're going to think of turning the hips slightly forward, which is going to activate the abdominals, right? And turn you into the ability to more deeply flex the right hip. Okay. The balance across the back foot is also important. So you have the domed up ankle, right?
Reaching like a bridge down onto the toes so the toes are relaxed as much as possible. The weight is balanced across the ball joints of the foot, and then the heel is weighted. So you have the ball, the reach of the ball forward on both feet, right? And then the heels on both feet have this quality of back and down, which creates space in the ankle joint. Okay? So the Tibia forward and down through into that tail is bone, not hybrid, extending the knee. And Christie, when you reach into the center of your back heel and I say something like, reached the back, the upper back leg back, you feel that right? So you feel the support in your hip to drive you forward, not just your quad. Okay. So then we go into the movement. So you curve, you could walk a slight bit forward, I'm sorry, so that you're not just into your tippy toes, but you're going to curve the entire forefoot as best you can onto the saddle.
And then keeping the knee bent, let the saddle and the spring just push you up in that position. Okay. And what you want. So it's really hard to get a lot of weight into the spring cause they're heavy. But we're gonna try not to rock the whole body back and forth to make this action. We're going to try and actually get the action from the foot and the ankle itself. So you can, um, you can push on my shoulder if you need to and I can also get you a pole.
But what I, you know, another tricky thing is that I don't really want you to look down, but for a moment, notice how you're closer to one of these little posts than the other. So you want to at least start out by centering yourself. Your desire is to press equally, side to side and front to back. And then with regard to the knee, okay, we've got some spirals in the body. I want you to think of lifting the outer border of your foot and curving, literally curving from the little toe side over toward the big toe.
So now you're starting to get a little bit more balance between your two ankle bones so that you don't collapse into the medial ankle. All right? And then it's tricky, right? Because your knee wants to roll in. So use my shoulder. There's a spiral when you bend, when one bends the knee and flexes at the hip, right? There's a natural little bit of external rotation in the Humerus, a femur that actually helps lift from the backside of your leg right up into your hip. That's beautiful. That's exactly what you want to do. Okay? So that's your set up, right? The whole back leg through the hip, front leg.
And then, then we have to do the stuff, right? So just let the saddle, you can use me or it. Would you like the pull? Try me. Okay, so here I am. So don't work too hard, but work to keep the weight balanced on the saddle. And then don't lift your toes. Let your arch wake up. Okay. So we're just gonna do a couple more so you press straight down and then keep the depth of flection at your ankle and your knee and let the saddle. So in a way, Christie, you have to think of the back of the saddle moving more quickly because the tendency is just to flex back. Alright? So even if you hardly move, you are getting this deeper work. Grab me as much as you want in the parts of our foot that don't want to activate. Okay, great.
So now lift that whole thing up and move it a little farther forward. So plant your heel and then you'll have a different area of your foot to work. Bend your knee to shift the weight onto the saddle, but keep your ground into the back leg as well. Okay, so there is going to be, you might even feel pigeon toed a little if you're not used to it, but there's this natural twist in the foot. It's designed to twist like that, to walk on uneven surfaces, right? So that you can find the ability to not hang into your medial ankle and not stress out your knee as well.
So you have to actually think not only a curving forward but that spiral. Okay, so here we are in a slightly different part of the foot. The saddle's going to come up and you push it down, grab me as much as you want and there that's really, really great and I can't, I can't stress enough how like depending on how stiff your foot corrector is, you don't have to make the movement large to get the benefit because what you're trying to do, you can rest anytime you want. What you're trying to do is open up some new areas of the foot that aren't typically the ones that you, that you worked through. Okay. It's hard. All right, well we'll get you on the other one in a minute.
So now I want to show just a little pattern that I think is kind of fun. So you go in as if you were already there. Instead of just curving up and down, I call it, um, what do I call it? Jellyfish. Snake. So as you go down onto the saddle, it's kind of like the jellyfish. Then you're going to stay there and you're going to reach the toes out. Let yourself get that deeper flection and feel how it pulls you back into your hip a little. So that's the naturalness of your walking pattern, right?
And then you shift your weight forward again over, and then you jellyfish up so the toes will stay down. So if it's with your hand, right? So it's jellyfish down snake out and up and back. Feel that natural rock. Then lengthen your foot like, oh, over the top of the thing and jellyfish up. Beautiful jellyfish down. Grab me jellyfish down. Snake it up. Snake it out. Jellyfish up. Perfect. Yeah. Jellyfish down. Snake it out. Reach the little toe toward the big toe.
That's your ankle. That's your total. Yeah, there you go. Then there you have it. Okay. So yeah, it's a lot of work, right? And it's hot. But how do you feel now? It feels big. Big. That's great. That's great. Okay, so now you're going to place the ball of your foot on this end for him. Same foot. Okay, so it's nice the way the the little foam stuff is because you can really use it to line up so that what we're looking for here is again, the pads of the toes. Try not to grip.
They go long and where you want the force to go from the ankle into the ball, the foot is onto the metatarsal, right? And there's that Tibia coming forward and down into the Taylorist bone and then the heel reaches back and over. The saddle grabbed me. If you need to, you might need to back up a little. Okay, so you're going to reach that over the saddle. And then what's interesting here is whatever pressure you can get into this spring instead of thinking of the back of the saddle coming up quite so quickly, try to think of the front of the saddle coming up a little bit.
You see, so you're getting into that right in front of your ankle. Parts of the sole of the foot. So you're not just rocking on the ankle joint, but you're actually still working all the muscles in the sole of your foot [inaudible] status. And you can see your back leg is working quite hard to try and balance for you, right? So there's this turn, you've got it, and then this lift and then the intention of going forward without falling into your lower back, which is why I've got my fingers on you to try to encourage the breath up the back, which is a lot to think about, but that's perfect. Okay, good. Go ahead and step off. Wow. Okay. So we're going to try the other side.
So we're just walking down the street and your heel hit a foot corrector at, but you're not phased. So you aim it right in between these wicked posts, right then the knee, and there you go. So the first position is just over the metatarsal. Any amount that you can get the spring to go down and then think of the back of the saddle pushing you up faster than the front. And that just, it's a, a sneaky way to get the, the muscles that are not the ones that you typically use. And the back leg is again, just to avoid this tension in the thigh.
Think of turning the hip a little in air. We go soften the back of the knee, reach back into the heel. Beautiful. So that's the first position. And then we moved the foot a little bit farther forward, so get more in the center of the foot. This is the part of the foot. When Amy did her foot corrector, she did that nice little kind of buoyant, bouncy thing.
Okay, so let's, let's be a little bit more buoyant too. All right, so same idea and this, but you're right, this one does have an easier time of getting that natural spiral so that you're thinking from the outer border all the way across each one of these cute little bones and right, right into that in step area and then the spiraling of the thigh to keep the need from going in, right? Which hooks you up into your hip. Beautiful. So that's why I think turning the standing leg in is helpful because it, it kind of naturally brings you into a deeper flection here. Okay. So let's do, um, just a quick jellyfish snake on this side. Okay. Nope, we're still here. Okay. So you've taken your stride, you're taking it in stride, and then you go down. So jellyfish snake, let there be that natural rocking snake over and jellyfish up, toes down, jellyfish down. Grab me snake up if you want.
Sneak over jellyfish up. Perfect. And then ball the foot to the front, just so I don't want you to feel uneven, you know? Okay. Okay. And then just, I don't know, it's almost like somebody took a pair of pl, not pliers, tweezers and cracked your heel. There you go. And then you just pull that heel back and down and try to keep the weight on the ball, the foot so that you're not shifting back and forth. But you're lengthening and curving. There you go. And you, you start to feel like your back leg almost naturally is trying to do the same thing. Right. It's like learning from it. Okay, great.
And so is your hand okay? But now you feel definitely feel centered. And do you feel any connection up into your hips at all? That's so good. I definitely feel my hips. Okay. So what I'd like to do now is take the patterning that started to get imprinted in Christie's body and help her use it on some chair exercises.
So now we're going to take it into what I call the foot ankle exercise. I don't know what do you call it? Angle. Exercise. Okay. So you're going to go ahead and take the ball of your right foot and place it on the paddle. You can put your hands on either side of the chair. Okay. And you can hold the chair, right?
Then you push the paddle down and you want to make sure that you're not leaning on your knee cap, your Patella, but that the Tibia bone, let's say you want to be on on bone, you don't want to be on soft tissue there. Okay? And so again, you don't want to be just leaning in your quad, right? So rotate slightly and on that left hip, pull the back of the leg back and down into your heel. Okay. And then the right hip is deeply flexed. So the job of the arms is to literally help some of hold some of your weight up cause you want the chair to be there as a support, but you don't want to lean on it and drop your weight.
You actually want to feel like the spring. Exactly. So you're letting your hands go. The spring comes up and hold to, okay. So then press down through the paddle and then as the heel reaches, keep the weight on the ball of your foot just like you did on the foot corrector. Right? So you've got the spread of the toes. And what I think is really nice is to really use the curvature of your, of your paddle. Okay. Almost like a, like you're shoveling the ball of your foot into it and then leave the weight there and reach the heel back away from it. Lengthen. Inhaling as you press opening the spring.
And another thing that's really nice to think about with regard to the chair is the angle of the springs, right? Christie, so that you're not just pushing down and up, but there's a layering thinning of the spring as you open it. So you're actually being the spring. Okay? And then of course, if you wanted to challenge the control through your pelvis, you could start to let go of your hands. Either stack your arms or put them behind your head and do the same thing. But I want you to stay over just as you were when your hands were down, because I don't want you to get into that habit of pushing back into your quad again. Right? Okay. Beautiful. So now put your hands on the chair. We're going to transition into the standing pumping.
So you press into the spring and feel how that tones your hip enough to pull your knee back, shift your weight so that you're standing on two legs evenly. You can do I dream of Jeannie. You can do hair, however you like to hold your arms. Okay. And then keeping your heel up. Begin to do the forward pumping. Notice that as you pump, you really want to be focusing on your standing leg equally as much as you're focusing on the pumping leg. And keep the heel high. Keep the sense of that Tibia beautiful going right into the front of your ankle. And the back foot is, is strong, right?
So now we'll go into the up and down or the lunge. Push the paddle down all the way to the floor. Grabbed me if you like, step up, walk a little bit forward. Okay. And then take your arm of choice. Okay, now here it is again. Here you are stepping forward onto this foot, not leaning into the quad because the spring is gonna push you up through your back leg puts. Feel your two feet right? So the ball of your back foot is shoveling you up into the closing of the spring and then reach your back heel back in space so that you're being pulled back.
Exactly. Beautiful. And then this heel to the one that's on the chair straight down and a little back. So you're kind of getting like scissor action between your two inner thighs and it doesn't keep you from just leaning on your thigh. Thigh. Yeah. Beautiful. Yep. Great. So you know your happened to be walking down the street one day and you stepped up on a chair just like that. Yeah. Okay.
Put your hands down and let's do the whole thing on the other side. So the left foot on the paddle, right foot on the floor and you notice how your immediate habit was to pretty much turn, you know, stand pretty turned out. Like when you went to put your right foot down, you know, it was pretty turned out, which is, that's not bad, it's just that it is going to encourage this, this tight line to stay quite tight. Okay. So you can be in what we call the Pilati Audis v, but it's what you have to think it through. You can't just like turn your foot out.
What you want to feel is that the hip itself rotates in a little to get you over the knee and then what I call the turnout without the turnout. So you feel that not from the front. Think it from the back. Think it from like the middle of your leg into your inner thigh so that you come up through your mid line more instead of just all this stuff I'm saying is to help us stop getting so stuck out here and down. Yes, we want to bring everything more centered. Okay, beautiful. And then again, you're not on your knee cap, you're on your Tibia and you press keeping the weight balanced equally through all five of the metatarsal. And if we had a mirror you could be watching, this would be a good one for you to actually have a mirror because it was hard for you on the foot corrector to keep the balance between the two ankle bones. Okay? So knowing that now you can probably feel it a little better and think it a little back.
Did you feel what just happened when I got you into the center of your ankles? Your whole leg pulled back a little. Okay, so without getting you too tired, press down, connect into the spring, suction that thigh back into the hip. Shift your weight in between two legs and begin the pumping, inhaling and exhaling. You can start in the gut mid range until you feel comfortable, you know, and then what you'll find is if you don't force your range too quickly, it naturally just kind of builds. There you go. Very good. Keeping the heel up and then make sure you're breathing into your back. Right.
Good job. And now push all the way down. Use me if you want. And then before you think, oh, I'm gonna push into my front knee, lift your back heel and let that doesn't say saddle. I'll say paddle. Push you. There you go. And now there you are. Yeah. And now reach the back heel back, keeping the weight on the ball of the foot. Beautiful. So it doesn't it open your hips more. Yeah, it's just less tight. Yeah.
And I mean, you know, and you're, you're clearly your body and your nervous system is trying to negotiate the two, but you're, you're more fluid and you can feel the, the likes a little suspension at the top instead of just plop. Whoa. Yeah. Yep. Last one. Very nice. And then come back. Alright. Put your hands down and step to the floor. Okay. So the last thing that we're going to do here, I call it the upside down. Push up. Okay. So Sh do you want to make it a little heavier or are you good?
Okay, so we'll go instead of a medium, medium, we'll go to a high medium. I got it. Okay. Alright, so go ahead and push down the paddle and stay with both feet on there. Okay. And holding onto the sides of the chair again. Okay. So before we actually go up into the pushup, we're going to do the lowering and the lifting of the heels. So in other words, the plantar and Dorsey flection, which is going to get that same openness and movement of the pelvis around the thigh joints, bone, right? So rise up onto the ball. The foot, use the, what I call it, the like over curve of the paddle. Get into it. You can use the shape of the equipment to actually encourage certain kinds of motion and usage of your foot. So instead of holding on with the toes, you want to actually lift your heel and feel like your shoe, almost like shoveling on the sole of your foot into the ball. You feel it.
Yeah. So it's okay. Are you tired? Can I keep going with this for a second? Alright. So if you were to rise up higher, you see how you naturally bend at your metatarsal is more. Yeah, but you actually did it by just pushing into your ankle. And when I'm trying to get you to do is do it with the sole of your foot. So you have to actually lengthen all this tissue and lift your heel up as opposed to just popping. Yeah, exactly. Exactly. Exactly.
Yes. So it's not that you don't want the height, you do want the height, but you want the support from below, not just the, exactly. So I feel like you can use the squishiness of the surface of the paddle to help you get more tone in the sole of your foot. Having gone through all that, do you now connect the push through that of a lift? All right. Because you're essentially that you took this too far, you'd go into an anterior pelvic tilt, right? That's closed area, right? You would keep going and your pelvis would keep lifting up and up and up, right? So then when you go the other way, plant our flex the which is, um, now dorsiflex pardon me, which is what we call flex flex, right? And you reach the heel instead of dropping, keep reaching, and it starts to anchor. If you took that too far, you would go ahead and posteriorly rotate. Okay?
So what you want to feel as you go up and down a few times is the naturalness of the motion around your hip joint. You see, which opens your spine as you Relevate is, you plant our flex. As you rise up onto the ball of your foot, the pelvis keeps turning and takes you farther forward. And there you go. You see, you go right up into the exercise. Beautiful. And if you want the support of the heels together, go ahead and pull them together from your inner thighs. And then to go down instead of just perched up in the front of your ankle, reach your heels. They don't have to drop, but they have to reach behind you. So you go up as if you are planned, tiring and down with the memory of a little bit of Dorsey flection and up with the memory of the Plantar flection and down. You feel the holes.
All support. Yeah. Beautiful. Okay. Yeah, step off. That's cool. Yeah. Okay. So I want to take this into one more set on the reformer. Great. Okay. Okay. So we're going to take all that into the front splits on the reformer. Okay. So go ahead and step up onto the reformer.
Put the ball of your right foot centered on the foot bar, or if you're a little tighter in the hip flexor, take it a little to the side of center. Okay. And right off the bat who you are, you're walking down the street and you stepped on a reformer. Okay. It's a stepped on it. Your fingers or with your thumbs. Okay. And then walk or you can hop a little depending how sticky you are. So the back leg is turned out and it's nice if you can, I would hop it a little farther to your left. Beautiful. So that you can actually feel the shoulder block is as if somebody was gonna hold your ankle for you and that you would press your ankle into my hand to feel how that tones, this whole outer line.
It's really important for the safety of the knee in this exercise so that the force doesn't go into your, into the medial knee, feel it, and then yeah, you can and then you want to try it. It's that same thing, Christie. You're doing it really, really well here that almost like a spiral or a twist and the foot is designed to do it. It's really, really nice so that you can have weight and support through the outside line of your leg right up into your hip. Exactly. Okay, so that now is the front foot. It doesn't have to be super high, but it's that same idea. You've got a curve here. You're shoveling yourself onto the up slope, and then as you start to press back, you mustn't drop this down. You're equally pressing the foot bar away and the shoulder block. Exactly. There you go. And then as you exhale, don't press into this knee. Keep driving through both feet.
Stay low in the hips. There you go. And deepen the flection of the front. Yep. Okay. So the back one is extending more and the front one is flexing more. And as you press out, the fact that you're in this long flection of your spine curls you right back into a lift of your hip. You see that? So again and again, if you, uh, press and hang out in this outer thigh, it diminishes the ability of you to get the work through your hips.
So I would say, again, think of the back of your leg here, lifting up, lift up, even take your hip higher than you want. That's it. So this is the curve of your spine. The flection is not coming because you're taking in tucking down on your pelvis, but because you're releasing over onto the foot bar and then deepen the flection of your right one as you come in. Nice. Right? Don't force the hips to be square quite yet. Okay, I see what you're doing and that's great, but let's do it one more time. Lift that heel. Yup. You might have to come down.
You might have to a little sticky pad. Okay. And this one only straightens to the degree that the the back one can release back. You see that? Otherwise you just pushing it into your knee. Now, drive through the hip here as you come in. That's going to do more for you ultimately being able to square your pelvis off. Then you arbitrarily pulling it around, okay? Because you'll have the strength to lift yourself up into a more square pelvis as opposed to just, Oh, they told me I have to square my pelvis. Okay, now how are you doing? Okay, so from here, let's do one more and we'll come into the control. Okay?
So you really want to keep Tibia into ankle. That's it. Now as you come in, drive yourself forward from the back leg. Bend your front knee. Come on up. Feel from the soul, from the instep of your left, all the way through into the support, right? And then where do you like your hands on this one? There is good.
And then I'm going to ask you to notice the tendency to collapse into t 12 maintain the space that you've got from being in that flection. Just lift up. Okay? And now here we go. Press out you. Who cares if this straightens right away, right? We don't care. We care that you get the both feet. All right? And then exhale, come here. And what's neat about the standing is that you do have more room to start to play.
So now I would do it more from pulling your right hip back as you bend this leg and come in. Then forcing the left one forward. Okay, so you go feel the little toe side of that back leg and now find that spiral. This is the spiral that you needed. Put your hands down and rest for a second. That's the spiral that you needed to maintain your knee alignment when you were doing foot corrector, when doing flux rector, right? You kept going like that. So here's that strength that you now have to stand on to do your split. So now rise up onto the ball of that left foot. Turn it in, and come onto the knee. Wiggle it over to the side a little.
See your heel is right in the middle of the shoulder block. That's okay. No worries. Can you get the knee down? Okay, so here to think for a second. You don't want all that force just going into your Patella. It depends on how open your foot is. Do you want to think to yourself? I'd love it if I could get these toes forward.
Be really more on the ball of my foot, and then have my heel up and back. So if you thought about it, you could push that heel and almost lift his knee up. I bet. Almost, right? Yep. Okay. And so this is an extension as opposed to the first one, which is inflection. Don't care how far you go right away. Okay, beautiful. Zip up the inner thighs just a tad and now be on both feet. Oh yeah. And then go back a little inhale and then exhale.
Don't force it to be big. If you start to push into that front knee, right. Come in now with the chest. That's it. So again, you have that whole pull through the back leg. Let's do it again. Turn that one in a little in your mind. So you're coming over here. Yeah, there you go. Go out. And then exhale. Come in with the heel with the heel to suck up your pelvic floor. Right? One more time. Inhale there. Yeah. Don't look down. Don't look down. It's extension. This one. It's not flection. Yeah.
Okay. Last time. Last time. Keep this up. This is it for sure. Don't look down. Don't look down. Keep pushing that back. Leg back. Don't hang in your knee. Push your back. Leg back. Okay. And then go. There you go. Okay. Okay. And if you want to do the sideband and you just [inaudible] okay.
Definitely step back. All right, so that was marvelous. And I'm sure you're going to do the other side on your own so that you don't walk about. So who would've thought what correct her to kneeling front splits. But these connections are always important and fun. It's just fun to make the connections from the parts, the patterning.
What it is is it's about imprinting the patterns in your body. Some of them are really just natural to us. I mean the whole idea of, you know, return to life. Okay. So we don't want to have to be so consciously mental about this all the time. We want to be able to do the movements more freely, more fluidly, and not have to get into this level of intensity all the time. But that presupposes that the pattern is naturally in us working and sort of like call honorable, you know, like hello pattern number 54 come on down.
And so if they're not, it takes the time. It takes rewiring. And what I've learned in various things that I've studied did, it really is never too late to repattern. And that the, that these patterns that are supposed to be natural inside us there, the developmental movement patterns starting from, you know, being born and learning to crawl, stand and walk, and they're all in the [inaudible] method. All of these patterns are inherent in the work. Sometimes they look, they don't look exactly what you think because the work is, it's complicated, can get very complicated, but the patterns are all there. Sometimes when we notice that we're struggling or we're having injuries or issues or I don't know, you know, you're just not feeling fluid. You're not feeling happy in the work. You have to go back and, um, you know, peel away, reveal, reveal the patterns.
And then sometimes you have to actually practice them as just a pattern. And then they do become more second nature. And then when you go to do something like front splits with control, there it is.
Comments


I am also glad that you verbalized the need to re-wire patterns so you start to see how it's all part of all of the Pilates work, and that many exercises then become accessible. Thank you for your caring, articulate yet anatomical correct teaching. We are more than glutes and abs.


Thank you.
Did you ever do another joint mobility class, after shoulders, that addresses the back and/or hips?


You need to be a subscriber to post a comment.
Please Log In or Create an Account to start your free trial.
