Description
About This Video
Transcript
Read Full Transcript
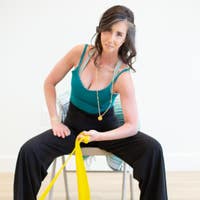
Hi, everybody. I'm Tom McCook. It's a pleasure to be back at Pilates anytime. This tutorial is on helping you understand how to balance the pelvis a little better, and you can blend this information into your classes or your personal practice. So briefly, you already probably know this, but I wanna show you anyway. Here's your pelvis, and you have two pelvic calves, one ilea on each side, which includes the sit bones and the hip joint.
Pubic symphysis in the middle. And if you look at the pelvis from the back, you have the sacrum, which is anatomically part of the spine, but functionally part of the pelvis. And at the bottom, you have the coccyx or tailbone, which connects your pelvic floor in the back. To the back underside of your pubic bone in the front. So as you can see with the two pelvic halves, you have your hip joint, which is the most mobile of the joints in the pelvis, that the pelvic halves are kinda shaped like this.
And let's just move the pelvis a minute. So you can just move your pelvis. You can curl the tail under. You can reach it back. You can lift one hip up.
You can rotate the pelvis. You have all these options of how you can move the pelvis. But first, as we as we hinge, I want you to get clear on something that happens when you hinge. So if you took your hands like this, and you can feel how the bottom of the pelvis is here where the heel of the hands are, the sit bones, When I hinge and let my knees bend, the bottom of the pelvis widens, then the bottom of the pelvis narrows because we are the only animal on the planet that has a mobile pelvis for being upright on two legs for gait, walking, squatting, movements that we do, and for force absorption. So we want that to happen.
The other thing is you have movement in the hip joints. So as you move the hip joints, you can move the hip joints without changing the shape of the spine, or hiking one hip. You can also take the leg to the side, to the back, And you can rotate the pelvis around the top of the legs. So from there, we are gonna go down onto the floor just to work on the pelvic floor, lower back abdominal connection to create a little more balance than those muscles. With that notion, an idea, an image of how the sit bones move in relationship to flexing at the hips.
So we're gonna come down onto Blacker, and you're gonna wanna have two Franklin balls and a, and a, a magic circle with you too. So help yourself down onto your back. Take your two Franklin balls or balls of this size. Now as you come onto your back, We're gonna put the balls in a different place than we typically do, which is above the sit bone. So we're gonna put them on the lower back.
So we're gonna put them in the space between your pubic bone in the front and your belly button right where the lower back and the back of the pelvis meet. Feed in line with the sit bones. So just let those balls be on each side of the spine. Now really slowly, Tip the pelvis forward, sit bones towards the floor, letting the lower back muscles slide together. Now in this position, the bottom of the pelvis widens.
Now as you curl the tail towards the ceiling, the lower back lengthens and the pelvic floor muscles slide together. As you go forward, feel how the bottom of the pelvis widens, the belly wall lengthens. And as you curl, the belly wall slides together with the pelvic floor as the lower back lengthens. So just go in a way where you're moving in a fluid way, make the range work for you. Doesn't have to be super big.
Go for equal effort on both sides. So now we're getting that functional glide in the muscles in the lower back, the muscles in the base of the pelvis, the belly wall, all restoring levels of function especially if we've been spending a lot of time sitting, which modern life dictates. And we're just gonna do that. And I recommend you do it until you feel the joints and the muscles in the lower back, glide better. So that could be four to six reps, or it could be 10 to 15 reps. And just two more like that, even fluid quality.
Now lift the hips and put the balls lower now. So they're above your sit bones on the back of your butt. Not on your lower back now. And now this would be more direct for the pelvic floor. So we're gonna bring the knees up in the air and put your hands on your inner knees with your palms facing away from each other.
So consider your pelvic floor muscles, the front of your pelvic floor, is sit bone to sit bone to the back of your pubic bone, like a triangle shape. And this is the focus of these this particular exercise. As you breathe in, let the knees and the feet open. Now we add light pressure out with your hands as you close, and picture those front pelvic floor muscles slide together, and the legs follow. Inhale to open.
Light pressure. Again, go for evenness on both sides. Feel as you feel the pelvic floor, then your inner thighs and your belly wall follow. Just two more. And one.
Now I'm gonna move this guy away. It's not personal. Now from there, we're gonna do the back of the pelvic floor. Since you take the legs up and go into internal rotation where your legs a little bit bent, The back pelvic floor is sit bone to sit bone to the tailbone. It's the back triangle. As you breathe in, let the knees open, and as you close, turn the heels in.
So you feel the rotator muscles in the back of the hip that tie into the pelvis floor, they slide apart as you open, they slide together as you close. Just two more. We're going for even. This is best we can on both sides. Then the legs place the feet on the floor.
Take the balls away. Now grab your ring and put your legs through the ring. And put the ring on the outer part of your knees. So now we're bringing in the activation of the pelvic floor and the hip rotators and using the legs, the glutes, and the hamstrings. So on the exhale, as you press out into the ring, follow the belly wall in, curl the tail towards the ring and slowly peel into a bridge.
Take a breath at the top, exhale press out to turn on those hip rotators, and roll down sequentially through the spine. Release the tail at the bottom. Release the press. Press out. Keep your foot points on the floor. That's the ball behind your big toe.
Behind the little toe in the heel. Take a breath, press out, and sequence down. And I recommend anywhere from four to six reps of this version. And then traction down. Now, because of time, I'm just gonna move to the next exercise. Now put the ring on the inner legs and put it just below the knee joint.
To work the inner part, inner line of the legs and pelvis so they're connecting to each other. So now we're including more your adductors. They tie into your pelvic floor. Have your feet just a little narrower than the ring before you squeeze it. Center the weight on the back of the pelvis.
Now in the exhale, follow it in, give it a squeeze, and then curl into the bridge. At the top, as you breathe in, let the knees open, close and articulate down. At the bottom, as you release the tail that the knees open, close and peel off the floor again. I'm not arching the back of the top. The ribs are dropped and trying to keep the front of the hips open, inhale to open, close, bring your foot points into the floor, sequence down.
Open on the inhale one more time. Close, peel off the ground. Open on the inhale, close and traction down. And then release. Now as you take the ring out of the way, we're gonna finish this sequence with knee sways, which is a side to side rotation, but we're gonna start with just the legs moving.
So the pelvis stays stable like you have a cup of tea bounce on your pubic bone, Now just let the knees sway, but the side you're moving away from, keep the back of the hip heavy. Now exhale, use your waistline muscles to draw the knees back. So give your body that feedback of understanding pelvic stability with internal and external rotation of your legs. It seems like a simple little exercise, but to find that balance of stability with movement is a skill Now the next time we're gonna let the knees go as far as they can without the pelvis going with it. It's not big.
Now let the pelvis rotate to keep the same side shoulder blade on the floor. Now draw the back of the waistline towards the floor to lead the pelvis and let the legs follow knees first, pelvis, same opposite shoulder blade on the floor. Waistline back to center. And again, knees first, pelvis, pelvis first, then the legs, last one, knees first, pelvis. Notice, I'm not trying to arch the back.
That's a that's a default. Pelvis first. He's back to center. And again, I'm doing a low number of reps, but I would do four to six or eight reps just to get a feel for it. And from there, everybody, now we're just gonna roll to your side and come up.
So whenever you're doing the ring exercise, one of the reasons why it's very helpful to use the ring in relationship to how you're moving the pelvis, is you're activating all the muscles that tie into the pelvis on the outer hips and the inseams, and they're all connected with faster connections to the pelvic floor, the abdominal wall, the glutes, and the spine. So you're actually creating a more of an integrated body where you're using more muscle in a skillful way. Now from there, we're gonna come up to standing. And we'll finish the sequence just with a squat, and then we'll do a stretch. So for the squat, take your feet about shoulder width apart, feet slightly turned out. Now as you bend, picture that you're gonna keep the weight balanced on the front and the back of the feet, and as you bend, picture the sit bones starting to widen as the knees bend because you're going into hip flexion.
Now from the top of your legs as you come up, feel how the sit bones narrow. Inhale on the down. Xhale back up. Then we can just add inhaling to bend. Exhale up and go for that even quality through both sides. I recommend doing a lot of squats every day.
Three more. And two, and one. From there, we're gonna finish with a hip flexor stretch. So come into a lunging position. Now have the front foot not on a tight rope, little wider apart, and turn your back foot in a little bit. So that's going into internal rotation, which will help you stretch a muscle inside your pelvis called your iliacus a little bit more.
So from a side view, I wanna be vertical. I'm not way forward. And with my back knee, I'm pushing the ground back to turn on my glute, and I'm getting a sense of length through the waistline. So in this position, just lunge a little bit on that diagonal towards the front leg. Now rest your elbow on your knee and put your other hand on your lower back and lengthen the lower back back into your hand.
So that's opening the front of the hip without substituting in your lower back. Now take the free arm forward, flex the wrist, fingers down. Press the heel of your hand forward. Pull the waistline back and feel like the back knee is reaching into the ground. Their front foot is is pulling towards the back knee.
Now just take slow fluid breath feel a nice opening a stretch up the front of your back thigh. Muscle called your rec femme that tends to get very tight for modern life. One more big breath. We're gonna add a small rotation, so small rotation towards the back knee side, small side then towards the front leg side. Press through the heel of your hand, smooth out your breathing.
You're gonna feel it more through the front of the hip? Slowly release and switch your legs. So again, not on the tight rope, maybe a foot apart front to back, take the back foot wider. Front elbow on the knee. Put the other hand on your lower back.
Take the lower back back into your hand. So a little posterior tip of the pelvis. Right away, I feel the stretch as I do that. Take the free arm forward, palm forward fingers down. Now press the heel of your hand forward.
Pull the waistline back. Take the tail forward. Reach the back knee into the floor with your front foot. Feel like you're pulling it towards your back knee. Smooth out your breathing.
One more big breath. Now very slow from the torso, small rotation towards the back knee side, small side bend towards the front knee side. Reach into the legs, reach into that back knee, press through the heel of your hand. Deep breathing. One more breath.
Slowly lower. Help yourself up to standing. Now just take a moment as you stand, get that feeling of ease, notice the hips, Notice your hinge. Take that good feeling for with you for the rest of the day. I hope you enjoyed, and I look forward to seeing you again on Pilates anytime.
Move Within Your Range: Pelvic Mobility

Comments


You need to be a subscriber to post a comment.
Please Log In or Create an Account to start your free trial.
