Description
About This Video
Transcript
Read Full Transcript
Hello, everybody. Welcome to a dive deeper into my bar and reformer workout. I've picked this section because it can be a little tricky if you don't understand where the correct setup is. So I'm going to explain to you where the box needs to be and where you need to be to get the most out of this exercise. So grab your box, and you're gonna move your box to where the actual reformer is.
You can see the reformer of the foot here. So you're gonna move the box right to the edge so it's flush with the foot of the reformer. Can you see that? So all I'm doing is I'm bringing the box flush to the foot of the reformer. So I'm bringing it back to here.
Now we've gotta think about the weight. Pick the lightest spring that you have. Like right now I'm on a yellow spring, which is the lightest this reformer will have. And that's perfect. And then you can always work upwards.
Best to start light and then start adding as you get stronger and feel more confident with your balance, 'cause it's all about balance here. So one yellow spring I've got. Now depending where you are on the box will depend on how heavy the pulley will be. So the closer forwards you are, the easier it's gonna be with your arms to pull. The further back, you're gonna feel more resistance.
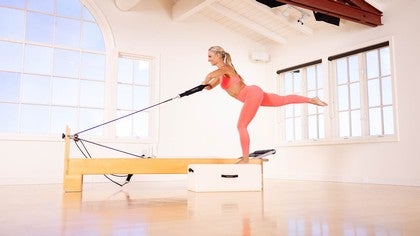
So my suggestion would be pick up your pulley here and I'll get a little bit closer, maybe in the middle of your box, which is kind of where I was actually in the workout. So I'm gonna work with my inside leg here. Now all I'm going to do is reach the arms out. Now your arms are reaching out. I'm gonna bend and I'm gonna go all the way forwards and lift that leg up.
So I can feel a little bit of resistance here. So place your hands on top so it's kinda like a little row here, okay? And then we're gonna bring that leg into a tap so we've got that balance there. So I would start here. Now what we're going to do is extend the leg, bend, and then bring it back into a tap.
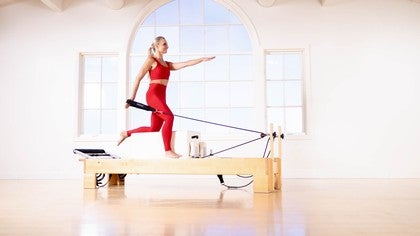
Now you can see I've got not so much resistance on the upper body 'cause I'm a little bit further forwards. So as I build confidence, I would say, my balance and strength, I can step back. So if I step back a little bit, there we go, can feel more resistance there, right? So reach the arms forwards, extend that leg back and let the pulley pull you forwards into your arabesque. Now we can bring it up to here and then bring it back down.
Now there's no wrong or right way of using the arms. You can see I'm extending with the arms as the leg extends and bending as I come in. Or I can do it opposition. I can reach, bend the elbows and then come up as I extend. So as I go into an arabesque, I can go into a row and then I can lift it back up again.
So we can always mix and change up the arm work, and back. Now remember, you bring it to a tap if you feel your balance is a little bit shaky. All righty? A lot of glute and hamstringing work there. Your hips are square.
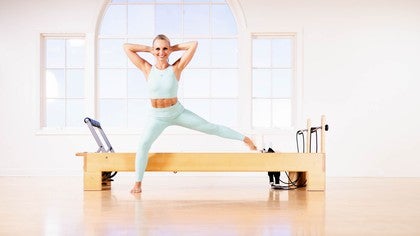
Now to move on from here, the flow would be, you've done your arabesque, so there's your arabesque to a tap or to a knee. From here, I'm gonna step down, step the outside leg to your reformer. Get yourself into a lunge position. Now all I'm gonna do is rotate forwards away from the reformer. Now take a note how I just queued it.
Outside leg, inside leg to your reformer. It's really important that you follow direction so that we are working the right muscles. We have the outside leg in front and we are rotating away from the reformer. Now as we do this, the hips are forwards and then we are rotating from your torso and looking over your shoulder as much as you can. You can really feel it in those obliques. Woo hoo.
And then we go back again. Extend those arms, one more. Rotate, rotate, rotate. Can you feel that? Go a little bit deeper as you get stronger into those legs. And then we come back.
And if you're feeling really daring, you can hold it here. And if I was in class, I'd have them pulse it out here, give them that little extra burn for those legs. They love that. And then we would take you back out again. Now from here, the flow would continue.
It's like a gift that keeps on giving. And then we sit down. Now I'm going to take my hand here. Now I'm still on that light spring. I can stay with a light spring or maybe I wanna go a little bit heavier and I could go to a blue spring.
I wouldn't really go any higher than a blue right now 'cause we are working on balance and core. Hand on hip, get away from your shoulder rest. So I'm kind of in the middle. Hand on hip, elbow high. Lift the knees up, doing that little V sit here.
Now we're gonna reach the arms overhead. Now remember, if this is too challenging in the class and you feel a little bit too much in your hip flexors, then of course you can always come to a seated position here and do it seated. So there's always a solution if something doesn't feel comfortable. You're still going with the flow. However, today we are gonna go back to here.
Now if you've really been really daring, we could add an extension and bring it back. I didn't do this in class. However, you can add it on if you feel strong enough into your teaser. Now from here, moving on, we take the outside hand nearest towards the jump board or the bar. We open out and back.
This is like your arms kneeling sideways, but we've just added that V sit into it to add a little bit more balance and just mix it up a little bit. Now you can follow your hand to increase the balance and your proprioception here. It is, elbow, forearm, wrist, wrist, forearm, elbow. That's how I always learnt this exercise and it's helped me many years later. Elbow, forearm, wrist, wrist, forearm, elbow.
Bring the legs down. Moving on, we can wrap it around your inner thigh. The flow just keeps on flowing and I'm right here. Now I am on the light spring. We can carry on with the same spring.
But if you feel like you know what, I want a little extra inner thigh today, you can bump it up a little bit. But if you wanna keep the flow and the continuity, keep it at the same spring. Now scoot away. If you wanted a little bit more intensity, scoot away a little bit further. That'll increase the intensity without changing the spring.
Fingertips forwards, take it back, scoot forwards a little bit. Bend the elbow so you're in that nice C curve position. Drop your scapula down. Now feel those abs. Lift the legs. We go into our little diamonds, our little clam here.
Now this is essentially working your inner thighs, but your abs are working. If you wanna make it even more challenging, you can have the hands behind the head. You can see I start smiling 'cause it's more challenging. However, we're gonna go back to here. We can always add a little extra here, a little open in and back to add to that little movement if we feel we wanna add a little bit more creativity to it, or we can just go out and in.
Feel that intensity, bring the leg forward, give yourself a nice little stretch, and then we roll ourself all the way up. We'd stand up, we'd move the box to the other side and repeat that all in all. So you can see how I moved from one exercise to another without much change in the springs. I hope to keep it at the same spring and to keep that flow continuous. Specifically if you're in class or maybe you are teaching a class, it's really important that you understand away from the bar, closer to the bar so everyone can follow direction so they're all working the right muscle groups.
I hope you enjoyed this little tutorial. Please give us your feedback because we want to continue helping you understand how to get more out of these innovative exercises that all derived from the root of Pilates. We're just adding a little extra twist or a little flair with it to keep it innovative and to keep you moving and getting stronger. Thank you for joining me. Goodbye.
Mix it Up: Athletic Reformer Workouts
Comments
You need to be a subscriber to post a comment.
Please Log In or Create an Account to start your free trial.


