Description
About This Video
Transcript
Read Full Transcript
Hello everybody. We're going to dig a little bit deeper into one of my workouts, which is called Strength and Restore. Now, I've picked this section because, well, one, I love it because it's a lot of hamstring, leg, and also hip mobility, which I'm all about. But also I want you to understand why I kind of put the moves together in the order and how you can get a little bit more out of the exercise. Either make it a little bit harder or a little bit easier, depending on what you choose as far as your spring gauge here for your resistance.
So first of all, the setup, as always, is super important, right? We wanna make sure we're safe and we've got the right amount of spring on for your body. So for this particular exercise, as I said in class, I had a blue spring on, which is a half of a spring. Now, if you really want to intensify even more, but to be honest, on a blue spring was quite adequate for me. So if you take it from that, I would stay with a blue spring, but there's always someone that wants to challenge themself a little bit more, and I'm totally for that, bring it down to a yellow spring.
However, as we progress through the flow, you will see I will start going from my hamstrings into my glutes here. So, because I don't wanna keep changing the springs around, if I had it on a yellow to challenge the hamstrings, when I come to that sideline, it may feel a little bit too easy for you. That is the reason why I try and keep it at a blue so I get a little bit of both. Hopefully, as we go through the progressions, you'll understand a little bit more how that relates to your muscle strengthening and contraction of those muscles. So let's get into the move first.
Obviously, I've got my lovely bar down here. The bar is down. I've set my spring gauge. I've got it on a half spring or a blue spring, all right? And I'm gonna get my box and place the box on the top here. So you can see, I've got it right on the top of my bar here.
And I'm just gonna push this out a little bit here. There we go. It's touching. It's nice and secure. It's slightly on an incline here because it's actually on the bar, alrighty? We're gonna come down, sit on the actual reformer.
Now first of all, start with your toes pointing forwards. They're gonna be on your shoulder rests. Now I'm gonna push out just a little bit. I'm gonna get myself a little comfortable. Push the carriage out.
Now I want to align the mid-thoracic spine with the corner of the actual box. I'm going for a little bit of mobilization through the mid-thoracic spine. Take the hands, clasp to the hands, put the hands behind the back of the head. Now from here, I'm going to open up my shoulders. So there's the stretch, right?
Now, from here, we're gonna lift all the way up and look towards your knees. Come back again, place the elbows back on the box, and we're gonna move the heels to the top of your shoulder rests. Are we ready? From here, yes, we're gonna pelvic tilt. Come all the way up through your pelvic bridge into your hip lift.
So this is basically you in a hip lift, like a bridge. Now from here, we're gonna lower down, articulating through the spine, lowering down, drop the hips down, and you can lift up again. So this is just a modification how you can break it down, lift it up, lower it down, drop the tailbone down, and come up. Now it's gonna get a little bit more challenging as we lift up, hold it here. Now just push the carriage out and in.
It's kind of like bottom lift, but we're obviously in a completely different arena of your reformer. This is a lot of hamstringing work. Keep your pelvis somewhat in line with the knees. And you imagine you're drawing your heels towards the hips, towards your little sit bumps. Now, if we wanna make it a little bit more challenging, we can add a little flexion here, a little extension.
Watch. Lift up. A little flexion, drop the tailbone down, and then a little extension. It's kind of a little bit like semi-circle where you're taking your hips down towards the carriage. So there's lots of variations here. This might feel a little tricky at first, so that's why I would suggest you waiting to get to this point and just do this, 'cause we can all somewhat manage to do this.
But can we manage to do single leg? So obviously, it's gonna be a lot more challenging to transfer and push out and in. So I recommend if you do in doing this, you only do a few reps on one side and then put your heel down, and then transfer, get your hips up to begin with, then you transfer and then you push out and in. You can see I'm shaking because I just recorded the class beforehand. (laughs) And bring your foot down. Hips are high and slowly curl, so you're articulating that pelvis as you roll down, and the tailbone hits.
Amazing. Come all the way up. Now we're gonna transition into the next move because we're right here. So we're just gonna lift up, pop your butt onto the box. So moving onto our long back stretch, like a version of that with a little tricep extension here. And then we're gonna use the box.
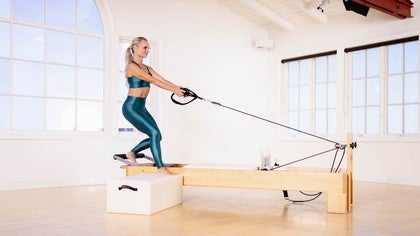
Now, the reason I put the two together is because of flow. I'm right here, so it's a perfect flow to move onto that next movement. So we're gonna put our feet forwards here, the hands are on the box. And I actually love it on the box because it's a little bit more elevated, and it seems to put less stretch on my shoulder joint instead of doing it actually on the bar. So it's a nice variation.
The hands are back, we're gonna push out, drop the tailbone back so you're in that neutral position, shoulders over our hips. Now tricep dips, we're going down towards the carriage, we push out and curl back. Now because we're in that neutral position here, we can pull the scapula down even more as we lower down towards the carriage. Now, push out. Now from here, it's a pelvic tilt.
Your pubic bones going towards the belly button, you're in a C-curve position, then you hit neutral. Let's just do one more. We go out, push all the way out, curl back. Now, if this is too challenging, you can always have them here, bend their knees, and do some little tricep dips here if you do not want to go into that long back stretch. Maybe your class or maybe you're just not feeling it today, and you can just minimize, bring your feet back, and do some tricep dips, and then you don't have to go into that long back stretch.
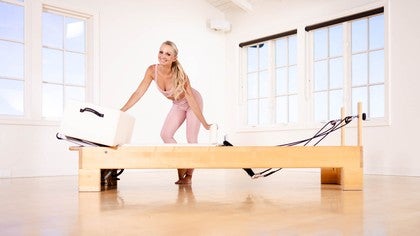
Especially if you've got shoulder issues, this just sometimes doesn't feel so comfortable, so there's always a way you can change it up, make it a little easier, and switch it around a little bit. We turn around, now we're gonna move the flow. We're right here. So now we're gonna work on the outer part of the leg and a little bit of hip mobility. So from here, we're gonna come up, put your knee on the top here.
Now this is important, where your foot goes. Look, right on the edge of the reformer. Your toes are pointing forwards, knees are in line with the toes, so it's parallel going forward. So this is a variation of your skater here. So I'm gonna take the hands behind the head, and we're gonna bend and we're gonna contract forwards.
We're gonna push out, contract forwards. Now we working the glute medius here, the outer part of the leg. But as I said right at the beginning of the class, the spring is not too heavy, so I'm not really going changing the spring now, it's staying where it is. But what I am getting is that nice hip mobility coming back, the femur's going back into the hip socket. I'm still working my glutes, and I'm going for a little bit more of a hip mobility stretch and outer thigh.
Now from here, of course, I'm always going to add a little bit more dynamic movements. Remember, like I said, Pilates is not always slow. It's dynamic. It's all different movements, different patterns. And we push out and in, getting that heart rate up just a little bit.
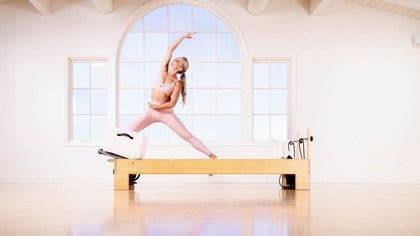
And then the next move we go into is, of course, a stretch. We can roll all the way up, perfect to go out into your mermaid, bring it back and in, out, mermaid over, that lateral stretch and back, and bring it in. Now we could, if we wanted to, carry on the flow so I could go this way and stretch out the hamstrings, 'cause we've worked the hamstrings a lot. So what I would do is we turn around, bring the carriage in, take the hands forwards, bring the back foot onto a toe, push out into a straddle position here. So here we could go into our splits, of course, right?
So we can really stretch out those hamstrings that we just worked and bring it back. Can you see how the flow just carried on? But we have to be careful that we don't flow too much, otherwise we end up forgetting what to do on the other side. But this is a nice way to add that hamstring stretch. And, of course, if you really, truly wanted to, you can always bring yourself up and move on to a lot of other things in your planking series here.
Bring that carriage back in. And then we would transition and go to the other side. So you can see how I sequenced all those movements together. I didn't change the springs, there was a focus for each one of those movements, and then we just move to the other side. I truly hope that this helps you get a little bit more out of the class and understand how exciting it is to keep moving evolving with Pilates but never losing sight of what the purpose is behind each of the movements.
Thank you for joining me. Hope to see you again. Goodbye.
Mix it Up: Athletic Reformer Workouts
Mention
 |
Tracey Mallett (Teacher) |
 |
Diane Duvall |
 |
Molly B |
Comments


You need to be a subscriber to post a comment.
Please Log In or Create an Account to start your free trial.
