Description
About This Video
Transcript
Read Full Transcript
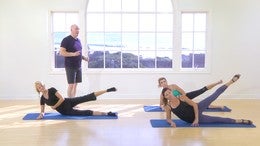
Hi, I'm Shelley powers. So pleased to be back, applaud any time. And we're gonna work on a class that started with a couple of classes that Brent Anderson taught and you might've seen these classes. He did one working with the young lady who had had a hip replacement surgery and then he worked with another, a young lady who just had some general lack of spine mobility. And so we're going to take that and make classes now where anybody really can take these, anybody, you don't have to, you don't have to have something, but it's going to mention and bring light to when you have a certain pathology, like a hip replacement or some spine immobility or even some spine pathologies and how you can work that safely into the classes that you're doing at home. And if you're going to a studio, know what you can do.
Feel empowered that you can, you know, modify the things that make it safe for your body. So let's get started. So let's go ahead and get onto the reform or we're going to set the springs for kind of a medium heavy leg press for footwork. So I like on these reformers, three reds, feel free to change that and make it, um, whatever spring tension feels comfortable for you. And then let's lie down and then there's always question about should I have my head rest up? Should I have the head rest down? I like for somebody who, especially if it's the first thing maybe you've done in the day, you're taking a class in the morning, it's kind of Nice to have the headrest up just a little bit so you don't feel like you're falling over backwards. The body feels supported. Um, if you feel comfortable lying all the way flat, that's also fine. Here are a couple tips that you could look at. So one, if you feel like the teacher or on the video, they're mentioning this and it's hard to get the back of your ribs down and you're kind of forcing it. If you put the head rest up a little bit, let's see how that feels. You might notice that the ribs come down just a little bit.
I'll put it down against, you can see now. Does it feel a little bit easier to get your ribs down? Yeah, cause I could just come in and push them down. But you know, that's not very friendly. So let's look at it again with the head rest down and just see if you can notice the difference as you're looking at the position to the headrest. And I think we're gonna leave it up. Okay, great. And this looks fine as well. The other thing that we'll take into consideration when we're starting footwork, and this is for your own body, is how flexed or how bent are your hips.
And 90 degrees is a great starting point, if that feels comfortable for you. If it feels like you're kind of scrunched though, you might put the foot bar either a little bit out or a little bit down. And that'll allow you to have an easy mobility in your hips as opposed to feeling like you're starting where it's kind of uncomfortable. So these feel, feel good for you. Great. And then we're gonna move our feet onto the heels and in a parallel position, that's about even with your hip joints. I remember we think sometimes that our hip joints are out here.
We always measure, uh, you know, that's an important, uh, important thing of how wide is this, how narrow is it? Actually it's really narrow and it's inside deep inside your pelvis here and that's about how wide your hips are. That's a great news. So let's start there and then just begin to press back and forth a little bit. Go ahead and just take it at your own timing. A very natural movement, natural breath. And sometimes I like as a teacher, I like to really position people and get them into the position. Other times I like to just allow the body to adapt a little bit to what's going on. So again, these are people who've been moving for a while.
You at home have been moving and doing this for awhile. So it's kind of interesting to allow the movement of the legs to influence what your body's doing. Can you kind of have that conversation with yourself and get to a position that feels really good? Great. We're looking for neutral, right? And are our feeling of neutral is having the back of the head, the back of the rib cage and the back of the pelvis comfortably in contact with the mat.
And this looks great pressing back and coming in good. And if we allow and have the feeling of the mat supporting the body, it makes that whole concept of it easier. No, that's great. All right, so pause now and let's change positions. So come down onto the balls of your feet and go into a little bit of an external spiral. You can check this by opening your legs really wide. That's not quite what we want. So bring the knees in a little bit more.
So there maybe as wide or just slightly wider than your shoulders. And again, begin to push back and forth. And don't be afraid here when you change foot positions to move your body position a little bit. I know Brent talks about the concept of concept of stability and stability, not being something that's rigid, but it's stable dynamically and that's what we want. So you may have to change your body position as you're going. Now, what I want you to to focus on now is instead of pushing away from the foot bar, feel like you could push the foot bar away from you and just see if that makes a difference in how you're going.
I know. And that the best feeling only problem at home. Sometimes you don't have somebody to pull your heels down
And what we're doing is setting up the body so that it has the right amount of core control. When you have those little images, you don't have to think about so many muscles and you get a little better results from it. Good. So let's do one more different position. So bend your knees and come down and we'll take the feet wide apart again toward the heel in an open stance and just have the heel where it feels comfortable, not so high on the Bart, it x is going to slip over. And let's keep going. We haven't really talked yet about the breath and the breathing. So what I like is for the breadth of match the movement, and this is really important when we're restoring movement and we're starting to challenge the body more. The breath really needs to be spontaneous. It looks good and as it's comfortable, press back, pause there for just a second and just lift your pubs straight up and right back down. Yep. Yeah. And now, yeah. Is that okay for you? Yep. And bend the knees.
So I was just noticing and this is super common, is to have that little feeling of wanting to tuck the pelvis under and that happens. We've been taught that that's a good thing, especially in the dance world and it's really a not if we're thinking about our, our posture. So go ahead and bend the knees. Great. And just sink in there. That's it. Let's just do two more cause we've done a few of these already working on again that sense of mobilizing, having mobility in the hip joint. As we're moving and pause, let's finish up with a little running in place. Feet back together, toes on the bar and we'll pick up the tempo a little bit.
So press back, pause for just a moment there. And now let's start to alternate the stretching. Good. And this looks super, what I'm really interested on this is that the weight is equal and sometimes when we're doing running in place, the stretch of the heel down feels so good that we forget that there's another foot. So one of the things we can focus on is keeping the weight equal. That's great. And then you're going to start to feel a lot more work happening in the foot and the lower leg of the leg that's bent.
Even sometimes it might even feel like it starts to cramp a little bit cause we don't use those muscles so much. So that's a good, good thing to work on our feet or our foundation and then pause and bend your knees and come all the way down. Good. All right, so let's go into a little bit of bridging now. And I have both of you take your headrest down and we're going to keep the springs the same. So again, kind of a medium to heavy support and we're going to go back to the heels and put the feet in a comfortable distance apart. That looks great. So let's go back to remembering back to the pelvic clock motion that Brent taught in both of the classes that are proceeding this one, that sense of having the pelvis tilt back and forth. You can think of it tilting towards you and away from you. You could think about gently putting your lower back toward the mat and then gently putting your tailbone toward the mat.
There's lots and lots of images around this going forward. I'm back. Great. And it's different now because the feet are higher so you might notice you don't have as much range of motion that you did when you were lying on the mat and the legs were lower and this might be an, you can experiment with this at home and go that way as well. Yeah, that's it is experiment with putting the feet down on the platform or you can change your foot bar around to feel like you get more motion if you feel like this just isn't quite enough for you because with the knees over the hip, we do lose a little bit of motion in the forward, not forward direction. God, that's it. And then let's start going side to side. So if we're thinking about the clock, which is this taken from the Felton Christ pelvic clock, we could go from three o'clock to nine o'clock or right to left or east to west. There's a lot of images there. Ah, back and forth from side to side.
Good. And so the knees, once you become familiar with this, the knees don't move so much side to side. They really kind of almost just go a little bit forward long and back into the hip socket. That's it. So other image I like is the kid's games that are the circles and they have little bits carved into them and has a marble that rolls around. So it's as if you could roll a marble from one side to the other.
Good. And then we're going to go on the diagonal. So let's start at the back of your right hip and we're going to go forward toward your left sit bone. So you're going to rock back and forth from your right down to your left. And this is kind of a funny one. We don't move on this diagonal so consciously, although this is what happens. Yeah, great. When we're doing things like walking, we've got this reciprocal movement right back and forth of the pelvis and the legs and so this is a great one for walking [inaudible] so come from up here.
Yeah, and then down here. Good.
Platform is a good place, or you can move your foot bar or you could even go onto the mat to do this on the floor. Let's connect all of it now. Going in our circle, going around and around, and if you're watching this, if you're observing this, also notice that there's movement in the rib cage and movement at the head. And when you're feeling this in your own body, it's nice to have that wave motion so you feel your head nod a little bit and you feel your ribs move back and forth. It's almost like there's a a clock at the ribcage and a clock at the head that's doing that same motion. You got it. And then when you're ready, reversed and go the other way around and around. And we think of this a lot and I hear this a lot about really working on spine mobility here, which we are, which is really good.
We're also working on hip joint mobility. So both of those things together as we go around and beautiful. That's lovely. So listen, now take it right up into our bridge with that same feeling of getting the little tilt towards you and then rolling up into the bridge and then roll back down. So always get one for free, one warmup, one before anybody corrects you. That's it. So as you roll, tilt the pelvis a little bit, so feel like you get a little tilt. And then if it's okay for you, tilt a little bit farther and that's too far, right?
So we're going maybe half of the range of motion that we have and then you're going to start to roll up great. And your line at the top hopefully is a long diagonal from your knee through your hip into your rib cage as opposed to pressing the ribs up toward the ceiling. Okay. Different kind of bridge. It's still good. It's just not what we're doing. And then begin to roll down. You got it. And make some space. Feel the shoulder blades go apart. So roll up again and as you're going, keep feeling like you're pulling your knees long and pulling your heels towards you just a little bit. It'll sometimes get your hamstring.
So yeah, that's it. But that's a way to provide length in the spine while we're moving so it doesn't feel compressed. All right, let's roll up again. Good. Now from that top long diagonal line, beautiful. Let's do start to press out and pull back and this is the first question people in class ask, how far do I go? How far do I push? So let's put some information around that. So I want it to be comfortable.
I want you to feel like you can press and pull back in, let the top of your pelvis come down just a little bit and there you go. Yeah. Press and pull back in and it's comfortable. It feels good. The other thing I want is not too much of a change. Rolling. Going to do two more. Don't worry. Am I forgetting too much of a change in the body position at first?
So when you're pressing back and forth, the body kind of stays and you're working the legs as you come back in this time. Pause and roll the body back down.
Yeah. You feel the hamstring start to kick in? Yeah. Oh yeah. I love that. So let's do five more presses and just see what happens as you're going back and forth. So it's not so important how high you are. It's can you maintain it and does it feel good? Is it comfortable? That's it. Good. Great. And then finish up on your last one and then roll yourself back down.
Good. Great. Very nice. And pause. Good. Excellent. Let's add a little bit of single leg, a little interest. So bring your feet a little closer together. And so in the math class, um, that we looked at for the hip, we did the dead bug where was just lifting the leg up and down to start to put weight through one side. Now we're going to do that, but we're going to do a little bit more with the other leg. So again, start to roll up into your bridge and then when you get to the top, just pause there for a moment. Great. And again, can you get to that? Yeah, that, that's excellent. You change the position on that long diagonal line. Good. And let your hips come up a little higher if you can. You got it. That's it.
So now pause there and just start to let your right leg reach up to the ceiling. Hold there for a moment and then super gracefully. Put it back down and the other side, take this down just a little bit [inaudible] and then the other side goes up. Hold there for a moment and put it back down again, right side. And what you're looking for is how do you maintain the position?
Can you maintain it and put it back down so it looks lovely and let's do our last one coming up. And don't be afraid to kind of move around. Sometimes you have to, and then pause and roll yourself back down. Getting that little pull of the SIP phones toward the end of the mat. Great. All right, excellent. Let's roll over and come up to change the springs now and we'll get the straps and get everything set for feet and straps. So I really like a red and a blue.
I feel like it's a good amount of support. If you haven't done a lot of reformer classes and you haven't done feet and straps very much, you might want to go a little heavier, um, to up to kind of a to red position on the spring. So we'll go ahead and lie down again and this would be another place to look at. Do I need to have the headrest up or not? And it's fine both ways. You want to feel like you can very easily keep the back of your ribs on the Mat.
So let's press back. Good. And as we're getting into the straps, if again, you've had some hip pathology and hip surgery, you might want to put the uninvolved side into the strap first because that has a little bit more mobility often and get into the straps that way. And then you'll do the same in reverse to come back to come back out. So I'm going to still say, let's put the head rest up as long as that's comfortable for you.
Cause that's part of the learning process. And anytime that we've had an injury it gets a little bit out of whack. It gets a little bit out of balance. Good. Now pause right here and we're going to start to go lower and lower. So you're gonna very gently flex your feet. If you flex too much, it just feels like the straps are going to come sliding off so you'll know, you'll know how much is the right amount.
And remember back into foot work where you are pushing the foot bar away. That's it. And then back up. So you may have been taught not to have the legs come so low because it's really important. You don't want your back to arch. True. I don't want the back to arch, but I want you to learn how to take your legs that low because we all walk around every day in this upright posture. We don't walk around like this. So it'd be nice to get to that point where you can. Yeah, good.
Get to that point where you can get down that low. But really we're just horizontal. Just as we would be standing up being vertical. Great. Now if you can't get that sense of pressing into the strap and pressing into the bar and you do feel your back arch, then don't go any lower but gradually add onto that range. Super. Yeah, she's getting down low. I love it. It feels okay.
It's always as a teacher I watch people's eyes and they start to go down low and their eyes get real big. It's like, Ooh, that's kind of uncharted territory. Good and let's do a few circles. You don't have to go so low now but we'll go up and around for circles. Again, looking at hip mobility and just getting all the musculature around the hip joint to participate. We don't want to think about using the muscles. The muscles are working there. We don't have to, we don't have to think about them but we can come pay attention to the quality of it so if it's a circle, everything's working in balance.
If it's a star or a triangle or some other shape, then we know maybe the muscles aren't working so unbalanced. So you can have those images of something rolling in a socket like ball and socket joint, something like that. And let's go the other direction going back around the other way. Good. And this is a terrific place to really explore ranges of motion because especially after an injury, especially a hip injury or a back injury or a little timid to go into bigger ranges. So let's do one more guys.
And so this is a great way because the legs are supported, we can teach the body how to get back to that point. All right, so it's time now for everybody's favorite exercise, but I want you to like me. So we're going to do it with your feet and with straps, we're going to go into the a hundred and the a hundred if you haven't practiced it very much, it's often one of those exercises that people, oh, let's see the love or hate, I want you to love it. So we're going to do it with the feet in the straps, which allows you to have some assistance where you don't have to manage the weight of your legs in space. So bend your knees to about a tabletop position or so to start with and just shimmy away from the shoulder rest a little bit if you need to. And then you're going to use your hands at the back of your thighs.
So put your hands kind of up pretty close to the knee maybe. Yeah. And you're just going to send your feet away a little bit and then begin to roll your head, neck and shoulders up and you're going to use your legs to help you. Yeah. Great. And Bend your knees just a little bit. Yeah, that's it. So that's the position we're going to be in for the hundred. We're going to take the hands away, but the legs are still going to be supported. So it's roll back down.
[inaudible]. So this time you can either use your hands or not your choice and you're going to start to roll your head, neck and shoulders up and lengthen the legs long out in space as much as you wish. You might be able to lengthen them longer than you do on the mat. And here we go. In hailing two, three, four, five and exhale, two, three, four, five. Good in him and exhale. Good is again, if this is kind of new to you, this hundred and especially being on the equipment, either with the straps on your hands or the straps in your feet, one of the main things you want to look for is how much does the abdominal wall move. A lot means you're not really supporting the position of the spine. If it changes a tiny bit, that's okay. That's a good thing. Yeah, but we want to keep it under control. Was that one set? No. Okay.
Let's do two more sets in here and x. How good. See if you can lengthen your legs a little bit more. Maybe they lower a little lower, yes. Last set and then stop your arms and just keep exhaling, exhaling, exhaling, exhaling, exhaling, exhaling, exhaling and roll back down. Beautiful. Very nice.
You can slip your feet out of the straps and keep a hold of them because we're going to go right into some arm work with the straps. All right, you let me know if this feels comfortable for you. So legs at tabletop, again, just an easy table top position and press into the straps and down towards your sides and just see how it feel. Just regular you can, you can stay down. You don't even need to roll up yet. Just up and down. How does that feel for, for our market fills? Okay. All right, good. So we haven't really talked about the shoulder yet, but I want to add this in because we all need to work on our shoulder alignment and shoulder awareness is at a certain point when you're pressing your arms down, there's probably going to come a time when your shoulder rolls forward.
So just be aware of that and let's stop. No lower than maybe the side seam of your shirt going up and down. Right? Inhaling as you come up and exhaling as you come down. Good. Now I want you to add in the same feeling of pressing into the straps, right? That was great. That was a good change in your body position.
So exhaling and pressing through and it changes it from it pressing down to pressing long. That's it. Inhaling as the arms are up and exhaling, those arms are long. Good and see if you can do that while still maintaining the back of your ribs on the Mat. So again, there's a tendency to want to pull the shoulder blades together and arch. Keep the shoulder blades just as they are as you're going into the movement. Let's make this next from our last one. Good.
And just for fun, if you need to scoot away from the shoulder rest, you can just for fun, let's do one and roll up into the hundreds position. We won't do the hundreds. Again, that's kind of mean. But see if you can find where, what height your arms need to be to push into them to help you get into that deeper curl. Right? And then if you take your arms too low, you lose it. So that's important for future classes too, of doing things like the overhead exercise, which rolls over onto the shoulders. Great. Come on and take a rest. Good. Alright.
Set your straps onto the posts and then roll over and come on up to sitting. And we're going to get into a little bit of knee stretch. So knee stretch. I like a fairly heavy a position. This is like our quadro pet exercise from the mat, but now we're taking it up onto the apparatus and moving a little bit more. So come onto your hands and knees on this same red and blue setting and we're going to look at it several different options of where this can be and where it can go. So the same idea, sitting back a little bit over the heels, having the sense of the neutral alignment. Good.
You corrected the head position. That was right where I was going. And the tendency, let your head tip a little forward tendency is to have the head down. It's comfortable, doesn't, doesn't really feel like anything. But again, we're using this to help train our awareness of our posture. So that's really important that the head is there. I use the image sometimes as if you were lengthening your ears, like Mr Spock can that filling of lengthening. They're beautiful.
Now you're going to keep this position and begin to send the carriage back and forth. Just rolling it back and rolling it in. So this is exactly like footwork, but now we're up on our hands and our knees. So managing your body may feel a little bit more challenging and it is. It's gotta you've got more to do. That's it. So some common mistakes, one of the common mistakes they see is the ribs starting to go a little bit forward. So you can just think of [inaudible]. Yes, exactly. Keeping the back of your ribs up against your tee shirt is a good way to maintain that position. That's it. Good. And for you, I want you to keep feeling like you're gonna press gently into my hand.
Push yourself away from the bar a little bit, right? That's it. Good. So let's change that now and start to move at the shoulders. So push your legs back and hold them there and stay there for a moment. And this is going to mimic the long stretch exercise. So you're going to keep your body in that same shape and pull it forward over the bar and then press with your arms and press away.
And then take one, move forward over the bar and then press away and then come back up into your V so you can change the choreography around as you like. That's it. Good. Let's do a couple more back and forth. And as you pull forward, keep feeling this lifts up and into your tee shirt. Yeah. [inaudible] ah, that's it. Keep the ribs gliding in the front down a little bit.
Beautiful. All right there. She's going over the bar and up into your v and pause our right. So now let's move on and go into the down stretch exercise. And I'm going to teach down stretch a little different. And this has to do with when you do a push up, you do push ups on the floor and you're thinking, wow, what can I put my hands on? Can I do my pushup from here instead?
Because it's easier. And the more we bring the body up in that diagonal, there's a little less demand from gravity, which is cool. And we're going to do the same thing with down stretch. So let's take our springs. I'm a little bit lighter. So on these machines, we're going to go down to a green, which if you have a yellow spring on your equipment, the lights spring, this would be equivalent to kind of a red and a yellow. And you wanted to be supportive but not super heavy because we want to have a good, easy range of motion in the shoulders. Now normally down stretch would start here. In this position, we're gonna walk the knees forward up in front.
So you're almost at the edge. That's it. And now we're going to take the body from this length in neutral position to a little bit more extension, and then just slide the carriage back enough that you can stay here. Right? So this would be a point in the class where if I was teaching this class a lot and I had taught some of the stuff that Brent taught in his class, that I would ask, where do we extend from when we go from neutral to extension? So I'm gonna hazard a guess.
It's a little unfair to ask you since you [inaudible] you weren't in the class, but we want to start instead of thinking I'm going to go from this neutral position and arch my back and you guys can feel free to come in and rest if you want. I'm gonna Arch my back totally. Instead I already have a little arch in my lower back. That's normal. We all have that. For the most part. I want to move from my upper back and try to match the curve of my lower back. Right. So I think about it too is like I take my, um, a credit card and then you just pull the ends of, if you've put it long ways between your fingers, it makes a little bit of a curve and it's all the way it's consistent. So not, it doesn't, hasn't gotten to that point where we get the white line before.
We're going to break it apart. Yeah. I don't want that. No white lines here. So send the, I know, I know. Send the carriage back a little bit and let your body be in the new, more neutral position to start just just for reference and then see if you can increase the curve in your upper back without really increasing the curve in your lower back. That's it. Excellent. Now maintain that and start to send the carriage back a little bit and forward a little bit. Good. And both of you could reach, almost like you're going to pull the foot bar covering a part and open.
Good. Good. Was that comfortable feeling? Yeah, so it's a little easier way to get into it. It's a lot going on. The other thing we have to watch out for is what's happening at the pelvis and they were lovely models. I didn't see any sagging from down here, but the next exercise we're going to do is going to speak to what's happening at the hips and the pelvis. So I want you to put on a little bit of spring tension. It doesn't really matter just so the carriage doesn't move around too much. So a couple of reds in addition to that as good. And you can do this on your reformer, you can also do this on the mat, it doesn't really matter.
We're going to look at a tall kneeling position and what's happening when we get into that, tal kneel because this is where we do all of our arm work and things and I see often this position where the body is kind of arched and the hips are a little bit creased. So I want you to, as you can feel like you're bringing your whole pelvis forward over your knees, right? And you might start to feel your hamstrings get a little bit active and it feels like your balance is a little bit challenged and that's normal. That's okay. Now can you have the rest of your spine aligned where it was when you were lying down? Ah, that's it. So we've been made to believe that this is a tall, tall standing position, should be something like this and this military stance, but it's not really our ideal or optimal alignment. So we want the ribs over the pelvis. It's like you had two ovals, one on top of the other. And so these ovals, and we could even include the, the oval of the shoulder girdle where the collarbones come around to the back.
It's like they're stacking like the little kid's toy that you have. The graduated rings that stack up around that central pole. And that's what's happening here. So we want to have that sense of, yeah, and it's going to feel weird a little bit. Shoulders go wide. Brass bone goes wide.
So that's the position we want to be in when we're doing all of this kneeling arm work. And it's also the position you're going to be in when you're standing. Right? I want to have that sense. Let your shoulders come a little forward. Don't feel like they have to go back so much more wide side to side. Yeah. Good. Okay. So going to transition into some of the kneeling arm work.
Now we're specifically going to look at kneeling arm work facing the side. So I have to say, first of all is be careful of your balance because if the carriage is light and you get on and you're not paying attention, it's a little bit like a skateboard underneath you. So we'll get on and off, um, smoothly. So we're gonna take one blue spring and this a fairly light spring. So if the colors on your reformer a little different, just go to a pretty light spring and we're gonna use rings and we're going to use a box. So you're going to stay in kneeling. I'm going to take the ring and you're going to grab your box and put it on.
And so if you're not ready for, you haven't done a lot of the kneeling work and you don't feel really stable in the position, you can take a position seated and normally we'd put it on long box, but we're going to sit with the box kind of in the middle here and your legs and a bit of a straddle. So the legs are going to be open and this is going to be safe for
You might sit up on a yoga block in addition to the box so that the hip is flexed to more 90 degrees. And this is not easy. Stand on this little teeny tiny block. It's a little challenging. So you can find something if you want less challenged, a little bit bigger, and you can see how now her body and her leg are just at 90 90 degrees. So you're gonna take the front strap and you're going to gently pull on it exactly. And you're going to put it over the handle and then put the other soft part of the handle right at your lower ribs at that point of it. That's it.
Great. So again, tall positions, see if you can bring your pelvis forward and your ribs
So I don't want the pelvis or the legs to change it. Just want the body to rotate around the central axis. That's it. Good. And so you're using the muscles to go in one direction, but then when you turn back to the Poli, you're getting a little bit of assistance back into that position.
It was all good and fine and then something happens. Right? So I'll take the ring for you and you can turn around and I would say step off. Yep. And then we'll show how to get on. If you come around to this side and just sit, then I'll help you with the block. Okay. How'd you go? I didn't hear any loud crashes, so it was good.
Life is good, right? So hadn't lift your bottom. And like I said, sitting on that yoga block is not easy. You're doing a super job. So strap again comes over and widen a little bit through here. That's a beautiful change. That's excellent. So when you're ready, get yourself set again, test the water a little bit, move slowly and maybe even a little smaller the first time you go. And now if you're in, especially the kneeling position, but you can even feel this a little bit in the seated position is you can start to reach the opposite knee or the opposite.
Sit bone down countering the rotation. All right, good. So this is the side that's reaching down and now as she twists this way, this knee is reaching down. And again, that's a little bit more functional. So when we are moving the spine and not moving the pelvis too much, we're usually working to get more mobility as if we just let the pelvis move, the whole thing moves together. So now we can think about having more like what it would look like if I was moving through space, doing a tennis serve or golf swing, or even just walking. There's that oppositional
Um, you can start to work into where have the foot bar higher. The higher the foot bar is, the higher you have to lift your legs though. So we're going to put it down. So there's just some work on a whole lot and we're going to go to one red spring. And again, it's kind of a medium, medium spring. It's not really heavy, not really light is good for pulling straps.
So you're going to climb onto the boxes, chest down, and I want your lower ribs to be in contact with the mat. So scoot forward just a little bit, right? Even farther forward if that's comfortable. So the chest is off in the lower ribs that cartledge is on and we're going to start with the hands out on the frame. So take your hands out in front of you and when your hands are there, you could grasp and you might feel like you need to grasp.
But instead see if you can just feel the friction of your hand on the frame of the machine and you're going to pull against that. That way we don't get a lot of tight neck and shoulder muscles, so just start to pull the carriage a little bit with your hands. That's it. And every time you go, you're going to go into just a little bit of thoracic extension or that upper back arch and take your hands even farther forward and go more forward. It'll feel like you're going a little too far and that's usually a good amount. That's it. Uh Huh. Good. I want you to, when you're thinking about this movement, when you're doing it, or even as you're just watching, this is, it's not so much about coming up and down.
It's about changing the shape of the rib cage. So as you start to move, pause there for a little bit. Keep the front of your ribs down on the box for sure, and then start to feel like you're going to lengthen your breastbone. So stay on the box, stay on the box and lengthen your breastbone in both directions. That's better. Feel the difference in the movement, right?
So if you feel like you're coming up and down really high and you're doing a lot of movement, that's not really that. We're not really accomplishing what we want, which is to bend the upper spine. So go again. That's it. Beautiful. You're gonna remember this because we're going to start to use this now as we take the straps into the hands. So take the straps and you can hold on the tape on the metal class, on the handles, whatever feels good. If you're at home, you can shorten your straps and put on handles.
So that you can hold that if that feels more comfortable. So long body's now keeping again some attention to the legs of sometimes we forget that we have legs and we're laying on the box. It's easy to let it go. So lengthen the legs and again, start to use the deep hip extensors, right, are our glutes, but in a good way. We're going to use them to lengthen and lift the legs a little bit up. So now pull with the arms and keep the body long, right? So let's not go into extension yet.
Let's just see if we can keep the body horizontal and as you're pulling and reaching with your arms, get that same feeling as you had when you were pressing into the straps with your hands and your feet. Here's another opportunity to press into the straps to send the body really long head long and forward. That's beautiful. Good. Stay down a little bit more. Uh Huh. That's right. Good. One more time. Long legs. Long Body.
We're maintaining the position of the body just as we did in footwork. Great. Let's start to add a little bit of extension to this now. So as you start to pull the arms go and then you change the shape of the spine and come down beautiful and x house. So the sense is that your lower ribs are reaching towards your pelvis and the upper ribs are coming around and over the back, it's opening like an accordion. So pause there, put these ribs down and then let these ribs come around that said you got it.
You got it. She had the ah, feeling right there. Good. And this, make this next one, our last one going through the movement and change the shape. Beautiful. Yes, I love it. And then take a break and come on down. Good. So you can um, hook the straps back onto the posts just for there. You can have a little break of your ribs, but we're going to do one more thing in this position, which is used the legs a little bit.
So we're going to go into the swimming legs. So you position yourself on the box where it feels good for you. So if you feel like you want to scoot back a little bit, that's fine. All right, good. And we can do a couple different things with the arms. You're reading my mind so we could have the hands out on the frame and do that little tiny bit of extension in the upper back. Sending the bottom ribs down into the mat. If that's comfortable, you can stay there.
Let your legs hover up and just do an easy flutter kick with just the legs. So leave the arms down and let's just do the legs. That's right. Keep pulling open here. It's like you're trying to stretch your breastbone top to bottom and side to side. That's it. So I was going a little bit more and or genetic.
You guys are just about to hit toes. That's great. Good. Now keep going. You're going to start to slowly let go with your hands and reach your arms back towards your heels. I know I'm not that mean I won't make it go over head. Good. Keep the sense of wide here. Aha. So it's not about the shoulders coming around. It's about the spine going into extension. Good. And only 35 sets more good. Keep going.
Not Too many and feel like you're lifting the back of your thighs more than the foot back of the thigh. That's so that the, he doesn't have to be higher. I just don't want your knee to bend. Keep your knee really straight and let it go and rest carefully. You can either push yourself up into child's pose on your box or if that's not so comfortable, you can turn and sit to the side. And you could also just sit on the box with your feet on the floor and stretch forward a little bit. Good. Great. So again, thinking about how we're going to rehab the hip, we want to make sure that we have good strong use of the hip extensors, not in the old squeezing way, but of the, I can stand up and be supportive here. So that's why the swimming exercises, all the prone exercises are great. Good. So you can carefully come off of your boxes now and we'll put the boxes away.
So our next exercise we're gonna go into is a standing hip stretch. And that's based on Eve's lunge. So it's the stretching out into the split position. So let's put the foot bars up and I think just the middle setting is good for the foot bar. Great. And then when you set yourself up, you want to stand where instead of having your foot so far forward, move it back a little bit. So your toes as a starting place are kind of in line with the front edge of the carriage. And that's a good place to start.
And you may find in your reformer at home, if you're reformer is higher that you may feel like you want to stand on a box or on a yoga block or something. Just make sure it doesn't slide, but that's a good option. If you feel like you just can't get your knee up off the mat, you might just need to raise the floor a little bit so you can stand up on a box. So let's take the hands to the foot bar and your back foot is going to turn under against the shoulder rest. And because the feet are a little bit apart, what happens? Sometimes we're thinking leg alignment. The knees start to come in a little bit. So we want to turn the back leg so that it's parallel.
So you feel as the best you can. It's not perfect, but the best you can. Your hip, knee, and ankle are in alignment here. Okay, how's that? That looks great. All right, so now when we're going to get going, there's a sense of lifting up and finding, re-establishing that neutral line. So again, the tendency is to sag a little forward. So you want to feel like we have some integrity and lift in the body. So you're gonna start to roll the carriage back and just test that the spring feels good for you and then let the carriage come back and that's it.
So pressing back and coming back in. You know what? Move your hand a little bit closer here than this hand. So it's more under, yeah, if you haven't narrow foot bar, it feels like you're a little squish, but just have the hands under you there. Good. So the next time you press the leg back, let's leave it back and hold it there. And now you're going to keep both legs long and press back into your split. So keep the front knee straight. Yeah, it doesn't have to be very big and might not be very big.
And then let your weight come back up and over your foot and bend the knee. Good. So again, we're starting to get into ranges of motion that are a little bit more than we've done before. So press back and press away. Good and come forward and come up. So if we're thinking back to our hip pathology and you've had, um, a posterior approach to your hip surgery, you'll want to watch how far you're bending at this front hip. Keep it about 90 degrees. And that's a good place to stop for that.
So now we're gonna add on, press back again in pause, press out into your long position. Now here's the place that for me is really important. As you bend the front knee, you want to keep feeling like your whole body is going down and you're rolling the carriage back farther. Pause right there and lift up off of my hand, right? And try to put some space, even though your body and your thigh are touching, put some space in here and then kind of glide forward. And we'll practice this a couple times cause it's kind of a weird kind of a weird feeling.
So press back to long legs once you get into that medium stretch with long legs, bend your supporting knee and allow your body to come down. But keep sending the carriage back. Keep pressing it away. And if somebody had their hand right here, you could feel how you could lift up a little bit inside. Good and come back in. So that's important. Again, my, my least favorite version of this exercise is people do this lovely press, they go back into their split and then they just go clunk, right? And everything kind of collapses. That's not good for any part of the body.
So we want to have control while we're doing it. So I say both of you step about a half step back with your standing foot just a little bit farther back, cause I think you both have a little bit more room that you can move. So let's go again. Press back to long legs. Keep lifting up here. Now as you bend, keep sending the carriage back, right? That's beautiful from here.
Now if you want to go into your prone press up right, that feeling of changing shape and your upper back, you can and then glide forward and up. We'll do one more on this side. So press back, keep the lift here. As you bend, the front knee keeps sending this leg long and the carriage back so your whole body comes down. So go into neutral first, right? And lift. Just off my hand. Lift up. Yeah. [inaudible] now you can change the shape of the body to go into that feeling. Now we've got head to foot in the stretch and come on in.
Good. And then you guys can walk around and change sides. You feel the, the lift when you're bending. Yeah, that's really, really important. It's another one of those I big Aha moments. Yeah. All right. So here we, so hands on again, start with your foot line where your toes are kind of in line with the front carriage and then you can move it back a little bit. If you want. Stand up on your foot and press the carriage back. Keep both legs long and go back into your long split.
So even here we're managing the trunk. [inaudible] keep the ribs pulled up a little bit. That's it. And then just come forward again and bend the back knee. So we'll just do the initial part of it first. So push back to go back with long legs.
Pause there. Come forward, up and over the hip. So again, we're mobilizing the front hip and you can keep the knees straight. Yeah, just that first part. Good. Now go back again. As you begin to add the bend, keep feeling like there's a lift of this hip [inaudible] right and go down. But instead of letting this be the only part, let this part come down as well. That's it. So the head is in between [inaudible] let it come up a little bit and come on in. Right. That's it.
And it's kind of a funny place because especially if you're used to doing this a lot, the immediate thing is to go into an arch and I want you to just like we talked about, where do we arch from first in this place from this low lunge, it's about moving the rib cage into a little bit of an art as opposed to letting the hips go down, right? The hips go down, but it says the whole body does. So let's go one more time. So a couple more times and we'll go back to straight legs and begin to bend the front knee and go longer. Keep this lifted, keep this lifted. So it's kind of like your long stretch position, right when you're in your plank position and then glide yourself forward. Good. Let's add the extension toward the end of that this time. So press back, keep the knees straight. Go down low.
Bend the front knee. Keep lifting up here though. Keep lifting up in both sides. Yeah. Uh Huh. She's finding it. Now. Go into your arch and feel how your breastbone and your thighs and your foot stretch away from each other and come back in bed. Or last time pressing out, pausing there. Go down as one piece. Keep that little bit lift here. Lift up, lift up. Yes.
And now go into the arch and just your upper back. Keep drawing up and go forward and pause. Future. Yeah. Little different feeling. So that was great you guys. All right, so let's finish up in some standing work. So we get ready to go on with our day. So we'll put the foot bars down.
And again, every different reformer has different parts. Some have upstanding platform that's already there. Some have a standing platform that goes inside so you can decide for, um, what works best for you. So this is going to flip over. Yep. Bring it around. Yeah. Perfect. Alright. So again, we're going to be on this kind of medium spring, uh, read on these reformers. You want to feel like you have support in both directions so it's not too hard to push out. It's not too hard to pull in when you've got, you got easy motion in both, both directions.
So we're going to start from the side. You're going to always step onto the stable platform first. That's not going to move and come up good. And if you're at home, and again, if you have a little taller reformer, you'll want to maybe have a dowel or you can stack up some boxes so that you have a little stair-step to go up. If you're having to take a gigantic step like this to get onto your reformer, make it a little easier on yourself. Maybe put some boxes next to it. So in this tall standing position and go ahead and bring your foot a little bit closer to the, yeah, not real close, but just a little closer.
So we're starting with the legs open, but not, not really far yet. Like we would maybe if we were using the the Gondola Pole. So in a little closer, and again, I want you to go back to that position, the feeling of tall kneeling that we looked at. How do you get your knees under your hips, your hips, over your knees, your ribs over your pelvis? Can you find that in standing? That's really important as takes, take some work. Take some time to find that.
So let's just start again. Just an easy opening of the legs out and in.
Keep your ribs back over my hand a little bit without feeling like you're scrunching down just a little bit. That's enough.
Good. Now push out and stay out. And just hold the carriage in that open position, not quite so big. Bringing in a little bit so that you can maintain the carriage and space and bend your knees a little bit and then straightened. So you ma both could bring the carriage in just a little bit. Yep. And you're going to keep it at that position.
Bending the knees and straightening right banding in the knees and straightening. Good. So at first I want to challenge you to keep your body upright. So can you bend and straighten without tipping forward? There's a little bit different way to do it. Have a little bit more demand through the whole leg of keeping yourself upright.
You'll feel like, wow, I can't go very deep. And that's normal feeling. [inaudible] can you do it without coming forward? Like if you were up against the wall [inaudible] that's it without letting the bottom go back. So again, it's about improving our awareness. That's it. One more time. This time do go into a little bit of a tip forward and now begin to press the carriage out and back in. That's it.
And again in your own self. Look down notice or your knees coming in. Are they open? Can you keep that feeling of legs aligned? Two more. One more. Good. And come on. Uh, great. All the way to standing. I'll take your hands. You can step backward.
Probably easier to go back and then we'll change positions.
Is this open at the front of the hip here and are your ribs on top of your pelvis? Great. How's it feel? It starting to feel a little bit more natural. You're getting into it quicker. Yeah. Get out and, and feel that there's an equal press through both legs as you're going back and forth. You got it out and back in this time. Press out and hold the carriage out. [inaudible]. So come back in just a little bit.
Almost feels like you want to take your tail under you. So just keep it out. There you go. Yeah, that's it. And now start to bend both knees and aim them forward and come back up. Right? So can you figure out how to keep the carriage steady as you're bending and straightening? Good. And that really is, again, that's an example of dynamic stability. If I was really stable and rigid, I wouldn't be able to bend my knees.
I need to be able to hold and move at the same time. Two more. Great. This looks super you guys. Now on this next one, bend and do tip over a little bit. This is fine. And now begin to press the carriage out in n. So again, we're looking at restoring some strength and endurance to the thigh muscles, to the buttocks muscles, and we're improving alignment of how you're maintaining your hip, knee and toes, all pointing in the same direction. Good. Let's do two more and one more.
Really good attention to everybody to that neutral spine alignment and then come all the way up. Good. And you can step down whichever way feels more comfortable.
I hope that you are able to put some of these things into practice in your own classes that you can start with the easier classes at Brenton. Not Easy, I should say, easier. Um, and move this into this more dynamic setting of being on the reformer takes a little bit more figuring out a little better body awareness and just really play it by ear. So do what feels good for you. And don't be afraid to do little adjustments and see what's going on. Our body responds to change. So if we just think it's one way, it's supposed to be this way, you, you might've guessed right, but sometimes you need to play around a little bit. Now we're at this point where you can, and that really helps the body understand, here's a wide range of options and here's what I'm choosing today. So it's a little bit even nicer than saying right and wrong, and here's what we want today and here's what we're going to do on different days. And the body will respond to that and heal really quickly.
So thanks so much. I look forward to seeing you again at plots anytime.
Comments


Thank you Shelly.
Giuseppe


You need to be a subscriber to post a comment.
Please Log In or Create an Account to start your free trial.
