Description
Note: For your safety, it is recommended to have a foot bar that locks on the No Spring Tendon Stretch.
About This Video
Transcript
Read Full Transcript
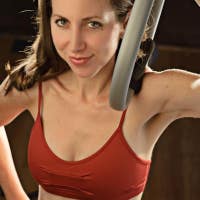
Hi I'm Mariska from Fuse Pilates in Washington DC and I have with me today two of my teachers. I have Brianna who actually lives and works in New York City and I have Meredith who lives and works in the Washington DC area. We're gonna do a contemporary reformer workout with a jump board warmup so I don't know roughly how long this jump board thing is gonna be. Maybe 15 minutes maybe 20 minutes. We'll see once we get started.
But we have the jump boards on. We have a red spring and a blue spring. If that feels too heavy for you you can take it to a red yellow. Most important thing for me is that when you're jumping you don't feel it in your low back. So I'll give some cues at some point.
Like if I see people starting to arch into their back to maybe slide their hands underneath their seat. We have people sometimes like sit on a ball. We do all sorts of various things to keep people in a better spinal position. You want to have your feet jump to the top of the board and again you can always adjust. But what we don't do when I teach jump board is take breaks.
So whenever I start talking about new choreography you're going to come back to jumping in parallel or in turnout your choice but you're not going to stop. Okay? Okay so headrests are up so that you can have a view of your feet and it's easier on your neck. So go ahead and lie down. They are both pretty warmed up so we're not gonna really do a long warmup.
We're gonna start with feet down on the foot bar bringing your legs, come up a little bit higher, and bringing your legs into a turnout position. So you want heels down toes down and we're just gonna start with just some leg presses. So we're not jumping yet we're just pressing out and bending to come back in. So you want to make sure that you have a nice lengthened low back. So what I look for a lot of times is and Brianna's fine but if she was in a tilted position.
Go ahead and come out for me and tilt your pelvis. Like if she was in tilted position I would just literally slide my hands underneath her and just drag her back into neutral because we do want to jump from a neutral back position. So bending and extending go ahead and stay out. Separate your heels. We're gonna do some parallel so bend in and you keep your heels down.
So you're coming in as far as you can come and then press it out, good bend in and press out. And then let's just do a little bit of work to warm up your ankles. So go ahead and stay bent in like about halfway. And then we're just gonna do some heel raises. So let your heels lift up and lower back down.
And lift up, and down, lift up, and down. We can keep going like this or we could turn it into a little bit of a prance. So we lift up and drop a heel and switch, and switch. Just alternating sides and making sure that you're really pushing through all of your toes when you're doing this. Now we're gonna come back to center.
We're gonna start in parallel. So we're gonna jump in parallel to start so when you're jumping off you want to make sure that you come off heel of your foot, ball of your foot, toes point last, land toe ball heel. So we're just gonna go ahead and start. I would actually because I know this always annoys me. I would actually throw your straps in the well.
Because I know sometimes they make noise and that's annoying so anytime you're ready just remember we're always going to come back to this place when I start giving you directions on something else. So anytime you're ready and go good. And so you're really launching off. So it's a reasonably medium heavy weight. You can always go heavier and know when you go heavier it's more legs when you go lighter it's more abs.
But I really want to work legs so we're gonna do a little bit more with legs today. If you keep jumping like this, they're so in sync. Like this is like not seen. If you teach jump board classes it doesn't happen. Good we're gonna do eight more.
See if you can stay in sync if you can. Two. Three. Four. Five.
Good six. Seven. After the eight you come to a turnout so heels together. And you try to have the heels stay together. Which I think is the hardest part of this.
And you also really try to land your heels. So you want to land your heels and come off because it connects to the backside of your body better and we all want to work our glutes or basically everyone I know or maybe it's just me. Maybe I'm projecting. Good so now while you keep jumping in the turnout position but you're gonna add a little leg extension out to the side. You don't have to go crazy and it doesn't have to be wider than the jump board.
So some people like to just go like way out into space which is not what we're going to do right now because it's a heavyweight which means it's pulling us back pretty quickly. And we want to have time to land our feet properly. Good you're gonna come back to just jumping in the turnout position but not doing the jumps out. And this time let your legs separate a little bit. So maybe they jump out to five inches apart.
Maybe like five and a half inches apart. Then when you're out you're gonna click your heels together. So we jump out click and land. Jump out click and land. And if it doesn't actually click I'll just pretend I didn't see it.
So click and land, click and land. And you would have an easier time actually if you had your feet more separate when you land. So that when you jump out you have more of a chance to click. So jump out click, jump out click, jump out click. We're gonna come back to just jumping while I'm talking.
So jumping while I'm talking. We're gonna have your right leg go out to the right side of the jump board. So you're jumping with just your left leg. So right leg is gonna stay off the jump board good. So it's kind of scooted out to the side.
We're gonna do four more there. One and two and try not to tip in your hips. So keep that left hip grounded. Three and four and then we switch. So opposite leg is out so we're jumping good.
And then you're heavy in the down leg. 'Cause the leg being out it's gonna want to have your hips tilt to one side and we don't want that to happen. We're gonna do a couple more there and then we're gonna switch and one leg goes out to the side and then switch and the other leg goes out to the side. Sort of like a tick tock kind of motion. Good so we're jumping.
I feel like I need to step out of the way. It's like Frogger and like you're walking through legs moving towards you. And so jump switch, good jump switch. We're gonna come back to the parallel jumping. So we're just jumping parallel, so just regular.
Again not taking breaks 'cause I'm not into that. And then we're going to go for a little run. So you're gonna jump off of your right and land with your left and then switch. So jump switch, jump switch, jump switch. If at any point you start to feel anything in your low back I want you to slide your hands underneath your seat.
Just gonna bring your back into what sort of seems like a posterior pelvic tilt but is actually coming into more of a neutral spine if the weight of your legs start moving away from you. Good so we're still switching, and still switching, and still switching and watching that your knee's tracking right over your foot. Good we're gonna come back to center. Come back to either parallel or turnout, so your favorite. Whichever one you like so you're gonna keep jumping and keep jumping.
Good now we're going to divide the jump board up into four sections. So we're gonna do a one two three and four so we can make that clockwise. So I want your feet to land in a different section when I tell you to go. So we're going to land one, and then land three. and then land two, and then land four.
This is like mind boggling. So you're gonna try to just jump in that. So it's like one two, or one three two four. So it's an X kind of shape. So you're doing an X kind of shape on the jump boards.
And then remember one and two are the top two. So we're gonna do a one two. So we're gonna jump from one to two and back to one. And so you can let your knees kind of go out to the side. So you're jumping from one side landing on the other side.
And jump good and switch, and jump and switch and try to land a little bit higher because that's gonna help it again stay out of your back. And then let's have one foot in one and one foot in two. So we're sort of in a wide second position and we're jumping out from there. Good and jump. Is anyone feeling anything yet?
Okay excellent. So we're gonna come back to jumping parallel. And then I want you to jump out. Land come in for a second. Go with your legs all the way straight.
We're gonna do a little Julian Littleford special. So go ahead and press all the way through with your legs. You're gonna jump from heels down. So just point your toes and try to jump off with straight legs. So you're just doing a little launch off, and a launch off.
So yep. Yep so you're literally just jumping from the bottoms of your legs which is very hard especially on this weight. But just jump with the base of your legs. Good and jump, just four more. One.
And two. And three. And four. Bring your right knee in towards your chest. Try not to let the carriage move.
Jump switch to your left but you're keeping the carriage still so switch, and switch, and switch, and switch. And go faster if you can so it's switch switch switch switch. That's a hard word to say really quickly. Good four more. Two.
Three. And four I'm having mercy on them come in. I'm taking off the blue spring. Actually because I want to do some choreography that's a little bit more complicated and you need a little bit more air time. So they're on now one red spring.
Left leg up towards the ceiling, right leg is on the jump board. Jump with just your right leg. So right leg jumps out. Left leg is just floating and come back in. As if you wouldn't come back in.
Jump and choose to come back in. Good going out and back in. So now when you land you're gonna shoot your left leg over the jump board. When you go out your left leg goes up good. So it's a reach and a lift, and a reach and a lift.
Good and a reach and a lift. We'll do four more. And two. And three. And four switch legs so your left leg is up.
We're gonna do a couple with your left leg just floating in space. And then we extend it over the jump board lift up towards the ceiling. So when you're lifting your leg too on this one I think it's like it becomes hard almost not to tilt your pelvis so I'm gonna ask you to try to find equal heaviness in your sacrum the entire time you're jumping and not to find that your low back is wanting to make contact with the mat. Good now we're gonna do a scissor jump so your one leg is up, straight leg switch, straight leg switch, straight leg switch. Good and this is totally not planned in advance.
As jump board I think should be. I think jump board should be make it up as you go. So just jump switch. We actually teach at our jump board classes at my studio we have a free jump period which is the best place to get ideas for jump exercises because people will do some of the craziest things when given free rein to do whatever they want. Good we're gonna go back to jumping with both legs landing.
Good now we're gonna try to do a pike. So legs are gonna go straight up but you still have to get them down. Why are we stopping? Keep going, so we're jumping out. Good lift your legs and land them.
Good and lift and land them. And try to glue your legs together at the ankle because that's going to basically just make it look better. And that happens regularly. What's actually nice that's happening here or not happening here is the the reformers haven't moved across the room because I know that wouldn't be so great for filming. I have one of my favorite clients is six foot five, 260 and I basically have to hold on to the equipment with all my weight to keep the thing from moving across the room.
Good we're going to come back to jumping just regular. We're gonna finish off with doing some Peter Pan jumping 'cause it's my favorite and basically everyone's. You're gonna bring one heel towards your midline other leg out to the side and then land. Good and jump and land, and jump this seems to be everyone's go to exercise when they're doing sort of the free jump. And you might want to limit how far out your leg goes again if you see your pelvis really tilting from side to side.
Good we'll do four more. And two. And three. And four. Coming all the way back in and just let your knees kind of sway from side to side, kind of relaxing out your low back.
We're gonna do some side jumping because side jumping is one of those miraculous exercises when it comes to working your outer hips and your glutes. So we have these wonderful kind of beanbag things which we're going to use as pillows. You can kind of use anything at home. We actually have at our studio we have tanning bed pillows because they were inexpensive and they fit perfectly. But you're gonna roll onto your side facing towards the camera so Meredith will you roll into your left side just so we can both be on the same side and I won't give wrong leg cues?
And you're just gonna come lie down on your side and you want to make sure that you are completely stacked. So shoulders, hips, knees, everything. The arm position I like the best is to actually take one hand and you hold on to the little post. And the other hand can hold on to the shoulder rest. So your bottom leg is bent in it's going along for the ride.
Top leg is on the jump board so you can even bend this in a little bit more good. So we're gonna land your heel first. So you want to make sure your heel is landed. Go ahead and press out so you're straight out. So this is sort of your start position.
We're just gonna jump in parallel from here. So go ahead and bend, and press out jump good. And usually the first couple you're just kind of getting a sense of what it is you're doing. And obviously because you want your leg at least for this first part to be in a straight line from your hip to your knee to your ankle, you're gonna be way lower on the jump board than you were for the first exercise. And you can jump with a lot of oomph or a little bit of oomph.
The red spring I think is like the perfect weight for side jumping when you really want to feel your glutes working. But if you want less of that then you can always go a little bit lighter. Good so we're gonna keep this going but now I want you to add your bottom leg kicking out. So you're basically bringing your legs into an L at the same time. So it goes out and then it bends in.
Kick out, bend in, and the challenge here with that bottom leg moving is that you don't tilt over. Go out and in four more one. And two. And three. Good and four, keep that leg bent in and we're gonna keep jumping on the top leg.
And we're gonna add a little kick up towards the ceiling. So you're gonna jump lift and land, jump lift and land. And bring your leg a teensy bit more forward if you feel like you're starting to roll back into your jumping legs hip and there's really not a good hands on for jumping 'cause you can't move that fast. So you just want to make sure that you're giving some good verbal cues so that your your people don't fall off the machines. Good lift up, and lift up.
Do a couple more there. Is anyone feeling anything yet? Yes? Okay excellent. So now we're going to do a little kick back.
So it's just a little tiny squeeze of your glutes to move your leg back let's say four inches or so if we're gonna have to measure something. So just the littlest kick and still landing toe ball heel which they're doing a great job of. Good we jump and land, and jump and land. Now we're gonna combine those last two exercises. So we do one up, and then one back.
And just keep going at your own pace. And they're no longer in sync. One is up while one is back. So we're just gonna keep going like this. And I will cue no one because I will always be cuing someone wrong so just moving your legs in that same basic direction.
Are you feeling enough yet that you feel like you have gotten a good enough hip workout? Which is really the warm up for the hip workout that's coming later in this class. Okay excellent let's call that it. We're gonna roll on to your back. This is a perfect opportunity to take a figure four stretch.
So you're gonna take the leg that hurts the most over the leg that hurts the least. And I say that because the next time it will make sense. 'Cause one side will still be kind of feeling it and the other side won't. And you can always pull your leg in off the jump board if you want. Whatever you feel like is giving you a good stretch.
And that seems like enough time for that. So let's go ahead and make your way onto your opposite side. Again you're stacked ears shoulders hips knees feet thighs. Everything is stacked on top of each other. You want to be scooted almost to the back edge of your machine so scoot back just a smidge Meredith.
Got a good grip on, bottom leg is bent in to start. And then we're just gonna start by jumping parallel with the top leg. So also remembering that everything is an abdominal exercise so we're keeping our abdominals pulled in. Good jump out and land, jump out and land. Good so staying parallel on these first ones.
Now we're gonna take the bottom leg kick it forward at the same time as you jump out. So your jump and land, and reach and land. Think long legs and land, and long legs and land. Good and jump, good and jump. Let's do four more like this.
And two. And three. We're gonna keep that bottom leg in on this next one and we're gonna add the top leg doing a hip lift up. So we're going up as you jump. And you have to get it back to where you can land it.
So it's up jump and land, up jump and land. Again they're perfectly in sync it's magic. Good up jump and land, good four more one. And two. And three.
And four now let's go ahead and do a little kick back. So it's a little squeeze of your glutes to move your leg back a smidge. A little squeeze back, and squeeze back, and back. Good and not with so much oomph that you feel like you're gonna fall or that it's messing up your center of gravity or your balance at all. Let's finish it off with three more here one.
And two. And three then we combine it so up one and back. Again this is where they get off interestingly. So we're either doing up or back but then alternating with the other. Good and lift.
You can't see everyone's faces like I can see their faces but they look kind of annoyed right now. We're gonna do a couple more and then we're gonna call it the end of the jump board warm up. 'Cause they're glistening so I feel like they're warmed up. Good we're gonna call this the last one. Good and then go ahead and we're gonna roll over on to your back.
Now this time it makes sense. The side that hurts the most over the side that hurts the least. And hug that shape in for a stretch. And so for the rest of this class we're gonna be doing a lot of stuff with the box both short and long. But we do not want the jump boards on.
So while they're stretching we're gonna take a little break. I'm gonna take the jump boards off and we'll come back. Okay so the jump boards have magically disappeared. And we also lowered the headrest. So you want to make sure that you have your box handy and ready to go.
And also for the last thing we're gonna do you're gonna want to have some pads 'cause we're gonna be doing some kneeling on here on this nice exfoliating pad which is not so comfortable. So headrests are down because we're actually not gonna be here very long we're gonna be doing overhead. So you need to make sure that the headrest's down. Two red springs. You could also do a red and a blue which is going to be easier on the first part harder for the overhead.
So go ahead and lie down on your back having your knees bent go ahead and rest your feet on the foot bar, reach back behind you for the handles and we'll hold on to them. We're gonna go ahead and start with your legs in tabletop. Press your arms down by your side. Good and extend your legs straight up towards the ceiling. Reach through your hands a lot and let your head and chest lift up.
So you're really kind of coming into a chest lift. Good we're gonna open your arms out to a T. So arms you're opening out to a T. Press your arms down to your side. Lower your legs down towards the foot bar.
They might not get all the way there. Exhale to lift them back up. Good opening your arms out to a T. Good and then pulling them in legs lower down twice. Down up.
And down up and then open your arms. And bring them in so lower your chest down a smidge. Good and then lower your legs down three times. Down up one. Down up two and I don't really care if you want your legs to be in parallel or a turn out.
So whichever you prefer and then open your arms out. Pull your arms down we're doing four with your legs. And really if you prefer parallel do turnout. And if you prefer turnout do parallel because it usually indicates where you have some muscle weakness. And just watch how low your legs go because you don't want to lose that abdominal connection.
One more round so bring your arms out to a T pressing it down we have five lower lifts. So lower down exhale up, lower down exhale up. Three more down you can always bend your knees. You can leave your head down two. And is this last one?
I think so. And then go ahead and bend your knees. Lower your head and chest down. Good let your arms reach up towards the ceiling. And then arms reach down by your side, head and chest lift.
We're gonna extend your right leg out. Switch with your left, and switch, and switch. So you're going to keep your legs going like that. Slowly begin to lift your arms up to 90 degrees. And then slowly lower your arms down as your legs keep going.
Good we're gonna do two more rounds of that. So leg switches, and switch, and arms lower, and lower and lift. Good go ahead and leave your arms by your side. Keep switching your legs for eight more. Two.
Three. Four. Five. Six. Seven both knees in, head and chest lower down let your arms lift up, this is your break.
On an exhale head and chest lift arms reach long by your side. So your arms are going to, your head is gonna stay up as your arms and legs move. So arms are gonna reach straight up to 90 legs extend out. Head stays up if you can, circle your arms bend your knees. So it's basically a double leg stretch.
So inhale reaching, exhale circle around and bend nice. Inhale to reach, exhale circle around and bend. Inhale to reach, exhale circle around and bend twice more. Inhale to reach, exhale circle around and bend one more time inhale to reach, exhale circle around and bend. Lower your upper body down arms are reaching up.
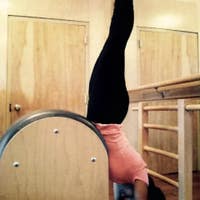
Extend your legs out over the foot bar. So if you have a foot bar that's one of those that's really easy to lower like you can just catch it with your foot you can lower it down. Otherwise we're gonna leave it up. So Meredith straight legs all the way over. So we're gonna do overhead so we're going to start by pressing your arms down by your hips lifting your legs to 90 degrees at the same time.
We're gonna take that shape up and over into a rollover. So legs are going up in over and then if you want you can take that into more of a jackknife so lifting your legs up a little bit higher. Good and then slowly lowering down. Bone by bone you wait till your tailbone touches down before you let your arms lift up. Then your legs move away from you.
Then we're gonna do two more like that. So arms go down, legs go up and over, and then lift up so come down a little bit lower. So she's like super, Brianna's like super yogi so she can come up and be pretty safe coming up really high on her shoulders but not true for everyone. So we're not gonna come up necessarily as high as you can. We're gonna do one more like this.
So we're going up and over and doing that little lift. Good and then slowly lowering it back down. Now we're gonna do a timed overhead. So we're gonna actually try not to let our arms touch down on either the up or the down. So begin to press your arms down and begin to fold your legs in towards your face.
Good they're coming up and over. First one doesn't count sometimes not even the second one. And then begin to lower it back down and lift your arms up and away. So we're gonna start here. So arms begin to press at the same time.
So right now fold your legs in. So keep folding them in good. Now keep your arms from touching so they're just hovering and then begin to slowly lower down and you're just going to create a counterbalance with your arms with that weight. Good we're gonna do a couple more there. So begin to press your arms lift your legs at the same time.
So if you start too late with your legs you never get there. Good and then roll back down slowly. Drop your ribs a little bit. Good and we'll do one more so we're up and over. Good and then slowly lowering all the way back down at the bottom.
Good and then bend your knees feet can come to the foot bar. And we're gonna hang the straps up behind you. Or you can throw them on the floor. Throwing them on the floor actually is also completely appropriate at this point. We're gonna go ahead and grab this short box which is the same thing as the long box which is very confusing if you haven't done Pilates before.
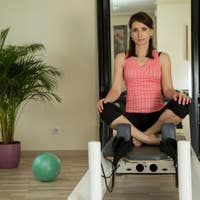
We're gonna have the short box on and we're gonna come to I think a blue spring because I'm feeling like super generous so we're gonna have one blue spring on, short boxes on. So I would actually put it in front of the shoulder rests on this machine. So we have one blue spring no other springs and we're gonna have a seat. And you always want to be seated about a hands distance from the back. Now if you have slippery pants you can always sit on one of the pads.
Anybody want to sit on one of those or you're good? Okay so we're gonna grab the straps. And you're gonna hold on to them behind you. Good and we're gonna do some of our seated arm work like this so we can have a little bit more of a challenge on your balance because obviously we don't have the shoulder rests to kind of lean into which we weren't supposed to do anyway. So we're gonna sit upright ribs are in you're gonna start with your arms by your sides.
And we're going to start by reaching your arms forward to about shoulder height with a little tiny bend in them and then drop them down with more of a bend in them. Good and reach forward. Good and then lower back down. Abs stay pulled in reach your arms forward and lower back down a couple more here. Reach forward and lower back down and last one like this.
Reach it forward and lower it back down. Now we're going to turn that into a little bit of a circle so you reach forward, keep your elbows in that little bend and then you're going to circle your arms out to the side and let your elbows touch your ribs and then reach forward. Circle it out around, elbows touch ribs. Good go forward go out around, elbows touch ribs. One more this direction.
And then we're gonna switch directions so we're gonna go up around and forward trying to maintain that little bend in your elbows the entire time which I think sometimes is a little bit harder then it seems to at the top part of the arc still have that little bit of a bend. And we're going to do two more. Out to the side around and down. One more like this out to the side around and down. Flip your hands so that your palms are facing down.
Lift your arms up a little bit higher than they are. So you don't want your hands to be higher than your shoulders but like almost at almost the same angle. We're gonna press your arms straight. They're not gonna touch but they're gonna come in line with your shoulders and then reach back out. Press your arms straight abs stay pulled in and reach back out.
We're doing a couple more here press and reach. Now on this next one I want you to extend your right leg at the same time. So press extend your right leg out. Bend your knee as you come in switching to the left. Press reach your left leg out and come back in.
Press right leg reaches and come back in. Press left leg reaches and come back in one more each side so we press reach your leg and then come back in. And press the reach your leg remember the ribs and come back and we're gonna try to do both legs together. Arms go straight legs go out. So you want to just you actually want your thighs to be down because if you start to tilt back it's gonna take you the springs are gonna take you with it.
So if I stay down go ahead and reach your arms straight maybe straight first, extend a leg thigh is touching. Extend the other leg thigh is touching. Try not to lean back that's it leaning forward. Bend your elbows out to the side. Good and push, good and bend and push.
And they're bending their knees a little bit so that they don't hit the foot bar and push or at least that's my assumption. Good two more. And last one. Good now bend your knees. Go ahead and just plant your feet down and we're gonna hang the straps up.
So we're gonna add a bunch of extra springs because we're gonna be doing some short box abs. So I'm just gonna throw on. I usually just throw on basically all of them or almost all of them, and then you have the straps. And you're just gonna hook your feet underneath the straps. And let your feet go kind of wide-ish to the side.
So we are going to be taking this into a back bend. If that is not something that works for your body then we won't be doing it. And we're not gonna do it on the first one. So go ahead and start with your arms on top of your abs one crossed over the other and it's a reminder to pull your abs in and away from your hands. We're gonna tilt your hips under you a little bit so pelvis goes forward.
You're gonna try to let your low back make contact with the back and then you're going to take that shape forward. So you're just a rounded through your spine as you come forward so scoot forward like an inch or two further than you are. Just to get a little bit more support. Good so again we're gonna stay round. and we're gonna round back good and then come back up.
Now we're gonna take it all the way into a backbend so Briana is the most flexible back of anyone I've ever worked with. So exhale to round back. So if you don't look like her I don't look like her either. Go ahead and round back so you're going into a back bend. Hands come down into the well.
And push into the floor if you'd like getting a little bit of a stretch. And she could actually touch her hands to her feet but that seems unnecessary in this exercise and also kind of impossible. So the hardest part of this isn't this. The hardest part is getting out of here. So bring your arms and cross them over your abs chin to your chest and you begin to round from your upper back and you're in keep rounding as you come over.
So if you feel like that last little bit is you lifting up with your back we're gonna practice using these outside handles because they are actually useful and they are something that's there for a reason. Or at least I'm told they are. So again we're gonna exhale to round back into a back bend. So we're taking it back going into a little bit of back extension. Good you can bring your hands to the floor if you'd like.
And then bring your arms back. And you might need way more warm up than these ladies do to go into this much back extension now pause there. Grab the straps, use them to pull down and pull your abs down and round over. So that's how the straps are meant to be used if you're doing back extension and you kind of can't find your way back up. So you can always grab hold of that.
We're gonna call that the end of that. We're gonna actually just sit upright. Bring your arms out to a T. We're just gonna use this to kind of stretch your low back ribs are in and we're just gonna do a little spine twist. So lift up to twist towards the right making sure that left hip stays grounded and knees don't move in space and then come back to center.
Good and up to twist to the other side and back to center. And up twist and back to center. And twist and back to center let's do one more each side. We twist and back to center and twist and back to center. Remove your left foot and you're gonna spin around so you're sitting on your left hip.
So you're gonna have your left leg folded in almost like a pigeon kind of position and you're gonna bring your left hand down to the headrest first. Good so you're gonna find a lot of length through your waist and length through your spine. You're gonna bring your right hand behind your head. I always wonder where's put my head and align with anything so chin in line with cleavage is one of the best cues that I've ever gotten. So chin in line with cleavage.
Bring your left hand behind your head so you have both hands behind your head. We're gonna do this a little bit differently than normal so you're first gonna go over and then come back up. And then pause there and you're going to rotate your chest open towards the ceiling. But trying to keep your lumbar spine down. Good you're gonna come back we're gonna do that again.
So we're going over so again trying to find some length through your waist lift it back up length here and then it's a rotate open and back. Just two more 'cause these are so hard. We'll go over and up twist open and back. And if if you notice she's doing a really nice job. They're not twisting their hip open.
they're twisting their upper back in their torso open. Good and then the best part of this exercise lower down bring your left hand to the left side right hand to the right side and then fold forward. So you're getting a little bit of a stretch in your QL which is that part of your low back that's sort of the opposite of your obliques which is probably the one that was screaming. And then you're gonna come up and the bad news is we only did half of that exercise. So we have to do the other half facing the other way.
So you're on your right hip this time. Hips are gonna be stacked, leg is gonna be straight. Right hand down on the headrest to get yourself situated. Left hand behind your head. Use your hand behind your head to lengthen your neck so you have a lot of length through your spine.
Pull those ribs in, right hand behind your head. So this is your start and stop position. Inhale over, exhale to lift hip stays put you rotate. And back to center, and go over, and lift up, and rotate, and center wider elbows if you can. Just two more over and up, and rotate, and center last one.
Over, lift up, and rotate, and center. Now the final big rotation and then you come into the stretch which again the only part about that exercise that anyone likes to do I find when I teach that class. Okay so let's come all the way back up. We're gonna come to a single blue spring. If you don't have a blue spring you could do it on a red spring.
I would do it on a red spring if you were doing this if you didn't have a box 'cause you can actually do this exercise without a box. Alright come to standing and your heels are gonna be right up against the box and your hands are going to come to the foot bar. So first we're just standing in a forward fold. We're going to take both of your feet and turn them so they're facing towards the left. But you're going to keep your torso facing towards the center.
Good so you're gonna lift up and drop your hips down. Good from this position you're gonna keep your shoulders where they're in space. Press yourself out into sort of a plank. So this is kind of similar a little bit to snake in a way. And then go ahead and lift yourself up.
Except much easier to do. Good so press out let your head drop and try not to drift away and then lift back up. Good and then press out. And lift back up. We're doing five total.
What are we on this is four? I think this is four I'm gonna call it four. So try to keep your back a little rounded when you lift up. Good one more time. Lower down and lift up so we're holding there now bring your right hand to the middle.
Press out into a side plank. So your left arm is going to come up. So you're in a side plank pressing out. Good holding yourself there. We're gonna take this shape travel it forward by lifting your hips up higher.
Good and then press out so you're dropping your hips down a little bit. Travel it out and in good. And maintaining that stable right shoulder. Good and back out we'll do two more like this. Lifting it up pulling it in and back out and one more time.
Lifting it up and back in we're going to lift your hips up rotate your chest back basically coming into your starting position. Pull the carriage all the way into the stopper. Turn your feet so they're facing the other direction. Good so your feet are lined up. You start with the carriage in with your back rounded your head dropped.
You're gonna press out without pushing from your arms. So your legs are pushing out good and then think abs pull you back in. Good and you're trying to keep your shoulders square to the front. Press out and pull back in just three more times. Press out and in twice more.
Press out good drop your head a little bit and back in. And press out, and back in now walk your left hand towards the center. Now press out and your right leg is going to lift up. So you're coming into a side plank. And we all have a better side.
This would be my left better side but I'm not participating in this so it doesn't really matter. Lift your hips up try to keep your body square like you're between two panes of glass. Good four more times lift and come back in. Good and lift up and come back in two more times. Lift up and come back in good one more time.
Lift up and then you're gonna take that and rotate it back around good to pull yourself all the way back in. Turn your feet back to center have a little bit of a seat on the box to take a break and we're gonna change your spring. So we're gonna come to a single red spring. You could probably keep it on a blue. I think a red will be more enjoyable.
And then you're gonna come to kneeling facing this way. So you're gonna come to your forearms. So we're gonna do a little forearm plank action so elbows are down. You're gonna tuck your toes under so it's right at this wood section like right underneath the exfoliating pad. And then press yourself out to a forearm plank.
Good so from there you want to probably be lifted up onto your tiptoes. Good you're gonna move from the shoulder joint so push it out a little bit and pull to come back in. Good push out a little bit and pull to come back in. Push out and in two more times. Push out and in last time like this push out.
Bring your elbows they're right underneath your shoulders. Bend your knees in so your knees come in towards the box and press your legs out straight. So you're trying to keep your hips basically at the same height that they are. Let me tilt under a little bit good. Bend in and press out good one more like this.
Bend in and press out and then bend in land your knees. We're gonna come to your hands so you can come. On these I find them a little bit uncomfortably squishy. So I would have my hands far forward so that you can have the heel of your hand down. And we're going to come to a full plank on the box.
And once you're there I want you to take your right knee and bend it in and touch the box and then extend your leg back. So it doesn't touch the top of the box if you can it touches kind of the base of the box good. Bend in and back and you're just trying to keep the carriage still going for a little walk. Bend in and back and push away more so that you're a broad. Good broaden your shoulder blades on the back side of your body.
Good bend in press back twice more. I think three times more because that balances us. And last one good and then bend your knees to come all the way in. Let's go ahead and magically change our short box into a long box. So we're gonna step off flip it.
Let's go ahead and lower. Or let's leave the foot bar up I think. And we're gonna come to I think we'll stay on a single red. So we're gonna sit facing this way. Probably want to drop the headrest down and then sit with your feet there.
And your hands are gonna hold on to the straps. Good so we're gonna go ahead and start with your hands reaching back we're just gonna start with a little bit of a chest expansion which you're gonna build on from there. So press your arms back. Squeeze slightly between your shoulder blades and then let your arms come forward. So we're doing that without letting our chest lift up.
We're just squeezing back. Good we'll do two more here. Just so we're getting a sense of where we're going. Last one like this now reach your arms forward. You're gonna tilt under a little bit so aim your pubic bone towards your ribs and stay in that position so it's more of like your teaser positioning because that is ultimately where we're going with this.
So press your arms back so you can get a sense of the weight and then arms can reach forward slightly. Press back and arms reach forward. Hold it there bring your right leg into tabletop. Bring your left leg into table top. So we're finding our balance here.
Zip your legs together as if they are one. Press your arms back a little bit see if you can straighten your legs. Good and then let your arms come forward legs bent. Good press straighten your legs. Good and bend so keep your abs pulled in.
So again we want a waste that's slightly behind your sit bones I think some of us like to come up a little bit higher than we need to and it gets it a little bit less in our abs and more in our back which some of us are most of us are probably stronger there. We'll do two more. And you don't have to go all the way straight with your legs and last one pressing back. Good and pulling all the way to come in. Lower your feet down, sit up tall flip your hands.
Let's just do a little biceps so we get a nice full body exercise. So elbows you're gonna stay as high as your shoulders. Bend your elbows in and then extend them just till you feel a release in the spring. So we actually almost all of us need to sit more forward than we actually sit when we're doing this exercise so pull in and reach. Good and pull in and reach.
Last two pull in and reach. Last one we'll pull in and hold. And just eight little tiny lifts to finish. Go eight, two, three, four, five, six, seven, and eight nice we're gonna lower the straps all the way down. Go ahead and hang them up.
And we're gonna come to kneeling on. We'll face towards the camera. We're gonna come to a blue spring so change your springs to a blue. And you're gonna come to stand on your knees on the box facing towards that direction. So yeah you'll face that way okay.
So you're on your knees first. So you have options, the option to do this is a forearm plank variation or a full plank variation. Full plank is harder. You may make your choice, doesn't matter to me. You're gonna bring a hand down.
If you're gonna come down to your forearm you're gonna bring, come all the way down to your forearm but you want to push the carriage out a little bit and you have your knees together good. So anyone who knows me knows anything relating to kneeling side kicks is my least favorite exercise in Pilates. But this is sort of related to kneeling side kicks. So I want you to lift your top leg up and extend it. Good so we're gonna press out a little bit so moving away a little bit leaving your leg extended and then pull to come back in.
Good press it out a little bit and pull to come back in. So you want to make sure your shoulder stays away from your ear. And pull to come back in. These are rough so we won't do too many. Pull to come back in good one more like this.
Hold it out there now you're going to take your top leg little tiny lifts up for eight. Two, three, four, five, six, seven, and eight. Turn into little circles for eight. Two try not to let the carriage move. Four, five, six, seven, and eight switch it eight.
Two, three, four, five, six, seven, and eight knee bends. Go ahead and come all the way back in. And then we have to turn around and do that all over on the other side so think of this as your opportunity to master the exercise if it didn't feel great the first time. So you're on your knees. You want to be far enough away that you feel like you can be stable in that like nice straight side plank.
So I think getting situated as one of the hardest parts. Go ahead and extend your top leg out. Ribs are in shoulders down. Good go ahead and press yourself out just a little bit and pull to come back in. Good press out and pull to come back in.
Press out and pull in couple more here. Last one like this and it's always that one leg that's harder to hold up in space. Hopefully this isn't the one. Go ahead and press out hold it there. Eight little lifts eight, two, three, four, five, six, seven, eight circle it eight.
Two, three, four, five, six, seven switch directions last eight. Two, three, four, five, six, seven and eight go ahead and bend your knee. Lower your hips down so we're gonna come all the way off for it in a moment. Just to get the foot bars out of the way. So we're gonna do one little back extension thing.
So it doesn't need to be super far away just kind of one lower down. You're gonna lie down on your stomach facing towards the risers. And a blue spring is nice red would be harder. Blue spring is nice might as well stay on a blue. We're going to choke up onto the tape and we're gonna do just a little bit of back extension.
So you want to make sure that your hip bones and pubic bones stay attached to the box. Take the straps off to the side. Start with your hands down. And I don't want you to do the chest lift first. I want you to do the arms pull first.
So pull your arms back towards your side without lifting your chest. Good and you want to make sure your pinkies are facing up towards the ceiling and your head is in line with your spine so lift it up a smidge. Good and then lower back down. Good so arms back so you're leading with your arms making sure that you're again hip bones and pubic bone maintain contact. We're gonna do one more now I don't want you to lift your arms as high so pull your arms back.
Think mid level of the box then you're gonna start by taking your shoulder blades back towards each other and lifting your chest up. So your extension is coming as a second part of the exercise not as the first. And then you go ahead and lower your torso down so your in a straight line then you let your arms go. So if it was heavier it would be more helpful for the extension harder on the arms. So we'll do two more like that so pull back not quite as far as you could and then get that chest lifted up.
So you're lifting up finding that extension and trying not to lead with your head because that actually doesn't make you extend more and then lower it back down and finally try to relax your legs just a teensy bit. We're gonna do one more like that. So pulling your arms back by your side. Good legs stay relaxed and then think about really opening here to lift up. Good and then lower it back to that straight line.
We're gonna finish with one arm holds with the other arm reaching forward. So the challenge here is to stabilize with your obliques or else your pelvis wants to shift from side to side. So one arm forward one arm back. And then just switch midair. And try not to let your lower body twist with that because it'll want to.
So there's sort of a part in the middle that does the weight catches and you're shifting the weight from one side to the other. Good we're doing just a couple more here. And this is the last one. Good and then go ahead we'll hang the straps up. Step off to the side and we'll take the boxes off and we'll just put them somewhere else.
So go behind I think behind. And we're gonna bring the foot bars back up. And we're gonna do a little elephant variation I think is kind of nice for a stretch so you can do one red or red and a blue. You don't want to be too heavy. If you have a green, green's probably perfect.
Red yellow is probably also perfect. So we're gonna go for a red blue because that's what we've got but if you have something else at home. We're gonna do sort of an elephant saw combination. So you're gonna stand with your heels flat against the shoulder rests hands on the foot bar. Good and then you're gonna push so make sure your head is in line with your spine and so elephant's a little different than down dog in that it has like a lifted abs and a tilted under pelvis.
And your head can be dropped down. Good you're going to press your legs back a little bit. As you pull to come in release your right hand and reach your right hand across your legs. And then press out with your hand where it is so your left hand where it is. And then you bring your right hand back to the foot bar.
And then you switch so you pull it in across the other leg with your hand. So reach your left hand across. Good and then pull to come back in. So you're just switching your arms and adding a cross. So you want to have the legs pulling in as you cross instead of pressing out as you cross just because then you can get a better stretch.
So press out a little bit. Pull in cross your arm reach for your ankle yeah. And if you want to really reach for it and give yourself a pull that kind of feels nice. Good two more. Press out a little bit.
As you pull in you reach for your ankle. This time I want you to really reach for it and see if you can almost pull yourself and I know she can, if you can pull yourself through to kind of a really big stretch. Because that's going to feel good but remember there's not that much weight on here so don't go crazy and go pushing yourself out. And then go ahead and we go to the other side. So you're gonna reach across and then trying to send your chest through your arms.
Good and then coming back to center. So go ahead and step off for a second. So I feel like I can't do a class without doing a very Julian Littleford specific exercise because we all miss him and I know he never taught this on Pilates Anytime so. We're going to take off the red spring or come to a single blue spring. We're gonna end up with no springs and we're gonna do Julian's no spring tendon stretch.
So may the force be with you. Go ahead and we're gonna have a seat here. Your hands are different and you're not lifting as high as you normally would. So you don't have to worry about that. So have a seat.
You're gonna bring right here on the foot bar. Feet are gonna be reaching out and you're gonna flex your feet. So they're not gonna be touching anything really. So normally you would have your hands this way. If you have a foot bar that can move without you unhooking it I would not recommend you trying this variation because we are pulling on the foot bar in a weird way that may make the foot bar come loose.
Feel like you should put a safety warning at the bottom. So hands are normally here we're gonna flip them. So thumbs are forward hands are back and you're going to push into your hands and lift your hips up so with a rounded spine. Good then you push that shape out and pull it to come back in. Good push the shape out good and pull to come back in.
So it's sort of like a tendon stretch but we're not coming into that all the way standing up version. Okay so we've got the basics of what we're doing. How a seat. Lose the spring. We're going to put your feet in a different position so don't go crazy pushing it out.
You want your toes to be on the edge. So sort of like your tendon stretch position. Push the carriage out. Keep your butt back. Push the carriage out first.
So push the carriage out first. So keep your hips seated push out. Good then you're going to keep your toes on and lift your legs up and back, back only. So we're going up, nice. And then lower forward only a little bit.
And lift up and only a little bit forward. Good so you don't want to go too far forward because there is no springs. Lift up and forward a couple more here. Lift it up and forward one more like this. Lift it up have a seat, bend your knees, throw on a blue spring.
We're throwing on a blue spring just for visual effect here 'cause we're actually not going to use a spring on the last exercise either. But I do want you to come off because we want to make some changes with the machine. So we're gonna be doing a little kneeling abduction work. So if you know that no springs is a terrible idea for you or in some ways really scary or sounds like an unpleasant thing then you're going to go ahead and have a spring on. But it also depends on how your machine works.
So I want this out of the way I think. That works okay so the way this foot bar works is you have this one part that's down. So there's no springs on here. You could have a blue spring on or a yellow spring on but you want it to be really kind of light. Now it's just drifting off into space proof that there's no springs on it.
We're gonna take the pads and you're gonna put them down on this gray exfoliating pad on the end of your machine because it's going to feel more comfortable to be kneeling this way. I would hold on to this for you. You're gonna bring and you're gonna face towards the camera so you might want to walk around to the same side as I'm on. So you're gonna bring your left knee here kind of close to the edge and your right knee on the pad kind of close to the edge. So you already have to pull in to keep it from moving.
So you're standing up on your knees. Everyone feel good? Okay I like to do my arms at the same time as my legs. I have no idea why. If you're in my club you can have your arms go out as your legs reach away from each other.
Inhale as we're reaching out exhale as we pull back in. Good inhale to reach out and exhale to pull back in. So they're running into the way the foot bar is. If your foot bar is different and you could lower it down in a way that you can kneel and have it move I would prefer if their legs could come all the way together but I couldn't figure out how to set up the reformer to do that right now. So we're gonna do it this way.
Good we're gonna do two more. And pull to come back in. Good one more like this. And now let's make it a little bit more interesting. Let's press it out.
And we're just gonna do the tiniest little lift in for eight one in, two, three, four, five, six, seven, and eight pull it all the way in. Reach your arms forward. Tilt your pelvis under slightly so you have a nice lengthened low back. We're gonna do a little thigh stretch. Remember you have no springs.
So you're gonna lean back try not to let it move at all. So Meredith keep your legs yep. So again and stand back up. So again we're just going to do like three. Lean back and lift it back up now if you're feeling feisty you combine them lean back let your legs abduct.
pull them in as you stand back up. And you could do one more just for practice keeping your hips tucked under and coming all the way back in. I would bring your hands down just so that you can safely sit up put your feet off. Walk it around to the other side. This would be, you notice all teachers when we're told to like walk it around to the other side we just hop over it and don't walk around to the other side.
But this would be like one of those exercises that I would say walking it around to the other side is probably important. So we're gonna have your arms hanging by your side. Inhale as you abduct and exhale as you pull back in. Good inhale as you reach, exhale to pull back in. Good inhale to reach, exhale to pull back in.
She's laughing over here and I don't know why. Good two more. I have students ask me all the time like why do we need to do this on both sides? And I'm like I don't know we just do. It's just slightly different, it's just enough slightly different.
Go ahead and reach out we're gonna do eight little pulses out go one, and two, three, four, five, six, seven, and eight. We'll pull everything back together. Arms go forward at first you trying not to let the carriage move two of those. Slight tilts under of your pelvis and that's just to lengthen out the lumbar curve on your back. And then stand yourself back up.
So notice nobody's going crazy and leaning way far back. They're just leaning back just a couple of inches and then coming up we're gonna do two where we combine it. So reaching out and open and then pull everything back in. And one more time out and open and pull everything back in. Hands down carefully make your way off.
Go ahead and just take the pads and we can just throw them on the floor. We're gonna put the machine back together to having some springs on it because that's always nice. We're gonna have a red spring just one and we're gonna do first a little outer hip stretch and then we're going to do a little inner thigh stretch so let's go high with the bar. Because I know you both are flexible. So I know you'll be able to get your leg up here.
So we're gonna do basically a pigeon stretch with your facing this way so. So you can stand there and bring your foot up in external rotation or the leg up in external rotation. And if you want to like I know again that Brianna is super flexible so I could take this for her. I have it on a red because where we're going next. Actually if you want to fold forward and press the carriage out.
She can push away. And breathe. Good then we'll come back in and we'll switch legs. So other leg on. And this stretch does not work for everybody.
If the stretch does not work for you regular figure four stretch ankle over knee kind of pulling back off the bar and hanging back can also work equally well stretching into that outer hip. And if your knee isn't down that's fine too. And you can do a couple pressing out and in. Good and then we'll come all the way in from there. We're gonna be on a red spring for this next one so Brianna if you want to come around to my side of the reformer we're just gonna do a little inner thigh stretch because we did work her inner thighs there some.
So go ahead and come to one red. You wanna be standing close to the foot bar. You're gonna bring your right leg so it's in external rotation left leg also in external rotation up against the shoulder rest. So if you wanted to turn your foot up more you can. We're gonna go ahead and press yourself out.
And you can walk your hands forward. So you can press out as far as your body lets you and the machine lets you because the machine is not long enough for everyone to go for their full range. And if you wanted to instead of being in this external rotation if you want to come to parallel you get a little bit of more of a stretch in that outer calf muscle into your peroneal, which is no longer called your peroneal, it's now your fibularis longus I think. So you can press out from there. New rule don't change any anatomy names.
That's not fair for those of us who learned it a long time ago. Good and then we can come all the way in. Walk it around to the other side. And in case you haven't figured out they're sort of winding down the class. I'm not gonna be throwing anything crazy at them anymore so turned out and turned out or both parallel.
And press out and walk yourself forward. A it's totally fine if you just choose to stay upright. And whatever degree you want to fold forward is also fine. And then you could also try the the parallel version. And you can try having this foot flat because that's gonna get more of that stretch into the outside.
And I know that 'cause for me this is a super tight area so it feels really good. And then go ahead and we'll walk yourself all the way in. Slowly coming up. Just turn to face the camera so you can see your pretty faces. Inhale your arms up and look up.
And exhale down one more time big inhale up and look up. And exhale down give yourself a hand. Nice job you guys are great. (hands clapping) And I'm sure everyone at home was great as well.
Comments


You need to be a subscriber to post a comment.
Please Log In or Create an Account to start your free trial.
