Description
About This Video
Transcript
Read Full Transcript
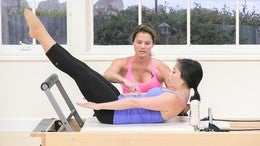
Hello, Pilates people! I am super pumped to be back at Pilates Anytime, teaching a fun reformer class. I've got Kada here as my student, and I think we should just get started, all right? So what we need to know here is that we're going to use the reformer. I've got her loaded for her footwork, she's on three red springs and a blue, and then we're going to use the box in a little bit. So if I could get you to lie down on the reformer with your feet on the bar.
We'll start just grounding, relaxing, okay? I like to put my feet so that my heel is just barely underneath the bar, and I can feel that sweet spot just above my heel grounding, or resting on the bar, I suppose, breathing in through your nose, and breathing out through your mouth. Feel openness through your chest, feel your bones settled. Allow your thigh bones to root deeply in your pelvis, and feel a little awareness in your inner thighs. And with your next breath, engage your abs to lift your pelvis, just your pelvis, that's all, and then lower back down, inhale.
And again, exhale, lifting your pelvis, and lower back down, inhale. And notice your shoulders and try to feel that your shoulder blades are nice and grounded. As you do this movement, they don't pull forward. And lower back down, and go through the full pelvic curl. Exhale, abs first, lift the pelvis up.
Feel that idea of scooping the pubic bone through the legs, lengthening your spine, inhale here. And with the exhale, lower down, staying engaged in the inner thighs, soft through the feet, enjoying the breath, wonderful. Inhale. Use the exhale to peel up again. Feel that your focus is lengthening the spine more than lifting.
And then as you lower down, that same lengthening focus, feeling the openness through your heart, yeah, and the heaviness in your arms. And just a couple more pelvic curls here, exhaling up. Wonderful. Feeling the hamstrings engaged, lengthening just a bit more. I kinda think about bending my knees a little, and flex your feet just a bit.
And then lower down, scooping in, and lengthening the spine as you lower down, feeling that nice easy articulation. Just one more pelvic curl, please. Beautiful. Let's stay here for just a moment longer, two breaths, feeling the openness through your hips, feeling the engagement in the back of the leg, really grounding your shoulders. Draw your abdominals active a little more, Kada, beautiful, and then lower down with that wonderful lengthening feeling.
So reach back and hold the pegs by your ears. Feel this and allow your collar bones to open a little more, your shoulder blades to anchor, and just sway your legs to one side, really easy-like. Let it be easy. And then easily bring your legs back, so we're not yet shaping this with the core so much, just an easy sway to the other side, wonderful, and then an easy sway back. One more time like that before we start to heat you up a little bit.
Mm-hmm, that's a promise. (laughs) Come back through to center, and last time. Nice, ooh! Little chiropractic adjustment may show up. So lift the legs to table top, squeeze the knees together, and let's inhale to twist again, feeling that we're going for range, but also really using the abdominals. Pull back to center. Again, inhale to twist, and exhale.
Lengthen your spine to pull back through center, so think about that. Twisting, and when you pull back, see if you can soften the back ribs down first, and it's really the middle spine that I'm looking to make a connection. Inhaling to twist again, lengthening through that middle spine, beautiful, to pull back. Adding on, twist, straighten both legs, keeping them glued perfectly together, and then pull back through to center. Bend your knees.
Inhale to twist, squeezing the legs together, straighten. Pull back through to center and then bend your knees. And we go again, inhale, twisting. Straighten both legs, reaching just a little more. Pull back through to center, and then bend.
And last time, please. Squeezing those knees together, pull back through to center, and bend. Pause there, reach your hands to the ceiling first. Use an exhale to lift your head and chest. Reach around to the backs of your legs, lift your body higher, lift your pelvis, hug your knees into your chest, trying to make a forehead to knee connection.
Take three breaths there. Good, allow your knees to bend, and then lower your body down, and let's move into the footwork. So with the heels on the bar, the ankles are flexed, and we're separated about hip-width distance. When you feel grounded and ready to go, we press out. Exhale, and inhale to pull in, finding a nice comfortable pace, not too slow, not too fast.
See if you can elongate a little bit more each time you lengthen your legs. Feel both the hamstrings and the quadriceps involved. Even more importantly, feel the inner thighs. I like to think about squeezing my upper inner thigh bones together a little bit, and then lifting your sternum just a little bit, hopefully without flaring the ribs. Do two more like that, and one more, please.
Now, shift to the toe position. When I say toes, I mean the balls of the feet. The toes may be slightly pulling back, depending on who you are and what your feet like to do. Exhale to press out, and gently come on in, nice. So with Kada, I want you to feel here that you're really pressing through the balls of the feet.
Press out and stay up a little higher right here. Now you're dazzling me, Kada. Come on in, thank you. Beautiful! So I do want that maximum lift in the heel. Now see if you can soften your toes just a little as you continue on, without changing anything.
So they're not so actively pulling back, but they're not prehensile either, right? So you've got that bend at the metatarsals. Just give me a couple more like that. Nice, just a little more inner thigh at the top, please, and then come all the way in. Slide your heels together, slight adjustment of your foot.
Still maximum plantar flexion, so exhale to press out. When you're in the out position, we're at maximum, and then the heels stay there. So you'll establish the high position when your legs are straight, and then you're gonna do your best to keep that there. Feel those inner thighs, exhale. Inhale in.
Each time you come in, feel the softening down of the tail bone. Feel the lengthening through the crown of the head, the lengthening through the upper spine each time you straighten. You can reestablish your shoulders by kind of pulling your shoulder blades on to the mat a little, and feeling that openness through your collar bones. Last one. Really nice.
Come all the way in, make open V position, so heels are wide. Really flex those feet back with intention. Look at that dorsiflexion, that's awesome. Out you go, exhale. Good, and inhale in.
So notice the feet stay completely still. What this does is it helps to actually mobilize the ankles. It's so wonderful, so important to have mobile ankles for so many things. Good. Now, in this position, I want to do a little rhythm change, so stay low, and give me those little pulses in and in.
Focus on pulling in. Whoopsies! It happens, even to the best of us, we bonk the stopper every now and again. (laughs) Open through the chest, calm the breath, feel the softness. Now, let's make this a little bigger, really use the legs, pushing out, pulling in, pushing out. Beautiful, wonderful, I love it. That was a lot of love there.
Press all the way out to straight, come all the way in, put your toes now where your heels are. Once again, you want to feel those metatarsals, the balls of the feet, on the bar. Exhale to press out, good. Here's where we establish the foot position. I just want you right there, my sweet friend.
Now come on in. So I'm just holding your feet still here, beautiful. Those of you that have a lot of outward rotation, explore this idea of not rotating out as far, and see if that feels different. I bet it will. When you come in each time, see if you can press through that first metatarsal.
In case you are unsure what first metatarsal is, it's the ball of the big toe, and still keeping that foot perfectly stable. Just two more, please, here. I absolutely love this. And then come all the way in, bring your feet close together. I often bring them all the way together, find center, and then separate.
Press the legs out to straight, stay there. We're in maximum plantar flexion. That means high up on our toes with inner thighs, beautiful legs here. Lower down, but keep the weight in the front of your foot. Press back up.
So I'm gonna limit the movement here. Don't go all the way. Really articulate through all five metatarsals as you press up, and give me a little more inner thigh. Go down, beautiful. So this idea of pulling the thigh bones together as you press up, beautiful.
When I say together, I don't mean that they're going to touch. I just mean that you're giving that knee the sensation of squeezing something. Two more just like that. Going a little deeper into the stretch, beautiful, and pressing up, and one more time, deeper into the stretch, good. Prances, pressing up to go down, and up, and down, and up.
Both feet are working equally. See if you can work to articulate through all five of those metatarsals, the balls of the feet, still staying contained in the inner thighs. I love that you knew what this meant. Clap your hands for inner thighs. (laughs) It's wonderful! Hold your stretch on one side. Adjust your foot so you feel comfortable.
I often like to move it up, and then just really let my feet relax over the bar. Really enjoy that stretch. Press up, switch sides, let those toes relax over the bar here, and enjoy the stretch through the bottom of the foot, the back of the ankle. Nice work, good, press up. Bend your knees and come in.
For single legs, we keep the spring the same, so put your heels on the bar, flex your ankles. Press out one time. Remove your right leg and put your right foot down on the little wood piece here, the frame. It's going to stay there, but it's not going to work, so the other leg is working. Go ahead and bend and come in.
Feel the connection here. So you want to keep the inner thighs engaged. You want to let the other leg move and engage the back of the leg, the hamstring, which will help you keep your pelvis stable. It might also allow you to work a slightly heavier spring. So we didn't change the spring, we kept it the same, although I don't want you to be working this other leg.
We were gonna do 10 here, and Kada's counting for me because I can't count and talk. So when we're done with 10 here, if you're going at the same pace, hopefully you'll be perfect. Thank you for that. We'll switch sides. So press out, one last time.
Lift the leg up, reorganize your feet, yeah? And then you're gonna put your other foot down and bend to come in. So again, what I like about this is it really gives you an opportunity to feel the difference between the two sides, which is kind of my focus today. Today, I really want to work on the sensation of asymmetry and feeling what the two legs feel like, the two arms, the two sides of the waist, whatever it may be. Really good, I like this a lot.
So all of these other pieces are still present, your abs are active, your upper back working, but a little extra hamstring work, because the leg is down instead of up. Perfect. And then we'll come on in one more time, or press out one more time, rather. Put your foot up, bend your knees to come in. Now put your toes on the bar, and we do the same thing.
Just going to move you over a little bit. Press out again, and then go ahead and remove now the other leg, and place your tall, the ball of your foot, right on the wood frame, and we do the same thing. And notice that it is possible to have both legs straighten both at the same time, especially if your feet are in the right position. So it may take a little finesse here from the ball of the foot to figure that out, but once you figure it out, I hope you enjoy this variation. Feel the inner thighs, and also feel that other hamstring, really engaged in that little bit of extension each and every time.
Nice. It's interesting because even though we're not working the other leg in the same way, you may find that it gets tired in a different way, which is kind of interesting and fun. Exploring, right? So we'll do 10 here. After the last one, you'll stay out.
Lift your leg up. Wow, that was me guessing. Can you believe that I guessed correctly, Kada? Cool, let me just move this foot here. Press out one last time, and now we'll switch sides.
Perfect. Now, the only reason I'm okay with making the shift when we're out there is because you have both feet on the bar. It does make it a little easier to find the wood chunk, so that's a nice bonus. And some of you may not quite be able to get all the way into the stopper with your foot on the frame, and certainly, that's why it's nice to start in the out position. Again, feel the inner thighs, and feel the other side hamstring.
So the leg that's not on the bar, you want to try to engage that hamstring to feel that openness through the hip each and every time. Beautiful. So the final one, we'll stay out to lift the leg up just so we don't get stuck on anything and we know exactly where we are. Beautiful, and then come all the way in for me. Go ahead and hug your legs into your chest for a breath or two, and we're going to come up next to the reverse knee stretch.
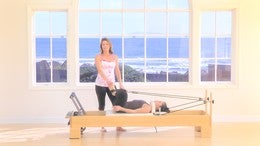
So I'm changing the spring to one blue spring, and you'll come to your knees with your hands on the frame, okay? Hands should not be too far forward. I find many people go too far here. So I want you to start in what feels like a quadruped position, and then pull your shoulders beyond your wrists, round through your low back, and pull the carriage in, beautiful. Holding this shape for a little while, embrace this idea of levitating up through your spine, really using your belly.
Inhale, legs back, exhale, legs in, stay rounded. There it is, beautiful. Stay rounded when you go back, wonderful. So the traditional reverse knee stretch here, quite good, quite powerful. A lot of abdominal work, and now we're going to play with a one-sided version.
Do one more for me. Pull in and stay here, so we're in this nice rounded position. Lift your right leg up, and chamber your right leg behind your other leg so it's resting. The knees are connected. I want you to now move your pelvis and your body a little over to the right, so you haven't shifted off-center.
We stay there. Just this should feel hard, hard, hard, hard. We're in a slight bit of rotation. Now you pull the legs in and out. Five, use the breath, four, beautiful, and three, I love it, and two, one more time.
Good, hold it in, put the right knee down. Good, now we switch sides. So you're gonna lift the other leg up. Good, take a breath, it's helpful. Come over to the left side, feel that.
Feel the rotation. It's a lot of work just to be here. And five times, we pull in, one, stay in rotation, and two, beautiful. Squeezing the knees together is helpful. And beautiful, I believe this is number five.
Good, unhook the leg, put it where it belongs, (laughs) and rest that, please. Sometimes you can just say rest, right? Do I need to speak so much? Maybe not. Sometimes, yes, sometimes, no.
Wonderful, never miss an opportunity to stretch. So here, you may step off your reformer. You'll change your springs to a blue and a red for your hip work. Lie down for hip work. So the shoulders against the shoulder rest, the head rest, down for me.
Grab your straps. So placing the straps on the balls of the feet here, so not quite on the arches, but more on the ball of the foot, and you'll have to figure out the sweet spot for you. We're gonna go parallel alignment, so the big toes touching, and the knees will be touching when the knees are bent, so go ahead and bend. The heels can be parted a little bit, so this is kind of like you might be in a chair pose if you take yoga. I want you to really work on pulling those pinky toes back.
Squeeze the big toes, or the inner part of the foot together and the knee together. Push out through the heels to straight, good. Inhale to come in and exhale to push out. So notice the shin bones are gonna stay perfectly aligned. This is way harder than it looks.
Squeeze here, good. I want you to think of squeezing the knees together when you come in. Allow your knees, maybe, to come in a little further, even if your back flattens a little. I just want you to not totally lift your pelvis, if that makes any sense, right? So that's giving us a little bit of an abdominal, I don't want to say crunch, but engagement there, and also helping to increase hip mobility, perhaps for, like, the deep squat, which I'm a fan of these days.
Press all the way out, beautiful. Do one more here, not going quite so far, stay here. Now, you're gonna keep the pressure on one foot. Let's say this is your left foot, correct? Keep the strap on the left foot.
Straighten the other leg up to the ceiling. Now, you're gonna push out for me with that left leg. Now, Kada, this is hard right? I want five, okay? So you can count for me while I cue.
Feel that this leg stays very still, the knee is straight, okay? And you want to feel the other leg graze by, right? And keeping the arrangement in your foot. After your fifth one, you'll come in and pause, and then you'll bend the other leg and find position. So here we go.
I like it, I knew we were close. Beautiful, so hold this, straighten the other leg so it's straight up here, and we feel that, good. And then press out, wonderful. Think of pushing through the heel. Let the strap assist you in the dorsiflexion, or the flexed foot position, and you're going to feel a different experience on your two legs.
Again, we're doing five just so you can sense the differences. Now, if you have one side that needs an extra one, I'm going to leave that up to you. Do an extra one, you'll find out, you'll decide, right? Then you'll bend both knees and press out one last time. You can scooch the straps down a little if you'd like by pointing your feet, and you'll go through a few circles, just easy circles, press down.
Come around to the high position, glue those heels together. Enjoy the hip work here, pushing down through center, and then nice big opening, beautiful. And again, nice big opening, and let's reverse. These are just to give you some freedom in your hips after all that containment. I know, most of my friends always appreciate that.
Feel the openness here, through the chest. Feel the engagement in the core as you try to go just a little lower, perhaps. And then we'll hold here. Bend your knees for me, and we'll move in to your short spine. Exhale to press out, point the toes.
Fold it to your hips until you find your way to the stopper. Use your belly to roll up, enjoy that, stretching up nice and high. Bend your knees with the inhale. Use the exhale to lengthen your spine as you roll down. Let your legs come in a little bit, and then pull this whole piece through, and then push your legs out to straight.
Folding at your hips, we'll just do one more, and then we get to play a little bit more here. Rolling up, nice. Bend your knees big, keeping this shape, keeping this length here, and then roll down. Wonderful, keep the shape of the legs as you pull the spine through, and then push the legs out to straight. So let's stay in outward rotation.
We come to 90 degrees at the hips, holding that right there. Really find those inner thighs, and use an exhale to roll up through your spine. Now, we play with a single leg, long spine. Absorb the tension with your left leg. Bend your other leg just a slight bit and put that heel right next to your other ankle bone, and then roll down here, keeping the shape of the legs through the remainder of the exercise.
So you'll put your pelvis back down. Feel the work in the one leg. Push both legs down. Inhale to a 90-degree at the hip, keeping the shape of the leg for me, and we exhale to roll up. We're gonna do two like this so you can really feel it.
Inhale here, stay. Exhale, roll down, try to feel both sides of the spine hitting equally, but really, one leg's supporting you. Dropping the tail bone down, and then push the legs down. Beautiful. Come up one last time, inhale.
Use the exhale to roll up. In the up position, reorganize, feel both legs. So stretch this leg to straight, beautiful. And then take this foot and put it right next to the ankle bone and have it connected. Roll down, both sides of the spine, beautiful.
Make a connection. Push down through center. Inhale to that 90 degrees, totally different sides. You feel it, don't you? I know, I saw that! I saw that! Lift, lift, lift! And roll down, feel it.
Beautiful, drop the tailbone down. I know, it's, like, killer. Good, push down. Next time, make sure you try using the other leg first. This is the last one, right?
I know you'll keep me real. Keep that, keep that, keep that. Reabsorb, open your legs, roll down with control. So the opening is only shoulder-width here, right? Drop the tailbone and then give a little circle of the legs to complete that.
Bend your knees, let the bottoms of your feet come together and your knees open, and just take a couple breaths to let go, (breathes deeply) and get ready to move on. (laughs) Take your feet out of your straps, please. Put them away where they belong. We're gonna come up and do a variation on the scooter. So I'm on one red spring, okay? And the placement is going to be, you can go ahead and put your one foot, you can start on that side.
So you're here, okay, you have one foot up against the shoulder rest. Your other foot is going to step back near that foot, so much like you would do if you were doing the BASI scooter. And then press your leg back to straight. Oh, this is cute, we can do it together here. All right, now I want you to push back even further and bend the knee, feel this nice, straight body.
Make sure your shoulder feels okay with this, yeah? And then here, can you straighten your leg? We'll come in just a little bit as we do, beautiful, and press back. Now, if you feel comfortable with your shoulders extended, or flexed, in this position, straighten your bottom leg here, but keep this kinda forward motion with your chest. I'm gonna step away, you're in charge now here, my friend, good.
All right, so we have a standing leg and we have a standing arm. The standing arm is the right arm. We wanna square the pelvis. If you are working on your own, which most of you are, look down at your pelvis and make sure it's square. I'm here helping this body right here, beautiful.
The standing leg needs to be just slightly bent so I can feel the hamstring. Now, we hang here for a little bit. Let your left arm, or your free arm, dangle. So we have free arm, free leg, body stays still. Allow the back knee to bend in.
Push back with the hamstring, the pelvis stays still, so does the spine. Go again, inhale. And actually, I want the reverse breath. Exhale to pull in, and inhale back. At a connection, hand to knee, and then the arm reaches with the leg, so the back stays perfectly still, good.
Nice. And we'll do just one more like that. Pause the in position. Good, round your back and stay here. So not quite as much with the upper back.
Give me just a little less right here. Yes, so it's here, and then I want just a little more right here, nice. Now, continue on. That was just me being picky for a moment, love it. This is a very mobile spine.
My spine doesn't do what you do. Most importantly here, I want this to be nice and stable. This is quite good, I like it. Slightly soft knee. There are a lot of pieces working here, nice.
And I believe we have one more. And then we'll gently come to close here. And then come up. And we'll go to the second side. And the interesting part about this is you have two sides, and both of them will feel very different from one another.
It might be a different challenge. I forgot to mention to really work on tucking the foot here, getting a real powerful foot position. Hop your foot back just the slightest bit, I think, and then press your leg back to straight. And here, this is exploration to find the position. We're gonna square the pelvis, we're gonna bend the knee.
We're gonna lunge the chest forward a little bit, if that feels good, so let your head kinda come between your arms, right? Beautiful. Feel that this is your standing arm. Can you move your left hand in a bit so it's, yeah, perfect, so it's more square. Now be here for a couple moments, straighten up a few times.
Just check it out, this is like an exploration. Where do I feel comfortable with my shoulders? Good, and this body feels comfortable in this low position. Stay there. So we're gonna keep the body here, but straighten the leg back and up, wonderful.
Watch that you don't lock your standing knee. Let your free arm dangle, and then you come in with the knee, keeping the pelvis still, and reach back. Use the breath, the exhale, to come in. Now, I'm on a red spring on the button. I don't know if I actually said that.
If I didn't, I'm saying it now, and I apologize for not saying it sooner. One red spring. Good, we add the hand to this. I forgot to do that, so here we go, reach, good. Nice, just do one more there, good.
And then here, come in and pause, round your low back here, not too much from the upper back, right there. Feel this pulling up here and go. Reach back and come in. So the arm and the leg are moving in a cross-patterning. This is so valuable for functional strength, also just to open our eyes to imbalances.
Feel the different sides. Enjoy the difference. Feel the hamstring here. Good, and about five is what I was looking for. And then rest there, beautiful.
It's important to remember that if you have two different sides, and you need to do a few extra on one side, that you don't have a problem doing that. You're gonna go to your knees for me for chest expansion. I'm still on that same red spring. The knees are up against the shoulder rest. Hold the ropes above the buckles and stand tall.
First feel lengthening through your low back and grounding through your shins and your feet. Exhale, pull your arms back, open your heart, beautiful. So I've been really, (laughs) lately, cuing a lot about lifting the sternum for shoulders, rather than pulling the shoulders down. I find when I pull my shoulders down, I compress my low back a lot. So here, stay for just a moment, and lift the heart up a little bit more.
That was beautiful. Hold this. The arms stay by your side, grounded through your shins. You're gonna bend your knees and sit on your feet. Keep your arms with you, beautiful.
Chest expansion a couple times here. Keep the lifting of the sternum, the openness of the heart, still the length in the low back, good. And do it again, keep the arms back and hold. Press into the tops of the feet and your shin bones, and come back up to your chest expansion using your core and your hamstrings. Arms again, three times.
Here's one, beautiful. And two, I love it. And stay back with your arms, keep that control, and sit down on your feet. This is your last time, three times, wonderful. Love this.
Last one, keep those arms back, lift up. Push into the tops of the feet and gently come to rest there. Chamber your straps on your pegs, or wherever they belong, and we're gonna sit in, like, a pseudo-mermaid position. So how about you have your right leg forward, yep. The other leg hangs off of the reformer, so the foot is resting down, perhaps.
So I want you to start with this feeling of stretch. So you want to try to feel equal weight on your two hip bones. Let this stretch position be here, and lean forward a little, enjoy. That should feel nice. And then sit tall.
If you're unable to put the thigh down here, perhaps you manually rotate just a little bit to try to find just a little more stretch, right? And then come back up, and we stay there, okay? So now, we're going to work a little bit deeper here by straightening the other leg. Reach your right arm up into the air. Reach forward and retrieve the strap on the opposite side.
You want to hold the rope above the buckle though, yep. So here, keep your hand on the shoulder rest and sit tall. Ground both sides of your pelvis, and then using your back and your core, rotate around. Good, and then reach forward, release the other arm, and rotate in the reverse. Keep both sides grounded, rotate around, and reach forward.
Oh, I'm in your way. Oh, you're so sweet! Just move outta my way! Here we go, and reaching open, I love that, I love that stretch. Yeah, yeah! And again! And reach forward. Okay, so you may continue on like this, or I have one more option that's so wonderful. Hold a neutral position, bend your left leg, and pull it up underneath you like a mermaid.
Now, if you feel comfortable and pretty grounded here, continue on. This will feel quite good, I think. But if that's too much on your knee or your body and you can't ground your other hip, then feel free to keep the leg out. So I want just a little bit more lengthening of your back as you come around, so this lengthening up through your back. Beautiful, now you're using your core a little more, and you're using your upper back muscles to help you more than your low back muscles, nice.
Good, I think that if I ask you to do two more, that would be five and five. That's what I'm hoping for. Beautiful. And then you can rest that, so we'll switch sides, yeah? Okay.
So now, you'll take your other leg, and you kinda want to line it up kinda like the pigeon, in front of the shoulder rest, and sit there for a little while. Ground yourself, feel your pelvis anchored, feel your leg resting, maybe lean forward a little bit. If you find that you have two different legs, just like everybody else in this world, spend a little more time on the one that needs a little bit more love, beautiful. And then sit up nice and tall. You can stretch the other leg out to straight, so now you're going to take your left arm up.
You're gonna reach across and find your strap. So it's the same arm as leg here. Good, and then start with your hand on the shoulder rest, just to feel grounded and anchored, and you'll pull around. Good, and then go all the way through, releasing your arm, wonderful, and we pull around. So feel that the movement comes from your back more than your arm, right?
It's more about moving with your back, wonderful. So you may feel free to stay with this version the whole way through. We'll do one more like this. Or you can pause in the neutral position, you'll bend your other leg, pull it up underneath you like the mermaid. Try to square your pelvis and sit equally on both sides, and then away you go, pulling and opening.
And again, feel this coming from your upper back, your low back long, your abdominals quite active. Nice. I like this a lot, good. Working that full range of motion, and I believe one more will make us even on the two sides. Perfect, love it.
Go ahead and rest that. Put the straps away, and you're gonna come around on your knees for me for the shoulder push. The knees are right up at the front of the reformer, slightly open, if that feels good. And then press out, let your chest relax forward. I'm looking for a little bit of flexion in the spine, so the head is going to come down just a little bit.
Good, wonderful. So here, your hands need to be a little narrower than the width of the bar. Bend your elbows for a couple shoulder pushes. Just push and press out. We're gonna work range of motion here.
So first, we'll just do a couple like this, like we're used to, using the arms. Good. Now, with the next one, we're going to work a little bit deeper, so bend again, and what I want you to do is find a connection with your forearm to the frame of the bar here, and sort of anchor that, right? Here, you're going to open your chest a little more. Notice the head needs to go under the bar.
Find a little bit of outward rotation, and go a little further. See if you can thread the head just under the bar with that wonderful shoulder position. This is about range of motion, shoulders stretch. And now, keeping the forearm down as long as you can, start pressing out, so you're opening up the elbow. And then when you need to, you press all the way to straight.
That should feel really good. If it doesn't feel good on your shoulders, certainly don't go as far. Try to get that forearm down sooner. Feel external rotation and opening through the collar bones, through the shoulder blades. Push, keep the arms down as long as you can, and then, when they have to lift, nice work.
For me, this helps with that flexibility needed to do Prone 2 on the Cadillac. That's the one where the arms come up behind you. It's a really, really nice shoulder opener. How about one more, one more here. Bend, bend, bend, feel that connection.
Go deeper, and then really pushing into the forearm and the hand, feeling that opening, and then press out. Gently come out of that and rest, please. Wonderful. We're going to step up to the elephant position. So with two feet flat, we're still on the same spring, I'm still on a red spring here, I haven't changed it.
Certainly, if you need to, you can. We've got a nice flat back here. Let's do a couple inhale back, exhale in. Nice! Something familiar. Next time, you'll find that stopper with ease.
Thank you, my friend, thank you. (laughs) Oh, that was a silly laugh, wasn't it? But at least it was a laugh. One more time, pull in and stay here, I love this. Now, let's bring the right hand to the center here, okay? Now, your left leg, the other leg, is going to be the standing leg.
The right leg comes back, and just rest on the head rest. Try to keep your pelvis square and your back straight. I find, most of the time, when we lift one arm or leg away, everything goes awry, so look at your own pelvis and make sure it's not wonky. Press out and in a few times, so we're doing just a single leg elephant. Really feel your hamstring and your abdominals, your hamstring and your abdominals, good.
And one more time for me, that would make four. Stay here. Lift your other leg up now. Find it parallel with the horizon. So I'm not looking for a dazzling arabesque, I'm just looking for parallel here.
Now, go back and in a couple more times here, just a couple. Just two. Now, stay here. Bend this knee for me. Beautiful.
Work on bending the knee more, all the way in, and straighten. Nice. And bend the knee all the way in. Look how square this pelvis is. We could probably get just a little more upper back, wonderful, nice.
One more time like that. I love that bent knee. We're gonna keep it bent here. We are going to, we're not gonna. Stay here, nice and bent.
Shift forward so we can straighten out the back here. So you've got equal weight on your two arms, nice flat or ironed out spine here, beautiful. You now have a standing arm and a free arm. See if you can let go. This stays still.
The knee comes in to touch the hand, the body stays pretty still. The arm and leg reach, shoot out. Go ahead and straighten the leg, it's more fun that way. Good, come in and then shoot out. So we're looking for keeping the pelvis square, which is really hard to do, by way of the abdominals here.
A little help from your friends, the back muscles, but really honing in on the abdominals, nice. Is this our last one, Kada? And then you can put your foot down. (exhales deeply) Reorganize, maybe take a forward fold for a moment, allowing your arms to dangle, your shoulders to rest. Oh, boy, so necessary, wasn't it? (laughs) Walk forward, placing your hands back on the bar, and we shift sides.
So you're gonna bring your left hand into the middle, and then put the other foot down, whoopsies. I'll help you. And lift up just a little here, that's nice, I like it. Okay, so keeping the foot down, you slide out and in. Love it.
Keep the pelvis square, harder on this side a little bit, keep it smaller. Good, let's do another one. That was nice, one more, please. Good. Now, hold.
Good, lift the leg up, straight up, stay connected to your core. Stay weighted on your left arm. Your left arm is your weighted arm, right? Now, slide out and in, just two times like we did on the other side here. Beautiful, keeping that pelvis still.
Good, now stay here. Bend your knee, really use the hamstring. How bent can you go? This is so hard to do, actually. You'd be surprised how hard it is to bend your knee that far.
Good, I want a little, uh-huh, and that's what I'm here to help you with. Good. Nice, keep the knee bent on the final third one here. Lift your heart up a little bit. We're straightening out the spine here, parallel with the horizon, a little more belly, a little more upper back, good.
You're going to have a dangling arm, yeah. Bring the knee in, keep the carriage still, touch knee and hand, and then shoot the arm and the leg out, good. I'm not looking as much for up as I am looking for out, so that this pelvis stays parallel, or square. Very difficult to do. Even with all the effort in the world, it's hard to figure this one out.
Good, and I believe we have one more to be even. Perfect. And then you can shift to your legs once you've completed those. Take a forward fold. (exhales deeply) Let your shoulders relax, let your head relax. Look at that, we're folded in half, it's nice. (laughs) And then gently step down from there.
All right, so we'll do a quick stretch here. Go ahead and stand on your right leg, and then we'll do like a hip flexor stretch. Okay, and then your other foot up against the shoulder rest, but here, I want you to bend your front knee a lot. Slide your back leg to straight, and push way out. Bend deep, deep, deep, and then lower your front of your hip down if you can.
You can rest your forehead on your arms, and just be here in a nice, kind of relaxing way, wonderful. So here, I'm okay with the leg going out, the knee going out just a little bit, in order to get this stretch. I'm looking for this opening here. So in order to really be here, sometimes taking the knee just a little bit out to the side gives you a little more space, and then stretches the front hip in a slightly different way. Couple more breaths here, and then bring your knee back in where it belongs.
Pull your body up, lifting in, all the way up. Perfect, perfect, perfect. So now I want you to lift up even more here. Keep your knee down, but think of lifting up through your spine, thank you. I needed to organize my cuing.
So this is lifting up through the spine. Just the knee is resting here, right? So option one, you keep the foot just like this. Option two, you can unhook the toes and just rest it on top of the shoulder rest, which might give you just a little more stretch here, really feeling this wonderful lift. Now, take same arm as leg that is back and reach up, lifting, wonderful, and then reach over, and enjoy that stretch.
So focus more on the up, but this is stretching that whole side body, perhaps a little IT band, a little bit of a quad stretch. That should feel really quite nice, I hope. Take another couple breaths there. See if you can go more up than over, my friend, and then rest that. And let's switch sides, yeah?
So we have two positions here, one with a straight leg, hip extension stretch, go ahead, and then the other one is a bent knee, and we're still working on hip extension. So really push back, enjoy that stretch. Focus on letting your hip relax a little here. So where I'm going to ask Kada to work a little is kinda drawing back on this left side to square the pelvis. That was a really nice shift.
Okay, so just be there, and feel that you're here with some sense of ease. She can actually relax her head. This knee might be rolling out a little bit. That's okay with me because we're looking for a square pelvis and a nice stretch here through the front of the hip. Take a couple more moments to breathe.
Feel the ease here, wonderful, and just a little more of that. Love it. And then here, slowly bring yourself forward. So you're gonna come forward, start to bring your hands back to the bar, lift your body up. You're standing as upright as you can with your knee connected.
So when I say lift up, the knee stays down, but the body lifts more, and I just got more height out of you again, that was beautiful. So we're really using the belly and squaring the pelvis here. You can unhook the foot and rest it on top of the shoulder rest if that works for you. Just gives a little more knee bend. And then take that right arm up, craving that stretch too, and just a little bit over.
So Kada, focus more on the up than the over. I already like that way better right there, wonderful. So we got this nice long back, nice easy stretch. And couple more moments there. Looks quite nice.
And then gently rest that, all right. So we're going to do a little side flexion for glute work as well, so let's start facing this way. You're gonna take your two straps and put them on your elbow, like that. You want to have your front heel connected to the shoulder rest, and your back knee connected to the shoulder rest. My sweet friends here, if you're not careful, you could fall over, so make sure you're careful, okay?
You may want to put your hand on the bar until you're sure you have this, okay? I want to get the pelvis squared and the shoulders squared here. Reach this other arm and place it behind your head so you're in this position, and then this just stays still. The spring is acting as an assist. Lengthen your low back a little bit, beautiful.
And then see if you feel comfortable unweighting that hand and making this shape. Now stay there, I'm gonna take my foot away. You have to keep the anchor here, knee and foot into the shoulder rest until you're sure you have this, okay? Let's explore a little bit of range. We're gonna go down and over a little, lengthening your low back as you do, and lift up.
This is really gorgeous, really gorgeous. Go down and over a little bit, feel that? Uh-huh. And lift back up here, good. Now go down and over again, feel that?
And we're going to stay right here. Now, we're holding this shape, if you dare. (laughs) Try lifting the leg up and resting it between, not resting, but floating it between the shoulder rest. Option one, make a connection to the shoulder rest. Option two, lift just above that shoulder rest. Continue on, three more times.
You have to keep that leg really anchored to space or to something. Yes, it's so awesome! There's a lot of gluteal work here too. And then finally, we lift and we hold. Lengthen your low back, feel this. Swing your leg forward, flex your foot, swing your leg back, belly in.
You just have to watch out for the straps. If you lift too high, you'll kick them, but if you find that sweet spot, it'll be perfect. Good. Two more, please. Love it, and she doesn't really need me there.
That just made her feel safe, and it looked pretty, I think. And when you come out of it, make sure you very carefully place your foot, your leg, back where it came from, and come up. We'll do the second side. Nice, right? Yeah.
So you'll turn to the other side. Your front heel is pressing into the shoulder rest, your back knee is pressing into the shoulder rest, so you have a really powerful anchor there. Good, hook your arm, then place your hand behind your head. Use your other arm to support you. Make sure you feel safe here.
So I am looking for this lengthening here through the low back. Beautiful, beautiful on that side, wonderful! Feel the grounding of your legs, and we just explore the range. You don't need to go very far to get something out of this. What I'm hoping that this will simulate is this feeling of lifting up when you're doing exercises like the side kick, or the side kick kneeling on the mat work, or in the mat work. Oftentimes, we rely on our arm too much.
That was three, right? So stay here. Unhook your back leg and float it between your two shoulder rests. Touch something if you need it. Otherwise, keep it floating, and give me three more.
Beautiful work here, I love it, and we're lifted. Oh, yes! And we're down. Good, so you want to imagine that there's an arc to curl over here. Yes, that was beautiful. Stay there.
Swing your leg forward and back, nice. Good, and you just sorta have to find the sweet spot, threading your foot if you lift. So those of us that have more range of motion, I shouldn't say us, those people like Kada who have a lot of range of motion, may find themselves kicking the straps. I can barely get over the shoulder rest, and that should be five right there, right? And you'll rest, very carefully, come out of that.
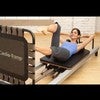
Wonderful. So let's finish with some back extension, yeah? Put your straps away. I'll grab the box for you, my friend. I'm gonna use the box in the long position, okay.
I'm still on that same spring. It seems to be my spring of choice for almost the entire workout today, that's good. On your belly for pulling straps, but we're not going to do traditional pulling straps. The chest is off a little bit. Reach forward and hold the ropes above the buckles, okay?
You want to feel more of a plank position than back extension. Lengthen the legs and feel them slightly hovering. Keep the low back long. The sternum is almost sinking down a little bit, and just the head comes up. Pull your arms underneath you, like plank position, and stay there.
So we're gonna stay in this feeling of plank, using the belly to kinda pull up and away from that box. Pull your shoulders back without changing your spine. And now, very small movement, just the arms back, and forward. Just a small movement back, and then exploring the forward range a little bit more. Beautiful, so the arms will come just a little bit beyond shoulders, and then forward, still feeling this real squeezing together here.
Nice, let's just do one more like that, and then pause in, like, a plank position. That means your arms are straight down, stay here. Absorb the weight of the spring with your left arm, okay? If you happen to be left-handed, maybe you should do your right arm first, but left arm today. Take your right hand and just find a place on the head rest, without changing your shoulders or your body, so it has somewhere to be.
And now, explore this movement with just the one arm. Good. (screaming) It's hard, I know. Now, this spring might be a little too heavy for some of you. I think it's right on the edge here for my friend, and I like it, good. Five?
Stay there. Good, bring the right arm down to join. Put the other hand up just to give it somewhere to be. Good, and then now, use just the other arm. Wow, piece of cake on that side, huh?
Almost, right? You know, so it's just so fun to explore those asymmetries. Good, we're doing five. Nice, piece of cake on one side. The other side is falling apart, right?
So that's just something to pay attention to and enjoy. Put your straps away for me. Here, let's have a satisfying back extension, my friend. Are you ready for it? Stay right there.
Just go ahead and hover those legs up nice and big. Bring your arms up by your side, like you would if you were doing pulling straps, and stay there. Let's really reach open, lift as much as you can. Enjoy the back extension. You're dying for that, I know.
Lower down, let your arms relax forward, let your head hang, keep your legs here. Lift up again, much like pulling straps. Beautiful, wonderful articulation. Just lengthen here a little bit, wonderful. And lower down, and we'll do just two more like that, and then we're going to add on right here.
Beautiful, enjoy that open feeling. And lower down, and just one more time. Lift and hold here. So exploring, staying in this wonderful position, this open heart, bend both knees. Squeeze your knees together if you can, keeping them lifted, and reach out to straight.
Do that five times. Bending the knees, feeling that openness through the front of the leg, so you might be getting a hip flexor stretch. You probably feel your hamstrings more than anything else, but you might be getting a hip flexor stretch. Good. And then rest that whole shape.
(exhales deeply) Good. Lift your back one last time. Reach back and hold on to your right foot. You can brace with your other hand on the head rest if you want, or wherever it makes sense, just to enjoy that nice stretch there, wonderful. And then switch.
And feel that nice stretch there, so we can push just a little bit deeper. Yeah, that's what I was looking for, that nice open shoulder position. Slightly bend the elbow just to give you that little extra peck stretch. How about both arms, so a little rocking prep here. Really lifting, opening, enjoying that stretch.
Good, and then let the head come down, bend the knees, just make this shape here. Let the head hang a little, and then lift up. Two more times like that. Nice, big, satisfying back extension. Wonderful.
And certainly, if this full extension, if this position doesn't work for you, you could stay with just one leg at a time, or even return just to a basic back extension, and then you can rest that. Slip off of your box and let's finish with just a couple of roll-downs from standing. Go ahead and face front, have your feet right underneath your two hips, (exhales deeply) and peel forward. Allow your head to relax, your arms will dangle. And don't go to your maximum fold here.
Feel this kind of scooping in, if you will, or hollowing in with your belly. Your head is relaxed, your arms are relaxed, and roll up. Standing nice and tall, feel this idea of lifting everything up, growing just a little taller. And again, exhale to peel forward. Wonderful.
Enjoy that flexion of the spine, the nice stretch in the low back, the calm. Mm-hmm. And then roll up. And stand for a breath, feeling a nice length. Open heart, grounded body.
And I thank you for playing.
Mention
 |
Sarah Bertucelli (Teacher) |
 |
Deanna |
 |
katrwall |
 |
Marina C |
 |
Kim F |
 |
Ali E |
 |
Marna P |
 |
Isabella P |
 |
Patti S |
 |
Holly P |
 |
Tunde M |
 |
Heather G |
 |
Leah D |
 |
Kk |
 |
Lizanne B |
 |
Patricia K |
 |
Heather H |
 |
Jean A |
 |
Sandra M |
 |
Sofia C |
 |
Doris K |
 |
Jill C |
 |
Pam H |
 |
Renee K |
|
|
Erin T |
 |
Zorica D |
|
|
Denee D |
 |
Heidi VDB |
 |
Pepperpot Pilates |
 |
Myriam Kane |
 |
Daniel T |
|
|
Mary M |
 |
Anna S |
 |
Hani Maizlik Hunch |
 |
Z A |
 |
Kelly W |
 |
Barbara H |
 |
Natalia H |
 |
@debofit |
|
|
Viera W |
Comments


You need to be a subscriber to post a comment.
Please Log In or Create an Account to start your free trial.
